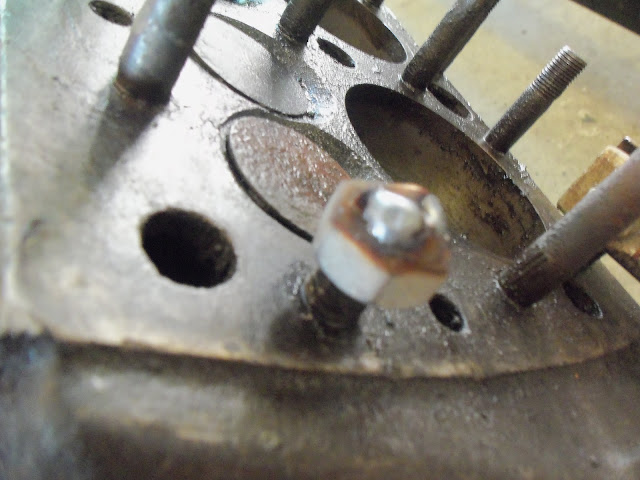
Thanks for the input Moon-rise! Reason I like to run a thread is that's how I was taught, doesn't take but a few minutes and it makes it easy to keep the nut centred and at the top if the stud for welding.
I've tried welding another nut onto a broken and now flush stud, but have never seen where it's worked. If the stud wouldn't come out with the extra weld surface we had to start with, it's unlikely (in my experience) that it would come out now with even less. Of course it may be worth a try and even if it worked once it sure would be nice!
As far as a larger wire giving more holding power in this situation, I believe I'm using 0.030 - do you really think there'd be that much difference in holding power going to .035? Again, I'm up for anything that might work so I'll research that a bit further for sure.
I usually figure that as long as the nut is 'reasonably' centered over the shaft remains, that is usually "Good Enough". If you feel happy/comfortable running the die and threading the tip of the shaft, that's fine.

It's not like you are spinning the nut/stud at several thousand RPM and have to worry about being off-center or anything. You are just slowly wrenching the stud/bolt out of wherever it is stuck and then scrapping/tossing the welded nut-n-stud.
")
As to the "holding power", if the weld itself (either on/at the nut or the stud/shaft) breaks then you didn't fuse/penetrate adequately into the parent metal on the nut or the stud/shaft. If the stud/shaft breaks, then it's because you exceeded the material strength of the metal there.
I usually leave the nut a little 'high' so the stud/bolt is a little recessed below the face of the nut. Makes it easier to see and center the weld with the hood on and get a bit more overall heat into the shaft. You're welding the pieces together so it's not like you are relying on the threads there to actually hold the nut and stud together.
I usually figure that getting 'adequate' heat into the (corroded/frozen/jammed) threads is a good side benefit of welding the nut onto the stud/shaft. Instead of having to break out a torch flame and heating the threaded fastener remains up to RedHot to get some thermal expansion/contraction going on to try and break the rusted/frozen threads loose from one another, you are just using the residual heat from welding to do the thermal expansion/contraction. That's kind of why we weld the nut on (something to wrench on
and the heat from welding to give the thermal expansion/contraction) instead of just sticking a pair of vise-grips onto the protruding stud end and yanking (no thermal expansion/contraction, so unless you can end up 'overpowering' the rust/whatever you end up spinning the vise-grips on the stud end or snapping the stud flush with the block (where the threads are still holding tight).
As to the wire size, over the Net the pic just looked a bit 'small' on the wire diameter. I figured if you were welding sheetmetal then you probably had some 0.025 wire in the machine and just grabbed that when you went to weld the nut onto the stud.
0.025 wire = tops out ~100 amps
0.030 wire = tops out around 130 amps. That's 30% more heat into the weld (better fusion/penetration into the nut/stud) and just overall heat into the stud (thus getting the stud hotter for hopefully a little more expansion/contraction to loosen the rusted/frozen threads).
0.035 wire = tops out around 180 amps. That's almost double the amps and heat into the weld and into the stud (good fusion and more thermal expansion/contraction to hopefully loosen the rusted/frozen threads). It's not like you are all that worried about blowing through the nut/stud from too much heat/amps like you are when welding the sheetmetal.

(amps numbers are for short-circuit transfer GMAW. If your machine can do spray transfer and you are running the 'appropriate' gas, those number can go higher.)
If the stud/bolt breaks off, then the threads are still rusted/frozen. Heat it again from welding another (bigger) nut on and/or heat the stud RedHot with a pin-point torch flame (not a big wide propane plumber's torch). Thermal expansion/contraction to help loosen the rusted/frozen threads. Repeat until stud is out or you run out of welding wire, shielding gas, spare/scrap nuts, or patience.


 ). Then apply wrench to nut and (hopefully) remove nut-n-stud (sort of like NutN-Honey, but different
  Or a shop with an EDM machine.