To avoid these ads, REGISTER NOW!

#FabSpace

OP
L

lilscorpion

Well-known member
Joined
Mar 15, 2010
Messages
3,599
Location
Colorado
i just just mean knee pads that are rounded on the sides, kinda like a motorcycle tire - so you can lean left and right and roll on the knee without the bump that happens with the style that's more like a car tire, with a defined/squarish shoulder.

or, for the super-fly, get rolling kneepads.


Oh gotcha. Makes sense. I think I weigh too much or my pads are too squishy to do any rolling.

On your “roller” idea, I’m visualizing mini set of car skates. [emoji12]
 
To avoid these ads, REGISTER NOW!

loganb

ALLIANCE MEMBER
Joined
Dec 29, 2011
Messages
5,495
Location
Omaha, NE

beelsr

Well-known member
Joined
May 6, 2007
Messages
1,324
Location
NE PA, USA
nota bene!

rolling kneepads will really work out your adductors (inside of the thigh) muscles. bungee cord/strap at the comfortable spread distance will go a long way towards helping break them (you!) in...

damhik... :(
 
OP
L

lilscorpion

Well-known member
Joined
Mar 15, 2010
Messages
3,599
Location
Colorado
Awe daym, they’re real?! Thought that was a joke..

6146026be773cd5918832d3ab200b720.jpg
 

Attachments

  • 6146026be773cd5918832d3ab200b720.jpg
    6146026be773cd5918832d3ab200b720.jpg
    31.3 KB · Views: 0
OP
L

lilscorpion

Well-known member
Joined
Mar 15, 2010
Messages
3,599
Location
Colorado
Got started on the cabinet additions tonight. Started with some 5x5 prefinished Baltic birch plywood.

b14f3e391d88c4de104c14ebb81107c6.jpg

Machined the bases, cross braces, counter top supports

43c5e93f259f49920ab27632412dcc64.jpg

Cut the sides with toe-kick reliefs for the 2 different heights

23a07b4dcdc721d87fc21a3595242d14.jpg

And got to assembly. Here’s a cheat for locating the base - I made a T that’s the same height as the toe-kick and clamp the side to the saw fence

30a60a6f908194a739bd90d384cec22a.jpg

The base rests on the T which gets the height right and staples are landed to hold the base into place while I counter sink and screw it together.

3b64a578ade5c36d33179ce06c07b528.jpg

The front counter support is added which now allows me to measure for the back which can be dropped into the dado groove and the rear counter support can be stapled and screwed into place.

a6c26bd54238d0b75055121a69699c01.jpg

With these in place, next step is to join them together and take final measurements for the filler cabinets. Between the two on the left will be the wife’s new desk opening. The original will fit between the two on the right with a filler cabinet made to fit the delta perfectly. Toe kick braces get installed on the very last step during install.

f447a07d589c2989af5a438c8da399bc.jpg

Fairly quick build. Sheet to 3 cases in about 3 hours.
 

Attachments

  • f447a07d589c2989af5a438c8da399bc.jpg
    f447a07d589c2989af5a438c8da399bc.jpg
    20.4 KB · Views: 1
  • 3b64a578ade5c36d33179ce06c07b528.jpg
    3b64a578ade5c36d33179ce06c07b528.jpg
    39.5 KB · Views: 0
  • 23a07b4dcdc721d87fc21a3595242d14.jpg
    23a07b4dcdc721d87fc21a3595242d14.jpg
    20.3 KB · Views: 0
  • 43c5e93f259f49920ab27632412dcc64.jpg
    43c5e93f259f49920ab27632412dcc64.jpg
    40.1 KB · Views: 0
  • b14f3e391d88c4de104c14ebb81107c6.jpg
    b14f3e391d88c4de104c14ebb81107c6.jpg
    36.2 KB · Views: 0
  • 30a60a6f908194a739bd90d384cec22a.jpg
    30a60a6f908194a739bd90d384cec22a.jpg
    43.6 KB · Views: 0
  • a6c26bd54238d0b75055121a69699c01.jpg
    a6c26bd54238d0b75055121a69699c01.jpg
    38.5 KB · Views: 0

stinkity stoink

Well-known member
Joined
Apr 8, 2007
Messages
729
Location
New Jersey
Are the cabinets going to be same color as the uppers in the last picture? They look good with the glass contrast . I’m not showing my bride
 
OP
L

lilscorpion

Well-known member
Joined
Mar 15, 2010
Messages
3,599
Location
Colorado
Are the cabinets going to be same color as the uppers in the last picture? They look good with the glass contrast . I’m not showing my bride


Yes, they’ll be finished the same. The color is a dark espresso and the panels are 80% opaque white lexan. Face frame process come next. Finishing always takes the longest tho.
 
OP
L

lilscorpion

Well-known member
Joined
Mar 15, 2010
Messages
3,599
Location
Colorado
Got a few hours in before mandatory Friday happy hour...wife will need some outlets for the laptop and peripherals between the two new cabinets.

75d238e05073a4454cb0d9f26ca8190e.jpg

Did a little drywall excavation and ran a wire through the 2x4’s between the existing outlet and where we really need it. #NowItsHappyHour

43c3611951d69cd6506d496ee1f54bb7.jpg

As the wife says, any progress is progress.

107bdfe4d66979bd7377fda62754cd8d.jpg
 

Attachments

  • 107bdfe4d66979bd7377fda62754cd8d.jpg
    107bdfe4d66979bd7377fda62754cd8d.jpg
    13.7 KB · Views: 0
  • 43c3611951d69cd6506d496ee1f54bb7.jpg
    43c3611951d69cd6506d496ee1f54bb7.jpg
    23.3 KB · Views: 0
  • 75d238e05073a4454cb0d9f26ca8190e.jpg
    75d238e05073a4454cb0d9f26ca8190e.jpg
    21.4 KB · Views: 0
Last edited:
OP
L

lilscorpion

Well-known member
Joined
Mar 15, 2010
Messages
3,599
Location
Colorado
It’s been a busy and hectic couple of weeks but I figured I should do a quick update -

Wife got the wall prepped for paint. Like how we painted around the cabinets last time?

e89ff8254990402b878a6bf2e366bd6d.jpg

I wanted to spray the whole room this time so we got the new floor covered and I got after it with Light French Grey in the airless sprayer.

e6c2341c3352bd97557ad0d3269d4403.jpg

Then we hung plastic on the walls so I could spray the ceiling white.

25f403f533b77a29854fb7dd196efffb.jpg

After given plenty of time to dry, we got the wall cabinets re-hung and the base cabinets set in place.

6b79744967af5cee1706cf4dd5c7641c.jpg

Gonna have to pause on the office so I can make some progress on the Powder Coating booth...
 

Attachments

  • 6b79744967af5cee1706cf4dd5c7641c.jpg
    6b79744967af5cee1706cf4dd5c7641c.jpg
    25.8 KB · Views: 0
  • 25f403f533b77a29854fb7dd196efffb.jpg
    25f403f533b77a29854fb7dd196efffb.jpg
    19.6 KB · Views: 0
  • e6c2341c3352bd97557ad0d3269d4403.jpg
    e6c2341c3352bd97557ad0d3269d4403.jpg
    21.9 KB · Views: 0
  • e89ff8254990402b878a6bf2e366bd6d.jpg
    e89ff8254990402b878a6bf2e366bd6d.jpg
    25.7 KB · Views: 0
OP
L

lilscorpion

Well-known member
Joined
Mar 15, 2010
Messages
3,599
Location
Colorado
Got started on the powder coating booth, planning on a simple design. The idea is to creat a vacuum in the booth and vent the exhaust outside using a fan. Parts will hang about 12” in front if a filter that will hopefully strain out much of the dust.

5d5115155dd58395d15f9731b45da0e9.jpg

Here’s what I picked up for the evacuation fan. This is a 20” variable speed attic fan that pushes 2220 cfm (at .25”) of static pressure. I used a fan like this at my old house to evacuate the smoke off of my plasma table. Worked very well until the motor inhaled too much plasma grit and seized a few years later. I’m thinking that I’ll mount it somehow to the top of the evacuation hood and pull the air up and out.

5f28b560657dc38553b24a44d4835bc3.jpg

I ran down to the local big box to see what they have for a filter. Initially I was thinking I’d get the biggest and best filter they had. After walking up and down the isle a few times, And saw the cost of the “better” filters, I realized it might make sense to run two - a cheapie in front if a good one. Let the cheapie take the brunt of the dust and prolong the life of the better one. I ended up picking up this cheap cleanable filter and an equivalent sized MERV 12.

0e7d822ce2427a99821405d66a35fe4f.jpg

Now to figure out how it all goes together..
 

Attachments

  • 5f28b560657dc38553b24a44d4835bc3.jpg
    5f28b560657dc38553b24a44d4835bc3.jpg
    34.2 KB · Views: 0
  • 0e7d822ce2427a99821405d66a35fe4f.jpg
    0e7d822ce2427a99821405d66a35fe4f.jpg
    34.1 KB · Views: 0
  • 5d5115155dd58395d15f9731b45da0e9.jpg
    5d5115155dd58395d15f9731b45da0e9.jpg
    33.7 KB · Views: 0
OP
L

lilscorpion

Well-known member
Joined
Mar 15, 2010
Messages
3,599
Location
Colorado
I’ve been doing some calculations and running large evac ducts outside (40-ish feet) from the booth isn’t going make any (financial) sense. So a change in direction - I need to figure out how to filter the air we’ll enough that I can breathe it and vent the hood inside. These home air filters ain’t good enough for that.

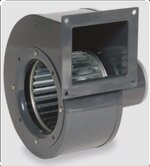
Not sure why I didn’t do it sooner but I started looking at smaller PC booths another the market to see how they set up the exhaust. Here’s a booth that Eastwood sells which design-wise is like most of what I found.

9225edfdd867c9e6af79d992da8b50a7.jpg

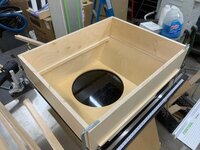
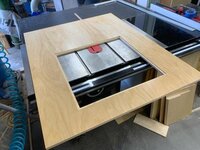
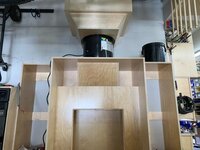
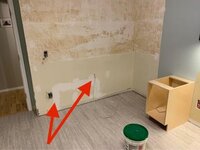
I can do something like this but with my space constraints, I’ll need to vent out the top instead of to the rear.

I found this cool site called PowderCoatingOnline- https://www.powdercoatingonline.com/the-super-specials-showcases/ . It has a listing of a bunch of different distributors and manufacturers for everything powder coating. . I started calling through the list until I found a supplier that both builds booths and sells filters. I landed on http://www.powdermarket.com. A Short conversation with these guys was beyond enlightening. Not only were they happy to answer my questions, they also made some design recommendations (along with some education) for my booth filtration and design.

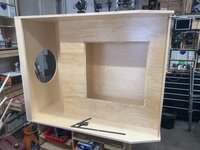
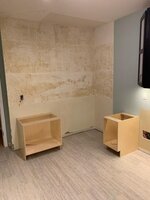
First - my fan must pull 100 cfm per square foot of booth face/opening. That was helpful. My opening is 50”h x 38.5w so I’ll need a fan that’s ~ 1350cfm.

Second - in order to recirculated the air back into the room, they recommend using a 3-stage filter assembly just like they do on their coating booths. Each and a specific purpose and together they keep the consumable cost low yet yield breathable exhaust air.

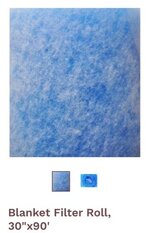
Stage 1/. Called a blanket filter, it looks an awesome lot like insulation. It is sold by the roll and you cut it to size. In the size I’ll be needing (25-ish x 25-ish), the math ends up ~$8 per fikter. In a 40hrs/week setting, they last about 2 weeks.

5bfdb382d98e1c563e4a119f95a909b1.jpg

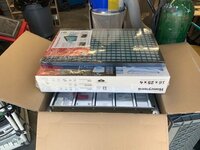
Second stage is a wind sock looking filter that’s called a pocket filter @ ~$130. Typical production usage @ 40/week they last about a month or so.

e48b3448668c99c5c75dcf8029fde0bf.jpg

Third stage is a hepa filter which looks like a traditional filter but on steroids. They cost ~ $250 each and last ~ 3 months in a 40/week environment.

d10adc3d156d1e8a7a4c3644b4dec816.jpg

I will not be coating 40 hours per week, probably more like 4 hours per month...so filters should last me WAY longer. PowderMarket sells a slick little vacuum gauge (a Manometer) that can help tell you when the filters need to be addressed. It has two pickup tubes which you can place on either side of a filter to understand what airflow loss you have. Initial readings are used as the baseline and then once you get to ~ 50% reduction in efficiency, you change the filter.

58719273d2c8a48db6865babdb003a4e.jpg

Though you could install one on either side of all three filters and know exactly when to change each, I think I’ll only put one with the front side pickup somewhere in front of all filters and then after the second stage.
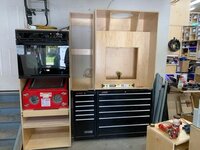
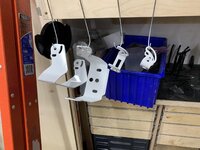
Filters inbound.
 

Attachments

  • 5bfdb382d98e1c563e4a119f95a909b1.jpg
    5bfdb382d98e1c563e4a119f95a909b1.jpg
    23.1 KB · Views: 0
  • 58719273d2c8a48db6865babdb003a4e.jpg
    58719273d2c8a48db6865babdb003a4e.jpg
    24.4 KB · Views: 0
  • d10adc3d156d1e8a7a4c3644b4dec816.jpg
    d10adc3d156d1e8a7a4c3644b4dec816.jpg
    20.7 KB · Views: 0
  • e48b3448668c99c5c75dcf8029fde0bf.jpg
    e48b3448668c99c5c75dcf8029fde0bf.jpg
    16 KB · Views: 0
  • 9225edfdd867c9e6af79d992da8b50a7.jpg
    9225edfdd867c9e6af79d992da8b50a7.jpg
    20.9 KB · Views: 0

loganb

ALLIANCE MEMBER
Joined
Dec 29, 2011
Messages
5,495
Location
Omaha, NE
Been awhile since I supported our finishing cells from an engineering standpoint, but the filter recommendations you got align very closely with what we used across 30+ finishing cells in multiple states for spraying of water based paint/stain/topcoat for wood parts. We exhaust thru the roof and spraying a different material so the actual filter media varies...but same concept.

Comment I'd make regarding the changing of the filters, first off the manometer is the right way to manage change interval especially in your environment. Unless your doing a very consistent, high volume usage a change schedule fixed on time is very hard to get right, filters get either too loaded or not used enough. If you want to to take it a step farther(as we know you do)...put a variable speed fan in. It gives you the additional ability to only spin that fan fast enough to get your desired flow in the booth based on your part and the condition of the filters...as the filters load up, crank the speed up.

Once that fan is maxed out and hollering for mercy...then you change the front filter media only(the blanket roll) and see what the new pressure drop is. Acceptable...move on....if not start changing some of the secondary filters. You'll likely find that the filters in the "middle" of the filter wall field get loaded up much faster than the others, so you can either direct swap the middle ones...or toss the middle filters out, move upper/lower rows around to fill the now vacant spots and put new filters in those upper/lower rows.

The final filter's (HEPA in your case) only then need changed when the primary and secondary filters are all fresh and you're still not getting suitable airflow....in which case congrats, you got all the "goody" out of the filters and time to swap out!
 

BoilermakerFan

Well-known member
Joined
Apr 17, 2006
Messages
2,188
Location
Indianapolis, Indiana
<snip>

The Columbia Coatings setup I have might be a little more than I really needed. They have their older generation (HyperSmooth) for $500 and its many times better than a hobby gun. With a used basic kitchen oven and a HyperSmooth, you could be pro-quality coating under $600. That’s insane.

And you have the shop space to build a real oven...one that could do bumpers, suspension parts, etc. There exists DIY PC oven build guides that give you step by step for full Size ovens for under $1k. This is my latest rabbit hole...

I was planning to build a DIY PC curing oven in my garage too. Take it a little step further with insulation and heating elements and you could also do ceramic coatings from Prismatic/Cerakote. Since it's the same company, you can order any of their colors from any of the palates. So you could actually color match exhaust headers to the Jeep Bright White if that came from Prismatic.

The tech support at Prismatic is amazing.

Could you run a pleated filter for the first stage to capture the powder for reuse? I know clean powder can be reused. You would have to change that filer for each color, but it could potentially save a fair bit of money over time.

We're going to finally be moving sooner than later, so my powder coating / ceramic coating setup will have to wait until after we move, but thanks to your lead on the Columbia Coatings setups, I have all the pieces planned out for my future setup. :rocker: Thanks Matt!
 
Last edited:
OP
L

lilscorpion

Well-known member
Joined
Mar 15, 2010
Messages
3,599
Location
Colorado
Looks like Columbia Coatings is doing a giveaway. Go and get signed up for chances to win an HD Kool Koat system (2 models up from the one I got). No purchase necessary. Registration link - https://wn.nr/69fxkr
 
Last edited:
OP
L

lilscorpion

Well-known member
Joined
Mar 15, 2010
Messages
3,599
Location
Colorado
So it turns out that the attic fan likely won’t work the way I’d hoped. An attic fan Is designed to move it’s rated free air (unconstrained by ducts and what not). They’d just not designed to have resistance so there’s a good chance that it won’t pull the rated volume and it won’t last. Since it wasn’t cheap, it goes back and back to the drawing board I go.

I used a huge squirrel cage fan for my 5x10 CNC plasma table years ago so I think that will work for this application well too. Seems some of the industrial BC booths use them as well. They ain’t cheap though - roughly $1400 or so for one that pulls the CFM I want with a balder motor.

54ccd0fa49d94791f87697edaf71d914.jpg

Downside to these units is that most of them have what appears to be non-standard intake and exhaust port sizes. You can’t just go down to the local HVAC store and get a 9 3/4 x 8 5/8 rectangle flanged duct off the shelf. When I installed a large squirrel cage fan in my shop I had an HVAC company build the transitions but it wasn’t cheap so I’m not wanting to go that direction. Even if the ducts weren’t difficult, these damn things are heavy...well over 100 lbs.

Noticed on a site that many paint and coating booths use what’s called a tube axial fan which is an in-duct fan which eliminates the need for transitional duct work or funky adapters.

8e0e3ba2666be047d9a36f70a6673f29.jpg

Interestingly enough, these fans are much lighter and flow much more with much less amp consumption than squirrel cage fans in a comparable horsepower. Looks like I can get into the right fan (~1400 cfm) perfect for my use-case for about $1k ($650 more than the attic fan I previously purchased)

...put a variable speed fan in. It gives you the additional ability to only spin that fan fast enough to get your desired flow in the booth based on your part and the condition of the filters...as the filters load up, crank the speed up.


Great idea and this fan does have the added benefit of having a second speed @ ~2400 rpm!

Fan on order!
 

Attachments

  • 54ccd0fa49d94791f87697edaf71d914.jpg
    54ccd0fa49d94791f87697edaf71d914.jpg
    19.7 KB · Views: 0
  • 8e0e3ba2666be047d9a36f70a6673f29.jpg
    8e0e3ba2666be047d9a36f70a6673f29.jpg
    28.1 KB · Views: 0
Last edited:
OP
L

lilscorpion

Well-known member
Joined
Mar 15, 2010
Messages
3,599
Location
Colorado
I was planning to build a DIY PC curing oven in my garage too. Take it a little step further with insulation and heating elements and you could also do ceramic coatings from Prismatic/Cerakote. Since it's the same company, you can order any of their colors from any of the palates. So you could actually color match exhaust headers to the Jeep Bright White if that came from Prismatic.

The tech support at Prismatic is amazing.

Could you run a pleated filter for the first stage to capture the powder for reuse? I know clean powder can be reused. You would have to change that filer for each color, but it could potentially save a fair bit of money over time.

We're going to finally be moving sooner than later, so my powder coating / ceramic coating setup will have to wait until after we move, but thanks to your lead on the Columbia Coatings setups, I have all the pieces planned out for my future setup. :rocker: Thanks Matt!


I plan to build a larger oven once I get everything up and running and am confident that I can actually coat with decent results. That said, every time I spend more money on this setup, the closer I get to it having to work...so I’ve started shopping for parts. It does look like it’ll be fairly easy. Amazon sells a fairly high quality oven controller unit that comes mostly turnkey (‘cept I have to assemble it).

92050a52fd1f929e1438826d6df32002.jpg

Here’s the link: Powder Coating Oven Controller Kit w/ Light and Fan Control, 240V 50A 12000W (KIT-PCO402) https://www.amazon.com/dp/B073X1CCY1/?tag=atomicindus08-20

Like you said, simple oven elements (4), this controller, a small high heat blower motor (to crest convection), the frame, and some insulation is really about it...well other than doors and hinges which is just a fabrication detail.

Am I missing any pieces that you have in your plan?
 

BoilermakerFan

Well-known member
Joined
Apr 17, 2006
Messages
2,188
Location
Indianapolis, Indiana
I plan to build a larger oven once I get everything up and running and am confident that I can actually coat with decent results. That said, every time I spend more money on this setup, the closer I get to it having to work...so I’ve started shopping for parts. It does look like it’ll be fairly easy. Amazon sells a fairly high quality oven controller unit that comes mostly turnkey (‘cept I have to assemble it).

92050a52fd1f929e1438826d6df32002.jpg

Here’s the link: Powder Coating Oven Controller Kit w/ Light and Fan Control, 240V 50A 12000W (KIT-PCO402) https://www.amazon.com/dp/B073X1CCY1/?tag=atomicindus08-20

Like you said, simple oven elements (4), this controller, a small high heat blower motor (to crest convection), the frame, and some insulation is really about it...well other than doors and hinges which is just a fabrication detail.

Am I missing any pieces that you have in your plan?

I signed up for the giveaway. It would be so sweet to win it, but I certainly don't have any high hopes of winning.

A pneumatic rivet gun if you don't have one already. The steel studs and sheet metal need to be attached with rivets. You'll need the high temp door seal too, and rockwool insulation. I have a 1/4HP-1/2HP 230V VFD I plan to use on my fan motor so I can adjust the convection speed while running a TEFC 3phase motor and have a very soft start on the fan.

You might need heat sinks for SSRs included in the kit too. It definitely would not hurt to add them regardless. The cooler they run, the longer they last. If the temp probe is a RTD type, you can usually add a second one to the temp controller and it will average the temp between the two so you don't have a chance of hot spots. The convection fan helps a lot, but I have about 10 RTD temp probes so I was going to use two with probe wells to make changing the probes easier when they fail.

I'm planning to build a 3'x3'x5' sized oven mounted on a 2x2 square tube frame on the heavy duty leveling casters. That's about the largest size I would need and it maximizes the material use based on 8' studs and 4x8 sheets of sheet metal. The extra sheet metal will be used to make a cover for the blower motor on the outside. The casters will let me push it up against the fold up spray booth when not in use. I'll have my fan and filters on the back side permanently attached to the wall, the sides, top, and bottom will be able to be folded down or back against the wall in order to minimize the floor footprint when not in use.
 
Last edited:

csp

Well-known member
Joined
Mar 23, 2010
Messages
5,719
Location
Franktown, CO
I don't know if a furnace blower fan is big enough, but I have a friend that's an HVAC guy who has a scrap pile full of blowers within a mile of Lincoln and Jordan. This assumes he hasn't taken scrap in for a while. I'm welcome to anything in the pile if that's a possible source for you.
 
To avoid these ads, REGISTER NOW!
OP
L

lilscorpion

Well-known member
Joined
Mar 15, 2010
Messages
3,599
Location
Colorado
I don't know if a furnace blower fan is big enough, but I have a friend that's an HVAC guy who has a scrap pile full of blowers within a mile of Lincoln and Jordan. This assumes he hasn't taken scrap in for a while. I'm welcome to anything in the pile if that's a possible source for you.


Dang, that might have worked and I might still take you up on it if the one I just bought doesn’t work. I was able to get down to Grainger get it -‘s there’s not much to it-

7656b4017a06991577f317cf37973efd.jpg

It isn’t very heavy or large though. The up-side about this one is its simplicity, it’s round and router jigs make round holes easy...that said, I need to figure out how to mount it in the cabinet that I built months ago before I had any plan. Being able to pull from a pile of HVAC blowers of various sizes might end up the ticket. Thanks for the offer, I’ll let you know.
 

Attachments

  • 7656b4017a06991577f317cf37973efd.jpg
    7656b4017a06991577f317cf37973efd.jpg
    39.8 KB · Views: 0
OP
L

lilscorpion

Well-known member
Joined
Mar 15, 2010
Messages
3,599
Location
Colorado
I signed up for the giveaway. It would be so sweet to win it, but I certainly don't have any high hopes of winning.

A pneumatic rivet gun if you don't have one already. The steel studs and sheet metal need to be attached with rivets. You'll need the high temp door seal too, and rockwool insulation. I have a 1/4HP-1/2HP 230V VFD I plan to use on my fan motor so I can adjust the convection speed while running a TEFC 3phase motor and have a very soft start on the fan.

You might need heat sinks for SSRs included in the kit too. It definitely would not hurt to add them regardless. The cooler they run, the longer they last. If the temp probe is a RTD type, you can usually add a second one to the temp controller and it will average the temp between the two so you don't have a chance of hot spots. The convection fan helps a lot, but I have about 10 RTD temp probes so I was going to use two with probe wells to make changing the probes easier when they fail.

I'm planning to build a 3'x3'x5' sized oven mounted on a 2x2 square tube frame on the heavy duty leveling casters. That's about the largest size I would need and it maximizes the material use based on 8' studs and 4x8 sheets of sheet metal. The extra sheet metal will be used to make a cover for the blower motor on the outside. The casters will let me push it up against the fold up spray booth when not in use. I'll have my fan and filters on the back side permanently attached to the wall, the sides, top, and bottom will be able to be folded down or back against the wall in order to minimize the floor footprint when not in use.


Who knows how they will pick the winner. I never trust drawings are on the up and up but that’s mostly because I’m cynical. Hope you win, it’s a sick unit.

Looks like my list is pretty close to your list so I’m close. Haven’t picked a riveter yet but pneumatic will be important. I want an oven high enough to fit a slider off of a Jeep so probably 6’ tall x 3’ wide x 3’ deep interior dimensions. The dimensions are diffidently not material/sheet optimized but important for the stuff I’ll be coating.

The two temp controllers is an interesting idea, hadn’t thought of that though I am worried about hot spots. Through the playing I’ve already done with powder there are some coatings that are temp sensitive. Anything Prismatic sells that has a PMT of 400* seems to be ok if temp flashes up higher. They have some clears that will yellow if you cure them over 375*. I coated my jack stands which have varying thicknesses if metal in their design which prevents them from heating and curing evenly. The upper parts cured at 375 but the bases ended up around 410* for last part of the cure process...mostly to do with how the oven maintains heat (fluctuates 20*). The bottoms were slightly yellow (no one else can tell) and the uppers stayed clear.

d619a506c337a4c8801e3c21e36dae4e.jpg96b47c6b52ba901c5ba3d76db6448fe5.jpg

I suspect similar things may happen with translucent powders but that’s a guess.
 

Attachments

  • d619a506c337a4c8801e3c21e36dae4e.jpg
    d619a506c337a4c8801e3c21e36dae4e.jpg
    259.8 KB · Views: 0
  • 96b47c6b52ba901c5ba3d76db6448fe5.jpg
    96b47c6b52ba901c5ba3d76db6448fe5.jpg
    264.7 KB · Views: 0
OP
L

lilscorpion

Well-known member
Joined
Mar 15, 2010
Messages
3,599
Location
Colorado
Here’s the starting point of the powder coating hood. I added a little structure in the top thinking it would be enough

34f40026bb638da3f219f11a1fbfc519.jpg

The fan is going to mount to the top of the hood something like this.

3b4eb66646e5477e70b6fba13c7b762f.jpg

I used a circuit cutting jig to rough in the fan mount and thru-hole.

272279934863835d2769cb406b900787.jpg

While I was set up, I cut another piece with the same sized hole cut in the center for building the fan mount for the upper filter box.

e1d67d51251e4f0236a03dd1558c473a.jpg

Can’t tell in the picture but the offset to the rear is exactly the same which will hopefully allow me to attach the filter box to the wall as well.

f6e42592208bd564c26454189fb8a1f4.jpg

Mocked up.

c2b61dfb2b83359f1a438bdc1d32a774.jpg

I need a transition from the fan to the filter box. This took a little figuring and I cut meters backwards a few times...LOL

9426a930bd798215bc9c6f581c9463ad.jpg

A little practice at some crafty miter saw work and I managed to get there.

ac7dfcadc2627ba42d641f325ff8b2d9.jpg

Test fit the assembly.

3eccdb65fce4476842589b9de25c2a17.jpg

Now for the filter box.

f5bce18714b3cd39181ebc33ce2b395b.jpg

I can use the filter itself to alight the birds for the box.

96214b90ef27caf6b6c8f5b7c4243bce.jpg

Attached the filter box to the transition.

c5f5fd0ad629cf39b33e000f9597caea.jpg

The entire assembly is only Brad nailed together so the final step is to screw everything together and make it permanent.

2fd4b316c06504eaa7c67f33344f505a.jpg

Filter box done.
 

Attachments

  • 34f40026bb638da3f219f11a1fbfc519.jpg
    34f40026bb638da3f219f11a1fbfc519.jpg
    28.4 KB · Views: 0
  • 3b4eb66646e5477e70b6fba13c7b762f.jpg
    3b4eb66646e5477e70b6fba13c7b762f.jpg
    35.5 KB · Views: 0
  • 272279934863835d2769cb406b900787.jpg
    272279934863835d2769cb406b900787.jpg
    32 KB · Views: 0
  • e1d67d51251e4f0236a03dd1558c473a.jpg
    e1d67d51251e4f0236a03dd1558c473a.jpg
    34.4 KB · Views: 0
  • f6e42592208bd564c26454189fb8a1f4.jpg
    f6e42592208bd564c26454189fb8a1f4.jpg
    32.5 KB · Views: 0
  • c2b61dfb2b83359f1a438bdc1d32a774.jpg
    c2b61dfb2b83359f1a438bdc1d32a774.jpg
    33.1 KB · Views: 0
  • 9426a930bd798215bc9c6f581c9463ad.jpg
    9426a930bd798215bc9c6f581c9463ad.jpg
    40.5 KB · Views: 0
  • ac7dfcadc2627ba42d641f325ff8b2d9.jpg
    ac7dfcadc2627ba42d641f325ff8b2d9.jpg
    34.8 KB · Views: 0
  • 3eccdb65fce4476842589b9de25c2a17.jpg
    3eccdb65fce4476842589b9de25c2a17.jpg
    38.3 KB · Views: 0
  • f5bce18714b3cd39181ebc33ce2b395b.jpg
    f5bce18714b3cd39181ebc33ce2b395b.jpg
    41.5 KB · Views: 0
  • 96214b90ef27caf6b6c8f5b7c4243bce.jpg
    96214b90ef27caf6b6c8f5b7c4243bce.jpg
    43.5 KB · Views: 0
  • c5f5fd0ad629cf39b33e000f9597caea.jpg
    c5f5fd0ad629cf39b33e000f9597caea.jpg
    35.1 KB · Views: 0
  • 2fd4b316c06504eaa7c67f33344f505a.jpg
    2fd4b316c06504eaa7c67f33344f505a.jpg
    41.3 KB · Views: 0

quadrcr87

Well-known member
Joined
Jul 5, 2013
Messages
1,036
Location
Travelers Rest, SC
Your progress is looking great. This powder coating setup is really going to be convenient for the jeep projects! Taking small parts to a powder coater and paying their minimum is always a pain. I am usually not patient enough to save up projects to get done in a batch with the same color.
 
OP
L

lilscorpion

Well-known member
Joined
Mar 15, 2010
Messages
3,599
Location
Colorado
Your progress is looking great. This powder coating setup is really going to be convenient for the jeep projects! Taking small parts to a powder coater and paying their minimum is always a pain. I am usually not patient enough to save up projects to get done in a batch with the same color.


Thanks! I’ll admit that I was a little worried about two parts of the build - building the transition between the fan and the HEPA filter and the internal air flow routing (ducting). Getting past the fan -> filter part is awesome. If I can figure out the internal ducting now, I’ll be home free.

I’ve done fairly well working with the local powder coating companies but they just have too many bad business practices. No matter how much stuff I take them, sometimes thousands of dollars of work, and I always get pushed down the priority list. I never get my stuff back faster than 6 weeks even when I say it’s a hurry job and willing to pay faster. That said, I’m already ecstatic with my choice to PC (most things) in-house going forward. We’ve done a few batches of parts for projects in-flight already and being able to fabricate, coat, and install within a single afternoon was amazing.

ac2ae4fe1eddb6c840fa4d46105e7ab2.jpg

cc1260719e7a0177bc3e74ae4d034f33.jpg

21e74e09128b30f252c5f050eec67a4e.jpg

So much better than spray paint and even better that I have powder that matches my Jeep OEM color code. I can only imagine how nice it will be with dust management once the hood is done.
 

Attachments

  • ac2ae4fe1eddb6c840fa4d46105e7ab2.jpg
    ac2ae4fe1eddb6c840fa4d46105e7ab2.jpg
    167.5 KB · Views: 0
  • cc1260719e7a0177bc3e74ae4d034f33.jpg
    cc1260719e7a0177bc3e74ae4d034f33.jpg
    148.6 KB · Views: 0
  • 21e74e09128b30f252c5f050eec67a4e.jpg
    21e74e09128b30f252c5f050eec67a4e.jpg
    287 KB · Views: 0
Last edited:

quadrcr87

Well-known member
Joined
Jul 5, 2013
Messages
1,036
Location
Travelers Rest, SC
So much better than spray paint and even better that I have powder that matches my Jeep OEM color code. I can only imagine how nice it will be with dust management once the hood is done.

Exactly. It allow you to raises the quality of everything you fabricate making the final install custom and professional.
 

BoilermakerFan

Well-known member
Joined
Apr 17, 2006
Messages
2,188
Location
Indianapolis, Indiana
Here’s the starting point of the powder coating hood. I added a little structure in the top thinking it would be enough

34f40026bb638da3f219f11a1fbfc519.jpg

The fan is going to mount to the top of the hood something like this.

3b4eb66646e5477e70b6fba13c7b762f.jpg

I used a circuit cutting jig to rough in the fan mount and thru-hole.

272279934863835d2769cb406b900787.jpg

While I was set up, I cut another piece with the same sized hole cut in the center for building the fan mount for the upper filter box.

e1d67d51251e4f0236a03dd1558c473a.jpg

Can’t tell in the picture but the offset to the rear is exactly the same which will hopefully allow me to attach the filter box to the wall as well.

f6e42592208bd564c26454189fb8a1f4.jpg

Mocked up.

c2b61dfb2b83359f1a438bdc1d32a774.jpg

I need a transition from the fan to the filter box. This took a little figuring and I cut meters backwards a few times...LOL

9426a930bd798215bc9c6f581c9463ad.jpg

A little practice at some crafty miter saw work and I managed to get there.

ac7dfcadc2627ba42d641f325ff8b2d9.jpg

Test fit the assembly.

3eccdb65fce4476842589b9de25c2a17.jpg

Now for the filter box.

f5bce18714b3cd39181ebc33ce2b395b.jpg

I can use the filter itself to alight the birds for the box.

96214b90ef27caf6b6c8f5b7c4243bce.jpg

Attached the filter box to the transition.

c5f5fd0ad629cf39b33e000f9597caea.jpg

The entire assembly is only Brad nailed together so the final step is to screw everything together and make it permanent.

2fd4b316c06504eaa7c67f33344f505a.jpg

Filter box done.

Are you putting a pleated filter inside the booth in front of the fan? If not, the fan will be sucking in a fair amount of powder.
 

Attachments

  • 2fd4b316c06504eaa7c67f33344f505a.jpg
    2fd4b316c06504eaa7c67f33344f505a.jpg
    39.3 KB · Views: 0
  • 34f40026bb638da3f219f11a1fbfc519.jpg
    34f40026bb638da3f219f11a1fbfc519.jpg
    27.2 KB · Views: 0
  • 3b4eb66646e5477e70b6fba13c7b762f.jpg
    3b4eb66646e5477e70b6fba13c7b762f.jpg
    34 KB · Views: 0
  • 272279934863835d2769cb406b900787.jpg
    272279934863835d2769cb406b900787.jpg
    30.6 KB · Views: 0
  • e1d67d51251e4f0236a03dd1558c473a.jpg
    e1d67d51251e4f0236a03dd1558c473a.jpg
    32.8 KB · Views: 0
  • f6e42592208bd564c26454189fb8a1f4.jpg
    f6e42592208bd564c26454189fb8a1f4.jpg
    31.1 KB · Views: 0
  • c2b61dfb2b83359f1a438bdc1d32a774.jpg
    c2b61dfb2b83359f1a438bdc1d32a774.jpg
    31.8 KB · Views: 0
  • 9426a930bd798215bc9c6f581c9463ad.jpg
    9426a930bd798215bc9c6f581c9463ad.jpg
    38.7 KB · Views: 0
  • ac7dfcadc2627ba42d641f325ff8b2d9.jpg
    ac7dfcadc2627ba42d641f325ff8b2d9.jpg
    33.2 KB · Views: 0
  • 3eccdb65fce4476842589b9de25c2a17.jpg
    3eccdb65fce4476842589b9de25c2a17.jpg
    36.5 KB · Views: 0
  • f5bce18714b3cd39181ebc33ce2b395b.jpg
    f5bce18714b3cd39181ebc33ce2b395b.jpg
    39.5 KB · Views: 0
  • 96214b90ef27caf6b6c8f5b7c4243bce.jpg
    96214b90ef27caf6b6c8f5b7c4243bce.jpg
    41 KB · Views: 0
  • c5f5fd0ad629cf39b33e000f9597caea.jpg
    c5f5fd0ad629cf39b33e000f9597caea.jpg
    33.3 KB · Views: 0
OP
L

lilscorpion

Well-known member
Joined
Mar 15, 2010
Messages
3,599
Location
Colorado
Are you putting a pleated filter inside the booth in front of the fan? If not, the fan will be sucking in a fair amount of powder.


There will be two filters before the fan and the Hepa after the fan. Once I get the next post and pictures up, it might start to make more sense I think. I probably should have done a drawing in advance but I’m kinda figuring my way as I go.
 
OP
L

lilscorpion

Well-known member
Joined
Mar 15, 2010
Messages
3,599
Location
Colorado
With the upper hepa filter box done. I now need to shift focus to the booth face, pocket filter mount, and internal ducting. The pocket filter is 24x24 so I cut a slightly undersized hole and recessed the edge so there was a place for the pocket filters wire frame to clamp to.

5f23d55b386ac522f3138ab3ce3efa71.jpg

This will serve as the face plate for the hood and just barely slides into the case.

f5d698f1aa8b1f85af71dcb04d69a0dd.jpg

I want to keep the internal ducting simple so I just box in the fan hole and use complementary angles on the miter saw for the angles (like 35/55).

0b2cc45fc8c5199626a150cfb3a8353a.jpg

And then cut two pieces to 30/60 to ease the transition and then build a mirrored copy.

04bccf95248afbef56f2fd669c38d483.jpg

Since I made the hood the same width as the craftsman cabinet, I decided that the o stall design needed to be symmetrical. I added a little cabinet at orate to the left between the hood and the oven.

b5033462e551706ffe6e4df88e48670b.jpg

Hoisted the fan and the HEPA filter up top into place.

1ef8803c15d31bf0253b7770ccc8c8fb.jpg

I decided to make a matching cabinet to the right.

1f7e05c5331682fde4547a922efdbf5e.jpg

With the fan wired, I was now able to close out the internal ducting making the hood now fully functional.

5682de39afeda41d265c89c27c5bc0a1.jpg

And the filter presses into place. So close now.

55f8fb9f0cda3a02129fdd41e8113122.jpg
 

Attachments

  • 1f7e05c5331682fde4547a922efdbf5e.jpg
    1f7e05c5331682fde4547a922efdbf5e.jpg
    30.9 KB · Views: 0
  • 5f23d55b386ac522f3138ab3ce3efa71.jpg
    5f23d55b386ac522f3138ab3ce3efa71.jpg
    33.6 KB · Views: 0
  • 0b2cc45fc8c5199626a150cfb3a8353a.jpg
    0b2cc45fc8c5199626a150cfb3a8353a.jpg
    29.6 KB · Views: 0
  • f5d698f1aa8b1f85af71dcb04d69a0dd.jpg
    f5d698f1aa8b1f85af71dcb04d69a0dd.jpg
    30.6 KB · Views: 0
  • 04bccf95248afbef56f2fd669c38d483.jpg
    04bccf95248afbef56f2fd669c38d483.jpg
    31 KB · Views: 0
  • b5033462e551706ffe6e4df88e48670b.jpg
    b5033462e551706ffe6e4df88e48670b.jpg
    34.6 KB · Views: 0
  • 1ef8803c15d31bf0253b7770ccc8c8fb.jpg
    1ef8803c15d31bf0253b7770ccc8c8fb.jpg
    30.3 KB · Views: 0
  • 5682de39afeda41d265c89c27c5bc0a1.jpg
    5682de39afeda41d265c89c27c5bc0a1.jpg
    28.2 KB · Views: 0
  • 55f8fb9f0cda3a02129fdd41e8113122.jpg
    55f8fb9f0cda3a02129fdd41e8113122.jpg
    29.8 KB · Views: 0
OP
L

lilscorpion

Well-known member
Joined
Mar 15, 2010
Messages
3,599
Location
Colorado
Controlling the two fan settings was something go hand quite solved until I couldn’t sleep the other night. I’d been thinking about a two position toggle switch until I found this cool selector switch.

82d970560e7efd883d596912944cc012.jpg

It’s a simple design that lets you connect A/B to various (or the same) inputs.

34bb3d263d980ef17bc1fc7e36b00842.jpg

I needed a place for the various switches the cabinet needs so I built a switch box into the drawer assembly.

30dbd20d56e3dacfd8bca8f2ce6a3008.jpg

I’ll keep my various masking material in these drawers. Stuff like high temp silicone plugs and caps.

62c1ff8ed6aa6baeb549de7f7ea34dd0.jpg

The switch panels are machines out of 6061 plate I had laying around.

dee79f898710ac8c9578eacd442b17b2.jpg

Two of the three panels done. The upper one is for the fan selector. The middle is to control the power to the Powder Coating box itself instead of using the switch on the back of the box and the second switch is for (the eventual) lights in the booth. Since the powder coating gun connections are also on the back of the box, I’ll use the lower plane for cabinet facing gun hookups.

7bc466bb57baa5bca181185b139ea1b6.jpg

On the other side of the cabinet received shelves, 3 drawers, and the accessory panel

cc3ea2e15191cba7d870df17a2348195.jpg

The accessory panel is a 1.25 wide piece if aluminum which will host dual gun connections in the future. For now it will just be plumbed for compressed air.

fe7545e9d66df507b083c61d76aa595f.jpg

The panel attaches to a few wood strips that are attached to the cabinet. This should give the panel some stiffness and make attaching accessories much easier.

dd7d9e0728703ac7602a55904c3f2ae9.jpg

At this point, the booth is fully functional so it was impossible to prevent a little powder coating from happening in the shop. Andrew sized the opportunity and coated about 100 flat head hex bolts s a side job.

3beabe2157ba40e183afda304a3335ba.jpg

We temporarily attached the pre-filter to the booth during the coating. As luck would have it, the 2600 cfm setting worked perfectly without the sides we had previously planned on attaching.

815ada0ceba3d0eedf018d4143040527.jpg

Slightly over 100 bolts, delivered and installed. Matching the bolts to the armor gives this blacked out Jeep that next level finish when compared to how it would have looked with uncoated stainless.

2ad465738a72a8dad9762e86c026b817.jpg

0f3115d7076f81538ba8e87d62568bce.jpg
 

Attachments

  • 3beabe2157ba40e183afda304a3335ba.jpg
    3beabe2157ba40e183afda304a3335ba.jpg
    25.1 KB · Views: 0
  • dd7d9e0728703ac7602a55904c3f2ae9.jpg
    dd7d9e0728703ac7602a55904c3f2ae9.jpg
    31.4 KB · Views: 0
  • dee79f898710ac8c9578eacd442b17b2.jpg
    dee79f898710ac8c9578eacd442b17b2.jpg
    37.9 KB · Views: 0
  • fe7545e9d66df507b083c61d76aa595f.jpg
    fe7545e9d66df507b083c61d76aa595f.jpg
    26.8 KB · Views: 0
  • cc3ea2e15191cba7d870df17a2348195.jpg
    cc3ea2e15191cba7d870df17a2348195.jpg
    37.5 KB · Views: 0
  • 62c1ff8ed6aa6baeb549de7f7ea34dd0.jpg
    62c1ff8ed6aa6baeb549de7f7ea34dd0.jpg
    39.4 KB · Views: 0
  • 30dbd20d56e3dacfd8bca8f2ce6a3008.jpg
    30dbd20d56e3dacfd8bca8f2ce6a3008.jpg
    33 KB · Views: 0
  • 34bb3d263d980ef17bc1fc7e36b00842.jpg
    34bb3d263d980ef17bc1fc7e36b00842.jpg
    19.7 KB · Views: 0
  • 815ada0ceba3d0eedf018d4143040527.jpg
    815ada0ceba3d0eedf018d4143040527.jpg
    37 KB · Views: 0
  • 7bc466bb57baa5bca181185b139ea1b6.jpg
    7bc466bb57baa5bca181185b139ea1b6.jpg
    24.9 KB · Views: 0
  • 0f3115d7076f81538ba8e87d62568bce.jpg
    0f3115d7076f81538ba8e87d62568bce.jpg
    218.8 KB · Views: 0
  • 2ad465738a72a8dad9762e86c026b817.jpg
    2ad465738a72a8dad9762e86c026b817.jpg
    210.5 KB · Views: 0
  • 82d970560e7efd883d596912944cc012.jpg
    82d970560e7efd883d596912944cc012.jpg
    18.5 KB · Views: 0
Last edited:
OP
L

lilscorpion

Well-known member
Joined
Mar 15, 2010
Messages
3,599
Location
Colorado
Matt, I see the black armor on a black LJ. Did you have your son's yellow LJ painted black?


Andrew’s Jeep started out with the black oxide stainless fasteners. At the time it was the only way for us to have them black.

a80b1a0bf81880098892c85c84b8725f.jpg

As a test he did match coat his fasteners to the yellow of the armor just to see what it would look like.

b6b4203ae09468b4ef399fa3b39953d9.jpg

With all of the corners and sliders matched, we’re now not totally sure matching was as cool looking. That said, he’s not yet switched them back. Not the best pic but it’s easy to see how muted the armor looks now. Clearly not as cool.

c6cc6e4228568c3d879d13c002a7b1cc.jpg
 

Attachments

  • c6cc6e4228568c3d879d13c002a7b1cc.jpg
    c6cc6e4228568c3d879d13c002a7b1cc.jpg
    44.5 KB · Views: 0
  • b6b4203ae09468b4ef399fa3b39953d9.jpg
    b6b4203ae09468b4ef399fa3b39953d9.jpg
    35.8 KB · Views: 0
  • a80b1a0bf81880098892c85c84b8725f.jpg
    a80b1a0bf81880098892c85c84b8725f.jpg
    46.4 KB · Views: 0
OP
L

lilscorpion

Well-known member
Joined
Mar 15, 2010
Messages
3,599
Location
Colorado
Nice PC setup! If you were located in Indiana I would be sending all of my work your way.


Thank you! I’m almost setup to the point I could do some side work. That said, I have a mountain of work I have to do for my Jeep on short order so if I did take work I’d end up a few months out. [emoji3061]

Got a few of my parts done as well. Interestingly enough, the powder I use that color matches the Bright Dodge White Laura down beautifully..

29f438ebaf69f9de0813dcf49a5695dd.jpg234b0669a9a38cf8cc96596113e72306.jpgbb36652610c78d5bca9aaef88dc14773.jpg
 

Attachments

  • bb36652610c78d5bca9aaef88dc14773.jpg
    bb36652610c78d5bca9aaef88dc14773.jpg
    105.5 KB · Views: 0
  • 29f438ebaf69f9de0813dcf49a5695dd.jpg
    29f438ebaf69f9de0813dcf49a5695dd.jpg
    177.3 KB · Views: 0
  • 234b0669a9a38cf8cc96596113e72306.jpg
    234b0669a9a38cf8cc96596113e72306.jpg
    147.5 KB · Views: 0
OP
L

lilscorpion

Well-known member
Joined
Mar 15, 2010
Messages
3,599
Location
Colorado
Nice.


I just saw the last couple of pictures in post # 471 and thought you painted Andrew's LJ black.


Oh hell no! Though I do wish I had the shop space to have a booth. Maybe someday but a bigger oven is first. His Jeep is done for now. Next step in it will be a turbo but that’s a few months away.

That black LJ is the GM’s latest personal build at a local 4WheelParts.
 

zmotorsports

ALLIANCE MEMBER
Joined
Oct 20, 2009
Messages
21,312
Location
Northern Utah
Oh hell no! Though I do wish I had the shop space to have a booth. Maybe someday but a bigger oven is first. His Jeep is done for now. Next step in it will be a turbo but that’s a few months away.

That black LJ is the GM’s latest personal build at a local 4WheelParts.

Gotcha. I thought the paint looked pretty damn good on Andrew's Jeep and was surprised when I saw the black one.
 

rattle_snake

Well-known member
Joined
Jun 25, 2015
Messages
5,144
Location
Chandler, AZ
Jealous of the powder setup. :drool:
Quite the undertaking, you did a great job on all the pieces., keeping it compact, organized. Great work.
:bowdown:
 
To avoid these ads, REGISTER NOW!
Top Bottom