OP
lilscorpion
Well-known member
Jealous of the powder setup.
Quite the undertaking, you did a great job on all the pieces., keeping it compact, organized. Great work.


Thanks Justin, much appreciated.

Jealous of the powder setup.
Quite the undertaking, you did a great job on all the pieces., keeping it compact, organized. Great work.


Excited to see how you fit the axle assy into the powder coat oven!! Nicely done as always
Sent from The Garage Journal mobile app


What’s needed to apply the Cerakote?
")

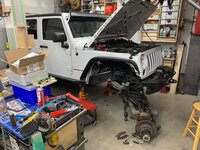
Jeep is coming along nicely Matt.
Are you leaving the ACOS off this time or reinstalling them? I ask because I removed mine just over a year or so ago. My issue was the hard rubber bumpstop was just too hard and when dropping down ledges it was quite a hard impact against them. Also when I went to the 37's I added about an inch and a half of bumpstop spacer to the axle and going over rough road at speed it became very harsh coming in contact with the hard rubber. After removing my ACOS and using a taller Metalcloack dual rate coil spring I added the Metalcloak Durospring jounce stops and LOVE them. They are so much more smooth when driving at speed and especially when descending a ledge there is no more harsh or abrupt impact against the ACOS hard rubber pad.
Well, since you have the axle out... I hear coil-overs are nice
Then you can fab bump provisions separately. more work, more money, I think that is how it goes.
future proof for 42s?


We think alike. Going CO’s and nitrogen bumps. Hopefully have some pics in a few days... [emoji481][emoji481]
No plans to run 42’s but am upgrading to 40’s. Couldn’t make it too easy on the motor...lots of plans for this build. As Andrew has been saying “she’s gonna be dirt nasty and whine a lot”.
I have a good friend I wheel with that regrets installing a supercharger on his 3.8, mainly from all the noise from the blow off valve. He was a little jealous when he saw a pair or LS engines in my pickup bed. I just couldn't resist going by his house after purchasing them and rubbing his nose in it.
Get your order for the coilovers in ASAP, unless you can find some on the shelf. King and Fox are both over 20weeks backordered.
Awesome, more tire, more power and more suspension. Sounds like a win!
Get your order for the coilovers in ASAP, unless you can find some on the shelf. King and Fox are both over 20weeks backordered.


I'll probably only ever buy ADS shocks from now on. Incredibly smart guys. Karl who worked for Bilstein is there, and they are making GREAT, AMERICAN MADE shocks, with super fast turn around time. During all this covid ****, I got two complete resis shipped out with the right adapters to fit my Fox bypasses, for $175. That's a bit more than a single Fox would cost. Not only that, their machining is better and to more consistent tolerances. Big fans of their shocks. They're out of AZ, too.
I'll probably only ever buy ADS shocks from now on. Incredibly smart guys. Karl who worked for Bilstein is there, and they are making GREAT, AMERICAN MADE shocks, with super fast turn around time. During all this covid ****, I got two complete resis shipped out with the right adapters to fit my Fox bypasses, for $175. That's a bit more than a single Fox would cost. Not only that, their machining is better and to more consistent tolerances. Big fans of their shocks. They're out of AZ, too.
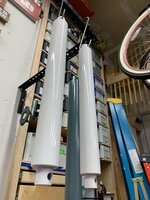
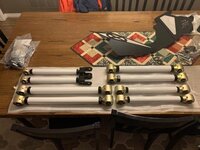
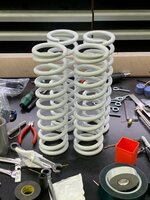
The white looks much better than blue on the coils Matt.
Very impressed with the powder coating abilities you have developed in your shop and how customized you made the entire process.
Thanks for taking the time to post your progress.With the shocks now in hand (tada!!) I need to shift focus to the suspension.


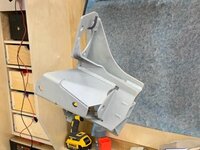


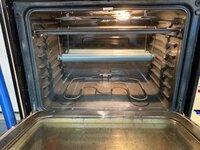
...I need a bigger oven.
I'm viewing it as a teaser of what's to come. I think he's already got ideas running around his head on what's next for a killer pizza and metal oven....just working to flesh them out before sharing with the horde hereI think everyone I know who has gotten into powder coating says that. As always, fantastic work!
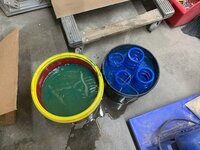
Matt please do tell the name of the stripper. I would love to be able to recoat parts but not sure I need to do it myself.
Thanks
I think everyone I know who has gotten into powder coating says that. As always, fantastic work!
I'm viewing it as a teaser of what's to come. I think he's already got ideas running around his head on what's next for a killer pizza and metal oven....just working to flesh them out before sharing with the horde here
Matt thanks for the info. As I read about powder coating I would like to do it and so the research begins. All said will I do it with enough frequency to make it worthwhile. I too am impatient and want things done correctly and quickly.

Matt now you have me all stirred up. I have the heat and moisture controlled (dehumidifier) space, the sand blast cabinet and compressor. I have looked at eastwoods lineup, watched a few you tubers, etc. The main reason I have held back from taking the plunge is I have rims and bumpers I want to get done. Many smaller parts that would fit and I could do, so more head scratching!
Thanks for the info!