
You are using an out of date browser. It may not display this or other websites correctly.
You should upgrade or use an alternative browser.
You should upgrade or use an alternative browser.
Finally getting to build a detached garage/shop!!!
- Thread starter CarCrazyRDM
- Start date
Man your place is looking fantastic. It is really something when it looks this good without anything in it. Cant wait to see how you fit it out. I bet you are getting really excited.
Merry Christmas from Texas!
Hope you and your family have a good one. Hopefully some things to fit out in the shop are on your list.
Bret
Merry Christmas from Texas!
Hope you and your family have a good one. Hopefully some things to fit out in the shop are on your list.
Bret
OP
CarCrazyRDM
Well-known member
Thanks Bret. And I have plenty on my "list" for the garage but I told my wife I'd already spent enough out here lately so very little was needed. If I can just find/have the time over X-Mas to get my lights installed that's all I really need/want. If I can get my sink and associated cabinets installed as well then that'll be a great bonus. Looking forward to some time out there in the coming week though.
zmotorsports
ALLIANCE MEMBER
Really looking sharp.
Mike.
Mike.
HRJoe
Well-known member
Just in time for Christmas!
Looks great!
Sent from my iPhone using Tapatalk
Looks great!
Sent from my iPhone using Tapatalk
OP
CarCrazyRDM
Well-known member
Thanks guys.
matta5
Well-known member
Really looking great!!
OP
CarCrazyRDM
Well-known member
So after many days of climbing up and down and up and down and... you get the idea, my A-frame ladder I finally finished installing all (?) my lights!!! Super excited to finally have some good, permanent lighting out there. There are currently 15 Maxlite fixtures with 22W (or possibly 25W) Maxlite LED tubes. I'm going to add one more fixture underneath the back stairs that will hang above my workbench and it's possible I might add two more perpendicular running fixtures in the middle at a later date. But for now I'm pretty pleased with it. I have this forum and specifically Platonic Solid to thank for much of the help in selecting fixtures, bulbs and even layout.
Next up... outlets and switches, three fans, speakers, install my cabinet, counter and sink and then some airline connections (hard lines are in the walls). There are and will be plenty of other little things as well (like some window and door trim and doing something with the stairs) but plenty to keep me busy in the mean time.
Now onto the pics:


Next up... outlets and switches, three fans, speakers, install my cabinet, counter and sink and then some airline connections (hard lines are in the walls). There are and will be plenty of other little things as well (like some window and door trim and doing something with the stairs) but plenty to keep me busy in the mean time.
Now onto the pics:


old taco
New member
I spent 3 hours on new years day reading your entire post, great build and a lot of pictures ! You really did your homework thru out this build,
Keep up the great work !
Keep up the great work !
OP
CarCrazyRDM
Well-known member
Thanks OT. I've been planning such a garage for a long time, in my head, so when the opportunity finally arose to be able to build it I already had a pretty good idea of what all I wanted. With that said, there has been and will continue to be a lot of things to research and this forum has been very helpful with pretty much every topic.
Last edited:
OP
CarCrazyRDM
Well-known member
While probably not super exciting to look at a photo of, my wife and I were pretty pleased earlier this weekend when I finally, permanently, got power to the exterior lights on the front face of the garage. Those lights have been hanging on the building for months but we hadn't ever seen them illuminated (other than a test run off the building) until now.
I wired in a wireless module made by Skylink Home so that we can control them from the house as well. I also plan to put the floods on the same type of modules (you control them all with the same remote). I used this companies products at my last house and was pretty pleased with them. If I wire the house floods with one of their modules too with the push of one button we can light up the entire property. We'll see though, I may not go that far.
Anyway, here's the only couple pics I have of them on. Like I said, not that exciting to look at but we were pleased to come home last night to them illuminating the driveway.


I wired in a wireless module made by Skylink Home so that we can control them from the house as well. I also plan to put the floods on the same type of modules (you control them all with the same remote). I used this companies products at my last house and was pretty pleased with them. If I wire the house floods with one of their modules too with the push of one button we can light up the entire property. We'll see though, I may not go that far.
Anyway, here's the only couple pics I have of them on. Like I said, not that exciting to look at but we were pleased to come home last night to them illuminating the driveway.


hotrodchevy1999
Member
nice work
HRJoe
Well-known member
Looks good!
Some how I missed the finished inside pics. It looks like you could perform surgery in there. Looks great. Now you need to fill it and get it dirty. My buddy at work would be Blue with Envy if he saw your car in there. That is his Eleanor.
Bret
Bret
OP
CarCrazyRDM
Well-known member
It looks like you could perform surgery in there.
My buddy at work would be Blue with Envy if he saw your car in there. That is his Eleanor.
Bret
That's what I was going for.
 Although to be honest, it isn't quite as bright as I was hoping for. But I may have just built it up too much in my head, lol. I can always add more if after starting some real work in there I decide it's not enough.
And if your buddy likes how the Cobra looks from the outside I imagine he'll like what's under the hood even more.


Last edited:
OP
CarCrazyRDM
Well-known member
I put my Westinghouse fans up today. I love the ways these bad boys look and they move a lot of air. And for less than $70 each they are hard to beat for the money. The only thing I "upgraded" was the controller because as you'll see below the one that comes with them is huge and looks like it came straight out of 1985. I installed a variable speed decor switch that someone else recommended either off of this forum or off of Amazon's comment section (I think it was the latter). The only negative to this setup is that I cannot run the fans in the opposite direction but I'm not too worried about it.
Fan details here.
Anyway, on to the pics/video:
I can't seem to get the video to embed within this post so you'll have to click on the the link.
http://vid34.photobucket.com/albums/d106/CarCrazyRDM/Detached Garage/20170121_115626_zpslhhfalzj.mp4


Fan details here.
Anyway, on to the pics/video:
I can't seem to get the video to embed within this post so you'll have to click on the the link.
http://vid34.photobucket.com/albums/d106/CarCrazyRDM/Detached Garage/20170121_115626_zpslhhfalzj.mp4


Last edited:
Remythepug
Well-known member
Oh wow, it just keeps getting better [emoji106] ps I'll bring the beer [emoji23]
Sent from my iPhone using Tapatalk
Sent from my iPhone using Tapatalk
HRJoe
Well-known member
Fans look nice!
Sent from my iPhone using Tapatalk
Sent from my iPhone using Tapatalk
Awesome to see another guy on here using a laser scanner. I do laser scanning as part of my job and we have three Faros here. I've already scanned the interior of my house and made a 2D floor plan from it. I also plan to take measurements from the cloud to help do a manual J calc on my house. I do plan to scan my garage before any wall coverings go up as well. Really handy to have that data when you need it one day down the road. Garage is looking really good.
Last edited:
OP
CarCrazyRDM
Well-known member
Yeah, since I had access to it I figured I might as well take advantage of it, even if I never use it. However I've already pulled the scan up at least once since drywall has been up because I was trying to figure out how a couple things came together in a corner.
getblown5.9
Well-known member
- Joined
- Jun 12, 2012
- Messages
- 100
I have used a FARO in the past. I do HVAC ductwork and piping BIM coordination, and we have used the scans for existing conditions before. Those babies aren't cheap. My last company quoted for one at about $50k for everything. Instead they just rented one for $1500/wk when needed. Only used it about twice a year.
OP
CarCrazyRDM
Well-known member
Yeah, they definitely aren't cheap. Then again not too long ago I think they ran upwards of $150k! We started needing/wanting to use it more and more often and found ourselves having the scan work sub-contracted out and it just became cost-effective enough for us to purchase one of our own. In fact, we now have two.
The bulk of the reason we have ours is for getting as-builts for BIM of new construction buildings. Also getting models together for existing buildings. We just do the scanning and sub out the modeling though. We started with one scanner, but grabbed two more for redundancy/less time spent in the field. Gotta love that gov't money.
OP
CarCrazyRDM
Well-known member
So this past week I was able to put a good dent in some of the smaller items left on my to-do list. I finished installing all my upstairs lights. I got my speaker mounts up and the speakers installed. And I got two of my four windows trimmed out today. None of these items are very exciting to look at in photos but I'm going to post a few pics anyway just to give you something to look at, lol.


Not painted yet but will be soon.


Not painted yet but will be soon.

OP
CarCrazyRDM
Well-known member
So I've had this base cabinet, counter top and sink around for months, mostly just in my way, and I finally got it all fully installed last weekend! The only things I have left to do are glue and trim the end caps onto the counter top and then paint the bottom molding.
The cabinets are nothing special, they came from Home Depot. They are far from top quality but they are sturdy enough for what I need, look fairly nice, and most importantly were reasonably priced. I looked for a while on Craigs List and a couple local ReStores but never could find anything I liked.
The counter top and sink were also HD specials. I selected that counter because I felt the color and pattern was similar enough to my floor that it would look better than all white. The sink I am fairly impressed with given its price (around $250... I think it was 16ga, it is big, deep, and also came with the faucet and soap dispenser at that price!). It's under cabinet mounting brackets were **** but I went and bought some better/stronger ones from the store and mostly remedied that situation.
Like I did at my last house for my garage sink/counter I decided to build a "stand" to add to the bottom of the cabinets to raise everything up to a better working height for me. I'm not super tall but I am 6'1" and when working in the garage, especially at the sink, I don't like to have to stand there half bent over. I may have gone a little over board by reinforcing the middle and where I cut out for plumbing but I wanted this thing to be rock solid (and because it's just cheap *** particle board and figure it can use all the help I can give it, lol). I also wanted a decent amount of space to the right of the sink to either lay parts out on, work on something, or just put some drawers with screws, bolts, etc. The 4x4's on the end may have been a little overkill but they look the part and will certainly get the job done. I'll also have a very heavy duty work bench at the back of the garage too.
I also then built a "brace" along the wall to tie the counter into the studs. The base cabinet is attached to the foundation wall but even after that it still wasn't as stable laterally as I wanted it. So my brace fixed that. It also closed the gap between the back of the counter and the sheet rock as well as created me a nice shelf area. I'm pretty pleased with the way it all turned out. And then to add some additional storage area I put in a couple wall cabinets as well.
Not sure what is next but I'm about ready to start moving everything from my attached garage in and begin some organizing. I still want to buy some cabinets for the other side of the garage but not sure what I want yet or how much to spend. I could just do some open shelves, and I may do a few, but I like the clean look of closed cabinets. My wife is due with our second child in about six weeks though so I better hurry while I've got the time!


The cabinets are nothing special, they came from Home Depot. They are far from top quality but they are sturdy enough for what I need, look fairly nice, and most importantly were reasonably priced. I looked for a while on Craigs List and a couple local ReStores but never could find anything I liked.
The counter top and sink were also HD specials. I selected that counter because I felt the color and pattern was similar enough to my floor that it would look better than all white. The sink I am fairly impressed with given its price (around $250... I think it was 16ga, it is big, deep, and also came with the faucet and soap dispenser at that price!). It's under cabinet mounting brackets were **** but I went and bought some better/stronger ones from the store and mostly remedied that situation.
Like I did at my last house for my garage sink/counter I decided to build a "stand" to add to the bottom of the cabinets to raise everything up to a better working height for me. I'm not super tall but I am 6'1" and when working in the garage, especially at the sink, I don't like to have to stand there half bent over. I may have gone a little over board by reinforcing the middle and where I cut out for plumbing but I wanted this thing to be rock solid (and because it's just cheap *** particle board and figure it can use all the help I can give it, lol). I also wanted a decent amount of space to the right of the sink to either lay parts out on, work on something, or just put some drawers with screws, bolts, etc. The 4x4's on the end may have been a little overkill but they look the part and will certainly get the job done. I'll also have a very heavy duty work bench at the back of the garage too.
I also then built a "brace" along the wall to tie the counter into the studs. The base cabinet is attached to the foundation wall but even after that it still wasn't as stable laterally as I wanted it. So my brace fixed that. It also closed the gap between the back of the counter and the sheet rock as well as created me a nice shelf area. I'm pretty pleased with the way it all turned out. And then to add some additional storage area I put in a couple wall cabinets as well.
Not sure what is next but I'm about ready to start moving everything from my attached garage in and begin some organizing. I still want to buy some cabinets for the other side of the garage but not sure what I want yet or how much to spend. I could just do some open shelves, and I may do a few, but I like the clean look of closed cabinets. My wife is due with our second child in about six weeks though so I better hurry while I've got the time!


texasranger
Well-known member
You could perform surgery in there, very clean! What types of projects do you have planned? I do too much grinding, plasma cutting, and welding to have white cabinets.
Congrats on the second. I can just imagine how much time that will consume, our 2 year old is a hand full all by himself. I need to get my **** in gear with my build or I'll be in the same boat.
Congrats on the second. I can just imagine how much time that will consume, our 2 year old is a hand full all by himself. I need to get my **** in gear with my build or I'll be in the same boat.
ajohno
Well-known member
That is a very tidy garage. The sink area is great also.
Cabinets came out great. As others have said this place is cleaner than most houses.
I plan on building a sink for parts washing and paint clean up but mine will be in the backyard near the shed so mine will have to be built out of outdoor materials.
Congratulations on the new upcoming little one. Hopefully you can squeeze some QST in here and there.
Bret
I plan on building a sink for parts washing and paint clean up but mine will be in the backyard near the shed so mine will have to be built out of outdoor materials.
Congratulations on the new upcoming little one. Hopefully you can squeeze some QST in here and there.
Bret
slik560
Well-known member
Subscribed. I love it when dreams come true....even someone else's! Well done all-around.
Well done all-around.
OP
CarCrazyRDM
Well-known member
First, thanks for the compliments guys.
The garage will mostly be for car related projects/things. From general maintenance to my long term goal is to have a "project car." Which might include something as simple as new suspension on a toy car or maybe as involved as building a Factory Five A/C Cobra replica from the ground up. Time and money though, lol. But building and getting this garage prepped for such is step one... and one I've been waiting years to do so I'm happy just to be working on it for the time being.
As for any major grinding, welding, etc... I hope to build a mobile metal table/cart for some of that type of work of which I can move out back onto the rear concrete pad and do there. But even if that doesn't happen I've got a more heavy duty work bench that is going along the back wall near where my tool box(es) are going where I'd likely do more "dirty" work.
You could perform surgery in there, very clean! What types of projects do you have planned? I do too much grinding, plasma cutting, and welding to have white cabinets.
The garage will mostly be for car related projects/things. From general maintenance to my long term goal is to have a "project car." Which might include something as simple as new suspension on a toy car or maybe as involved as building a Factory Five A/C Cobra replica from the ground up. Time and money though, lol. But building and getting this garage prepped for such is step one... and one I've been waiting years to do so I'm happy just to be working on it for the time being.
As for any major grinding, welding, etc... I hope to build a mobile metal table/cart for some of that type of work of which I can move out back onto the rear concrete pad and do there. But even if that doesn't happen I've got a more heavy duty work bench that is going along the back wall near where my tool box(es) are going where I'd likely do more "dirty" work.
diiulio
Well-known member
Like your build, looks good.
What size are your eaves for overhang and the size of your front facia? I am building a 24x32 that has 12' ceiling and a 12/12 pitch, so it is fairly similar to yours. Trying to gauge what I need. I was thinking a 12" overhang and a 6" facia.
I have also been thinking about putting a garage door on the house side so I could drive through if I need to because I won't have enough space to get into the backyard with anything after I build the garage.
What size are your eaves for overhang and the size of your front facia? I am building a 24x32 that has 12' ceiling and a 12/12 pitch, so it is fairly similar to yours. Trying to gauge what I need. I was thinking a 12" overhang and a 6" facia.
I have also been thinking about putting a garage door on the house side so I could drive through if I need to because I won't have enough space to get into the backyard with anything after I build the garage.
OP
CarCrazyRDM
Well-known member
Like your build, looks good.
What size are your eaves for overhang and the size of your front facia? I am building a 24x32 that has 12' ceiling and a 12/12 pitch, so it is fairly similar to yours. Trying to gauge what I need. I was thinking a 12" overhang and a 6" facia.
I have also been thinking about putting a garage door on the house side so I could drive through if I need to because I won't have enough space to get into the backyard with anything after I build the garage.
Thanks. And I am nearly certain my eave overhang and fascia height are what you mentioned... 12" and 6" respectively. If you really want to know for sure I can measure it this weekend and get back to you.
And FWIW having the rear door on the garage has been great. I haven't really used it for any driving through, although I did want that option, but just for general access to the rear pad out back and ability to get larger items in and out, including my trailer.
OP
CarCrazyRDM
Well-known member
So a few more little things got done over the last couple of weekends. I finally moved my tool boxes and one of my heavy duty work benches up to the detached. And then I added another set of smaller cabinets above that work bench. I still need to buy and put some handles on them though. In this same area since my last update I think I also installed and painted the trim around my access door for under the stairs.
A couple of things in this general area that I plan to do are install one more of my LED fixtures that will hang over the work bench and then I've decided I want to add another 2 gang electrical outlet box under the little cutout/nook area above my access door but below the stairs. That little area will work nicely for a charging station etc. Which I had originally planned on and already have one set of outlets on the wall but I think another will be nice to have. And since the underside of the floor inside the storage area isn't finished it'll be easy enough to install.

I also finally got all my window molding caulked and painted. I was a little hesitant to go with the black at first but after the wife and a few friends agreed they really liked it after I had done just one of them, I pulled the trigger and did them all that way. I'm pleased with the look. As my hope was, it helps break up all the upper white space a little.


And last but not least I scored this awesome metal cabinet off Craig's List... for $75! It was apparently an equipment closest at a local Eaton factory. The guy I bought it from got it from his brother who used to work there. It's 6.5' tall, 2' deep (which is something I was looking for), and 3' wide. It's a big boy but will hold a lot of stuff and do so without me having to worry about it decaying over time like some of the MDF cabinets I was looking at. I plan to basecoat/clearcoat it but I think I've about decided to wait until I purchase a new toolbox (hopefully later in the year) and possibly match whatever color box I end up with (maybe a lime green Tool Vault chest... we'll see though). I'm tempted to paint it black though and keep the garage color scheme consistent. I've got some other priorities ahead of that, so there is time to decide.


I think I'm just about done with adding storage areas at this point. Now I just need to start bringing all the stuff up from the attached garage and getting it all organized. It'll take a while I imagine because I like things neat and organized and I'd like to only do it once. But I'm sure there will be things I change my mind about or find out aren't working as far as layout etc. I may have what seems like wasted space in the back left corner for a bit but that is where the lift will be going so I'm kind of planning around it.
A couple of things in this general area that I plan to do are install one more of my LED fixtures that will hang over the work bench and then I've decided I want to add another 2 gang electrical outlet box under the little cutout/nook area above my access door but below the stairs. That little area will work nicely for a charging station etc. Which I had originally planned on and already have one set of outlets on the wall but I think another will be nice to have. And since the underside of the floor inside the storage area isn't finished it'll be easy enough to install.

I also finally got all my window molding caulked and painted. I was a little hesitant to go with the black at first but after the wife and a few friends agreed they really liked it after I had done just one of them, I pulled the trigger and did them all that way. I'm pleased with the look. As my hope was, it helps break up all the upper white space a little.


And last but not least I scored this awesome metal cabinet off Craig's List... for $75! It was apparently an equipment closest at a local Eaton factory. The guy I bought it from got it from his brother who used to work there. It's 6.5' tall, 2' deep (which is something I was looking for), and 3' wide. It's a big boy but will hold a lot of stuff and do so without me having to worry about it decaying over time like some of the MDF cabinets I was looking at. I plan to basecoat/clearcoat it but I think I've about decided to wait until I purchase a new toolbox (hopefully later in the year) and possibly match whatever color box I end up with (maybe a lime green Tool Vault chest... we'll see though). I'm tempted to paint it black though and keep the garage color scheme consistent. I've got some other priorities ahead of that, so there is time to decide.


I think I'm just about done with adding storage areas at this point. Now I just need to start bringing all the stuff up from the attached garage and getting it all organized. It'll take a while I imagine because I like things neat and organized and I'd like to only do it once. But I'm sure there will be things I change my mind about or find out aren't working as far as layout etc. I may have what seems like wasted space in the back left corner for a bit but that is where the lift will be going so I'm kind of planning around it.
Last edited:
tfb
Well-known member
Awesome job! You spared no expense, and the details are top shelf. I can't think of anything you could of done better.
I was looking early on for any info on what size I Joist they used? With a 24' open span I guess it was substantial. Do you have that info??? Thanks, and good luck with it.
I was looking early on for any info on what size I Joist they used? With a 24' open span I guess it was substantial. Do you have that info??? Thanks, and good luck with it.
OP
CarCrazyRDM
Well-known member
Awesome job! You spared no expense, and the details are top shelf. I can't think of anything you could of done better.
I was looking early on for any info on what size I Joist they used? With a 24' open span I guess it was substantial. Do you have that info??? Thanks, and good luck with it.
Thanks tfb. As for the joists, I don't know if this will mean anything to you, I'm just reading it from the plans, but they are category 4 BCI 60's. They are 16" deep with a flange that is 2-5/16" wide and 1-1/2" tall. And I believe they are 19" or 20" on-center but that's going off memory. They may be 24" O.C.
All I know is my contractor said going wider than 24 ft meant the cost went up exponentially when trying to use I-beam construction. Either the beams got really expensive in order to span a 26' or 28' width or another large beam or beams had to be run the length of the building down the middle, which also drove cost up a good bit. It really didn't matter because I was already pushing my budget as is and it definitely was cheaper to keep it 24' and just go deeper if I wanted to spend more. Ideally I really would have preferred a 28' wide building but between the added cost (or having to make it's length only 24' - 28') and lot constraints, a width of 24' just made the most sense. 28' x 42' would have been awesome but at some point you have to draw the line.
zmotorsports
ALLIANCE MEMBER
Looking great.
That gray locker style cabinet is exactly what I am looking for to place in my shop. I would like to find about 6-8 of them for storage vs. on shelves in my last shop. I've been looking locally for a few months now but they are hard to find in fair condition.
Keep the pics coming, looking great.
Mike.
That gray locker style cabinet is exactly what I am looking for to place in my shop. I would like to find about 6-8 of them for storage vs. on shelves in my last shop. I've been looking locally for a few months now but they are hard to find in fair condition.
Keep the pics coming, looking great.
Mike.
texasranger
Well-known member
Old switch gear cabinets make nice cabinets too. I ended up with two from an auction. They have rubber seals around the doors and what must be a baked on enamel which is super durable. Just have to build your own shelves inside.Looking great.
That gray locker style cabinet is exactly what I am looking for to place in my shop. I would like to find about 6-8 of them for storage vs. on shelves in my last shop. I've been looking locally for a few months now but they are hard to find in fair condition.
Keep the pics coming, looking great.
Mike.
Knyte Tyne
Well-known member
The scratch on the floor from the dry wall screw unfortunately is just the Garage Gods taking their first Offering. Unless I missed it what are your plans for the upstairs?
Great Build. Awesome space... Yours is the type of Workshop that most of us can dream about having one day...
Great Build. Awesome space... Yours is the type of Workshop that most of us can dream about having one day...
OP
CarCrazyRDM
Well-known member
The scratch on the floor from the dry wall screw unfortunately is just the Garage Gods taking their first Offering. Unless I missed it what are your plans for the upstairs?
Great Build. Awesome space... Yours is the type of Workshop that most of us can dream about having one day...
Yeah, sadly I am sure there will be plenty more scratches on the floor. But the more stuff I get in there the more any imperfections are "hidden." That's the other reason I like the flakes, they help hide stuff like that. But they also help hide things you drop on the floor as well, lol.
No real plans for the upstairs other than general storage for all the things I don't use all that often and don't want downstairs (for the sake of space or looks). It may also one day serve the purpose of being storage for all the stuff we have in the "attic" of the house, if we one day decide to finish that space because it's an unfinished walk-up third floor.
OP
CarCrazyRDM
Well-known member
Nothing too overly exciting lately but I did fill the above cabinet with lots of stuff. I also built some natural area boxes along the side of the garage and added some bushes/plants and a pencil holly to hide my electrical conduit. And just today I finally installed some shutters on the side windows. I originally didn't think they were "necessary"... I should have listened to my wife, lol, they make it look a lot more finished from the outside. Oh, and I added a few pavers between sidewalk and the garage man-door. Also something I should have done a long time ago. It's nice not to have to walk through mud or wet grass to get into the garage without the big door up.
Mostly I've just been doing some organizing inside. Something I haven't gotten to yet but hope to soon are installing some pulleys/hooks to hang my extension and possibly my 12' A-frame ladder from the ceiling.

A before pic -
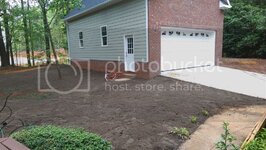
And after -

Mostly I've just been doing some organizing inside. Something I haven't gotten to yet but hope to soon are installing some pulleys/hooks to hang my extension and possibly my 12' A-frame ladder from the ceiling.
A before pic -
And after -