To avoid these ads, REGISTER NOW!

Fordkid's ADHD Fabrications

OP
F

fordkid88

Well-known member
Joined
Nov 10, 2013
Messages
680
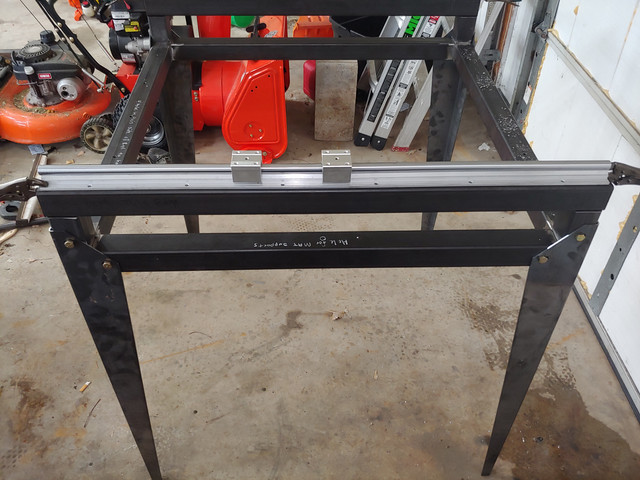
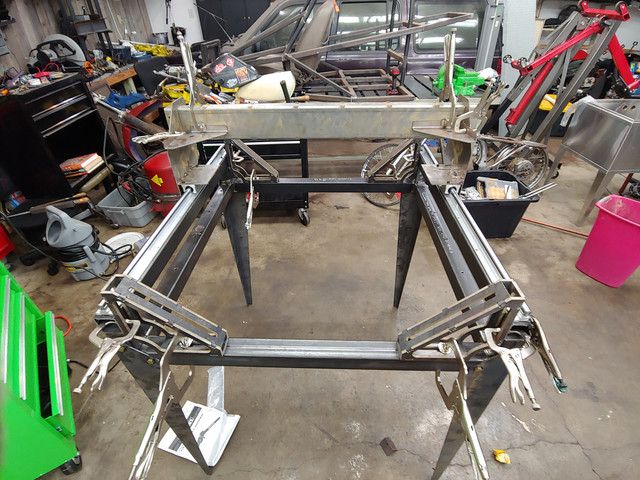
So the plasma table that ive been running my mouth about with nothing to show now has something to show. Its only tacked up at the moment but its within a 32nd of being square so im gonna tackle that soon. Glad that 10,000 grand for an advance metal fab program is paying off.


To avoid these ads, REGISTER NOW!
OP
F

fordkid88

Well-known member
Joined
Nov 10, 2013
Messages
680
Nice work, Fordkid; just found this thread; subscribed for updates.

Missed you at Fabtech, I was just a few booths down from the big Davi rolls...

Thanks! Theres is a possibilty i ran into you. I was like a kid in a candy store, i was all over the place bothering everyone i could.
 
OP
F

fordkid88

Well-known member
Joined
Nov 10, 2013
Messages
680
Well since school is postponed until well whenever its figured out ive been keeping myself working on several different projects.

I picked up a mostly complete 1981 cb125s for a parts bike for a 100 bucks. So ive been busy swapping parts onto my 1971 cl100. Im working the seat pan and rear indicator mounts now.


I made a prototype gantry before school was cancelled. It will remain a prototype as i whipped it up in cad the night before school was cancelled because well i saw the writing on the wall. Its far from perfect but this way i can mocked things up and make sure they work.


upload image
 
OP
F

fordkid88

Well-known member
Joined
Nov 10, 2013
Messages
680
Spent the last few days working on the bike. I've dumped a ton of MEK and bolts into the tank and rattled the piss out of it over the period of about an hour. Got the of rest the **** liner out of the tank. I had to drill out two large holes on each side of the bottom the tank to get the big nasty chunks of that **** that wouldnt really come out. Then after the MEK wash I did two seperate acid dips and then a baking soda bath after each acid dip. I tig welded the holes on the bottom which was fun because there were 18g and there wasn't a hole lot of room to move my torch around.

And then I screwed up...I normally leave my ground clamp on the table and dont any issues, I had poor grounding and I ended popping a hole in the top of the tank. Its 20g and it took me quite a bit of time to fill it because I had to build it up and if I spent even a fraction of second to long it would burn away the base metal. I finally got it built up enough that I could ground the weld flush. Its not a big deal because I have to do body fill on pretty much the hole tank.

Tomorrow Im going to do an acetone wash on the inside and try and get out the last little bit of crud in there and start with the body work and paint on it.


Up next I fixed the broken lever. Looks like the bike was dumped at one time and it broke the mirror mount off the brake lever which is ok because I dont plan on using them. I cleaned the aluminum and just started dumping filler rod into it so it was heavily built up. Then I ground it down to shape and have to sand and polish it. Im going to do the same to the other side so they look the same. While doing this I noticed that the brake switch was kinda rough so I have to add that to the list a parts to replace just for peace of mind.


I also started the seat pan. I originally did a fiberglass version but I hated it and I thought it looked like ****. So I did one from metal and started forming the frame mounts for it.

Hopefully I can take some pics that dont **** and have a little more to show.
 
OP
F

fordkid88

Well-known member
Joined
Nov 10, 2013
Messages
680
Tank was patched up, body filler worked and painted. I have to wait for it to cure for a couple more days then I'm going to wet sand it and do a couple clear coats.

Since the original head light was pretty rotted away I picked up one of these $7 offroad lights from harbor freight. It'll get painted white and black to match the color scheme I'm going for. From what I've read you can modify these lights and make them pretty decent
 
OP
F

fordkid88

Well-known member
Joined
Nov 10, 2013
Messages
680
So after not being entirely happy with the fix for the trashed upper shock mounts I cut them out and redid them last night. And...I still was happy. So after having an Old Fashioned or two and maybe a beer or two I decided to use the rear assembly from the parts bike. I made transfer punch templates on one side of the bike and then made location holes on each frame so everything would line up in the transfer. Then I cut **** assembly off and then the donor one and hoped to hell everything would line up and it did. Monday or Tuesday I'll clean everything up Tig the grinder marks and fully weld the new rear end on.

The only thing I'm really loosing is the rear seat hoop bit I'm going to look for one that slants upwards.
 
OP
F

fordkid88

Well-known member
Joined
Nov 10, 2013
Messages
680
It was the liquid courage and my nitt picking that made me.
Oh man you are getting in deep. Excellent work !

I don't lol. I actually went out there to clean and this happened. It was nice at one time, then school, work and my little guy stole all of my time. Goal for next week is to get it back up and running.
You definitely got skills but how do you find anything in that pile!
 
OP
F

fordkid88

Well-known member
Joined
Nov 10, 2013
Messages
680
Alright today has been go to town day. So many projects knocked out and cleaning done. I'm only have way through.

Squirrel fan bracket made and mounted so I can turn it to where ever I'm working.


Coolant setup and flowing for the band saw.


Moved my fab boxes and am working on cleaning them up.


Power box wired and mounted to the little weld table.


Grinder mounted to the little weld table.


Welder/Plasma table area arranged.

 
OP
F

fordkid88

Well-known member
Joined
Nov 10, 2013
Messages
680
Spent the day doing the welds for the rear frame and modifying the motor mount cradle area. This 100cc frame now fits 125cc and up. I want to tweak just a bit more. But I should be able to plop in one of those 200cc Chinese clone motors.

 
OP
F

fordkid88

Well-known member
Joined
Nov 10, 2013
Messages
680
Messing with appliance Enamel. Mixed it with acetone and an Enamel hardener. Comes out pretty decent in fact I was impressed because I hate painting. The can says I can shoot a second coat tomorrow so I'll see if I can get to that tomorrow. I'm going to finish the welds on the frame and try and shoot that next week as this was just a test to see how it would come out.

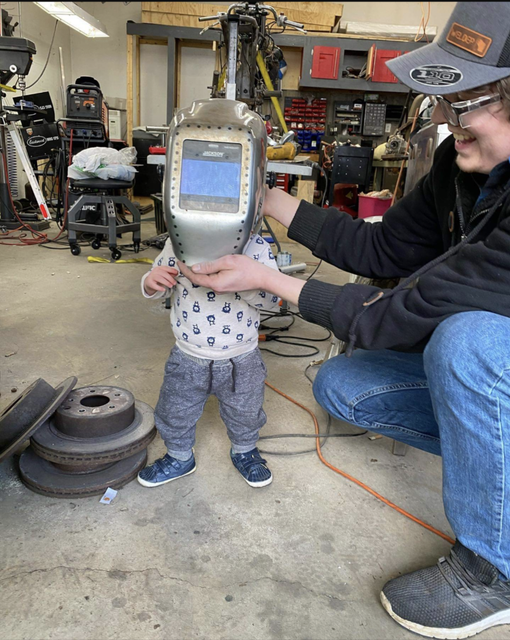
Getting my helper situated.


matt_i

Well-known member
Joined
Mar 14, 2008
Messages
10,752
Location
SE Michigan
Wow major teardown!

I do love the days when the planets align and I can move a bunch of 95% projects to 100s.

Cleaning, while it should be organizing, always goes tangential into other things lol.

Keep the pics coming, please!
 
OP
F

fordkid88

Well-known member
Joined
Nov 10, 2013
Messages
680
You have been a busy guy!!!

I like the progress!!!

Wow major teardown!

I do love the days when the planets align and I can move a bunch of 95% projects to 100s.

Cleaning, while it should be organizing, always goes tangential into other things lol.

Keep the pics coming, please!

Thanks guys. I'm trying to stay as busy as I can until I start my new job next week.

Yesterday was a mixture of quick and easy and a **** show.

I used a finger sander to grind the weld off of the brake spring mount as it has to be relocated.


Then I finally had a chance to use this nifty little plug weld tool from Eastwood. The weld was so close to the edge I didnt want to blow out the edge.


Worked out pretty well.


The spring retainer welded into it's new position.


Had to weld a nut to the helmet lock so I could get it off.


Drilled out the older motor mounts to 10mm and then did a reinforcement weld to them.


Then I dropped it off at the sand blaster(my backyard), degreased it and shot some primer and then Enamel. This is the **** show part as my better spray gun which is still junk ripped the pattern threads and shot the adjustment knob into orbit. So I used the $10 hf one and it didn't want to spray worth a **** so I've got a good amount of fine orange peel. I'm going to live with it for now and maybe have the frame powder coated in a year or two.
 

racer-john

Well-known member
Joined
Apr 1, 2008
Messages
1,461
Location
Newmarket, ON Canada
Messing with appliance Enamel. Mixed it with acetone and an Enamel hardener. Comes out pretty decent in fact I was impressed because I hate painting. The can says I can shoot a second coat tomorrow so I'll see if I can get to that tomorrow. I'm going to finish the welds on the frame and try and shoot that next week as this was just a test to see how it would come out.

Getting my helper situated.


Is it my eyesight or are those two mounting (channel shape) brackets not in line? :lol_hitti
 
Last edited:
OP
F

fordkid88

Well-known member
Joined
Nov 10, 2013
Messages
680
They're in line as far as I can tell. It's one of the few things I haven't messed with lol. I think it's the angle of the picture.
 
To avoid these ads, REGISTER NOW!

Bigblue&Goldie

Well-known member
Joined
Mar 12, 2009
Messages
10,734
Location
AZ
This is looking bitchin so far. I've seen guys use appliance enamel on guns before, but never automotive/motorcycle use. It's actually a great idea. Got me thinking it would be good for random stuff that I usually hose down with cheap spray paint.
 
OP
F

fordkid88

Well-known member
Joined
Nov 10, 2013
Messages
680
This is looking bitchin so far. I've seen guys use appliance enamel on guns before, but never automotive/motorcycle use. It's actually a great idea. Got me thinking it would be good for random stuff that I usually hose down with cheap spray paint.

I spent a couple hours reading on painting and this popped up a lot for motorcycle and vehicle chassis quite a bit. The only down side is the lack of uv protection. The parts that I did in white-the appliance Enamel are hard I can leave a mark on them. The black I can say the same. I think I'm gonna wet sand and spray the white one more time mainly for touch up and I'll let the black sit a week and do the same.
 
OP
F

fordkid88

Well-known member
Joined
Nov 10, 2013
Messages
680
My seat came in. It was whatever was cheapest and shipping the fastest as I knew it would not be long before I cut it up to make it work, which has already started. It's pretty close but I wish it was an inch longer but all of the seats on eBay and Amazon were pretty much the same.


image upload
 
OP
F

fordkid88

Well-known member
Joined
Nov 10, 2013
Messages
680
Couldnt sleep last night so I started the ghetto sandblast cabinet as I was tired of doing stuff in the back yard and pretty much wasting sand once it's out of the gun, and my wife is getting pretty tired of me bringing sand in the house no matter how much I brush off.
 
OP
F

fordkid88

Well-known member
Joined
Nov 10, 2013
Messages
680
Mostly a good morning. Rocking out to The Cult and The Smashing Pumpkins.

Sand blast barrel is like 90% done. I needed it so finishing the drain portion and completing the window can wait.


Wet sanding the frame and spraying a second coat came out decent. No great but my hatred for painting says it'll do.

Last part to spray and I had a couple of really weird globs that **** out of my gun....I tryed a tip I found were you spray them heavily down to the edge and let gravity do its thing and it looked like it was working. I came back twenty minutes later and Gravity did another thing and let the piece turn over and so that wet paint decided to run towards it's new bottom...looks like this get redone in a week.


I think for white I have the triple tree, lower forks, and the foot rest left to do. There is a possibility of getting a used oven and doing some powder coating parts at home for things that aren't aluminum so I may just powder coat the head light if I end up getting a used oven.

I also landed this yesterday. Doesn't amount to much but I'm still proud of it.
 
Last edited:
OP
F

fordkid88

Well-known member
Joined
Nov 10, 2013
Messages
680
The wife got real funny when I asked her if I could play with her nail polish.
 

tarbellb

Well-known member
Joined
Apr 17, 2011
Messages
5,779
Location
Oregon
Been quietly following, enjoy seeing the progression. Keep up the hard work and momentum, it will pay off.

And congrats on the award, it all happens for a reason.
 
OP
F

fordkid88

Well-known member
Joined
Nov 10, 2013
Messages
680
Well I had another ADD moment, I was cleaning the basement shop and I realized I was tired of my mill being on the big work bench and got to thinking that if I made a separate cabinet/stand for the mill about the foot print of the mill I could get rid of the shoddy work bench that came with the house when we bought and really make some space in my little basement shop. Plus it'll really help being able to get to the rear of the machine to aid in clean up.


So I've got the main frame partially welded and tacked up. I've got the over kill workbench casters on it rated at like 3300lbs a piece. They're pretty sweet as they have built in level feet.

The top plate is 1/4" so I could have a solid surface for the mill to mount to. This ended up being on headache partially on my part and in part to metal supermarket. My sight does not have a shear large enough to do 1/4" plate. I have access to one at work that can do 1/2", so I asked what is the widest flat bar that they carried which was 12" which was perfect. I could shear a plate and have one weld seam and we done, well in my rush to help my friend after work I quickly sheared it up with to the inside dimension....4" short. So I accepted partial defeat and weld on a section 4" plate. It'll never be seen as the chip tray will sit on it but I know I fucked up so that irritating.

I'm doing the math and planing for the side panels door and drawer at the moment. I'll form these up one after work but I'm going to take my time over a couple days as I don't want to screws these up.
 

Monza Harry

Well-known member
Joined
Dec 29, 2018
Messages
1,433
Location
Windsor ON
Well you like Fords so .... Just bustin' on your vehicular taste, says the guy in Love with an Italian designed Chevy that allowed accountants to have final say on engineering concerns. Back on topic, the only people that don't make mistakes are God (not really people) and those not doing anything. The more mistakes you make the more your doing/learning. Great deal trying to wrestle every inch out of your space! Harry P.S. If anyone sees it and asks "WTF" tell them it's been designed to a "T"
 
Last edited:
OP
F

fordkid88

Well-known member
Joined
Nov 10, 2013
Messages
680
Well you like Fords so .... Just bustin' on your vehicular taste, says the guy in Love with an Italian designed Chevy that allowed accountants to have final say on engineering concerns. Back on topic, the only people that don't make mistakes are God (not really people) and those not doing anything. The more mistakes you make the more your doing/learning. Great deal trying to wrestle every inch out of your space! Harry P.S. If anyone sees it and asks "WTF" tell them it's been designed to a "T"

Hahaha oh man do I love puns and dad jokes!!! You're right, the best way to learn is through mistakes so at this point I may be bordering on being the most educated man to walk this planet.

Alright so I've got the materials to make the side panels and doors. So over the next few weeks I'm going to form them up after work. I've also been spurred on by erty67 and his scruffy huffy post, but I don't have a rider, I've looked a d found some dirt cheap junkers that I could chop up and start my own but I decided to start my own version.


I picked the hood up tonight for 35 bucks so I decided screw it and I start this tonight from box tubing.
 

harley jim

Well-known member
Joined
Dec 6, 2013
Messages
11,426
Location
Cleveland Tn..........out in the sticks
Hahaha oh man do I love puns and dad jokes!!! You're right, the best way to learn is through mistakes so at this point I may be bordering on being the most educated man to walk this planet.

Alright so I've got the materials to make the side panels and doors. So over the next few weeks I'm going to form them up after work. I've also been spurred on by erty67 and his scruffy huffy post, but I don't have a rider, I've looked a d found some dirt cheap junkers that I could chop up and start my own but I decided to start my own version.


I picked the hood up tonight for 35 bucks so I decided screw it and I start this tonight from box tubing.
I like the hood, I had to make a new hood for mine. Been quietly watching like everyone else seems to be doing. Just thought I would speak up and say good work, you have a lot of good ideas in your mind that want to get out[emoji106]20200528_153826.jpeg

Sent from my SM-A102U using The Garage Journal mobile app
 
OP
F

fordkid88

Well-known member
Joined
Nov 10, 2013
Messages
680
I like the hood, I had to make a new hood for mine. Been quietly watching like everyone else seems to be doing. Just thought I would speak up and say good work, you have a lot of good ideas in your mind that want to get out[emoji106]20200528_153826.jpeg

Sent from my SM-A102U using The Garage Journal mobile app

Thanks! I do like your custom hood, gives it a somewhat vintage look.

The ideas in my head kinda get me into trouble, as I'm always looking for something to work on. It's chaos between my ears keeping track of everything. My bike is in search of new motor, my plasma table his on hold until I can get some parts cut, this milling table came about as I was machining some parts for the bike and I really hated the orientation of the basement shop.
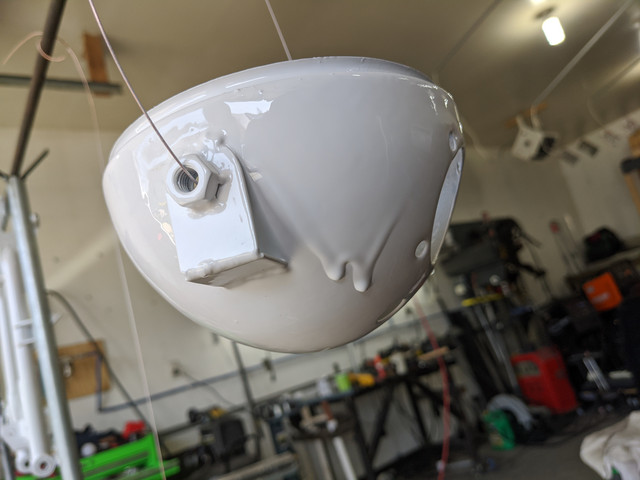
I thought if I got rid of shoddy work bench that came with the house when we bought the house and take the workbench that the mill is on and turn that into a my assembly bench and computer desk and just build a new stand for the mill all would be good, that just snowballed into being more in depth than I planned but hey it'll be cool.

The kart is actually for my little guy, he gets so excited about things like that so after seeing the scruffy huffy post I had to build the little turd one.
 
OP
F

fordkid88

Well-known member
Joined
Nov 10, 2013
Messages
680
This weekend was mostly low key as far as fun work goes. My wife had made plans to redo the landscape in the front and pant the front of the house, which we still need to finish. I was able to sneak away after we called it a night.

I set the hood up to actually tilt like it should. I'm going to tweak it some more to functional as well asthetically pleasing and giving just a little more clearance to the steering linkage which I also started. I picked up some Heim joints and machined some weld on bungs for them. I also made delrin bushings for the steering knuckles. Which after installing them I realized I may need to completely remake the knuckles because the wheel and tire combo I'm using now are not the final ones I'm going to use and if the wheels end up being any smaller I'll be scraping the chassis on the ground.


Keyblazer

Well-known member
Joined
Jul 30, 2009
Messages
1,471
Location
Irvine, CA
Great thread!
Subscribed!

My old Training Manager would say:
"A man who never made a mistake, never made anything".
 
OP
F

fordkid88

Well-known member
Joined
Nov 10, 2013
Messages
680
Well I got some work done on the milling machine stand. I still have to get setup for the drawer and form that up, as well as probably paint. Before that I have to figure out the coolant setup.


OP
F

fordkid88

Well-known member
Joined
Nov 10, 2013
Messages
680
I got the main body painted. I still have to do the do the door. I probably going to do a blue to match the blue from precision Mathews.


I started working on the kids kart after this. I realized that the Briggs 5hp is too tall and will not work so I'm going to look at the predator 212 which I think will work especially without the tank and all the plastic **** on it
 
OP
F

fordkid88

Well-known member
Joined
Nov 10, 2013
Messages
680
Pardon the distatorous mess I just dumped everything on the table to move the mill.

 
OP
F

fordkid88

Well-known member
Joined
Nov 10, 2013
Messages
680
So I completely forgot I had motor sitting around for this kart, well my buddy did. About 2 months ago a friend texted me if I wanted this motor. I said yeah I'd find something for it and then it sat at my buddy's until tonight when I remember it. The carb is gummed up but if I pour a little gas in the carb it'll run for a few seconds and shuts off. I'll order a new cab because at this point it's easier to do that and then I'll fab a stainless steel exhaust at work.

Fits nice in the cage. Just need to figure out the tank and steering.
 
To avoid these ads, REGISTER NOW!
Top Bottom