don long
Well-known member
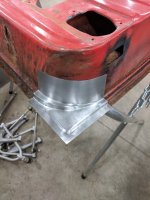
As an old body man, You have my attention. I only wish that I had those metal bending skills!! I do know how to make those repairs that you are correcting how ever..
Very nice work
Don
Very nice work
Don

Absolutely beautiful work. One day I hope to have the tools and know how to work sheet metal like that. Also i love the Fuel line work. I may have to borrow some ideas when I redo the lines on my foxbody
Sent from my iPhone using Tapatalk
Fox Valley can you mandrel Bend 304SS 2.5" dia into a 45 degree angle 6" or so leg on each side is ok? What is the price for two of these? I am in Mequon, WI.
Tom
414-530-6662 cell
As an old body man, You have my attention. I only wish that I had those metal bending skills!! I do know how to make those repairs that you are correcting how ever..
Very nice work
Don
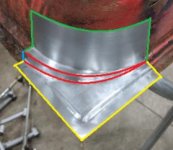
Well done! Shirt in different planes is cool !!
")
You sir are a craftsman. Your work is incredible.
The header repair worked out great, that die is awesome.
As is your sheet metal skills amazing on that door.
Nicely done.
You have mail
How did you bend the edges after the piece was formed on the english wheel? Did you use a bead roller?
You're the man Bryan
Thank you
Very nicely done. That's the way I've had to repair spots like that as well as I don't have the machinery either but they turn out great and you can never tell they were more than one piece when done.
Nice work. Can you explain the process you used to make that corner piece? I have a lot of experience on a pressbrake bending sheetmetal but no experience doing work like you are doing with the radius's and transitions.
Very nice work, and not that time consuming. What gauge metal did you use?
Fantastic repair. As good if not better than new.
Nice job Bryan, enjoy MN!
Glad to help! Let me know how that die works for you!

Very nicely done.
Looks like you've been a bit busy.
Nice work as always.
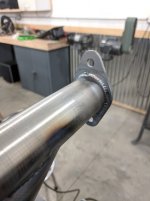
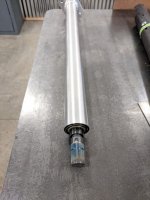
That steering column looks great
Absolutely gorgeous! I wish I had those skills. And the equipment.
I never cease to be amazed by the skills of people on GJ. Beautiful work, Yaidunno. Just beautiful.
Just started looking on the forum again after not being on in a while. First thing I see is a local guy building cool stuff! That's good to see more from the area posting here!
I'm from the other side of Appleton & do metal fabrication / auto restoration
You sir are an artist.
What do you use to so uniformly sand the ends of your roll cage tubing? Just a belt sander or some kind of super ninja trick?

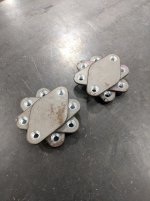
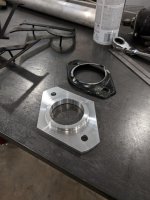
Great work as usual! Okay now! I'm usually pretty good at puzzles but I'm having a hard time trying to figure out how these are to be used?
Thanks
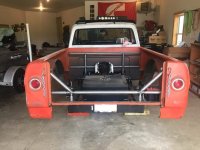
Now the bedside supports make more sense! Drag truck or bagged truck?
That steering column is ****!
I was trying to figure that out as well but the puzzle wasn't making sense in mine head.That makes much gooder sense.
I assume that drag truck is a 1961-1964 Dodge D100? Were the headers on page 1 440 headers for that?