OP
Re: Garage Refurb
About the last three weeks, I've had an issue with my woodburner. It would be fine at times and then would seem to lose it's draft. I'll be the first to admit, that after using it last year with the new chimney, I never got around to clean it. I wasn't worried too much since 95% of what I burn is standing dead wood. So it's been drying for a few years and I've not had an issue since we bought the place. This year, winter came on and stuck around, no nice days, snow that never melted and just a harsher winter than we have had for a long time.
I had wondered what was going on with the wood burner and when it lost it's draft, the garage would get from a light haze of smoke to not wanting to vent. This usually occurred when I had left to go to town and would come home to this. There was a few days that it would keep me out of the garage. I knew that I needed to fix the latch on the door of the woodburner. After 60 plus years of use, the cast iron latch had wore to the point, it didn't shut tightly. As long as the draft was pulling, it wasn't an issue. I was half afraid to weld it and have it crack, leaving the door useless. Between the issues, I needed to do something.
Saturday afternoon, I broke out the ladders and made my up to the chimney. Hoping to find something but nothing too bad. The thought of a broken chimney liner has crossed my mind and that would take tearing into the chimney to fix. As I took the cap off, I saw that it appeared to have a huge build up of creosote.

As it turned out, the paint had blistered and peeled away, leaving those bulges. I used my flash light and looked down inside. There was an area right above the thimble where it had completely closed shut and creosoted up. I knocked a hole through it, it appeared to only be about a 1/2-3/4" thick. Then I put the brush on the rods and cleaned the small amount that had built up on the walls of the liner. Since we had so many single digit days, and the chimney being outside (cold) it must have cooled as soon as it hit the cold air of the chimney.
I moved inside after the chimeny was clean to work on the door. I used some MAPP gas to put some heat in the door before welding it. All I needed to do was build it up, it didn't need to be pretty.

This morning, I went out and cleaned it up enough for it to shut tight. I wanted to get a fire going as it was cold and windy today (out of the east). Once Spring hits, I'll clean the weld up more so it looks prettier(picture makes it look worse than it is) . Right now, it works and that's all that matters.

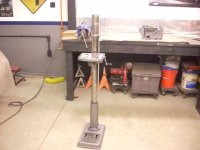
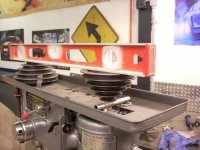
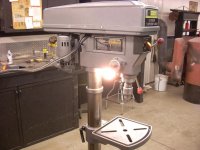
The chimney now drafts like it should and the door closes tight. I did get the column cleaned up for the drill press and it'll get reassembled this week.
About the last three weeks, I've had an issue with my woodburner. It would be fine at times and then would seem to lose it's draft. I'll be the first to admit, that after using it last year with the new chimney, I never got around to clean it. I wasn't worried too much since 95% of what I burn is standing dead wood. So it's been drying for a few years and I've not had an issue since we bought the place. This year, winter came on and stuck around, no nice days, snow that never melted and just a harsher winter than we have had for a long time.
I had wondered what was going on with the wood burner and when it lost it's draft, the garage would get from a light haze of smoke to not wanting to vent. This usually occurred when I had left to go to town and would come home to this. There was a few days that it would keep me out of the garage. I knew that I needed to fix the latch on the door of the woodburner. After 60 plus years of use, the cast iron latch had wore to the point, it didn't shut tightly. As long as the draft was pulling, it wasn't an issue. I was half afraid to weld it and have it crack, leaving the door useless. Between the issues, I needed to do something.
Saturday afternoon, I broke out the ladders and made my up to the chimney. Hoping to find something but nothing too bad. The thought of a broken chimney liner has crossed my mind and that would take tearing into the chimney to fix. As I took the cap off, I saw that it appeared to have a huge build up of creosote.

As it turned out, the paint had blistered and peeled away, leaving those bulges. I used my flash light and looked down inside. There was an area right above the thimble where it had completely closed shut and creosoted up. I knocked a hole through it, it appeared to only be about a 1/2-3/4" thick. Then I put the brush on the rods and cleaned the small amount that had built up on the walls of the liner. Since we had so many single digit days, and the chimney being outside (cold) it must have cooled as soon as it hit the cold air of the chimney.
I moved inside after the chimeny was clean to work on the door. I used some MAPP gas to put some heat in the door before welding it. All I needed to do was build it up, it didn't need to be pretty.

This morning, I went out and cleaned it up enough for it to shut tight. I wanted to get a fire going as it was cold and windy today (out of the east). Once Spring hits, I'll clean the weld up more so it looks prettier(picture makes it look worse than it is) . Right now, it works and that's all that matters.

The chimney now drafts like it should and the door closes tight. I did get the column cleaned up for the drill press and it'll get reassembled this week.
Attachments


Last edited:
 I should have known better.