To avoid these ads, REGISTER NOW!

Hein Werner OS

wingsnaprop

Member
Joined
Mar 13, 2011
Messages
10
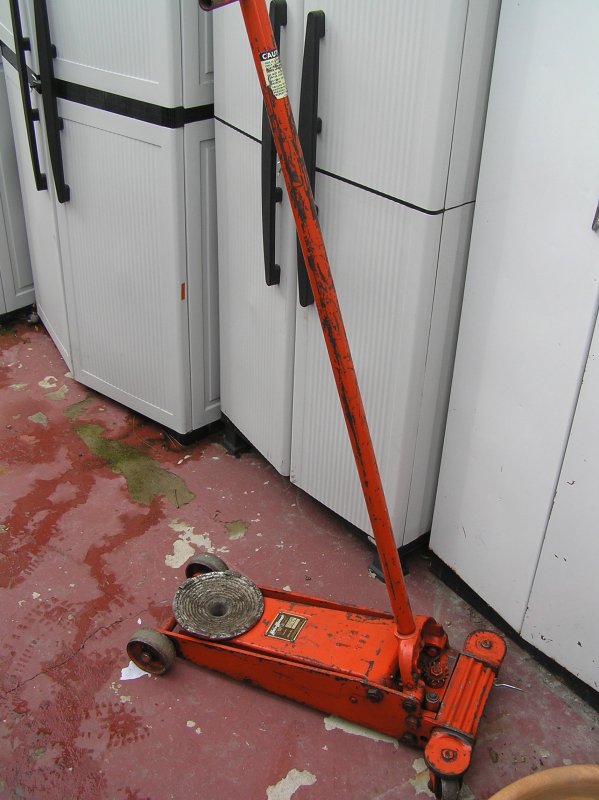
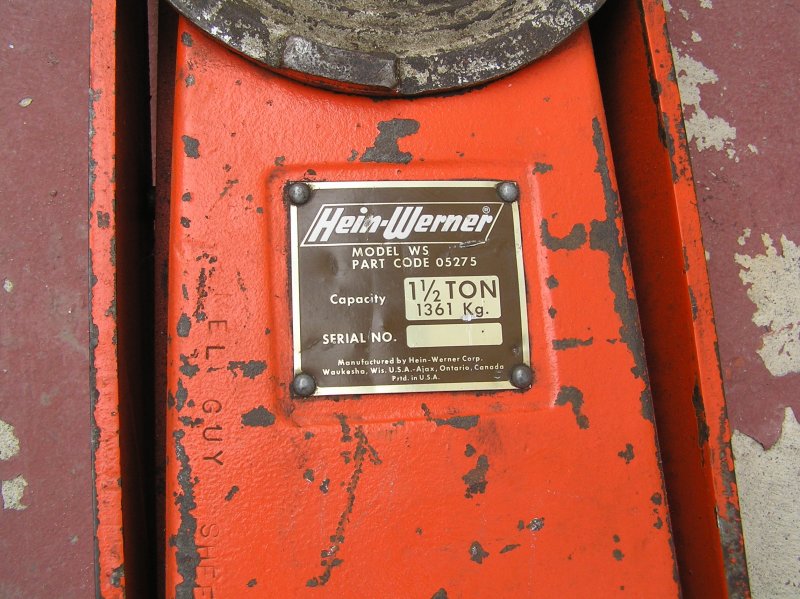
I would like to echo the Voices here praising this thread. Fine Job Leroy and thanks Hiball .. Made me decide to rebuild my Hein Werner WS 1.5 ton Jack I purchased new in 1976.. or was it 75 ..It Just started leaking this winter ..36 yrs Loyal Service.. It damn sure aint Chinese.
Might take some pics for here too ..
Jay Markland
AutobodyMan
Dayton OH
45 yrs exp.
 
To avoid these ads, REGISTER NOW!

brianpgriset

Well-known member
Joined
Sep 29, 2006
Messages
1,038
Location
Beaumont, TX
Time to revive the dead. I've started my O'boy rebuild. Already got my seal kit from Hiball. Great thread though, already answered many of my questions.:thumbup:

This does lead to my first question, the drag link rivet between the drag link and the side plates has a good 3/32" of play or so. Any reason for concern? Everything in else appears to be in order other than a wiper packing leak.

DSCN0828_zpsb8e1441a.jpg


DSCN0815_zpscffff349.jpg
 

brianpgriset

Well-known member
Joined
Sep 29, 2006
Messages
1,038
Location
Beaumont, TX
And one more question, how tight should the packing follower be? I found it so loose I could turn it by hand. This thing may OT even need a rebuild as that was the only leak.
 

Hiball

Well-known member
Joined
Apr 30, 2009
Messages
14,027
Location
Missery
And one more question, how tight should the packing follower be? I found it so loose I could turn it by hand. This thing may OT even need a rebuild as that was the only leak.

Rule of thumb is not to over tighten when everything is New, just 1/8- 1/4 once it bottoms against the packing. If its operating on old seals and your noticing excessive leaking, try tightening it down little by little, if it fails to subside the leak... Inspect the Main Piston Seal.
 

brianpgriset

Well-known member
Joined
Sep 29, 2006
Messages
1,038
Location
Beaumont, TX
Ok I'm getting into the hydraulic unit rebuild and have a few questions about disassembly before I ruin anything:

1. How hard should the tank cap be to pull off? Looks like calls for a spanner wrench but can I just use a pipe wrench? Is it reverse thread?

2. To get to the release valve it looks like I should just unthread the valve "box", not the nut on top of the little gear, right? Is it reverse thread?

3. I pulled the clip off the top of plunger cap but it won't come out. It appears this is due o the mushrooming of he top of the plunger head but does this make sense? How do I get it out now that I have the clip off?
 

Hiball

Well-known member
Joined
Apr 30, 2009
Messages
14,027
Location
Missery
Ok I'm getting into the hydraulic unit rebuild and have a few questions about disassembly before I ruin anything:

1. How hard should the tank cap be to pull off? Looks like calls for a spanner wrench but can I just use a pipe wrench? Is it reverse thread?

2. To get to the release valve it looks like I should just unthread the valve "box", not the nut on top of the little gear, right? Is it reverse thread?

3. I pulled the clip off the top of plunger cap but it won't come out. It appears this is due o the mushrooming of he top of the plunger head but does this make sense? How do I get it out now that I have the clip off?

1. It's calls for a specialty spanner tool that isn't available for purchase, unless you want to manufacture something, use a pipe wrench (stay off the seam where it meets the reservoir) Standard thread..

2. Yes, unthread the big outer Hex, standard thread, to replace the packing in the release assembly, you will need to remove the nut on top of the star gear.

3. There is a guide that screws into the block, it surrounds the pump piston and again, another specialty tool .. But you can unscrew them fairly easily with a pair of pliers ( standard thread). Once the guide unscrews you can pull the entire pump piston out, sometimes the pump piston head is mushroomed and you will need to hit it with the grinding wheel, so it can exit thru the guide.

Elroy has some real good pictures showing these components.. Either in his OS or WS which are almost identical component.
 

brianpgriset

Well-known member
Joined
Sep 29, 2006
Messages
1,038
Location
Beaumont, TX
Elroy has some real good pictures showing these components.. Either in his OS or WS which are almost identical component.

I spent a bit more time looking at some of the older OS and WS rebuild threads on here and saw some of those pictures you reference. Many thanks for the response!:beer:
 

sk farmer

Well-known member
Joined
Mar 4, 2009
Messages
5,556
Location
nd
seems he didn't see eye to eye with the management and we know how that turns out.

elroy is alive and well at the gazette. matter of fact i just chatted on the phone with him last week. no ******** and lies with that dude. watch for team elroy t-shirts coming soon.:thumbup:
 

brianpgriset

Well-known member
Joined
Sep 29, 2006
Messages
1,038
Location
Beaumont, TX
Ok all torn down, two more questions:

1. What is the nylon washer in the rebuild kit for, ram cup seal retainer? Can I just use the old metal washer?

2. How long should I soak the new seals in fresh jack fluid before I can proceed?
 

Hiball

Well-known member
Joined
Apr 30, 2009
Messages
14,027
Location
Missery
Ok all torn down, two more questions:

1. What is the nylon washer in the rebuild kit for, ram cup seal retainer? Can I just use the old metal washer?

2. How long should I soak the new seals in fresh jack fluid before I can proceed?

1. Fill plug gasket.

2. 36-48 hours.. Then the cup will have to be compressed a bit on the flared end.
 

brianpgriset

Well-known member
Joined
Sep 29, 2006
Messages
1,038
Location
Beaumont, TX
Great!

Ok two more questions Hiball! Sorry!

1. The upper end of the piston bore has some moderate corrosion from where all the mud sat, any issue with compromising seal integrity during install? Would I be better off going in from the bottom? I guess even if it did a bit of damage worst case would be slightly diminished pumping efficiency right?

2. I wanted to polish up the ram a bit, any suggestions or should I just clean and move on?

Many thanks to Hiball and others who have contributed, could have never done this without GJ.:thumbup:
 

Hiball

Well-known member
Joined
Apr 30, 2009
Messages
14,027
Location
Missery
Great!

Ok two more questions Hiball! Sorry!

1. The upper end of the piston bore has some moderate corrosion from where all the mud sat, any issue with compromising seal integrity during install? Would I be better off going in from the bottom? I guess even if it did a bit of damage worst case would be slightly diminished pumping efficiency right?

2. I wanted to polish up the ram a bit, any suggestions or should I just clean and move on?

Many thanks to Hiball and others who have contributed, could have never done this without GJ.:thumbup:

1. It's possible to come from the bottom, what type of plug do you have? I'm assuming you have the hex version? Or you could just clean up the rough spots.. Prior to installation.

2. I always clean mine and then polish them on the lathe with a variety of grits, dependent on there condition.
 

brianpgriset

Well-known member
Joined
Sep 29, 2006
Messages
1,038
Location
Beaumont, TX
It's hex but its chewed up really bad. Can't get it out. I'm thinking ill just get I clean as possible and install it from the top.
 

brianpgriset

Well-known member
Joined
Sep 29, 2006
Messages
1,038
Location
Beaumont, TX
Ok started to put things together after letting all the seals soaks for 4 days. Gonna just do a bit at a time as I get time.

Release valve went together pretty easy, it's back together. Then I started on the ball/spring stack up on the top of the block (I assume some type of check valve).

What is the right way to install the little seal that goes under the plug? I was worried I was going to cut it during install.
 

Hiball

Well-known member
Joined
Apr 30, 2009
Messages
14,027
Location
Missery
Ok started to put things together after letting all the seals soaks for 4 days. Gonna just do a bit at a time as I get time.

Release valve went together pretty easy, it's back together. Then I started on the ball/spring stack up on the top of the block (I assume some type of check valve).

What is the right way to install the little seal that goes under the plug? I was worried I was going to cut it during install.

Flat side up, cup towards the bottom/pressure. They made small tool to help install them in the bore, generally you can simply get it in place utilizing a small pick.
 

brianpgriset

Well-known member
Joined
Sep 29, 2006
Messages
1,038
Location
Beaumont, TX
Ok almost all done with the hydraulic unit, last question, what is th easiest way to install the packing and tank nut? I would guess tank nut then wiper packing, then snug down with the follower. Is that right?
 

Hiball

Well-known member
Joined
Apr 30, 2009
Messages
14,027
Location
Missery
Ok almost all done with the hydraulic unit, last question, what is th easiest way to install the packing and tank nut? I would guess tank nut then wiper packing, then snug down with the follower. Is that right?

Yes.. 1 piece at a time, make sure it is flush Prior to installing the next piece, don't overtighten the follower/compression nut too tight.
 
To avoid these ads, REGISTER NOW!

brianpgriset

Well-known member
Joined
Sep 29, 2006
Messages
1,038
Location
Beaumont, TX
Alright got it back together and got some time to work on the frame. Gonna try out the hydraulic unit tomorrow. I sure hope it doesn't leak!
 

basspro

Well-known member
Joined
Mar 20, 2013
Messages
327
Location
In the sticks, WI
When I was doing Hydraulic work full time, I rebuilt hundreds of Hein Werner jacks a month, we had contracts with the local grocery stores and walmarts, they sent em' over. They are the cadillac of jacks no doubt. When we would get a china jack in, 9 times out of 10 it was such a pile we would have a room full of Northern Tool Jacks we would just give the customer, just because it wasnt worth our time to try to get a POS to work. A Hein Werner we would always salvage, even if it was just for parts.
 

brianpgriset

Well-known member
Joined
Sep 29, 2006
Messages
1,038
Location
Beaumont, TX
So I topped it off with oil. Ram and pump appear to be working well but I got a leak on the plug for the check valves at the top! I pulled out the little rubber cup and I rolled one edge.

Luckily I didn't mess with the relief valve so I have the extra seal from that and it looks very similar to the other, BUT any tricks to getting this thing in? Last time I tried driving it in with a closely sized transfer punch turned backwards, but the release valve was in the way. This time I will pull off the release valve first, but is there anything wrong with driving in the seal the way I mention?
 

Hiball

Well-known member
Joined
Apr 30, 2009
Messages
14,027
Location
Missery
So I topped it off with oil. Ram and pump appear to be working well but I got a leak on the plug for the check valves at the top! I pulled out the little rubber cup and I rolled one edge.

Luckily I didn't mess with the relief valve so I have the extra seal from that and it looks very similar to the other, BUT any tricks to getting this thing in? Last time I tried driving it in with a closely sized transfer punch turned backwards, but the release valve was in the way. This time I will pull off the release valve first, but is there anything wrong with driving in the seal the way I mention?

Like I said earlier, they made a special tool to install those seals, essentially all it was was a small plastic cylinder that fit in the valve and then there was a inner piece that pushed the seal in place. Without that tool you will have to simply install it with a small pick etc.. The hardest part is getting it by the threads.
 

Hiball

Well-known member
Joined
Apr 30, 2009
Messages
14,027
Location
Missery
I found one of those Tools here at the House.. HWT-1 was the Official Part Number.

Initial Set up..

DSC03861_zps363c7c79.jpg


Insert the Seal into the Lower part.

DSC03864_zps1900c7b0.jpg


Insert the Lower part into the Valve Galley, Notice its long enough to cover threads.

DSC03865_zpsa2e68f94.jpg


Depress Top piece, Which pushes Seal Into Valve..

DSC03867_zpse05ca03c.jpg


If your wanting to find/make something Locally, It has to be fairly thin tubing. Measuring this piece comes up to 1/2" OD x 7/16" ID with aprox 1/2" of Depth to clear the threads. Again.. Thats the lower piece, You could use anything to persuade the seal thru the tube.. Dowel etc..
 

brianpgriset

Well-known member
Joined
Sep 29, 2006
Messages
1,038
Location
Beaumont, TX
Thanks Hiball! I was able to get the original seal seated (it went back into shape after letting soak for awhile). Pumped it up and no leaks! Now I just need to finish the frame and get a load on it.
 

brianpgriset

Well-known member
Joined
Sep 29, 2006
Messages
1,038
Location
Beaumont, TX
only took 2 months but its all cleaned, blasted, and painted! Work good! Thanks to Hiball and others for help. Here it is next to the "3 ton" sears jack it will replace.

DSCN0856_zpsf6749750.jpg


DSCN0855_zpsc73c00be.jpg
 

mrborohachi

Well-known member
Joined
Mar 27, 2013
Messages
841
Location
Berdoo Route 66
very nice :thumbup:, I have the same model O' Boy and i love that jack. I paid $160 to have it professionally rebuilt. My guy is also an air tool re-builder.

The jack is so nice in that it the relief valve is just the little knob at the end of the handle. I finally trust friends lowering the jack while i'm placing jack stands vs my Lincoln that has the twist handle.
 

MattUm

New member
Joined
Sep 10, 2014
Messages
2
Hey guys, I'm new to the site and mainly joined because of this thread. I know its a bit of an old thread but I'm getting started on my O' Boy rebuild and figured I should introduce myself here. I see in Elroy's build that the main pin was originally held in place with clips but updated to include threaded shaft and nuts. I'm wondering if that main pin is available for purchase and where I might be able to buy it from.
 

MattUm

New member
Joined
Sep 10, 2014
Messages
2
ah, I see that I am mistaken already. I can see that his main pin did have nuts on it when he started his project.
 

pike5653

New member
Joined
Oct 20, 2014
Messages
1
I just inherit a Hein-Werner floor jack. I am trying to get some info about how old this jack is by the serial number. On the plate it also states that the capacity is 9000 lbs.

hein-wernerfloorjackplate_zps7bfa0573.jpg.html


I will have a picture of the jack tomorrow
 

acacia1602

Member
Joined
Apr 18, 2014
Messages
13
Location
Phoenix AZ
Hi, first post for me here. What an incredibly useful thread! It has converted me from a lurker to a member. :)

I'm really sorry to hear that Elroy is banned, the guy clearly contributed a huge body of work in this area. Hey management, maybe reinstatement is in order?

Anyway I bought a WS that I want to restore and this thread and Elroy's preceding thread look to be gold. HiBall, you can expect a call from me in the coming days as well. I'm a software guy, not all that mechanically inclined, but I do love to work with my hands and get out of the abstract, out of my head, in my free time. I look forward to participating in these forums!

Andrew
 

ClassicGMJunkie

Active member
Joined
Oct 11, 2011
Messages
25
Location
Wheeling, WV
awesome thread! I am in the middle of repairing my O-Boy with a seal kit. really wanting to keep taking it apart and do a full resto so it will be good for another 50+ yrs...
 

On-Wheel

Well-known member
Joined
Oct 6, 2014
Messages
487
Priceless informative threads! Now to get a WS 1 1/2 ton rebuild kit for today's $20 find.
Thanks Guys
 

On-Wheel

Well-known member
Joined
Oct 6, 2014
Messages
487
Hiball's KS supplier shipped $29 rebuild kit,$12 service drain plug,$15 shop manual TODAY!
The 500 ft lb torque on tube is ,well, 5 foot persuader was needed.lol The gasket was wet all around it so it probably needed changed? The cup gasket on ram rod was probably where it was leaking ,oil gushed out of end packing gaskets.They were deteriorating and not sealing oil that leaked past cup.Cup is hard as a rock.The plunger stops where drain plug threads are while tapping lightly with hammer.Hopfully the manual has info getting it out.I have dangerous ideas :) haha
 

123Go

Well-known member
Joined
Oct 7, 2012
Messages
199
"The jack is so nice in that it the relief valve is just the little knob at the end of the handle. I finally trust friends lowering the jack while i'm placing jack stands vs my Lincoln that has the twist handle. "

On my Walker/Lincoln design I grease the bottom of my handle, slide it in the base and it turns smooth as glass on release and lowers as slow as I want. Smooooth
 
Last edited:

Roberts210

Well-known member
Joined
Dec 21, 2015
Messages
3,177
Location
Missouri
I bought this Hein Werner WS off the local CL for a decent price a couple of months ago. It works fine, but leaks. After my successful rebuilding of my buddy's green Craftsman, (thanks to HiBall) I'm going to tackle this HW soon. It looks like a more complicated rebuild, but I'm looking forward to going at it.

161707172.jpg


Here's a close up of the tag:

161707120.jpg
 
To avoid these ads, REGISTER NOW!
Top Bottom