To avoid these ads, REGISTER NOW!

Hoffman Hoist...need wire schematic

stealthbob

Active member
Joined
Jul 12, 2009
Messages
41
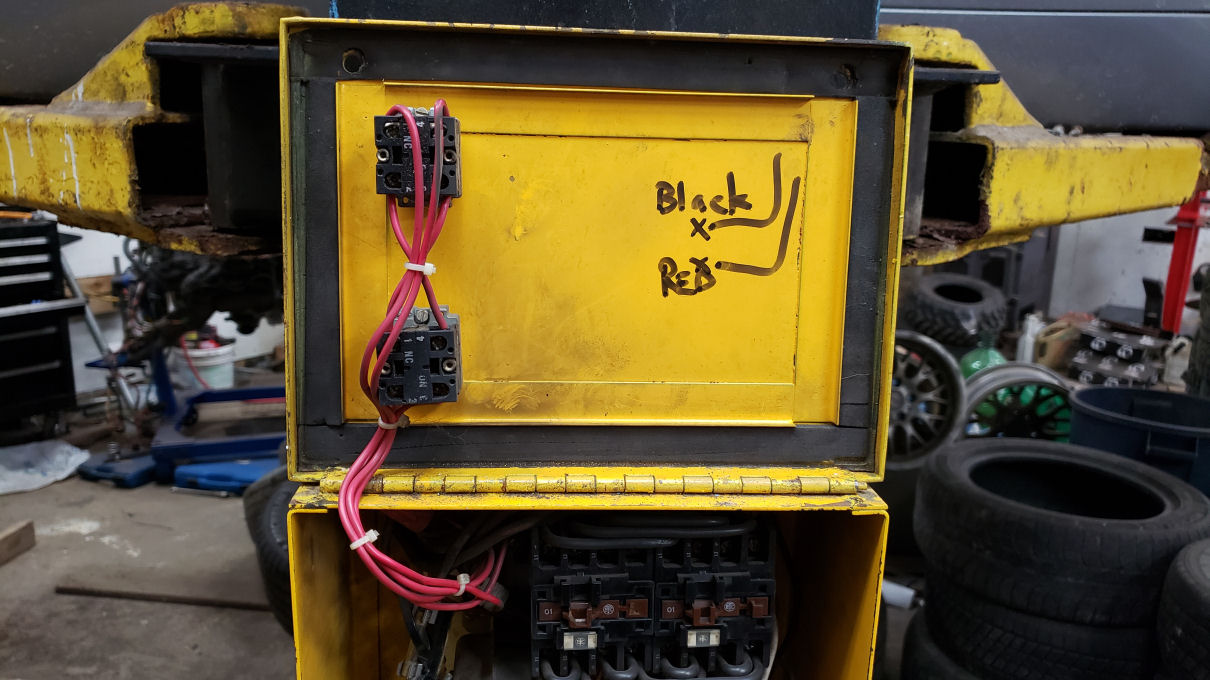
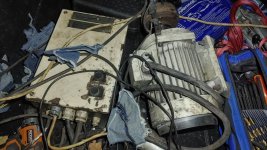
Need some help with a hoist I just got. (free):thumbup:

Its a Hoffman, screw type which is very much like the GTE 2500 shown here:

http://hofmann.snaponequipment.eu/product/68239

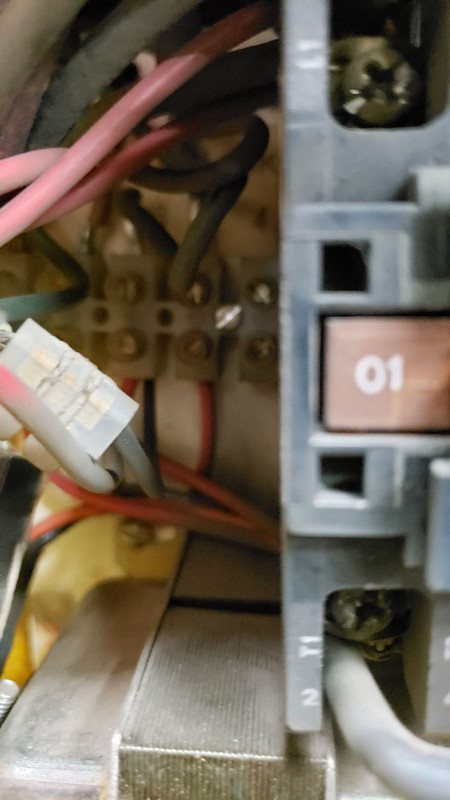
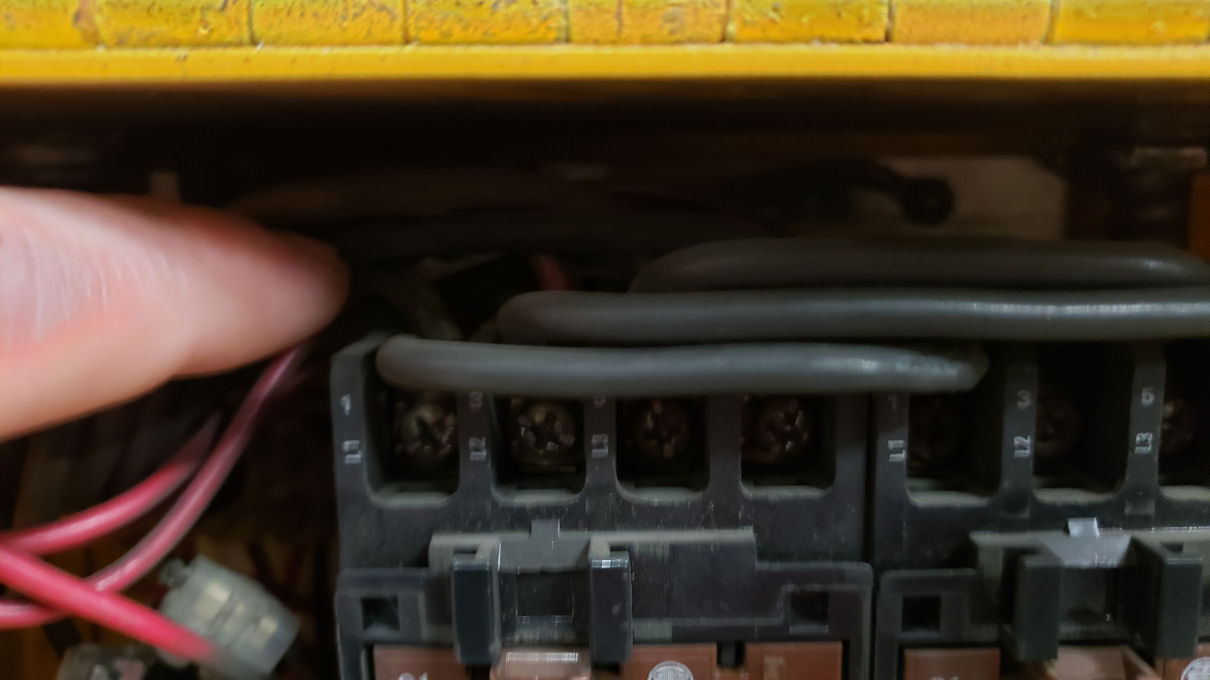
I have been having difficulty finding a manual and more specifically the wire diagram for it. It comes with a multi voltage 3 phase motor and some switch starters for up and down. I will need to verify the motor wiring and ensure that it is setup for 230 volt, then I will setup a static phase converter which will be feed from my home 230 single phase system.

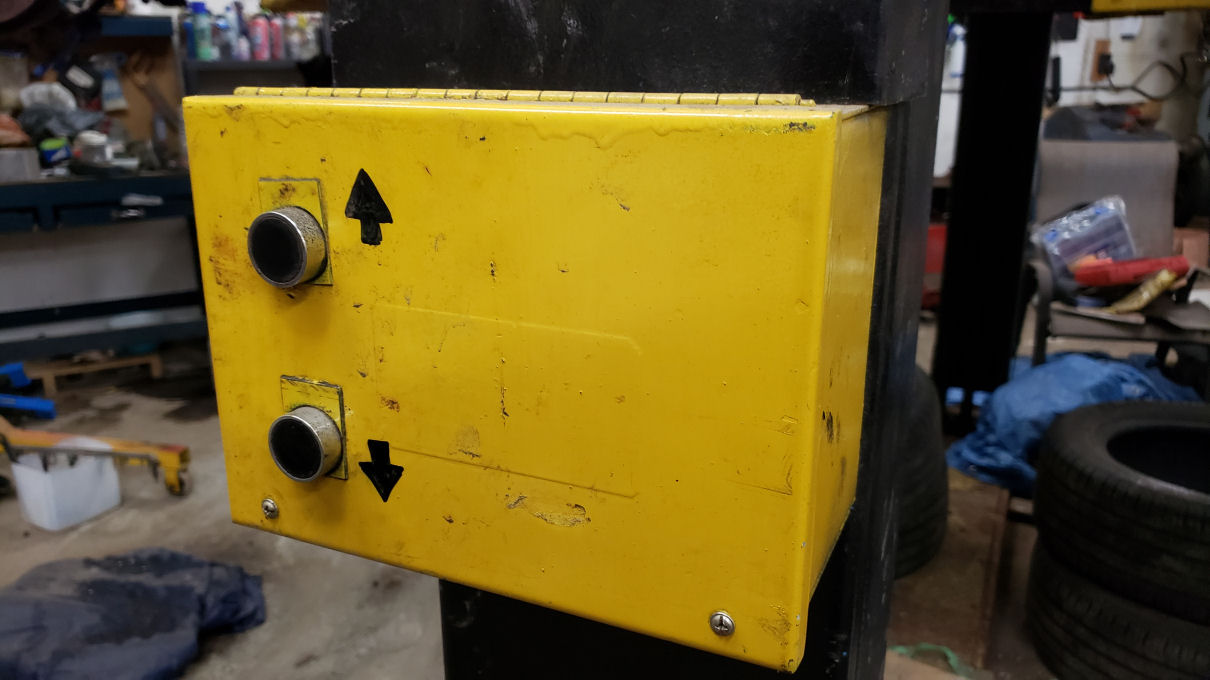
The controls have been played with and I would like to confirm via a wire diagram that they are set up correct.

Anyone know how to get the schematic?
 
Last edited:
To avoid these ads, REGISTER NOW!
OP
S

stealthbob

Active member
Joined
Jul 12, 2009
Messages
41
Just to bump this....

I am using a VFD and have the electrics all worked out. My concern now is I want to verify this thing is safe and I need to measure the main nuts that take all the weight.

Anyone with any Hofmann lift knowledge out there? A pdf of a manual would sure be sweet! I have tried the manufacture, they reffer me to a service company, they say its too old for thier records (translate-go away and don't bother me).
 
OP
S

stealthbob

Active member
Joined
Jul 12, 2009
Messages
41
Re: Hofman Hoist...need wire schematic

I finnaly found it!

:rocker::willy_nil:D

Dang...can't attach it, 1.7 mb is too big? :dunno:
 

Neura

Well-known member
Joined
Feb 23, 2009
Messages
79
Location
St. Albert, Alberta, CAN
I am looking at picking up a hoist that is almost identical made by hoffman. the model I am looking at is a GE-7000 but I am not having any luck finding a manual. the one I am looking at is a screw type and has a 3ph motor. I am debating between a VFD or replace the motor with a 1ph. but if you could pm me the manual that would be great.
 

uniballer

Well-known member
Joined
Aug 6, 2012
Messages
2,567
Location
bedford, va
Hoffman sounds like my dad shop! Do they make all kinds of balancing equipment?
He make some huge stuff( like to balance wind turbines).
 

Neura

Well-known member
Joined
Feb 23, 2009
Messages
79
Location
St. Albert, Alberta, CAN
Hofmann used to make a lot of larger industrial equipment, balancers, tire machines, hoists, alignment machines, machining machines. Not sure how much of it they still make since they were purchased by Snap-On. And Snap-On customer service is no help for anything older then 10 years now.

I have the cell number for the old Hofmann rep in my area, but even his voicemail says to call Snap-On 1-800 number for any parts requests or manuals. So I am debating now if one of these old hofmann hoists will be any good if you can't get parts to fix them any more. My local hoist guy said to have a machine shop make any of the sheave pins or sprockets when they ware out. But machine shops cost a ton of money. So how are the say 1990 Hofmann hoists compared to the new bendpak, danmar, atlas stuff. I think if I purchased a Mohawk or a Rotary though then the wife would make me sleep in the garage. :D
 
OP
S

stealthbob

Active member
Joined
Jul 12, 2009
Messages
41
You got it...I was basically told I'm screwed for parts, even from SVI

I have access to a machinist friend who can make anything so my last try will be to remove the lifting nut and see if he can replicate it.

I'm in $200 to the lift and $300 for the VFD (the motor is 3ph) Its all setup so if I can get this nut done for under a hundred I figure I'm still ok.

Neura...check PM, I will send the manual I have
 
OP
S

stealthbob

Active member
Joined
Jul 12, 2009
Messages
41
Sort of.....the belts were not properly tight. They are now and the lift goes up but that motor strains hard. Half the time it just stops on the way up which indicates a worn lifting nut.

I now just use it to lift high enough for jack stands, then I do my work. One day I will replace the lifting nuts.
 

Jasonjames

New member
Joined
Jun 8, 2016
Messages
1
Hi there i have spent last two days looking fora wiring diag and was just aboutto give up when i found this
Would you be so kind as to send me a copy please i would greatly appreciate it
Many thanks in advance
J
 

djbmw

Well-known member
Joined
Jun 20, 2013
Messages
1,115
Location
Ottawa, Ontario, Canada
Sorry to revive an old thread but, if anyone wants me to take a picture of the wiring setup for my Hoffman Duolift GE 6500, let me know. There's the wiring at the motor for the start and run winding/capacitors, as well as at the control box to control up/down, max up, max down.
 

Dlabl0

New member
Joined
Apr 27, 2010
Messages
1
Can someone please send me the manual for this lift. I just purchased a 1986 7000lb Hoffman screw lift and cannot locate a installation/maintenance manual.
 

djbmw

Well-known member
Joined
Jun 20, 2013
Messages
1,115
Location
Ottawa, Ontario, Canada
Can someone please send me the manual for this lift. I just purchased a 1986 7000lb Hoffman screw lift and cannot locate a installation/maintenance manual.

You might have a hard time finding a manual... But installlation isnt hard....

Choose a spot that you want the lift, use the base plate as a template to mark your holes... Use a hammer drill to drill into the concrete... Install concrete anchor bolts and install as per the instructions, leaving just enough thread exposed to mount the baseplate + washer + nut and then 3 or 4 threads exposed.

Lay your chain in the baseplate, ensuring its in the plastic channels.... And at both ends ensure that theres easy access for the sprocket to fit in when you and 2 other buddies (or a tractor, or an engine hoist, etc) helps position each column.

Spraking of which... Now get each column mounted (without dropping it AND without bending the sprocket!). Once each column is mounted.... Manually raise each arm trolly (with arms removed) up about a foot... This will gain you access to position the chain around the sprocket using a screw driver or pry tool.

To manually move the arm carriage up and down... Turn the pulley at the top of each column.

Once the chain is positioned on both columns... Loosen the column bolts that hold it to the plate SLIGHTLY...
You can now use the tensioning bolt at the bottom of each column to pull the column closer to the edge of the baseplate, thereby tightening the chain.

Tighten all the bolts down.

Wire up your motor and bottom/top switches and make 100% sure your motor is perfectly flat/aligned with the pulley or you'll have issues.

Enjoy :)
 
To avoid these ads, REGISTER NOW!

Gowerbikes

New member
Joined
Nov 21, 2019
Messages
1
Location
Home
Sorry to revive an old thread but, if anyone wants me to take a picture of the wiring setup for my Hoffman Duolift GE 6500, let me know. There's the wiring at the motor for the start and run winding/capacitors, as well as at the control box to control up/down, max up, max down.
Dj, did you get the wiring sorted out for your lift? I have a Hofmann htb 8000 same issue, it's a relay box with mysterious wiring point, so looking for a diagram to connect the 3 wires to this box, anything you can send me? Thanks Rog
 

Johnny D

New member
Joined
Oct 25, 2020
Messages
3
Location
Sault Ste Marie
Hey djbmw:
Interested in the wiring diagram for that Hofmann Duo Lift 6500. I believe the safety mechanism at the bottom of the posts may be missing on the hoist I have so need to see how that works exactly.
Thanks JD
 

djbmw

Well-known member
Joined
Jun 20, 2013
Messages
1,115
Location
Ottawa, Ontario, Canada
Hi Johnny - The 'safety' is just the stop relay for the "down" control. There's a rod connected to the arm on the motor side that pushes a pin down which then makes contact with the "down" relay, which cuts power to the motor. I've attached several pictures that might, or might not help:

20201026-204833.jpg

20201026-205334.jpg


The wire I'm touching is NOT in use, and is capped off
20201026-205354.jpg


This pin makes contact with the switch/relay that cuts power
20201026-205408.jpg


Inside the control panel:

20201026-204930.jpg

20201026-204949.jpg

20201026-205004.jpg

20201026-205014.jpg

20201026-205018.jpg

20201026-205058.jpg

20201026-205153.jpg

20201026-205128.jpg


I hope that helps
 
Last edited:

Johnny D

New member
Joined
Oct 25, 2020
Messages
3
Location
Sault Ste Marie
Hey Thanks so much for the great pics. My hoist does not have this rod with micro switches. Maybe I have an older model. Mine is 83' /84' vintage. Now that I've opened it up a little more I see there is a jamming nut under the hoist nut on the hoist trolley that must jam if there is a rapid lowering without the motor turning the hoist rod?
The switch box looks the same as yours.
 

djbmw

Well-known member
Joined
Jun 20, 2013
Messages
1,115
Location
Ottawa, Ontario, Canada
Hey Thanks so much for the great pics. My hoist does not have this rod with micro switches. Maybe I have an older model. Mine is 83' /84' vintage. Now that I've opened it up a little more I see there is a jamming nut under the hoist nut on the hoist trolley that must jam if there is a rapid lowering without the motor turning the hoist rod?
The switch box looks the same as yours.

Thats correct. Now if the spacing between the jam nut and the hoist nut goes out of spec, you'll have issues raising and lowering the arm. To overcome this you can make a notch or divot in the jam nut so that you can use a punch to spin it one way or the other. I forget what the spacing/tolerance is but im sure it can be easily looked up (or just do the trial and error method :))
 

djbmw

Well-known member
Joined
Jun 20, 2013
Messages
1,115
Location
Ottawa, Ontario, Canada
For reference, my lift was built in 1985.
Johnny - without the micro switches, how does your lift determine its at the bottom, without going too far and messing up your jam nut (the same is true for max height)?
 
Last edited:

Cerious

Member
Joined
Jul 3, 2018
Messages
19
Location
Berwick Nova Scotia
I just stumbled across this thread after searching for information on an old Duolift >S< I have. It needs a lot of work but trying to find as much information as I can. Has anyone tried machining new lift nuts for these. From what I can tell I think mine is a Duolift VS 300/320. I found a parts manual for it but any shop I have contacted says it is way to old to source anything for.
I just picked up a used 5hp motor and control box from a similar screw type lift that was being junked. Hopefully I can make tis all work.
it looks like there might be a bit of meat left in the lift nuts as there is still a gap between it and the safety nut and everything moves up and down but I haven't been able to find specs for what the gap should be.
This is the thread I have started to document the "restoration" of the lift.
https://www.garagejournal.com/forum/showthread.php?t=471787

Pics for reference of mine.
 

Attachments

  • IMG_20190916_081205_494.jpg
    IMG_20190916_081205_494.jpg
    146.9 KB · Views: 15
  • IMG_20190914_164144.jpg
    IMG_20190914_164144.jpg
    155 KB · Views: 13
  • 20210111_220002_HDR.jpg
    20210111_220002_HDR.jpg
    158 KB · Views: 14
  • 20210113_174159.jpg
    20210113_174159.jpg
    122.1 KB · Views: 14
  • 20210113_174257.jpg
    20210113_174257.jpg
    149 KB · Views: 11
  • 20210113_173758.jpg
    20210113_173758.jpg
    143 KB · Views: 16

djbmw

Well-known member
Joined
Jun 20, 2013
Messages
1,115
Location
Ottawa, Ontario, Canada
I just stumbled across this thread after searching for information on an old Duolift.
.

Thats a big project for sure! It looks like mostly surface rust but please check for pitting, thinning of the steel, and cracked welds. That thing was left outside for quite some time...
As for parts,... Awt-shop.de stocks parts for these, including the jam/lift nut. Clearances are probably half the thickness of a business card.
 

Cerious

Member
Joined
Jul 3, 2018
Messages
19
Location
Berwick Nova Scotia
Djbmw, thanks for the link to the spare parts. That will definitely come in handy.
Yes the lift was left out in the elements for nearly 1 year. Hopefully I can bring it back from the dead. I'm planning to strip everything back and visual dye penatrent check all of it.
 

JustRV

New member
Joined
Mar 18, 2021
Messages
1
Location
Berlin, CT
Hello,

I realize that this is ancient but I was looking for manuals or wiring diagrams for Hoffman GE2500 lift made back in 1985 and came across this thread but could not open the dropbox file.

if someone has the manual, id really appreciate it if i could get a copy


also, maybe a pic or two or an explanation of how the motor is wired into the control box, because when i bought my lift - the guy took the wires out without marking anything so I'm kind of stuck now.

My control box has a knob on it, turn it up to go up and down to go down i think.

and theres bunch of terminals marked like "SL" and "NE" or "ME" and thats where the 4 wires from the motor are supposed to go but theres like 12 terminals i believe and i only got 4 wires.


Thanks
 

Cerious

Member
Joined
Jul 3, 2018
Messages
19
Location
Berwick Nova Scotia
Hi JustRV,

I haven't been able to find much on the electrical side of things for these older lifts. It looks like Hofmann still lists the GE2500 on their site. Have you tried contacting them to see if they have the old manual?

Panzitta Sales also knew a little about these old lifts like mine when I contacted them, maybe they might have something? https://panzittasales.com/

Here is a link to the parts catalog for the GE 2.5 GS/GSE/VS
https://atlanticmiami.com/uploads/s...hase? Sent from my LM-G850 using Tapatalk
 

gpzmax

New member
Joined
Jan 16, 2022
Messages
4
I acquired an old lift. With the help of my electrician friend, I have made a rough draft wiring diagram. My limit switch for the chain tension was deleted by a PO. I will clean this up and post a better picture later.20220122_090315.jpg
 

gpzmax

New member
Joined
Jan 16, 2022
Messages
4
FYI. The thermal overload relay on mine got broken in delivery. This is what I did as a temporary fix. Another issue resolved! This thermal overload relay had been dropped and broken 😫
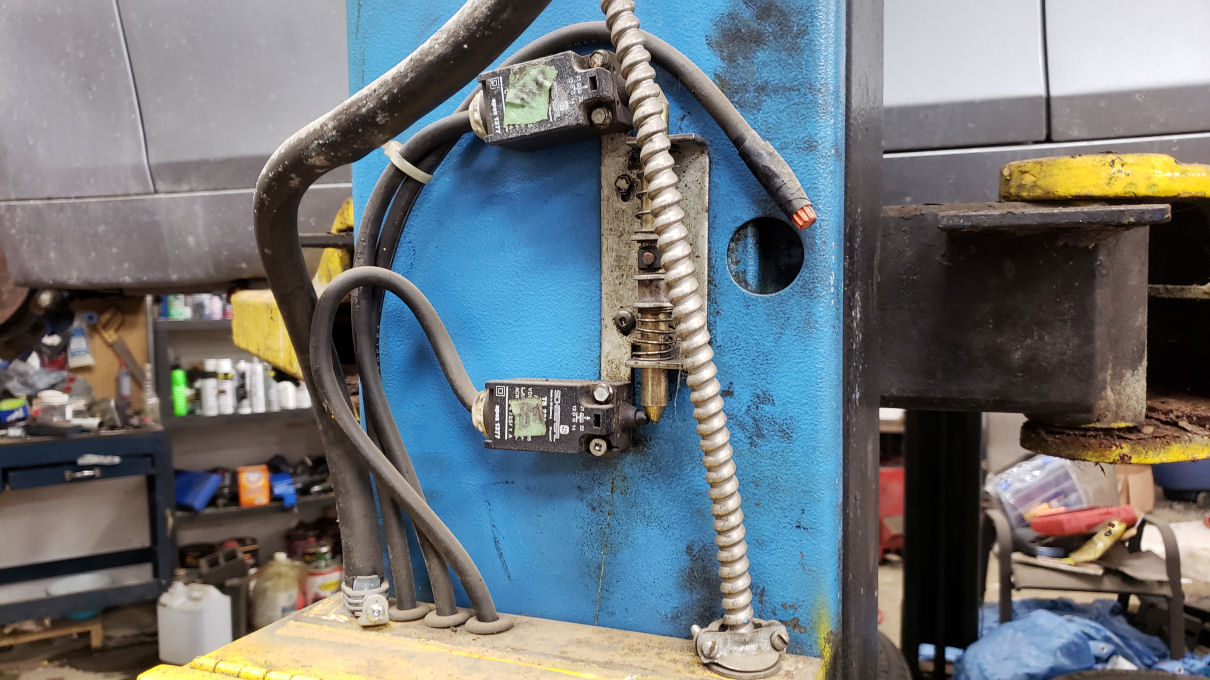
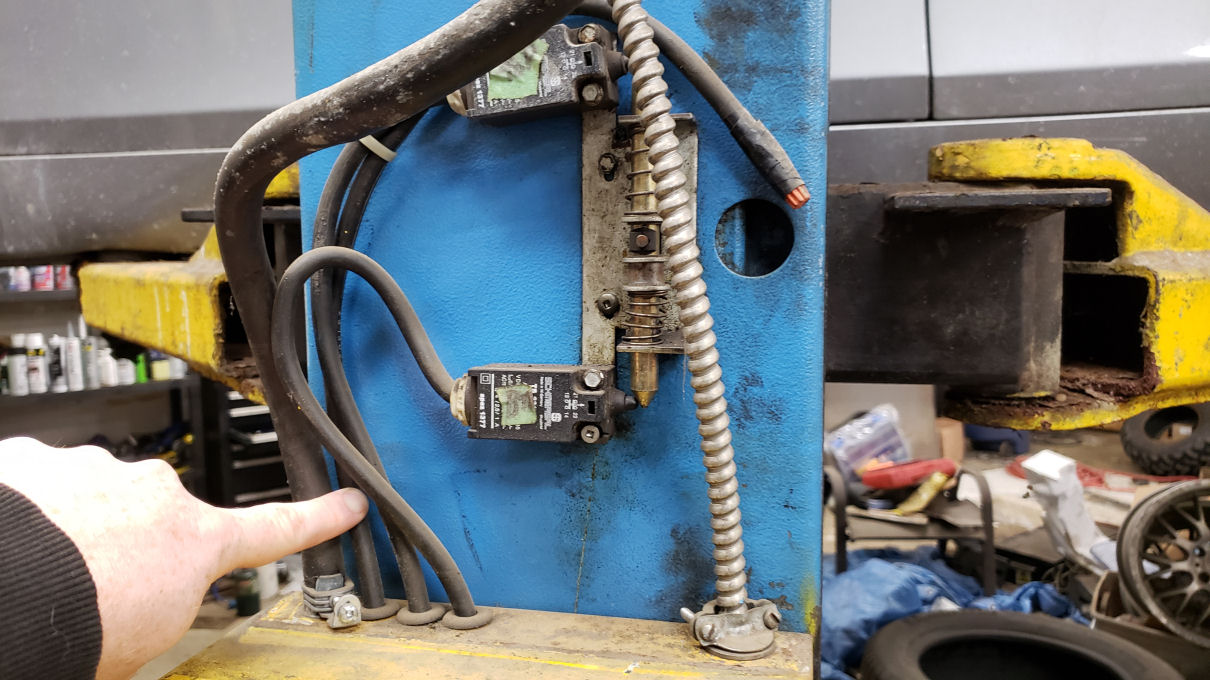
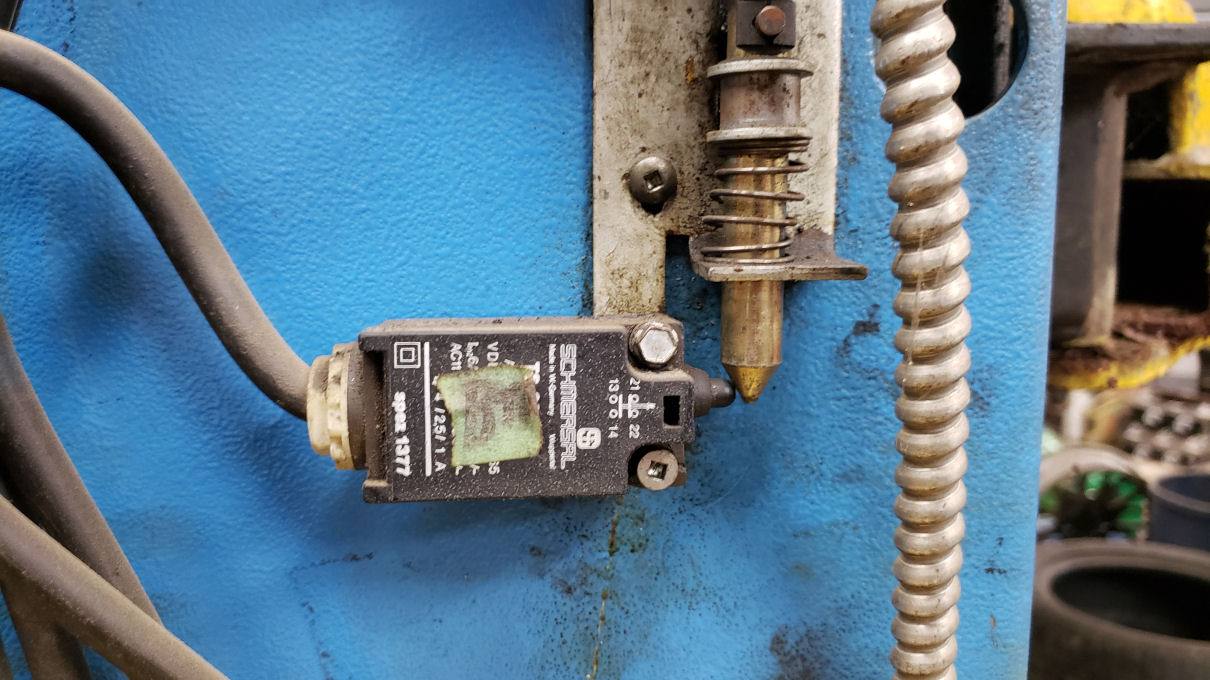
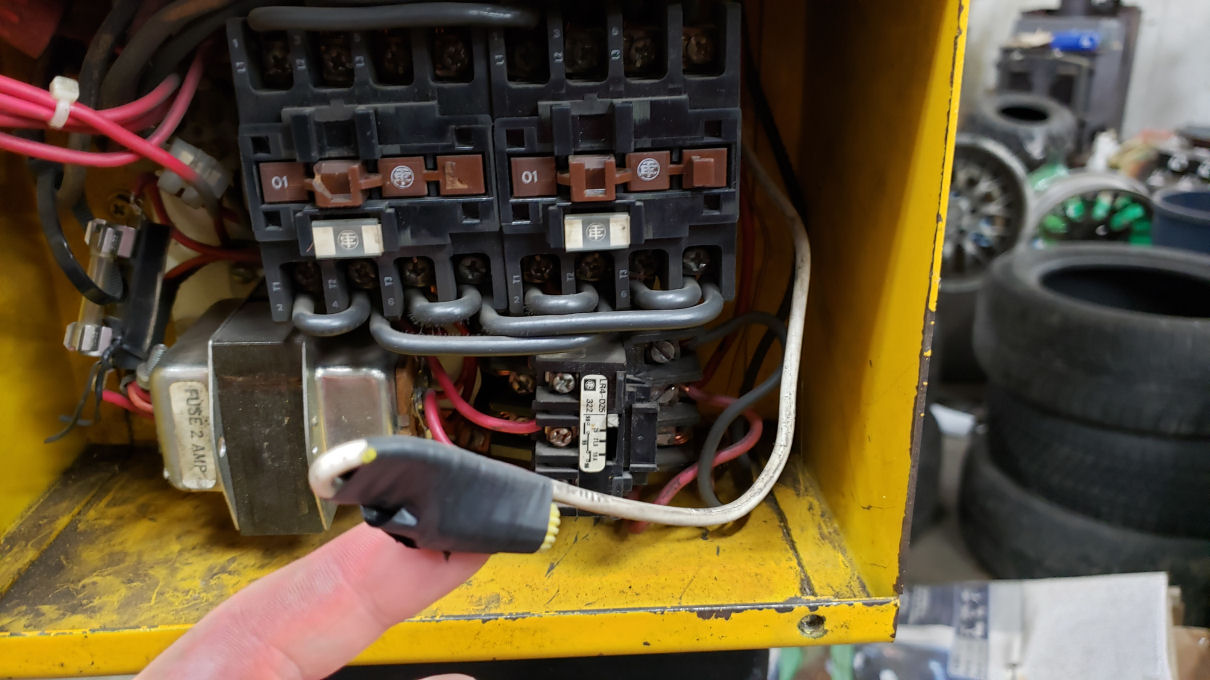
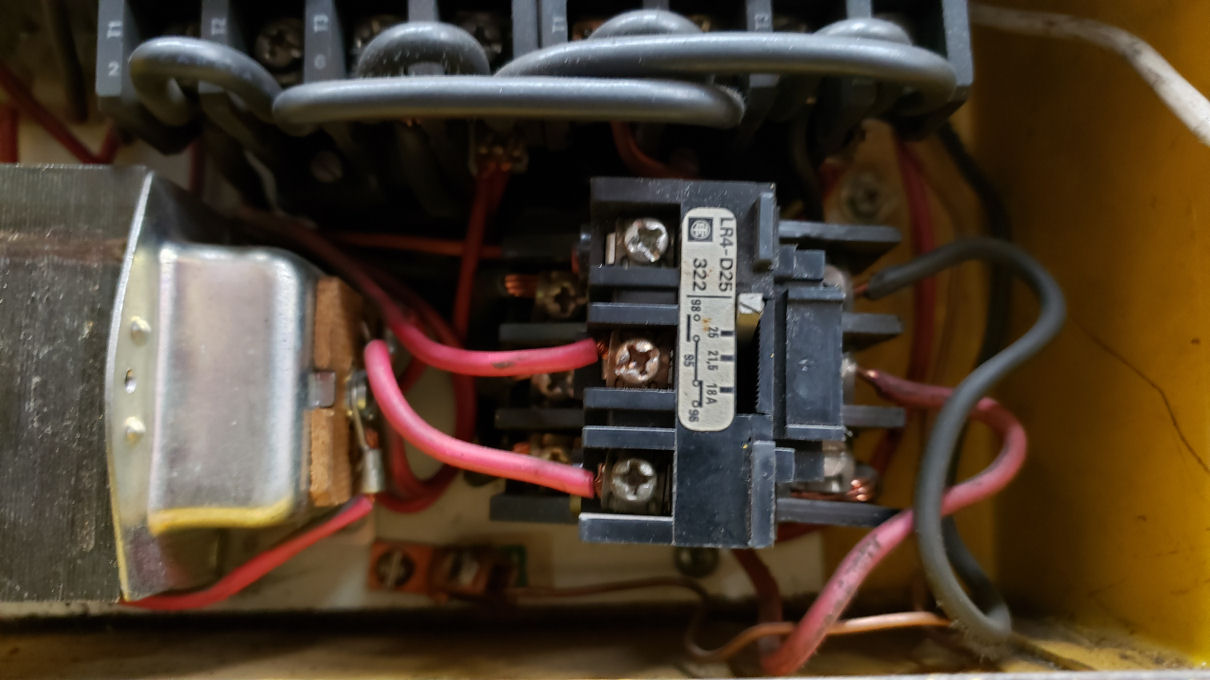
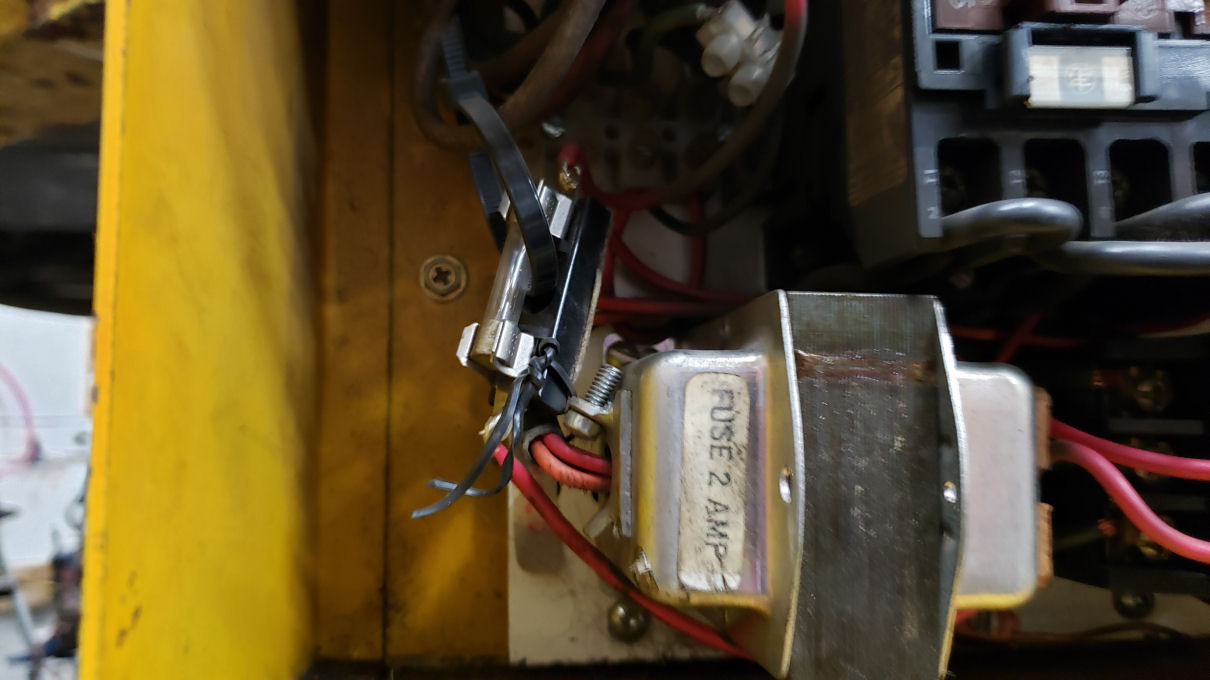
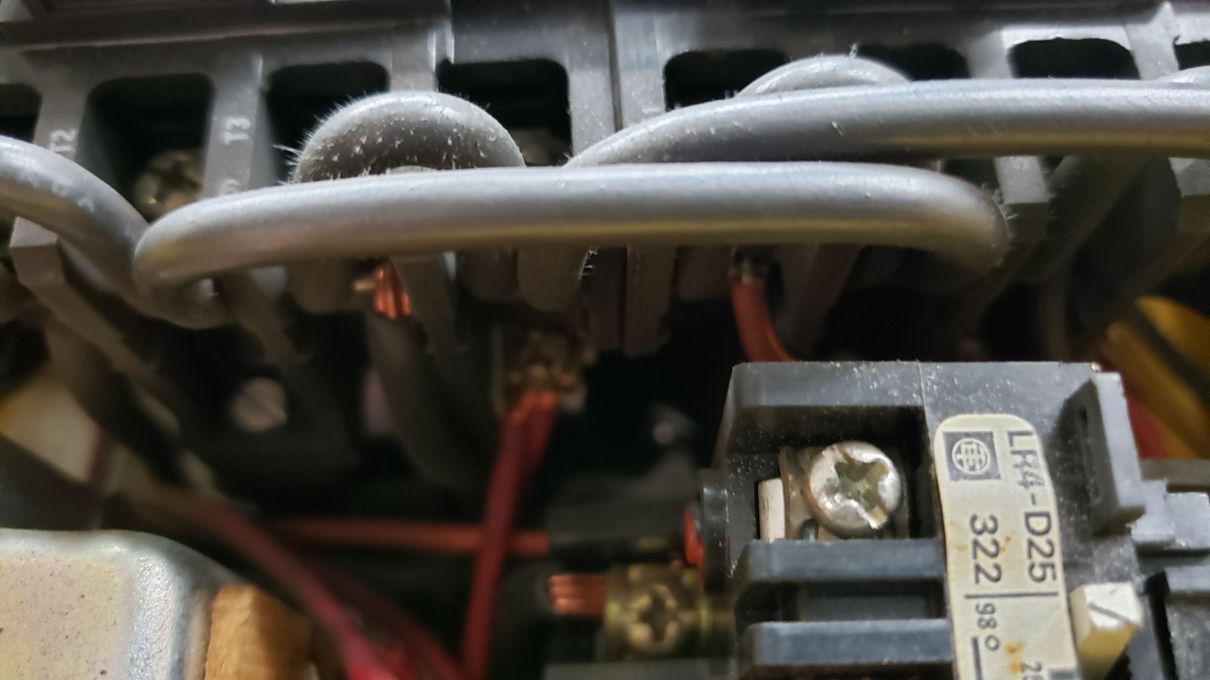
. It is part of the control for the lift. So I went out and searched the gravel and found the 3 small parts 🙂. I then analyzed and figured out how to assemble them. Next, I had to reattach a lead to the one thermal piece. I couldn't get a good solder connection. So, I stripped some stranded wire and used it to wrap the pieces together. I then added some solder to hold it together. I reassembled the whole unit, and Gorilla taped it securely. 🦍 I then tested it first correct electrical continuity. Succes! Dang, I really enjoy figuring out and fixing things. 😁
 

Attachments

  • 20220121_170535.jpg
    20220121_170535.jpg
    485.5 KB · Views: 9
  • 20220121_170600.jpg
    20220121_170600.jpg
    324 KB · Views: 7
  • 20220121_174324.jpg
    20220121_174324.jpg
    190.4 KB · Views: 6
  • 20220121_144526.jpg
    20220121_144526.jpg
    206.6 KB · Views: 6
  • 20220121_174437.jpg
    20220121_174437.jpg
    217.3 KB · Views: 7
  • 20220121_181459.jpg
    20220121_181459.jpg
    236 KB · Views: 10
To avoid these ads, REGISTER NOW!
Top Bottom