To avoid these ads, REGISTER NOW!

Mohawk Dave

Well-known member
Joined
Oct 7, 2012
Messages
5,068
Location
SoCal
PCO6,

Thank you very much for your detailed response. I appreciate it and you answered all my Qs.

Great input. Thanks.
 
To avoid these ads, REGISTER NOW!

Rural53

Well-known member
Joined
Mar 11, 2010
Messages
1,476
Location
Tauranga, New Zealand
I didn't make this, it arrived in the mail after i sent a guy on our main NZ 4wd forum $35.

P1000178-Copy.jpg

P1000179-Copy.jpg


Any guesses what it is for?
 

split150

Well-known member
Joined
Jul 8, 2012
Messages
154
Location
Southwest PA
Some type of crank pulley/balancer holder? Breaker bar goes in the square end to hold, 2 short bolts go into crank pulley or balancer, and ratchet/socket breaks nut loose that comes through the center?


I didn't make this, it arrived in the mail after i sent a guy on our main NZ 4wd forum $35.

P1000178-Copy.jpg

P1000179-Copy.jpg


Any guesses what it is for?
 

PCO6

Well-known member
Joined
Dec 25, 2008
Messages
4,573
Location
Newmarket, Ontario

Rural53

Well-known member
Joined
Mar 11, 2010
Messages
1,476
Location
Tauranga, New Zealand
Front end axle nuts?

A hub locker?

Close enough. Wheel bearing "nut" on a Nissan front H233b axle, as used under a Nissan Patrol, is not a nut but a threaded disk with holes in it. It is locked with two screws. The tool is 1/2" drive. I have been meaning to make one but when a guy on our main 4wd forum said he was making some I decided to buy one instead. All the bits are profile cut, hence why he wanted to make more than one.
 

gf0012-aust

Well-known member
Joined
Apr 17, 2011
Messages
172
Location
Adelaide
Close enough. Wheel bearing "nut" on a Nissan front H233b axle, as used under a Nissan Patrol, is not a nut but a threaded disk with holes in it. It is locked with two screws. The tool is 1/2" drive. I have been meaning to make one but when a guy on our main 4wd forum said he was making some I decided to buy one instead. All the bits are profile cut, hence why he wanted to make more than one.

Mate, how much does he sell them for.

Have 2 trolls, so saves me getting the cheap ebay rubbish
 

Finnrodder

Member
Joined
Dec 28, 2012
Messages
17
Location
Finland
I made a screwknocker from crappy chisel and 1/2 socket extension.
It worked pretty good with the 51' Ford door hinge bolts.Those over 60 yr old philips screws can be real pain in the ***.

screwknocker008800x600.jpg


hinges009800x600.jpg
 

Krokodil

Well-known member
Joined
Apr 11, 2010
Messages
1,428
Location
South Africa
Here is a "basin wrench" that I made. Tried the normal basin wrenches, crowfoot wrenches, nothing could get in. Cut up an old wrench and made this. Works perfectly!
 

Attachments

  • photo.jpg
    photo.jpg
    149.7 KB · Views: 351

T_Raven

Well-known member
Joined
Oct 17, 2009
Messages
209
Location
Idaho
Time to bring this thread back to the top. . .

Quite often I am given tools from coworkers and friends that no longer function. Last year I was given a Craftsman 14.4v drill and flashlight set that "both batteries died." Turns out the cheap dumb charger took a ****. My solution to make the system usable is below. I took the top of an old DeWalt 12v pack and wired in a S connector to the battery terminals. Then I filled the pack top with epoxy. I also gutted the Craftsman charger and wired in a S connector to those terminals. Now to charge the Craftsman battery packs I hook what is left of the Craftsman charger to the adapter and put the adapter into the DeWalt charger.

It works like a charm and as a bonus, since the DeWalt is a smart charger, it doesn't cook the Craftsman batteries.

Charger1.jpg


Charger2.jpg

Did you check that bad charger for a fuse? My mac charger quit working once and I took it apart and find a blown fuse in it
 

STGFordCrazy04

Well-known member
Joined
Dec 20, 2012
Messages
289
Location
St. George, SC
Ive made a few things over the years...

289/302/351w oil pump primer. I also have one I made for 351m/c/370/429/460
2012-10-11_14-29-22_26.jpg


Not really a tool but it holds my stinger and ground for my mig.
IMG00180-20110901-1936.jpg


also not really a tool but it makes installing and removing axles really easy
crossmemberandD70191.jpg


20t air/hydraulic press
IMG00512-20101210-1257.jpg


using a tool to make a part - 98 Polaris Scrambler linkage
pics010.jpg


4wheeler001.jpg


4wheeler002.jpg


4wheeler003.jpg


4wheeler004.jpg


4wheeler005.jpg


Spanner wrench for rebuilding 9" axles
2012-05-09_11-00-40_529.jpg


2012-05-09_11-02-53_114.jpg
 

rslaback

Well-known member
Joined
Jul 24, 2010
Messages
4,061
Location
Westcentral Wisconsin
Did you check that bad charger for a fuse? My mac charger quit working once and I took it apart and find a blown fuse in it

It was a super cheap charger and didn't have a replaceable link in the system. It was also a dumb charger so even if it would have been that simple I still would have gone this way.
 

RCStocker

Well-known member
Joined
Aug 12, 2012
Messages
1,266
Location
Indiana, California, Australia
Those old drills use to be bolted to every barn beam support across the country.
That one is missing parts. I have seen the remounted 101 ways. We had 2 of them in the grain barn on the farm That is where the shop was. It was half way up in the loft and went across the entire width of the barn. I still have the tools.
 

gj67stang

Well-known member
Joined
Jan 9, 2010
Messages
897
Location
Sycamore, OH
0-1.75" adjustable crowfoot wrench, 1/2" drive. Takes up less toolbox space (and certainly left me with more cash) than buying a whole set of jumbo crowfoot wrenches.
 

Attachments

  • Large Adj. Crowfoot.jpg
    Large Adj. Crowfoot.jpg
    102.6 KB · Views: 362
  • Large Adj. Crowfoot_2.jpg
    Large Adj. Crowfoot_2.jpg
    105.6 KB · Views: 266
To avoid these ads, REGISTER NOW!

E.Marquez

Well-known member
Joined
Jan 11, 2010
Messages
499
Location
Kempner Texas
Too many to list and show all..
Making a tool is a weekly occurrence.
Here is today's

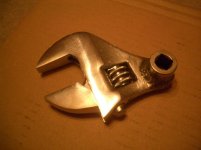
The new QCTP has a center bolt with a 22mm nut.
While I have lots of 22mm wrenches, sockets ect on hand to use, I wanted a dedicated tool to keep at the lathe.
Quick inventory of the garage sale / pawn shop tool bucket.. and I found a ½ drive craftsman 22mm socket.
The steel drops pile reviled a 3ft piece of 5/8 cold rolled bar.
And the Aluminum drops pile had some old motorcycle handle bars …..
And a tool was conceived.
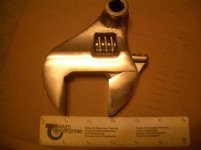
5/8’s bar was cut on four sides at one end down to .500 across the flats, .500 in length… No spin indexer yet, so it was just a WAG on the indexing.. Not a big deal here as I planned on welding it to the socket.
Heated and bent the bar .750 from the cut end to a 85 deg bend.. and added a few deg of curve to the bar for 5.00”
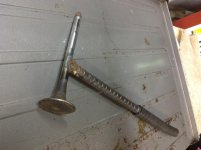
Cut off a section of the old aluminum, faced one end, knurled the other for 1.75” and then bored 1.25” in depth for a .002 friction fit to the bar.
Cut off the section of aluminum I needed, debured it, and pressed it on to the bar with some Loctite stud and bearing mount anaerobic compound.
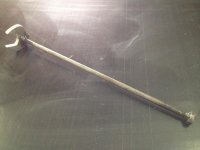
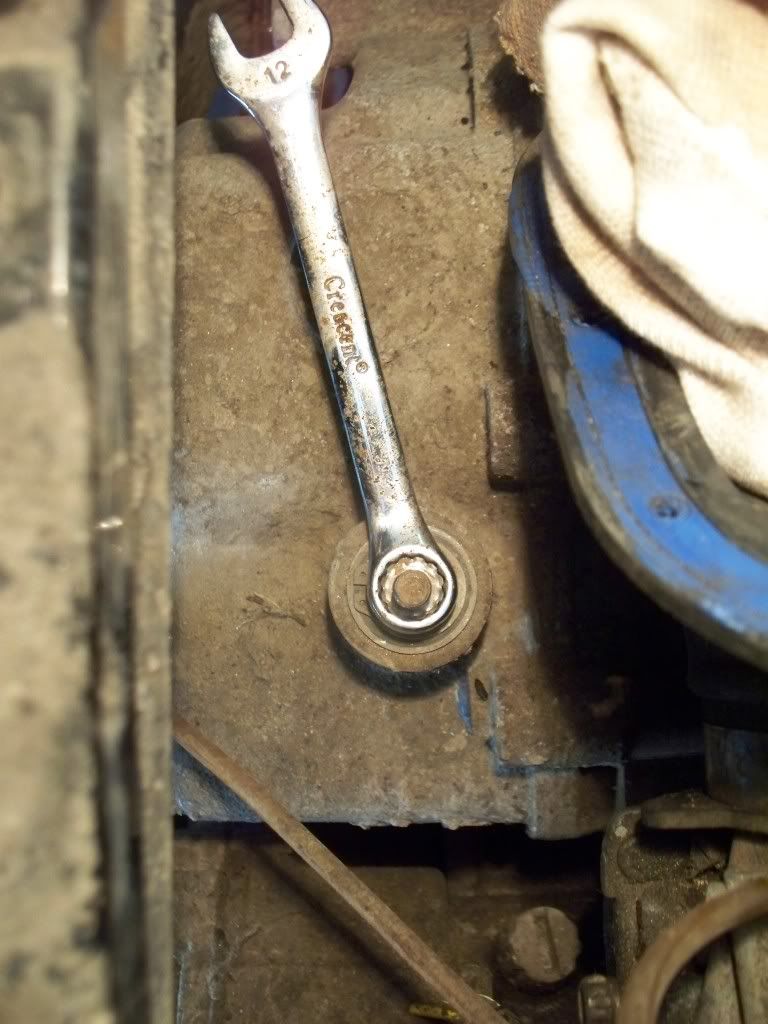
Welded the end of the bar to a faced socket (just enough to remove the chrome for welding)
Cleaned it up , taped off the aluminum handle part, and shot it with plastic dip aerosol spray.
And there we have it
1E1-EF1816C382CF-3928-000007CC8201B671_zpsfe46f4ff.jpg

3E5-2F07E07FDDE9-3928-000007CC79B41313_zps0be44d45.jpg


Simple homemade tool, produced from scraps in the garage and now a dedicated, tool on hand for the QCTP.
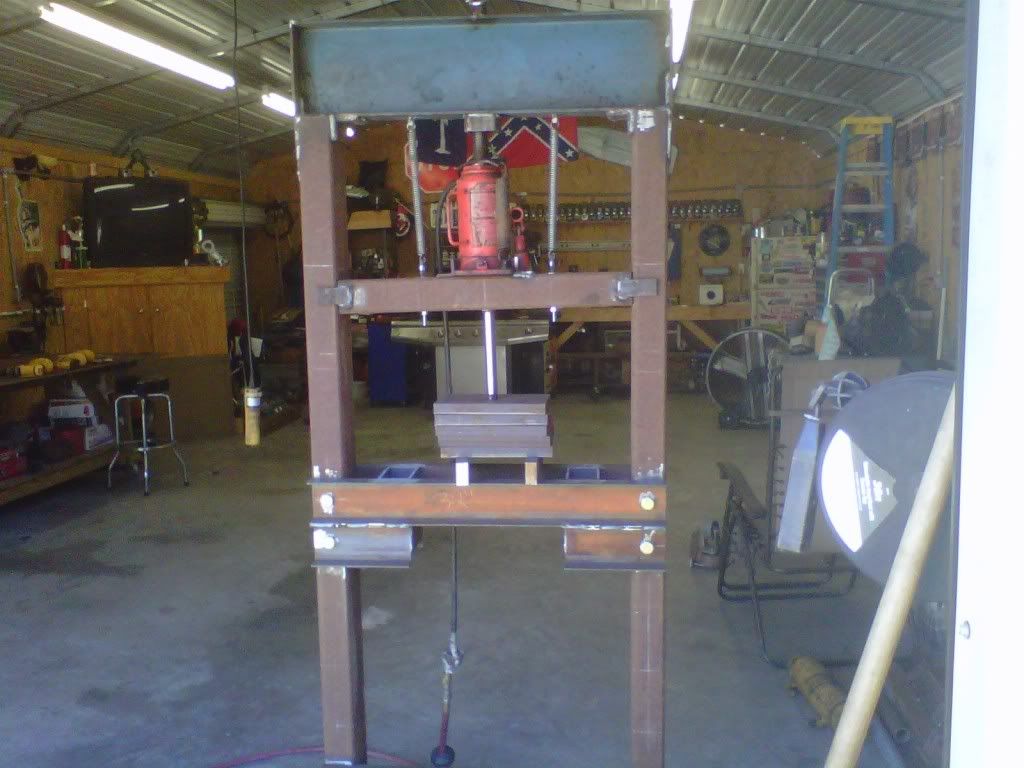
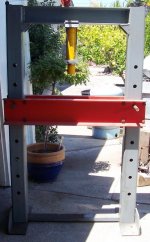
And a few others


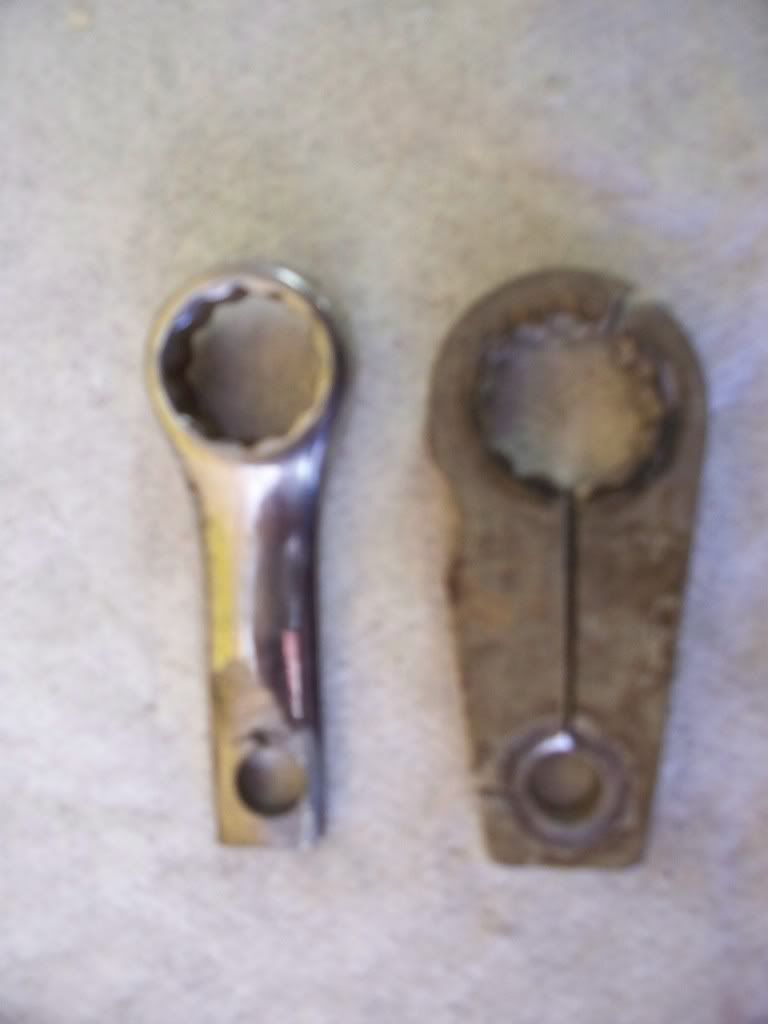
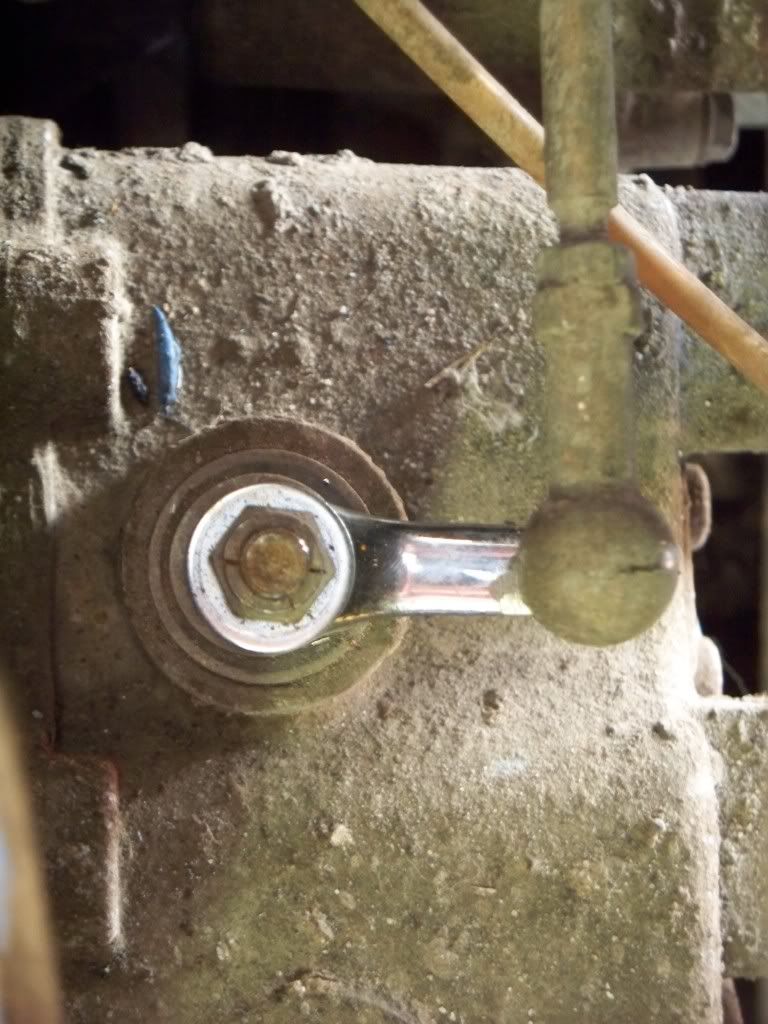
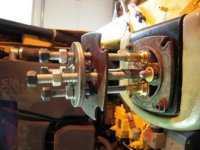
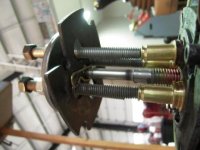
Motorcycle case splittter
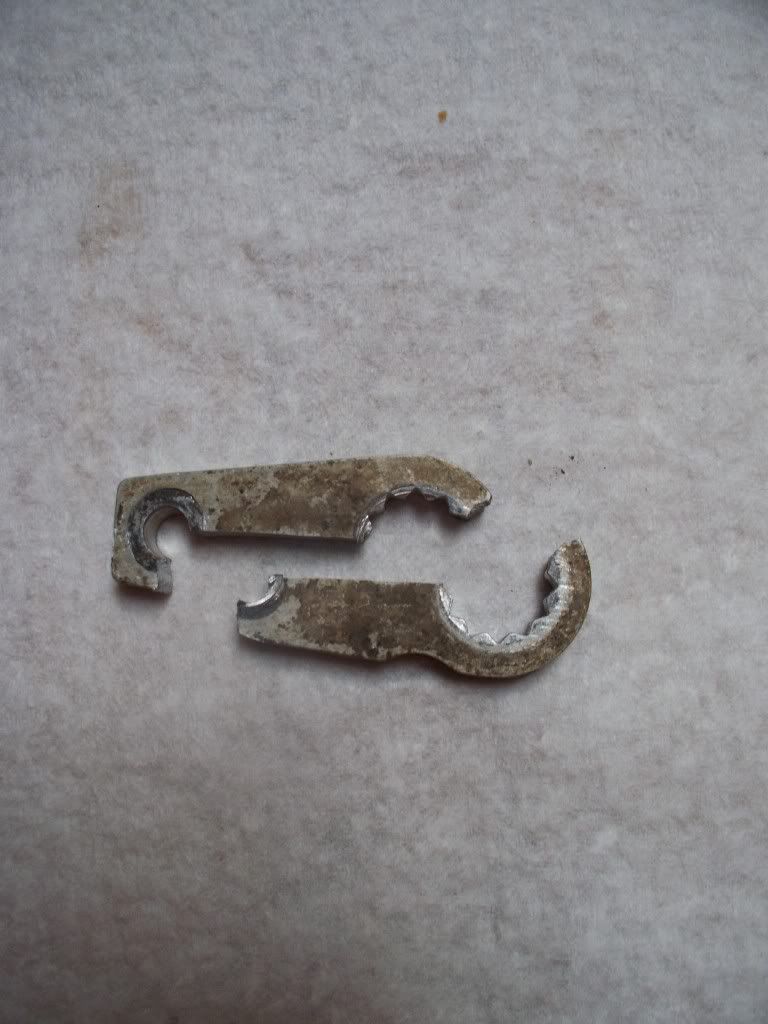
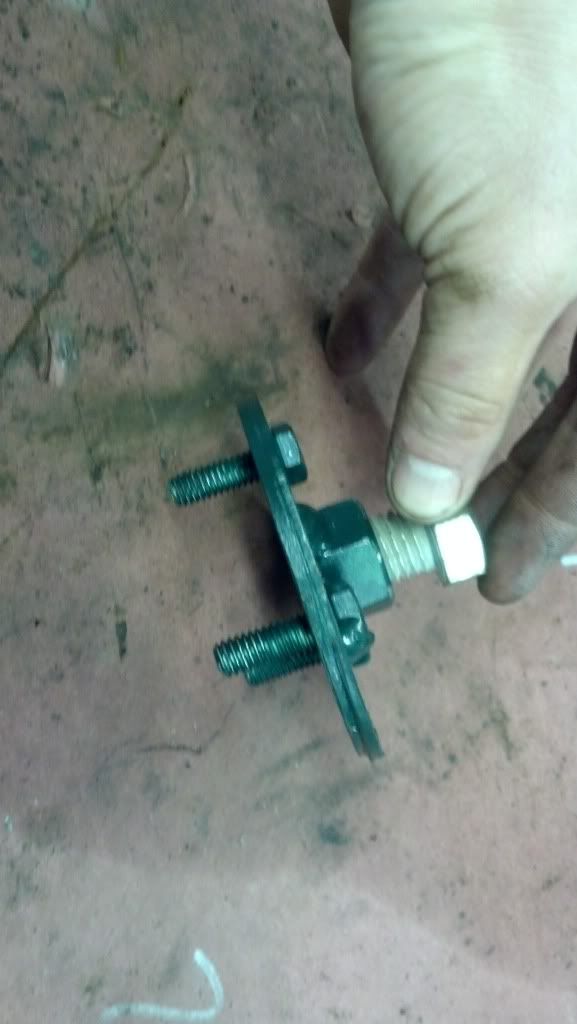
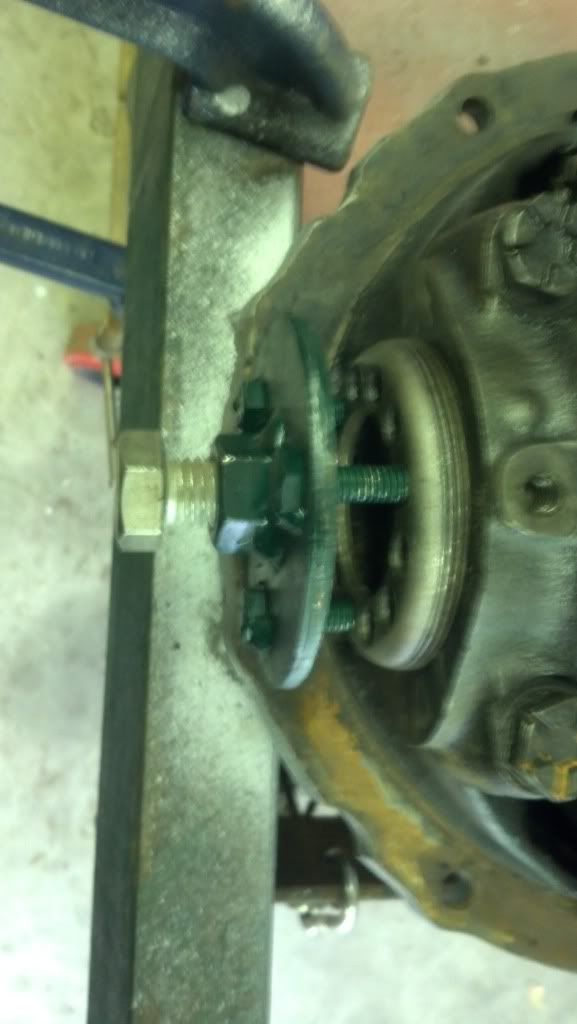
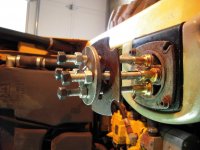
attachment.jpg

Clutch holder
attachment-2.jpg

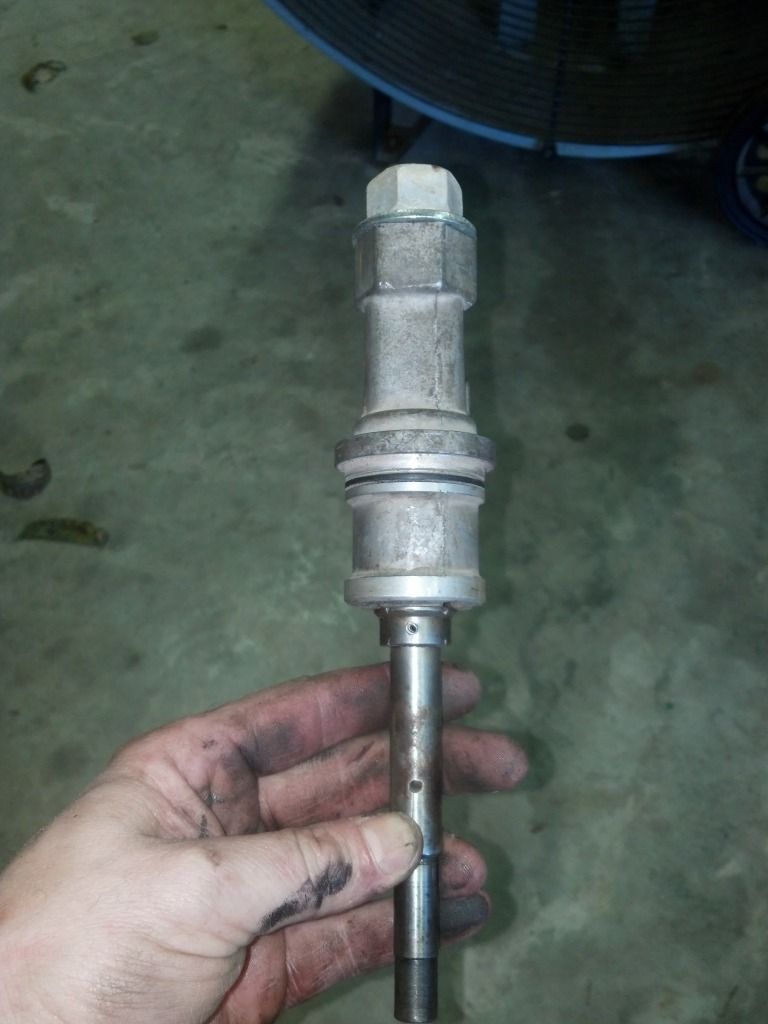
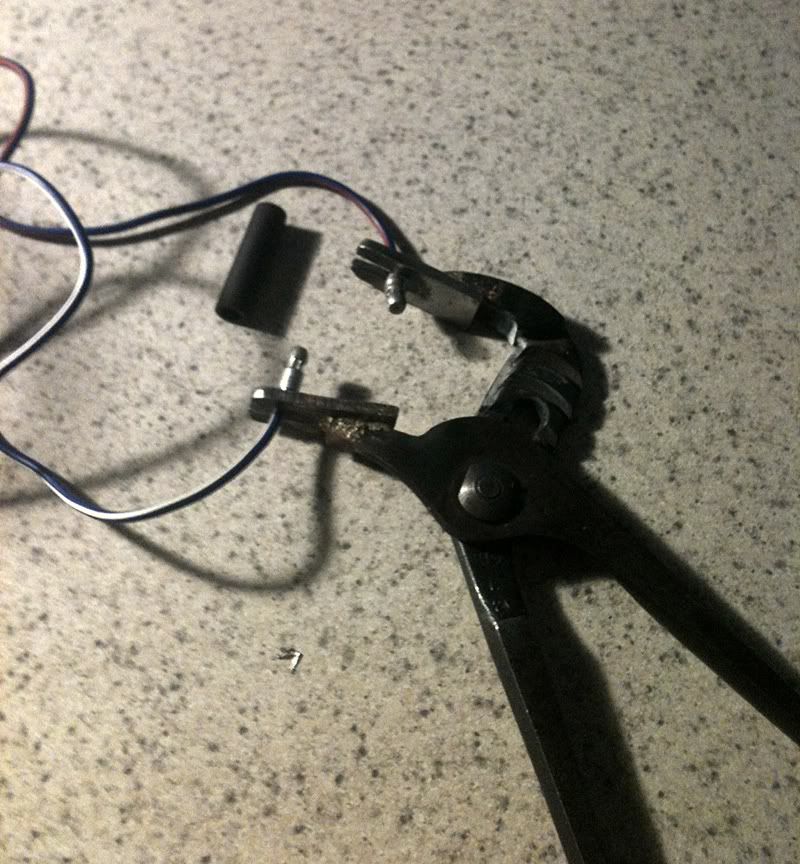
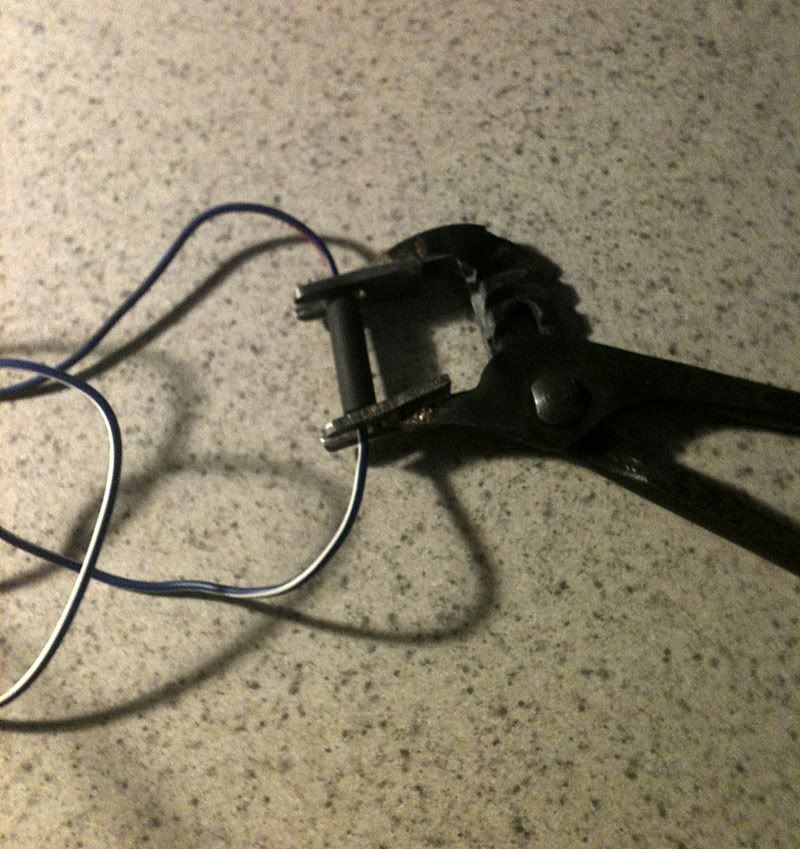
Shock shaft vice jaw
done.jpg
clamped2.jpg

Ford 4.6 broken spark plug remover
CIMG0776.jpg
 

supra90turbo

Well-known member
Joined
Sep 30, 2011
Messages
595
Location
Central MA
From the mini hard handle thread:


I took a spare mini pick, and turned it into a multi-bit driver today.

5¾" overall, which may be a little too long, but I'll try it for a while and see how it goes.

The pick:
IMG_20130317_182627_108_zps30d0f28f.jpg


What was used. The wrench was slid up to the handle to prevent damage when removing from the pick.
IMG_20130317_182936_293_zps349253fb.jpg


In the hand:
IMG_20130317_183814_607_zps7fdff43a.jpg


In it's new home:
IMG_20130317_183502_084_zps4a047590.jpg
 

Justin1776

Well-known member
Joined
Feb 28, 2012
Messages
286
Location
SW Florida
c15d08b0-67f3-445a-8115-38a13fd858bf_zpseddc2b9b.jpg


Not too fancy but I made this when trying to get a snapped off seized starter bolt out of my Detroit 6.2. Extractors where not working, drilled a slightly off center hole into the bolt, made this tool thinking I would have enough torque to twist out the broken bolt (broken inside the hole). 20 years of salt exposure proved otherwise, it didn't work. I ended up drilling out the whole hardened bolt and putting in a heli-coil but it was fun using my redneck ingenuity for a few hours. That's 5/32 rod, a steel bushing and regular zinc plated nut, welded and ground to fit.
 

Outlawmws

Well-known member
Joined
Aug 9, 2011
Messages
39,080
Location
The Badlands
Time to resurrect this before I lose track of the ****** pic...

This is the press I built about 25-30 years ago. I have no clue what the frame will take, but the ram is good for about 40T IIR. The pump and reservoir are off it just now as the ram is the "new" one and I'm still in progress. This is actually a good thing as I'd have had to take the plumbing off the way we went about moving it the 200 ft around e corner to the new shed...

I only got to it as it was buried in the corner of the garage, and this is one tool that can live in my new shed for as often as I use it these days...

The uprights are 5X5 box tubing 1/4" thick and the table alone weighs over 100 lbs, and is made of 8" channel with grade 8 bolts holding it together with heavy wall tubing as spacers. The top beam is 5" I beam 3/8" thick, and all the heavy structure was arc welded using SS rod for higher strength. (that was the highest I ever had to run the old buzz box....)

The whole thing as it sits is about 500 lbs. It stands 6 ft tall and the inside the posts dimension is 32".

attachment.php
 

Attachments

  • Press.jpg
    Press.jpg
    103.5 KB · Views: 4,183

IONH

Well-known member
Joined
Feb 12, 2010
Messages
2,043
Location
Central Massachusetts
Just went through this entire thread. Great read, thanks for posting the pictures and please keep them coming. :beer:

I've been known to McGuyver some tools from time to time, but I haven't done nearly as creative of things as yours. If I think of something to post, I'll be sure to contribute.
 

clintonroy

Member
Joined
Mar 7, 2013
Messages
8
A spring compressor tool for a Dodge 48RE overdrive unit.


<a href="http://s1160.photobucket.com/user/clintonroy/media/Overdrivetool1.jpg.html" target="_blank"><img src="http://i1160.photobucket.com/albums/q496/clintonroy/Overdrivetool1.jpg" border="0" alt=" photo Overdrivetool1.jpg"/></a>

<a href="http://s1160.photobucket.com/user/clintonroy/media/Overdrivetool2.jpg.html" target="_blank"><img src="http://i1160.photobucket.com/albums/q496/clintonroy/Overdrivetool2.jpg" border="0" alt=" photo Overdrivetool2.jpg"/></a>
 

Provincial

Well-known member
Joined
Sep 21, 2011
Messages
6,855
Location
Near Salem, OR
I had a leaking pilot valve plunger on the joystick of a Caterpillar skid steer loader. I made a tool to hold the plunger guides in place while I repaired them one at a time. It works by removing the universal joint that the joystick pivots on and screwing the center shaft where the u-joint went. I used .45 Auto brass to transfer the pressure from the four screws to the plunger guides. I turned the ends of the screws to a slip fit in the primer pockets of the brass. 9mm brass will also work, but the .45 Auto gives you some wiggle room.
 

Attachments

  • DSCN1481 Resized.jpg
    DSCN1481 Resized.jpg
    137.8 KB · Views: 227
  • DSCN1479 Resized.JPG
    DSCN1479 Resized.JPG
    26.4 KB · Views: 285
  • DSCN1480 Resized.JPG
    DSCN1480 Resized.JPG
    24.2 KB · Views: 217

Vegaman_Dan

Well-known member
Joined
Jun 1, 2012
Messages
2,453
Location
Pacific, WA
DIY Wire bender:

Didn't want to buy a wire bending jig. That would require going to the store and cut into my fabrication time. What I did have around me was my welding table, nuts, bolts, my 3/8" drill and a welder.


Quickly drilled three 3/8" holes along one of the sides of the table in the 2x2 tube. They are spaced 1.5 and 1.75 apart from the center hole. Welded on 3/8" nut on the bottom of each hole. I took three 3/8" x 4" bolts and cut the heads off them, then ground them smooth. They go into the holes and screw in place securely. They can readily be removed and inserted to the same nuts from below for storage.

Easy, simple, and fun. I think I may make another set further down the same side using 1/4" bolts next for tighter radius bends.
 

rusty65

Well-known member
Joined
Mar 20, 2012
Messages
2,278
Location
Pekin,IL
My tiny little addition to the thread. A 3/8 chuck mounted on a screwdriver handle.
ejuvyha5.jpg


Sent From Snap On Headquarters deep in China.
 

Alchymist

Well-known member
Joined
Mar 1, 2009
Messages
4,423
Location
Central PA
Fence stops for router table. Rods from old ink jet printers, stops and mount from aluminum bar stock. Ran out of thumb screws, hence the one hex bolt until I restock.
 

Attachments

  • IMG_3525.jpg
    IMG_3525.jpg
    130.1 KB · Views: 295

PCO6

Well-known member
Joined
Dec 25, 2008
Messages
4,573
Location
Newmarket, Ontario
This is a tool I made years ago but haven't used in a while. I used it a few days ago to test the ignition wire on my son's ATV. Just plug the ignition wire on to the end of the spark plug an clamp the tool to the engine to ground it. Crank the engine and if the plug "sparks" the wire is good. His did so it was on to checking all of the kill switches.

This is a common homemade tool that I'm sure many of you have made. I have a spare spark plug for various cars so there is usually no need to remove one from the engine I am testing.

View media item 44352
 
Last edited:

bonneyman

Well-known member
Joined
Apr 22, 2010
Messages
8,752
Location
Desert SW
I didn't make this, but I picked it up on Craig's from a guy who father did build it. $50 :) I couldn't have bought the material to male it myself for that much!

78083700a7d5faa4b959802f7cd21dc0.jpg


62d394370841926384a217894df5dbb3.jpg


Absolutely love this rig! Nice use of aluminum blower motor pulleys to adjust the turning speed. Just awesome!
 

kelpaso1

MEMBER EMERITUS
Joined
Sep 28, 2009
Messages
3,962
Location
New Brunswick
I already posted this in another thread but thought I'd post it here also.

Simple homemade piston ring compressor for motorcycles and ATV's

After looking at ring compressors for atv's and motorcycles online I made this myself for nothing. Since most atv's and mc's have about 3 inch pistons I grabbed a piece of 3 inch abs pipe and cut about a half inch off the end. Then I split the ring in one spot. Now just spread it open and place over the piston and rings. Don't even need to use a hose clamp . Now makes setting the cylinder onto the piston so much easier without having fiddle with compressing the rings with your fingers while at the same time trying to push the cylinder down. After the piston is in the cyl just slide the compressor down the rod and spread it open to remove it from the rod. Plus the ABS doesn't scratch your $300 piston and rings:thumbup:
 

Attachments

  • WP_20141019_001[1].jpg
    WP_20141019_001[1].jpg
    150.7 KB · Views: 236
  • WP_20141019_002[1].jpg
    WP_20141019_002[1].jpg
    151.9 KB · Views: 195
Last edited:

Outlawmws

Well-known member
Joined
Aug 9, 2011
Messages
39,080
Location
The Badlands
This is a tool I made years ago but haven't used in a while. I used it a few days ago to test the ignition wire on my son's ATV. Just plug the ignition wire on to the end of the spark plug an clamp the tool to the engine to ground it. Crank the engine and if the plug "sparks" the wire is good. His did so it was on to checking all of the kill switches.

This is a common homemade tool that I'm sure many of you have made. I have a spare spark plug for various cars so there is usually no need to remove one from the engine I am testing.

View media item 44352

:thumbup::thumbup::thumbup:

I like it! Simple and to the point!

:beer:
 

NicksRodz

Well-known member
Joined
Nov 5, 2012
Messages
92
Location
Upstate NY
These tools are great. If there is a will there is a way.

Its like tool recycling. Don't throw it away make it into something else useful.:thumbup:
 

22george

Well-known member
Joined
Jan 26, 2011
Messages
1,634
Location
SW Ohio
This is a tool I made years ago but haven't used in a while. I used it a few days ago to test the ignition wire on my son's ATV. Just plug the ignition wire on to the end of the spark plug an clamp the tool to the engine to ground it. Crank the engine and if the plug "sparks" the wire is good. His did so it was on to checking all of the kill switches.

This is a common homemade tool that I'm sure many of you have made. I have a spare spark plug for various cars so there is usually no need to remove one from the engine I am testing.

View media item 44352


Thanks for posting. So simple yet effective it makes me feel stupid not thinking of it :lol_hitti :lol_hitti
 
To avoid these ads, REGISTER NOW!
Top Bottom