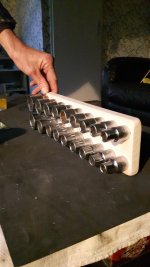
care to share how u made that i think i could use something like that
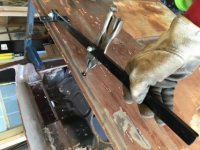
I'll describe it as I should have done it, instead of how I did. I drilled the diameter of the shaft from the back of the handle and knocked the shaft out with a punch. Then drill 27/64" from the front of the handle down to about 3/8" from the back, then drill 17/32" down to about 7/8" from the back.
Then take a short length of 1/2" aluminum tube, slide it in, should stop at 7/8" from the back. Take your biggest bit that'll slide easily inside the tube and drill all the way through, using the tube as a guide.
Now you just cut 1/2"x20 threads inside the handle through that 1/2" portion that's drilled at 27/64". Choose a suitable length of tube, cut threads at one end, then cut and file your point at the other end. I shaped the point so the bevel wouldn't be sharp. I want it to stretch through a small hole in the rubber, not cut a larger hole.
As I did it, the tube will just accommodate 1/4" id wire loom. I may make a smaller one too, possibly with copper so I can bend it a bit when obstacles call for that.
I hope my description was written such that it's understandable.
Sent from my SAMSUNG-SGH-I337Z using Tapatalk


") You can see two of the other cans that aren't yet covered in the ceiling too. I was laying up the rock and cutting out the holes for the cans with a rotozip. There is barely any gap between the edge of the can and the sheetrock.
You can see two of the other cans that aren't yet covered in the ceiling too. I was laying up the rock and cutting out the holes for the cans with a rotozip. There is barely any gap between the edge of the can and the sheetrock.


 I do the same thing with the cheap stuff, I won't turn a torch or grinder onto my good stuff.


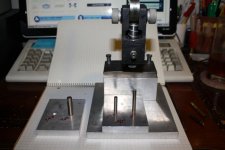
 ). Didn't have much ram to anvil distance, so I whacked the front half of the base off, and used riser blocks under it. 1st pic shows a rotary anvil with fixtures for use as a pen press. 2nd picture shows the ram drilled and tapped for 5/16 -18 bolts to vary ram to anvil distance. Third picture is different anvils for the same job as I decided I didn't like the rotating anvil.
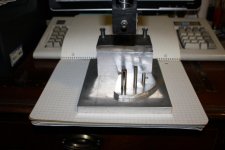

![brake%201[1].jpg](/forum/data/attachments/375/375744-b6ed2ac42e262587a77bd6f4fb72b07b.jpg)
![rocker%20panel[1].jpg](/forum/data/attachments/375/375773-27523339008cc1edb82b2b61fa59fa8b.jpg)