To avoid these ads, REGISTER NOW!

bareass172

Well-known member
Joined
Aug 5, 2012
Messages
817
Location
N'awlins
I posted this one a couple years ago, nothing special but very functional. When my MityVac died I wanted a quick and easy solution that would allow me to pump bleed because sometimes that's faster. I like speed bleeders but wanted something "portable".

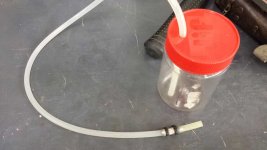
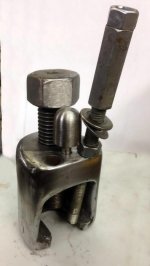
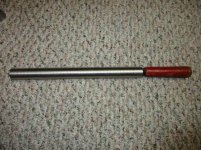
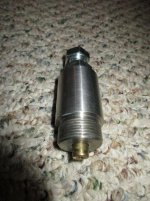
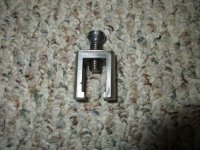
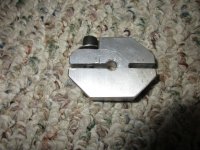
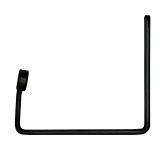
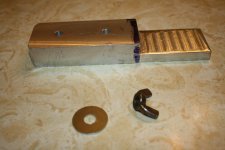
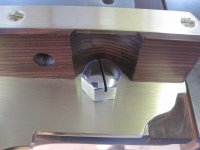
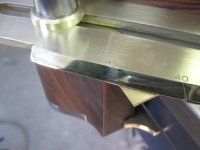
Simple setup - jar, speed bleeder, and hose. I bought silicone hose from speed bleeder when I bought the bleeder. Drilled a snug hole in the jar lid for the hose, it seals itself, and a second tiny hole for air transfer (tiny to limit spills). The inset in the picture of the bleeder just shows the orientation and the line is where I cut the tapered end off, giving me straight through passage. One pump with the caliper bleeder open easily fills the short distance to the speed bleeder and then it self seals just like all speed bleeders do.

You can also add another hole/hose to tie to a vacuum pump if I want and then do pump or vacuum at your discretion. The jar is plastic and will collapse under too much vacuum, but I tested with another lid and the jar held up pretty darn well. This kind of check valve bleeder already exists but they are usually ****.
 

Attachments

  • 20140408_141910.jpg
    20140408_141910.jpg
    34.7 KB · Views: 411
  • 20140408_141922.jpg
    20140408_141922.jpg
    39.8 KB · Views: 494
To avoid these ads, REGISTER NOW!

barrybeefburger

Well-known member
Joined
Dec 20, 2015
Messages
155
Location
North of the GTA, Ontario
I can't even count how many times I've tried to test for spark by holding the plug by hand to some part of the engine head. This is so common sense I'm kicking myself. And I have all the parts in the garage to make this. A new tool is about to enter my tool box. Thanks for posting.

Im new to the site and this is fantastic
 

Hoopty Mike

Member
Joined
Feb 23, 2016
Messages
7
Location
CT
So I had to share this, apologies if something like this has been shared already, but it's so simple and worked 6 times today without issue on my 86' c10. It's my homemade mildly rounded off flare nut removal tool. Pretty simple, cut the top off a 3/8" cheap shallow 6 pt socket, put a nice size slot as to a fit a 3/16" brake line, slip it over the flare nut like you would a flare wrench. Now take your vice grips, and clamp down on that sucker. It tightens over the flare nut, even if it's rounded slightly. It also will usually fix the flare nut a bit in the process. I've rounded off multiple flare nuts on rusty ****, regardless of what brand flare wrenches I use. If they get really bad, I usually end up taking a vice grip to it or cut it and smack a slightly smaller socket over it. This solved that for me.
https://scontent-lga3-1.**.fbcdn.net/hphotos-xlp1/v/t34.0-12/12784769_10207309082383404_1331768118_n.jpg?oh=ea6c64d88ad2b51e0a38f9740df7a6dc&oe=56D0DCC9
https://scontent-lga3-1.**.fbcdn.net/hphotos-xat1/v/t34.0-12/12782226_10207309082143398_760716138_n.jpg?oh=a26c0f49f16fab1ef859d90eb419a949&oe=56D0A6E6
https://scontent-lga3-1.**.fbcdn.net/hphotos-xfp1/v/t34.0-12/12767306_10207309081743388_1682487990_n.jpg?oh=fe6e902e262ab4199dcc60c7d92eba73&oe=56D07F6F
 

zmotorsports

ALLIANCE MEMBER
Joined
Oct 20, 2009
Messages
21,312
Location
Northern Utah
I can't believe I missed this great thread. Unfortunately I didn't really start taking pictures of any of my shop made tools until the last couple of years. Not an excuse, I know.

Here is a power drawbar that I fabricated/machined for my vertical mill when I purchased it back in mid-2014.
1412gea.jpg


Purchased a blank backing plate and machined it taking it from this....
2jb7ux.jpg


To this....
14vjorm.jpg


And lastly to this so I could mount a 3-jaw chuck to my 8" rotary table.
2m80dxi.jpg


Technically not a tool, but I made a captive nut puzzle for my son a few years ago as a Christmas stocking stuffer. Cool thing is now that he is a Mechanical Engineer at an aerospace company, he has it sitting on his desk as a conversation piece.
ie35e8.jpg


Made an adapter to mount my small Noga holder to my Indicol quill mounted base.
9s48t3.jpg


2d7ejom.jpg


votrpx.jpg


Set of screwjacks.
blvt.jpg


Bases and threaded bungs are interchangeable for a variety of heights.
oshls7.jpg


There are many more and I wish I had pictures of all of them. You can't step foot into my shop without seeing many within sight.

Someone mentioned earlier that they made a lot of them because they couldn't afford to buy them. I look at it in a different point of view, although I probably could afford many of them, I chose to make them and use that money for other things that I am unable to fabricate or machine. Hence stretching my dollar further and keeping more of that money in my own pocket. Also, many times we need a tool that is either for a very specific purpose OR if you are like me, you just want something that is different than everyone elses.:dunno:

Mike.
 

bonneyman

Well-known member
Joined
Apr 22, 2010
Messages
8,752
Location
Desert SW
I made this carb adjustment tool recently from a piece of aluminum tubing, an old speedometer cable, and some cobbled together pieces. Attached a broken Proto Betrgrip handle as a hand hold. Junk mostly.

But it came out OK.
 
Last edited:

slopdog

Well-known member
Joined
Jul 27, 2010
Messages
162
Location
prince edward island , canada
Here.s an auto door lift I built a few years ago . one thing that I changed was to weld a piece of tuben across the front and it now has two wheels on front as well as the back . a small hyd jack is used to lift the door /
 

Attachments

  • d%20lift%205.jpg
    d%20lift%205.jpg
    90.4 KB · Views: 265
  • d%20lift.jpg
    d%20lift.jpg
    92.5 KB · Views: 270

Griff93

Well-known member
Joined
Jul 25, 2009
Messages
1,121
Location
Huntsville, AL
I needed an N-06 bearing nut socket the other day. I was putting together a pto gear box for a firetruck pump. These sockets are very hard to come by. I found two companies selling them the other day when I was looking. They were around $250 ea and special order so I decided to make one. I went to the parts store and bought a 1 3/8" socket which I bored out on my lathe.


I put it in the mill and cut away the excess to create 4 fingers.


Here's the finished product with the nut sitting in it. It fit great and worked to tighten the nut. I should have made the fingers slightly shorter as they barely hit the fingered lock washer tabs. Either way, it worked out much better than trying to beat it on there with a punch.


twertsy

Well-known member
Joined
Jan 5, 2014
Messages
6,725
Location
Reedville, VA
Here are a couple:

Extra long Truth Ratchet;
Custom MAC Lady's Foot / Pry bar;
Extra extra deep 3/4 socket;
Non-ratcheting ratchet / Breaker Bar.
 

Attachments

  • permsocket.jpg
    permsocket.jpg
    107.6 KB · Views: 264
  • permsocket2.jpg
    permsocket2.jpg
    95.3 KB · Views: 265
  • extradeep3-4.jpg
    extradeep3-4.jpg
    104.9 KB · Views: 278
  • MAC ladysfoot.jpg
    MAC ladysfoot.jpg
    107.2 KB · Views: 290
  • longtruth.jpg
    longtruth.jpg
    97 KB · Views: 292

kbeitz

Well-known member
Joined
Jun 1, 2007
Messages
103
Location
Pennsylvania
Way back on page eight years ago I said I wanted to build an Iron worker.
well I'm now doing just that...
 

Attachments

  • DSC04472.jpg
    DSC04472.jpg
    144.2 KB · Views: 328
  • Dsc04450.jpg
    Dsc04450.jpg
    142.6 KB · Views: 340
  • DSC04446.jpg
    DSC04446.jpg
    151.1 KB · Views: 364

2oolhound

Well-known member
Joined
Dec 18, 2010
Messages
5,918
Location
BC Canada
I had no way to get a puller for a power steering pump pulley so I made one out of 1/8 wall square tubing. The bottom plate was 3/16" which I drilled a 29/32" hole into and cut that hole open on one side forming a "U" shape so it could be slid into the grove on the pulley. A 7/16" top plate was drilled and tapped for a 9/16 fine thread forcing screw. It looked great but the bottom "U" plate started to bend then the sides started buckling. I added another "U" shaped bottom plate with a wider opening to clear the higher section of the pulley shaft and welded 3/16" straps on 3 sides of the body making the sides and back over 1/4" thick. Then the 9/16 forcing screw threads stripped so I used a piece of 7/8" grade 8 all thread I had available. I re-cut the threads in the top plate to match and also added an 7/8" nut inside of the top plate to share the load. This worked.

When I was done I set it up to store all the components in one handful. Top photo you can see the big 7/8" forcing screw in the back. The little round top shaft has a 1/4" stem that fits inside the power steering pump shaft and just dangles there until the hollow end of the forcing screw is threaded up to it's round end. Then the pulley starts getting pulled onto it. It's a few thou. smaller than the ps shaft. The other 3/8" threaded rod on the angle is the pulley install tool that is just being stored there to keep it all together.

attachment.php


attachment.php
 

Attachments

  • PowerSteeringPuller.jpg
    PowerSteeringPuller.jpg
    41.2 KB · Views: 2,014
  • PowerSteeringPuller2.jpg
    PowerSteeringPuller2.jpg
    48.6 KB · Views: 2,007

cliftonbros89

Well-known member
Joined
Jun 2, 2015
Messages
3,009
Location
Missouri
I had new gauge wheels to put on our JD 1990 drill. I think there's 46 or 48 or them. They fit super tight on the 2 piece rim. So my brother-in-law whipped up a few things to put them on with the press.
b023e9b55763d60a9cb22fead1dbdbf1.jpg
First was the base.

45dc43b592529ad30fd4469e0a912e51.jpg
Put the plastic piece of the rim on

225e111e3f88563ab1573987245ceea5.jpg
Sit the tire on

dd187173f07f76c6d2f85b548e430308.jpg
Then the metal part of the rim. The rims only line up one way to get the bolts in.

a2894700742d0b13e5cb1563609e8f20.jpg
Then comes the plate to go on top and fit inside the lip of the metal rim

155d228c721a800de82eeaeca1d5734d.jpg
Put a block on and press it together. A simple little set up that saved me a whole lot of time.
 

Attachments

  • 155d228c721a800de82eeaeca1d5734d.jpg
    155d228c721a800de82eeaeca1d5734d.jpg
    653.7 KB · Views: 10
  • a2894700742d0b13e5cb1563609e8f20.jpg
    a2894700742d0b13e5cb1563609e8f20.jpg
    658.5 KB · Views: 8
  • dd187173f07f76c6d2f85b548e430308.jpg
    dd187173f07f76c6d2f85b548e430308.jpg
    658.8 KB · Views: 5
  • 225e111e3f88563ab1573987245ceea5.jpg
    225e111e3f88563ab1573987245ceea5.jpg
    673.5 KB · Views: 5
  • 45dc43b592529ad30fd4469e0a912e51.jpg
    45dc43b592529ad30fd4469e0a912e51.jpg
    654.5 KB · Views: 6
  • b023e9b55763d60a9cb22fead1dbdbf1.jpg
    b023e9b55763d60a9cb22fead1dbdbf1.jpg
    739 KB · Views: 21

jpickar

Well-known member
Joined
May 21, 2010
Messages
964
I make a lot of things that I need. Some because I think the asking price is too high for what they are or I don't have time to waste waiting for one to be shipped or going to town and find one.

First is a ring lapping tool for lapping in scope rings.
Second are ring alignment rods for aligning scope rings
Third is a Remington 700 action truing mandrel
Fourth are three fore arm wrenches for a Remington 870-12ga., 870-20ga., and for a Remington 760 pump action rifle
 

Attachments

  • IMG_3895.jpg
    IMG_3895.jpg
    150.2 KB · Views: 121
  • IMG_3892.jpg
    IMG_3892.jpg
    97.2 KB · Views: 124
  • IMG_3893.jpg
    IMG_3893.jpg
    96 KB · Views: 122
  • IMG_3894.jpg
    IMG_3894.jpg
    98.3 KB · Views: 121

jpickar

Well-known member
Joined
May 21, 2010
Messages
964
Next is a Remington 700 bolt ejector removal tool and a Remington 700, 721, 722 bolt lug lapping tool.
And finally a Smith & Wesson return spring housing tool and a Smith & Wesson ejector rod tool.
 

Attachments

  • IMG_3902.jpg
    IMG_3902.jpg
    118 KB · Views: 119
  • IMG_3899.JPG
    IMG_3899.JPG
    123.3 KB · Views: 130
  • IMG_3898.JPG
    IMG_3898.JPG
    129.6 KB · Views: 130
  • IMG_3903.JPG
    IMG_3903.JPG
    124.3 KB · Views: 114
To avoid these ads, REGISTER NOW!

schor

Well-known member
Joined
Apr 16, 2013
Messages
531
Location
Ajax, Ontario
Zero clearance table saw insert.

bjSg5rzi7pLFgWqnM980x5jicfqI54ClY8HMzXl3ndy49bzK5Uu0DC8VFfH9CbzkYblgl0HZiyTxOC98fYHboskjHIgQAyT1DrxaQoXf_9JFcc0SQsETgqI447aFJJA1vCS003XJJ01cQtKo8edcaR9uc-qtlt7uHZgUe-JKr3szKogUbcHa7YFMh9g5K_ZnkKEKJ1CjuxyeQ7TyrST9go5xQeR75KwwT6Vn0OoOw9f53nMXv76GgnQWGrlQtW2T0k3b1iyz53w7bS_xl822IU7J-SX5vdM-MPoIw3aFyQ3TbVsaC-x-o8d6DxTCHmVoNDe-_zFNzNa9LaRxpcEzf8EKe-IyxLwiyEAGucg0CEmJhKhPxD-3v5rT_IcbCBy-N7c_pqhC0YXAYjSEUn9g8KpqLOZ3Ar8bX44pO5IegU4PqtMcqwoBdSg2EGwrm-zVQ0Kxv8ZZxtihhyMRYVszMzbCRPU0hihzI0zUUyoPZ7HSvxM-FYXd41Un4mPmqzIh5RCxg12fBBqtItbixeUwQxItNsm3W8B_5MO6NHvOFxJuJHzI39faP5XkQeNvh8TjGrQvnE4oYY-5he6_j1xmkdAN0oQ3HJmPwgevQj0mMKwjgCjWyGV_=w1110-h832-no


Some structural support.
FRifQmLztZunXMGNRorVPFOly5WnrWJa93ryGE7pCm6hJCg3s4gjo5p9GA0Bx2Ar4zR_6W0HM4r2J6W1zYPE75rtvnOvBMLxgI4Y4rHHPNsJwP2IRsjiEv3EmBU3lvom8grS1GA0YqDWYkvPPzhl49VoudBGgjmIDH596ZC_nBRmRNC4f-SgHaFKRtIrUbw8eyYX1dUBkqrMEUpzilaDYNcOmdqjBB0FPlBtVrVaKY8k9EAIcFYgGt82HlbfAIeRiPLch943vS4YhSccJH9riUK-0Gj34xs-tklZBCHjV9MN6DNutz75rDfKGM1t5Zv9yxvuh_-DvutyKFJVb7DAt1qb98Pt0DCljSwEyYbqWS6IunnjCorhahlUgvUyM0Kb4fkfAoppUFLeFpZniVpguvPhecqezYWUnOG5OrRMWyB2qlw0VDPPm2BmzqoX4pJptI13R0QYA0wWlQ2PJ-RnHZGOzZKw6CyR25KgBNkIuL97Lk6FoDm-vJWQsryAn2mUATZ1dprN3SXVCgqrDSoYC85QUyXgF2hD0jE1TBAzL7CgDNsj6V4Gkjjlx5UNx4TCDD3Sll99ByGUDZJnLMOIgQs0ptc7N-dy66K9uXDlwClxoO2_lZJl=w1110-h832-no


With finger hole and set screws to set the height.
eqsbtxTUqDqpoB8wdZ78JxRnxEpHTtnovypE5PTV2Odce4q7feR2uiDASsU1pX9oqOfgRxMwCv0WH04gCzIiUX6S5fnY1d1HUs6emI8ecpZzuR4ZZs__jfCbzwMq1yrUafyxSzJDfnHtFZUebx5kuNwz6ej5o_ixLsZJ3YJR1RPSFVQ0Rqs84LVV7XtsvCDg3gpJ6STsllYRSg7YDSeo8w4KMRWUlu1D1ZTPjW1J3cnKKlU8otBi7sHOKrHt3mvJMesi3TaYnINl0O7qVfnBewMKC2b-3_P5yAaSwRhX4r6zZCHg-7ztGrZi3n3awxKxNDWDOV60bV-0mbShQcg6GEYNWU5ENfDbhl09cJr6CUe3x8oLORP4hoTB2mhiEcbpztEsBvouiY-xkAMJzbPpSjU8RPQvSMK_ZMpESQfcSREOJiUqiGa1HXtfj2LxykKXc0ylt-abHw2QlElb1kkFTCZfn2-b9P69WhEA_8jrBTZ6LvxGVS38dGqSbWK7_opmNH7n_A4o3nVlCnE580XSzdDG7uN-d__w3D7TrTDUhY8BsNkPXMMDtGiJOLFfLHC2WX6Zj2lY30Kmq41ZP8dW08IJId7dwHLRV_o-a0X0FM7l_M6v-7-A=w1110-h832-no
 

chaplin49

New member
Joined
Jun 17, 2017
Messages
1
Howdy, recently retired fr grain(AG) business, live on the farmstead where we used to farm. Live in ND, and enjoy tinkering.
 

rslaback

Well-known member
Joined
Jul 24, 2010
Messages
4,061
Location
Westcentral Wisconsin
Not sure if this really qualifies as it is a homemade tool modification but this thread deserved another bump so here goes:

I recently bought a 3 in 1 30" shear/press/roll from Harbor Freight for a cabinet drawer making project I got myself into. I knew going in that I wasn't looking at a $2000 machine so my expectations have been pretty low and the tool has actually performed quite well.

However, the one glaring weakness that I saw is that the stop/square for the shear is ridiculously undersized. Due to it only being about 2 9/16" long it really can't be relied on to keep your workpiece square to the shear. The short table also means that it can be difficult supporting a longer sheet where you want it in order to shear it to a specific size which was also difficult due to the lack of a scale.

(Image stolen from Youtube)

My solution was to machine a new stop which would obviously need to be removed if I wanted to store the machine that I could bolt on in place of the short square/stop. To the bottom of that I fastened a section of framing square tuned to the distance from the shear which serves as both a support for the material as well as an integrated scale. I haven't yet tried it out but I'm hoping it works as well in reality as it does in my head.
 

Attachments

  • 1022171608a.jpg
    1022171608a.jpg
    147.8 KB · Views: 192
  • Capture.JPG
    Capture.JPG
    39.4 KB · Views: 200
  • 1022171607.jpg
    1022171607.jpg
    147 KB · Views: 185
Last edited:

ex-x-fire

Well-known member
Joined
Nov 10, 2012
Messages
3,741
Location
Sheboygan Falls Wi.
This is a GM 3.1 thermostat wrench, I was able to make one from only the picture. The given was the box end size which is 13mm, I used that to get the scale for the other parts of the wrench. Works good.
 

Attachments

  • 61lsEAMf65L__SL1500_.jpg
    61lsEAMf65L__SL1500_.jpg
    64.3 KB · Views: 141

Cf mtn

Well-known member
Joined
Aug 5, 2016
Messages
265
hi all, going through a box i picked up. looks like the gentleman liked creating his own designs. these long crow's foot things are kind of interesting? any idea what they might have been used for? they're 10-11" long.
 

Attachments

  • tools 004.jpg
    tools 004.jpg
    103.1 KB · Views: 255
  • tools 007.jpg
    tools 007.jpg
    108.6 KB · Views: 216
  • tools 008.jpg
    tools 008.jpg
    108.4 KB · Views: 207
  • tools 009.jpg
    tools 009.jpg
    99.8 KB · Views: 196
  • tools 006.jpg
    tools 006.jpg
    93.5 KB · Views: 237

Alchymist

Well-known member
Joined
Mar 1, 2009
Messages
4,423
Location
Central PA
Not "garage" tools, but made in the garage for jewelry/watchmaking bench.

The black casting is an el cheapo watchmaker's vise, used with the wooden part. The little red vise has been in the family for ages, and was missing the clamp part that threaded into the bottom. Made in USA, no mfgr's name, too nice to toss. So, piece of 1 X 2 inch aluminum bar, piece of 3/8" redi-rod and a wing nut, a little machine work, and presto, new bench vise. Two holes in the aluminum mount allow for various positionings. In the vise is another gadget - block of aluminum with various sized and slotted posts for twisting & bending wire.

Oh yeah, blew the final drive gear in the HF micro - mill, replaced with the last one in the drawer. Guess it's reorder time. Dumb idea using plastic gears anyway. :headscrat
 

Attachments

  • IMG_0126.jpg
    IMG_0126.jpg
    134.4 KB · Views: 178
  • IMG_0127.jpg
    IMG_0127.jpg
    128.6 KB · Views: 173
  • IMG_0122.jpg
    IMG_0122.jpg
    130.7 KB · Views: 166
  • IMG_0121.jpg
    IMG_0121.jpg
    132.4 KB · Views: 167
  • IMG_0125.jpg
    IMG_0125.jpg
    130.4 KB · Views: 168

bonneyman

Well-known member
Joined
Apr 22, 2010
Messages
8,752
Location
Desert SW
Not "garage" tools, but made in the garage for jewelry/watchmaking bench.

The black casting is an el cheapo watchmaker's vise, used with the wooden part. The little red vise has been in the family for ages, and was missing the clamp part that threaded into the bottom. Made in USA, no mfgr's name, too nice to toss. So, piece of 1 X 2 inch aluminum bar, piece of 3/8" redi-rod and a wing nut, a little machine work, and presto, new bench vise. Two holes in the aluminum mount allow for various positionings. In the vise is another gadget - block of aluminum with various sized and slotted posts for twisting & bending wire.

Oh yeah, blew the final drive gear in the HF micro - mill, replaced with the last one in the drawer. Guess it's reorder time. Dumb idea using plastic gears anyway. :headscrat

Nice! I've got a small old Dunlap vise like that form my FIL. I should try rigging up a base for it like yours.
 

bonneyman

Well-known member
Joined
Apr 22, 2010
Messages
8,752
Location
Desert SW
hi all, going through a box i picked up. looks like the gentleman liked creating his own designs. these long crow's foot things are kind of interesting? any idea what they might have been used for? they're 10-11" long.

Those tools remind me of some that are used for recessed plumbing fixtures, like the water meter out by my mail box. 10-11 inches long would be just about perfect for reaching down there (though I'd never mess with it - that's water company property)
 

TractorJeff

Well-known member
Joined
Dec 8, 2013
Messages
3,309
Location
Elkhorn, WI
Thread 426 looks like the wrench's needed to reach down to hydraulic fittings on some of the Combines I've worked on.
 

Cf mtn

Well-known member
Joined
Aug 5, 2016
Messages
265
Thread 426 looks like the wrench's needed to reach down to hydraulic fittings on some of the Combines I've worked on.

hi tractor, you might be on to something. these where in that box. black looking 1 appears unmarked, the other is armstrong. both have same numbers.
 

Attachments

  • cat wrench 001.jpg
    cat wrench 001.jpg
    114.9 KB · Views: 130
  • cat wrench 002.jpg
    cat wrench 002.jpg
    79.2 KB · Views: 113
  • cat wrench 003.jpg
    cat wrench 003.jpg
    86.1 KB · Views: 112

highpriest

Member
Joined
Oct 14, 2015
Messages
13
Location
Ottawa
lots of old sliders have lost there miter and some people make a fence to make the slider useful. I do have the Double miter but still wanted to make the back fence.


The large 5/8" holes to hold the larger cross cut fence on the Wadkin PK slider put the cross cut at its largest length. We have sometimes wished we had this back fence. i was tempted to bolts a 2x4 there at times but always had in the back of my mind a real fence in a Wadkin flavor. i made one and it has give me 39" at 1" and 36" and full depth

video of it in action


Attachments

  • wadkinbackmiter003_zps9baf6e71.jpg
    wadkinbackmiter003_zps9baf6e71.jpg
    79.5 KB · Views: 127
  • wadkinbackmiter002_zpsd343c1f6.jpg
    wadkinbackmiter002_zpsd343c1f6.jpg
    77 KB · Views: 124
  • wadkinbackmiter004_zps214c7aa8.jpg
    wadkinbackmiter004_zps214c7aa8.jpg
    79.6 KB · Views: 122
  • wadkinbackmiter008_zps3c28cf39.jpg
    wadkinbackmiter008_zps3c28cf39.jpg
    67.6 KB · Views: 109
  • wadkinbackmiter009_zps70878fd2.jpg
    wadkinbackmiter009_zps70878fd2.jpg
    91.8 KB · Views: 113
  • wadkinbackmiter010_zps37731b28.jpg
    wadkinbackmiter010_zps37731b28.jpg
    43.3 KB · Views: 117
  • wadkinbackmiter015_zps726c41f5.jpg
    wadkinbackmiter015_zps726c41f5.jpg
    55.7 KB · Views: 107

stercorarius

Well-known member
Joined
Mar 6, 2016
Messages
220
Location
Eastern Washington
9c1ae0aea2f76b55dc900dffd1e21a5c.jpg9a8aedc2754ca0279cfb740bdf75132d.jpgc11e9482b96390ba3166f8f5dcf44ca2.jpg4754621e2848777a169f2d63ce9ee79d.jpge96f50810941753a05143ec4f4bb3f5b.jpg
Portapress I made for King pins on tag axles because the "mechanic" doing the job was butchering the pins with a sledge. Will probably need to either mod this one to be extendable or build a bigger one for pressing the new ones in. Uses a 10t short portapower ram. In hindsight I should have made it for use with a 20t bottle jack.
 

Attachments

  • 9a8aedc2754ca0279cfb740bdf75132d.jpg
    9a8aedc2754ca0279cfb740bdf75132d.jpg
    63.3 KB · Views: 18
  • c11e9482b96390ba3166f8f5dcf44ca2.jpg
    c11e9482b96390ba3166f8f5dcf44ca2.jpg
    58.5 KB · Views: 16
  • e96f50810941753a05143ec4f4bb3f5b.jpg
    e96f50810941753a05143ec4f4bb3f5b.jpg
    122.6 KB · Views: 15
  • 9c1ae0aea2f76b55dc900dffd1e21a5c.jpg
    9c1ae0aea2f76b55dc900dffd1e21a5c.jpg
    75.7 KB · Views: 15
  • 4754621e2848777a169f2d63ce9ee79d.jpg
    4754621e2848777a169f2d63ce9ee79d.jpg
    69.4 KB · Views: 22

JABgj

Well-known member
Joined
Nov 11, 2013
Messages
536
Location
So. California
Cam chain tensioner holding tool for my XR600. Design liberated from factory tool.
 

Attachments

  • chain tool 2 454.jpg
    chain tool 2 454.jpg
    163.5 KB · Views: 127

zmotorsports

ALLIANCE MEMBER
Joined
Oct 20, 2009
Messages
21,312
Location
Northern Utah
Cam chain tensioner holding tool for my XR600. Design liberated from factory tool.

That's awesome. I knew what it was the second I saw it. I made mine after measuring a friends Honda tool. Used it for years, I'll have to see if I can find it and post it up. I don't think mine turned out as nice as yours though.:thumbup:
 
To avoid these ads, REGISTER NOW!
Top Bottom