To avoid these ads, REGISTER NOW!

Kansas Camaro Corral

OP
C

camarosrus69

Well-known member
Joined
Aug 7, 2013
Messages
243
Location
South central Kansas
Yes, they passed the initial "Jynx" test. But, he was really waiting to test the inside of the box.:) And yes, I do have a couple car covers. It came with a canvas one and I purchased a better one that's not supposed to scratch the paint. However, as you can see, the car is already dusty, and I don't want to put the cover on until it is cleaned.
 
Last edited:
To avoid these ads, REGISTER NOW!

C_F

ALLIANCE MEMBER
Joined
Jan 21, 2005
Messages
9,675
Location
Utah...SNOW BLOWS!
I can see a big smile on the Camaro's face, it loves it's nice big garage! :D

BTW, I am running those same tires on my Town Car this year, I really like them...

ZsZQrZ7t.jpg

ZxcDrqDt.jpg
 
OP
C

camarosrus69

Well-known member
Joined
Aug 7, 2013
Messages
243
Location
South central Kansas
Hey guys, I could use some advice. As you may remember I used textured fiber cement lap siding. I bought 4" round light boxes for the exterior lights. I also have a POS HF hole saw kit that I tried to cut through a scrap piece of siding to check the fit. I got about half way through the siding before I wasted the never used blade. I finished the cut by pounding nail holes all the way around the circle, and knocking the center out. It actually didn't look too bad, but that's not the method I want to use for the real job. Does anyone have a better method for cutting a hole in this stuff? (Edit; As it turns out, I shouldn't have even tried to use the HF hole saw on the siding. According to YouTube, that just ain't gonna work.)
 
Last edited:
OP
C

camarosrus69

Well-known member
Joined
Aug 7, 2013
Messages
243
Location
South central Kansas
I was hoping to show you trenches in my back, and fuse boxes, but that hasn't happened yet. Electrical was supposed to show on Tuesday. It has been bitterly cold, and, with the recent moisture, the ground is as hard as a rock. We agreed to postpone until Thursday. Wednesday they called and asked to slide until Friday. Friday morning was a no-show and when I called, they said the trench operator didn't come in. (I'm guessing, sick) So now we're on for Monday. I went out and bought a high dollar, carbide bit, hole saw. It went through the siding like butter. So I was able to finish the outside lights and wire up the switches. All I really have left, that I can do, is to put up the ceiling fan and wire up the exterior outlet. I temporarily powered the lights like I did the outlets and gave them a test. The 100 watt equivalent LED bulbs are plenty bright.
 

Attachments

  • IMG_20180114_173432344.jpg
    IMG_20180114_173432344.jpg
    145.8 KB · Views: 83
  • IMG_20180114_173527269.jpg
    IMG_20180114_173527269.jpg
    145.1 KB · Views: 76
  • IMG_20180114_173548840.jpg
    IMG_20180114_173548840.jpg
    145.8 KB · Views: 73
  • IMG_20180118_184801085.jpg
    IMG_20180118_184801085.jpg
    141.5 KB · Views: 106

C_F

ALLIANCE MEMBER
Joined
Jan 21, 2005
Messages
9,675
Location
Utah...SNOW BLOWS!
Glad your hole saw cut well. Sometimes it ***** buying expensive tools, especially when you won't use them much...but if the end result is a nicely completed job, then it's worth it. :)

The lights look nice!
 
OP
C

camarosrus69

Well-known member
Joined
Aug 7, 2013
Messages
243
Location
South central Kansas
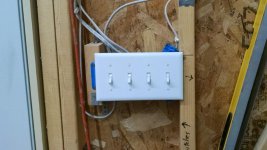
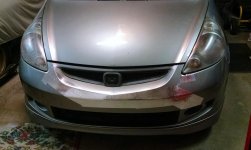
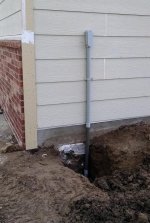
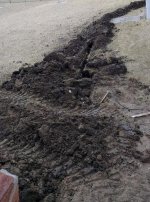
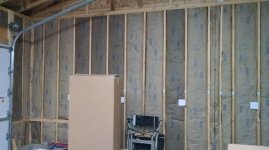
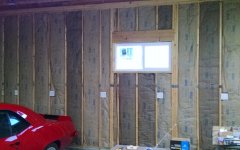
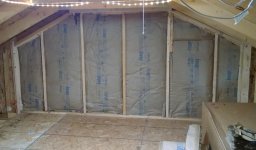
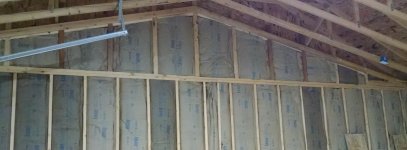
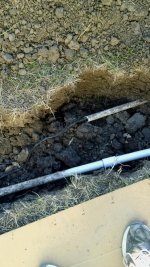
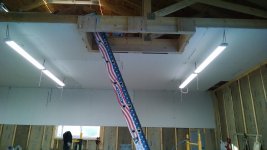
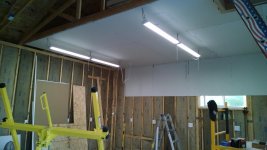
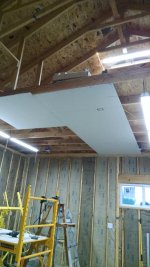
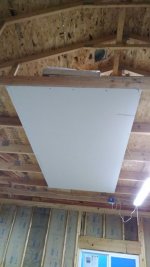
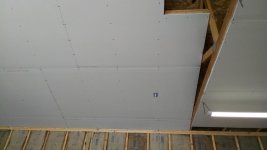
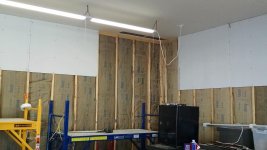
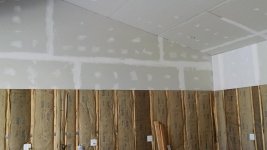
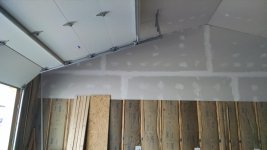
The electrons are flowing! As mentioned, the electricians arrived as (re)scheduled, on Monday morning. It was an occasionally drizzly, snowy day with temps in the upper 30s. But they forged ahead, with one running the trencher and laying conduit, and two others in the garage and house. By 3:00 pm, I had what you see here. The next day, I had the opportunity to perform my first car repair in the garage. Someone backed into my daughter's Fit, cracking the front bumper. Brittle plastic is an unfortunate side affect of the cold temps. I washed the front end and then rolled it into the new garage, because there's more room, better light, and that's where the heater is. I wiped it down again, made sure it was dry, and then carefully pushed it back together and taped it up with aluminum tape. This is just like the tape that we use at work to hold stuff onto the outsides of planes, during flight tests. I'm sure it will hold long enough to get the new bumper (which arrived today) painted. That's the nicest looking redneck repair job I've ever done.
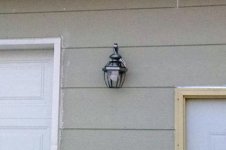
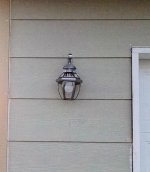
I spent today finishing up some odds and ends in preparation for the framing and electrical inspection on Monday. I tightened down all of the outlets and added the covers. I also installed the outside outlet on the back of the garage. I did experience one anomaly. One of the the GFCIs started buzzing, and then popped and wouldn't reset. I checked the wiring and found no errors, and then replaced it with a spare GFCI that I had in the house. That one is working fine. So tomorrow I'm taking this one back for a replacement. The spare is the wrong color and is not tamper resistant.
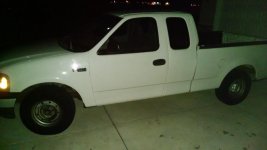
 

Attachments

  • first car repair in garage.jpg
    first car repair in garage.jpg
    146.6 KB · Views: 128
  • IMG_20180122_161211732.jpg
    IMG_20180122_161211732.jpg
    147.8 KB · Views: 97
  • IMG_20180122_161116380.jpg
    IMG_20180122_161116380.jpg
    146.2 KB · Views: 96
  • IMG_20180122_161037311.jpg
    IMG_20180122_161037311.jpg
    148.9 KB · Views: 87
  • IMG_20180122_161029125.jpg
    IMG_20180122_161029125.jpg
    149.7 KB · Views: 83

sean Buick 76

Well-known member
Joined
May 7, 2013
Messages
3,221
Location
Edmonton Alberta
Nice progress, it looks great! I also have my plugs like that... An electrician told me it’s the correct way to put them, who knows. I like how it’s easier to plug things in as you can see the ground...
 

C_F

ALLIANCE MEMBER
Joined
Jan 21, 2005
Messages
9,675
Location
Utah...SNOW BLOWS!
Yay, you have power to the garage!:rocker:

Nice work on the temporary bumper repair too, that tape looks like it sticks really well.
 
OP
C

camarosrus69

Well-known member
Joined
Aug 7, 2013
Messages
243
Location
South central Kansas
Quick update tonight. Inspector came on Thursday. I passed the framing, electric service, electric rough-in, and electric final. If I had the door seal on the big garage door, I would have passed final inspection as well. Didn't expect that. So I've got tomorrow to put in insulation, before the weather goes to hell again. Menards has a really good sale on drywall thru Saturday, so I'm planning on snagging about 56 sheets. I think that will take of everything that isn't pegboard or plywood. That also takes care of my big rebate check. No more "free" stuff, until the next rebate checks arrive. I'll get the door seal while I'm at it, then I won't have to worry about inspectors anymore. Ill post some pics, when the insulation is in, on Sunday.
 
Last edited:
OP
C

camarosrus69

Well-known member
Joined
Aug 7, 2013
Messages
243
Location
South central Kansas
Took a big bite out of the insulation job this weekend. Had to stop at about 2:30 this afternoon because I ran out of propane, and it was about 16 outside and 30 inside the garage. I still have the skinny pieces and and little pieces left to do. I like to say it felt warmer, but that would be an alternative fact. :) Tomorrow, I get to go pick up the drywall, a couple sheets of plywood, some 2x4s, and the garage door moulding. Oh yeah, and some propane.
 

Attachments

  • Insul6.jpg
    Insul6.jpg
    146.7 KB · Views: 97
  • insul5.jpg
    insul5.jpg
    150 KB · Views: 107
  • Insul4.jpg
    Insul4.jpg
    140.7 KB · Views: 115
  • Insul3.jpg
    Insul3.jpg
    138.4 KB · Views: 134
  • Insul2.jpg
    Insul2.jpg
    145.6 KB · Views: 117
  • insul1.jpg
    insul1.jpg
    144.2 KB · Views: 119

NoPressure

Well-known member
Joined
Jul 1, 2011
Messages
182
Location
Hazel Green, AL
Jealous. I tried to have a shop built last year and it turned into a major s$*t show. Ended up getting my down payment back and gave up on building one for awhile. Nice car btw. I’ve got an 01 SS with a 4.8 ls and 76mm turbo. It’s red and black also.
 
OP
C

camarosrus69

Well-known member
Joined
Aug 7, 2013
Messages
243
Location
South central Kansas
Sorry to hear about your shop issues, Nopressure. Keep trying. and thanks. I'm curious why you would go from a 5.7 to 4.8 ls engine. John, it is safe and dry in the trunk, but you're right, it should be on the car. As I said before I need to clean the car first, and when I was doing the insulation, I needed to move the car back and forth to get it out of the way. That would have been tougher with the cover in place.
 
OP
C

camarosrus69

Well-known member
Joined
Aug 7, 2013
Messages
243
Location
South central Kansas
Here's an update from this weekend. Doesn't look a lot different than than the last set of pictures, but the gaps are filled in. Also, there is a stack of drywall on the floor. I have 3 rolls of insulation to take back to trade for some 24 inch wide stuff for the high areas of the end walls.
 

Attachments

  • insul2.1.jpg
    insul2.1.jpg
    139 KB · Views: 59
  • insul2.2.jpg
    insul2.2.jpg
    142.7 KB · Views: 57
  • insul2.3.jpg
    insul2.3.jpg
    140 KB · Views: 58
  • insul2.4.jpg
    insul2.4.jpg
    144 KB · Views: 64
  • insul2.5.jpg
    insul2.5.jpg
    146.2 KB · Views: 59
  • insul2.7.jpg
    insul2.7.jpg
    147.7 KB · Views: 56
  • insul2.6.jpg
    insul2.6.jpg
    151 KB · Views: 58
OP
C

camarosrus69

Well-known member
Joined
Aug 7, 2013
Messages
243
Location
South central Kansas
Just a few pics of the last bit of wall insulation,and the temporary deck over the lift pit. I needed to do that so scaffold wouldn't fall in the hole while i was sheet rocking the ceiling. I've also started to install the attic ladder, so far all I have is a hole in the attic floor and one of the cross braces made. At work, I'm in the midst of an online surplus auction. On the block are 6 good quality overhead cabinets. If you look at my sketchup model, you'll notice I have something similar running along the wall. The price is still below my theoretical limit and the bidding ends at midnight tomorrow. I'll throw in my final offer at the COB tomorrow and find out Friday if I won. I hope no one on second shift wants them. Wish me luck.
 

Attachments

  • IMG_20180225_124106324.jpg
    IMG_20180225_124106324.jpg
    122.9 KB · Views: 73
  • IMG_20180224_192127626.jpg
    IMG_20180224_192127626.jpg
    89.1 KB · Views: 67
  • IMG_20180218_180358391.jpg
    IMG_20180218_180358391.jpg
    146.7 KB · Views: 68
  • IMG_20180218_134158512.jpg
    IMG_20180218_134158512.jpg
    146.4 KB · Views: 79

NWOhioChevyGuy

Well-known member
Joined
Feb 20, 2007
Messages
1,933
Location
Buckeye Hill (Morenci, MI)
My 02 SS will get a home this summer.

Can't wait to be able to keep her at home during the winter months.

Nice garage. I will likely do like you and hire the concrete & framing and finish by myself and with Beer money / buddies.
 
To avoid these ads, REGISTER NOW!
OP
C

camarosrus69

Well-known member
Joined
Aug 7, 2013
Messages
243
Location
South central Kansas
Where does the time go? As you can see it has been a while since I last updated this thread. I have been working on it steadily all year, and as of this writing, I have finished the outside, and completed the inside to the point of completing the insulation, sheetrock, mud and tape and sanding, and the interior is ready for paint. I have purchased all of the big parts still to be installed. Namely, the compressor, the lighting, the lift, the AC, and the garage door opener. The only big ticket item left to purchase is the concrete work for the lift pit. I have also taken pictures along the way, and plan is to, over the next several posts, bring you up to speed visually.
 
Last edited:
OP
C

camarosrus69

Well-known member
Joined
Aug 7, 2013
Messages
243
Location
South central Kansas
As you might remember from my comment a couple posts up, (10 months ago) I was bidding on some overhead cabinets. As it turns out, I won. Here is a couple shots of one of them. I ended up getting 10 more, along with a workbench and a tall cabinet. The workbench and cabinet need some work, but the price was right.
 

Attachments

  • IMG_20180310_211248627.jpg
    IMG_20180310_211248627.jpg
    63.5 KB · Views: 95
  • IMG_20180310_211335101.jpg
    IMG_20180310_211335101.jpg
    102.5 KB · Views: 108
OP
C

camarosrus69

Well-known member
Joined
Aug 7, 2013
Messages
243
Location
South central Kansas
Some of the stuff that ate up my time. This is the repair work I had to perform on the sprinkler system, after the electrical installation tore it all up. It became first priority. to keep the rest of the yard from dying.
 

Attachments

  • IMG_20180317_185006269.jpg
    IMG_20180317_185006269.jpg
    132.9 KB · Views: 60
  • IMG_20180317_184948971.jpg
    IMG_20180317_184948971.jpg
    147.9 KB · Views: 63
  • IMG_20180317_184907181.jpg
    IMG_20180317_184907181.jpg
    148.2 KB · Views: 65
  • IMG_20180317_184018345.jpg
    IMG_20180317_184018345.jpg
    145.6 KB · Views: 69
Last edited:

C_F

ALLIANCE MEMBER
Joined
Jan 21, 2005
Messages
9,675
Location
Utah...SNOW BLOWS!
That reminds me, I need to do some of my own sprinkler fixing next spring. A tree root has broken one of the main lines in the back yard.

I hope you and your family had a great Christmas, and will have a happy new year! :beer:
 
OP
C

camarosrus69

Well-known member
Joined
Aug 7, 2013
Messages
243
Location
South central Kansas
Thanks CF. Hope your Christmas went well also. You must have had a nice impromptu fountain in your yard. The trickiest part of the repair was splicing 6 feet of wire to the main valve box. The wires in the box were faded and the colors were indecipherable. the wires were in a tube underground and I came up with a convoluted solution using multiple tube diameters and a sliding union to get everything all sealed up. Once again I spent lots of time instead of lots of money to do the repair, which is why I'm still not done.
 
OP
C

camarosrus69

Well-known member
Joined
Aug 7, 2013
Messages
243
Location
South central Kansas
And finally, the sheetrock started going up. When you have 50+ sheets of drywall in your way, you have two choices. Move them, or figure out a way to work around them. Having already moved them a couple times, I chose the latter.
 

Attachments

  • IMG_20180504_194343327.jpg
    IMG_20180504_194343327.jpg
    116.8 KB · Views: 105
  • IMG_20180504_194336331.jpg
    IMG_20180504_194336331.jpg
    125.8 KB · Views: 109
  • IMG_20180422_175348461.jpg
    IMG_20180422_175348461.jpg
    148.7 KB · Views: 106
  • IMG_20180422_175354220.jpg
    IMG_20180422_175354220.jpg
    147 KB · Views: 108
  • IMG_20180415_200405720.jpg
    IMG_20180415_200405720.jpg
    80.7 KB · Views: 102
  • IMG_20180412_201054307.jpg
    IMG_20180412_201054307.jpg
    54.3 KB · Views: 106
OP
C

camarosrus69

Well-known member
Joined
Aug 7, 2013
Messages
243
Location
South central Kansas
Another unplanned expense, or should I say, investment came up. This was another auction item I came across at work. Since I didn't have a truck, I was becoming "that guy" that was always needing to borrow or rent a truck to haul something big home for this project. It's a beast, but it's also straight and rust free, so I hope I can get my money back out of it when I'm done.
 

Attachments

  • IMG_20180525_214413962.jpg
    IMG_20180525_214413962.jpg
    79.2 KB · Views: 89
OP
C

camarosrus69

Well-known member
Joined
Aug 7, 2013
Messages
243
Location
South central Kansas
Next, I tackled the vaulted ceiling. To give you perspective, the first picture is looking south, and then I spun clockwise to get the whole ceiling, that is done, to this point.
 

Attachments

  • IMG_20180610_152411481.jpg
    IMG_20180610_152411481.jpg
    101.3 KB · Views: 70
  • IMG_20180610_152358510.jpg
    IMG_20180610_152358510.jpg
    87.3 KB · Views: 72
  • IMG_20180610_152347375.jpg
    IMG_20180610_152347375.jpg
    81.8 KB · Views: 67
  • IMG_20180610_152342806.jpg
    IMG_20180610_152342806.jpg
    91.5 KB · Views: 67
  • IMG_20180610_152338092.jpg
    IMG_20180610_152338092.jpg
    79.5 KB · Views: 69
Last edited:
OP
C

camarosrus69

Well-known member
Joined
Aug 7, 2013
Messages
243
Location
South central Kansas
At this point it is mid June, and I am still under the foolhardy belief that I can get the ceiling insulated and get the AC installed before the real heat of summer arrives. I have the attic ladder installed and am refocusing on the walls.
 

Attachments

  • IMG_20180617_181548675.jpg
    IMG_20180617_181548675.jpg
    104.6 KB · Views: 74
  • IMG_20180617_181620013.jpg
    IMG_20180617_181620013.jpg
    138.5 KB · Views: 98
  • IMG_20180617_181625140.jpg
    IMG_20180617_181625140.jpg
    143.2 KB · Views: 87

Toothaker

Well-known member
Joined
Nov 25, 2016
Messages
1,367
Location
Wichita, Kansas
Another unplanned expense, or should I say, investment came up. This was another auction item I came across at work. Since I didn't have a truck, I was becoming "that guy" that was always needing to borrow or rent a truck to haul something big home for this project. It's a beast, but it's also straight and rust free, so I hope I can get my money back out of it when I'm done.

Now that's funny. The Camaro guy buys an F150.

It's ok, this Ford guy drives a GMC Sierra.:lol_hitti

Greetings from another resident of the Air Capital.
 

Bears Fan

Well-known member
Joined
Jan 26, 2012
Messages
3,438
Location
Indiana
Its been a while since I have checked in! looks like the garage is coming along, great job! looks awesome :thumbup: :thumbup:
 

Toothaker

Well-known member
Joined
Nov 25, 2016
Messages
1,367
Location
Wichita, Kansas
The sheetrocking looked like you were making good progress.:thumbup: These were taken this summer? Hopefully more to come...

Many moons ago I tried putting up rock on a ceiling without the right tools, and I swore 'never again'. And seeing someone who has the tools and knows how to do it, I still don't want to hang sheetrock.:)
 
OP
C

camarosrus69

Well-known member
Joined
Aug 7, 2013
Messages
243
Location
South central Kansas
Toothaker, like you, I planned to stay in my familiar car family, but couldn't find one that I liked, in my price range. As far as Fords go, this is my favorite truck body style. I think they're all trying too hard to look like big rigs these days. As far as the sheet rock goes, I may have had the right tools, but that only made me hate it slightly less. That tall ceiling was a major PITA. I was only averaging a couple sheets a day, so it took me a month to get it all hung.
Nice 'Bird, by the way.

Bears Fan, Thanks for checking in. I'm trying to get caught up with the photos that I've taken to date. It will take several posts. I've promised/threatened myself to get paint on the ceiling before the end of the year. Hopefully that will happen tomorrow. But you guys probably won't see it till next year.
 
Last edited:
OP
C

camarosrus69

Well-known member
Joined
Aug 7, 2013
Messages
243
Location
South central Kansas
Sheet rock going up on the walls. It's amazing how fast it seems to be going in the pictures. In fact, there are some things going on, that I didn't photograph. I spent several evenings adding hurricane straps, and blocking to the ends of the trusses, to keep the insulation from sliding into the eaves.
 

Attachments

  • IMG_20180626_171853879.jpg
    IMG_20180626_171853879.jpg
    141.6 KB · Views: 59
  • IMG_20180626_171848531.jpg
    IMG_20180626_171848531.jpg
    119.9 KB · Views: 61
  • IMG_20180626_171834969.jpg
    IMG_20180626_171834969.jpg
    120.5 KB · Views: 67
  • IMG_20180621_194741333.jpg
    IMG_20180621_194741333.jpg
    86.1 KB · Views: 67
  • IMG_20180620_200106430.jpg
    IMG_20180620_200106430.jpg
    119.9 KB · Views: 68
OP
C

camarosrus69

Well-known member
Joined
Aug 7, 2013
Messages
243
Location
South central Kansas
These pics look a lot like the last batch, except there is more mud on the joints. The mudding started a little early because my daughter wanted to help, so I had her start taping the joints with sticky backed mesh tape. With the heat and humidity, it started working loose in a couple places. so I threw some mud at it to seal it in place.
 

Attachments

  • IMG_20180630_154241422.jpg
    IMG_20180630_154241422.jpg
    122.8 KB · Views: 50
  • IMG_20180630_154232384.jpg
    IMG_20180630_154232384.jpg
    101.9 KB · Views: 46
  • IMG_20180630_154229396.jpg
    IMG_20180630_154229396.jpg
    94.5 KB · Views: 49
  • IMG_20180630_154226619.jpg
    IMG_20180630_154226619.jpg
    111.8 KB · Views: 48
Last edited:
OP
C

camarosrus69

Well-known member
Joined
Aug 7, 2013
Messages
243
Location
South central Kansas
Had to temporarily switch gears. The HOA sent me a nasty gram about the garage not being painted yet. One of my problems was that I couldn't find the color for the trim at Sherwin Williams, where we got the paint originally, many years ago. I finally found some leftover from a storm door project, and now it is preserved forever on this forum.:) I was also hoping for cooler weather. This is right at the Fourth of July, so I took a couple extra days off and got the damn thing painted. Happy now, HOA?
 

Attachments

  • IMG_20180707_102406100.jpg
    IMG_20180707_102406100.jpg
    81.4 KB · Views: 80
  • IMG_20180707_203728615.jpg
    IMG_20180707_203728615.jpg
    139.2 KB · Views: 96
OP
C

camarosrus69

Well-known member
Joined
Aug 7, 2013
Messages
243
Location
South central Kansas
I turned my attention toward the attic. My goal was to get the blown in insulation, blown in, and seal off the upper area from the lower, to keep some of the heat out. The attic was triple digit temps, and easily twenty degrees hotter than ambient. I framed out the access ladder and added a squirrel cage fan to exhaust hot air from the occupied space to the roof area and out thru the roof vents, like a whole house fan. the green straps you see, are holding up a temporary platform cantilevered out from, and screwed to, the attic floor.
 

Attachments

  • IMG_20180729_184507011.jpg
    IMG_20180729_184507011.jpg
    105.5 KB · Views: 62
  • IMG_20180729_184332569.jpg
    IMG_20180729_184332569.jpg
    135.2 KB · Views: 59
  • IMG_20180729_184317686.jpg
    IMG_20180729_184317686.jpg
    127.8 KB · Views: 58
  • IMG_20180729_184314024.jpg
    IMG_20180729_184314024.jpg
    146.6 KB · Views: 58
  • IMG_20180721_145421782.jpg
    IMG_20180721_145421782.jpg
    122.6 KB · Views: 60
  • IMG_20180721_145401076.jpg
    IMG_20180721_145401076.jpg
    149.6 KB · Views: 60
  • IMG_20180721_145149220.jpg
    IMG_20180721_145149220.jpg
    51.4 KB · Views: 62
OP
C

camarosrus69

Well-known member
Joined
Aug 7, 2013
Messages
243
Location
South central Kansas
Moving along, we're up to September. I managed to blow in the cellulose insulation over the Labor Day weekend, starting at 10:00 PM Saturday night and finishing at about 4:00 AM Sunday morning, to avoid the heat. Coincidentally, I wasn't in the mood to take pictures when I finished, so you'll just have to take my word for it. With the insulation in, the shop was noticeably cooler. Of course, we were past the major heat of the summer. As a consequence, I noticed that the mini split heat pump I wanted, went on an end of season sale, so it was time to buy. With the insulation in, I was able to finish sheet rocking the attic and, put in the end wall of the attic. Then it was back to mudding and taping. Arrrrrgh!
 

Attachments

  • IMG_20181104_185120971.jpg
    IMG_20181104_185120971.jpg
    102.2 KB · Views: 59
  • IMG_20181007_172039562.jpg
    IMG_20181007_172039562.jpg
    69.6 KB · Views: 49
  • IMG_20180927_195107664.jpg
    IMG_20180927_195107664.jpg
    92.3 KB · Views: 51
  • IMG_20180925_153628143.jpg
    IMG_20180925_153628143.jpg
    149 KB · Views: 62
  • IMG_20180911_163047144.jpg
    IMG_20180911_163047144.jpg
    102.4 KB · Views: 45
  • IMG_20180911_163037418.jpg
    IMG_20180911_163037418.jpg
    91 KB · Views: 48
  • IMG_20180911_163021546.jpg
    IMG_20180911_163021546.jpg
    40.4 KB · Views: 47
OP
C

camarosrus69

Well-known member
Joined
Aug 7, 2013
Messages
243
Location
South central Kansas
I got the rear rain gutter installed, and the AC compressor pad poured. Another big purchase. I'd been watching the price on the Atlas FM9SL Scissor Lift from Greg Smith, since before I started this project. The price went up a couple hundred bucks early in year, then again this summer due to some happy "tariffs". In late October, I heard about the latest round of proposed tariffs, and called the company to see if they would be affected. She indicated that the newest tariffs would not affect their price. Well, wouldn't you know it, two weeks later the price went up again. I called them up again and got the same woman. She apologized and said she wasn't aware of the latest increase and since I talked to her before the increase, that they would honor the previous price for me. I wasn't ready for it, but decided to get it before I couldn't afford it. These last shots were taken around Thanksgiving, after the second coat of mud was applied,and sanding had started.
 

Attachments

  • IMG_20181125_094237537.jpg
    IMG_20181125_094237537.jpg
    104.3 KB · Views: 69
  • IMG_20181125_094224598.jpg
    IMG_20181125_094224598.jpg
    103.6 KB · Views: 59
  • IMG_20181125_094221068.jpg
    IMG_20181125_094221068.jpg
    72.8 KB · Views: 64
  • IMG_20181125_094149306.jpg
    IMG_20181125_094149306.jpg
    86.3 KB · Views: 62
  • IMG_20181107_190839093.jpg
    IMG_20181107_190839093.jpg
    111.9 KB · Views: 73
  • IMG_20181023_181022311.jpg
    IMG_20181023_181022311.jpg
    149 KB · Views: 66
  • IMG_20181023_181058612.jpg
    IMG_20181023_181058612.jpg
    140.4 KB · Views: 62
To avoid these ads, REGISTER NOW!
Top Bottom