To avoid these ads, REGISTER NOW!

Latest (pay) project: Rusty 66 Ford Truck

djd99

Well-known member
Joined
May 4, 2009
Messages
1,006
Location
Owosso,Michigan
I don't want to offend but have to ask. Wouldn't it have been easier to find a cab in better shape?? Seems like your building a new one out of pieces anyway.
Just wondering.

I wouldn't think it would be that easy to find a solid southern cab as most were scrapped when the price of steel shot up. My cousin down in north carolina had a friend who own a junk yard with lots of old car and truck parts and when the price of steel went to a all time high he scrapped it all, what a shame.
 
To avoid these ads, REGISTER NOW!

Stuart in MN

Well-known member
Joined
Sep 8, 2005
Messages
23,159
Location
Minneapolis
I don't want to offend but have to ask. Wouldn't it have been easier to find a cab in better shape?? Seems like your building a new one out of pieces anyway.
Just wondering.

You can still find very clean examples of that year truck for reasonable prices, but I believe it was mentioned at the beginning of the thread that this particular truck has important sentimental value to the owner and he wanted to save it. Certainly, it would have made financial sense to find another truck from Texas or Arizona or someplace.
 
OP
E

e-tek

Well-known member
Joined
Dec 19, 2007
Messages
10,690
Location
Saskatoon, SK
Are you charging this guy by the hour or did you guys set some sort of price for the job up?

I estimated the job at 115 hrs and I charge $50 an hour. That should be pretty close. I have about 45 hrs into it now and I'm just getting it ready for paint. The paint-work and putting it together is being done elsewhere. If I find something that couldn't be seen, I have the owner back and give him options. So far I think I'm close. I always end up putting in more time, because I metal prep everything, use POR15 everywhere, etc. If I go over a bit, but there wasn't anything really missed estimating, I'll eat it. I just treat it like it was mine.

I don't want to offend but have to ask. Wouldn't it have been easier to find a cab in better shape?? Seems like your building a new one out of pieces anyway.
Just wondering.

No offense taken! We spoke about a new cab, but (a), it was his grandpa's truck, (b) it would take just as much time to swap cabs (glass, wiring, interior, paint, engine, steering, etc) and (c) another cab would still have some rust issues... so we went with this.

But, where are the pics of Mrs. eTek helping you out?

She doesn't want to get that dirty on something that aint hers!!! I'm still hoping she poses with the Challenger come spring!

You can still find very clean examples of that year truck for reasonable prices, but I believe it was mentioned at the beginning of the thread that this particular truck has important sentimental value to the owner and he wanted to save it. Certainly, it would have made financial sense to find another truck from Texas or Arizona or someplace.

Definitely could have found sound examples - even right here. plus you're right on the sentimental bit. But shipping from anywhere would have been expensive - it was mostly the labour and the originality.

Thanks for the interest guys! :beer:
 

customcab

Well-known member
Joined
May 25, 2006
Messages
115
Location
Terra Hote, Indiana
E-tek, great job on the old Slick!! A while back I did a pretty similar 64 F-100 project that was in about the same shape. They didn't make floors or mounts for those (61-64)then. I had the same rust issues with the tailgate too. One thing you might do since I see you like POR-15 is tape up all the holes and pour the whole quart of POR-15 inside the thing and roll it around, just like sealing up a gas tank. Then pour it back into the can. That way it will be painted all over. That rust never sleeps inside those darn things. keep up the pix though, I like to watch.
Good luck, Phil

4262824298_122b5f40a3_o.jpg


http://fordtruk.com/forums/album.ph...d=pic_time&sort_order=DESC&user_id=92&start=0
 
Last edited:
OP
E

e-tek

Well-known member
Joined
Dec 19, 2007
Messages
10,690
Location
Saskatoon, SK
Hey Customcab - that looks really good. Nice fab-work. Interesting - although similar - how different that part is from 64 to 66. Looks like they beefed it up over time.

I see some cuts in the body mount too - did you replace that or repair it?
 

rickairmedic

Well-known member
Joined
May 31, 2005
Messages
4,165
Location
louisville ,Ky
Etec the cabs were changed in 65 and the 65-66 cabs are actually closer to the 67-73 underneath than the 61-64 :D. 64 was also the last year for a footwell step on the cabs .


Rick
 

customcab

Well-known member
Joined
May 25, 2006
Messages
115
Location
Terra Hote, Indiana
Quote-I see some cuts in the body mount too - did you replace that or repair it?[/QUOTE]

I had to replace the front mounts too. The 61-64 (4x2) mounts are all different than the 65-79. Had to make them then. Now you can buy new ones. (Carolina Classics for one)

Later, Phil :thumbup:

4263935682_c7696c3169_o.jpg


(also-the 4x4 and the F-350's still used the cab with the step inside,till 66)
 
Last edited:

customcab

Well-known member
Joined
May 25, 2006
Messages
115
Location
Terra Hote, Indiana
I haven't seen the 61-64 cab mounts in the flesh, but I did get to see some 61-64 floorpans at the F-100 Nats a while back and they are excellent.

pair%20floors.jpg
 
Last edited:

customcab

Well-known member
Joined
May 25, 2006
Messages
115
Location
Terra Hote, Indiana
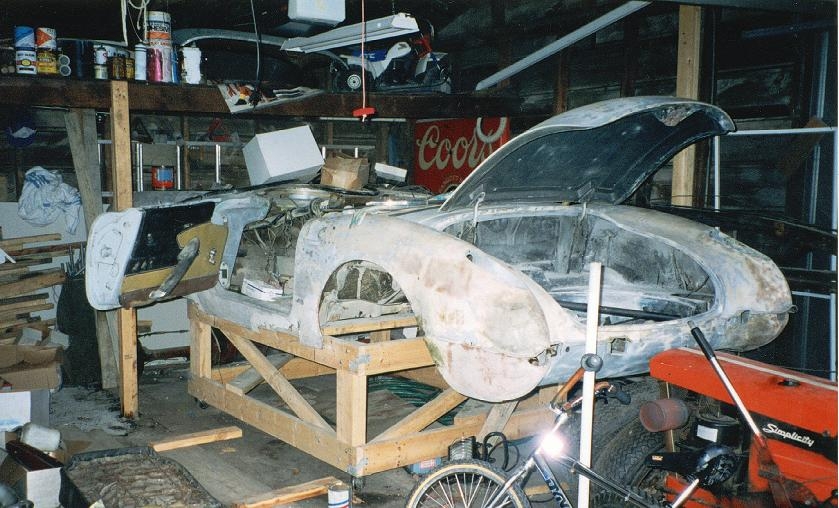
Not to hijack your thread, but here's a 55 Bird I'm helping with now. This is the biggest piece of rolling oxidation I have ever worked on. This thing had been settling down into a dirt floored shed since 1968. :shocking:


4264033132_bc90edbda7.jpg


4181233391_8dc60dce27.jpg
 
Last edited:
OP
E

e-tek

Well-known member
Joined
Dec 19, 2007
Messages
10,690
Location
Saskatoon, SK
Thanks Rick & Customcab - very interesting info!

the floors I got for this left a lot to be desired, even tho I thought they looked OK to start. I had to bend a lip along the top and they wouldn't sit flush along the entire mount - but that may have also been the mount shape. At least they where 16G!

CC - that t-bird is ROTTEN - but something that'd be a joy to return to it's former glory. Something that most everyone can see putting the time into. Did you start a thread for it somewhere? Good luck with it!77
 
Last edited:

krooser

Well-known member
Joined
Jun 3, 2005
Messages
2,377
Location
Waupaca, Wisconsin
Here's my F-100... stalled project due to poverty...

mojoslicks3.jpg


mojoshemi4.jpg


E-Tek... nice job you're doing on that old F-100... nice to have the right tools to do the job. I spent two years filling my shop with the stuff I need... after 40 years of making do without it's a good feeling.

I sorta spent the $$$ I needed to finish my truck and bought that equipment... first things first.
 
Last edited:

The Big M

Active member
Joined
Apr 16, 2007
Messages
29
Location
Rocky View County, Alberta
Great job e-tek! That rust repair is quite reminiscent of my '62 uni project. Except I was the customer, not the fabricator.

I like what you did with the lower door pillars (below the hinge pocket). For future reference though, Carolina Classics repops those parts in 14 ga steel for all 61-66 trucks. $100 US a pair. That's what I got for mine, although the guy who did the welding still had to do a fair bit of fabrication in the driver's side kick panel/toeboard area.

2d05re2.jpg


cdc8re2.jpg
 

customcab

Well-known member
Joined
May 25, 2006
Messages
115
Location
Terra Hote, Indiana
Thanks Rick & Customcab - very interesting info!
CC - that t-bird is ROTTEN - Did you start a thread for it somewhere? Good luck with it!77

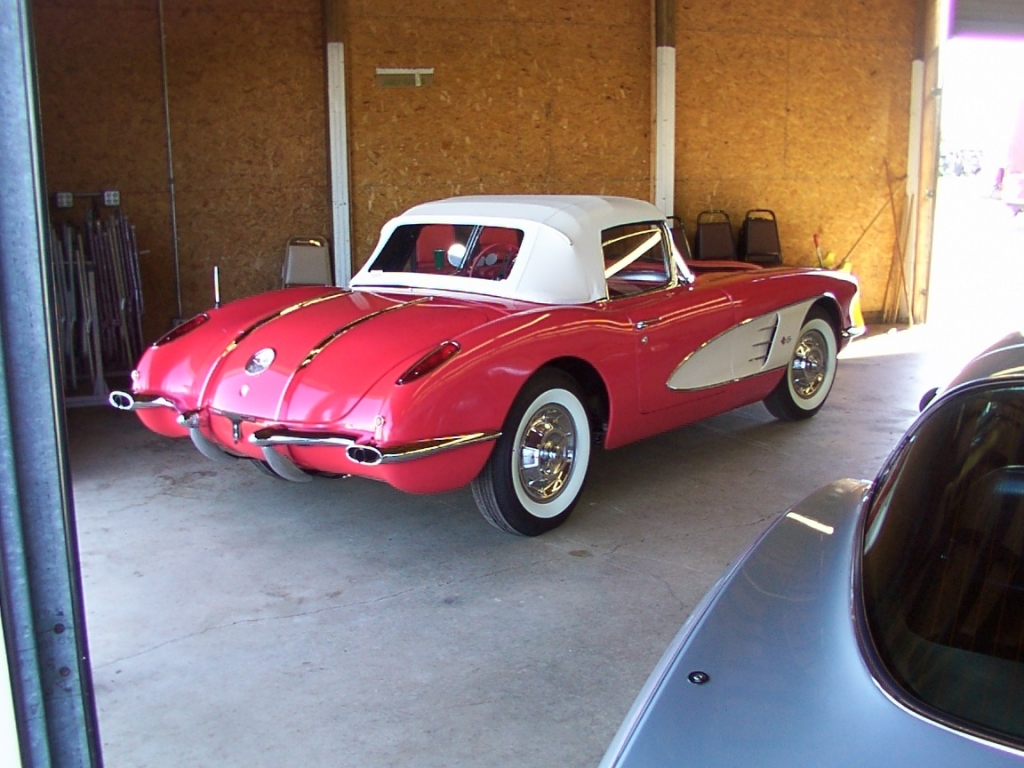
No, I need to. It will be a lengthy project. :thumbup: We finished a 58 Vette recently and were able to keep a pretty good weblog on the C1registry (for first generation Vettes). I haven't been able to find anything like that for the early Birds.

weblog_SM4559560a208ef.jpg


weblog_SM48ab7d7a345e8.jpg


Here's a link to the Registry and the weblog. It spans about 9 to 10 years of work.
http://www.c1registry.com/index.php?job=ShowWeblogs&wl_id=16&uid=1987
 
Last edited:
OP
E

e-tek

Well-known member
Joined
Dec 19, 2007
Messages
10,690
Location
Saskatoon, SK
SOME GREAT PICS ADDED BY YOU BOYS - - Great work too!

But back to the original project - sorry I haven't updated this week (computer issues), but here's a WHACK of pics from this weeks' work (the right side):

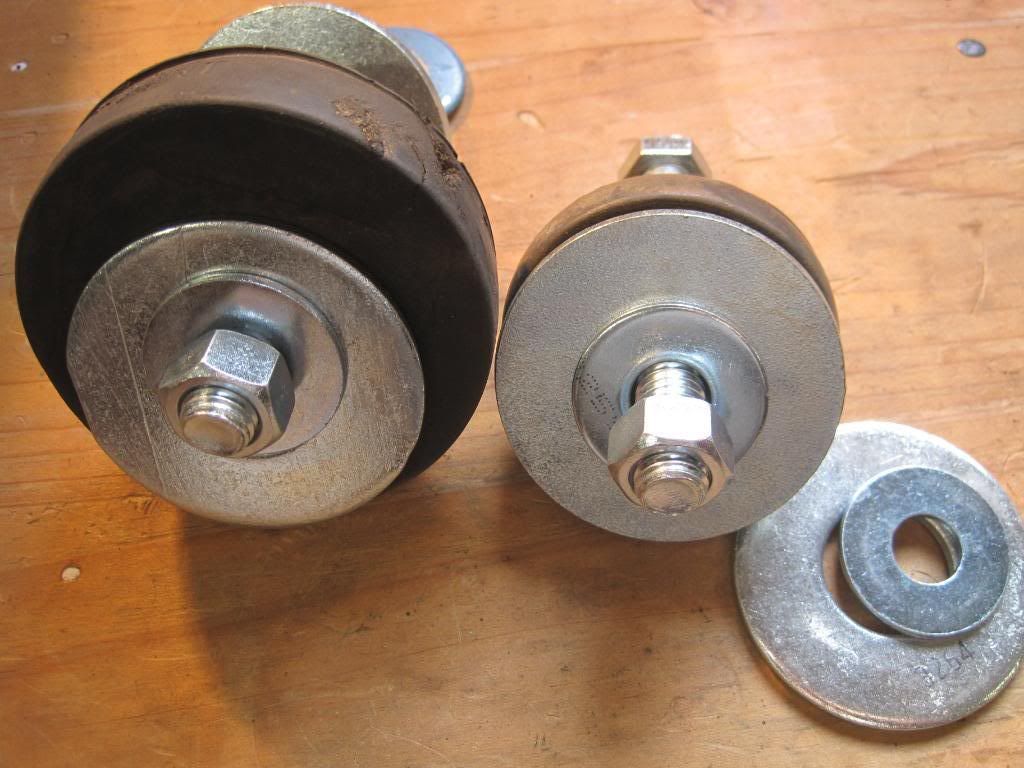
First off, you'll recall the mounts I rebuilt for the owner, because I felt new mounts where too much. I sourced the prototype pieces from my shop bins. This week, I went out and bought new hardware so it would match the level of the finished resto. Total cost $15.00.

IMG_0884.jpg


Right side with rust mostly cut out. I left those bare threads in place so that I wouldn't change any of the dimensions when fitting the pieces. Things can move really easily when your fitting - bending, welding, clamping - and you may not notice, until you try and bolt up the fenders and doors!!

IMG_0891.jpg


IMG_0892.jpg


IMG_0893.jpg


Under bench seat area I again had to cut out the floor metal and the centre support brace.

IMG_0894.jpg


Here are the pieces cut for the Right side:

IMG_0885.jpg


Priming prior to installation. I've seen many shops not primer things you can't see.:-X16

IMG_0895.jpg


Fitting....fitting....fitting....

IMG_0899.jpg


IMG_0903.jpg


IMG_0904.jpg


IMG_0908.jpg


Bending a lip in the floor pan to fit properly against the upper cab lip.

IMG_0915.jpg


IMG_0918.jpg


IMG_0920.jpg


Part way there....

IMG_0921.jpg


IMG_0923.jpg


IMG_0924.jpg


IMG_0925.jpg


Once I clean up and weld some more bits into the corner, I'll weld in the floor and do some finishing work on the area. Next on the agenda is to remove the box (already unbolted) to get at the rear cab corners. Once those are done I have the 2 holes I cut out in the box and I'll be ready to fit the front end parts back on. That'll be 90% of the metal work completed :)-missingt) and I can get to prepping it for paint. The doors require several mount-holes welded up and tomorrow the owner is bringing the fenders and rad support he sourced.

Thanks again for looking - your comments are welcomed!
 
Last edited:

willy3486

Well-known member
Joined
Jan 14, 2010
Messages
1,594
Location
Middle Tennessee
In case you need info for these I belong to a group that is dedicated to the 61-66 Ford trucks. Its at slick60s.org . I used it when I redid mine. One word of advice at far as the vent windows goes use the replacement rubber from Carpenters or a vendor that has Ford authorized replacements. These windows for the most part are fragile and will break if the rubber seals are not authorized replacements. Mine were not and they are way off, I have to buy some more since they won't seal. As far as mine goes it was almost that bad. I did all the work myself so thats why it isn't profesional looking. But It has worked out good for me and held up well.

You can see before and after at
http://good-times.webshots.com/album/569424874eCPltp

If you get true blue trucks It was in the first one and I also wrote the story about recovering a dash that just come out in the second one.
 
Last edited:
OP
E

e-tek

Well-known member
Joined
Dec 19, 2007
Messages
10,690
Location
Saskatoon, SK
To avoid these ads, REGISTER NOW!

NUTTSGT

Super Moderator
Staff member
Joined
Sep 14, 2009
Messages
51,101
Location
Northern Central Ohio
Not sure how I missed this thread, but very nice work, recording it with pics. I would assume the owner will get a copy of the pics ?


I see you like POR15. Do you open the can like normal? Have problems getting open after it dries in groove?

What I do is use 2 self tapping sheet metal screws in the bottom of the can. Run in the screws and take them back out. One on each side, one pours/the other lets the air in. Pour out what you need and put screwes back in. tip the can right side up to get POR15 on the screws and store the can upside down.

Sometimes the screws will come out for the next use sometimes they don't. If they don't, just make new holes.
 
OP
E

e-tek

Well-known member
Joined
Dec 19, 2007
Messages
10,690
Location
Saskatoon, SK
Not sure how I missed this thread, but very nice work, recording it with pics. I would assume the owner will get a copy of the pics ?


I see you like POR15. Do you open the can like normal? Have problems getting open after it dries in groove?

What I do is use 2 self tapping sheet metal screws in the bottom of the can. Run in the screws and take them back out. One on each side, one pours/the other lets the air in. Pour out what you need and put screwes back in. tip the can right side up to get POR15 on the screws and store the can upside down.

Sometimes the screws will come out for the next use sometimes they don't. If they don't, just make new holes.

The owner is watching a similar thread on FTE - Ford Truck Enthusiast - Forum. Its a service I provide for the jobs Ive done - they really like it. Gives them a permanent record and others comments help the customer know its being done right.

I LOVE POR15! Due to my interent goings on though, another company that makes rust paint found out where I lived and sent me their product as a sample - I gave it a good try and it didnt pass muster. Though it seems thereès a couple brands now that may have the same formula.

I like your idea - I just transfer it to a glass jar and use a plastic bag between the jar and lid. Ive stored it like that for nearly a year in one case - no problems.
 
OP
E

e-tek

Well-known member
Joined
Dec 19, 2007
Messages
10,690
Location
Saskatoon, SK
No updates this week boyz - had to fly to Montreal. Hopefully on Friday I can finish up the Right floor and kick panel. Then I can get to the rear cab corners! Stay tuned - and thanks for the positive feedback!
 
OP
E

e-tek

Well-known member
Joined
Dec 19, 2007
Messages
10,690
Location
Saskatoon, SK
Had a day before my next trip (Jamaica conference) so I got the drivers floor fitted and welded in.

Trimmed the pan again - little by little...

IMG_1016.jpg


IMG_1013.jpg


Here's my metal-working station. Not quite as stout as Jack Olsens :bowdown: - but it's a good slab of hardened steel (that's what she said!). Plus I have a bunch a pieces I use for shaping and bending. This is a lip to attach the floor to the kick panel;

IMG_1007.jpg


IMG_1008.jpg


IMG_1005.jpg


IMG_1006.jpg


A little shaking on the welding - it's easy to get out of practice! Little extra grinding will make it all purdy!

IMG_1012.jpg


Interior nearly done. When I return I'll start the cab corners....

IMG_1012.jpg
 

4StarCstms

Well-known member
Joined
Mar 14, 2008
Messages
938
Location
Kentucky
Your doing a great job.. I've been thru the same thing on a couple of 73-79's...
Please don't take offense to this cause its not directed at you but... It never fails to amaze me, People will spend a boat load of cash on the drivetrain, chrome, wheels/tires but they wont spent 100 or 150 bucks for something like a set of GOOD body mount bushings. Even if they cost 2 or 3 times that..its worth it.


Okay I'm off my soapbox..
heres my 75 F250 4x4 Highboy 390FE Np435 4spd Div. NP 205 Tcase 35" tires w/o a lift
684542.jpg

595771.jpg


Heres a buddies 79 we are doing its a 79 F100 300 Inline Six, three on the tree (thou its getting a 5spd)
555870.jpg

565951.jpg

565953.jpg

635366.jpg


I'll post more indepth on those two trucks and the other shop projects in a different thread..dont wanna Hijack too much. Look forward to seeing how it turns out..
 

austin308

Active member
Joined
Oct 14, 2009
Messages
28
Wow what a great thread have had several 66 Fords over the years. Brought back some great menories thanks guys. Will share some neat tricks about these trucks with you. If you use 1967 tail lights they fit right in and gives your truck backup lights with factory ford tailights. You will need a newer ****** that also has the sender on it but buy now lots of these have newer ******'s already in them. You can also take the old plastic dash found on the custom cab and replace it with a 1964 custom cab dash it is chrome and cleans up and looks great in theses trucks. I do think you have to drill a whole in it for the flasher unit. Some of these trucks also had door pockets and arm rest if yours didn't come with it it is a nice add to look for. If you want to jump out there the engine stands can be replaced with a think it was 1968 engine stands off a small block truck and a 302 or 289 bolts in. Any way that is a few things that you can do with these trucks. Thanks
 

jktruck150

Well-known member
Joined
Oct 19, 2009
Messages
835
Location
Outskirts of Jackson, MS.
You know, the art of rust replacement is long gone. I know where I am from, finding cars like this f-100, the rusty t-bird, etc. is really really common and very very cheap around the southeast. Sometimes, we all have to make do with what we have. E-tek, thanks for showing all the pictures. More than likely, I will be doing the same thing because a rust bucket is all that can be found on an empty bucket. Good luck with it and send up more pictures. I am surprised you have so few hours in this project. I would have looked at it and told myself about a 1500 hour job, and you estimate 115!! Shows you have a great artistic ability!! Keep it up!
 

tyrell2004

Well-known member
Joined
Feb 27, 2009
Messages
116
Drove by this gal and thought of you old truck guys. I thought she was up for adoption but when I went by to take these pics, the sign was gone.
Located in Santa Paula Ca.
 

Attachments

  • Studebaker.jpg
    Studebaker.jpg
    148.8 KB · Views: 72
  • Studebaker-2.jpg
    Studebaker-2.jpg
    136.3 KB · Views: 63
  • Studebaker-3.jpg
    Studebaker-3.jpg
    150.9 KB · Views: 63

6 Grrrs

Well-known member
Joined
Nov 29, 2008
Messages
143
Location
Greensburg, PA
Drove by this gal and thought of you old truck guys. I thought she was up for adoption but when I went by to take these pics, the sign was gone.
Located in Santa Paula Ca.

I used to have one just like it, but green. I wish I still had it. Mine was a '51.

Stude trucks make nice little street rods. None of them left around these parts.
 

VHF

Well-known member
Joined
Oct 27, 2008
Messages
420
Location
NW Wisconsin
My first vehicle was a '66 F100. Dark green, 300 cu in, 3-on-the-tree. Dad bought it new, always stored it in the barn, and treated it very gently--he always had a layer or two of cardboard in the bed when hauling something. He gave it to me my senior year of high school in near-mint condition with 29,000 miles on it. I'll have to see if I can dig up a picture.

Mine was a standard cab with heavy duty black vinyl bench seat--Dad ordered it special because all the used trucks he had looked at had worn seats. Had the optional oil pressure gauge and ammeter (in addition to the idiot lights surrounding the speedometer.) Added a digital clock/tachometer from Radio Shack under the dash. Also a Radio Shack intermittent wiper delay.

No factory radio. I had a cassette deck and speakers under the seat--I was not going to cut into that nice metal dash to install a stereo!

If you use 1967 tail lights they fit right in and gives your truck backup lights with factory ford taillights. You will need a newer ****** that also has the sender on it...

The '67s with a 3-speed didn't have the switch in the ******--instead they added a button switch where the shift linkage attached at the bottom of the steering column (under the hood). I emulated this design to add backup lights to my '66, but rather than swap the taillights, I mounted a couple of white fog lights to the rear. This was after I backed into a dark colored car one night backing out of a friend's driveway... I didn't see it at all, and suddenly felt an obstruction. Did $600 damage to the guys fender, no damage to my F100!

Sadly, I only had the truck a couple years. One day a lady in a Caddy pulled out from a side street right in front of me while I was doing 45mph. Hit the left front fender of her car and pushed it down the road sideways 30 or 40 feet. Fortunately for her I didn't hit the driver's door! There were parts of her engine sticking out the other side of her car. Front of my truck was bashed in, and the frame rails were cracked. Totaled. Being young and stupid, I settled for $1,800 with her insurance company. Found out later similar trucks were selling for $3,750 at auction. Went and bought a '78 Mustang II (like I said, young and stupid!)
 
Last edited:

zkslawn

Well-known member
Joined
Jan 23, 2010
Messages
53
WOW.. just wow.. i just read this whole thread and it deff proves to me that i can take an old rust bucket and make it nice again.. ill deff be following this thread
 
OP
E

e-tek

Well-known member
Joined
Dec 19, 2007
Messages
10,690
Location
Saskatoon, SK
WOW.. just wow.. i just read this whole thread and it deff proves to me that i can take an old rust bucket and make it nice again.. ill deff be following this thread

First: many thanks for the kind words :bowdown:. It's a pleasure to take the time to post up the pics when they're appreciated. :thumbup:

As per the several comments on people being able to save "rust buckets" - YES YOU CAN! Just take your time, cut little by little (and in straight lines).

Cheers!
 
OP
E

e-tek

Well-known member
Joined
Dec 19, 2007
Messages
10,690
Location
Saskatoon, SK
OK BOYS - I'm BACK!!!!!! After over a month of travelling (new job) I was READY to git back in my shop. Today I did a bunch of welding and grinding on this 66, plus pulled the bumpers off my Galaxie to have them re-chromed. By the end of the day today, I polished off another bottle of MIG-mix....think I'd better get the BIG bottle this time!

First up was to fab-up and weld one last piece for the Left cab corner rebuild:

IMG_1312.jpg


IMG_1313.jpg


IMG_1315.jpg


IMG_1321.jpg


IMG_1322.jpg


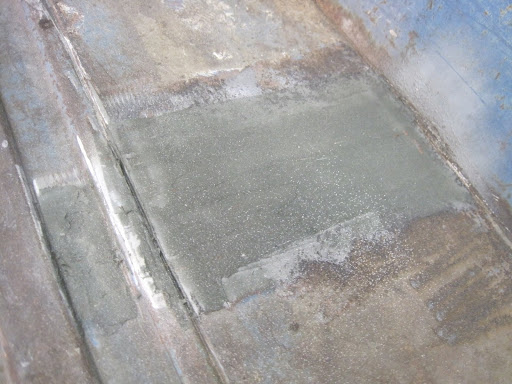
Cleaned up the floor welds to prep for some fibre-glass filler:

IMG_1317.jpg


IMG_1318.jpg


Next items on the agenda are the rear cab corners.I'm guessing 2-3 days each.....

IMG_1323.jpg


More to come!:beer:
 

MP&C

Well-known member
Joined
Oct 21, 2009
Messages
4,405
Location
Leonardtown, MD
E-tek, don't know where you are with finding a FH engine, but a local guy here pulled out a rebuilt FH Lincoln to install a 332 Y block Lincoln in his Big Job Ford. Don't know if the Lincoln FH would mate to the Mercury Bell housing??
 
OP
E

e-tek

Well-known member
Joined
Dec 19, 2007
Messages
10,690
Location
Saskatoon, SK
The owner brought over a rad support and a couple fenders. Although I had originally told him not to have them blasted, once I saw them I thought better of it (can you say RUFF?!)....so while he gets them cleaned up, I'll continue with the metal work. (Sorry Jim!:beer:)

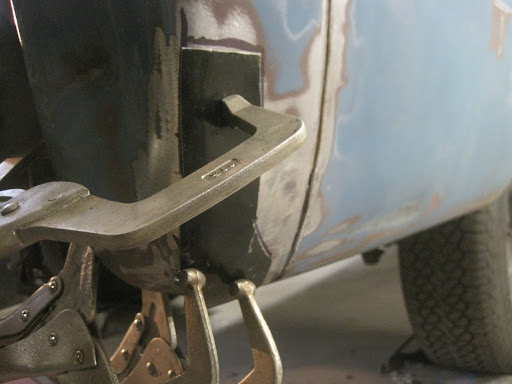
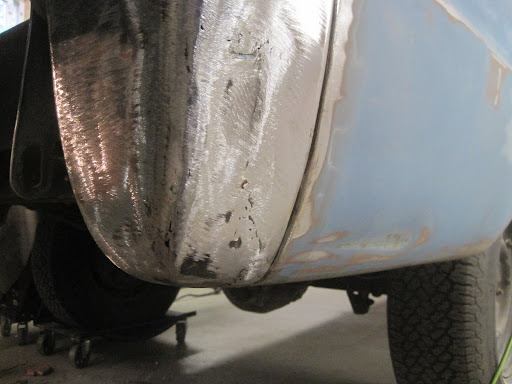
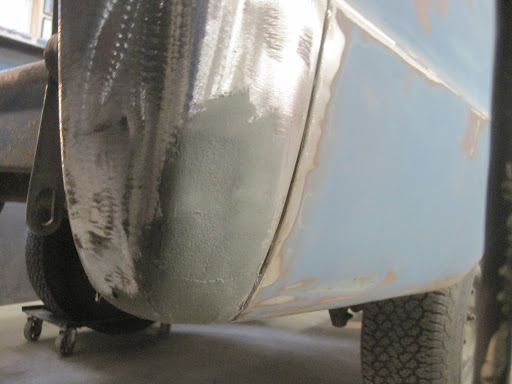
Even though the rebuilt front cab corners won't be seen, I hate to have it look like a patch-work quilt of metal and weld - so I skimmed it with some fiber-glass bondo ("kitty hair"). This will also help keep any water off the new metal and help it all last for at least another 40 years!

IMG_1335.jpg


IMG_1337.jpg


A initial skim of kitty hair over the welds on the floor patch and a quick grind down will help ensure any final filler put down will not crack and fall out when the cab flexes...

IMG_1336.jpg


If you look back a bit, you'll see how this area was rusted above the seam. I cut it out and patched the upper portion prior to welding the cab mount on.(Also added some kitty hair here to keep water off the repair)

IMG_1339.jpg


I noticed a few hair-line cracks in the bondo on the cowl side. From previous experience I knew this was a good sign of something (bad) happening under the filler. Sure enough, once I ground the 1/2" (!) of filler out, I found some brazed holes - likely from a slide hammer repair. This used to be a common repair method - before MIG came along - but often the brass would flex, causing the filler to crack...this will have to be ground out and re-welded. I'll also try and bring the metal out a bit to decrease the amount of fill that has to be re-applied.

IMG_1346.jpg


Last thing I did was to stip the tops of the box, as well as some other rusty spots. I wanted to get some phosphoric acid (I use Metal Ready) on here to set the rust before hitting the entire thing with the DA sander.

IMG_1347.jpg


One thing I haven't mentioned is the inner portions of the rear cab corners. Altough we have the outers - and I did estimate time for them, I didn't add anything for the inner skin. Due to not wanting to feel overwhelmed (!) I guess I just kept ignoring it! I also hate to seem like I'm "adding on" to the repair costs...I guess that's why I don't "make a living" off this kind of work - I'm not ruthless enough!! Can you say: "SEE THROUGH"!:wtf:

IMG_1348.jpg
 
OP
E

e-tek

Well-known member
Joined
Dec 19, 2007
Messages
10,690
Location
Saskatoon, SK
Time to tackle those corners....

First up was to cut out the finely fabricated aluminum siding patches....

IMG_1377.jpg


IMG_1376.jpg


IMG_1380.jpg


Other side had some more rat-nests - looked comfy!

IMG_1381.jpg


Here's the left side patch, just cut down and placed - a good fit

IMG_1383.jpg


Next up was to fab up some pieces for the inner sides of the double-walled cab corners. Can't buy these and it's not often the entire bottom end is rusted through....

IMG_1385.jpg


The only issue was the time-intensive channels. Sure, I could have hammered the original part flat and welded on astraight piece, but I don't roll that way, so I made this form from some would scraps just to get the shape started. Then I finished them on the vice and anvil.

IMG_1387.jpg


IMG_1388.jpg


IMG_1391.jpg


IMG_1392.jpg


Etch primer on everyting before welding it up...

IMG_1395.jpg


Not bad I guess...for a part no-one will ever see!

IMG_1397.jpg


Now for this mess. It was a toss up between cutting it all out and trying to make a new piece, or making smaller bits and fill-welding it. I always like to save original parts where I can,becuase (a) they're original, (b) they fit, and (c) it can be faster - sometimes....

IMG_1398.jpg


IMG_1399.jpg


IMG_1405.jpg


IMG_1401.jpg


I held little pieces up in behind to back-up my welds to fill the holes.

IMG_1402.jpg


IMG_1407.jpg


Grind out the thin stuff first...

IMG_1404.jpg


IMG_1403.jpg


IMG_1406.jpg


Grind-fill-grind-fill-grind until done...

IMG_1411.jpg


IMG_1416-1.jpg


IMG_1420-1.jpg


Now the outer piece get welded on. I have started using plug welds where I can becuase it helps keep the panel flatbefore welding the seam.

IMG_1412.jpg


Some grinding and a skiff of fill and she's done (the "metal work" part anyways!)

IMG_1414.jpg


IMG_1419-1.jpg


Next up - drivers side. Stay tuned and thansk for looking!

IMG_1423-1.jpg
 
OP
E

e-tek

Well-known member
Joined
Dec 19, 2007
Messages
10,690
Location
Saskatoon, SK
Final metal work!!!

IMG_1960.JPG


What you don't see: Cut, fit, trim, weld, grind...

IMG_1970.JPG


Turned out well enough to only require a skiff of fibreglass filler ("kittyhair"), which seals any pin holes in the weld...

IMG_1979.JPG


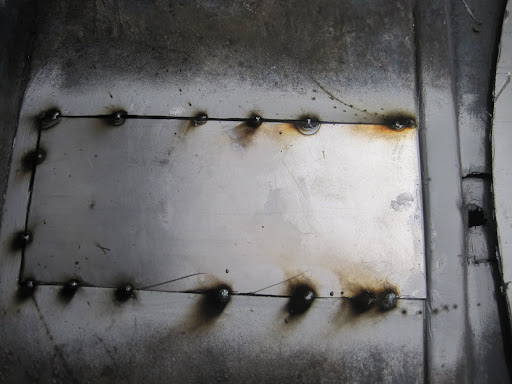
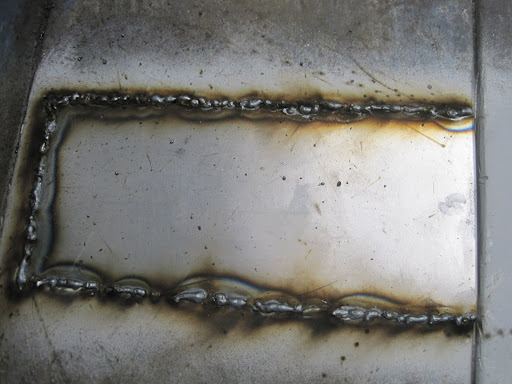
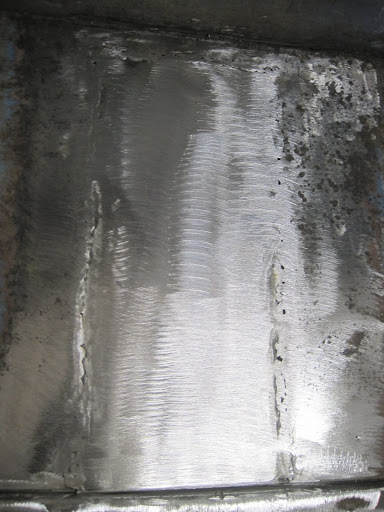
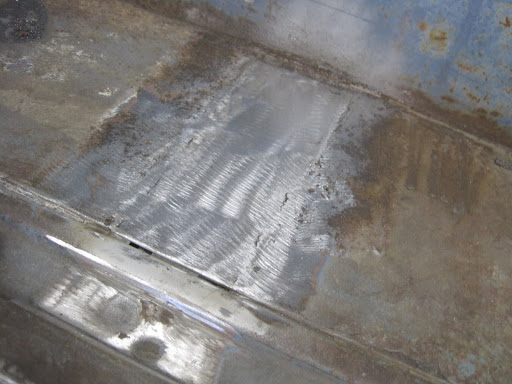
Big rust holes cut out of the floor bed and patched. **** welded and dollied throughout so as not to warp it and not need much filler.

IMG_1957.JPG


IMG_1958.JPG


IMG_1965.JPG


IMG_1968.JPG


Skiff of filler....

IMG_1978.JPG
 
To avoid these ads, REGISTER NOW!
Top Bottom