To avoid these ads, REGISTER NOW!

Lets see your workbench

abstamaria

Well-known member
Joined
Jun 24, 2010
Messages
1,338
Location
Manila
Robot Legs

thanks for the compliments guys.
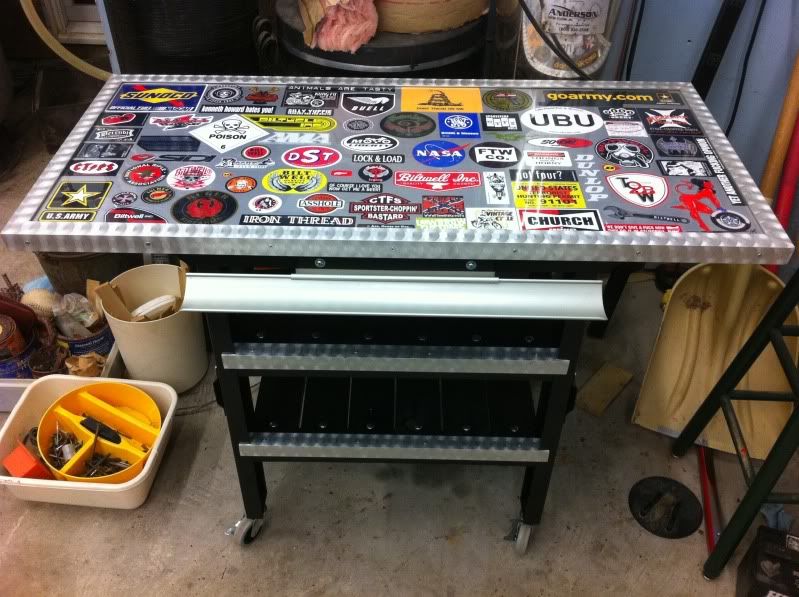
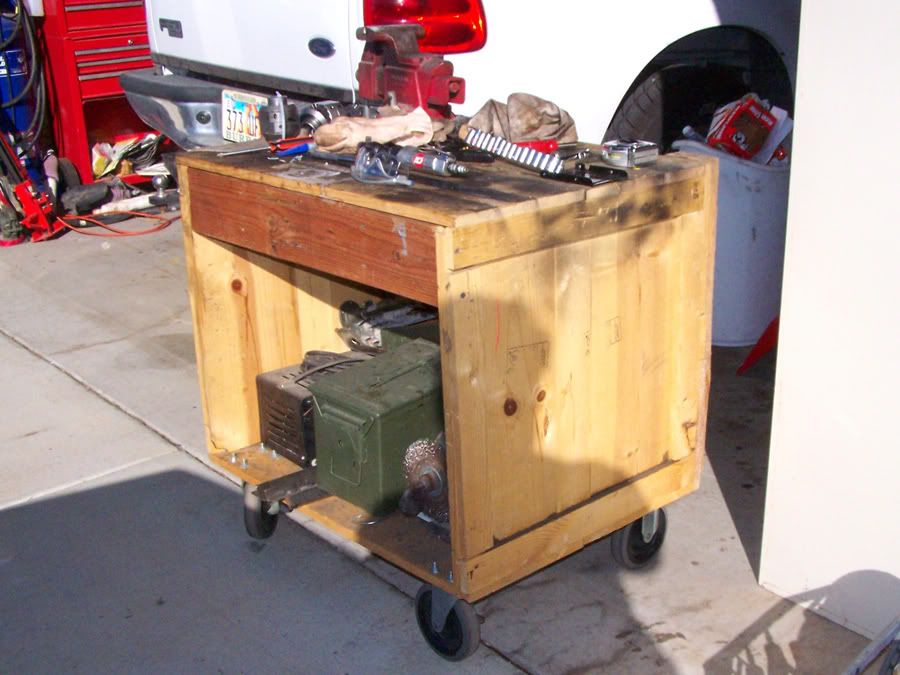
I like my vice as close to the edge of a bench as possible. Also, with the way i mounted the legs, i did not want them to get in the way of vertical work pieces clamped in the vice. With my last bench, If i put a piece of work vertically, and it extended down past the bench, it would hit the bench. As far as strength, The vise will break before the bench fails. The extension on the bench is solid 2" thick steel. All mounting bolts are LE (USA made :thumbup:) grade 8. The 4 vice mounting bolts are 5/8" diameter. The side extension is held on with three 1/2" bolts. All bolts are threaded deep in the steel block.

I understand, thanks. Great work, Alan.

Andy
 
To avoid these ads, REGISTER NOW!

DENALIAKITAS

Banned
Joined
Jul 4, 2011
Messages
350
Location
Sonova Beach
You can't see my work bench there is just too much stuff on it.
jh2.jpg

22.jpg

6.jpg


Yeah to many red "x's" on it to see anything!
 

scotstern

Active member
Joined
Jul 31, 2009
Messages
43
Location
San Diego, CA
Here is my shop. It is a bit more crowed today though.
 

Attachments

  • DSCN1018 (Medium).JPG
    DSCN1018 (Medium).JPG
    87.9 KB · Views: 1,787
  • DSCN1019 (Medium).JPG
    DSCN1019 (Medium).JPG
    85 KB · Views: 1,706
  • DSCN1030 (Medium).JPG
    DSCN1030 (Medium).JPG
    52.3 KB · Views: 2,087
  • DSCN1029 (Medium).JPG
    DSCN1029 (Medium).JPG
    44.6 KB · Views: 2,084
  • DSCN1028 (Medium).JPG
    DSCN1028 (Medium).JPG
    53.7 KB · Views: 2,200
  • DSCN1027 (Medium).JPG
    DSCN1027 (Medium).JPG
    51.3 KB · Views: 2,255
  • DSCN1026 (Medium).JPG
    DSCN1026 (Medium).JPG
    49.8 KB · Views: 2,566

colo crawler

Well-known member
Joined
Nov 15, 2011
Messages
86
Location
Thornton Co.
Sweet! I need to find a way to work that into one of my benches. How do you have the receiver tube attached to the bench?

Thanks! After I beat it in there with a 20lb sledge, I welded tabs on the back side and on the front so that it won't move forward or back.

-Tom
 

mypov

Well-known member
Joined
Aug 1, 2011
Messages
557
Re: Simple workbench for assemby and light repair

I don't do metal work or heavy fabrication, and so my shop and workbench are set up for assembly, servicing, and light repair. The workbench to the left is an off-the-shelf unit and has an aluminum top.

L1010740_2.jpg


This pales in comparison to the really serious benches shown in this thread. I do have a sturdy, wood workbench that I built about 20 years ago. It is in a shed in the yard, and that that is where I do heavy filing, cutting, pounding. I will take a photo of it to show you.

Best,

Andy

LOVE THIS - but would be afraid to use it.
 

JD65Elky

New member
Joined
Dec 23, 2011
Messages
4
Location
Minneapolis 'burbs
Here's my setup:

The bench runs nearly the depth of the garage along 1 side wall. It's 34" deep and about 22 feet long. The best thing was getting the dang compressor up off the floor and tucked into the corner out of the way.
2x4 framing, MDF top, and particle board face. 2 full-length & depth shelves behind the doors. (The compressor sits on 4x4 legs to the floor)
 

Attachments

  • Shop01.jpg
    Shop01.jpg
    58 KB · Views: 475
  • Shop02.jpg
    Shop02.jpg
    72.1 KB · Views: 914
  • Shop03.jpg
    Shop03.jpg
    68.7 KB · Views: 716
To avoid these ads, REGISTER NOW!

zjrog

Well-known member
Joined
Mar 25, 2007
Messages
555
Location
Tooele, Ut
Since I've decided to re-organize my garage this winter, thought I'd show what I did a few years ago.
Box003.jpg

Shipping box converted to rolling table, has an older Columbian vise on it.

garage023.jpg

30" deep and 8' long. and hasn't been this clean since that picture was taken. Just one reason to re-organize. I can rarely use it.

tool00001.jpg

And this rolling table has been worth its weight, easy to roll next to whatever I'm working on.

We'll see how things look come spring time.
 

donnie m

Well-known member
Joined
Dec 22, 2011
Messages
218
Location
wisconsin
here's mine...my shop is 30 X 40 and things are always changing . this is what my bench looks like today......
1.jpg


2.jpg


3.jpg


4.jpg


5.jpg


6.jpg
 

Qwk

Member
Joined
Dec 11, 2006
Messages
13
Mine arent "seasoned" yet as Im still working on the garage. Hopefully that will change soon.:)

b.jpg


b1.jpg


b2.jpg


b3.jpg
 

StarWolve

Well-known member
Joined
Jul 7, 2009
Messages
104
Location
The Queen City
I built these "temporary" benches to last for a few years until I can afford to build a new garage. The tops were from an old computer desk, with 4x4 legs. I made them tall enough to stand and work at them, and with enough clearance for totes stacked 2 high on the left, and the fridge or tool chest on the right. The only cost was some stain and the 4x4's, everything else was scrap I had on hand. The pegboard was from my old shop.

IMG_0365.jpg


An overall shot - the garage is always a work in progress:
IMG_0871.jpg


Touchscreen computer for manuals and music, and beer fridge:
IMG_1035.jpg


I made this Portable workbench, which I found in a dumpster - paint, plexi, decals, casters, and some aluminum trim, and she's pretty:
IMG_0744.jpg


The benches will work (for now) but the new garage will have something more professional looking and much larger. I'm looking into using HF boxes in steel frames, similar to Steevo's thread.
 

bdkruger1

Banned
Joined
Sep 14, 2010
Messages
349
Location
Constant Disbelief
Here's mine. Vidmar on the left. The black bench I built 11 years ago. The frame is 2"x2"x1/4". 8' long. Doors are 12gauge with an offset formed the length on one side so the doors overlap when closed. Full legnth piano hinge also. Top is 3/4" sanded ply. Wilton bullet at right end. I have a second bullet for the left end when I need to hold something long. One long shelf down the middle, behind the doors for power tool storage.

The cabinet to the right is a heavy sob. 3, 3/4" x 2" solid stock welded depth wise on the bottom so it can be moved with a forklift. 4 shelves in it.

I plan on repainting all 3 after a little body work to the blue pieces. The peg board is all going to leave soon also. Bulkhead cabs up by the ceiling around all 3 sides of the garage are going to happen also. I've been doing more remodeling in the house lately than in the garage. This needs to stop !!
 

Attachments

  • bench3.JPG
    bench3.JPG
    92.3 KB · Views: 918
  • bench2.JPG
    bench2.JPG
    114.1 KB · Views: 1,182
  • bench1.JPG
    bench1.JPG
    109.3 KB · Views: 904

eriksalo

Well-known member
Joined
Nov 29, 2007
Messages
184
Location
Colorado
Workbench and welding table. 3/4 Inch Plate. Weighs 900 pounds.
 

Attachments

  • WeldingTable.jpg
    WeldingTable.jpg
    42.6 KB · Views: 628

Dz_speed

Well-known member
Joined
Jun 18, 2011
Messages
133
Here's my first attempt at a work bench. Built it a few years ago for the new house. It mainly served as a storage bench until a few months ago I decided I needed more room. So it sacrificed it's life and I incorporated it into a new build that's coming along.
 

Dz_speed

Well-known member
Joined
Jun 18, 2011
Messages
133
Not sure why they didn't post. I'll have to dig up some images of my current setup that I Frankenstein'd together.
 

Chipmunk

Well-known member
Joined
Dec 24, 2011
Messages
436
Here is the work bench I finished last summer. The base is American Elm, which I cut two years ago and is still moving. Thus the reason for the raised floating panels.
The top is American Black Walnut, with hard Maple inlay. I have a drawer at one end for my planes and spoke shaves and a vice at the other.

The bench is so heavy I had to put silicone slippery buttons under each foot and it still takes my wife and myself just skid it around.

Some may think a Walnut top is foolishly elaborate, but it looks better and forces one to work more carefully and if I do scratch and dent the top…it just adds character. The base is finished in Garnet Shellac and the top in boiled linseed oil and lemon oil.
 

Attachments

  • IMG_2148.JPG
    IMG_2148.JPG
    95.3 KB · Views: 518
  • DSC00012.JPG
    DSC00012.JPG
    140.4 KB · Views: 715
  • DSC00011.jpg
    DSC00011.jpg
    44.9 KB · Views: 564
  • DSC00010.jpg
    DSC00010.jpg
    48.2 KB · Views: 627
  • DSC00009.JPG
    DSC00009.JPG
    142.3 KB · Views: 657
  • 001.JPG
    001.JPG
    99.9 KB · Views: 784
  • IMG_2149.JPG
    IMG_2149.JPG
    103.8 KB · Views: 538
To avoid these ads, REGISTER NOW!
Top Bottom