Thanks Dave. Have a cool Wilton under bench vise, just could not get it to fit properly given my set up and table top size. The Record vice was a perfect size, nice look, and cleaned up nicely given the vice sat in a England barn for most of its life.
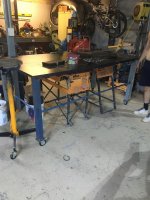
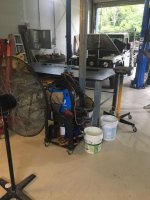
Regarding vintage legs, look for wood/metal lathe legs. Often a machine is long out of service/parted out and the base leg pairs are sold off. I turned a pair of legs into a tool chest base station/riser. Not sure where to post that specific project within these forums?
Regarding vintage legs, look for wood/metal lathe legs. Often a machine is long out of service/parted out and the base leg pairs are sold off. I turned a pair of legs into a tool chest base station/riser. Not sure where to post that specific project within these forums?