To avoid these ads, REGISTER NOW!

Logan 922 ca.1951 Restoration

OldeTimeEtc

Well-known member
Joined
Aug 16, 2014
Messages
478
Location
Palm springs area in S. Calif
Apr 10, 2015
Thought I would share my experience with what I feel has been an enjoyable and fun experience restoring this great old metal lathe for my shop. Please keep in mind the methods I used are my own and not by any means the only methods available.....I have been restoring mechanical antiques for decades and feel how I do it works best for me although I'm always improving and learning. This restoration I have been working on the last several months so please ignore the posted timeline.

Not new to rebuilding old machines just new to this forum. I recently found an old 1951 Logan 922 Lathe sitting in a packed crowded garage collecting dust. The owner having passed away over a year ago, his wife was now wanting to clear out the place. After a 2 1/2 hour drive I arrived at the home. Here sat this beautiful old lathe covered in grease and grime perched precariously and bolted down on top of an old Kennedy Tools work station ...at an angle....the original cast iron legs and chip pan were gone. A re-purposed very heavy thick gage metal shelf....or what looked like a shelf turned upside down, he was using as a make shift chip pan. Metal chips were piled and stuffed all around the lathe.
My friend who volunteered to help me transport this 600lb= beast had brought along his car trailer and hoist to help in the process. The place was cluttered with piles of wood, other tools and machines. we first had to clear out this mess to get to the machine. I should have taken more pics but at the time hadn't thought of posting this thread. Here is the only pic of how I found the lathe.
 

Attachments

  • Logan Ad Photo.jpg
    Logan Ad Photo.jpg
    98.7 KB · Views: 190
Last edited:
To avoid these ads, REGISTER NOW!
OP
O

OldeTimeEtc

Well-known member
Joined
Aug 16, 2014
Messages
478
Location
Palm springs area in S. Calif
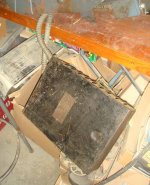
Clearing out a clear path out of the garage and removing the metal shavings were the first chore......of course cutting bits and tooling was under all this....it was like buried treasure. After cleaning out the "chip pan" I first removed the chuck, carriage and tail stock to help lighten the load. Even unplugging the lathe was a chore because he had wired, what looked like at the time, a large fuse box to it with flex conduit.....please don't ask me why.......I had no idea.....(at the time)
 

Attachments

  • DSC01745a.jpg
    DSC01745a.jpg
    123 KB · Views: 80
Last edited:
OP
O

OldeTimeEtc

Well-known member
Joined
Aug 16, 2014
Messages
478
Location
Palm springs area in S. Calif
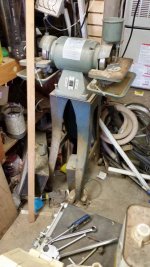
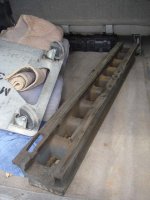
Next was the chore of pulling the lathe out of the garage. I had just acquired some heavy duty trucks from a carpet company sellout...they came right handy. Oh and by the way I had mentioned the chip pan and legs were missing. I happen to spot the original case iron legs in the back of the garage. The last owner who had removed them from the lathe...WHY????.......had re-purposed them by bolting them together to make a stand for a Harbor Freight made tool grinder.
 

Attachments

  • 20150404_134754a.jpg
    20150404_134754a.jpg
    98.9 KB · Views: 115
OP
O

OldeTimeEtc

Well-known member
Joined
Aug 16, 2014
Messages
478
Location
Palm springs area in S. Calif
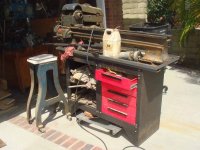
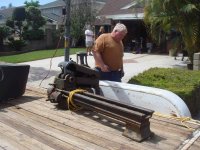
Anyway we managed to pull the lathe out of the garage but while doing so the flimsy work station buckled on one side from the weight. We still managed to keep it upright till my friend and I could get his hoist on to it to lift it onto the trailer. You can see the Kennedy "KenCraft" Work Station laying on its side on the trailer.......one of its legs bent on one side. Man that lathe was heavy! We did have to unbolt the lathe from the workstation. Extra holes had been drilled into the lathe's cast iron feet for this purpose. I'm assuming the original chip pan is still there which I will return to search for later.
 

Attachments

  • DSC01686.jpg
    DSC01686.jpg
    100.3 KB · Views: 115
  • DSC01688.jpg
    DSC01688.jpg
    125.4 KB · Views: 104
  • DSC01689.jpg
    DSC01689.jpg
    124.3 KB · Views: 80
OP
O

OldeTimeEtc

Well-known member
Joined
Aug 16, 2014
Messages
478
Location
Palm springs area in S. Calif
Upon getting home late that night I insisted we at least get the Lathe into my garage even though my poor tired friend protested and wanted to leave it on the trailer parked in my driveway till the next day. it would be just my luck some yahoo would mess with it during the night or take something. So we quickly unbolted the rest of the drive and quick change carriage and got the heavy parts onto my work bench in the garage and wheeled the lathe bed in for the night.......here you can see the makeshift chip pan the guy used. That and the workstation we left on the trailer that night.....at the time I didn't care about either.
 

Attachments

  • DSC01739.jpg
    DSC01739.jpg
    96.2 KB · Views: 58
  • DSC01738.jpg
    DSC01738.jpg
    117.2 KB · Views: 58
  • DSC01737.jpg
    DSC01737.jpg
    107.5 KB · Views: 59
  • DSC01713.jpg
    DSC01713.jpg
    86 KB · Views: 57
OP
O

OldeTimeEtc

Well-known member
Joined
Aug 16, 2014
Messages
478
Location
Palm springs area in S. Calif
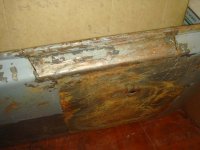
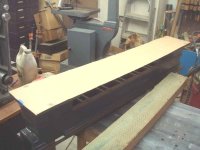
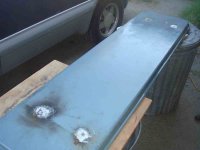
That night I thought long and hard if I wanted to do a complete teardown and repaint or just a cleanup and try to preserve what was originally there. I finally decided to just do a cleanup since most of the original paint was still intact. The only complete repaint I will do is the lathes legs, chip pan and the Lathe's right and left bed supports since I was going to have to have the extra holes that was drilled into them plugged and welded. The picture above you can see the test paint spot I did on the drive cover to get the nearest match I could find to the original paint.....Rustoleum Dark Gray.

A couple days later I did a quick run out of town alone and obtained a chip pan I had previously found in case I couldn't find the original one that came with the Lathe......luckly I found a guy who had one from another Logan 922. It needed some work but I was lucky to even find one. Someone had cut a section on its side and bent that part down to make room or clearance for something.....where do these butchers come from??
 

Attachments

  • 00505_4zrWC8ZrkV2_600x450.jpg
    00505_4zrWC8ZrkV2_600x450.jpg
    22.9 KB · Views: 50
OP
O

OldeTimeEtc

Well-known member
Joined
Aug 16, 2014
Messages
478
Location
Palm springs area in S. Calif
While taking a break from the lathe restoration to rearrange my shop machines for a space to set up my "new" lathe I got this brainstorm.....for the last approx 20 years I've had this little 6" Craftsman Lathe made by Atlas mounted on top of a work bench I constructed for it...why not re-purpose the KenCraft Workstation and gain all that storage space to boot? Here is my Craftsman Lathe as it was....
 

Attachments

  • DSC01716.jpg
    DSC01716.jpg
    123.4 KB · Views: 67
OP
O

OldeTimeEtc

Well-known member
Joined
Aug 16, 2014
Messages
478
Location
Palm springs area in S. Calif
Apr 14, 2015
...So while my friends car trailer was still parked in my driveway (it made a good convenient work bench) I went to work partially disassembling the work station where it had been damaged (bent) and got busy hammering it back into shape straightening out the metal. Took a good part of the day but I managed to put it back into shape. A quick trip to the local lumber store and I had the makings of a new top for it. Fortunately I had some 3/4 molding left over from another past project I used for edging the birch 3/4 veneer plywood I got and had a new top for the workstation. A couple days later and a couple coats of clear urethane finish and I had a new work bench for my 6" Lathe. I then transferred the lathe to the new bench.......I think it turned out pretty good and I gained storage for all its tooling plus tool storage for the "new" Lathe till I could find cabinets for it. To think I was planning on reselling the workstation...glad I didn't.
 

Attachments

  • DSC01728.jpg
    DSC01728.jpg
    114.1 KB · Views: 45
  • DSC01744.jpg
    DSC01744.jpg
    130.8 KB · Views: 69
Last edited:
OP
O

OldeTimeEtc

Well-known member
Joined
Aug 16, 2014
Messages
478
Location
Palm springs area in S. Calif
Back to the Lathe rebuild.........first decided to repair the chip pan. These are pretty heavy gage steel so it wasn't easy bending the cutout back and hammering it back into shape. I then went to my friends since he has a good Mig welder. About an hour later and some light hammering and slight grinding and I had a "new" pan for my "new" lathe. We also welded up the additional mounting holes in the pan that didn't belong there.
 

Attachments

  • DSC01685.jpg
    DSC01685.jpg
    137.9 KB · Views: 43
  • DSC01684.jpg
    DSC01684.jpg
    124.5 KB · Views: 37
  • DSC01683.jpg
    DSC01683.jpg
    128.5 KB · Views: 37
  • DSC01682.jpg
    DSC01682.jpg
    132.1 KB · Views: 40
  • DSC01671.jpg
    DSC01671.jpg
    135.4 KB · Views: 40
  • DSC01670.jpg
    DSC01670.jpg
    105.2 KB · Views: 44
OP
O

OldeTimeEtc

Well-known member
Joined
Aug 16, 2014
Messages
478
Location
Palm springs area in S. Calif
Apr 22, 2015
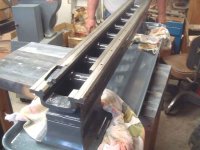
Today was windy so it delayed my going outside to prime and/or paint. In the meantime I took the lathe bed to a coin car wash to make use of their high pressure washers. Got the bed on wood on top of one of my dollies and bathed the bed with gunk degreaser. Let it sit awhile and then high pressured it all off......unfortunately not all the crud came off. even after using degreaser, a brush and elbow grease could I remove all of it. I tested some "crud remover" on a small spot but it attacked the paint which I didn't want to remove. Right now I'm not sure how to go about this. The crud on the lathe bed is pretty thick, hard and in some places caked on. I thought of using a high pressure hot steam cleaner but can't locate anyone who has one. I guess I'll have to do some experimenting with different solvents that will remove the crud without harming the paint. Sand blasting is out of the question since it will ruin the machined surfaces. If nothing works I'll be forced to have it hot tanked and repainted.

Here is the bed before washing it....and after....still lots of crud on it
 

Attachments

  • DSC01748.jpg
    DSC01748.jpg
    118.9 KB · Views: 47
  • DSC01749.jpg
    DSC01749.jpg
    105.7 KB · Views: 53
Last edited:
OP
O

OldeTimeEtc

Well-known member
Joined
Aug 16, 2014
Messages
478
Location
Palm springs area in S. Calif
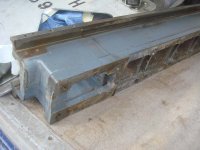
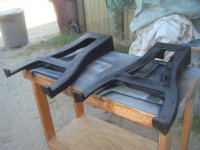
The wind died down so I put the Lathe Bed aside and finished priming the chip pan of which I had already given it a nice coat of Rust Reformer the day before. I also finished painting the bed supports.

Note: The bed supports had extra holes drilled into them and I had to have them plugged, welded and ground down.....which is why I was forced to repaint them.
 

Attachments

  • DSC01750.jpg
    DSC01750.jpg
    96.8 KB · Views: 40
  • DSC01751.jpg
    DSC01751.jpg
    102.8 KB · Views: 36
  • DSC01747.jpg
    DSC01747.jpg
    102.3 KB · Views: 37
OP
O

OldeTimeEtc

Well-known member
Joined
Aug 16, 2014
Messages
478
Location
Palm springs area in S. Calif
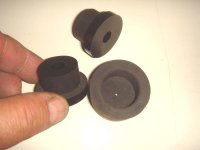
A package I was expecting arrived today......previously I had ordered some parts from Logan. Just a couple rubber bushings and a rubber cushion support for the drive assembly. Man talk about expensive for 3 rubber parts!! I could have made them out of neoprene or nylon but I wanted the machine returned to its original state as much as possible. It just amazed me how much they charge....yikes!.....With shipping $58.69!
 

Attachments

  • DSC01753.jpg
    DSC01753.jpg
    62.7 KB · Views: 22
OP
O

OldeTimeEtc

Well-known member
Joined
Aug 16, 2014
Messages
478
Location
Palm springs area in S. Calif
May 10, 2015
Since my Lathe restore project was stalled while I had to wait for some hard to get industrial paint in my area to ship to me (typical ******* lame California laws so no stores locally stock it but I can have it shipped to me)....I thought I would do a little "quickie restore" on an old oil can I found at a local garage sale yesterday. Perfect for my "new" Lathe and since it was going to be part of the lathe I felt it wouldn't be too off topic to my thread here. I've never really taken notice of oil cans before but this one just stood out because of its design and very vintage look and it was solid brass.....I just had to have it for my Lathe so I bought it for $5. Upon research I found this can
(an Eagle no.66) to be very collectible and popular to collectors......one thing Ive always had was a good eye and gut instinct when it came to antiques.

Here's the can as I got it...it was pretty cruddy and filled with old muddy oil and dirt.
 

Attachments

  • Oil Can 1.jpg
    Oil Can 1.jpg
    97.7 KB · Views: 45
Last edited:
OP
O

OldeTimeEtc

Well-known member
Joined
Aug 16, 2014
Messages
478
Location
Palm springs area in S. Calif
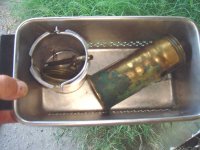
First thing to do was rinse out the old oil and take it completely apart. Put the cap gasket aside and tossed all the parts into my ultrasonic cleaner to cook for awhile.....
 

Attachments

  • Oil Can 2.jpg
    Oil Can 2.jpg
    111.2 KB · Views: 28
OP
O

OldeTimeEtc

Well-known member
Joined
Aug 16, 2014
Messages
478
Location
Palm springs area in S. Calif
Next out of the ultrasonic was to do an initial cleaning of the harder to remove stains on the brass and then a final polishing..........
 

Attachments

  • Oil Can 3.jpg
    Oil Can 3.jpg
    82.1 KB · Views: 29
  • Oil Can 4.jpg
    Oil Can 4.jpg
    69.1 KB · Views: 29
OP
O

OldeTimeEtc

Well-known member
Joined
Aug 16, 2014
Messages
478
Location
Palm springs area in S. Calif
Next was to remove a few dents and patch up a crack I found on the cap using silver solder........
 

Attachments

  • Oil Can 10.jpg
    Oil Can 10.jpg
    78.6 KB · Views: 35
  • Oil Can 9.jpg
    Oil Can 9.jpg
    66.9 KB · Views: 32
  • Oil Can 8.jpg
    Oil Can 8.jpg
    82.9 KB · Views: 36
  • Oil Can 7.jpg
    Oil Can 7.jpg
    66.5 KB · Views: 31
  • Oil Can 6.jpg
    Oil Can 6.jpg
    91 KB · Views: 32
  • Oil Can 5.jpg
    Oil Can 5.jpg
    82.4 KB · Views: 32
OP
O

OldeTimeEtc

Well-known member
Joined
Aug 16, 2014
Messages
478
Location
Palm springs area in S. Calif
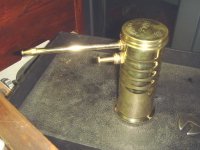
Last was final polishing, then reassembling all the parts, fill it with some way oil for my Lathe and the finished Oil Can!....works great too! It was a fun little project for a cool Saturday night evening and perfect for my Logan Lathe.
 

Attachments

  • Oil Can 11.jpg
    Oil Can 11.jpg
    131.5 KB · Views: 41
  • Oil Can 12.jpg
    Oil Can 12.jpg
    103.3 KB · Views: 48
To avoid these ads, REGISTER NOW!
OP
O

OldeTimeEtc

Well-known member
Joined
Aug 16, 2014
Messages
478
Location
Palm springs area in S. Calif
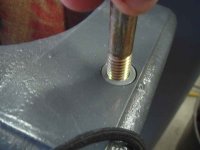
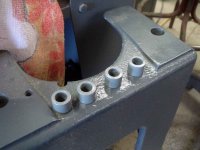
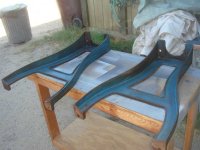
Still waiting for my shipment of paint.....Thought I would go ahead and make these 4 "spacers" for bolting the legs to the chip pan and main lathe bed. Because the previous owner repurposed these cast iron legs to make a stand for a tool grinder he drilled the factory mounting holes quit a bit larger so I had to make these spacers to reduce the hole size back to the factory bolt size of 7/16-14. Once made I primed and painted them to protect them from rust.
 

Attachments

  • DSC01811.jpg
    DSC01811.jpg
    53.2 KB · Views: 23
  • DSC01810.jpg
    DSC01810.jpg
    64.2 KB · Views: 24
OP
O

OldeTimeEtc

Well-known member
Joined
Aug 16, 2014
Messages
478
Location
Palm springs area in S. Calif
May 15, 2015
The paint finally arrived. All this time I've been racking my brain trying to figure out how to remove 50 years of caked on hard oil, dirt, grime and crud without removing the old paint from the Lathe Bed. I tried almost every degreaser I could find. Some removed a little and/or it also removed the paint in test spots.....but only a little crud came off. I also tried a high pressure washer but that wouldn't remove all of it. I thought about using a hot pressure washer but only could find one guy in this entire valley who owned one and he wasn't interested in me paying him to clean it. I thought about renting one but only one rental company owned it and wanted a kings ransom to use it for less than an hour. I finally concurred I had no choice but to face the facts I wasn't going to clean this beast and save the paint too. Still I couldn't find anything to remove this difficult crud that was caked on the lathe bed. Degreasers, all kinds of solvents and even diesel fuel wouldn't dissolve this crud. Sand blasting was out since it would have ruined the machined ways. I even thought of hot tanking it but not one place in this burg had a tank large enough to accept something this huge and heavy.
Finally I found something that worked......Heavy duty EASY OFF OVEN CLEANER! Took 2 cans, a toothbrush. a small wire brush, a couple hours and lots of scrubbing but it cut thru and dissolved this crud like heat to butter. Removed some paint too but I was already resolved I was going to repaint the bed.
 

Attachments

  • DSC01807.jpg
    DSC01807.jpg
    74.2 KB · Views: 32
  • DSC01808.jpg
    DSC01808.jpg
    79 KB · Views: 30
Last edited:
OP
O

OldeTimeEtc

Well-known member
Joined
Aug 16, 2014
Messages
478
Location
Palm springs area in S. Calif
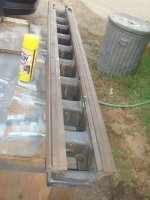
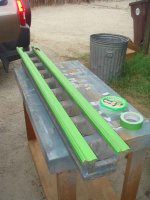
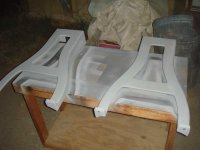
Once cleaned I washed the bed off and then immediately dried it off with compressed air to inhibit any rust. I then washed it off again with a rag dipped in Lacquer Thinner to prepare it for priming. After a preliminary scubbing of any machined surfaces and ways with scotchbrite I then taped those areas off with frog painters tape. Then primed the entire bed. Almost ready for painting and then I can start reassembling.
 

Attachments

  • DSC01816.jpg
    DSC01816.jpg
    66.9 KB · Views: 16
  • DSC01815.jpg
    DSC01815.jpg
    76.3 KB · Views: 15
OP
O

OldeTimeEtc

Well-known member
Joined
Aug 16, 2014
Messages
478
Location
Palm springs area in S. Calif
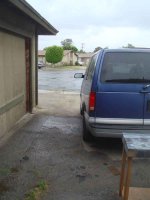
Later that day the rain let up......clouds parted.....the sun came out...no wind and of course no dust since it was compacted by the rain.......plenty of daylight to get this done....now if it just stays like this for a couple hours so the paint dries enough to move the lathe bed back into the garage....
 

Attachments

  • DSC01819.jpg
    DSC01819.jpg
    69.2 KB · Views: 24
OP
O

OldeTimeEtc

Well-known member
Joined
Aug 16, 2014
Messages
478
Location
Palm springs area in S. Calif
May 19, 2015
Another setback.....was all prepared to start assembling the first parts of the lathe....the legs , lathe bed with feet installed and chip pan. Come to find out the mounting holes in the chip pan were off by over 2" on each side. I bought the chip pan from a Used machine vendor who assured me it came off a Logan 922 just like mine.....apparently I shouldn't have taken his word for it...lesson learned.
 

Attachments

  • DSC01822.jpg
    DSC01822.jpg
    65.7 KB · Views: 23
Last edited:
OP
O

OldeTimeEtc

Well-known member
Joined
Aug 16, 2014
Messages
478
Location
Palm springs area in S. Calif
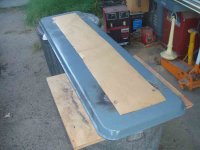
So I first made a pattern using butcher paper I happen to have a huge roll of.......and since the lathe bed and supports were already assembled and laying upside down in my shop it was easy to trace the hole patterns , cut the pattern to the proper length and then use it to lay out the holes evenly and exactly where I wanted them. Photos posted just to illustrate.....
 

Attachments

  • DSC01820.jpg
    DSC01820.jpg
    57.6 KB · Views: 19
  • DSC01825.jpg
    DSC01825.jpg
    65.5 KB · Views: 18
OP
O

OldeTimeEtc

Well-known member
Joined
Aug 16, 2014
Messages
478
Location
Palm springs area in S. Calif
Once the pattern was made I double checked it with the lathe bed then drilled the correct holes and checked them with the pattern again and then made sure the hole pattern matched on the lathe bed just to be sure.....now a perfect fit. I then patch welded the old holes closed, grinded them flat and used a little bondo to fill in the ruff grinding marks. Then after, I sanded them smooth, rough sanded the entire pan on both sides and reprimed the exposed metal areas ready to repaint the entire pan again.
 

Attachments

  • DSC01821.jpg
    DSC01821.jpg
    48.8 KB · Views: 18
OP
O

OldeTimeEtc

Well-known member
Joined
Aug 16, 2014
Messages
478
Location
Palm springs area in S. Calif
May 20, 2015
All repainted and ready to assemble. Unfortunately I'm at the mercy of having to wait till a friend of mine has time to come over to help me lift the lathe bed so it can be assembled since I can't do this on my own.
 

Attachments

  • DSC01826.jpg
    DSC01826.jpg
    57.9 KB · Views: 17
OP
O

OldeTimeEtc

Well-known member
Joined
Aug 16, 2014
Messages
478
Location
Palm springs area in S. Calif
May 20, 2015
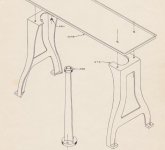
So while I'm waiting for my friend to have time to come over I thought I might as well get started making the "peg leg" that was missing from the Lathe. This is a part that supports the motor assembly on the rear of the Lathe. Here I found a drawing of one in case some of you don't know what I'm talking about....
 

Attachments

  • Pedestal leg.jpg
    Pedestal leg.jpg
    102.9 KB · Views: 18
OP
O

OldeTimeEtc

Well-known member
Joined
Aug 16, 2014
Messages
478
Location
Palm springs area in S. Calif
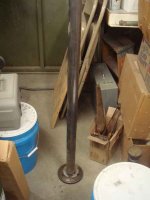
As luck would have it amongst the boxes of scrape metal stock I have I found this large metal disc which is perfect for the base. I layed out 3 holes for bolting to the floor and drilled them. Then took a length of 2" steel tubing I had, leveled and welded it to the disc. I'll cut it to length later once I have the top part I still need to machine.
 

Attachments

  • DSC01827.jpg
    DSC01827.jpg
    66 KB · Views: 20
  • DSC01824.jpg
    DSC01824.jpg
    79.4 KB · Views: 24
OP
O

OldeTimeEtc

Well-known member
Joined
Aug 16, 2014
Messages
478
Location
Palm springs area in S. Calif
May 21, 2015
Tonight a friend of mine dropped by just to give me a hand so temporarily putting aside the peg leg I was working on we set off getting the first part of my lathe assembled. Supporting the pan with a huge wood beam I had setting across my old atlas lathe work bench, and using old towels to protect the paint we lifted the heavy...and I good lord do mean HEAVY...lathe bed onto the pan and bolted on the legs....then set the whole assembly onto the floor. I then set about doing a little rearranging of a few machines till I was satisfied with their placement in my small shop. You might also notice that the lathe bed is slightly off center length-wise with it sitting closer to the rear than the front.....although this would have been a personal choice to me its also set this way by the factory to prevent the pan from interfering with the motor assembly. Also I'm very pleased about the "2-toned" color scheme I chose.

Once I give the ways their final clean and shine I'll level them by shimming and then I can begin assembly.
 

Attachments

  • DSC01829.jpg
    DSC01829.jpg
    75.3 KB · Views: 35
  • DSC01831.jpg
    DSC01831.jpg
    78.3 KB · Views: 41
OP
O

OldeTimeEtc

Well-known member
Joined
Aug 16, 2014
Messages
478
Location
Palm springs area in S. Calif
May 22, 2015
Before the real "fun" begins I thought I would try a little experiment. As I have said before I had decided to try to keep the original paint of this Lathe intact as much as I could and only painting parts that really needed it and/or I had no choice in the matter. What I was trying to achieve was to basically have an old vintage machine that had the look of being well cared for all its life but still had its vintage look and charm intact. This way also saves me money and time since I don't have to do a full tear down and repaint. I have been restoring antiques with this principle for several decades and prefer this way in most cases. After all I like something vintage to look vintage.

So I tried an experiment on a small factory part with almost all its paint still intact. I first immersed it in diesel fuel.....I got this tip from an old school machinist who told me that he usually keeps his machines clean using a rag dipped in diesel fuel because it cuts the grease and grime and yet leaves the paint unharmed. So I went down and got a gal of fuel to try. Poured some into a small container and let the part that was covered in grime, crud and grease soak awhile.

PLEASE KEEP IN MIND THIS WAS DONE IN A WELL VENTILATED AREA AND MOSTLY OUTSIDE
 

Attachments

  • DSC01835.jpg
    DSC01835.jpg
    66.1 KB · Views: 19
Last edited:
OP
O

OldeTimeEtc

Well-known member
Joined
Aug 16, 2014
Messages
478
Location
Palm springs area in S. Calif
After about 10 mins or more I pulled the part out and scrubbed it with a tooth brush. It cleaned up very well and left the paint untouched. Another benefit I noticed is the diesel fuel also acted as restorer to the paint....removing its faded dull look and oxidation and enhancing the color back to its original look. This also gave me an idea so once the part was dried I took some car wax and rubbed some on the part to further help seal the original paint......looked great as you can see in the photo.

I am going to start with the headstock using this method and feel its the best way I have found to help preserve the Lathe's originality as best I can.
 

Attachments

  • DSC01836.jpg
    DSC01836.jpg
    49.6 KB · Views: 26
OP
O

OldeTimeEtc

Well-known member
Joined
Aug 16, 2014
Messages
478
Location
Palm springs area in S. Calif
May 22, 2015
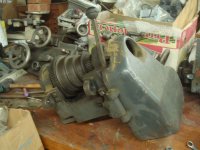
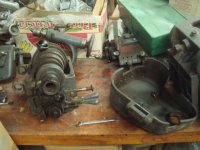
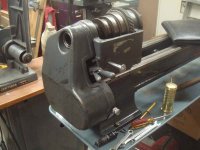
Heres the headstock. I first removed the gear cover plate and all its hinges. I will further remove all external parts I can for cleaning ......plus clean and shine all screws and bolts. That includes the reversing gears which needed a complete scrubbing to remove all the grease and crud. Some parts I had already removed that have no paint I have them soaking in a good degreaser (Purple Power) overnight.
 

Attachments

  • DSC01832.jpg
    DSC01832.jpg
    72.8 KB · Views: 32
  • DSC01833.jpg
    DSC01833.jpg
    73.1 KB · Views: 32
  • DSC01834.jpg
    DSC01834.jpg
    89.7 KB · Views: 32
OP
O

OldeTimeEtc

Well-known member
Joined
Aug 16, 2014
Messages
478
Location
Palm springs area in S. Calif
May 23, 2015
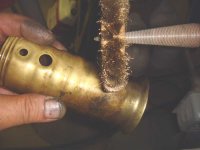
Upon removing external parts I set about first giving the main headstock a good scrubbing. My main bathtub consisted of a used tub I found for a couple bucks at a local restaurant supply house ...the type used to bus dirty dishes from the tables. Filled with a couple gals of diesel fuel it makes a perfect cheap "bathtub". Only other things I needed were some old toothbrushes in a few different sizes so I can get into small nooks and crannys and a couple good brass and stainless steel wire brushes for the stubborn stuff. Also I didn't forget the pads of scotchbrite for scrubbing off decades of age on polished metal surfaces....only other thing left is plenty of elbow grease.
 

Attachments

  • DSC01838.jpg
    DSC01838.jpg
    93.8 KB · Views: 24
  • DSC01837.jpg
    DSC01837.jpg
    70.6 KB · Views: 24
OP
O

OldeTimeEtc

Well-known member
Joined
Aug 16, 2014
Messages
478
Location
Palm springs area in S. Calif
Once cleaned I blew off all the old fuel making sure all the fuel was absent from the headstock especially in small places and around bearings then wipe it clean with an old rag. I repeated this several times till I was sure all the fuel was absent from the headstock. SAFETY NOTE: I never do this in an enclosed garage or room and since I don't smoke I needn't have to worry about how combustible atomized fuel is to a lite cigarette! )

READ - ANOTHER SAFETY NOTE: Old rags covered in grease and fuel is a formula for possible spontaneous combustion or just plain fire hazard......I keep them stored in a good metal covered container or since I don't have one I used an old empty metal garbage can with a tight lid as temporary storage kept outside until I am done using them and they can be properly disposed of. As an added precaution once I finished using them I watered all the rags down untill then.
 
OP
O

OldeTimeEtc

Well-known member
Joined
Aug 16, 2014
Messages
478
Location
Palm springs area in S. Calif
May 23, 2015
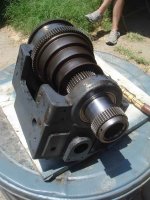
Once cleared of all cleaner and dried I installed the headstock and added the other parts as I went along.....in this case I'm glad I didn't remove entirely all the Lathe's "oldness". Some of the areas like the guides for the flat belt will be further polished clean with Scotch-brite once I get this running and can spin them under its own power. Also once installed I gave all working parts a few drops of oil.
 

Attachments

  • DSC01843.jpg
    DSC01843.jpg
    73.7 KB · Views: 35
  • DSC01845.jpg
    DSC01845.jpg
    79.9 KB · Views: 34
Last edited:
OP
O

OldeTimeEtc

Well-known member
Joined
Aug 16, 2014
Messages
478
Location
Palm springs area in S. Calif
May 23, 2015
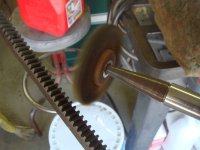
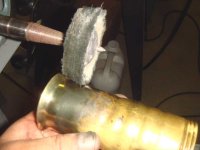
Here's something that I can't live without for doing this kind of restore work......my buffing wheels outfitted with a fine soft brass and stainless steel wire wheel on one and the other a coarse steel wire wheel and my scotch-brite fine wheel. All but the coarse steel wheel I pick these up at a jewelers supply house since I found hardware bought ones are too coarse. These are good for removing rust and crud off gears and metal surfaces without removing metal just leaving a nice satin shine. Be prepared if you going to buy a 3M Scotch-brite Light Finishing Wheel...they are expensive! Online they can cost well over $100......I found them under $100 at my jewelers supply. Expensive yes but well worth the investment. Also don't let the large 1" mounting hole bother you....you can purchase adapting washers for 1/2" and 5/8" arbors and even adapters for quick change tapered arbors.
 

Attachments

  • DSC01839.jpg
    DSC01839.jpg
    66.8 KB · Views: 28
  • DSC01840.jpg
    DSC01840.jpg
    62.9 KB · Views: 29
  • DSC01841.jpg
    DSC01841.jpg
    78.4 KB · Views: 29
  • DSC01842.jpg
    DSC01842.jpg
    73.9 KB · Views: 27
To avoid these ads, REGISTER NOW!
Top Bottom