To avoid these ads, REGISTER NOW!

Matty's Garage Projects (Aus)

OP
O

octane_matty

Well-known member
Joined
Jul 21, 2014
Messages
315
Location
Melbourne, Australia
Another weekend and 1 step forward, 2 steps back

Thought the shifter setup was good but the sides were a little too high for comfort

Zw_J71niNivVZS?width=768&height=1024&cropmode=none.jpg

Alot of grinding and ugly welds later
S14OWXTqH5p1Jk?width=768&height=1024&cropmode=none.jpg

Finally centered and high enough in the tunnel
cut/welded the shifter rod and shortened the shifter assembly until we're at an acceptable height

Lower than stock but probably not as low as a ZHP knob
sdSGvEKFJH3U8S?width=768&height=1024&cropmode=none.jpg

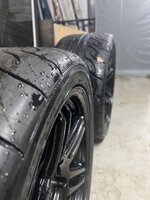
Recently purchased a fresh set of AD08Rs
Turns our 285/30/18s are being phased out so i nabbed a set quick

Initial fitment check is 👌
dtDu3yWzw5M8wR?width=768&height=1024&cropmode=none.jpg

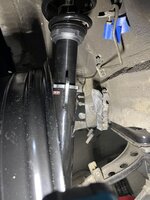
Front is a different story with 265/35/18s
eIK9JZiCzC3xeQ?width=768&height=1024&cropmode=none.jpg

JXX-vI7J-34ani?width=768&height=1024&cropmode=none.jpg
Suprised the AD08Rs are a very wide tyre in 265/35, measuring around 272mm
With about 2.6deg camber i'm pushing the absolute limits of my fenders.
Beyond 2.8 degrees probably isn't feasable for a street car 😁
Hopefully when they're mounted on a 9" rim it will pinch the tyre a little and i can make some more adjustments on the coilovers. (Already removed the helper spring)

I know what you're thinking;
  1. Why not run a 245/35/18 tyre? they don't really make them anymore in a matching set with decent rear sizes.
  2. Why not run a 255/35/18 over a 265/35/18? unfortunately 255 AD08Rs are below the legal load rating limit 90, i need minimum 91 (615kg)
  3. Why not run the 17" CCW rims;
Ideally i'd run 17x10.5 rear and 17x9-9.5 front.
With the rears a 275/40/17 would be ideal but it's beyond the maximum diameter allowed by 1mm.
Run a 255 or 265/40/17 then stretched? Nope, the maximum allowed rim width for a 255 is 10"

It aint easy trying to keep within the rules :headscrat

ETA to completion: 149.6hrs only 11 weekends to christmas 😲
Unfortunately shifter changes put me behind again.
Recent Purchases: Intake boot,custom brake lines and some titanium 😉

Cheers for reading
 
To avoid these ads, REGISTER NOW!
OP
O

octane_matty

Well-known member
Joined
Jul 21, 2014
Messages
315
Location
Melbourne, Australia
Another weekend another e36 saga 😁

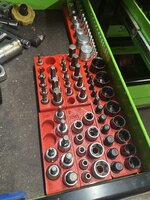
Back on the 3d printing, my main tool drawer has been over flowing and needs a good tidy
dy4KXjB8v90aWZ?width=768&height=1024&cropmode=none.jpg

Someday i'll find the missing pieces :headscrat

EDIT: I've updated my signature with a link to thingiverse if you want to print these yourself
_wK6JhAyDPrPTV?width=768&height=1024&cropmode=none.jpg

Started running the fuel lines for the E36
3/8 tube, raceworks AN6 fittings

UuuhYcMrvHczTg?width=768&height=1024&cropmode=none.jpg

Transmission mount number...3?
US4-b3OiopSlFg?width=768&height=1024&cropmode=none.jpg

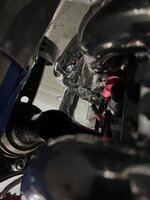
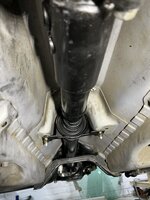
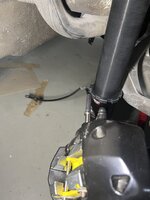
While underneath the car spotted a little problem
rUg-ZG_VFhyczS?width=1024&height=768&cropmode=none.jpg

Arggghhh pinion seal leaking
Job for another day, getting parts for this in Australia will be fun.
PKVhwzOzPol6Xv?width=768&height=1024&cropmode=none.jpg

I've been thinking about running no rear seats for a while, but the cost of a nice plastic rear seat delete is $1200+
Making one was a much more viable option but would cut into my tight schedule :headscrat

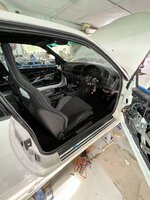
Originally rear seats wasn't going to be possible because i was planning on running race buckets, now i have the Recaro Sporters they have the tilt function for coupe's.

Decided to attempt to find a set of rear seats just to fill the void for the moment.

Somehow i managed to score a set of m3 rear seats in very good condition locally :cool:😎

They've been in stored a few years so needed alot of love
kSnMFpiHPet-nM?width=768&height=1024&cropmode=none.jpg
I've had this colour matched bmw black leather dye for around 8 years....
It's not hoarding if you use it eventually right? 😁


After practically soaking in leather conditioner i couldn't resist
MfAVpXN70GjoZk?width=1024&height=768&cropmode=none.jpg
Absolutely STOKED how this came out....I wasn't expecting to be able to find m3 seats let alone a good condition set.
I was offered worse condition seats for over double the price i paid for these :eek:

Since the 3D printer is back in action i've started on draft of my first interior mod
bLVmfoVZMmAWwu?width=768&height=1024&cropmode=none.jpg

Originally early E36s came with an analog clock/storage bin, working on a replacement 3d printed panel to fit a 52mm Banks Power Datamonster
This guage costs about 3x a single digital guage these days but for good reason;
- It can read OBD2/CAN signals
- You can add analog sensors (oil, air, temp etc)
- Displays up to 8 sensors on the one screen (+flip to other display screens)
- Data logs your inputs to an SD Card
- Has an almost 90s look and amber lighting option :)
Honestly not sure why these aren't more common 🤷‍♂️


When i see a car like this i don't understand :ROFLMAO:
1666521906470.png


ETA to completion 141.1hrs
9 weekends to Christmas :eek:

Hovering a bit lately, had to add some time for the pinion seal but took some off for the seats.

Cheers
 
Last edited:
OP
O

octane_matty

Well-known member
Joined
Jul 21, 2014
Messages
315
Location
Melbourne, Australia
Long weekend!!

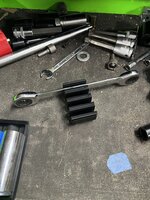
been working on some designs for a modular spanner holder
p0Ip0TuwP3Wh7-?width=768&height=1024&cropmode=none.jpg

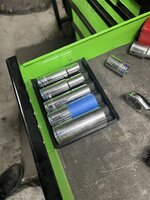
Socket holders
eZfJar21KKBb-B?width=768&height=1024&cropmode=none.jpg

Started re-assembling the 135i brakes
I had some titanium shims cut to compensate for the rotor thickness difference 1mm rear, .5mm fronts
EBC Yellows were reccomended by the engineer for passing brake tests
01NUcFGODomuz6?width=768&height=1024&cropmode=none.jpg

62SQpI1g-O8PrV?width=768&height=1024&cropmode=none.jpg

Custom to order Koya SF01s arrived
Front clearance looks roomy
QN6nYVnnjrYxfA?width=768&height=1024&cropmode=none.jpg

Front 265/35 on 18x9 285/30 on 18x10
sIPZG8TCkRfR4C?width=768&height=1024&cropmode=none.jpg

Oooof, maybe a little too much 😁, hard to say
LZfeaZUiN1Ro6A?width=768&height=1024&cropmode=none.jpg

No rear suspension yet but also oof
GGzt0CyhseYYCm?width=768&height=1024&cropmode=none.jpg

As with everything if it's worth doing once, it's worth doing again and again

New rear subframe brace
The round parts locate on the subframe for rigidity
-7zhqDRMkakWQg?width=768&height=1024&cropmode=none.jpg

6XrQPONmoKtVK9?width=1024&height=768&cropmode=none.jpg

Been a while since i've seen this piece
fO5Im_lb0_eJTX?width=768&height=1024&cropmode=none.jpg

Still looks clean in here suprisingly!
F4wioq0149VLXT?width=768&height=1024&cropmode=none.jpg


Some of the finest juice for your backyard builds
BS38leZnpVNpMa?width=768&height=1024&cropmode=none.jpg

Turns out GM/BMW power steering fittings are the perfect size for LS oil gallery
Few litres of oil in the cap and another in the tube, then followed with some compressed air to force it into the system.
wiwvpV0gjGiqCI?width=768&height=1024&cropmode=none.jpg

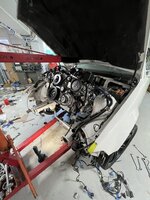
Wiring specialties conversion harness, 95% of the wiring i need
be4fFtyaoGoJ18?width=768&height=1024&cropmode=none.jpg

Started wiring up the LS
3t4eq_Rp13EbIU?width=768&height=1024&cropmode=none.jpg

ETA to completion: 124hrs
8 weekends to christmas :eek:

Still having some issues with the drivers side header. Some new issues cropped up with spark plug to steering shaft clearance.
Exhaust & brake dust shields are the only 'major' fabrication really remaining.

So hopefully see the eta number come down quick soon :ROFLMAO:

cheers
 
OP
O

octane_matty

Well-known member
Joined
Jul 21, 2014
Messages
315
Location
Melbourne, Australia
Back for more?

✅ Ford 8.8 pinion seal done, i have a feeling the dust cap is the real problem so i might be doing that again soon :ROFLMAO:

✅ Cleanup injector/coil wiring
✅ Hard to see but positive battery wiring/starter sorted
Ground for the starter done to engine mount

2hrCskTtg3MZ92?width=768&height=1024&cropmode=none.jpg


✅ Chassis ground to engine done

xLU1-7K8aYXRul?width=768&height=1024&cropmode=none.jpg

✅ "Forged" :ROFLMAO: ECU mount
I've also re-pinned the OBD connector and run it through the firewall behind the ECU into the passenger glovebox

LqeQpNN4l7vQxp?width=768&height=1024&cropmode=none.jpg


lsMDEu6SQksWtH?width=768&height=1024&cropmode=none.jpg

Still working on what to do with all this extra wiring 🤔🤔
-nzoiHi4tmC-S6?width=1024&height=768&cropmode=none.jpg

Alot of debate around the fuel line routing, this is the best i could come up with for the moment
Made a new steel bracket off the horn mounts, hopefully clears the headlights, inner guard and intake.
XKTWFtEs8khW14?width=768&height=1024&cropmode=none.jpg

Been working on V3? of the power steering bracket
All was going well before until i realised the pump was upside down :lol_hitti

Yeah might take the award for ugliest alloy welding on GJ...and bench.
mVsw3zE04DoSYf?width=768&height=1024&cropmode=none.jpg


IBlF48K5EetRZ0?width=768&height=1024&cropmode=none.jpg

Recent Purchases: Power steering hose, Last fuel line fitting, Battery.

In the process of looking for alot of vacuum hoses to complete the intake setup for brake vacuum, pcv, breather hoses etc.

ECU has been read with HPtuners and VATS delete applied.
Just need that last fuel line to get the first start happening.

ETA to completion: 107.6Hrs
 
OP
O

octane_matty

Well-known member
Joined
Jul 21, 2014
Messages
315
Location
Melbourne, Australia
Another weekend and i have a feeling this is going to be a rollercoaster of a wordy update!


Yes...that's fresh 98
YbW9D86gKV_Hnz?width=768&height=1024&cropmode=none.jpg

The OBD connector on my wiring specialties harness was a little short so i started running it through the firewall into the glovebox.
Deautsche DT6, re-pinned the existing connector

Seems after re-connecting hptuners....nothing, no connection, nada
Tested OBD port to my DT connector, all good
Really confused what went wrong :headscrat

Eventually i removed the connector i added to the harness and connected the pins directly to the scanner and viola we're back in action
The connector looked 100%, all wires seperated and clicked in so i'm rather confused why it wasn't working

Finally got some more settings written to the E38
CPHXtI4nabWRvT?width=1024&height=768&cropmode=none.jpg

After a considerable amount of checking things....
Attempted first crank.....and nothing

ECU is a little unhappy but nothing too major
cvcunphobIqQ4t?width=768&height=1024&cropmode=none.jpg
Cleared a few things, tried plugging a few more things in.....still nothing :headscrat

Wrote new config disabling Started checks, transmission neutral check

...still nothing

Checked voltage at the starter trigger wire......nothing 🤔

This is a 92 E36 with no EWS as far as i know, and i removed the 90s alarm (i think)

AHA brainwave....this was an auto car

Jump the neutral switch!
d21f046NyhnQ_r?width=768&height=1024&cropmode=none.jpg
And we're cranking! with plugs and injectors disconnected.

At this point this is the first start of the engine since i put it together ~3 years ago :eek:

Started cranking and we have minimal data coming out of the ECU in HPtuners. Most importantly no RPM/oil pressure showing 🤔
Is it the scanner? is it the oil pressure sensor not working? grounds? no oil?

Checked everything over and over again, few more cranks, tried pouring some oil into the oil gallery and following with compressed air.

Still no oil pressure :cry: dry as a bone
At this point you start to wonder how much of the 3yr old assembly lube is still on the bearings.

After a few G&Ts saturday night i've come to the conclusion the engine isn't spinning fast enough to fully prime the oil pump (Larger volume melling pump)
I think my efforts to prime the engine with pouring oil + compressed air have been unsuccessful or i have a serious internal oil leak (missing plug, oil barbel etc)

Took the front cover off, bought some Vaseline to fill the oil pump
I'm very careful to avoid stripping threads, slowly undo the torx bolts on the pump except one.

This one just refused and stripped out in an instant like butter :cry:
FvvIod_8yxK6gc?width=768&height=1024&cropmode=none.jpg
There's no chance of getting a replacement bolt for this i bet, pretty much means i'll have to replace the pump in the future.
Ideally the pump needs shimming to prolong it's life so i'm not sure how long i'll keep it now.

Well getting vaseline into the pump isn't possible, time for plan B

If you want to try this at home:
SCA Guage adapter M16x1.5 to 1/8 npt
Champion 1/8 bsp to 5/16 hose with some teflon tape (note NPT to BSP, 1 thread difference)
Motive Power bleeder
Js7b_xQlZ0J-v8?width=768&height=1024&cropmode=none.jpg

Cleaned out the power bleeder as originally i used it for brakes.
I actually found it overrated and your leg pumping works much better 😁 haven't used it in 5+yrs

Drained 2L of oil, into the pump and maxed it out at 25-30psi
Let it slowly push oil into the system until it was almost empty.
rotating the engine every so often.

Time to check if the top end has oil yet....
5DJusCNutDx_7h?width=768&height=1024&cropmode=none.jpg

Far from ideal but i have other issues also.
No RPM signal; was that the scanner? scanner PC setup? or the crank sensor?

Let me tell you getting to the Crank sensor on an LS is a PAIN
looks tight, plug seems intact and fully clipped in.

The sensor is brand new on the right.
Did i buy a cheap sensor? no it was genuine AC Delco
All i can see on the sensor is GM part number marking and China :confused:

Switch it anyway for the old one just because i love the pain of installing them.
G2190ERRi5XYdO?width=768&height=1024&cropmode=none.jpg

Reconnected everything this time including ignition coils.


This time we got RPM signal and 50PSI oil pressure!!!!
fpIBp9wl6QW-Bj?width=1024&height=768&cropmode=none.jpg
It seems that the cranking even without plugs at ~125rpm isn't enough to prime this oil pump and my brand new crank sensor is bin worthy.

It's early days but i'm pretty chuffed the engine didn't blow up immediately considering a rookie like my put it together and hopefully hasn't damaged the bearings turning it over with no oil pressure :D

Welded the power steering bracket and adjusted the spacers (made some bad measurements last time)
0YrVyiFuZUPTVQ?width=768&height=1024&cropmode=none.jpg
And that wraps up the weekend.

ETA to completion: 104.5hrs with 7 busy weekends to christmas.

Recent Purchases: PCV hoses, Brake vacuum hoses, power steering hose and fittings
Bulk wiring connectors for OBD port, Flex fuel sensor and EVAP canister.
Custom driveshaft is being made currently :cool:

Diff pinion seal started leaking again and i've realised the diff doesn't have a breather so it's gotta come out again :cry:

The most significant fab remaining is the exhaust and muffler which will hopefully take less than the 30hrs i estimated.

Cheers
 

Attachments

  • d21f046NyhnQ_r?width=768&height=1024&cropmode=none.jpg
    d21f046NyhnQ_r?width=768&height=1024&cropmode=none.jpg
    140 KB · Views: 9
Last edited:

Geoff289

Well-known member
Joined
Nov 10, 2013
Messages
1,235
Location
Melbourne, Australia
Just got caught up on your thread on a very rainy Melbourne morning no good for anything else. Very nice work. I choose to know nothing about GM products but I was interested in your attempts to prime the oil pump.

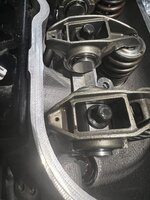
When I put the new engine in my Mustang, not having the right tool to do this with a drill on the pump hex usually driven by the distributor I did it with a $20 pressure garden sprayer and some plastic tube attached to the port the oil pressure sender goes in. Valve covers off and just pumped it up and watched the oil enter the engine and eventually become evident at the rockers. Once I could see oil at all the rockers I buttoned it up, poured the rest of the oil in conventionally, took a deep breath and turned the key. Instant oil pressure on the gauge.
 
OP
O

octane_matty

Well-known member
Joined
Jul 21, 2014
Messages
315
Location
Melbourne, Australia
Just got caught up on your thread on a very rainy Melbourne morning no good for anything else. Very nice work. I choose to know nothing about GM products but I was interested in your attempts to prime the oil pump.

When I put the new engine in my Mustang, not having the right tool to do this with a drill on the pump hex usually driven by the distributor I did it with a $20 pressure garden sprayer and some plastic tube attached to the port the oil pressure sender goes in. Valve covers off and just pumped it up and watched the oil enter the engine and eventually become evident at the rockers. Once I could see oil at all the rockers I buttoned it up, poured the rest of the oil in conventionally, took a deep breath and turned the key. Instant oil pressure on the gauge.

Yeah no doubt i really wish i started it with ignition earlier in hindsight.

I honestly forgot i even had the power bleeder, jumped at the chance to not spend $50-100 at hammerbarn on a tool i'd use once or twice.

Hopefully the bearings are still ok to last this engine until it's next rebuild 😁
Top end i don't care about for the most part, all used parts that will be replaced after registration.
Cam bearings in the LS world are known to look ugly no matter what.
Bottom end is the only thing i'd like to last a few years before maybe a slightly longer stroke crank 🤔
Then again Mrs Octane has rightfully already assumed FI will be on the menu someday :cool:


Picked up an alternator idler pulley today to measure the drive belt looking like it's around 2045-2055mm with no tension
ICT billet recommend 2145mm with a GM power steering pump.
GM power steering pulley approx 165mm BMW approx 135mm

Working on getting the wiring cleaned up after work this week
 
OP
O

octane_matty

Well-known member
Joined
Jul 21, 2014
Messages
315
Location
Melbourne, Australia
Another week and some progress as always

Dug into the spare L98 wiring harness i have to find the EVAP wiring.
Appears ground goes to ECU and switched 12v to the other side
Seems too much trouble to find the pins and correct wire so i'm just going to de-pin and re pin into my X1/X2 connectors
Also picked up a pin for the flex fuel sensor ;)

Edit:
for future reference EVAP is X2 (Grey connector) pin 8
Flex fuel is X1 (Black Connector) pin 40
K7Fox80aANHU9G?width=768&height=1024&cropmode=none.jpg

Thanks to some old information on a forum it turns out BMW accelerator pedals are very similair to Camaro/Corvette
The low end voltage is borderline but otherwise a perfect pedal.
JQFWaJifGbl4P3?width=768&height=1024&cropmode=none.jpg
Sent some wires through the firewall with DT connectors through the old cable throttle hole.
Fresh BMW connector and pigtails for the pedal
HPTuners came in handy with a throttle test feature which worked great!

JcIreAlSalM7N6?width=768&height=1024&cropmode=none.jpg

Unfortunately didn't save the before picture of the armrest but it was gross :sick:
Fresh leather from the UK fitted pretty well

kNTnGjuB0cWNFn?width=768&height=1024&cropmode=none.jpg

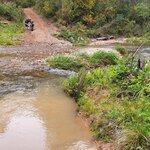
Saturday ended up taking the dirtbike out after throwing a new stator in it.
Most of victoria is under water currently so hard to find somewhere to ride but ended up going for Glenmaggie

This was the worst of river crossings luckily, only had to walk the bikes through 2-3 of them.
The silt is deceiving, that's a about 2-3 foot deep hole there.
PlJ8z10SRB2Ju?width=1024&height=1024&cropmode=none.jpg

As always though...the Victoria high country never dissapoints
J1Z0P27vlHB6G?width=1024&height=1024&cropmode=none.jpg

qYsXalICPrulB?width=1024&height=1024&cropmode=none.jpg

After a few trips to the parts store i've landed on a 2065 belt which is middle of the range.
Probably switch for a 2050-2055 to really get full use of the tensioner

ejOekXKnOibf3Y?width=768&height=1024&cropmode=none.jpg

I attempted to change the Ford 8.8 speed sensor previously to use for vehicle speed for the LS but the sensor didn't fit.
Since then i installed the diff and forgot if i tightened the bolt 🤣
I've also now realised i have a Mustang ford 8.8 cover which doesn't have a breather which could be contributing to my leaking problem.

Yep turns out it was tight
kZKlInMLKNwt6V?width=768&height=1024&cropmode=none.jpg

Picked up this brass breather at the local hose shop
Yeah it's BSP or NPT and no i don't have a tapered drill/tap
I suggest you look away, that's a 16mm hole and i'm about to send it
9WKOwTqKydaxLv?width=768&height=1024&cropmode=none.jpg

bit of gasket goo, fresh oring and we're done
7gO78aiYpwSips?width=768&height=1024&cropmode=none.jpg


Time to look at the exhaust for the E36
Picked up this stock 6cyl muffler and cut it open
I planned on using parts of it purely because it fits the space perfectly under the car and it's stainless

After some closer inspection, nah this will be in the bin.
It's nice but everything is funneled into a single 2" pipe
2PAlC3jBtBiGV9?width=768&height=1024&cropmode=none.jpg

Here we have the factory E36 heatshield, a Magnaflow 2.5" dual muffler with internal "X pipe" it's not smooth inside so i'd barely call it an X pipe 🤣

and 2 x racecraft 2.5" resonators, can't remember the length sorry
B41z8D6u3MNUVq?width=768&height=1024&cropmode=none.jpg

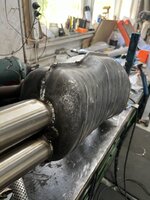
I have tight clearance on everything as always so these resonators need a little "squishing"
As they say "We're not building a milk processing plant" No purging, half *** cleaning and plenty of holes to fill 🤣
O33rJ7v4DrqiWT?width=768&height=1024&cropmode=none.jpg

Found some new things to sort so ETA still hovering at 106hrs
Should be picking up a fresh driveshaft this week :cool:
Cheers
 
Last edited:
OP
O

octane_matty

Well-known member
Joined
Jul 21, 2014
Messages
315
Location
Melbourne, Australia
Been only a week and a half but busy time of year
Ended up going dirtbike riding again last weekend at Rosedale so didn't get much of a chance to work on the E36

Let me show you how easy it is to install an E-pedal on a 92 BMW

Standard mounts for a cable pedal
2qjktLTbuxHNms?width=768&height=1024&cropmode=none.jpg

Z3 M coupe bracket
mQlGgoAJoj1knx?width=768&height=1024&cropmode=none.jpg

BMW pedal
CvEK_g6orb_7Rt?width=768&height=1024&cropmode=none.jpg


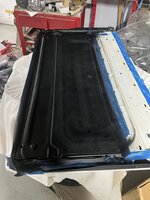
Recently received some parts for the sunroof i've been waiting for since July
During the week sprayed the underside of the panel black to match the headliner and installed
Figured out pretty sure my sunroof motor is trash, keeps tripping 30A fuses.
I installed a new gasket for the sunroof which was genuine but seems to be different to the original :(
The panel currently sits a little weird, i'm not super happy with it but it's been a while since i've taken a close look at another E36 to compare
TIAtoMIr9qFPrd?width=768&height=1024&cropmode=none.jpg

Driveshaft shop stuffed me around, safe to say i might find another for the next job.
VE commodore shaft cut/lengthened with BMW center bearing, ford 8.8 1330 u-joint at the diff.
ywPqxiXc594BmE?width=768&height=1024&cropmode=none.jpg
Driveshaft angles are in the 1.3 front 2.25 degree rear range
Might run a washer under the center bearing holder to get closer to 1.5 each side.

Diff has stopped leaking since i installed the breather or maybe the fluid level is below the seal 🤣

Engine is showing some signs of oil leaks, rocker cover, oil gallery plug, oil filter area 🤣
Future problems at this stage

ETA to complention 101hrs
3 weeks off work booked for Christmas

Weekends are looking very busy to Christmas but hopefully slip some solid progress in
 
OP
O

octane_matty

Well-known member
Joined
Jul 21, 2014
Messages
315
Location
Melbourne, Australia
2 weeks later

Haven't had much time to work on the E36 during the weekend due to family committments but been chipping away at things during the week.

Started installing the rear suspension, custom brake lines are just a little too close to the shock
Ordered a new set of rears with shorter ends.
_mNPzq4ViG5RyQ?width=768&height=1024&cropmode=none.jpg

Rear bump travel test went well
14nkC_G0O_tpxl?width=768&height=1024&cropmode=none.jpg


Business end of things looking good
uZ4hfSdCqFHAnx?width=768&height=1024&cropmode=none.jpg

Before i threw the interior back in i decided to do the cabin filter while i could

Really confused since there wasn't one....who goes to the trouble of removing it to not put a new one back in? 🤣
T85TopoGz55AU7?width=1024&height=768&cropmode=none.jpg

Also have done a few other small jobs including replacing the driveshaft guibo.
Turns out there's 4 different sizes of guibo and i've bought the wrong ones twice :cry:
At least it confirmed my gearbox appears to be from a Holden VE GTS

ETA to completion 88hrs

Recent purchases: New rear brake lines with better fitment, New LS throttle body (Found a bargain on an fresh OEM TB)
Rear shock tower reinforcement plates
 
OP
O

octane_matty

Well-known member
Joined
Jul 21, 2014
Messages
315
Location
Melbourne, Australia
Good solid weekend working on the E36 again

Radiator fitment is amazing, so much room!

gn5tiPJxO4ME_V?width=768&height=1024&cropmode=none.jpg


When your grinder tool goes missing....you gotta make do 🤣
czbVsiLDxU3Tjq?width=768&height=1024&cropmode=none.jpg

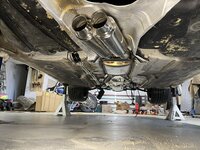
After adjusting the cat exit angle to clear the transmission i got to work!

Suprisingly a little easier building the exhaust than headers
lAJurH3AOZQLNk?width=1024&height=768&cropmode=none.jpg

At the end of the weekend we're about 65% done
gv2Ykfed1x6GH-?width=768&height=1024&cropmode=none.jpg
Really struggling to get the middle section welded :cry:
Tig welding the gaps upside down in a confined space is incredibly hard.
Might consider getting some Stainless MIG filler wire

ETA to completion: 76hrs :cool:
Estimate seems on the high side currently since i've still got 20hrs allocated for the exhaust and 12hrs for the speed sensor wiring 😁

Hopefully build the muffler and have the exhaust fully welded before Christmas day :D


Cheers and Merry Christmas
 
OP
O

octane_matty

Well-known member
Joined
Jul 21, 2014
Messages
315
Location
Melbourne, Australia
Merry Christmas all

I've been hard at work but slow progress on the exhaust

Started work on the muffler setup

iVHW3CWp3o0xg-?width=768&height=1024&cropmode=none.jpg

I won't show you the welds under all this because they aren't safe for public consumption 🤣


The original muffler is restricted to dual 2" roughly, this is now a basic sort of chambered design.
Despite the flow loss i calculated the holes are larger than dual 2.5" combined.
_EwSwipVPWeDmU?width=1024&height=768&cropmode=none.jpg

Took absolute ages to weld the entire muffler shell back together
My welds aren't getting any better on Stainless either. I think i need to invest in a large gas cup to help get proper gas coverage.
gELNXUM5cWXELJ?width=768&height=1024&cropmode=none.jpg

Car had a brief break from jackstand duty

LUxboYpchG7dLl?width=768&height=1024&cropmode=none.jpg

Spent a day or so cleaning up around the car and re-organising ready to finish the exhaust
tNHbprxBXcT_YE?width=1024&height=768&cropmode=none.jpg

I quite like factory E36 exhaust mounts so i've purchased some new rubbers and made a brace to hold the mid section like factory
ThcGIqnR5i34c3?width=1024&height=768&cropmode=none.jpg

Polished up some leftover tube for tips
Trying to keep the factory look
tvoVHKrqzq_1NX?width=1024&height=768&cropmode=none.jpg

Tips follow the lower valance/bumper lines
rp4VZh7i8K3yDu?width=768&height=1024&cropmode=none.jpg

WMZz1P8dSWU7ji?width=768&height=1024&cropmode=none.jpg

I've been working on the exhaust now for about 3 days straight and i severley underestimated the amount of welding required to complete this 🤣 next time 100% i'll be mig welding
I've finally sorted the angles and muffler/tip fitment is sorted. I hate TIG welding upside down with a passion :mad:
Definately should have added an extra 2 v-bands somewhere to make life easier

We're onto the 3rd bottle of Argon now in the past week and probably 1kg of filler rod once i'm done.
Roughly a meter or two left of welding left hopefully but it's all the inside hard bits :cry:

ETA of Car completion: ~60hrs
still 2+ weeks left of holidays :cool:

Cheers and happy holidays
 
OP
O

octane_matty

Well-known member
Joined
Jul 21, 2014
Messages
315
Location
Melbourne, Australia
Well it's been a busy week!

I'll keep it brief because there's been alot of progress

After full welding the exhaust...went to reinstall and welp....everything warped :cry:
spent another day or so getting thing back into alignment

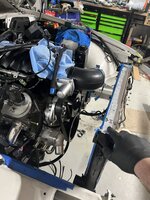
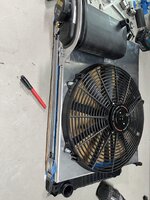
Radiator shroud made
mZf-y5qqrTb38F?width=768&height=1024&cropmode=none.jpg

After raiding all the 5/8 hose joiners from the eastern suburbs of melbourne heater hoses plumbed in!
Also plumbed in the booster vac line with a 180 degree fitting to help with clearance.
K-ScgoXk0wzMAZ?width=1024&height=768&cropmode=none.jpg

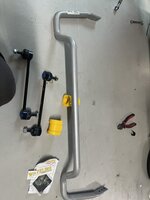
Fresh whiteline swaybar installed
IHAblvkvuK9P6p?width=768&height=1024&cropmode=none.jpg

Fresh tail lights
KYYw3bzW1BYrN2?width=768&height=1024&cropmode=none.jpg

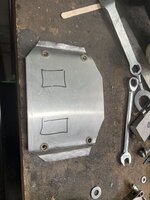
Braker calipers reinstalled, some new hardware and new brake dust shields made

With the help of Mrs Octane and 5 bleeder bottles bled the clutch and brakes
Bh0BaO0_u4zPeX?width=768&height=1024&cropmode=none.jpg

Plenty of hoses and multiple trips for clamps later we're ready for the second start

Aaand no luck.
Appears we're missing crank signal now and the heater valve is malfunctioning.
Starts but won't run for more than a second

and to top things off....******* oil out the rear of the block 🤣
xRfchXGxaMImJo?width=768&height=1024&cropmode=none.jpg

I did actually buy the alignment tool recently predicting this would be my luck :confused:
Not even sure if i can remove the gearbox without the engine which i'm not looking forward too

Happy Holidays 🤣
 

Terrick down Under

Well-known member
Joined
Jul 2, 2015
Messages
1,904
Location
Royalla, NSW, Aust.
these things are sent to test us, to make sure we really want to do all this, and keep going.
If it waw easy everyone would do it.
Keep going, it is looking great..... and a lot better than some of the shiteboxes I saw on the weekend.
 
OP
O

octane_matty

Well-known member
Joined
Jul 21, 2014
Messages
315
Location
Melbourne, Australia
Well last week of holidays, i was planning on a more relaxed week but here goes 🤣

LO2IKE9BmuaO-F?width=768&height=1024&cropmode=none.jpg

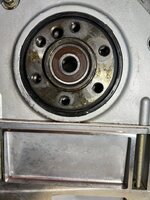
and yep confirmed the bottom lip of the seal was tainted
Wouldn't it just be nice if GM added dowel pins to the rear cover :cry:
ULjmb-u4IHzdvM?width=768&height=1024&cropmode=none.jpg

Cover bolts near the cam look a little moist too

_5n3qwmfEiVkrE?width=1024&height=768&cropmode=none.jpg

Fresh new factory GM cover, seal, bolts and sealant on everything, grease on the oil seal :fingersx:
CpmNZPC9e06Nw3?width=768&height=1024&cropmode=none.jpg

Since i was missing crank signal before, time to swap in another Crank sensor
Although the original is known working, it's covered in paint and the engine wasn't exactly in the best condition when i purchased it.

Repco says the part is made in Japan, box says made in taiwan? 🤣 only 2000km difference 🤣
aFfsOHqr4bf_Pl?width=768&height=1024&cropmode=none.jpg

Having no oil pressure once again gave me flashbacks of the original starting problems.
Recently i re-did the wiring for the neutral switch with a deutsch connector
Cut the wires and yep oil pressure and crank signal back :LOL:
With a multimeter tested the plug and it's connected....maybe just very weak connection on the crimped terminals :cry:

Engine starts again and worked great for about a minute...then nothing.
I had a feeling it was fuel related, topped up the tank and we're back in action.

Turns out i plumbed the tank siphon the wrong way then re-inserting it the correct way has kinked the PTFE lines.
Time to find some rubber submersible hose.

Repco wanted $55 for ONE FOOT! Absolute rip off and they only stock a single length.

Ended up taking a 2hr round trip to VPW in epping where they sell by the meter for about $23/meter
Despite the travel i must say VPW stock levels vs their website appear 100% accurate and really good blokes to deal with.
The owner appears to have a stunning Porsche out the front (and i'm not even a porsche guy)
Finding it more and more often "In Stock" means in-stock at the supplier or another warehouse in this economy :confused:

Re-plumbed and left it alone i was that confident it's now a running car :LOL:


I now have a long list of "small" but crucial little things to solve

First up: speed sensors
I need to remount the factory diff speed sensor + provide a speed sensor for the GM ECU
mc6yYuG44dC-NY?width=1024&height=768&cropmode=none.jpg

Some classic CAD and mounted

Ts1AeBZCnPI3LD?width=768&height=1024&cropmode=none.jpg
At some point during the assmebly of this bracket i realised i'm an idiot and these are magnetic based sensors and i had the reluctor wheel cut in stainless 🤣🤦‍♂️

A quick rough intake shield, shoe-horning this 4" intake in
Not sure how the engineer will feel about this, it's pretty much touching the radiator hose and 10mm from the accessory belt.
0_2hQrEBsU9rWh?width=1024&height=768&cropmode=none.jpg

Seat belt tensioners installed and both seats in
Steering wheel installed
Vn5-rt82FYzaUW?width=768&height=1024&cropmode=none.jpg

Missing plenty of clips, found a bent tie rod, clutch re-bled, fresh badges, fans wired (one backwards)

Confident about a sneaky trip around the block
xCjFT_D4XuTjVJ?width=1024&height=768&cropmode=none.jpg

Started her up, fans run full tilt!
Turns out if you don't disable the A/C pressure sensor it assumes you need 100% fan action

Went to turn the steering wheel and the steering violently shakes ripping the steering wheel out of my hands :oops:

Appears i've either plumbed the rack backwards or some kind of pressure restriction in the wrong place 🤣
Well that's the end of the holidays and i almost had a running car....almost :LOL:


ETA to car completion 13hrs
 

Geoff289

Well-known member
Joined
Nov 10, 2013
Messages
1,235
Location
Melbourne, Australia
Ended up taking a 2hr round trip to VPW in epping where they sell by the meter for about $23/meter
Despite the travel i must say VPW stock levels vs their website appear 100% accurate and really good blokes to deal with.
The owner appears to have a stunning Porsche out the front (and i'm not even a porsche guy)
Finding it more and more often "In Stock" means in-stock at the supplier or another warehouse in this economy :confused:
VPW is a real success story. The founder and owner/Porsche driver, Bruno Cugnetto, built this up from a little speed shop called Epping Street Performance starting in his 20's. He was a very successful drag racer for quite a while back in the '90's. As well as the Porsche he has an enormous boat down at St. Kilda marina.

bruno.jpg

I don't know where you are in Melbourne but this mob in Clayton are another great source of parts. They are primarily a wholesaler but happy to sell single orders to mugs like me and their prices are often very good compared to other options.

https://www.precisionintl.com/
 
OP
O

octane_matty

Well-known member
Joined
Jul 21, 2014
Messages
315
Location
Melbourne, Australia
VPW is a real success story. The founder and owner/Porsche driver, Bruno Cugnetto, built this up from a little speed shop called Epping Street Performance starting in his 20's. He was a very successful drag racer for quite a while back in the '90's. As well as the Porsche he has an enormous boat down at St. Kilda marina.

bruno.jpg

I don't know where you are in Melbourne but this mob in Clayton are another great source of parts. They are primarily a wholesaler but happy to sell single orders to mugs like me and their prices are often very good compared to other options.

https://www.precisionintl.com/

Thanks Geoff, interesting info!

Hah funny you mention Precision i actually got the rear cover/seal kit from them. Only place i could find with confirmed stock and luckily not far away from me. I actually used to work around the corner from them circa 2011-2012 :LOL: time flies i bought the gearbox back then.
Edit: also props to them for not really being a retail shop but i headed into the warehouse entry and a bloke sorted me out on the spot. I felt a little rude but saved me waiting for Auspost :cool:


Even with VPW for performance parts, i can't wait for larger parts suppliers to enter Aus market.

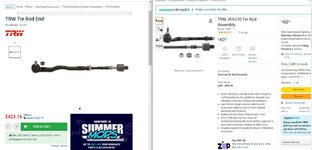
Recent example here: Sparesbox on the left here must be having a laugh :oops::ROFLMAO:
TRW330.JPG
 
OP
O

octane_matty

Well-known member
Joined
Jul 21, 2014
Messages
315
Location
Melbourne, Australia
Another week and a few little tweaks!

Started hunting for my steering line problems, checked and double checked but lines seemed correct

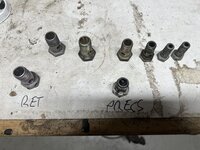
I was then thinking about the pressure restrictor in some BMW's as you can see on the right banjo.
The rack i have was from a crashed car and it's possible a hard hit has broken the pressure valve.

Removed it and replaced with one from my spares collection without the restrictor.
yoy4MPGNG0HOGG?width=1024&height=768&cropmode=none.jpg
After thinking about the car this rack came from i then realised I damaged the lines on the rack and lone behold that was it.
Somehow i got the hardlines on the rack mixed up when replacing them.

After fixing that i also installed some new inner tie rods to replace the bent one
3RPnMxuFEshqn9?width=768&height=1024&cropmode=none.jpg

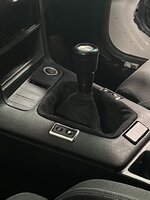
Small side project i've been working on 3d Printing a shifter boot plastic piece in ASA
I actually bought a replacement one but turns out it was LHD and poorly 3d printed 🤣

This is about version 3 after alot of calibration work
GLMsxr-dFzZXYi?width=768&height=1024&cropmode=none.jpg


wXVtYyPXFupleC?width=768&height=1024&cropmode=none.jpg
There's a special place in hell for companies that put white branded labels on their shifter boots. Took forever to pick the logo out of the boot.

Ohh yess.....don't worry the chrome won't stick around :cool:
vgqJNxdYQ1PnKT?width=768&height=1024&cropmode=none.jpg


After fixing the steering rack issues there really was nothing stopping me from attempting a drive.
The E36 made it to the driveway under it's own power but a few more issues have cropped up :ROFLMAO:

1) Clutch feels like there's still air in the lines but even so doesn't feel like it's got enough stroke to really push the clutch.
2) Reverse lockout solenoid doesn't seem to be working
3) Tacho showing nothing

As they say the last 5% takes the longest 😁

Jobs to do over the coming weeks:
Complete EVAP plumbing
Door panel alignment
New clutch master

Future projects already in planning 🤣
Trailer build
Kitchen


Meters E36 Driven under it's own power: 6

Cheers
 
OP
O

octane_matty

Well-known member
Joined
Jul 21, 2014
Messages
315
Location
Melbourne, Australia
Another week and a pretty busy long weekend

Been attempting a final print of the guage holder for the E36 in ASA

unfortunately for a 14+hr print i experienced multiple filament tangles and destroyed the print 6hrs in :cry:
Seems i'll have to completely re-wind the spool as it's my only ASA spool currently.
hcByJRCvzEHt7q?width=768&height=1024&cropmode=none.jpg

E36 has been getting a new 7/8 wilwood master cylinder
Mount is sorted, ended up making a custom pushrod from a M8 bolt.
Additional bonus the master cylinder has an integrated return spring
Just waiting on a 3/8-24 adapter fitting to plumb it in
EEz3G7G79rMpwl?width=768&height=1024&cropmode=none.jpg


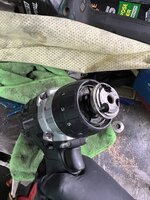
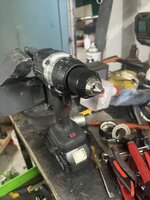
After 8 years of trusty service my Makita DHP458 chuck wore out. Despite attempts to replace the chuck i couldn't get the chuck unscrewed no matter what i did.
Mrs Octane has been after a lighter drill also so i offered to purchase her a new compact drill and take her Brushless drill.
Unfortunately shortly after receiving her drill the chuck had problems loosening while drilling :confused:

I still had a brand new chuck ready to go, so thought i'd be successful the second time replacing a chuck 🤣

Ended up having to slowly cut the chuck off bit by bit until i could release it
szN3FmDH61c5NC?width=768&height=1024&cropmode=none.jpg

Accidently damaged the outer plastic ring on the drill so swapped that over from my old drill

Back in action for another 5 years hopefully :cool:
jHQJaLLCvqeC_i?width=768&height=1024&cropmode=none.jpg

I know when it's 30 degrees outside my first thought of something to do is demolish a 3.5x1.2m double brick wall
Not my smartest idea 🤣
1675122552681.png

Then finish off on a 36 degree day moving all the bricks and disposing of 300kg broken bricks at the recylers :ROFLMAO:

Sleepers laid for a future/temporary garden bed
Gap to the driveway is to accept a new letterbox and widen our driveway entry for easier access
1675122704443.png

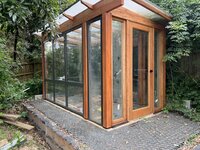
With the help of Mrs Octane and borrowing a glass sucker the greenhouse is finally glazed!
Took some real effort to get the windows in but glad nothing broke!

KSFqOxE2vTJ7oa?width=1024&height=768&cropmode=none.jpg

More to come!

Cheers
 
OP
O

octane_matty

Well-known member
Joined
Jul 21, 2014
Messages
315
Location
Melbourne, Australia
Been a busy few weeks with a bit of progress!

I have been talking about a potential trailer build on the horizon.
Scrolling marketplace and came across a deal i couldn't pass up 🤣 I guess two trailer builds are on the cards now 🤣
1Ig_jTaw32H37N?width=768&height=1024&cropmode=none.jpg

Concrete poured to widen my driveway entry
Safe to say concrete isn't an alternate occupation for me
iPXkTd996S-fOh?width=1024&height=768&cropmode=none.jpg

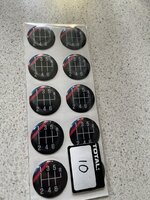
The internet is amazing, suprisingly easy to make and order some shifter caps
5swyyFpebn-uhg?width=768&height=1024&cropmode=none.jpg

Quick work trip to Perth for a few days
3ES0jzbM2Rz4Uv?width=1024&height=768&cropmode=none.jpg

m_HlZwhqsVsnQ8?width=1024&height=768&cropmode=none.jpg

Still struggling on the mount for this, but configured the guage anyway
osgg-MHGMluWfQ?width=768&height=1024&cropmode=none.jpg

kgox6ttetdZOMB?width=1024&height=768&cropmode=none.jpg

E36 has now left the house twice for a small trip up the street. Unfortunately the RDA rotors i bought came with the friction surface painted. Combined with fresh pads all around driving the car is SKETCHY!!!
There is no safe flat ground around my house, everything is steep :oops:

I think my brake master cylinder is also undersized for the piston area of these brakes also which makes the pedal require alot of travel before you feel brakes. Not exactly helping the other brake issues.

Ordered a M3 master cylinder that's hopefully a direct bolt on, increasing bore from 7/8 to 1"

Cheers
 
To avoid these ads, REGISTER NOW!
OP
O

octane_matty

Well-known member
Joined
Jul 21, 2014
Messages
315
Location
Melbourne, Australia
Well few more weeks passed and a few little projects on the go


E36 has had a new windscreen installed
hPYMjM6mAihJtw?width=1024&height=768&cropmode=none.jpg

Finally completed the guage holder print for the E36
Took probably over 10 failures to make this happen. Over extrusion, under extrusion, adhesion problems, tangled reel x 3, gcode errors etc etc. I ended up splitting the part into 3 pieces to keep printing time shorter.

Really struggling to get the paint finish i want on it so far but still working on it
Sanding for hours
TW0ytUb8865KJu?width=768&height=1024&cropmode=none.jpg

M3 badges on the outside seem a little cliché so i opted for these replica motorsport badges on the side trim.

Unfortunately real ones are NLA and probably only offered to LTW owners :ROFLMAO:
nqukEOWCHQY2ZO?width=1024&height=768&cropmode=none.jpg

I totally forgot my painter also modified and bent the rear wheel mouldings to fit with the flares which actually looks pretty good.
xMSi1iMN2yNj0L?width=1024&height=768&cropmode=none.jpg

Side markers reinstalled
Bought some replica markers but the plastic sticks out too much and looks cheap
Used the new gaskets and re-installed the old ones
MZj0yljeo8HENh?width=768&height=1024&cropmode=none.jpg

Brake problem update!
Installed a new M3 master cylinder
Brakes now work perfectly, feels heaps better!
wworBwEUGH7TN2?width=768&height=1024&cropmode=none.jpg

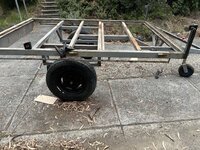
My brother in law bought this trailer a while ago for cheap.
It functions as a trailer but the height makes it sorta useless for heavy loads or dirtbikes.
We've had a long running plan to give it a freshen up so i've got about 3 weeks to sort it out and make it functional.

M9BxqPpEgrScF7?width=1024&height=768&cropmode=none.jpg

Split the top off, 3mm steel is a little overkill
Qvy30MFF7NrvZ1?width=1024&height=768&cropmode=none.jpg

Seperated the axle
OwjNJlo8_rR4D8?width=1024&height=768&cropmode=none.jpg
The trailer is about 1.4t axle rated with electric brakes. The axle width is limiting but pretty much turning it into a beefy 7x4 trailer for hauling anything that fits. Hopfully give it another 20 years service at least.


Latest purchases: fex fuel sensor for the E36, 90s spec radio for the E36

Few things holding me up on the E36 at the moment mostly asthetic things i want cleaned up before i have to hand over the keys to anyone or have the rozzers give it a once over :LOL:


Going to be a busy few months ahead; Kitchen starts easter weekend.


Cheers
 
OP
O

octane_matty

Well-known member
Joined
Jul 21, 2014
Messages
315
Location
Melbourne, Australia
And another 3 weekends of annoying my neighbors with the grinder orchestra

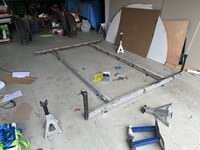
Trailer has gone back to the frame
VBrlb-YAKEmqnA?width=1024&height=768&cropmode=none.jpg

New drawbar
9atzmjwazWl2Gn?width=768&height=1024&cropmode=none.jpg

ebkdejK7ImQcfV?width=1024&height=768&cropmode=none.jpg

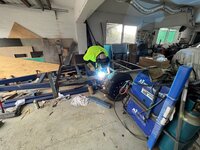
It's my brother in law's trailer and his MIG welder, so i sat back and let him weld most of the weekend :LOL:
IDhZ8eWe7MbguP?width=1024&height=768&cropmode=none.jpg

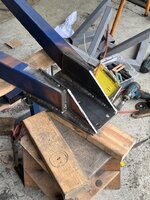
Not your most traditional hitch setup but fairly common in 4x4 camper builds.
This is the bad side i swear :ROFLMAO: but feel free to judge
OyzxbVGTFwUaqu?width=768&height=1024&cropmode=none.jpg

fYLP7eVrNSTG7G?width=768&height=1024&cropmode=none.jpg

Unfortunately couldn't get the remaining steel to complete the trailer this weekend so we took the bikes out to Eildon/Rubicon
Mostly firetrails but covered about 100km mostly parts of the 2022 Open Roads Rally Intermediate maps.

Had an absolute debacle of a start to the day with flat tyres and the CRF not starting :LOL:
TphvMiZGt76m98?width=768&height=1024&cropmode=none.jpg

E36 is still waiting on some Stereo bits to be delivered from overseas
Kitchen renovation starts next weekend :oops:

As always 3 projects in progress and 5 about to start 😁

Cheers
 

Geoff289

Well-known member
Joined
Nov 10, 2013
Messages
1,235
Location
Melbourne, Australia
Head unit adapter cable finally arrived!

90s look perfection :cool:
fI8zjSRJPKGHFf?width=768&height=1024&cropmode=none.jpg
NIce work on the trailer. I'm always envious of people who can weld nicely. Mine usually hold together but look awful.

I see you have the car radio tuned to Gold 104. At the risk of confirming my old fart status, I find Gold, while maybe the least worst of commercial FM stations, pretty hard to stomach these days. When they started they played mostly good music from the '60's with some from the decade either side. These days they still claim to be a nostalgia station but seem to think **** from the '90's qualifies.

But your radio looks good.
 
Last edited:
OP
O

octane_matty

Well-known member
Joined
Jul 21, 2014
Messages
315
Location
Melbourne, Australia
NIce work on the trailer. I'm always envious of people who can weld nicely. Mine usually hold together but look awful.

I see you have the car radio tuned to Gold 104. At the risk of confirming by old fart status, I find Gold, while maybe the least worst of commercial FM stations, pretty hard to stomach these days. When they started they played mostly good music from the '60's with some from the decade either side. These days they still claim to be a nostalgia station but seem to think **** from the '90's qualifies.

But your radio looks good.

I agree entirely lately i find Smooth FM more reliable lately, they have slightly less ads and a decent mix of 70s-80s and sometimes 90s

I often end up listening to streaming services anyway due to the ads or being out of radio reception often.
 

Ralf99

Well-known member
Joined
Apr 14, 2011
Messages
440
Location
S.W.Victoria, Australia
I was a 3PBS and 3RRR supporter for decades - through the 80s, 90s and early 2000s - then relocated overseas for another decade or so and when I returned found that they’d moved on with the times and I hadn’t. These days if I listen to the radio it’s most likely ABC774 or even RN, now that’s real old fart stuff, but surprisingly common to hear bands and comedians that I used to see in the pubs decades ago on air or presenting. I think I may have already turned into my parents.
 
OP
O

octane_matty

Well-known member
Joined
Jul 21, 2014
Messages
315
Location
Melbourne, Australia
I was a 3PBS and 3RRR supporter for decades - through the 80s, 90s and early 2000s - then relocated overseas for another decade or so and when I returned found that they’d moved on with the times and I hadn’t. These days if I listen to the radio it’s most likely ABC774 or even RN, now that’s real old fart stuff, but surprisingly common to hear bands and comedians that I used to see in the pubs decades ago on air or presenting. I think I may have already turned into my parents.

weirdly i remember seeing all these 3RRR stickers everywhere growing up but i don't think i've ever listened to the station :ROFLMAO:

scratch that i opened 3RRR in the background and got distracted while replying....it's like a more quirky Triple J, not bad...would rate higher than anything in the 100-101.9 range

774 is incredibly dry mate, can i suggest some podcasts 🤣
 

Ralf99

Well-known member
Joined
Apr 14, 2011
Messages
440
Location
S.W.Victoria, Australia
If you think 774 is dry, RN would be positively arid.

3RRR had its roots in student radio at RMIT before setting up on it's own in '79 - long before my time at RMIT, but I was involved briefly with student radio 3ST there in the late '80s. Those 3RRR stickers were pretty ubiquitous, and I had a minor input in to the late 90's versions as my girlfriend of the time designed some of them. Early RRR was more like the JJ of the time, with JJJ being formed to garner the 'youth' market.
I preferred 3PBS as it was more of a true community radio station run out of a particularly shabby studio in Fitzroy Street in St Kilda, just down the road from where I was living.
Ahhh, the good old days.
 

Geoff289

Well-known member
Joined
Nov 10, 2013
Messages
1,235
Location
Melbourne, Australia
If you think 774 is dry, RN would be positively arid.

3RRR had its roots in student radio at RMIT before setting up on it's own in '79 - long before my time at RMIT, but I was involved briefly with student radio 3ST there in the late '80s. Those 3RRR stickers were pretty ubiquitous, and I had a minor input in to the late 90's versions as my girlfriend of the time designed some of them. Early RRR was more like the JJ of the time, with JJJ being formed to garner the 'youth' market.
I preferred 3PBS as it was more of a true community radio station run out of a particularly shabby studio in Fitzroy Street in St Kilda, just down the road from where I was living.
Ahhh, the good old days.
Have to confess that both RN and 774 are part of my normal morning listening but I've already admitted to being an old fart. My musical tastes are firmly rooted in the blues and '60's music. My phone via bluetooth in my Mustang and the 10 Gb hard drive in my daily driver are full of such good music and at home once I've had my politics and current affairs fix I stream a few US stations that play wall to wall blues, no ads. In between I've just bought myself a new strat that I've been annoying the neighbours with in the last few days.
 
OP
O

octane_matty

Well-known member
Joined
Jul 21, 2014
Messages
315
Location
Melbourne, Australia
Another 2 weeks and plenty of work all around
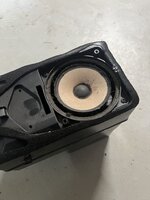
E36 now has Audison AP5's in the kick panels, Hertz 6x9s in the rear parcel shelf.

I was skeptical about if i really needed to replace the speakers but then i pulled this parcel shelf speaker out :LOL: C2zoY-Nq3TGAM8?width=768&height=1024&cropmode=none.jpg

Kitchen renovation has started
Classic 70s
2aoFG4txAVtRXP?width=1024&height=768&cropmode=none.jpg

uneq_siXF_ReVD?width=1024&height=768&cropmode=none.jpg

A full skip later and asbestos removal later
pRp1AFb6V8_ugO?width=1024&height=768&cropmode=none.jpg
having some problems with engineers to fix my brick wall problem and plenty of work still to come to level that floor. ~20mm fall in 3m

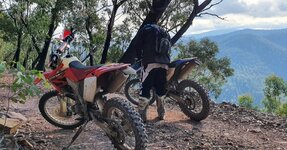
Last weekend was a long weekend so good to time to take the bikes out
(Rare headless octane_matty)
OGipA2GPRk_OMj?width=1024&height=536&cropmode=none.jpg

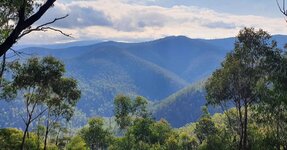
This was from the south end of the Victorian high country, east of Avon wilderness
Most likely Maroka Rd, amazing track that followed the ridgeline with views like this for about 10km

Unfortunately my brother in law's CRF gave up 3km from the car park. Bit dissapointing since it had the valves checked/serviced 3 rides ago. Hopefully a few tweaks and its working again.

DLBSf7rZWhJoND?width=1024&height=536&cropmode=none.jpg

Spent Anzac day working on the trailer again, it's now sporting steel sheet on 3 sides.

Hope everyone had a good long weekend with some QST

Cheers
 
OP
O

octane_matty

Well-known member
Joined
Jul 21, 2014
Messages
315
Location
Melbourne, Australia
Wow 2 months went by real quick!

Quick update on a few things
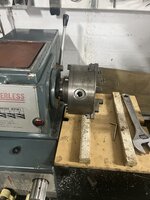
little bit of lathe servicing, took the chuck off and gave it a good clean lately
YTj2CWS_1V9imr?width=768&height=1024&cropmode=none.jpg


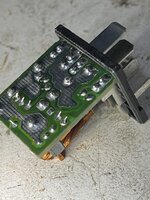
Having all kinds of problems trying to get the E36 sunroof working smoothly without blowing fuses etc.
After testing a few times the sunroof seemed to function unreliably. Supposably this is a common issue with the comfort relay.

Found a cracked solder joint in the middle there
After a dab of solder it helped but still needs alot of work on the sunroof mechanism :cry:
rlcEvgnanndt_0?width=768&height=1024&cropmode=none.jpg

Kitchen is in progress
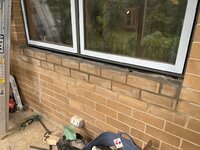
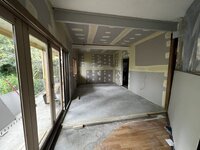
Floor levelling has started, aluminium strip covers the expansion joint between concrete slab & timber side of the house.
Window out
h_tCi76mqYmq30?width=1024&height=768&cropmode=none.jpg

New double glazed casement installed
YRwBUxiuCHrjHK?width=1024&height=768&cropmode=none.jpg

Wouldn't quit my dayjob to be a brickie :ROFLMAO:
tSeDNFSyqIQnwU?width=1024&height=768&cropmode=none.jpg
shh don't look at the ends, it'll be covered up by an outdoor kitchen eventually.
Instead of the sloping bricks protruding out from the wall the top will be capped with a sloped piece of hardwood.

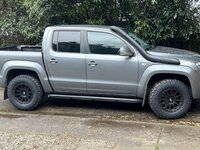
The Amarok recently started to get a little sketchy in the Melbourne winter
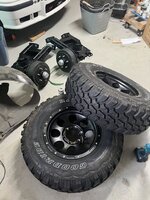
Decided on a new set of KO2s and couldn't help but get a new set of wheels too :cool:
3n9akYOs4dFL96?width=1024&height=768&cropmode=none.jpg

As i'm working on the award for most expensive and least used greenhouse :LOL:
Added some bluestone pavers to the floor
ct2PjmrlHPGvq0?width=768&height=1024&cropmode=none.jpg
Planning to start growing some things in a few months 🤣

Ongoing projects:
E36 - Working on fixing the sunroof, working on speaker setup
Kitchen - Waiting on building permit + organising steel fabriction, Cabinets eta 26th July
Power - Needs an upgrade for new kitchen + 3 phase ;), waiting on a quote for a new supply/pit install.
Trailer - no updates, waiting on a sunny day when i've got a break from the Kitchen

It's only May but it's going to be a sprint to the end of this year!

Cheers
 
OP
O

octane_matty

Well-known member
Joined
Jul 21, 2014
Messages
315
Location
Melbourne, Australia
Well it's been just over 2 months and a few lazy weekends but we're finally back on track :cool:

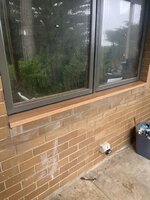
New window sill/drinks shelf installed
D2%21108444&authkey=%21ALHAQ4FrNSHmeO8&height=1024.jpg


Hopefully planning on a warm summer in melbourne this year so time to dust off the MTB
Pulled it off the rack but the seatpost wouldn't budge. Circa 2012 rockshox reverb finally gave up on me.
Yeah bleeding might fix it but the post has given me nothing but trouble considering how little i ride it.
(Bled it afterwards and more glitter came out :LOL:,still broken)

Purchased a new bikeyoke post with the quick bleed function and wolf tooth light lever!@
100% superior design compared to the reverb by using cable actuated lever & Air assisted spring. Comes with a tiny tool to bleed it within seconds whenever it needs a 'factory reset'
D2%21108447&authkey=%21AHwfQqltDf6gqAY&height=1024.jpg

Recently found out my partner and I are expecting so renovation schedule has added urgency :oops::oops: and a holiday at short notice was on the cards!
Spent a week up the coast in Port Douglas, 26 degrees everyday :cool:
D2%21108446&authkey=%21ABxBWHWjjkkIJ9M&height=1024.jpg

meanwhile there's been alot of back and forth with the Engineer/Building surveyor and a draftsman now
Finally i have successfully received a building permit :D
Took alot longer than expected (almost 5 months)!!! I completely understand why plenty of people just play the ignorance card and go ahead.

Saturday was finally time to start the demolition with some help from Pink Floyd
D2%21108448&authkey=%21AJgIfz3wJNY-e18&height=1024.jpg

Today just did a tip run then decided to get the greenhouse ready for Spring
Shelf finally fixed & flyscreens installed.
D2%21108445&authkey=%21AEJKpzJS9X8uw0A&height=1024.jpg

For proof that i actually plan on using the greenhouse :ROFLMAO:
We've got some carrots, garlic or chives,capsicum, cherry tomato, chillies & lettuce to start with
D2%21108449&authkey=%21ALeTo-6zYvPFekI&height=1024.jpg
If it isn't abundantly clear i have absolutely no idea what i'm doing :unsure:
If you've got any recommendations on some youtube channels for greenhouse stuff let me know!

Current schedule for the next 2 months:
Steel beam install/BiFold - 2 weeks away
Plasterering/Trenching for electrics - 3-5 weeks away
Painting - 6 weeks away
Kitchen install - 7 weeks away
Stone install - 9 weeks away

It's going to be non-stop to Christmas :p


Cheers for reading:oops:
 
OP
O

octane_matty

Well-known member
Joined
Jul 21, 2014
Messages
315
Location
Melbourne, Australia
Well three weeks have passed but i'm well and truly smashing into the kitchen

First part of the wall removed for Beam prep
D2%21108448&authkey=%21AJgIfz3wJNY-e18&height=1024.jpg

Had a chippy mate help out and a welder come out to sort out the structural beams.
Drilling 4 x M16 chemsets on each post
D2%21108659&authkey=%21AB-vqYyRubdhrLc&height=1024.jpg
Opening cut out!
D2%21108658&authkey=%21AL-uKfxVGRona_U&height=1024.jpg
4m 180mm C Channel
0D2%21108661&authkey=%21ANZyKrwsqIq23v4&width=1024.jpg

Some fun joist hanger spots :unsure:
D2%21108665&authkey=%21AHaZe1kPpcqy5co&height=1024.jpg

bricks bricks bricks
0D2%21108660&authkey=%21AFR9HywLFJ0ovGc&width=1024.jpg

This picture sums up most of my weekend - 4cubic meters of bricks and concrete :ROFLMAO:(fingers crossed the truck can still pick it up)
D2%21108664&authkey=%21AIq5jrIUC0fQ4Rk&height=1024.jpg

and that's not even the last of it :cry:
D2%21108667&authkey=%21AEBi7HQb-zSkra0&height=1024.jpg

Alot of effort but we're getting there...
D2%21108663&authkey=%21AEAaEp2gwzFhYxE&height=1024.jpg

Well it seems i'm running behind schedule 4 weeks to kitchen install :eek:

Cheers
 
OP
O

octane_matty

Well-known member
Joined
Jul 21, 2014
Messages
315
Location
Melbourne, Australia
Another month and plenty of progress :cool:

Kitchen ceiling battened out, insulated, walls levelled

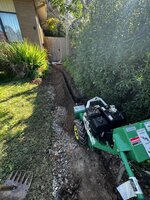
Finally a good sunny weekend came up in time to start digging the trench for my new power feed.
Hired a trencher for the day, only used it for an hour :ROFLMAO:
D2%21108876&authkey=%21AIl07Sbxbj0BHPU&height=1024.jpg

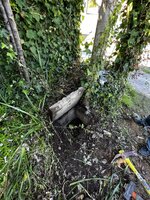
Sparky wanted the trench as direct as possible but then i discovered a suprise stormwater pit :unsure:
That's one of my neighbors dropping by to laugh at my misfortune :ROFLMAO:
D2%21108875&authkey=%21AGg6alGlEQDEDo0&height=1024.jpg

What was meant to be a quick 1 day operation ended up being a solid 2 full day ordeal but i got there in the end. I'm sore to say the least :oops:
D2%21108877&authkey=%21AMD1MtnPkLSPfmQ&height=1024.jpg

Time to rest? nah, time to mix and lay a few hundred kg of self leveller :LOL:

I ended up purchasing a heap of Sika Level top. It has a fairly high water to bag ratio which should make levelling easier. The only more fluid product is Ardex K55 which is about 3x cost per bag.

The floor has a significant 10-30mm dip to where the brick wall was removed.
0D2%21108874&authkey=%21AENMFP3K4il-HU0&width=1024.jpg

Plasterers came in today and smashed it out
0D2%21108878&authkey=%21AClwyv7wat8s_pw&width=1024.jpg

Only a week left until the cabinetry is installed, hopefully sort the final floor levelling this weekend and fill in the trench.

Latest tool purchases:
Trojan post hole shovel (fibreglass handle) - not bad, good foot steps on it
cyclone trench shovel - not as useful as i hoped (can't stand on it easily)
Kanga circ saw blade (definitely not as good as diablo)

Cheers for reading :)
 
To avoid these ads, REGISTER NOW!
Top Bottom