I haven't seen another discussion of epoxying in the anchors, so I thought I'd offer up my experience.
I was drilled 6 holes for epoxy, and 7 holes for drop-in anchors, so I used tape on the floor to indicate how deep the hole was supposed to be. I also marked on the tape which was the last hole to be filled with epoxy.
Holes are drilled 6-1/4" deep (regular drop in anchors are only 5-1/2"). That's going to take a longer drill bit, so take that into account. I bought 2 6-3/4" long Bosche bits (new from EBay $5.50), and one 13" Vermont American (used off of EBay). I used the shorter bits to do the first 5" of the hole, and finished off with the longer bit. I used my shop vac while I was drilling to keep the dirt down
I used a laser level to help keep the drill bit vertical, at least in one plane. The drill had a tendency to wander a little bit, and a couple of my holes were less than vertical, but they are tilted outward from the post. If they aren't perpendicular, I would think this is the best direction to be off in.
I used a rubber hose attached to the end of my blow gun to blow up the dirt from the bottom of the hole. When I was sure I had drilled deep enough, I used a bottle brush that I fould at Northern Tool when I was in their store (Lowe's also has one on their web page that you have to order). I used that brush to clean out the holes well, again using the blow gun and vac to clean the hole as best as possible. Cleanliness is important for holding strength.
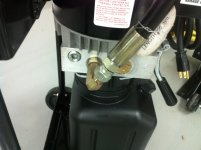
After the holes were drilled and cleaned, get your anchors ready to be inserted. As was recommended by somone else here, I wrapped the exposed threads with masking tape, just to keep the epoxy off of the threads.
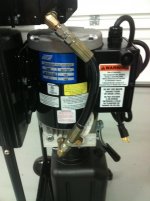
The directions said that you should be able to get about 6 holes filled per tube. I had 6 holes to epoxy, and was worried that I might run short (I've read that it has happened to others, but they had gone all the way through their concrete. I wasn't). I had one hole marked to fill last. If I didn't have enough epoxy, I would have used a regular drop-in anchor there. I chose the center hole in the back to be that hole, but I had no trouble filling 6 holes with one tube.
Mark a line on the injection nozzle about 3-1/4"-3-1/2" from the tip. That is how deep you want to fill the holes with epoxy. If you overfill them, it just oozes out when you insert the anchor. You should have a little bit come out when you set the anchor, otherwise it might not be full enough. Fill one hole and set the anchor, just so that you know if you can put a little less in each hole. Helps save on cleanup.
***** IMPORTANT NOTE *****
Wear goggles, and at least one disposable glove when you set the anchors. You also want to wrap a couple paper towels around the anchor before you hit it. The epoxy comes out of there and goes everywhere, so a paper towel and gloves really help with the mess.
Epoxy is supposed to harden in 45 minutes. I cleaned up the rest of the garage, took a break, and after an hour, I removed the bolts. No trouble removing them, and all the anchors were below the surface.
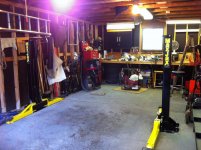
All of my anchors )epoxied and drop-in) are well well below the surface, so I'll probably look into getitng longer bolts. Cost in minimal, and better safe than sorry.