To avoid these ads, REGISTER NOW!

Maxjax Installs: Post Here

EuroVt

Well-known member
Joined
Nov 28, 2010
Messages
103
Location
Central Vermont
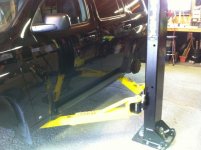
My slab was originally 3-3/8" deep, but since it was built less than 2 years ago, I was able to get the builder to repair it. They took out a piece 4' x 21' and pour that 12 inches deep, with rebar in the bottom 6 inches, 3500 psi. I used epoxy on the anchors that were 6 inches from the edge, but used the regular drop in anchors for the others. When I get time, I'll post the epoxy experience, since I haven't seen anyone talk about that yet.

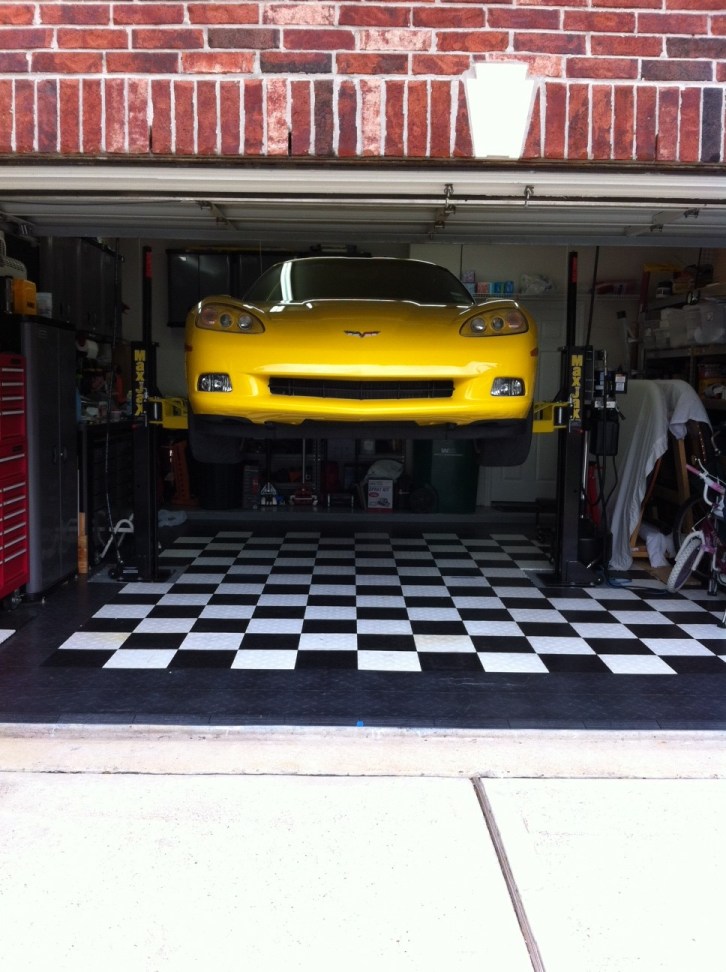
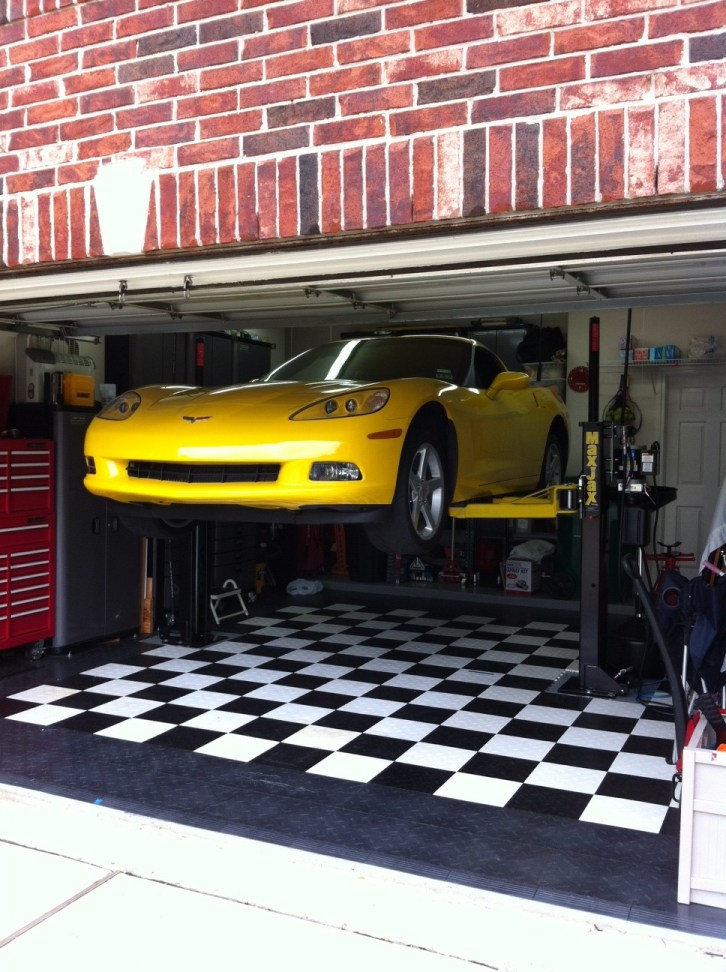
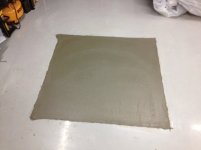
Epoxy is in, and hardened overnight. I'll get out there soon and get a car in the air....

If you pour a new pad for the posts, can't you just set the hardware in the fresh concrete?
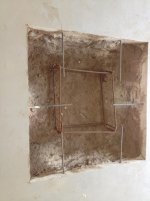
:headscrat
 
To avoid these ads, REGISTER NOW!

DonIvey

Active member
Joined
Mar 25, 2009
Messages
35
Just got my Maxjax installed and am unsure about something. Do I worry about whether the lift is plumb unweighted, or after the car is on it. It does change, you know. Thanks,

Don Ivey
 

regguy1

Well-known member
Joined
Dec 15, 2009
Messages
4,053
Location
On Mount Olympus with Zeus

mercury26

Well-known member
Joined
Sep 28, 2010
Messages
47
Location
Broomfield, CO
Ok, I just finished the other (5) anchors on the other column. Same type of behavior, a few them when being torqued popped up above the concrete into the hole on the baseplate. But they all eventually torqued up to 90 ft/lbs. I feel a bit nervous about the anchor setting. Maybe I am being irrational...


Further update, I am not comfortable with the anchor setting. I attribute this to the depth of the concrete (but could be my incompetence :) ) though probably the 3.5" concrete. I have decided to have a concrete company come out an install two new footings. The plan is to do 48" x 48" x 12" 4,000 PSI concrete which will be doweled (epoxy dowels) into the existing concrete. After the concrete has cured for 30 days, I will be putting in the Wej-It Epoxy anchor kit from GES. Will keep folks up to date, as my situation my be useful to some one else.

Regards,

Chuck
 

les_garten

Banned
Joined
Oct 8, 2010
Messages
660
Location
PSL, FL Next door to Megan FOX, and down the stre
Further update, I am not comfortable with the anchor setting. I attribute this to the depth of the concrete (but could be my incompetence :) ) though probably the 3.5" concrete. I have decided to have a concrete company come out an install two new footings. The plan is to do 48" x 48" x 12" 4,000 PSI concrete which will be doweled (epoxy dowels) into the existing concrete. After the concrete has cured for 30 days, I will be putting in the Wej-It Epoxy anchor kit from GES. Will keep folks up to date, as my situation my be useful to some one else.

Regards,

Chuck

How much ya figure that will cost ya?
 

73 Mustang Bill

Well-known member
Joined
May 27, 2011
Messages
124
Further update, I am not comfortable with the anchor setting. I attribute this to the depth of the concrete (but could be my incompetence :) ) though probably the 3.5" concrete. I have decided to have a concrete company come out an install two new footings. The plan is to do 48" x 48" x 12" 4,000 PSI concrete which will be doweled (epoxy dowels) into the existing concrete. After the concrete has cured for 30 days, I will be putting in the Wej-It Epoxy anchor kit from GES. Will keep folks up to date, as my situation my be useful to some one else.

Regards,

Chuck

I had this done, at the cost of the builder (probably charged to the concrete sub though). What a MESS they made. I taped plastic from floor to ceiling, taping every inch. One cabinet even had an extra layer of plastic over it, and yet concrete dust still was able to get in everywhere.

When I talked to Gabe at Garage Equipment Supply, he recommended one continuous pour for both sides, with steel in the bottom (bottom 6 inches). Since I might some day but anchors on the other side, I had both 'bays' of the garage done, so mine was 4' x 21' x 12" deep. I had 3500 psi concrete poured. They claimed to have used extra hardener as well. Things turned out well, and I've used my lift for a couple weeks without any problems. The anchors all set well. I used a combination of regualr wedge anchors and epoxied anchors.

Good luck.
 

mercury26

Well-known member
Joined
Sep 28, 2010
Messages
47
Location
Broomfield, CO
I had this done, at the cost of the builder (probably charged to the concrete sub though). What a MESS they made. I taped plastic from floor to ceiling, taping every inch. One cabinet even had an extra layer of plastic over it, and yet concrete dust still was able to get in everywhere.

When I talked to Gabe at Garage Equipment Supply, he recommended one continuous pour for both sides, with steel in the bottom (bottom 6 inches). Since I might some day but anchors on the other side, I had both 'bays' of the garage done, so mine was 4' x 21' x 12" deep. I had 3500 psi concrete poured. They claimed to have used extra hardener as well. Things turned out well, and I've used my lift for a couple weeks without any problems. The anchors all set well. I used a combination of regualr wedge anchors and epoxied anchors.

Good luck.


Yes, I am going to tape and mask off all my cabinets, tools, etc. Gabe recommended two footings. I am sure either approach will be sufficient.

Regards,

Chuck
 

73 Mustang Bill

Well-known member
Joined
May 27, 2011
Messages
124
When I taped off my garage, the windows were in the 'clean' area. I wish I had run a fan blowing air into the area to create a positive pressure in there. Maybe that would have helped keep some fo the dust out.
 

Todd.Brock

Well-known member
Joined
Jul 15, 2008
Messages
4,248
Location
Cincinnati
Man, I have got to get my lift in the ground. I have had my maxjax since last June and have not had time or rather taken the time to install. A 1year old and new born will do that to you. I am going to try the wej-its but am leaning toward the epoxy. Kind of stinks they are 150 bucks. I guess it's cheap insurance. The 2 post lift I sold to buy the maxjax had normal red head concrete anchors. Being reusable will be important b/c. I will have to set it up every time I use the lift. It's just in my 2 car at the house. I will see how it goes.
 

regguy1

Well-known member
Joined
Dec 15, 2009
Messages
4,053
Location
On Mount Olympus with Zeus
Man, I have got to get my lift in the ground. I have had my maxjax since last June and have not had time or rather taken the time to install. A 1year old and new born will do that to you. I am going to try the wej-its but am leaning toward the epoxy. Kind of stinks they are 150 bucks. I guess it's cheap insurance. The 2 post lift I sold to buy the maxjax had normal red head concrete anchors. Being reusable will be important b/c. I will have to set it up every time I use the lift. It's just in my 2 car at the house. I will see how it goes.

I believe Dannmar offers the epoxy anchor kit for less than that, I'd call and explain, they might give you a break on price. Or PM GJ member: UPSHIFT


Here's a photo of a job done on the MaxJax this week:
 

Attachments

  • GMC on MaxJax.jpg
    GMC on MaxJax.jpg
    128.2 KB · Views: 318
  • GMC SS Job.jpg
    GMC SS Job.jpg
    144.3 KB · Views: 192
Last edited:

halo

Active member
Joined
Mar 25, 2008
Messages
44
Just picked mine up last week. Lots of reading from everyone and appreciate all the tips.

Seems that the big issue comes back to the floor anchors. Looks like the instructions have been updated so as to install the anchors as per manufacturer guidelines.

So before I start drilling, anything else I should know?

Also - Should I stay with the supplied anchors, go with an epoxy anchor or add epoxy fill as insurance for this install

Thanks

Dave
 

skamp

Well-known member
Joined
Jul 20, 2007
Messages
644
Location
Cypress, TX
Just picked mine up last week. Lots of reading from everyone and appreciate all the tips.

Seems that the big issue comes back to the floor anchors. Looks like the instructions have been updated so as to install the anchors as per manufacturer guidelines.

So before I start drilling, anything else I should know?

Also - Should I stay with the supplied anchors, go with an epoxy anchor or add epoxy fill as insurance for this install

Thanks

Dave

If you have 5.5-6" of concerete then go with the epoxy anchors. It is a small cost and provides higher strength and less possibility of a mistake. if you only have 4" then use the drop anchors. I used the drop anchors but also filled the holes 2/3'rd of the way with epoxy. I used the redhead G5 epoxy from Lowes.

Steve
 

olytdi

Well-known member
Joined
Dec 3, 2011
Messages
2,202
Location
Olympia, Washington
Just picked mine up last week. Lots of reading from everyone and appreciate all the tips.

Seems that the big issue comes back to the floor anchors. Looks like the instructions have been updated so as to install the anchors as per manufacturer guidelines.

So before I start drilling, anything else I should know?

Also - Should I stay with the supplied anchors, go with an epoxy anchor or add epoxy fill as insurance for this install

Thanks

Dave

Why wouldn't you go with the supplied anchors? They work just fine.
 

mercury26

Well-known member
Joined
Sep 28, 2010
Messages
47
Location
Broomfield, CO
Yes, I am going to tape and mask off all my cabinets, tools, etc. Gabe recommended two footings. I am sure either approach will be sufficient.

Regards,

Chuck


OK, new footings poured on Monday. Here are some pics. Now the 30 day wait for everything to fully cure.
 

Attachments

  • Floor_Dry1.jpg
    Floor_Dry1.jpg
    133.9 KB · Views: 196
  • Floor_Pour2.jpg
    Floor_Pour2.jpg
    133.7 KB · Views: 198
  • Floor_Pour1.jpg
    Floor_Pour1.jpg
    132.4 KB · Views: 212
  • Floor_Cut2.jpg
    Floor_Cut2.jpg
    129.3 KB · Views: 221
  • Floor_Cut.jpg
    Floor_Cut.jpg
    120.6 KB · Views: 252

skamp

Well-known member
Joined
Jul 20, 2007
Messages
644
Location
Cypress, TX
OK, new footings poured on Monday. Here are some pics. Now the 30 day wait for everything to fully cure.

Did they get the concrete off a truck or just mix it there? I would think that is only like a yard or so of concrete.

Steve
 
To avoid these ads, REGISTER NOW!

olytdi

Well-known member
Joined
Dec 3, 2011
Messages
2,202
Location
Olympia, Washington
Been a while since anyone posted updates on re-routing hoses overhead and remote or column-mounting the power unit. Moving forward on this and would like to hear from others who already have done this. Costs? Suppliers? Tips/Tricks?

This has been a good thread!
 

JTSmithson

Well-known member
Joined
Jul 9, 2009
Messages
199
Location
Bloomington, Minnesota
my buddy and i were wondering if we just ran a new hose from the pump to the distribution block that would be mounted on the ceiling and have the hoses for each side come down from there, that way you're only buying and running one new hose. does that work instead of buying two long hoses that go from the distribution block to the posts?
 

les_garten

Banned
Joined
Oct 8, 2010
Messages
660
Location
PSL, FL Next door to Megan FOX, and down the stre
my buddy and i were wondering if we just ran a new hose from the pump to the distribution block that would be mounted on the ceiling and have the hoses for each side come down from there, that way you're only buying and running one new hose. does that work instead of buying two long hoses that go from the distribution block to the posts?


I have a hose that is like 30' and one that is 6'. Makes no difference.
 

73 Mustang Bill

Well-known member
Joined
May 27, 2011
Messages
124
Been a while since anyone posted updates on re-routing hoses overhead and remote or column-mounting the power unit. Moving forward on this and would like to hear from others who already have done this. Costs? Suppliers? Tips/Tricks?

This has been a good thread!

I considered going overhead out of my cabinet, and had started collecting supplies needed. However, after using my MaxJax for a while, I decided it wasn't worth the effort. If I'm working on wheels, brakes, etc., then the hoses don't really get in the way under the car. I will be doing some extensive work under one car soon, in the area of the transmission and exhaust, so I'll just remove the offending hose from that column when I'm working under there. The other column is pretty close to the cabinet door, so I have to walk carefully there anyway, so stepping over the hose isn't a problem.

As far as my plans, I was planning an "L" piece of PCV which would hold the hose. The elbow could have to be cut to allow the coupler to pass through it. I bought a couple strong magnets at Northern Tool to hold the PCV against the post.
 

73 Mustang Bill

Well-known member
Joined
May 27, 2011
Messages
124
my buddy and i were wondering if we just ran a new hose from the pump to the distribution block that would be mounted on the ceiling and have the hoses for each side come down from there, that way you're only buying and running one new hose. does that work instead of buying two long hoses that go from the distribution block to the posts?

Well, you'd have the hoses hanging down from the ceiling all the time.
 

skamp

Well-known member
Joined
Jul 20, 2007
Messages
644
Location
Cypress, TX
Been a while since anyone posted updates on re-routing hoses overhead and remote or column-mounting the power unit. Moving forward on this and would like to hear from others who already have done this. Costs? Suppliers? Tips/Tricks?

This has been a good thread!

I am doing this now. I have mounted my divider and pump on one of the columns. I used the following parts.

1. 2 x stock hoses (14.5' each) - Left column
2. 1 x 96" hose - left column
3. 2 x 3/8" couplers to connect stock hoses and 96" hose
4. 1 x 60" hose for right column
5. 2 x 3/8" disconnect sets - These connect to the street elbow
6. 2 x 3" ****** - comes off divider and connects to street elbow
7. 2 x 90* street elbow - comes off ****** and connects to quick disconnects
8. 2 x 45* street elbow - Used on ram disconnect to allow hose to come straight up

I got my hoses at tractor supply and the other parts at www.discounthydraulichose.com

I created a mounting solution using some spring hangers I found at northern tool. http://www.northerntool.com/shop/tools/product_326674_326674. I had to notch the inside of it as the arms would contact it at full height and make the whole assembly lift up. :eyecrazy:

These hang over the top of the column. I made a mounting plate out of some aluminum sheet I had around. Here are some pictures.

maxjax1.jpg


maxjax2.jpg


maxjax3.jpg


I still need to mount the hose to the ceiling. I have seen no issues with having unequal length hoses after bleeding multiple times. I have a total of 37' of hose on one side and 5' on the other. Seems to work ok.

Steve
 
Last edited:

olytdi

Well-known member
Joined
Dec 3, 2011
Messages
2,202
Location
Olympia, Washington
I am doing this now. I have mounted my divider and pump on one of the columns. I used the following parts.

1. 2 x stock hoses (14.5' each) - Left column
2. 1 x 96" hose - left column
3. 2 x 3/8" couplers to connect stock hoses and 96" hose
4. 1 x 60" hose for right column
5. 2 x 3/8" disconnect sets - These connect to the street elbow
6. 2 x 3" ****** - comes off divider and connects to street elbow
7. 2 x 90* street elbow - comes off ****** and connects to quick disconnects
8. 2 x 45* street elbow - Used on ram disconnect to allow hose to come straight up

I got my hoses at tractor supply and the other parts at www.discounthydraulichose.com

I created a mounting solution using some spring hangers I found at northern tool. http://www.northerntool.com/shop/tools/product_326674_326674. I had to notch the inside of it as the arms would contact it at full height and make the whole assembly lift up. :eyecrazy:

These hang over the top of the column. I made a mounting plate out of some aluminum sheet I had around. Here are some pictures.

I still need to mount the hose to the ceiling. I have seen no issues with having unequal length hoses after bleeding multiple times. I have a total of 37' of hose on one side and 5' on the other. Seems to work ok.

Steve

Nice post, Steve and good job! Could you clarify a couple of things?

Is the 96" hose for the left column just an addition to get the length needed by three hoses to go up and over?

How do you intend to hang the hose that goes up and over to the other side?

What did you order in terms of hose specs?

You lost me on the mounting springs thing! I like the post mount approach though!

Costs?

For the hose that goes to the other side, I'm thinking of going straight up from the column-mounted pump assembly to the truss that is conveniently located directly over that column, into a piece of conduit (rigid pvc?) that spans from the truss all the over to the other side, then have the hose exit straight down to the other column. I don't think I 'need' the pvc across the top, I just thought it might look neater than a hose lumbering and sagging across the great divide between the columns. I've got like 11 feet to cross. I was thinking of a single suspension wire at the middle of the conduit up to the rafter to keep the 11 ft pipe from sagging.

Thinking out loud here...
 

Mike007

Well-known member
Joined
Dec 4, 2010
Messages
2,592
Been a while since anyone posted updates on re-routing hoses overhead and remote or column-mounting the power unit. Moving forward on this and would like to hear from others who already have done this. Costs? Suppliers? Tips/Tricks?

This has been a good thread!

Heres what I did. I snaked the hose through 1-1/4" pvc electrical conduit. I picked the hose up locally for around $70.
 

Attachments

  • lift3.JPG
    lift3.JPG
    104.8 KB · Views: 402
Last edited:

olytdi

Well-known member
Joined
Dec 3, 2011
Messages
2,202
Location
Olympia, Washington
Heres what I did. I snaked the hose through 1-1/4" pvc electrical conduit. I picked the hose up locally for around $70.

The pic doesn't enlarge for me and is small:dunno:

From what I can tell this is a very clean install -- nice!

So, your power unit is wall mounted on the far side with the cross over to the near side, right?

what did you do in terms of the hose from the wall mounted power unit to the column closest to it? Does it come down the pump to the floor and over to the column?

thanks!
 

Mike007

Well-known member
Joined
Dec 4, 2010
Messages
2,592
The pic doesn't enlarge for me and is small:dunno:

From what I can tell this is a very clean install -- nice!

So, your power unit is wall mounted on the far side with the cross over to the near side, right?

what did you do in terms of the hose from the wall mounted power unit to the column closest to it? Does it come down the pump to the floor and over to the column?

thanks!
The picture should enlarge now.

Although not required, I joined the two 12' hoses with a hydraulic coupling for the sake of keeping the hose lengths close. I then spooled it up under the pump and then obviously it connects to the column right there.
 

skamp

Well-known member
Joined
Jul 20, 2007
Messages
644
Location
Cypress, TX
Nice post, Steve and good job! Could you clarify a couple of things?

Is the 96" hose for the left column just an addition to get the length needed by three hoses to go up and over?

How do you intend to hang the hose that goes up and over to the other side?

What did you order in terms of hose specs?

You lost me on the mounting springs thing! I like the post mount approach though!

Costs?

For the hose that goes to the other side, I'm thinking of going straight up from the column-mounted pump assembly to the truss that is conveniently located directly over that column, into a piece of conduit (rigid pvc?) that spans from the truss all the over to the other side, then have the hose exit straight down to the other column. I don't think I 'need' the pvc across the top, I just thought it might look neater than a hose lumbering and sagging across the great divide between the columns. I've got like 11 feet to cross. I was thinking of a single suspension wire at the middle of the conduit up to the rafter to keep the 11 ft pipe from sagging.

Thinking out loud here...

Here are some answers:

Is the 96" hose for the left column just an addition to get the length needed by three hoses to go up and over?

In my case I could not go staight up and over. I have lights in the way so had to go up sideways, over, sideways and then down to the other column. I needed about 35' to do that so used the 2 14.5' hoses + an additonal 96" hose for a total hose length of 37'

How do you intend to hang the hose that goes up and over to the other side?

I am not done but I am using drywall anchors into the ceiling and 1" metal conduit hangers to hold the hose. I plan on finishing this weekend and will post pictures.

What did you order in terms of hose specs?

They are 4000 PSI 3/8 hoses like these http://www.tractorsupply.com/hydraulic-hose-3-8-in-2-wire-36-in-l-1810018. Northern Tool sells silimar ones.


You lost me on the mounting springs thing! I like the post mount approach though!

I needed somthing that was a "U" bracket and had no real way to make. I found that at Northern Tool and it worked. Very beefy bracket.


Costs?

Total costs were like $70 for the fittings and $35.00 for the hoses. Pretty cheap.

I hope this helps.

Steve
 

skamp

Well-known member
Joined
Jul 20, 2007
Messages
644
Location
Cypress, TX
I finally got my lift completed with the hose routed to one side and the pump mounted to one of the columns.

Here is the hose routing:

maxphoto1.jpg


maxphoto6.jpg


maxphoto4.jpg


Here are a couple of shots using the lift.

maxphoto2.jpg


maxphoto3.jpg


maxphoto5.jpg


So glad I got this lift. I am able to get all 3 of my cars to full height. The only downside is I need to close my garage door a little bit when lifting the Honda Pilot.

Steve
 

les_garten

Banned
Joined
Oct 8, 2010
Messages
660
Location
PSL, FL Next door to Megan FOX, and down the stre
I finally got my lift completed with the hose routed to one side and the pump mounted to one of the columns.


So glad I got this lift. I am able to get all 3 of my cars to full height. The only downside is I need to close my garage door a little bit when lifting the Honda Pilot.

Steve

You look like you are about 135" apart, is that correct?
 

motorheadsdiygarage

Well-known member
Joined
May 4, 2011
Messages
109
Location
Near Montreal
Annual tire change and brake check on my HHR. I love this lift and it's so much easier on my back.
 

Attachments

  • IMG_0782.jpg
    IMG_0782.jpg
    142.7 KB · Views: 134
  • IMG_0783.jpg
    IMG_0783.jpg
    144.8 KB · Views: 106
To avoid these ads, REGISTER NOW!
Top Bottom