To avoid these ads, REGISTER NOW!

Maxjax Installs: Post Here

Jvvmusme

Well-known member
Joined
Sep 25, 2011
Messages
566
Location
Bogota, Colombia
I do not know why dannmar doesn't make epoxy anchors mandatory....

Or at least maxjax owners should always use epoxy anchors for their peace of mind
 
To avoid these ads, REGISTER NOW!

JMAL

Member
Joined
Mar 14, 2014
Messages
14
Location
NYC
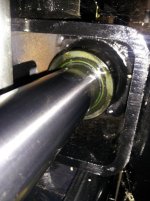
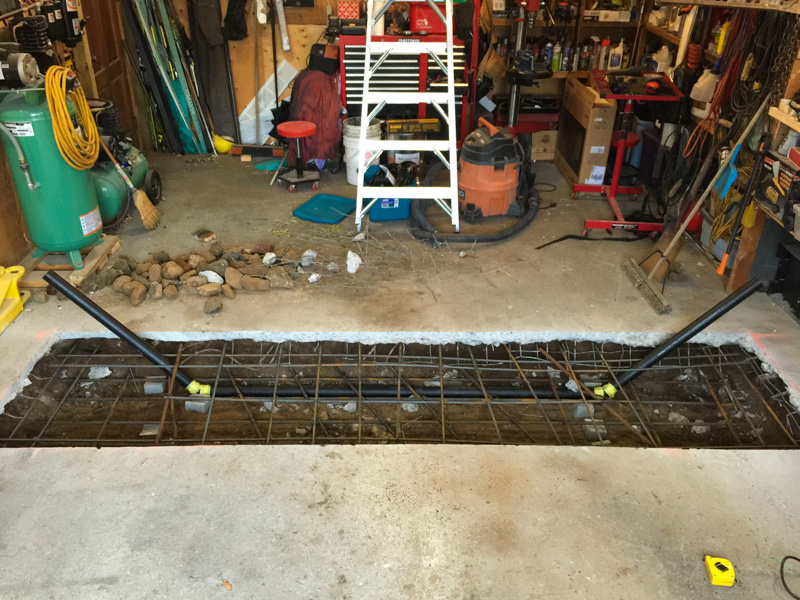
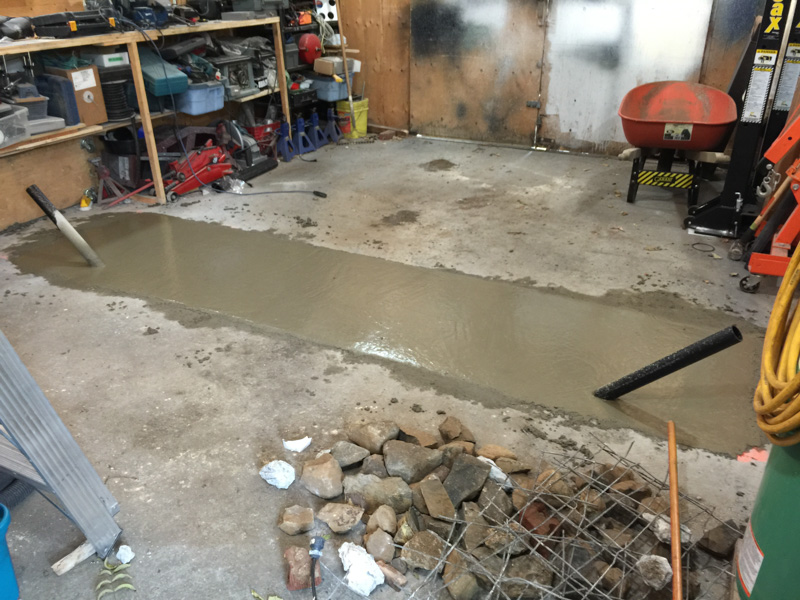
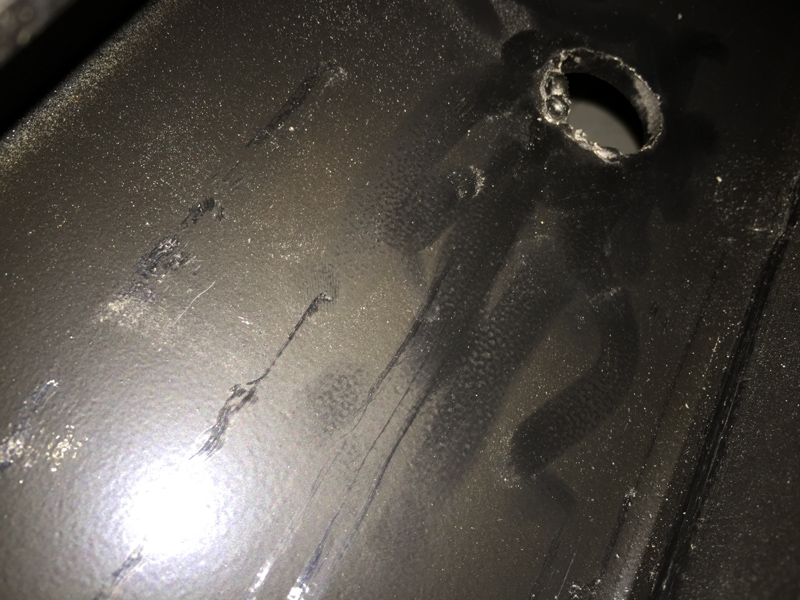
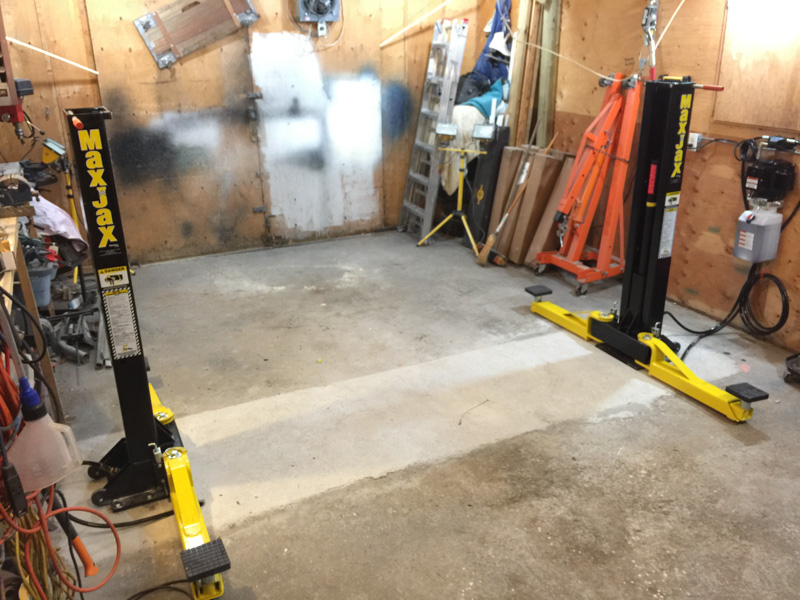
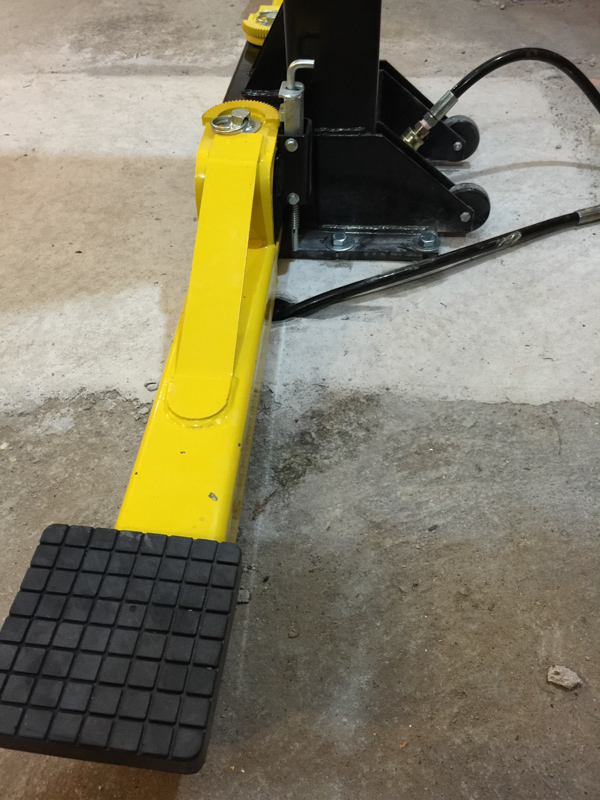
Well, for what its worth..., I have a brand new concrete slab that I had poured for this project and it is beween four and five inches thick. I got seven of the wej-it anchors to bite, but not without upward travel before really locking into the concrete. I used a small piece of pipe and washer to set the anchors and got them to between ninety five and one hundred foot pounds of torque and the anchors that set solid, set just below the concrete. The anchors that did not set were the three at the back of the post on the drivers side. They did finally grab, however they were above the concrete. So for the mechanical anchors, there's a reason why on the wej-it web site they recommend at least five inches and change to work properly.
The problem is the lift is marketed needing a minimum of four inch concrete with anchors that will probably need at least five.
Has anyone here successfully set the provided anchors in four inch concrete?
My Epoxy anchors for the three that didnt bite are on the way!
Should have went with six inches of concrete..., but I figured five would be enough!

My slab is 4.5 to 5.5. 9 of my original anchors seemed to bite exactly how explained in the instructions. After lifting my pickup on full arm extension they all slipped a bit. They didn't totally let go, but it was not acceptable. I have lifted a 3600lb and 3800lb car with no movement or even a hint of instability with the new epoxy anchors in my 4.5 - 5.5 inch slab. It is super solid and reassuring even at just under 6". Hope this helps, when i was in your shoes, i hammered them all down and went all epoxy. My only regret was not going epoxy off the bat.
 

In My Garage

Well-known member
Joined
Jul 28, 2011
Messages
315
Location
ON
They have eliminated the quick fittings at the pump.

They didn't have those back in July 2012 when I ordered mine.

Besides, if Dannmar did supply them, you'd have four instead of two garbage quick disconnects. The ones that came with my MaxJax are packed away; I don't know why I kept them.
 

In My Garage

Well-known member
Joined
Jul 28, 2011
Messages
315
Location
ON
Can anyone recommend an online dealer to upgrade the fittings and disconnects?

Just look up "hydraulics" in the Yellow Pages and go to a local hydraulics supplier.

As for the fittings, it doesn't matter where they are made; its the quality control that matters. I replaced the ones that came with the MaxJax (one fitting was faulty) with new fittings (they are made in China) and my hydraulic system has been bone dry for over 18 months.

As for the couplers, I went with Faster FFH High Pressure Flat-Face couplers. Not cheap, but no regrets.

See page 3 of my MaxJax install for pics of the faulty MaxJax fitting (and what to look out for) and upgraded couplers.
 

abstamaria

Well-known member
Joined
Jun 24, 2010
Messages
1,338
Location
Manila
Maxjax in Use

I serviced the car today - changed oil, filter, coolant, and greased the rear suspension bushes (two *******). The lift is quite a treat and certainly a big improvement over a jack and stands. I had the airconditioning on, so it was a pleasant way to spend the day.
 

Attachments

  • L1000293.jpg
    L1000293.jpg
    128.8 KB · Views: 369

Cobra96

Well-known member
Joined
Jul 29, 2014
Messages
88
Question for you guys!
Setting up my pump and reviewing my parts, I noticed that there was no "o" ring on the o- ring fitting on the hose from the pump to floe divider. Is there supposed to be an "0" ring there, or am I missing something, because its no where to be found?
Any help would be appreciated!
Thanks
 

In My Garage

Well-known member
Joined
Jul 28, 2011
Messages
315
Location
ON
Setting up my pump and reviewing my parts, I noticed that there was no "o" ring on the o- ring fitting on the hose from the pump to floe divider. Is there supposed to be an "0" ring there, or am I missing something, because its no where to be found?

Unless something has changed since I bought my MaxJax in July 2012, there is an O-ring on the fitting that screws into the aluminum block at the pump. The O-ring is then crushed by a large washer that is tightened down by a nut.

The short hose connecting the fittings at the pump and flow divider are JIC fittings and do not require O-rings or sealing tape.
 
Last edited:

Cobra96

Well-known member
Joined
Jul 29, 2014
Messages
88
Yeah... they shorted me on the O ring that goes into the block at the pump, unless its under the cap, I have to check. They say its a 5/8 O ring..., I bought a whole box and not one looks like the right size.
Thanks Alex!
 

Cobra96

Well-known member
Joined
Jul 29, 2014
Messages
88
Ahhh..., thanks for the tip!

Well...., moving right along with my Maxjax Installation.
Although, my set up isnt as pretty as some of the awesome garages ive seen on here, I've gotten some really great ideas. Anchors down and rock solid, pump off the cart and floor, and mounted on the wall. Installation is outdoors so I installed some 5/8 nylon bolts and washers to keep debris and moisture out of the anchors.
Purchased all new fittings and two 30' foot hoses for under $200 at discount hydraulics online. Received my order in a day and its really nice quality equipment. I will post pics of the hoses.
After reading all the posts with regard to leaks from the fittings, I inspected the suppplied fittings and they looked like they were tapped with a chisel. Tossed those in the trash and the fittings I received from the online suplier were precision.

http://www.garagejournal.com/forum/picture.php?albumid=3861&pictureid=43538

http://www.garagejournal.com/forum/picture.php?albumid=3861&pictureid=43537
 

Jvvmusme

Well-known member
Joined
Sep 25, 2011
Messages
566
Location
Bogota, Colombia
Re: Maxjax in Use

I serviced the car today - changed oil, filter, coolant, and greased the rear suspension bushes (two *******). The lift is quite a treat and certainly a big improvement over a jack and stands. I had the airconditioning on, so it was a pleasant way to spend the day.

Andres:

I am very worried that your garage is very dirty. Please clean it !!!

And give some tlc to your cars
 

Cobra96

Well-known member
Joined
Jul 29, 2014
Messages
88
Just about done with my install after finding the time to tackle it today. everything looks pretty good with the exception of the lift arms being uneven on both posts. the right side seems to be higher then the left. Does anyone else have a situation like this? Both posts are nearly perfectly level and plumb.

http://www.garagejournal.com/forum/picture.php?albumid=3861&pictureid=43837

http://www.garagejournal.com/forum/picture.php?albumid=3861&pictureid=43836

Any insight would be great!
Thanks!
 

In My Garage

Well-known member
Joined
Jul 28, 2011
Messages
315
Location
ON
everything looks pretty good with the exception of the lift arms being uneven on both posts. the right side seems to be higher then the left. Does anyone else have a situation like this?

Put a car on the lift raise it a foot and open the bleed screws a turn and listen for hissing air. Close when fluid comes out. Raise the car fully a few times if safe to do so and repeat. Make sure you have the fluid topped up when the lift is fully down. Otherwise it is a flow divider issue or whatever that thing is called.
 

Cobra96

Well-known member
Joined
Jul 29, 2014
Messages
88
Everything is Bled..., the issue is that the right arm on each column seems to be higher then the left, as if the holes weren't drilled properly. Was wondering if anyone else noticed this. Not a lifting issue.
 

In My Garage

Well-known member
Joined
Jul 28, 2011
Messages
315
Location
ON
Everything is Bled..., the issue is that the right arm on each column seems to be higher then the left, as if the holes weren't drilled properly. Was wondering if anyone else noticed this. Not a lifting issue.

Is your garage floor sloped for drainage? Better get the 4-foot level out.
 
To avoid these ads, REGISTER NOW!

Cobra96

Well-known member
Joined
Jul 29, 2014
Messages
88
Its the way the arms are on the lift head. The concrete and the posts are level and plumb!
Example..., if I tried to put the motorcycle adaptor on the two arms when they are closed, the adaptor wouldnt fit on properly!
 

Johns12

Active member
Joined
Dec 29, 2013
Messages
33
I just wanted to mention that I did my install using the original anchors and fittings. No leaks and the anchors hold fine. I had a car on the lift for 3 weeks with no problems.
 

Cobra96

Well-known member
Joined
Jul 29, 2014
Messages
88
Thank you for the responses...! I figured it out..., two of the ratchet locks on the lift arms were bent which was making the the arm sit out of level. I'm up and running, no leaks and it seems to be lifting level. It does seem to kind of hop on the way up after the midway point.
Just have to figure out why my pics cannot be viewed?
 

Moonlighter

Member
Joined
Oct 6, 2014
Messages
5
Location
Henderson, TN
I just joined today. Hello to all! Not used to joining a forum. How do I ask a question. I just bought a piece of property with a concrete block shop that I need to wire using EMT and need some help on how many conductors to run (for 120V, I assume black and white, but do I need to run a ground or does the EMT suffice as a ground). Thanks!
 

skamp

Well-known member
Joined
Jul 20, 2007
Messages
644
Location
Cypress, TX
I just joined today. Hello to all! Not used to joining a forum. How do I ask a question. I just bought a piece of property with a concrete block shop that I need to wire using EMT and need some help on how many conductors to run (for 120V, I assume black and white, but do I need to run a ground or does the EMT suffice as a ground). Thanks!

Post that question in the lighting and electrical section. I am sure someone will give an answer to that. Off hand I think you need a dedicate ground so 3 wires in the EMT.

Steve
 

abstamaria

Well-known member
Joined
Jun 24, 2010
Messages
1,338
Location
Manila
Re: Maxjax in Use

Andres:

I am very worried that your garage is very dirty. Please clean it !!!

And give some tlc to your cars

Hello, Jose. I will. ;) I hope things are well in your part of the World.

Best personal regards,

Andy
 

abstamaria

Well-known member
Joined
Jun 24, 2010
Messages
1,338
Location
Manila
Not too bad. The weather patterns have changed dramatically though,mand there is great risk of very strong hurricanes. The cars are fine though.
 

sidwin

Well-known member
Joined
Mar 30, 2014
Messages
49
If you leave the hoses directly to the columns they are going very difficult to move

not true. simply put the quick connect on the pump side. then when you want to move the post, disconnect the at the pump and roll the hose up and place on column.

cheapest improvement can be made for less than $10 bucks that would save everyone all the headaches. Take the long hoses and get cut the 3/8 npt off and put 1/2 npt. then thread them directly onto the post. then put the quick connects at the pumps.

No more leaks from stupid cheap fittings and you can still have your quick connect.

i bought 2 1ft hoses and added a 90 bend so my hose can lay flat. That cost me $100. if i had to do it again i would have cut the stock hose.
 

NewShockerGuy

Well-known member
Joined
Oct 12, 2010
Messages
2,481
Location
Northern Virginia / DC
Figured I'd ask here since this sees more action...

My right cylinder housing is leaking at the point that it seals against the cylinder, up and down..etc.

I ordered a new seal kit for the cylinder and was wondering has anyone put new seals in the unit? Or is there a how to on doing so? I can't imagine it being that difficult but I've never done something like this so wanted to see if anyone had some pointers or guidance.

Thanks much,
-Nigel
 

Attachments

  • leaky1.jpg
    leaky1.jpg
    92.3 KB · Views: 110
  • leaky2.jpg
    leaky2.jpg
    91.1 KB · Views: 111

sidwin

Well-known member
Joined
Mar 30, 2014
Messages
49
nigel,

that ***** man. That honestly looks like a pain. i've done plenty of seals before. go buy yourself a piece of pvc pipe that is close to the same size diameter so when you tap it in, you'll get even force and the seal should go down evenly.

I've always used a pick and razor blade to try to get the old seal out. cut the seal then use the pick to pull it apart.

thanks,
sid
 

Mike C5

Active member
Joined
Feb 12, 2011
Messages
27
Newbie here, I'm taking delivery of my Maxjax tomorrow and was doing some research on ATF/Hydraulic Oil. Lots of good info here.

I came across this statement from Eagle Lifts:
Use AW32 Hydraulic Oil. The AW stands for Anti-Wear. It also protects against Rust & Oxidation, and contains Anti-Foam additives. An oil’s rating refers to its viscosity, which determines its ability to flow at different temperatures. Lower numbers indicate thinner, more easily flowing oils. AW32 is approximately 10-weight oil with the additives and is ideal for all climates. Whether you plan to use your lift on a cold morning or down in Miami, AW32 is universal.

For Eagle Equipment lifts, AW32 is required in all circumstances. We do not recommend the use of automatic transmission fluid (ATF) because its thinner viscosity (5W) can allow the oil to “leak” around hydraulic cylinder seals and will reduce the life of the pump seals. When you use ATF, you can expect your seals to break and your lift to be useless. This is why Eagle Equipment must void your warranty if you put ATF in your Eagle Lift (This is also stated in all Eagle Lift manuals.)

I know from reading through this thread that a lot of you have used ATF Dexron III. I'm having trouble finding AW32 locally and so am considering ATF. I live in eastern CT so it will get cold. Some of you guys who have had the Maxjax for a few years, have you had leak problems with ATF?
 

Mike C5

Active member
Joined
Feb 12, 2011
Messages
27
I found some AW 32 at Advance Auto. I got most of it assembled today. One question though; where the supplied hydraulic hoses screw into the flow divider, the instructions don't mention using teflon tape. The threads on the fittings look like all of the others that do use teflon tape. Is this just an error?
 

Denwood

Well-known member
Joined
Sep 22, 2014
Messages
4,180
Location
Thunder Bay, Ontario, Canada
Here's a summary of my install:

rebar2.jpg


newslab1.jpg


Check for burrs (and remove them) on the inside of each column.

max1.jpg


max2.jpg


max3.jpg


max4.jpg


max5.jpg


max6.jpg


max7.jpg
 
To avoid these ads, REGISTER NOW!
Top Bottom