To avoid these ads, REGISTER NOW!

Between 485 & 705 SQ/FT Mid-Century Moto Mecca Makeover

Workspaces between 485 and 705 squarefeet.

zanyad

ALLIANCE MEMBER
Joined
Apr 26, 2018
Messages
2,814
Location
NE Ohio
And now I need a new edge banding trimmer...
 
To avoid these ads, REGISTER NOW!

legenddc

Well-known member
Joined
Aug 19, 2012
Messages
1,073
He really should start an Amazon affiliate account at this point. I forgot about the mechanical pencils. Now I need to go find them again and order one.
 
OP
S

sakurama

Well-known member
Joined
Oct 10, 2010
Messages
1,458
Location
Portland - the cool one.
Sorry to side track you on details, it's my nature.

I think you are referring to the little stepped presetting adjuster which is graduated in a number of metric values, am I right? If so, it isn't great for metric either as it misses some rather standard values (at least of what I can get over here) so I ended up making my own replacement part with the material thicknesses I use, (yes 3D printer again.) If you have some values you typically need, let me know, I can find the file and model you a part with some imperial ( :sick: gack) step values matching your common stock.

The other option is they left a pair of machined surfaces at the front that accept a gauge block stack, (half the material thickness - 3mm) that's how I used to set it before I decided to 'fix' it with my custom slider. The stepped stop isn't really what holds the moving fence in place, the lock mechanism does that, so once to have the centering offset set, the lock generally suffices.

I may take you up on that. The Domino is phenomenal when it is aligned to the material but you're right that it's almost never that easy. And when it's not it's frustrating. That's one of the reasons I liked through Dominos - they take care of both sides in one go.

Gregor
 

Bakafish

Well-known member
Joined
Feb 7, 2017
Messages
477
Location
Tokyo
I may take you up on that. The Domino is phenomenal when it is aligned to the material but you're right that it's almost never that easy. And when it's not it's frustrating. That's one of the reasons I liked through Dominos - they take care of both sides in one go.

Gregor

Festool_Domino_Offset_Bar_installed.jpeg

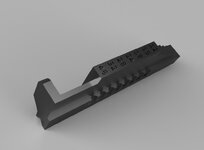
I'm providing the models for the "Metric Baltic Birch" design that I've been using. It has steps for 12, 15, 18, 24, 28, 32 and 40mm, which are the standard sizes that I get over here (I suspect the good Euro stuff is the same there, but maybe they specially manufacture imperial stuff for US import?) The part is very complex for a normal 3D printer to make, due to the tight tolerances and features on all sides. My expectation is that SLS (selective laser sintering) out of (Glass fiber re-enforced) Nylon from a place like PCBway or a really high resolution UV resin printer is going to give the best results. I used my filament printer, but was able to do all the post processing required to hit the numbers, not exactly turn key with such limited resolution machines.

Festool_Archive.jpeg

I embedded a couple STL's, a STEP file, and a drawing with the critical dimensions in a zip archive appended to the image above. Download and UNZIP the image to get the files.

I'm happy to make you a custom version with any 6 thicknesses you'd like (the 40mm is hardcoded in the part as it is just using the top surface of the selector.) But I'll add to anyone just getting started with the Domino that while these offsets will get you close to on center to the material thickness selected, the best practice is to make sure you always reference the Domino from the same planar surface of both pieces. Basically, there is going to be error in the wood thickness, the tool, the adjuster, etc, so make sure the error is in the same direction on both parts so it cancels out. Don't put the offset plate on the inside wall of one panel and the outside edge of the other, because it will likely end up with some offset error and the two edges won't line up perfectly. For the same reason, make sure your edge banding is in place before making domino holes!

I have to admit I rarely even bother to try and center the Dominoes in panels anymore, and instead just use the built in 10mm offset and make sure I reference it from the correct surface. It's actually helpful to have it clearly offset a bit as it is 100% obvious if it is correctly referenced or not.
 

wendle

Active member
Joined
Jul 19, 2018
Messages
27
Location
NSW,AU
So I bought the Star-M ceramic trimmer that Bakafish recommended and while searching for that came across this little Edge Supply yellow one. It was expensive at $60 but...


After the talk about how great the Roto-Trim was I thought this was worth a try. The reviews seemed positive and this sort of cutter would actually cut and not sheer so should, theoretically, cut irrespective of grain orientation - the thing that was messing up my other efforts.


The M-Star has a 1mm bevel and that was probably too much. The veneer is slightly less thick and so on the back side the cutter just touched the black stained birch. Also, it worked great on edge banding that was linear but less great on the end grain which is sort of a strange thing to do anyway so no fault there.

Definitely better than the FastCap option. If I were to buy it again I might do the non bevel version as I like to knock the edges down with a sanding block.


This weird little cutter did phenomenal with the grain and and fine on the end grain. It made flawless 90 degree cuts and there was no tear out at all - just a neat and tidy cut. It's not easy to hold, it would be better if it was a bit larger and you could do more than pinch it between two fingers but it's really good. I hate to say it's worth $60 because it's physically cheap and toy like. The idea is great but the execution is pretty weak. But the cuts are the best option short of a router.


Neither was great at the end grain so I switched to the Fastcap which doesn't bevel like the green one and because you're squeezing this cutter with your whole hand it could more aggressively cut the end grain veneer.

Hi.

Cabinetmaker of 30 years or so here - I've always trimmed up veneer with a file.

You can see this dude doing it from about 2:20 -
- Not so much using the file as a file, but you push the veneer back and it kind of tears back just slightly higher than flush and ready to sand

It'd take you about 30 seconds of practice to get the technique down and you'd be set. Works with melamine edge strip too.
 

Bakafish

Well-known member
Joined
Feb 7, 2017
Messages
477
Location
Tokyo
For the Domino with imperial plywood, I've really come to like Seneca's Domiplate. https://www.senecawoodworking.com/products/domiplate-for-1-2-and-3-4-ply

You end up holding the entire tool upside down from how it's designed, but the setup is simple, accurate, and repeatable.
Yeah, I'm familiar with this solution. There's just no way I would spend that much on such a basic plate, and it duplicating functionality (an offset fence) already in the tool. I've never seen the built in adjustable plate slip, it is rigid and secure when used correctly. And this solution is only good for 90° joints, I often miter my Baltic ply because that edge detail is so beautiful to me.

I'm known for overly complex solutions to simple problems, making my own step adjuster wasn't something I initially wanted to share because of the complexity for most people to implement successfully. I still think it is the correct solution, but I know it is out of reach to many. I have all the metrological tools, and thousands of dollars worth of Nakanishi gear to make sure the part is factory equivalent. So let me propose an alternative solution that anyone can make.

First some background. The Domino (500 anyway) has a fixed offset of 10mm from the bottom plate to the centerline of the cutting tool. As I tried to explain previously, if the dominoes are blind (hidden inside the joint) having them perfectly centered isn't really required and for some loads like fixed shelves isn't even ideal. So just making sure you cut the slots with the same offset reference, you are golden. This is the method Festool themselves recommends when making floating shelves, you place the shelf edge on the layout line, clamp it in place, using it as a fence you make your holes in the side panels and shelf, both using that built in 10mm offset, and you are set. Notice that the domino isn't centered (unless you happen to be using 20mm thick plywood) and for anything thicker than 20mm there will be more material above the domino than below it, which biases the tearout strength of the joint in the desired direction.

The Senica plate is using that fixed 10mm offset, and creating a new offset from it. The fact that you could 3D print or construct out of Corian or metal the same thing for a lot less money shouldn't be lost on anyone here, (but this is not the easiest solution, just another solution.) If you want to try something like this, precision shims (or again, 3D printed ones) are just a click away. You are just establishing an offset between two flat surfaces, so get a chunk of aluminum or Corian, drill two holes for thumb screws to attach to the existing holes in the Domino's base plate, a hole or slot to see the centering line, put the 3d printed offset plate or shims between the two, and as long as your plywood is thicker than 20mm you are set. The offset (shim thickness) here is ½ the thickness of your plywood - 10mm if you need to make a plate for thinner material it is also easy, but requires two sheets of material. But as I said, I'm not crazy about this solution unless you are just doing 90° joints and you are comfortable with the tool being upside down. That's actually a bigger problem than it sounds as it means your material always has to be hanging out in space or at an edge of the table to have enough tool clearance, I like the work fully supported on my table and it is just one more thing to have to deal with*.

So what is the simplest solution? The problem again is how to set the movable fence to center the cutter in material of a thickness not provided by the preset, and for whatever reason you do not trust the highly precise mm accurate scale provided on the fence itself (I'm not judging, it is showing the offset from the centerline, not the material thickness and in metric, so easy to get it wrong or forget what it should be set to.) You just want to slam it in place and know it is correct. Well, if you had a piece of material that was exactly ½ the thickness of your plywood + 10mm, then you just place that on a flat surface, **** the Domino against it, shove the fence down on top of it, then lock the slide. EZPZ. Where do you get such a block? That's something any 3D printer can make with sub mm accuracy for pennies. No arcane tools or finishing processes required, no stack of gauge blocks (you know you want them though), no fancy CAD modeling software to design the offset tool (so simple it can be made inside most slicers), and repeatable and cheap custom offsets for every conceivable material thickness you desire**.

Anyway, the Domino is a great tool, one that I absolutely recommend to anyone making cabinetry. Sakurama was absolutely responsible for me getting one, and I'm forever thankful as pocket screws were making my stuff look like the amateur **** it was (they are not as easy to make work as you'd think.) It has a learning curve for sure, but the more you understand it, the easier it is to work with and understanding the offsets and reference planes are the key to perfection here.

*Note that because of the fixed 10mm baseplate if your material is less than 20mm thick you must be careful to make sure you are referencing off of the adjustable fence! It is really easy to miss the fact with something like 18mm plywood that you are making holes with the wrong offset because the bottom plate is touching the work surface (10mm) instead of the fence referencing off the workpiece (9mm.)

**A javascript page to dynamically generate STL's of these offset blocks based on the material thickness required is well within the realm of possibility.
 
OP
S

sakurama

Well-known member
Joined
Oct 10, 2010
Messages
1,458
Location
Portland - the cool one.
Cabinetmaker of 30 years or so here - I've always trimmed up veneer with a file.

It'd take you about 30 seconds of practice to get the technique down and you'd be set. Works with melamine edge strip too.

That looks like a great way to do it. I've used a file once or twice to knock down the edge or bevel but never like that. I'm going to try it next time.

For the Domino with imperial plywood, I've really come to like Seneca's Domiplate. https://www.senecawoodworking.com/products/domiplate-for-1-2-and-3-4-ply

You end up holding the entire tool upside down from how it's designed, but the setup is simple, accurate, and repeatable.

I actually have that and used it for the top of the box. The bottom was inset slightly so I had to figure out a different way.


_________________________________________________________


i-6Jn8hmw-X2.jpg
So one of the last things to do was to put a hole in the side of the box where the power cords can enter for the amps. The power strip is going to be hidden inside vertically behind the albums. I wasn't sure if I wanted several holes or just one. I'm going to try one and see if all the cords can fit.

Speaking of cords...

i-XwCpH3r-X2.jpg

There's a ridiculous amount and the connections are confusing. I'm starting to add labels to them now so that I can reconnect them in a hopefully orderly way. This particular amp set up - active bi-amp - is pretty obscure and I had to reach out to Naim NA directly find a wiring diagram. Each stereo amp powers one speaker, the left channel of amp 1 powers the tweeter and the right powers the woofer. Or something like that.

i-GvMC4XC-X2.jpg

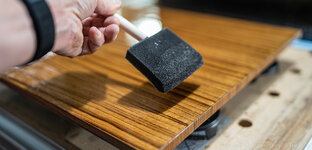
I touched up the black on the box and then sanded the veneer and gave it a second coat of poly. It's tricky to get the inside and this cut down pad was the choice for the corners.


The top will most likely have a lamp on top or a fan or something so I wanted an extra coat of poly on that. Plus the second coat wasn't smooth with some glitches or hairs or drips - it was a mess.

i-frxPcV4-X2.jpg

I sanded it completely with 220 and gave it a light 3rd coat brushed in the direction of the grain.

i-nRfz6bk-X2.jpg

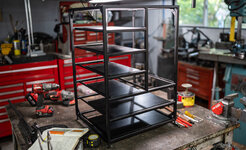
Then I painted the frame (no photos - it was cold so I did it very quickly outside.) I did a satin black base coat and the frame was really hard to get the interior even. After that dried I went over the outside with the same textured Rustoleum that I'd used on the turntable.

i-W34vvcm-X2.jpg

And then tried to find the better side of the base boards. They're not great but they're black and there will be amps on them. I keep thinking that today will be the day I finish and then that becomes tomorrow. I need to finish before family comes to town.

i-tc3hBjQ-X2.jpg

But I'm close.

i-dhT9n2c-X2.jpg

Sunday we went to get a tree. Same place as last year. Nadia is pointing to it. We usually have the tree in the living room but I tossed out the idea of getting a big tree this year and using the higher ceiling of the dining room. Nadia wanted a "vintage" Christmas tree - which was funny because she showed me photos from the 1970's - when I was a kid! To her (and me) that means colored lights (thanks for the tip Sean!) and tinsel.

That tree was about 18-20' tall. We needed about a 12-14' tree but took this one so we'd have extra branches for decorating. Nadia wants to go all out for her Nona and Poppa Len and Lara.

You'd think we'd take the van but with no roof rack and "only" a 13' interior it wasn't going to work so...

i-8FGCMGf-X2.jpg

...the Volvo comes through again. Fastest tree around. Actually it was slow because driving this car on a forest road is a delicate thing.

I have a couple days of work with a new client and then I'm going to spend Wednesday wrapping up the cabinet. Down to the wire!

Gregor
 
OP
S

sakurama

Well-known member
Joined
Oct 10, 2010
Messages
1,458
Location
Portland - the cool one.
Lara and family are supposed to get in tonight. I absolutely have to finish.

i-qp3WQmv-X2.jpg

Yesterday when I was installing the panels one of the inserts spun. Since the panels are all slightly warped because I used the half sheet of baltic birch that was in storage I accepted that but I needed a solid connection. I think it was maybe cross threaded and I didn't catch it - my fault.

I used a forstner bit to drill out the hole with a larger one.

i-XFxqBzc-X2.jpg

Then a slightly larger sized hole saw to cut a plug from a piece of walnut.

i-2jdZRHL-X2.jpg

It always feels strange to use the lathe to turn wood. Especially when I'm using the DRO's to get the size right. But I want it to fit right.

i-gRpgxKs-X2.jpg
i-srHhQvp-X2.jpg

The plug was a nice snug fit and I managed to not go through the veneer. Glued into place and then left to dry.

i-fJtQWfv-X2.jpg

I bought a couple different types of M8 bolts/screws that was going to weld more stainless to and then turn into nice feet on the lathe. I was going to do that because paying $18 each for these stainless feet from McMaster seemed criminal. Then I considered how much time I've spent on this already and how much time I have to finish it and pressed add to cart. They're expensive but they're absolutely perfect.

i-qcQFwZq-X2.jpg
i-628JDT3-X2.jpg

Finished.

Except for installing it. It's heavy. Maybe 40-50lbs. (almost 25kg) which I didn't expect because I never bothered to add up the materials and because it wasn't a concern. The amps all together are maybe 70-80lbs so it's going to be a chonky piece of furniture.

Next is install.

Gregor
 

broinkrist

Well-known member
Joined
Feb 15, 2010
Messages
71
Location
NJ
Very cool looking piece. Did you leave 'easy' access to the rear to more easily make all the electrical/audio connections?

Also, you said that the power strip/management would be behind the records vertically. What will be in the space under the records?

I really enjoy how you approach your designs and how you plan them. I hope to finally be able to make some nice pieces that will last, after finishing the never-ending "more important" house renovation projects.

Happy Holidays!

*edit*

Answered my own question about under the records by going back and re-reading! Power supply for the turn table.

Cant wait to see it loaded up with all the gear. Is hooking up gear/setting up equipment something your kids have learned to enjoy also? I've always found it thereputic to finish a really nice clean electronics setup. Whether that is computers, networking, etc.
 
Last edited:

Vertigo Cycles

Well-known member
Joined
Jan 14, 2010
Messages
193
Location
Portland, OR
Speaking of cords...

i-XwCpH3r-X2.jpg

There's a ridiculous amount and the connections are confusing. I'm starting to add labels to them now so that I can reconnect them in a hopefully orderly way. This particular amp set up - active bi-amp - is pretty obscure and I had to reach out to Naim NA directly find a wiring diagram. Each stereo amp powers one speaker, the left channel of amp 1 powers the tweeter and the right powers the woofer. Or something like that.

Speaking of cords...do you make your own? It could be another satisfying rabbit hole. They can be exactly the length you need them to be, you can get some shrink tube labels if you have a TZe label printer, a little marine grade shrink tube and some and expandable sleeve for paired wires and it'll be soooo nice!

I bought a bunch of barrel aged stout to share. If it's up your alley, lets make some time soon and I'll invite myself over with beers and we can bask in the glorious sights and sounds of your setup
 
OP
S

sakurama

Well-known member
Joined
Oct 10, 2010
Messages
1,458
Location
Portland - the cool one.
Very cool looking piece. Did you leave 'easy' access to the rear to more easily make all the electrical/audio connections?

Also, you said that the power strip/management would be behind the records vertically. What will be in the space under the records?

You'll get to see right now!

i-zFbttRT-X2.jpg

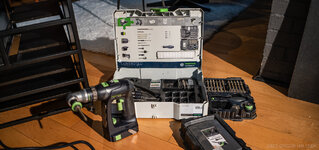
Why hasn't Festool sponsored me again? Somehow it feels like I'm sponsoring them...

I remember finding a deal on this Festool bit set and only "needing" a couple of the bits, drills etc. but over the years this has been my goto box for so many "cabinet" projects.

i-QrnKhK7-X2.jpg

For instance the right angle attachment (part of the drill kit) would not be enough to reach the screw for the power strip without the long, skinny driver bit. And to your question above, the space under the records is for the turntable power supply which is made by Linn and therefore a different design than the amps and so I wanted to hide it.

i-b3qcj7x-X2.jpg

The fit is tight, it slides in and has about 2mm clearance. I could cut the feet down to give some more room but it fits. A part of me wonders if it needs more space for cooling but it's never gotten hot, there's no venting and the body isn't a heat sink so I'm going to say no.

i-sDQXrm9-X2.jpg

The amps, crossover, power supplies and preamp pulled and ready. I considered making something in this format - a long horizontal - but decided that it would have been a waste of space. Fun and unusual but a waste of space.

i-nFFzbdW-X2.jpg

The power strip now blocks the turntable power supply. Not like it's coming out anyway. All the gear is slotted in and the cords are pulled through.

i-LkZ763j-X2.jpgi-rFS8DjZ-X2.jpg

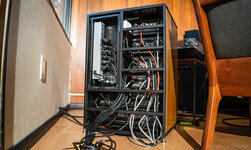
The power cords stay to the left and I grouped them together and zip tied them into a bunch and then tucked them into the space behind the amps. The signal cords and interconnects I kept loose and on the right side. I'm always a bit hesitant to buy into the hifi voodoo theories because they can be downright kookie (suspending speaker cables off the floor for instance) but I do know you don't want the signal cables ******* together.

I'd planned to put the gear on the far side of the couch but when I started to pull the speaker cables I realized that even though I had some really long 20' lengths (I was so smart when I was in college and bought this cable and knew, just knew, some day I'd live in something larger than a 200 sqft studio).

i-gjZhJps-X2.jpg

When I took this system active I never pulled the crossovers from the speakers. "Active" means that the the signal is divided between tweeter and woofer by a separate (fancier) crossover and then each driver is supplied by its own amp. Or in this case by it's own channel as I'm using two stereo amps. So amp one powers the right speaker, channel 1 powers the bass and channel 2 powers the tweeter and the second amp handles the left side. Overkill and amazing.

i-2hzZc8X-X2.jpg

The lamp that I got (from Spain?) didn't have any cushion on the base so I took this opportunity to glue some cork on the bottom. I imagined this lamp sitting on the top of the stand pointing down on the turntable. That was a looooonnnnnggg time ago.

i-BTnHgFK-X2.jpg

Since the cables weren't long enough to place it where I originally imagined I tried a few options that were in the range. The corner was just a (bad) thought. And before you suggest getting more cable this stuff was expensive - the four pair would have retailed at... $3000? For speaker cable? Man, I'm glad I worked at the shop and got it for free.

i-S3znjN4-X2.jpg

Another bad thought was when I placed the turntable on the top of the cabinet and saw that it fit perfectly and then considered that I maybe had wasted a lot of time building a turntable stand. It looked great sitting on the top - almost too great actually - like one of those "rack" systems from the 80's.

i-QQDWVcT-X2.jpg

At this point I'm just leveling everything: the cabinet, the turntable stand, the speakers.

i-KbgCGLG-X2.jpg

I did listen to the system with the turntable on top and it sounded... meh. When I put the turntable back onto its own stand it was a huge improvement that made me feel relieved and happy. My design for that works flawlessly. It was my one single perfect use of MDF.

i-Vnfh87c-X2.jpg
i-NKD3drd-X2.jpg
i-snj7fKV-X2.jpg

Then I nervously took the stack of new, on deck, currently listening to records and stuffed them into the empty space, half expecting there to be at least one or two that wouldn't fit.

But that didn't happen!

i-bTfC4QT-X2.jpg

I can think of a lot of ways that I might have done this differently but honestly I'm pretty happy. The spacing on the gear is great - if I'd added even 2-3mm around I could have gotten more space for the turntable power supply and the records but that would have felt too much. The spacing feels exactly right to me.

i-h7dbhB3-X2.jpg

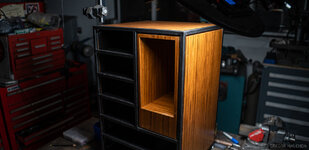
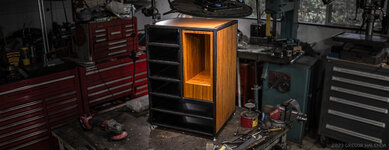
The teak veneer looks stunning and fits the feel of the living room. I could push the amps in a bit more if I wanted to hide the knobs inside the frame but this felt nice with them just proud of the face but with the gear mostly disappearing into the black frame.

I'm super happy with the mid course correction to make the record box teak as well. It adds warmth and makes it feel more like furniture than a piece of hifi gear and having the place for the records solves an age old problem of albums you've bought but not finished listening to or filed away. They always leaned agains things and then fell over. Now that stack has a home. A solution that feels perfect.

And I have two hours to clean up and get ready.

Happy holidays all.

Gregor
 
OP
S

sakurama

Well-known member
Joined
Oct 10, 2010
Messages
1,458
Location
Portland - the cool one.
Speaking of cords...do you make your own? It could be another satisfying rabbit hole. They can be exactly the length you need them to be, you can get some shrink tube labels if you have a TZe label printer, a little marine grade shrink tube and some and expandable sleeve for paired wires and it'll be soooo nice!

I bought a bunch of barrel aged stout to share. If it's up your alley, lets make some time soon and I'll invite myself over with beers and we can bask in the glorious sights and sounds of your setup

Yes, I used to. I'd probably do it again. One of the things we used to do when we made them in the shop was to fill the space inside the connector with 5 minute epoxy as a form of hidden strain relief. I always loved that detail. And hated it if you forgot to test the cable before you filled it.

I'd consider making new connectors for this - next year! But I'd consider having you over for beers as soon as family is gone - I will need that beer more than ever!

But I will say that this project has done more for my attitude than any anti-depressant ever could.

G
 

Vertigo Cycles

Well-known member
Joined
Jan 14, 2010
Messages
193
Location
Portland, OR
i-h7dbhB3-X2.jpg
The teak veneer looks stunning and fits the feel of the living room. I could push the amps in a bit more if I wanted to hide the knobs inside the frame but this felt nice with them just proud of the face but with the gear mostly disappearing into the black frame.

I'm super happy with the mid course correction to make the record box teak as well. It adds warmth and makes it feel more like furniture than a piece of hifi gear and having the place for the records solves an age old problem of albums you've bought but not finished listening to or filed away. They always leaned agains things and then fell over. Now that stack has a home. A solution that feels perfect.

And I have two hours to clean up and get ready.

Happy holidays all.

Gregor
Killer work! It looks amazing! You get high marks for working with the teak veneer too.
 

Bakafish

Well-known member
Joined
Feb 7, 2017
Messages
477
Location
Tokyo
Fantastic looking system.

When I took this system active I never pulled the crossovers from the speakers. "Active" means that the the signal is divided between tweeter and woofer by a separate (fancier) crossover and then each driver is supplied by its own amp. Or in this case by it's own channel as I'm using two stereo amps. So amp one powers the right speaker, channel 1 powers the bass and channel 2 powers the tweeter and the second amp handles the left side. Overkill and amazing.

Having a lot of painful experience in the land of biamplification, it is critical that you leave at least a capacitor on the tweeters to block any DC from reaching them, otherwise they will die a Vikings death (the DC will heat those little voice coils and burn them in an instant.) Amps are not supposed to output DC, they have filtering, but powering up or down (or a lot of age related issues) can cause it to leak through, and there is little downside to protecting them. You can have the passive crossover point well below the 'active' crossover you set, just make sure some sort of crossover (capacitor) remains in place for them as they will be otherwise unprotected.
 
OP
S

sakurama

Well-known member
Joined
Oct 10, 2010
Messages
1,458
Location
Portland - the cool one.
Fantastic looking system.


Having a lot of painful experience in the land of biamplification, it is critical that you leave at least a capacitor on the tweeters to block any DC from reaching them, otherwise they will die a Vikings death (the DC will heat those little voice coils and burn them in an instant.) Amps are not supposed to output DC, they have filtering, but powering up or down (or a lot of age related issues) can cause it to leak through, and there is little downside to protecting them. You can have the passive crossover point well below the 'active' crossover you set, just make sure some sort of crossover (capacitor) remains in place for them as they will be otherwise unprotected.

When I said “never pulled the crossover” I meant the passive one that was on the back of the speaker. They’ve been driven for the past 6 or so months with the Naim Snaxo 2-4 which is powered by it’s own Hicap and I’m going to assume since Naim designed this crossover for these amps and these speakers that they’ve thought of all that. It’s a very closed design - nothing off the menu.

This was the system that I’d heard when I was in college working at the hifi shop. We had a customer (a programmer with IBM) with this specific setup, wildly exotic at the time, and it became my “grail” setup. The ”someday I’ll have that” system and now I do - about 30 years later and thankfully at a fraction of the cost since I bought used. Also, this is effectively vintage gear now.

I found a photo of the inside of the SNAXO - maybe it will tell you something? It’s a pretty empty box really.

Gregor
 

Attachments

  • IMG_1967.jpeg
    IMG_1967.jpeg
    224.5 KB · Views: 167

Bakafish

Well-known member
Joined
Feb 7, 2017
Messages
477
Location
Tokyo
When I said “never pulled the crossover” I meant the passive one that was on the back of the speaker.
Okay, good. I misunderstood and feared you were thinking of removing the passive crossovers (as redundant), if you are following their design and left them in place I agree you are all set.

The great thing about vintage gear is that they really haven't improved on it, it is still cutting edge as far as doing what it does. All the development has been around multichannel AV stuff (which I won't claim I'm disinterested in) but well preserved and maintained systems like yours are as good as it's ever likely to get. I wish I could say the same about my hearing, enjoy the high frequencies while you can! :)
 

Jayman17

Well-known member
Joined
Feb 6, 2017
Messages
3,812
Location
Seattle, Wa
Those component racks look amazing! Nice save on the spinning insert too. Love your thread and I wish you and your family Happy Holidays. I hope you get quality time with your sister. I really enjoyed seeing her help out at your place earlier in the thread and was upset to hear her diagnosis. I think she sounds like a great sister...
 
To avoid these ads, REGISTER NOW!

Vertigo Cycles

Well-known member
Joined
Jan 14, 2010
Messages
193
Location
Portland, OR
I found a photo of the inside of the SNAXO - maybe it will tell you something? It’s a pretty empty box really.

Gregor
Did someone mention starting a thread titled, "Damn it, Gregor!" where we can all commiserate about all of the things we've purchased or become interested in as a result of this thread? It's a good thing I don't have money or space for hi fi gear.

I'd love to see a schematic of that crossover circuit. There isn't anything crazy going on in there...a mix of electrolytic, film and tantalum capacitors, plenty of 1% resistors, three relays that judging from the size of the PCB traces are likely switching power, and some transistors that do who knows what...perhaps little FETs or opamps that are boosting signal after filtering?

What's interesting to me is that all of the in/out wires are tied together at the back panel. It's active circuitry, which means that there's power coming in, but there's no IEC socket so I'm assuming that the in/out wires are carrying DC power. Seeing those wires bundled and that they're all unshielded kind of puts a dent into the "don't bundle signal wires together" idea
 
OP
S

sakurama

Well-known member
Joined
Oct 10, 2010
Messages
1,458
Location
Portland - the cool one.
Nice project Gregor, as usual! I dig the Linn and Naim gear. What speakers are you driving?

It's an old set of Naim SBL's (separate box loudspeakers) which were their top speaker 20 or so years ago. Supposedly they no longer make the drivers but tweeters can still be sourced. I think I have a spare set somewhere.
I'd love to see a schematic of that crossover circuit. There isn't anything crazy going on in there...a mix of electrolytic, film and tantalum capacitors, plenty of 1% resistors, three relays that judging from the size of the PCB traces are likely switching power, and some transistors that do who knows what...perhaps little FETs or opamps that are boosting signal after filtering?

What's interesting to me is that all of the in/out wires are tied together at the back panel. It's active circuitry, which means that there's power coming in, but there's no IEC socket so I'm assuming that the in/out wires are carrying DC power. Seeing those wires bundled and that they're all unshielded kind of puts a dent into the "don't bundle signal wires together" idea

Naim's game was simple, well made circuits and big power supplies. They made a simple, tiny integrated amp called the Nait which was my first bit of gear. Then you could upgrade to amp/preamp and then the next upgrade was a HiCap - a large power supply for the preamp. In this system there's two HiCaps; one for the preamp and one for the active crossover which is designed for this set of speakers.

I can't find a schematic of it but there's a better definition of the active system here.

The other nice thing was the preamp used interchangeable boards and there's a few people making updated output plug-ins and phono boards. This pre is running Kit's boards which were a good upgrade to the old ones.

i-2sZKqzt-X2.jpg

Part of the goal of this project is to drive a stake in the heart of upgrades - there's no space to add a CD player, swap the stereo amps for mono's or anything. Done and dusted. Moving on.

The next project is inviting Sean over for beers and listening.

Gregor
 

zanyad

ALLIANCE MEMBER
Joined
Apr 26, 2018
Messages
2,814
Location
NE Ohio
Did someone mention starting a thread titled, "Damn it, Gregor!" where we can all commiserate about all of the things we've purchased or become interested in as a result of this thread? It's a good thing I don't have money or space for hi fi gear.
Louder for those in the back:
 

hewey

Well-known member
Joined
Sep 5, 2014
Messages
1,681
Location
Blue Mountains, Australia
Beautiful work on that stand, that's come out stunning (like all your projects). Great to follow a new project from you again. And all the best for the new year and overcoming it's challenges.
 

LeonardY

Well-known member
Joined
Apr 16, 2011
Messages
5,077
Location
Southern California
I'm asking you to remind me to never use MDF again.
I don't use it much anymore either. But mostly because it's so heavy. I can get a light weight version but it's the equivalent of drinking Corona light.

I really like this type of plywood but it's really expensive.


Southernbuild

Well-known member
Joined
Aug 25, 2012
Messages
408
Location
North MS
One of the best threads on the GJ, I've been following for years, and have been inspired to up my overall execution level.

I truly appreciate your time and effort to document all of this for random strangers on the internet.

My heart goes out to you in regards to your sister's illness; I have no words.

Thank you.

PS, thanks for causing me to buy a pizza oven.
 

BombShelter

Well-known member
Joined
Nov 16, 2015
Messages
544
Location
State of Hockey
That's one of the best looking stereo racks I've seen and I've been pondering them for years. I can't stand most of the "cool" audiophile stuff that looks dated and not manly enough for me. As a designer I love anything WOOD + METAL and this works perfectly. Back in the day, AIWA used to put out all kinds of interesting stands/racks for it's Mini 22 Component Systems, some looked kind of similar but not as nice. I think the AIWA 22 Footprint is slightly smaller then the Naim but have never seen them side by side.

Unfortunately I'm a huge believer in voodoo audio, especially wiring. In one of my jobs at an audio company, they made mid-level thick wiring (back when this was new), I grabbed a ton of it and I could easily tell the difference. In another job I worked with very high end wire manufacturers for engineered applications, they are really picky about the wire and manufacturing process for their finish product.
 
Last edited:

thomfr

Well-known member
Joined
Sep 16, 2010
Messages
410
Location
The Netherlands
Nice rack and an even nicer set! Love those old Naim pieces.
These are still quality products from Naim. Currently I'm very annoyed as my Naim Unity 2 had it's display dying (become dark). I did some investigation and it is a very well known problem as they all do... It can only be replaced including some modifications via a Naim service center and they quoted € 500,- excl shipping costs.
For correcting a bad design (it is 6 years old) at the cost of the customer with a very hefty profit.
It sounds great (combined with my Piega Coax 30.2 speakers) but my next audio investment will not be in a Naim.

Thom
 

zjohnson1

Well-known member
Joined
Oct 21, 2014
Messages
86
Location
Newnan, GA
Love this thread and all the detail! I usually give it a month or two before checking in so I can binge projects and as an added benefit it gives me drive to finish one of my own.

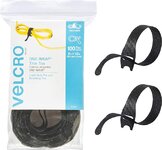
Noticed you used zip ties for all your cables in the back of your rack. It's semi permanent so makes sense but an IT buddy of mine put me on these velcro cable ties a little while back and I LOVE them. They stay in place for permanent installs but are super easy to remove. I've gone thru several hundred and my giant bin of spare cables is completely organized with these. An added benefit for storage is that once you tie some cables in the middle you can loosely secure bundles of similar types using extra velcro strips


Attachments

  • velcro cable ties.jpg
    velcro cable ties.jpg
    44.4 KB · Views: 88
Last edited:

67CarGuy

Well-known member
Joined
Feb 6, 2008
Messages
764
Location
Outside Boston, MA
Gregor,
I've been reading your thread off and on for years now - I think your van welding adventures were my first introduction to the world of Sakurama... As I'm currently in-between garages/shops/workspaces, I get to live vicariously through the many impressive spaces, tools, and skillsets that are shared here. Thanks for being a part of that, and for sharing as much of your life with us as you do. Hope you and your family are well, and getting to spend some quality time with each other.
 
OP
S

sakurama

Well-known member
Joined
Oct 10, 2010
Messages
1,458
Location
Portland - the cool one.
Nice rack and an even nicer set! Love those old Naim pieces.
These are still quality products from Naim.

Thom
Thanks Thom. I like the old stuff for the simplicity. I think I'll go back and update the older chrome bumper stuff I have next.
Love this thread and all the detail! I usually give it a month or two before checking in so I can binge projects and as an added benefit it gives me drive to finish one of my own.

Noticed you used zip ties for all your cables in the back of your rack. It's semi permanent so makes sense but an IT buddy of mine put me on these velcro cable ties a little while back and I LOVE them. They stay in place for permanent installs but are super easy to remove. I've gone thru several hundred and my giant bin of spare cables is completely organized with these. An added benefit for storage is that once you tie some cables in the middle you can loosely secure bundles of similar types using extra velcro strips

I use those for organizing my tether and power cords on my photo gear but wouldn't have thought to use them for anything interior. I like the small size of the mini cable ties for that.
Wow! That audio cabinet looks amazing. Very well thought out and executed.
I am seeing it right, 5 components to drive sound for 1 turntable?

Yes. Two stereo amps, a preamp, and active crossover and then two power supplies which power the crossover and the preamp. Naim has always used separate power supplies in its gear or in a path of upgrades. It's a little bonkers but the sound is pretty great.

Gregor,
I've been reading your thread off and on for years now - I think your van welding adventures were my first introduction to the world of Sakurama... As I'm currently in-between garages/shops/workspaces, I get to live vicariously through the many impressive spaces, tools, and skillsets that are shared here. Thanks for being a part of that, and for sharing as much of your life with us as you do. Hope you and your family are well, and getting to spend some quality time with each other.

Yes, and I've been off the thread myself. I'm coming back to remedy that for the moment.

So the hifi cabinet was a good project that got me into the shop and greatly improved my attitude. It's probably not coincidental that shortly after that I felt like dating again. I got a fortune cookie that said "a romantic encounter is in your future" and I'll be damned if that wasn't true.

So Lara, my Mom and stepdad Len showed up for Christmas. Judiiaan was kind enough to shuffle our parenting dates so the kids got to stay a bit longer with their grandparents and we had a nice holiday. I really didn't take any photos during that time as I was preoccupied with cooking, cleaning and entertaining.

After Mom went home Lara settled in. I was nervous about how this might work as I'd gotten used to having the house to myself after the kids head to mom's but it's been great actually. I love having Lara around and she's been super helpful.

i-7trW4MK-X2.jpg

If you didn't know she had dementia you probably wouldn't have any idea that anything was different. Unless you tried to find anything in the kitchen. Her helpfulness extends to putting away the dishes (which is supposed to be the kids job) but she has almost no ability to see the patterns or remember where things go. After a few weeks of trying to gently correct her - "See this grater goes with all these other graters - just look for the similar things" I decided to abandon that and let her put things away where she wanted for a couple of weeks. Interestingly I could see the patterns that she used: shapes and sizes instead of purpose. She'd nest various bowls and strainers together perfectly even though their uses are different. And she was pretty consistent.

It was a good insight into her brain and how it works now. Another thing that is a dead giveaway is she can't really write anymore. Words are so mis-spelled or phonetically written that they are hard to parse. She's comfortable with routines but gets very flustered by random, unusual or new things. I think I'd mentioned it before but some of the best advice I've gotten from a friend was, "They can't join your world but you can join theirs" and that's been a helpful reminder. If I get upset she'll get upset, if I get flustered she will. If I brush things off and joke about something she forgets she will laugh and brush it off. So we're working on a lot of calm positivity in the house.

i-4L8B6kv-X2.jpg

Yard work is a place that she excels. She can just go and go and rarely has to stop or question things. Which is a great thing as we've had a **** ton of it with a huge storm in January...

i-TdgW4K3-X2.jpg

We've lost a major tree with every major storm. The PNW isn't really good with cold snaps and in January we had a lot of rain which soaked the ground and loosened the soil then we had a huge freeze and ice storm paired with strong winds. The trees were heavy with ice and the ground was wet and loose and over the course of a day Portland had several thousand trees come down. This was one of our huge Black Locusts with a trunk diameter of almost 30" (almost a meter) and we watched it fall from the house taking out power lines, several other trees and a telephone pole/street light.


i-C2883LH-X2.jpg

i-qMpsbNk-X2.jpg

Immediately after this tree fell I knew others were going to so so I moved the van up to the upper driveway and tucked the car next to the garage. Not more than 30 minutes later a 16" diameter branch fell where the van and car were parked and some of the branches reached the bumper of the car.

While this tree didn't knock out our power we did lose power a couple of days later and it stayed out for four days. The house was freezing but we still had gas and the generator. Well, sort of.

i-vhhs47S-X2.jpg
i-jkcKV5f-X2.jpg

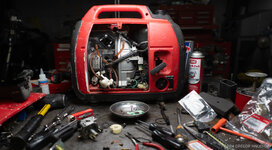
The generator hung on for three of those days before the carb finally became too clogged to keep running. The lights over my bench are photo LED panels and luckily run off standard video batteries so between that and a headlight I rebuilt the carb in the freezing garage. Power came back when I was almost finished so I took the time to go over the whole generator and fix some parts so that it's in good shape for the next one.

i-47JqhNc-X2.jpg

I had no idea how heavy Locust was until I started to try to move some of the branches. It's about as heavy as oak but it's a really beautiful wood with a bright golden outer layer and a deep red/orange center. There's no point in crying over spilled trees. I now have enough firewood for the next couple of years and that trunk will now probably become a table if I can figure out how to mill it with a chainsaw.

Speaking of the chainsaw. When I started to break down some of the branches the saw was struggling a bit and I began wondering about the yellow chains that are supposedly more aggressive (and less safe). I figured that a 29" diameter tree was going to need all I could get so I bought a 20" bar (it was 18") and a yellow chain.

Then I fell down a chainsaw rabbit hole. I had no idea that people modify chainsaws for performance...
i-sdqpFKD-X2.jpg

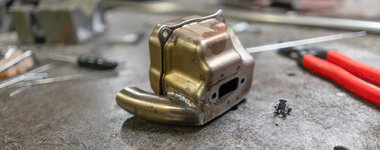
I kept seeing ads for exhaust modifications which are basically ports that open the exhaust and reduce the back pressure by skipping the baffle. I considered ordering one of those kits since it's supposed to make an extra 20-25% more power but then I went into the garage and took off the exhaust to look at it. Before I'd even given it any thought I put it in the mill and bored straight through the baffle and then made a quick exhaust pipe from stainless header scrap.

It's not pretty but it was a fast project.

i-FwM84BS-X2.jpg

I was afraid it was going to be a lot louder but it wasn't really. It was extremely scary. With the exhaust mod and the new chain it cuts so fast and so effortlessly that it's a bit frightening. I'd say it's close to twice as fast as before.

The phrase "hot knife through butter" is a very accurate description of this saw now.

i-QJQJsRN-X2.jpg

The sharpie line on the bar is 16" which is how long I cut my firewood so I have a quick gauge. The rest of that tree is so big and so heavy and so awkwardly elevated that I'm waiting for a dry day to figure out how to start to brace it, support it and begin breaking it down. For now I've just been limbing and cutting the smaller stuff.

I've got some other stuff to post too but this is a good warm up.

Gregor
 

legenddc

Well-known member
Joined
Aug 19, 2012
Messages
1,073
Your story about Lara reminds me of my grandparents. My grandmother had short term memory loss. My grandfather had failing vision (macular degeneration). He used to have to watch her put away the groceries so he could find them later.

Best of luck to you, the kids and Lara!
 

bdbecker

ALLIANCE MEMBER
Joined
Nov 18, 2015
Messages
5,576
Location
Iowa
I'm happy to hear that you are staying optimistic despite a tough series of events. Keep fighting the good fight, but also don't be afraid to ask for help when you need it. Exhaustion (mental and physical) can sneak up on you if you aren't careful, which can lead to a whole host of other issues down the road. It's too easy to forget to take care of yourself when you are busy helping everyone else.

-----

Switching to a lighter topic...

...I had no idea that people modify chainsaws for performance...

For whatever reason, that statement reminded me of a YT rabbit hole I went down awhile back about how fanatical the Thai people are about racing. If it's got an engine, they are souping it up and racing it.


I don't know how some of those guys are even able to walk given the size of their... ummm... courage.
 
To avoid these ads, REGISTER NOW!
Top Bottom