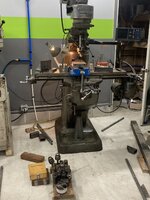
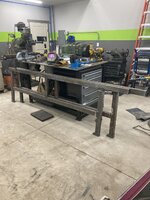
To avoid these ads, REGISTER NOW!

Modest 25x35 Fabrication Shop Build

cbacres

Well-known member
Joined
May 28, 2010
Messages
5,998
Location
SW Florida
Looking good. You’ll love the Vidmars. Don’t forget to take the time before there full and clean/ lube the bearings on the drawers. I’ve been using a #1 Superlube.I’ve used regular grease on other years ago and it needs to be redone as it’s a little heavy.

I like the sink, I have a double compartment, but outside my shop.
 
To avoid these ads, REGISTER NOW!
OP
T

Trm303

Well-known member
Joined
Aug 4, 2020
Messages
162
Location
Cape May
Not much progress lately, I did get a 220 outlet hooked and was able to test my Miller 251 that I bought sight unseen/untested. Looks like everything works and I will be starting on a welding table here very shortly.

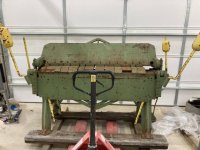
I just received my first fabrication order from a repeat customer so I will be making 15 target holders for the local gun range. I was quick on the draw finding a 52” Chicago finger brake off MP for $700 and picked it up on my only day off this week (thus the lack of progress). Looks like it could use a cleaning and maybe some paint but it came with all the fingers which is pretty impressive let alone the price I got it for haha

IMG_5635.jpg


Sent from my iPhone using The Garage Journal mobile app
 

Attachments

  • IMG_5635.jpg
    IMG_5635.jpg
    142.3 KB · Views: 243
OP
T

Trm303

Well-known member
Joined
Aug 4, 2020
Messages
162
Location
Cape May
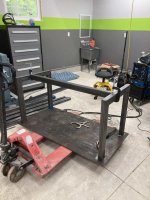
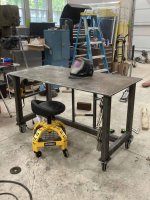
My first official welding project was a welding table. I decided to go with 5’x30” with a 1/2” top as I believe it will be a large enough size for any pieces I may end up welding yet compact enough to not get in my way when I’m using the tools surrounding it. I ended up buying a dewalt stool to accompany the table (so far very pleased with the quality/comfort as there are not many options in that price range).I’m going to use the table for a while before I decide to paint it in case I decide to add anymore features to it, I am currently considering a drawer under the table to keep gloves and squares.

IMG_5647.jpg
IMG_5660.jpg
IMG_5661.jpg

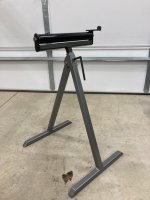
My first project using the welding table was a material roller stand for the bandsaw (because using a trash can, with shims for height, was beginning to get annoying)

IMG_5678.jpg

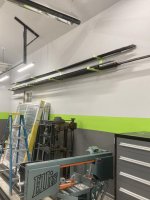
I also hung some previously built wall hanging material racks for the lighter gauge tube and small diameter solids. This freed up some floor space and I will be building lower wall mounts and an organization rack for cut offs to eliminate the rest of the material still sitting on the floor.

IMG_5644.jpg


Sent from my iPhone using The Garage Journal mobile app
 

Attachments

  • IMG_5647.jpg
    IMG_5647.jpg
    152.5 KB · Views: 194
  • IMG_5660.jpg
    IMG_5660.jpg
    96.8 KB · Views: 202
  • IMG_5661.jpg
    IMG_5661.jpg
    115.1 KB · Views: 205
  • IMG_5678.jpg
    IMG_5678.jpg
    73.2 KB · Views: 204
  • IMG_5644.jpg
    IMG_5644.jpg
    76.8 KB · Views: 194
OP
T

Trm303

Well-known member
Joined
Aug 4, 2020
Messages
162
Location
Cape May
Thanks Cbacres, I love the saw and is definitely the most used tool in the shop.

I made some progress on the shop but also working a lot of overtime to pay for it. Getting some little things out of the way to make the shop more useful. I partially built a grinder bench to house my two grinders and a belt sander, I will be building some storage solutions underneath as soon as I get my drill press operational.
C9F3E70D-54F5-4099-9EAD-68E6F928D512.jpeg

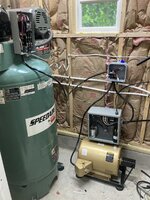
To get my drill press running I need air and 3 phase so I got work on my 3 phase converter. I went with a Crowman panel and I am very pleased with the quality. Once the converter was up and running, I also hooked up the compressor which was bought in unknown running condition for a good deal due to it being 3 phase. Luckily the compressor appears to run good. For now, I will be connecting all machines together at a junction box in the utility closet.
02825F86-6AB4-46DB-B267-5D34CE9A069E.jpeg
31EF53CC-9B2F-4D66-A65B-6685C124B1B2.jpeg

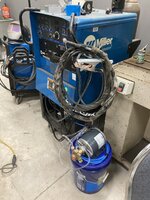
I have a buddy that needs an exhaust done on his truck and of course he wants stainless so I had to get my syncrowave up and running. This was also a unknown condition auction buy. I got a free water cooled tig torch given to my so I bought a Procon carbonater pump/motor off eBay and with some fittings and a bucket, I have a makeshift cooler for the time being. I bought a 14 pin plug, monetary switch and some wire for a push button arc switch and to my delight, the welder works perfectly. I am still learning the machine so far but coming from an inverter machine, I am very happy with this Syncrowave DX. When I get some free time I will be building a legitimate cooler and a better welding cart.
594EAF4B-5C63-425F-93A2-FC6731CCCE90.jpeg
5B91901C-7376-4BA7-8152-3B438A9FFC2E.jpeg
 

azk5

New member
Joined
Mar 21, 2021
Messages
3
Location
AZ
I like the equipment you've acquired so far and that you're doing jobs as you're outfitting the shop. I've changed my mind about needs in my shop based on the jobs I get.
 
OP
T

Trm303

Well-known member
Joined
Aug 4, 2020
Messages
162
Location
Cape May
The wall mounted Lista's look good, did you weld up the holes from where the hasps were mounted?
Yes, All holes plugged before paint, I would have liked to keep them original blue for the sentimental value but that went out the window when I had to grind and weld on them.
 
OP
T

Trm303

Well-known member
Joined
Aug 4, 2020
Messages
162
Location
Cape May
Thanks for all the positive feedback guys I appreciate it!

Not much progress to report back, summertime means a lot of overtime and side work so there’s not much time for anything else. Im still on the hunt for a milling machine but there are not many options out there. I have also been looking into plasma tables with all the overtime I’ve been working. If anyone has any suggestions I am open to them but as of right now I’m looking at a 4x8 premier plasma with a hypertherm 65a.

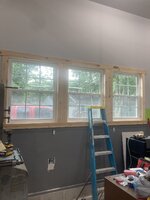
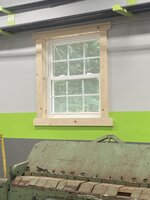
As for the little I did do, I framed all the windows with 4” pine that I will eventually paint dark grey. The doall drill press now runs but I am currently running into issues with my wiring as it seems all of my contactors/starters were ran with a neutral wire and 120v coil in their original settings. As of now, my current/most cost effective plan, is to replace all the coils with 240v coils and hope that I do not run into anymore issues.

I did also manage to move my last and largest machine in the shop. My 1940s American Pacemaker is now in its new home. This is one of the few machines I was able to run under power before purchasing so I do know that it runs perfectly. Unfortunately it also has a 120v coil so I will be switching that over shortly along with giving it a thorough cleaning and lube before putting it to work.

F7F79BEA-14B1-4306-8CD6-A44D147F8352.jpeg
979C1E66-9450-4A2E-B326-C198CA61C6E9.jpeg
58345A94-D9A5-4B27-9625-5D4146A9423A.jpeg
 
Last edited:
OP
T

Trm303

Well-known member
Joined
Aug 4, 2020
Messages
162
Location
Cape May
I was actually able to spend some time working ON the shop instead of in it this past week.

I got my Doall drill press running and fully operational aside from a good cleaning. For the smaller holes I will unfortunately be replacing my small southbend drill press for something better suited for my needs. I am on the hunt for something with a t-slot table and capable of much slower speeds.

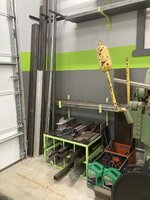
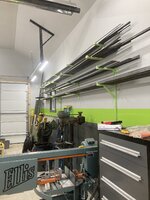
I took some material storage ideas from other members on the forum and put something together. I built it on the fly so I’m not quite sure how I feel about it yet but I am happy to be gaining some floor space and becoming more organized. I also built some more full length racks for some of my heavier material, two of the four racks have legs that go to the sill plate to hopefully take some of the load off the wall.
985DE8A9-4912-4EA4-9100-562DA2E3663E.jpeg
2756EFE2-8BE4-41FD-BF34-782F1B451CB3.jpeg
I was talking about a CNC plasma machine in the foreseeable future but nothing really seals the deal like a Facebook market place find. I picked up a very lightly used 2020 Hypertherm 65 with 25’ machine torch for $2300. The guy who was closing up shop told me it had no more than 15 hours on it and it is hard not to believe it. Since I was planning on buying the same machine new in the $4k area, I think my budget will allow me to get a table sooner than expected. After much research, I’ve decided to build the table instead of buying one. On my next trip to the steel yard I will be picking up the materials for a winter project.
E645DD0F-C3E4-4750-A90C-DF52E26EAF02.jpeg
Up next on the agenda is to get the lathe cleaned, oiled and running and continue with organization. I have a small lull in side work and overtime so I hope to get as much done as possible before they both pick back up.
 
OP
T

Trm303

Well-known member
Joined
Aug 4, 2020
Messages
162
Location
Cape May
Nothing huge to report back as of lately, I did put together a base for my Brake with a shelf to organize my jack stands among other things. I like to leave everything I build with a 4” space underneath ever so I can easily move it around with the pallet jack or a set of forks. It will be one of my many planned winter projects.

12A22735-BC46-499F-950D-D775C4247C27.jpeg

I ended up selling my small south bend drill press and replacing it with a lightly used 90’s craftsman with a t-slot table that I have already put to good use.

4F2D28BC-1467-449B-A757-D4ADEC4A7E7B.jpeg

My friend did pull through and I finally picked up a 5x12x1” road plate (in addition to some extra steel while I was in the area) If I had to guess a weight (based off of how my skid steer couldn’t pick it up without the back wheels coming off the ground) I would say this plate weighs close to 3k lbs. I plan to make a 3x6’ bench that I will call my “machinist bench” for any machine work or tabletop mechanic work. It will have a vidmar built in for all my hardware and a bench vise and bar bender mounted on the corners.

88054B70-D039-47DE-B1F0-BD92A997AF03.jpeg
 
OP
T

Trm303

Well-known member
Joined
Aug 4, 2020
Messages
162
Location
Cape May
One of my bigger accomplishments lately was getting my machinist bench completed. Cutting the 1” plate with my Milwaukee circular saw did not go as planned and I ended up having to cut a couple feet with a bunch of cut off wheels after I fried 3 carbide blades. I built a Vidmar and Kobalt tool box into the table, the kobalt box will house all my machine tooling/taps/dies etc. while the Vidmar will house all of my hardware. My $80 marketplace Milwaukee mag drill made quick work of mounting my vise and bar bender.
BD6367A8-A357-4677-B0BB-98BE33645E27.jpeg
481FC8AC-A008-4562-BE4A-6EE5BB85C5F7.jpeg
E52F6D75-09C9-4FE3-9A28-B93B90A75814.jpeg

In other news, my search for a mill may have finally come to an end. I found a 63’ J head Bridgeport with DRO and power feed in addition to a collection of tooling and Kurt vise for $1500 on market place. Machine looks to be in good shape and was owned by a former machinist who has since passed away. The seller agreed to hold it for me till this coming Monday/Tuesday when I am available to go pick it up.
 
To avoid these ads, REGISTER NOW!
Joined
Nov 8, 2017
Messages
13
That looks great! I like the looks of your shop, I’m actually planning the details for the interior of my new shop right now and settled on a similar approach to paint and window trim. Dark grey lower, maroon stripe and cream upper walls. Still playing with the details, a lot of work between reality and the cad vision I’m imagining. :)
 

Attachments

  • m11.JPG
    m11.JPG
    152.6 KB · Views: 177
OP
T

Trm303

Well-known member
Joined
Aug 4, 2020
Messages
162
Location
Cape May
That looks great! I like the looks of your shop, I’m actually planning the details for the interior of my new shop right now and settled on a similar approach to paint and window trim. Dark grey lower, maroon stripe and cream upper walls. Still playing with the details, a lot of work between reality and the cad vision I’m imagining. :)

Thanks! That looks good! I was set on the green, but while we were painting the interior, we actually brought up the fact that red would have looked just as good. You will definitely like the color scheme with red!
 
OP
T

Trm303

Well-known member
Joined
Aug 4, 2020
Messages
162
Location
Cape May
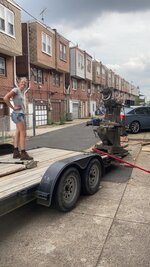
As promised, I went to Philly and picked up a very nice looking Bridgeport from the middle of a housing development. Everything appears to function and it came with quite a bit of tooling. With a bunch of pipe and wood cut-offs and about an hour and a half in time, my girlfriend and I had loaded up on my flatbed. Once home, the skid steer made quick work of unloading it and putting it in the shop.
8DFB4C00-81E6-459D-8F23-FDE1BDFAD58B.jpeg
6CCE6B06-5220-4DAE-A1EA-13D4DC3C8BB9.jpeg
CFAFA01C-E665-4CCE-B22C-650CBDC55E11.jpeg
 

matt_i

Well-known member
Joined
Mar 14, 2008
Messages
10,752
Location
SE Michigan
Dang, a readout and a lot of accessories! Perfect! :cool:

Is that another Custom Deluxe that I see?!? I have an R30 crew cab which has been primarily used every whichway imagineable concentrating iron in my shop lol.
 
OP
T

Trm303

Well-known member
Joined
Aug 4, 2020
Messages
162
Location
Cape May
Took a small vacation from progress for a while, snuck up to West Virginia and bought an airstream, proposed with said airstream, been doing a fair share of side work to build up the shop bank for the CNC table I will be building (and now the camper we will be rebuilding after the new year)
151CF482-0CA0-4313-95D9-F38F4FD45486.jpeg
More recently I needed the pacemaker to bore out some holes in my most recent project so I cleaned, lubed, and wired it up. The lathe runs smooth however it does seem to be weeping a fair amount of oil from multiple locations which gives me the feeling I will be pulling it apart in the near future to reseal it and give it a much more thorough cleaning

I have been doing quite a bit of organizing and I am starting to have a home for all of my tooling. Getting the lathe up and running and actually throwing some chips was a very rewarding feeling as it feels like I’m finally working IN the shop rather than ON it. One of my less priority storage ideas has been a way to store heavy milk crates under my benches with a way to access all of them without having to physically move them. My solution for this was to put them on swivels so I can swivel them out from under the bench and so far, the concept seems to be working very well. I am able to put all of my 175lbs on each shelf and they still swivel smoothly on their oilite bushings. Due to the fact that these are in an area that will see a lot of dust and sparks, I will be making cabinet doors on barrel hinges to conceal the crates and make the bench look more appealing.
E10675BA-5738-492D-A79F-395BAF160380.jpeg
2E4524D9-2E29-42D0-ACFA-15D1C343488E.jpeg
 

zc15

Well-known member
Joined
Dec 22, 2020
Messages
433
Location
SE Michigan
Very cool thread, I am subbing for sure! I really like your 10' tall door, but I'm curious why you didn't go with an 18' wide given the width of the building
 
OP
T

Trm303

Well-known member
Joined
Aug 4, 2020
Messages
162
Location
Cape May
Very cool thread, I am subbing for sure! I really like your 10' tall door, but I'm curious why you didn't go with an 18' wide given the width of the building
I originally had a good used 16’ door given to me that I was planning to install but opted for a new door when the time came, looking back I am happy With the size, any wider would have been less wall space.

Thank you all for the congratulations!
 
OP
T

Trm303

Well-known member
Joined
Aug 4, 2020
Messages
162
Location
Cape May
Not as much progress as I would like to admit, I’ve been finishing up a lot of small tasks that have been put off for too long.
I still have a few things that don’t quite have a home including my arbor press which has been living on the floor up to this point. I decided to mount it on a stand with my 20 ton press, the stand is elevated on feet so they can both be moved around with my pallet jack

AF69ABB3-BBBA-4420-83C9-5F9884A7355A.jpeg
I did get the radiant tube heat up and running and I am very pleased with the reverberray product. The heater is very quiet on both stages and brings the shop up to temp fairly quickly. I now keep it at 45 at all times and turn it up to low 50’s when I’m working, I’m waiting to get my next gas bill to see what the consumption looks like.

The latest thing on my shopping list has been a tube bender. I was hoping to pick up a used JD2 model 32 for cheap but I ended up finding a pretty good deal on a Model 4 with air over hydro unit on marketplace. It came with a 5/8, 7/8, and 1” die but I will probably end up buying die set or two in the 1.75” area. The thing is awesome and I am very excited to start some tubing projects.
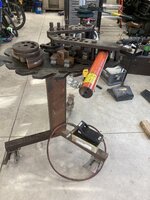
7AF9547D-1A7F-475A-88F1-0595E4074A38.jpeg
I am now slowly preparing myself for the CNC plasma table build I’m hoping to tackle this winter. I have been stepping over the steel for the table sitting on floor in the shop for the last two months and I am now finally starting to cut it to size. I will be basing my design off the Precision Plasma table with some minor modifications. I will be running the CandCNC blade runner controller with the Hypertherm 65 I picked up late last year. I will post some pictures in the near future as the table evolves.
 
Last edited:
OP
T

Trm303

Well-known member
Joined
Aug 4, 2020
Messages
162
Location
Cape May
Got all the material for the table cut to size and the table legs all welded up. I have two trucks coming in for work in the next two weeks so I may not start assembling the rest of the table and until I get the trucks out of the way and won’t need to worry about space limitations.
A2F0E52C-0BF9-4791-A1AA-77AD0013BA70.jpeg
BAE979B3-1928-41FA-986B-F4E2BA43FA83.jpeg
I intend to put a bladder tank under the table to drain it when it is not in use to prevent evaporation and make the table easier to clean/service. I was originally on the hunt for a 60gallon compressor tank but my local propane guy had two 100lb tanks that were unfit for service he was willing to give me. I’m going to cut both ends and weld the tanks together to form one long tank to run the length of the table. I will be running a pneumatic pressure system to drain/fill the table. According to other designs I will only need about 5psi max so I am not too concerned about tank integrity
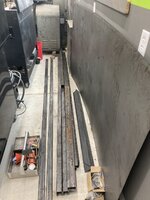
F6D3CFE2-B91B-44B3-A485-BBD54587C972.jpeg
 
OP
T

Trm303

Well-known member
Joined
Aug 4, 2020
Messages
162
Location
Cape May
Making small progress on the plasma table. I have the table itself welded together now and since it is in the middle of the shop, I am forced to at least build the drop down casters which will allow it move out of the way before I can bring my next job in.
4D438135-282C-4D10-BFA2-2D4824909F6D.jpeg
18ABC0C3-2AD5-4492-8D13-FD7C0D177DB1.jpeg
I am designing the wheels so either side can lift up independently allowing me to tilt the table towards the sump and allow the table to fully drain when it is not in use.
A2F69852-3DDB-4536-9ADF-84F049854A03.jpeg
I am slowly getting more fabrication jobs but unfortunately majority of my side work is still mechanical in nature. At this point I am welcoming any work that comes in as I just purchased the full motion control kit from CandCNC with floating Z-axis in addition to some linear motion parts and gear reduction rack and pinion drives from AVID CNC. For some reason this time of the year is when all the work starts pouring in so anymore forward momentum is going to be slow moving
 
OP
T

Trm303

Well-known member
Joined
Aug 4, 2020
Messages
162
Location
Cape May
Having plenty of work coming in sure beats pounding the street looking for work.

What kind of mechanism do you have in mind for the caster lift?

A lever arm will come off of each caster plate and both will be connected together via tube/angle so they will move in unison. Then a foot lever will engage the front set and a separate for the back set. This side is the more challenging side as the foot lever is moving the opposite way I need the castor levers to go so I am considering a cam mechanism. The other side should be easier with simply a long tube linkage connecting the foot lever to the caster plate levers.

There seems to be a decent mechanical advantage for lifting the table at this time but I am concerned when the table starts getting up to the expected 1200lb weight how well it will fare.
 
OP
T

Trm303

Well-known member
Joined
Aug 4, 2020
Messages
162
Location
Cape May
I have the one side mocked up and functioning, I tried to take a picture of the mechanism to best show how it works but that proved to be rather difficult. It seems to work very well and picks the table up effortlessly with the foot lever so I’m a little less concerned with table weight now. The other side should be much smoother now that I know this design will work.
33E0B5E7-5F73-4595-ACD0-ED3245EFD0AC.jpeg
B7034CAA-943D-48EB-9E33-420D9C157E79.jpeg
I’ve also been working getting my Vidmars organized. I had originally planned on buying small plastics organizing cups from eBay that are advertised to fit in the cabinets but it turns out ordering the dividers directly from Stanley is very affordable and is the much better option. Now that I’m working in the shop, I can’t tell you how nice it is to be able to open a drawer and know exactly where everything is!
41CDDD2A-5A66-46B1-B63E-0EB4CBD3E84D.jpeg
053DACB6-4B15-4131-9AA9-D037B3897F94.jpeg


On a side note, I finally got my latest gas bill with the infrared tube heater running for anyone who is curious. Keeping the shop at 45 when I’m not in it and bumping it up to the 50’s when I am, it is burning the same amount to keep my 1300sq ft home heated or around $115 in Gas. I am very happy with this heater and highly recommend one for anyone looking for affordable heat. The added bonus is everything in the shop is warm, not just the air.
 
OP
T

Trm303

Well-known member
Joined
Aug 4, 2020
Messages
162
Location
Cape May
Haven’t posted in a while, I had a truck come in for some welding work and turned out to be A LOT of welding work.

I did however get the CNC table wheel mechanism dialed in and working well. I also got the linear rail mounts for the x axis squared and welded in. Table itself is out by an 1/8th but I was able to get the rail mounts within 1/32” tolerances, hoping to get the rails themselves within a similar tolerance.

I have the water table mocked up, and as soon as I get some free time, I am hoping to lay some bead down and get the water table welded. With everything going on in the world, I went ahead and ordered everything else I may need for this project so I don’t run in to delays later. Went with HIWIN style rails for the Y-axis. (Had I known how affordable some of the ground rail options are, I would have gone precision ground for the x axis as well). I also went with the Cand CNC super Z axis with magnetic breakaway.

5F385918-AFC6-4642-901F-25017BF001B9.jpeg
06278937-5681-4982-AD76-87394B41A608.jpeg
 
To avoid these ads, REGISTER NOW!
Top Bottom