
You are using an out of date browser. It may not display this or other websites correctly.
You should upgrade or use an alternative browser.
You should upgrade or use an alternative browser.
MP&C Shop Projects
- Thread starter MP&C
- Start date
Beefbuzz, when you visit your Dr. for insomnia, just blame it on GJ!
Good idea. In fact I think I will start a running list of all the things I can blame on GJ!
")
Cool! Where are you located?
was born and raised in St. Mary's, but recently moved to King George, VA, parents live in Dameron, and i still work at PAX
TurboCup87
Well-known member
I've just invested over 4 hours on this wonderful informative thread! You are to be commended for not just your amazing skills, but your willingness to spend a TON of time teaching us. Thank you, thank you!
TempleofZoom
New member
- Joined
- Dec 25, 2010
- Messages
- 4
Kevin, the lift gate should be the last major hurdle, then double check all the panel fitment and do some metal bumping, and then blow it back apart and paint. Hopefully soon!:
Great News!
TempleofZoom
New member
- Joined
- Dec 25, 2010
- Messages
- 4
Will, have you posted any pics of the upcoming project here on GJ?
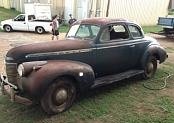
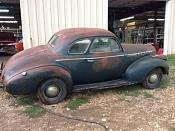
Just a little teaser as to what is next for MP&C. Think era correct gasser circa 1963/1964. A high end museum quality type build.... more to come so stay tuned!
Attachments
larry4406
Well-known member
Just a little teaser as to what is next for MP&C. Think era correct gasser circa 1963/1964. A high end museum quality type build.... more to come so stay tuned!
This will be good!
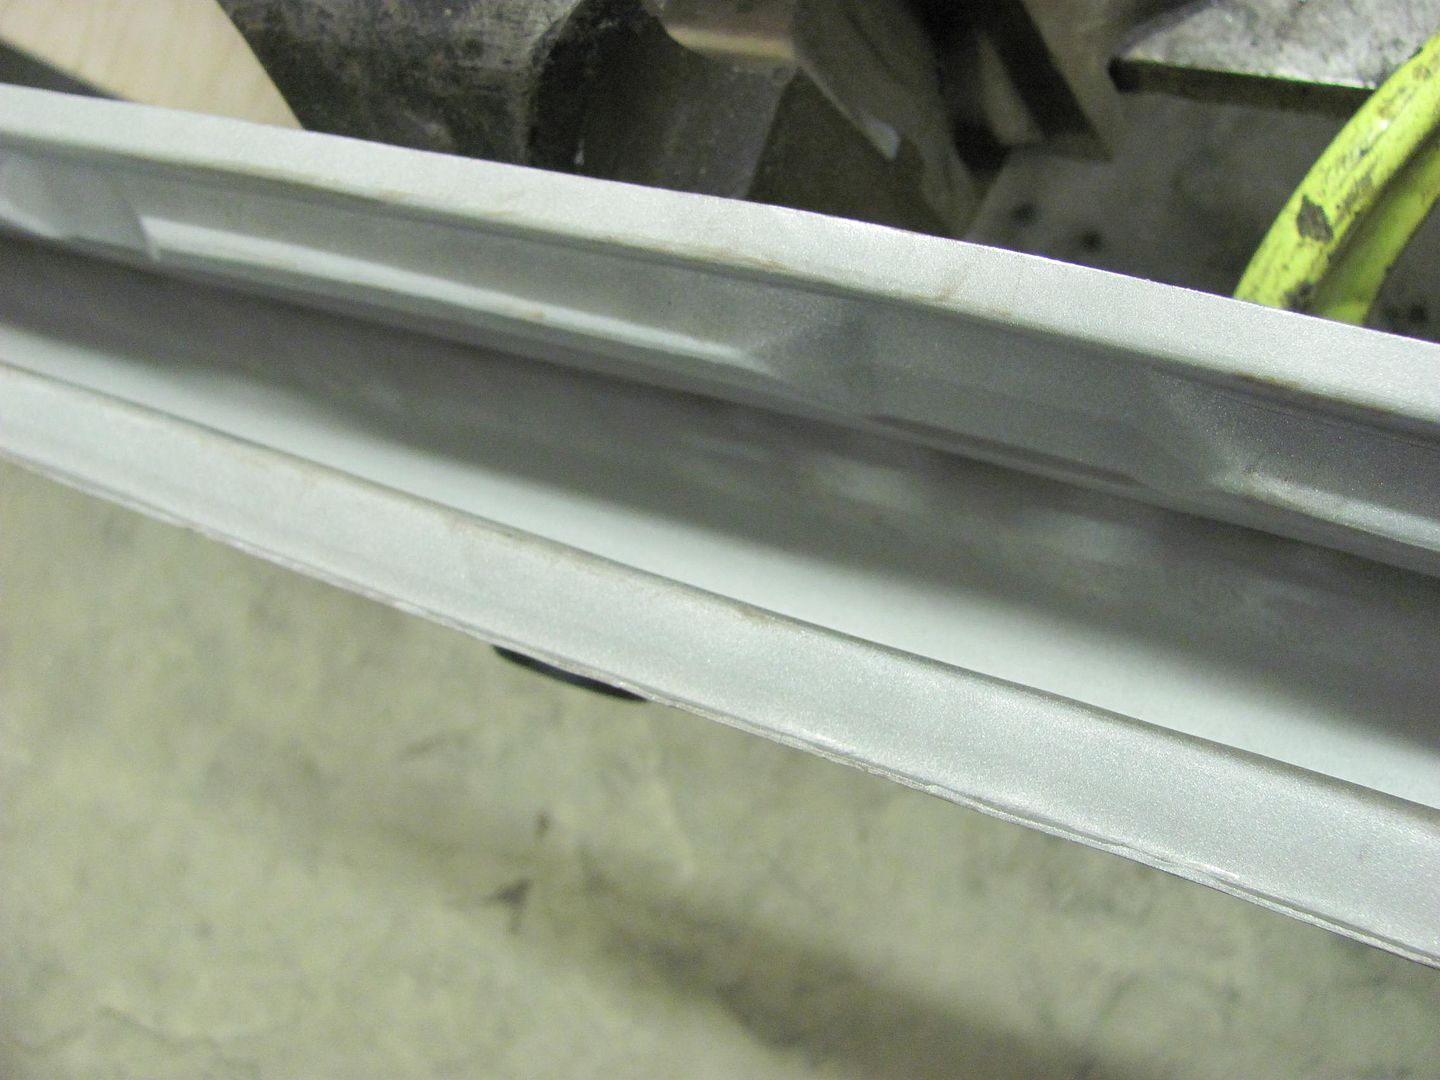
Just a test today to see if I could bend up some Jeep Cherokee drip rail to match the small sample I was sent in the mail. This was done with 18ga crs using the bead roller, mag brake, and press brake. The layout details needs just a bit of tweaking, but I think it may just work...


Attachments


Last edited:
DoghouseForge
Well-known member
Just a test today to see if I could bend up some Jeep Cherokee drip rail to match the small sample I was sent in the mail. This was done with 18ga crs using the bead roller, mag brake, and press brake. The layout details needs just a bit of tweaking, but I think it may just work...


What is this!?! some kinda of cruel new years joke for the FSJ Jeep boys! you tease me with dip rail pics and then show me "X's"...
grumble...
JP
DoghouseForge
Well-known member
Yahhh! and there was much rejoicing...
Excited!
Jp
Excited!
Jp
Sometimes you just need to back up and punt.
Even though I have been working on this car far too long, with travel for the day job and two other resto's having been quite an interruption..... you get to where you finally see light at the end of the tunnel, and just come to grips with something that needs to come back out....
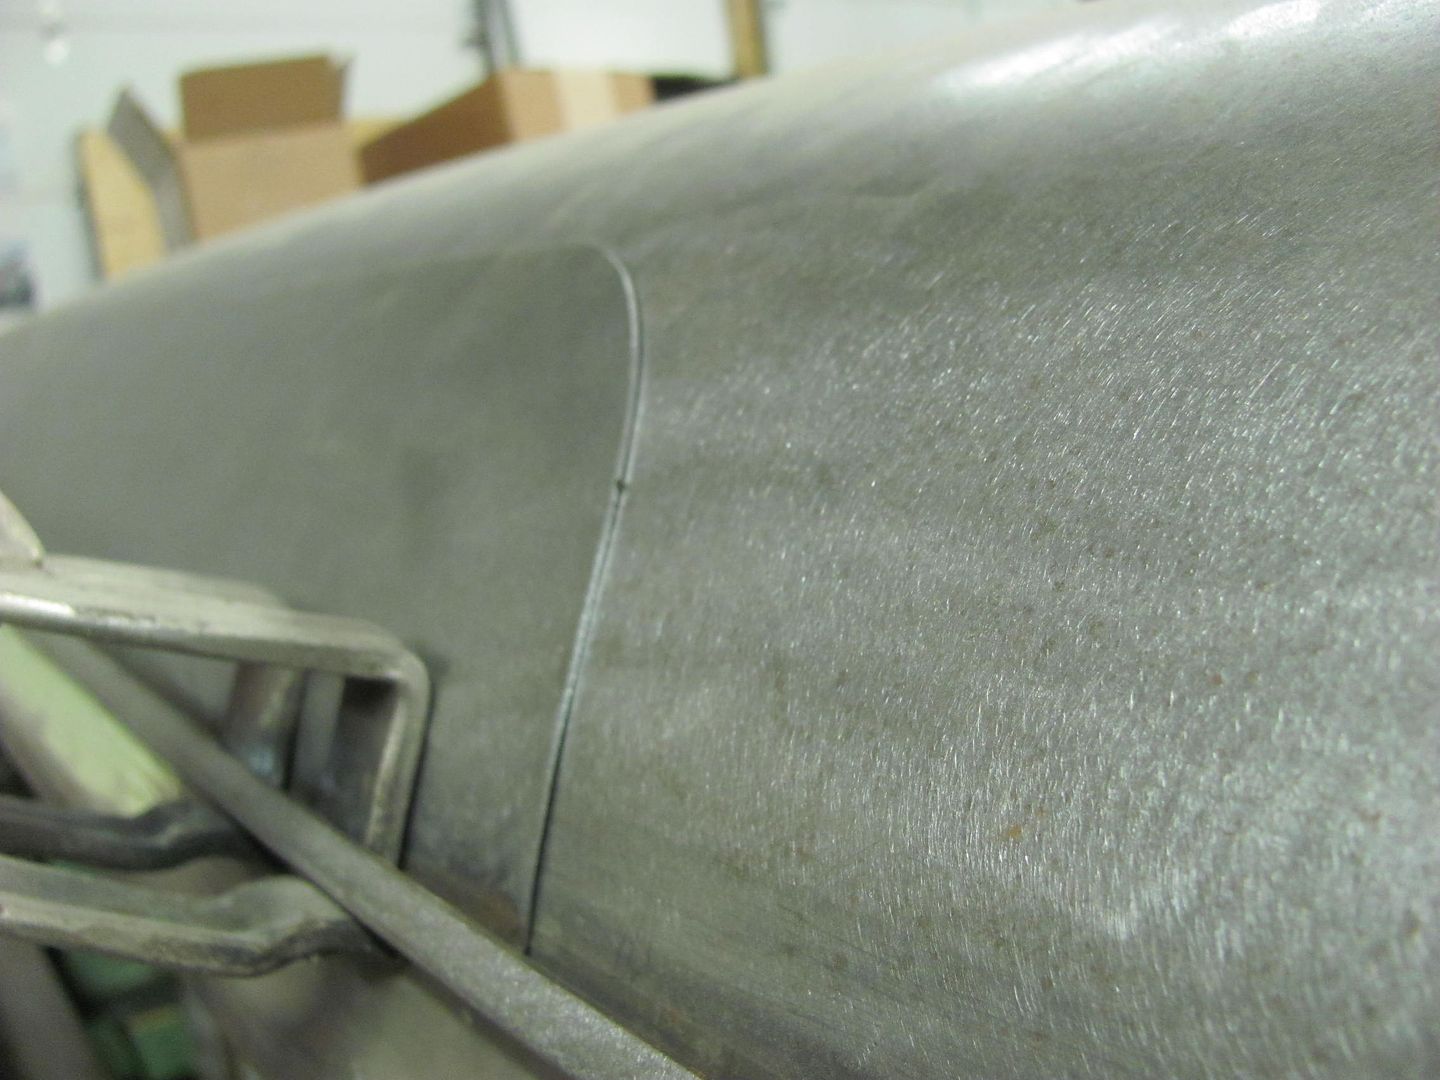
When I originally did this roof repair, I did not have the Lennox nibbler or English wheel or many of the tools I now have, and the patch panel you see below.....
....was fabricated using incremental bends in an apron brake. Given the creases you see due to the fabrication method, I likely made this shorter than I should have in an attempt to limit the creases, and the result was the horizontal weld was not up high enough to be readily accessible for planishing. After making these patch panels for a second roof repair......
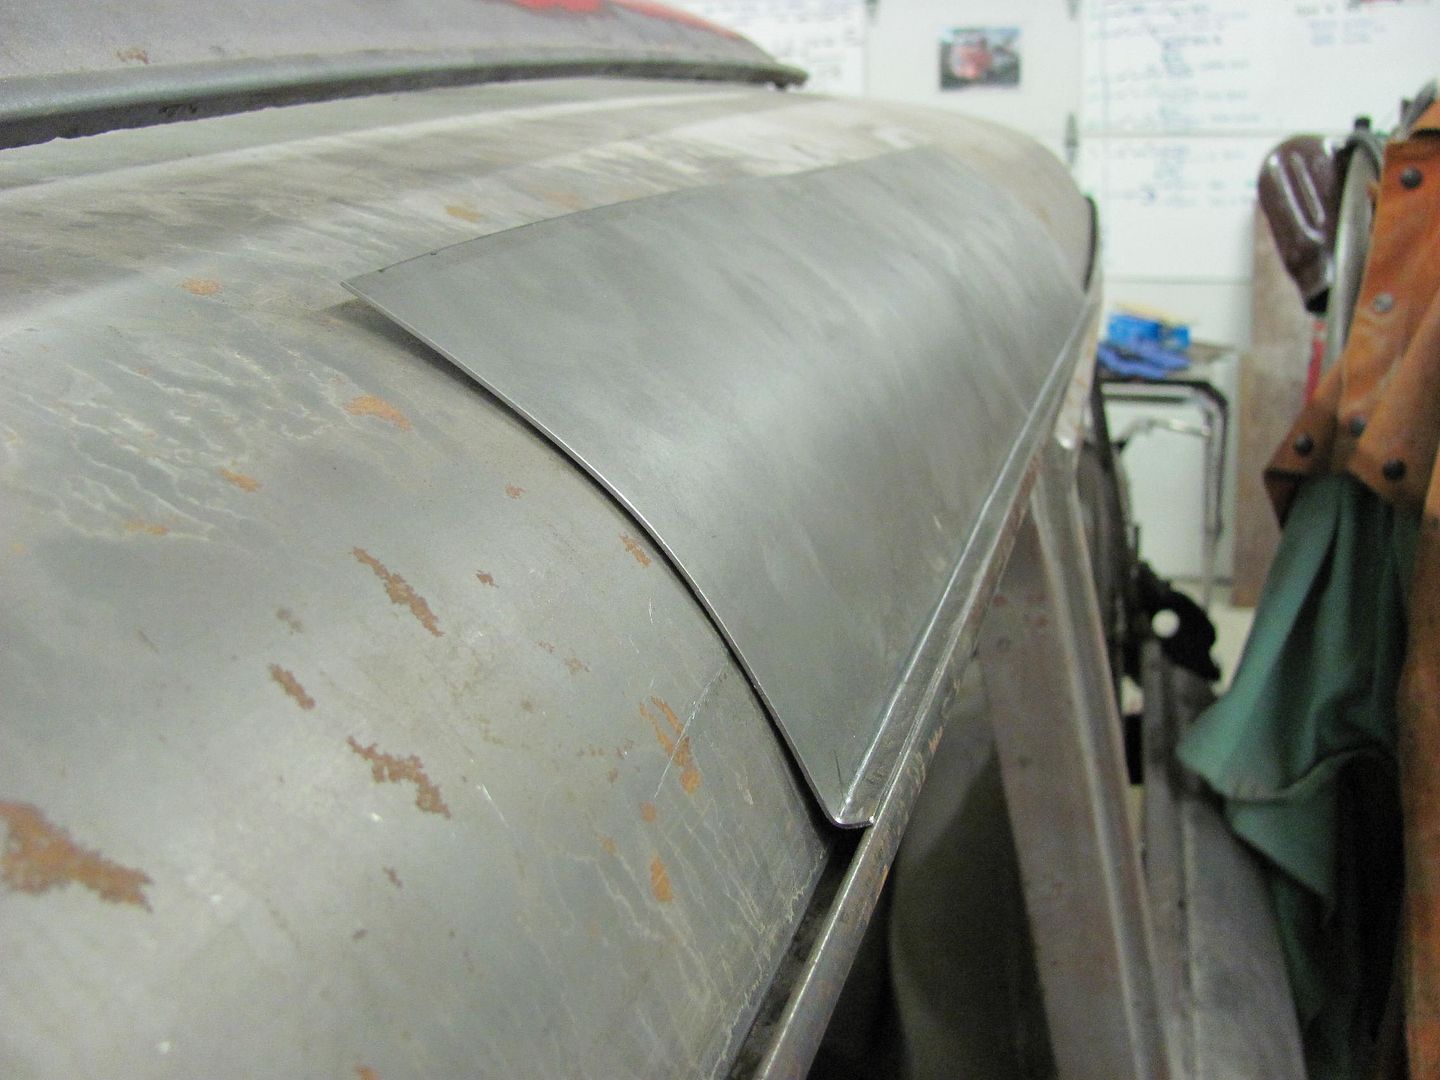
.....it was more apparent that the first attempt was not the best, and if I wasn't happy with it before, this new panel really made the old one grab my attention...each time I've walked by.
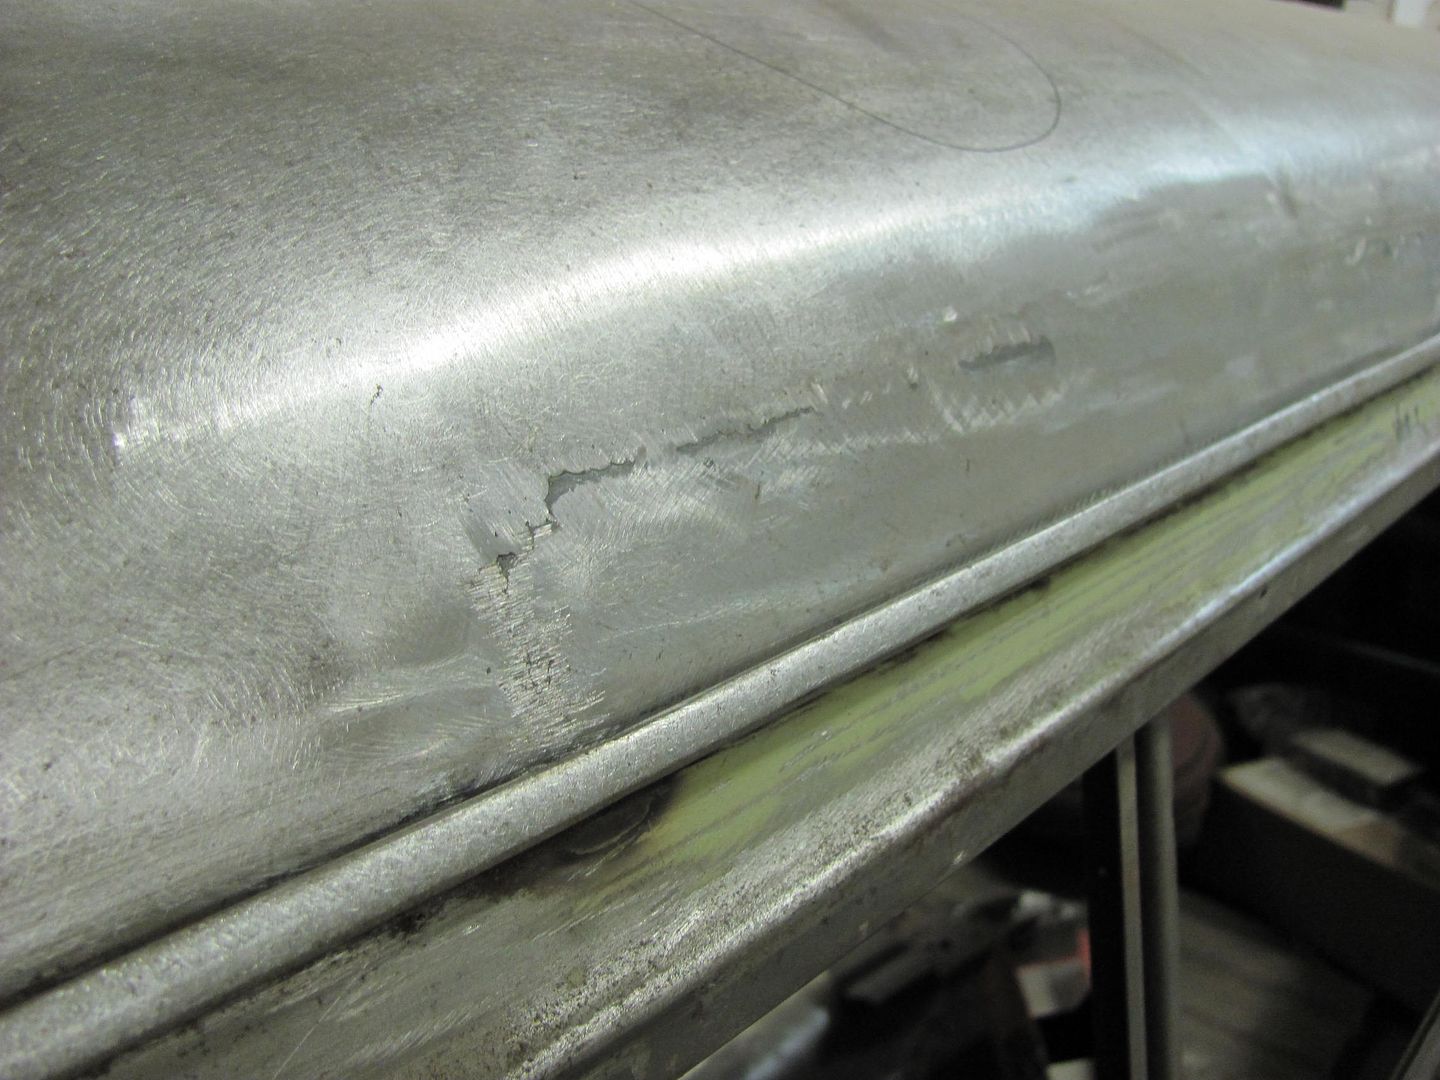
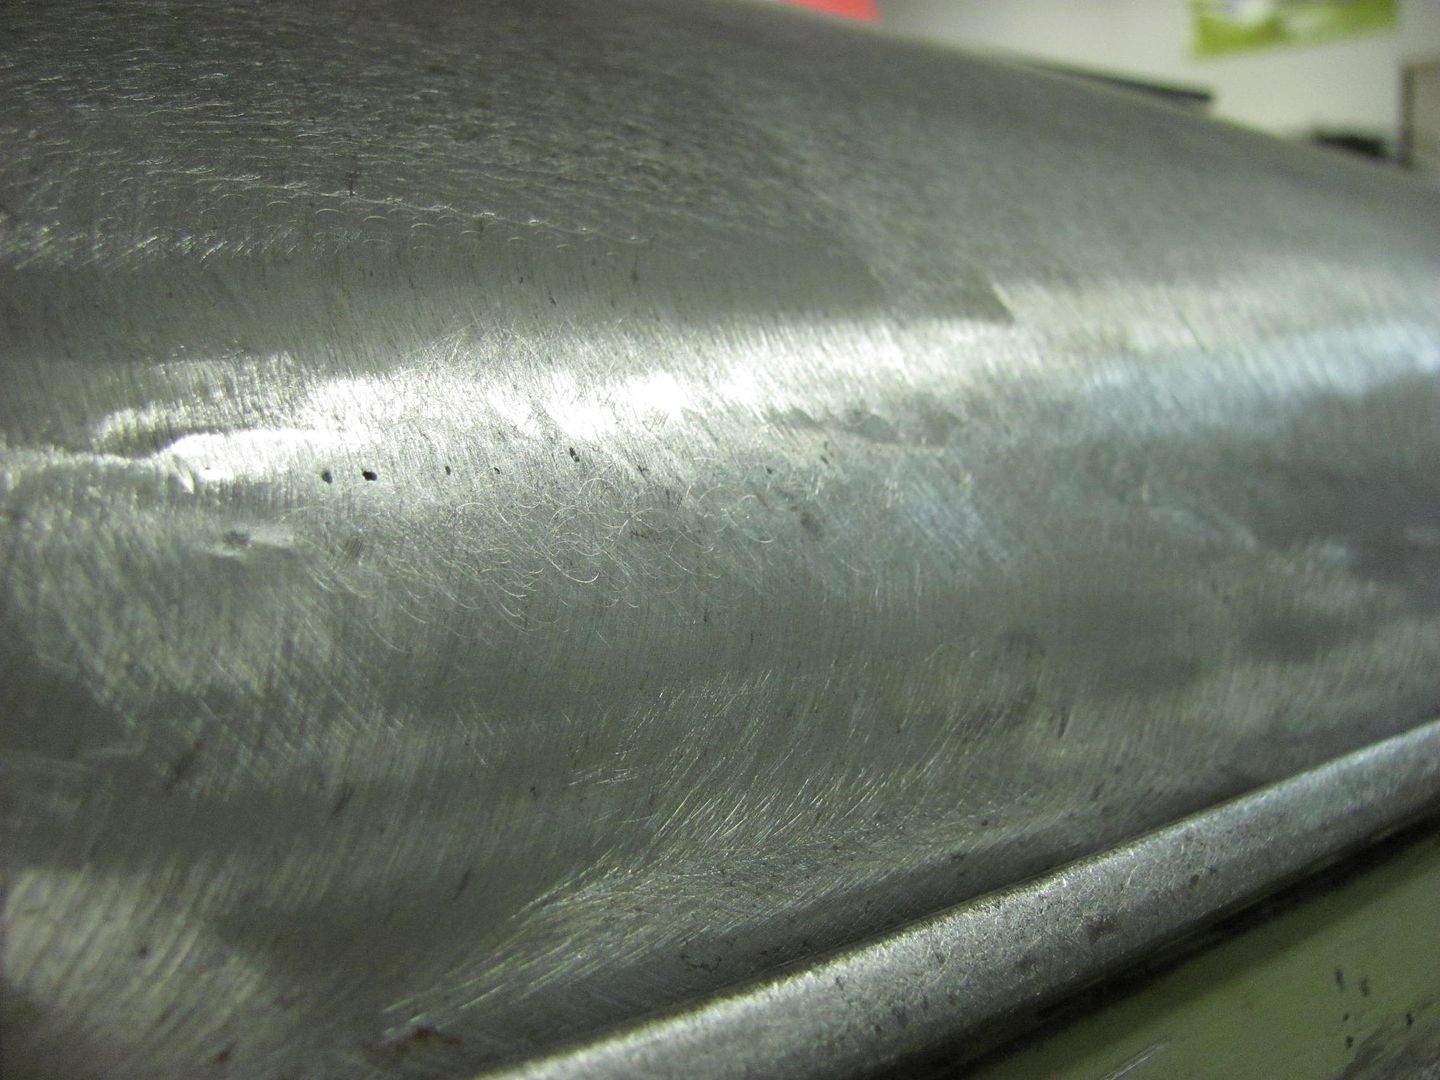
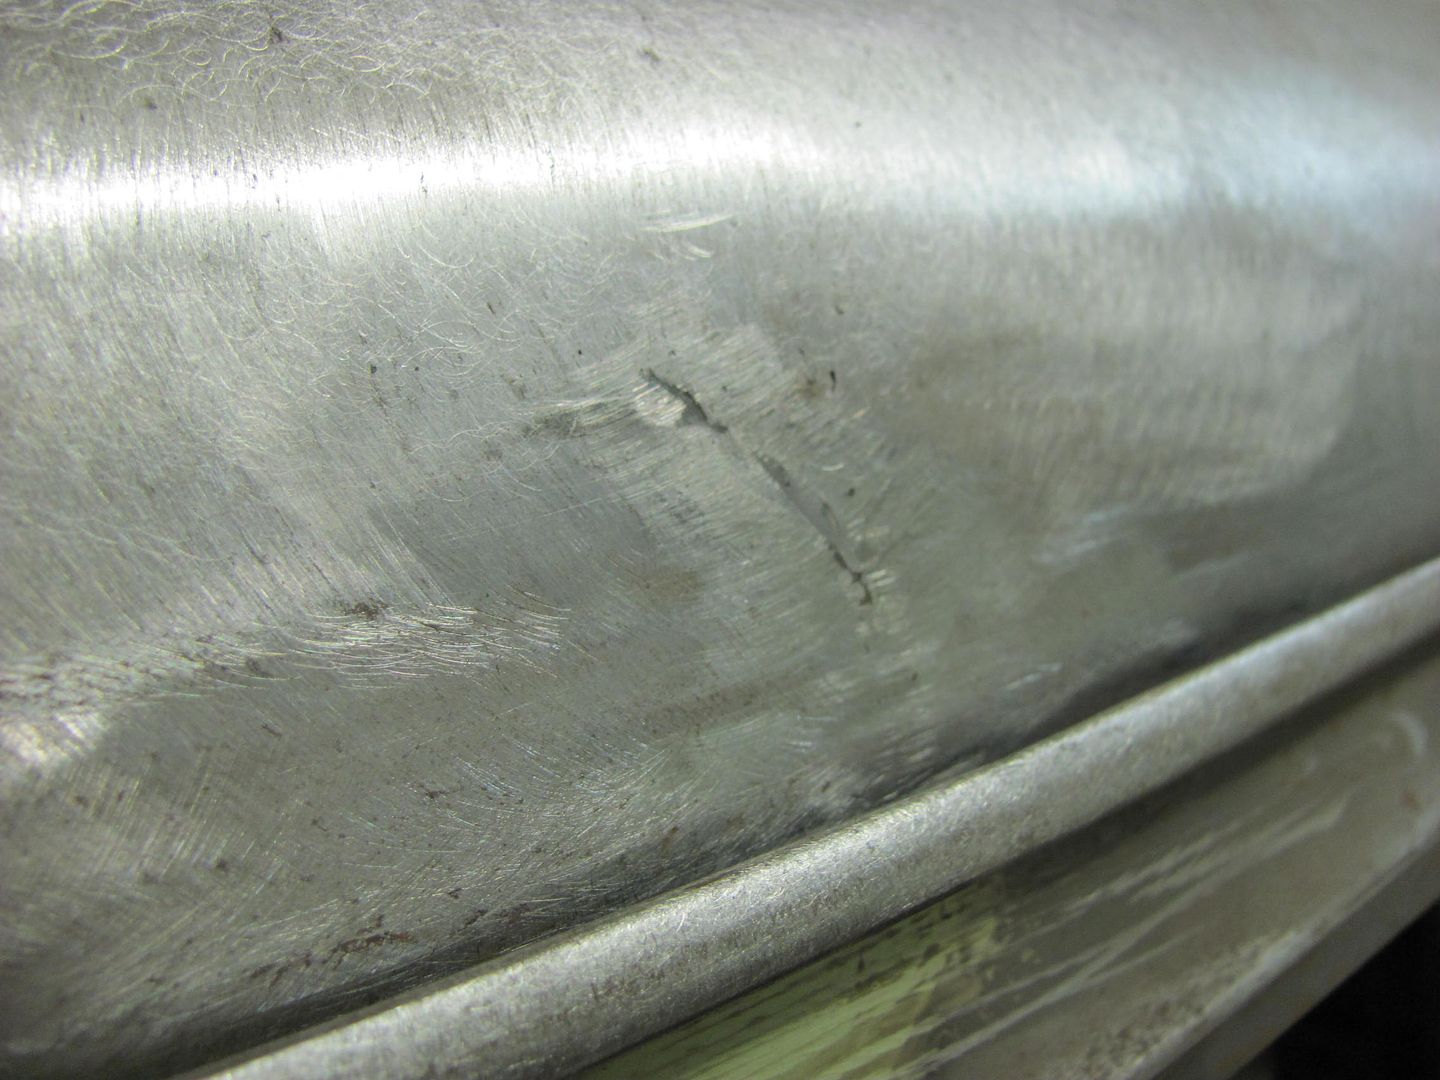
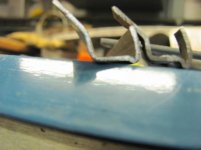
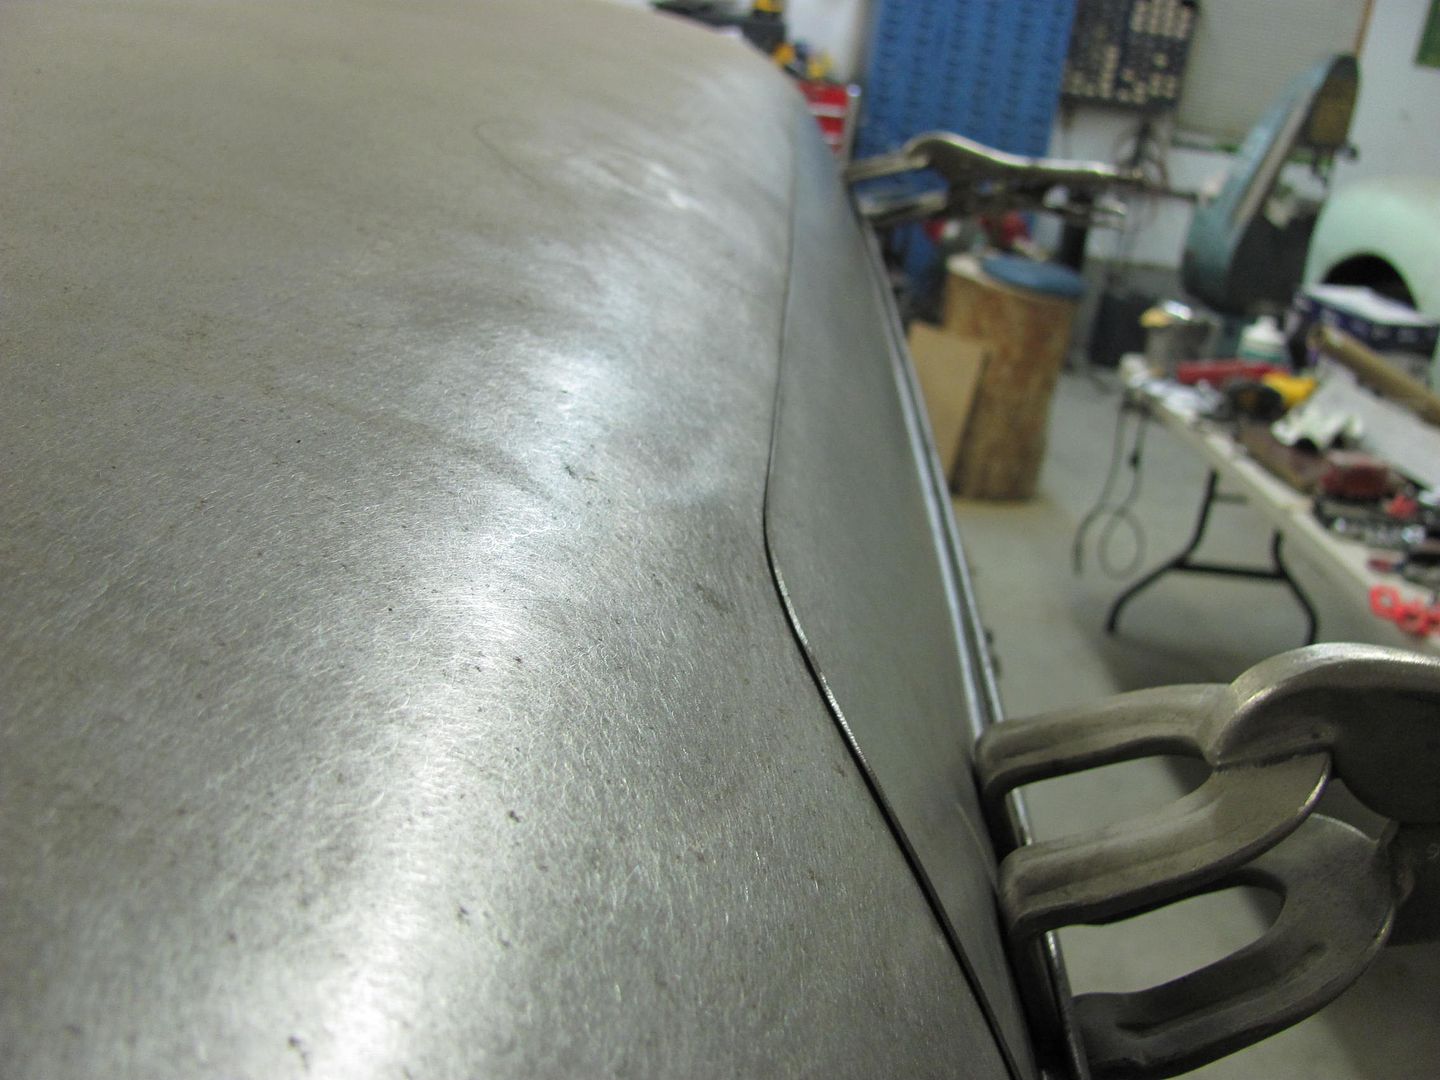
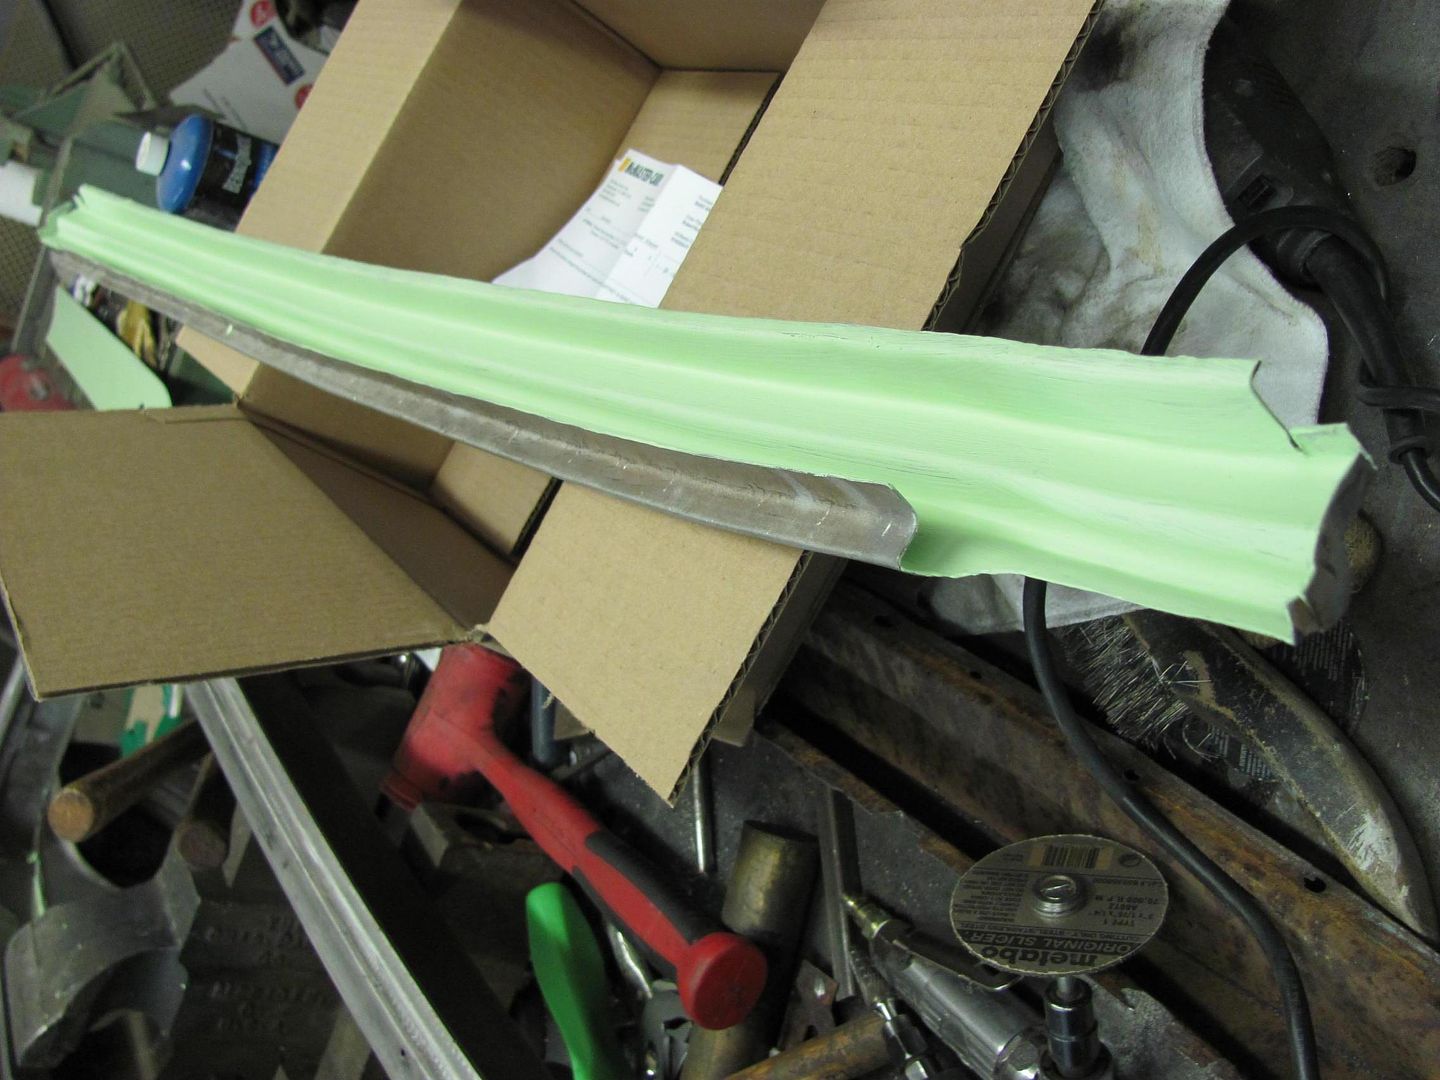
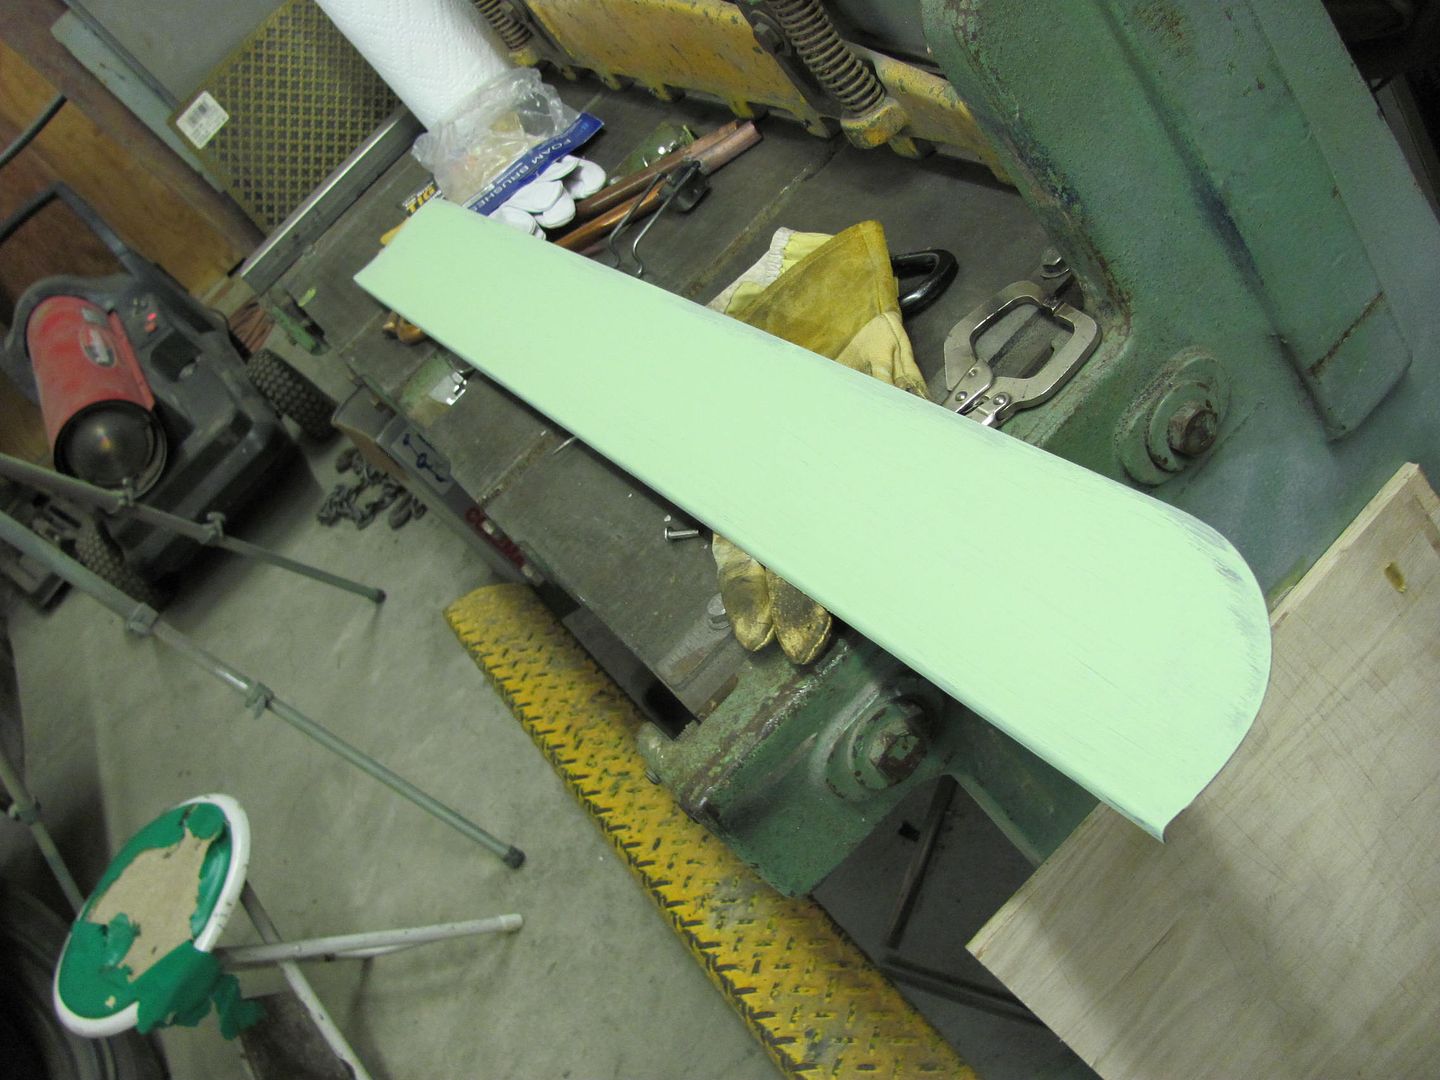
Well a person with spare patches lying around can only take so much, so tonight I checked the fit of one of the spare patch panels.... Looking at the front, the panel needed just a bit more crown....

And the rear needed just a bit less....

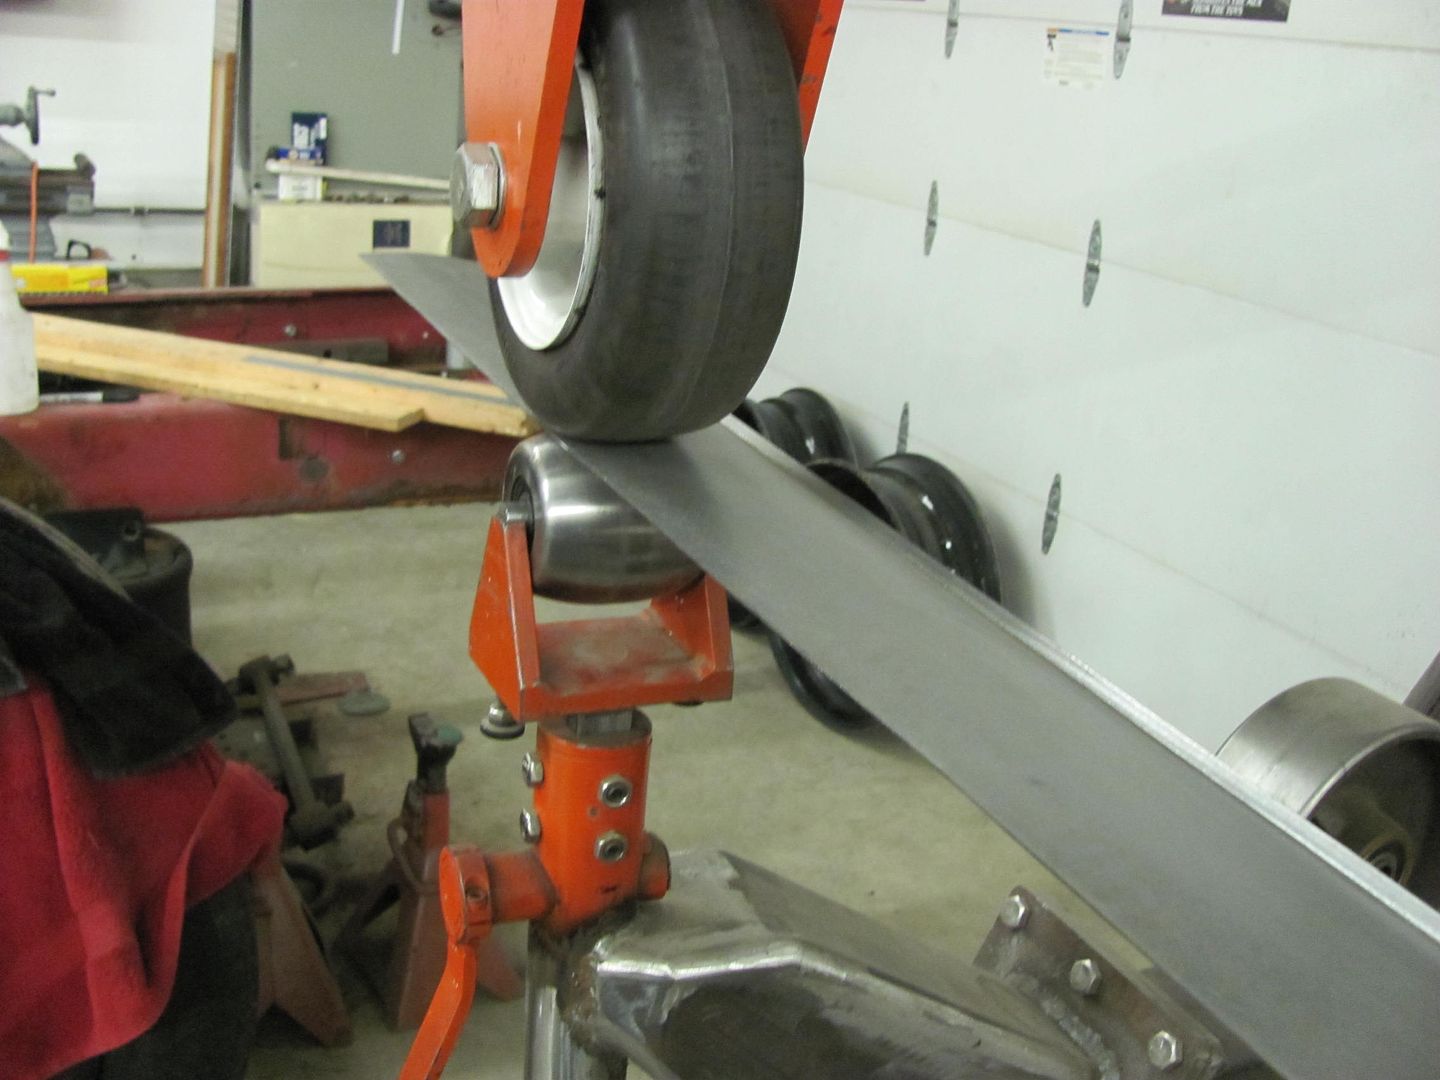
So with the Go Kart slick mounted up and ready to go, a 6" then 3.75" radius lower anvil added the crown needed for the front and a 24" radius flattened out the rear for a much better fit.

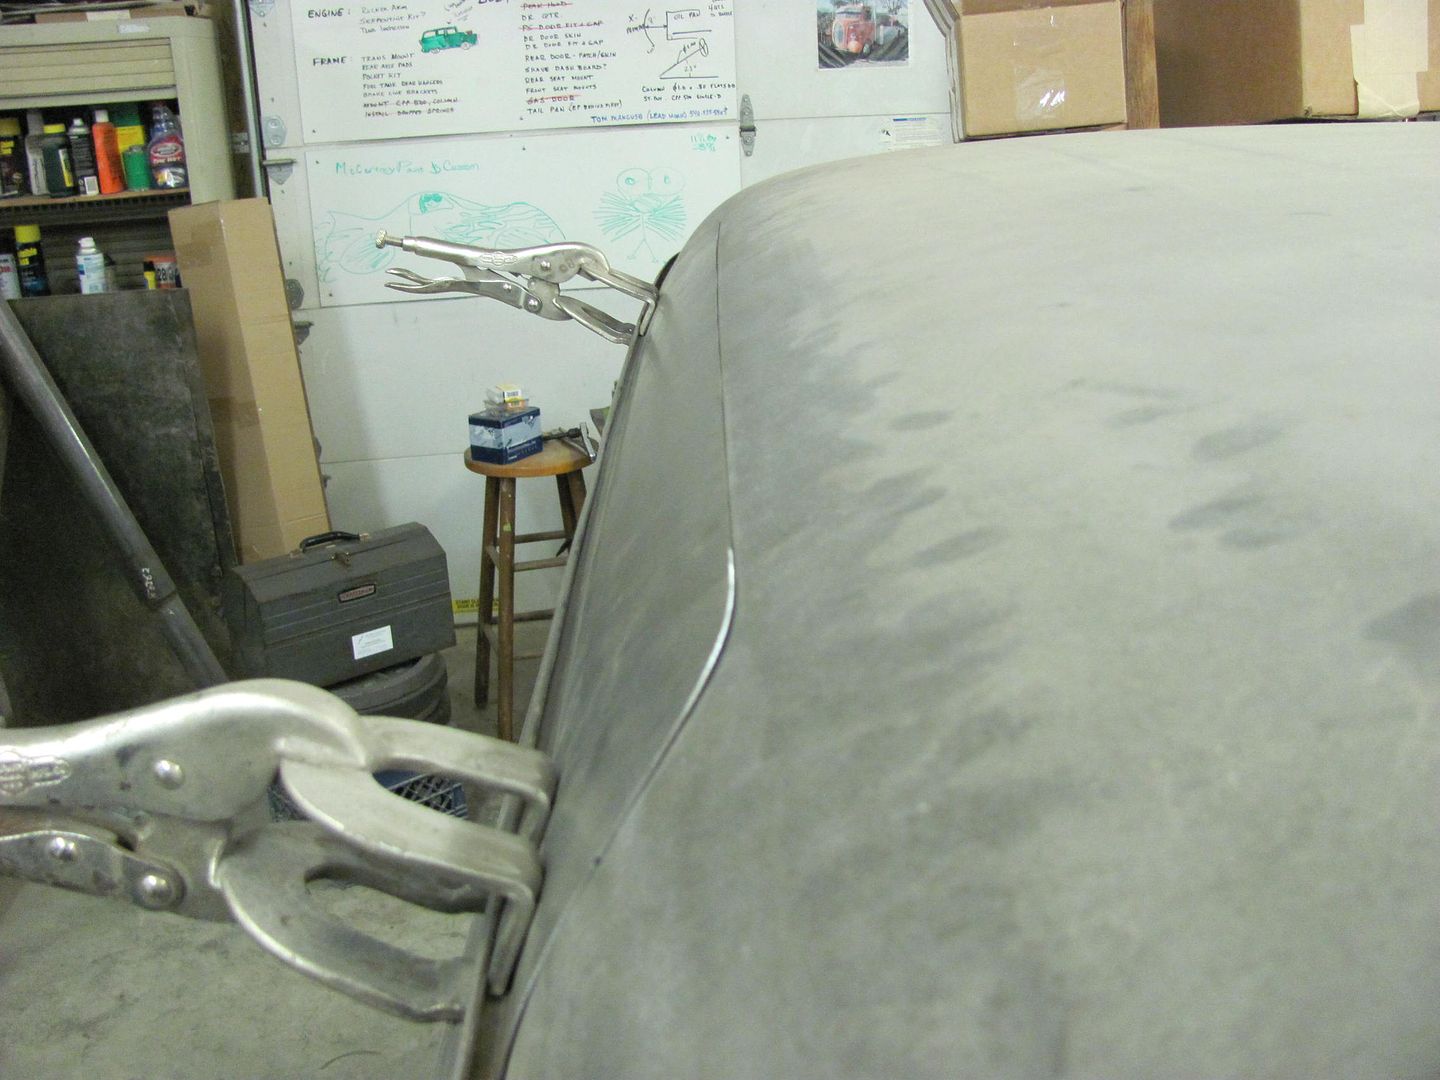

These panels are about 4" high and put the weld up above the roof boxing structure, so planishing will be more accessible to give us a better job. I'll get the patch all primed on the inside and let it cure. Then cut out the old patch and get this new one welded in.. More to come..
Even though I have been working on this car far too long, with travel for the day job and two other resto's having been quite an interruption..... you get to where you finally see light at the end of the tunnel, and just come to grips with something that needs to come back out....
When I originally did this roof repair, I did not have the Lennox nibbler or English wheel or many of the tools I now have, and the patch panel you see below.....
....was fabricated using incremental bends in an apron brake. Given the creases you see due to the fabrication method, I likely made this shorter than I should have in an attempt to limit the creases, and the result was the horizontal weld was not up high enough to be readily accessible for planishing. After making these patch panels for a second roof repair......
.....it was more apparent that the first attempt was not the best, and if I wasn't happy with it before, this new panel really made the old one grab my attention...each time I've walked by.
Well a person with spare patches lying around can only take so much, so tonight I checked the fit of one of the spare patch panels.... Looking at the front, the panel needed just a bit more crown....
And the rear needed just a bit less....
So with the Go Kart slick mounted up and ready to go, a 6" then 3.75" radius lower anvil added the crown needed for the front and a 24" radius flattened out the rear for a much better fit.
These panels are about 4" high and put the weld up above the roof boxing structure, so planishing will be more accessible to give us a better job. I'll get the patch all primed on the inside and let it cure. Then cut out the old patch and get this new one welded in.. More to come..
Last edited:
1971gsfan
Well-known member
man you do good work!e-tek
Well-known member
I hear you on re-doing stuff. I do that when needed too, especially wiring, paint finishing and gaps!
I think i recall you saying that wagon belongs to a lady customer - right? How long have you had it and what's your timeline on finishing?
I think i recall you saying that wagon belongs to a lady customer - right? How long have you had it and what's your timeline on finishing?
BigMike782
Well-known member
How many years have you been doing this kind of work?
Have you had any time to work on your shop truck?
Have you had any time to work on your shop truck?
NASTYZEN
Well-known member
I like that wheel of yours. Go kart wheel? Who would of thunk it!
Brilliant Robert!
We are getting spoiled with all this new machinery you know, remember when all we had were old hammers and vise grips....
Brilliant Robert!
We are getting spoiled with all this new machinery you know, remember when all we had were old hammers and vise grips....
Claude, use the go kart slick about half inflated, and the anvil pushes up into the tire. The tire will tend to force the work piece around the anvil to add the contour, but doesn't roll it around in the direction of travel like a hard wheel would. So think of it as a slip roll of infinite length, change your anvil to match the radius desired..
daparrothead
Well-known member
- Joined
- Dec 21, 2013
- Messages
- 200
Wow! This thread is full of nothing but True Craftsmanship! You don't find many people now days that can work sheet metal like this any more.
Thanks!
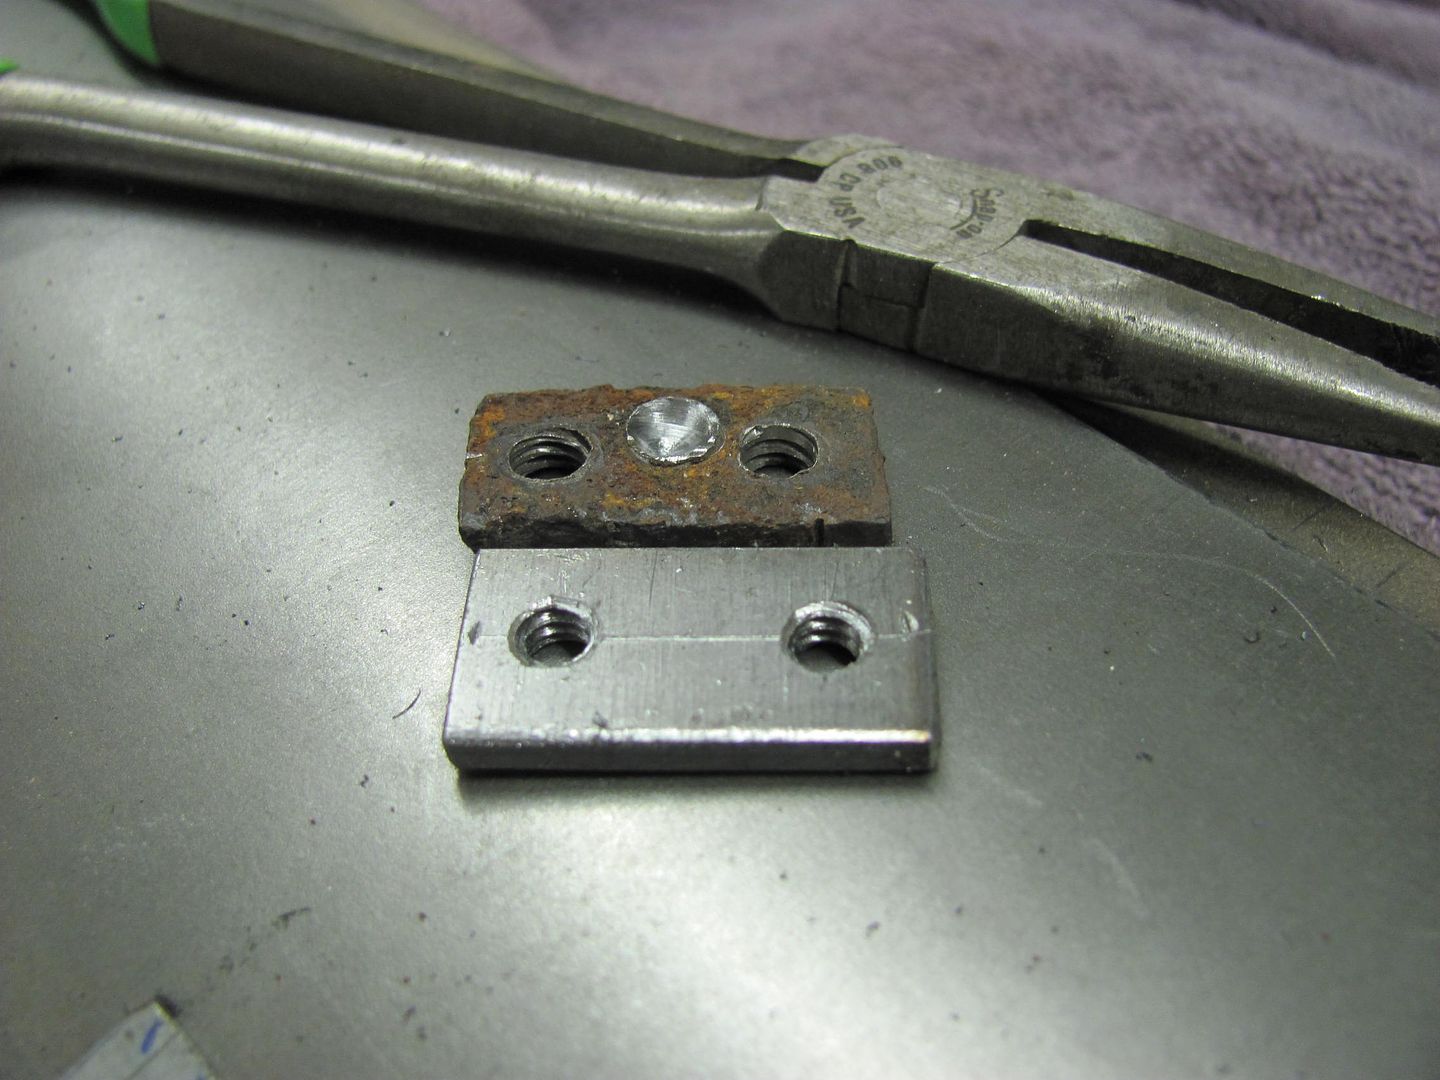
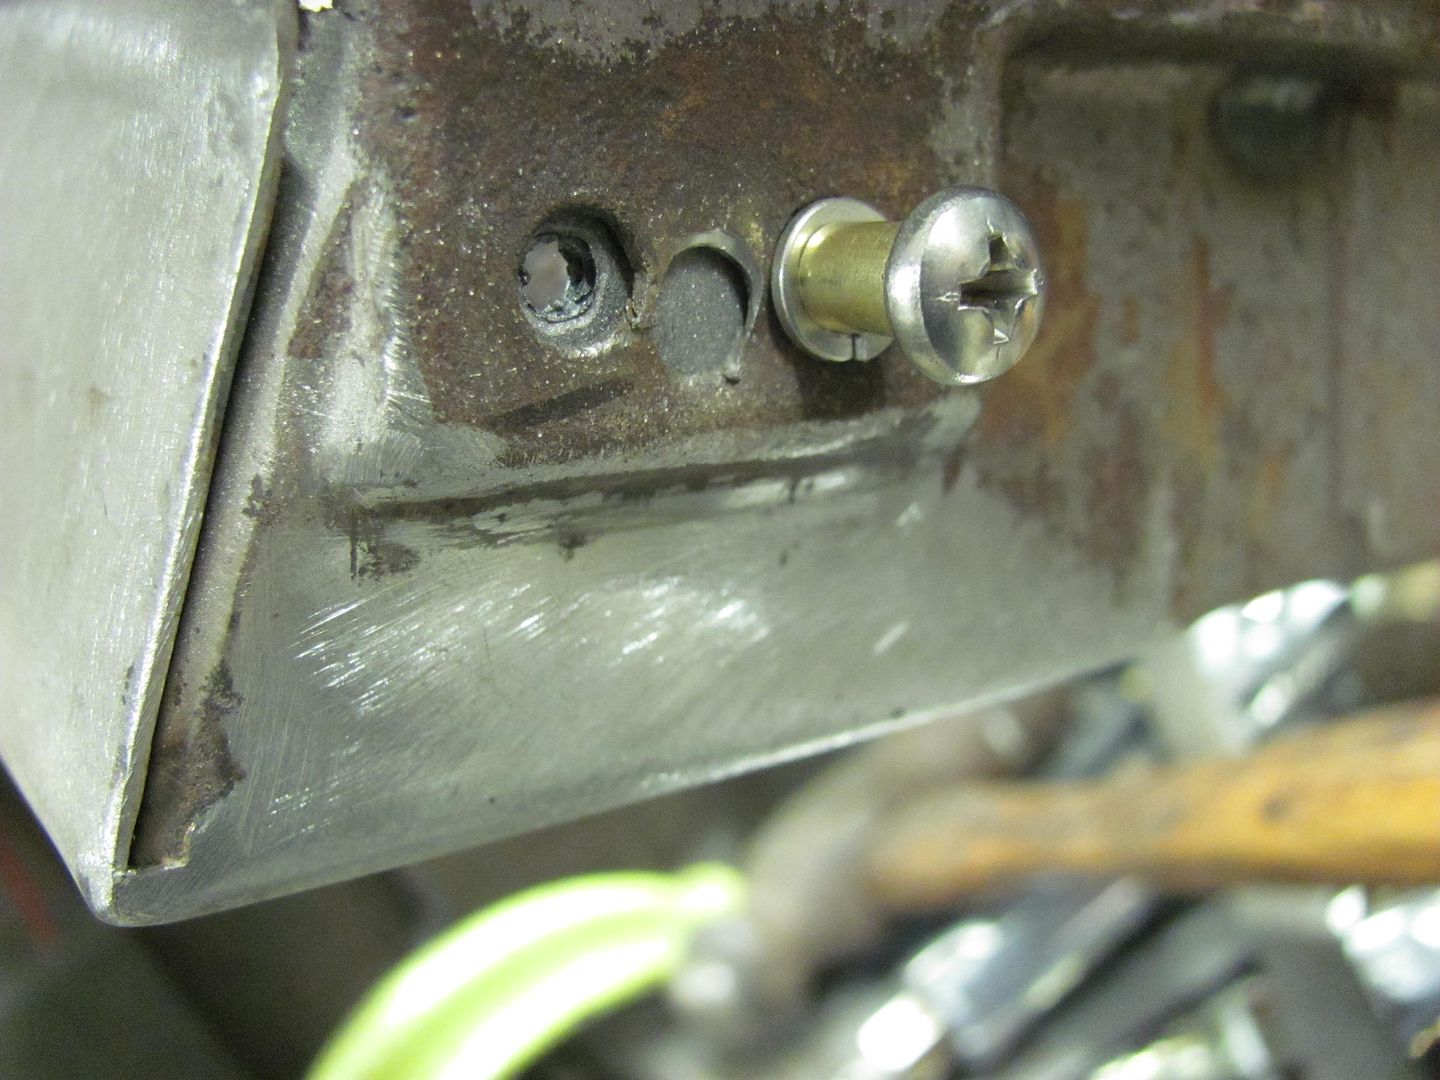
Was in the middle of media blasting the innards of the lift gate and noticed the threads for these nut plates didn't look too "full" A test with a 10-24 screw showed that some of the holes were so bad that they had a "slip" fit.
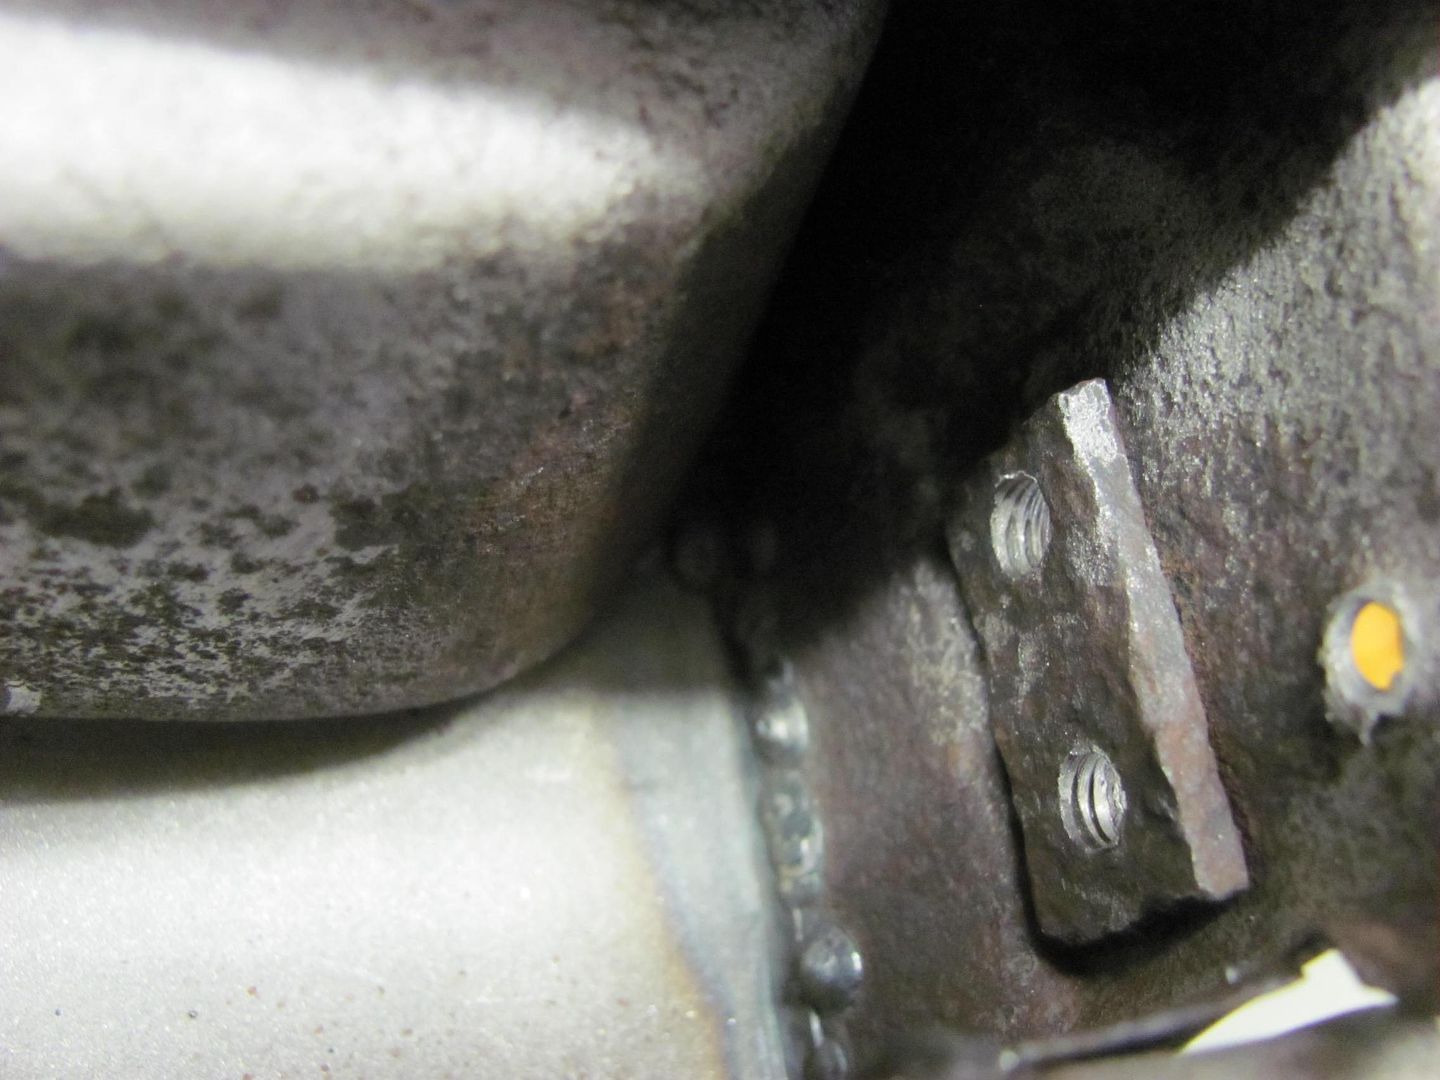
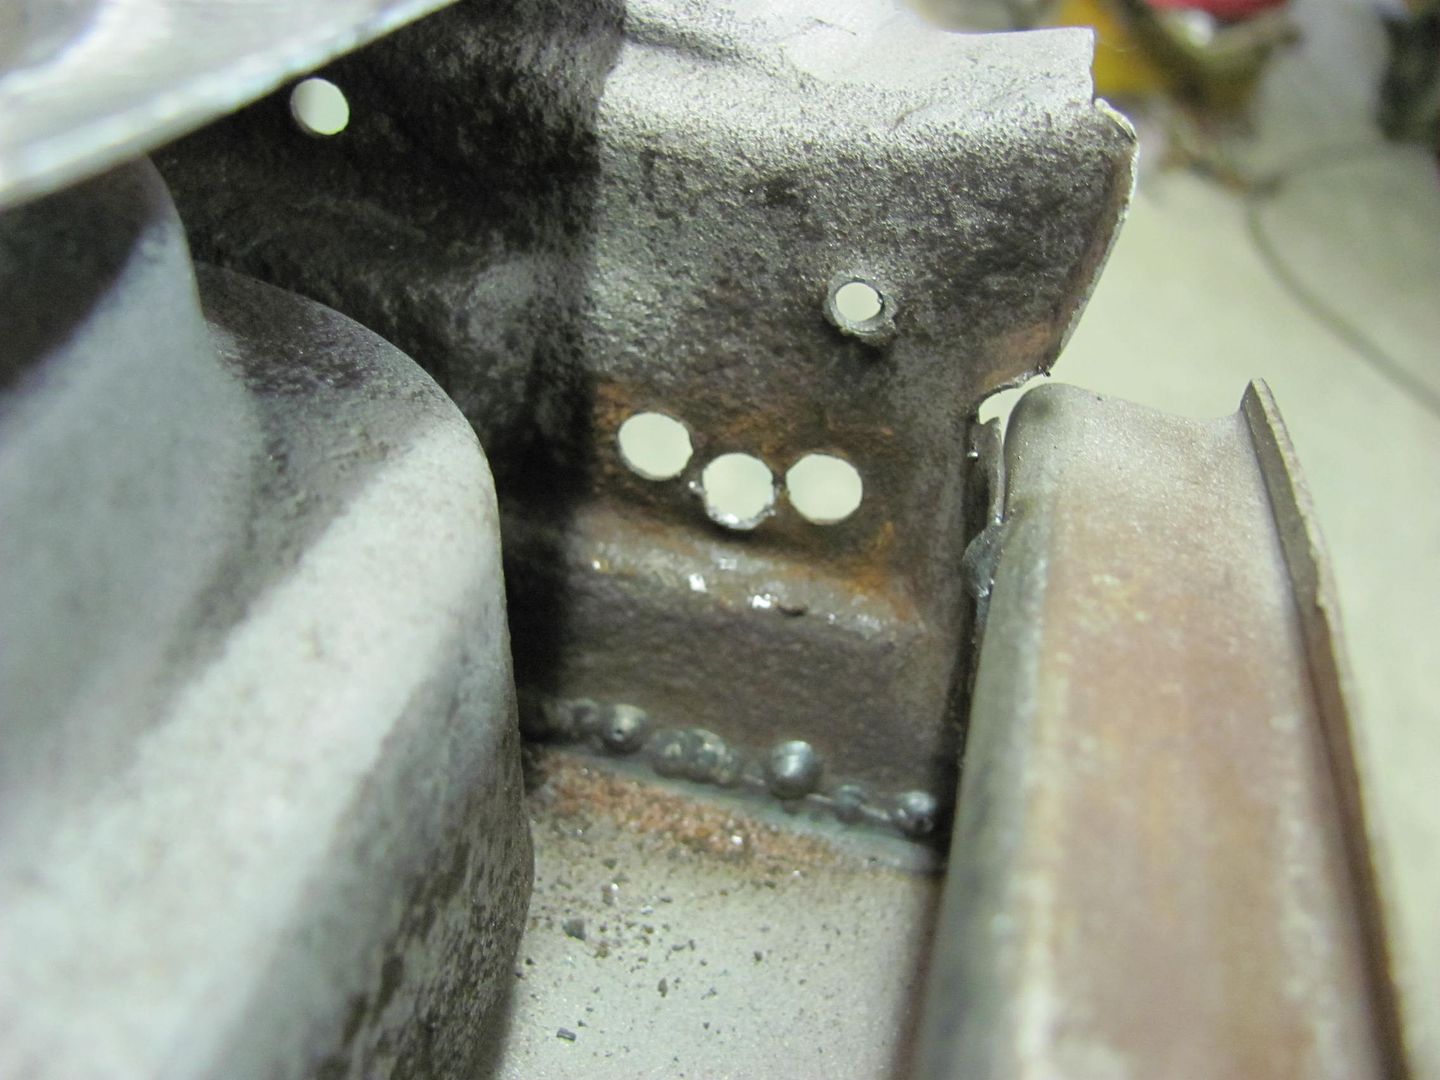
These hold the rubber bumpers on the bottom inside edge of the lift gate. The spot welds are drilled to release the nut plate..

The new ones are cut out of some 10ga steel, holes drilled and tapped.

yeah, these threads look much better....
Where I normally use a couple screws to hold nut plates in place for welding, with the close proximity of the plug weld hole the screw heads would obscure some of the hole, and we would undoubtedly be welding in the screw heads for difficult removal. For this case, we'll use some brass tubing as a spacer. Since the tubing I picked up passes though the screw holes, a sacrificial lock washer is used for it's minimal diameter.
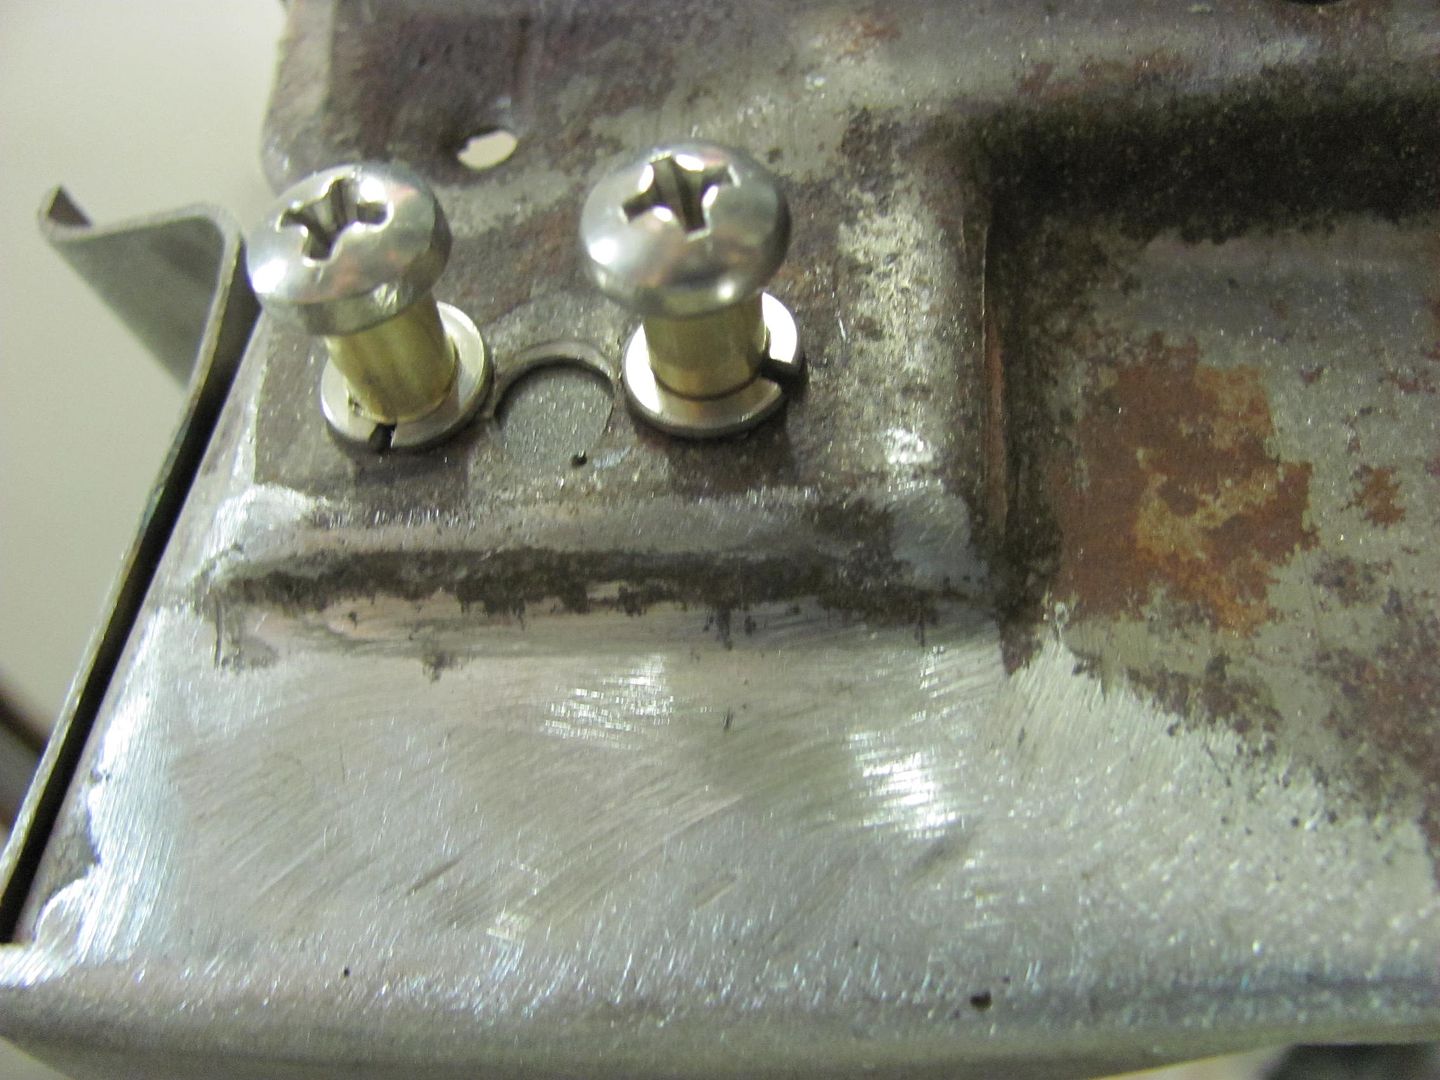
A dab of anti sieze is placed on the screw threads to insure they don't get welded in place from arcing across the threads.. Plug welded, and screws removed.

Lock washers removed and plug welds ground flush....
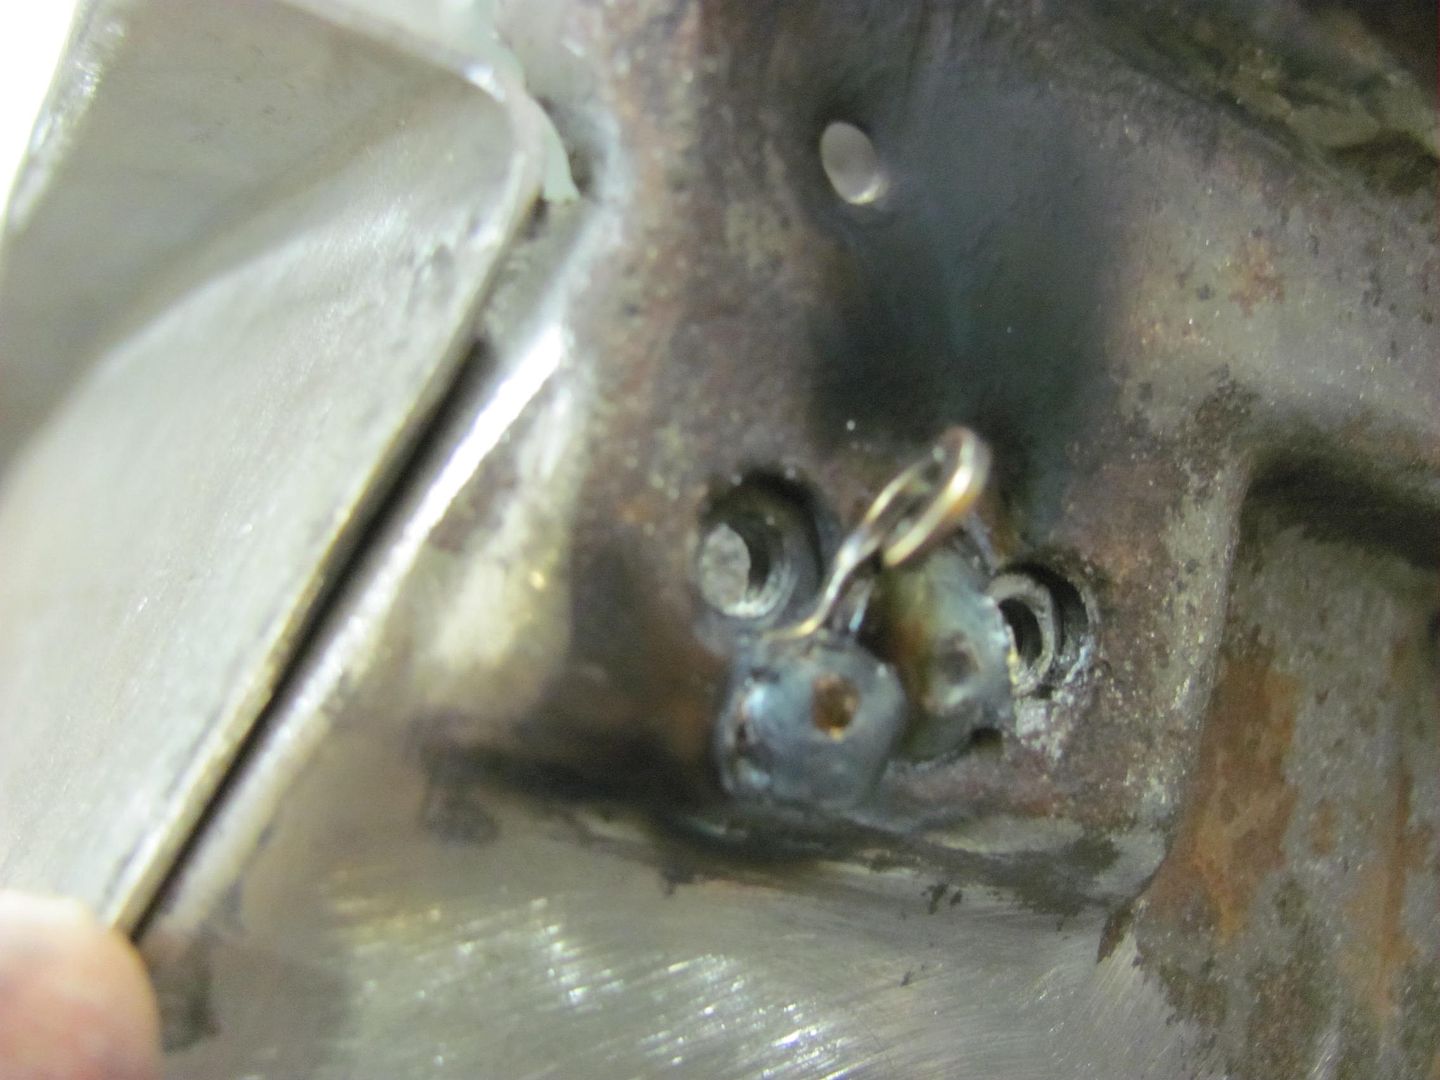

And now we can finish up the media blasting....

Was in the middle of media blasting the innards of the lift gate and noticed the threads for these nut plates didn't look too "full" A test with a 10-24 screw showed that some of the holes were so bad that they had a "slip" fit.
These hold the rubber bumpers on the bottom inside edge of the lift gate. The spot welds are drilled to release the nut plate..
The new ones are cut out of some 10ga steel, holes drilled and tapped.
yeah, these threads look much better....
Where I normally use a couple screws to hold nut plates in place for welding, with the close proximity of the plug weld hole the screw heads would obscure some of the hole, and we would undoubtedly be welding in the screw heads for difficult removal. For this case, we'll use some brass tubing as a spacer. Since the tubing I picked up passes though the screw holes, a sacrificial lock washer is used for it's minimal diameter.
A dab of anti sieze is placed on the screw threads to insure they don't get welded in place from arcing across the threads.. Plug welded, and screws removed.
Lock washers removed and plug welds ground flush....
And now we can finish up the media blasting....
e-tek
Well-known member
I hear you on re-doing stuff. I do that when needed too, especially wiring, paint finishing and gaps!
I think i recall you saying that wagon belongs to a lady customer - right? How long have you had it and what's your timeline on finishing?
Hey Robert, I was reviewing your thread and just noticed that Claude, Kevin and I all asked when the wagon will be done!!

With GJ 'friends' like this, who needs customers barking at you to finish their cars eh?!

UKCHRIS
Member
New to the site and have been through the whole thread, and have to say the work your doing is amazing, keep the detailed pics and vids coming please
stinkity stoink
Well-known member
I keep looking here and allmetalshaping at this. It is incredible with such attention to detail that will never be seen or appreciated when it is painted. It as awesome work. Thanks for sharing and taking the time to post these photos and tutorials.
BigMike782
Well-known member
A little over twenty years. Unfortunately the shop truck is on the back burner, I did get the air ride axle installed but need to bolt up and plumb the air tanks.
You have amazing skill.
It's good your busy but it's too bad you are so busy
36racin
Active member
Hey Robert, I was reviewing your thread and just noticed that Claude, Kevin and I all asked when the wagon will be done!!
I think Robert needs to set up a Teach and Learn session at his shop and invite all the Garage Journal people subscribed to this post. That way we can watch Claude, Kevin, Ed and Robert do their magic in person.
Cant wait to see some paint on it. Maybe I missed the color somewhere. What color?
Todd
Thanks for the comments guys.
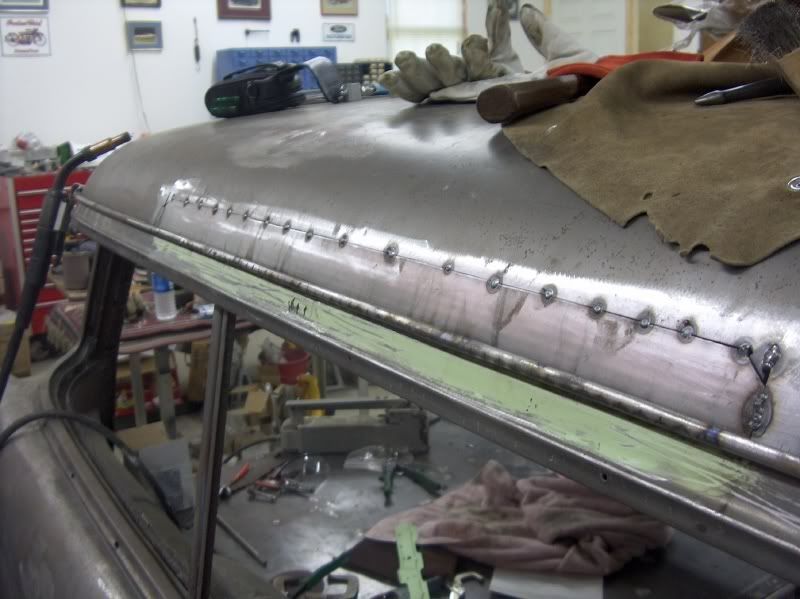
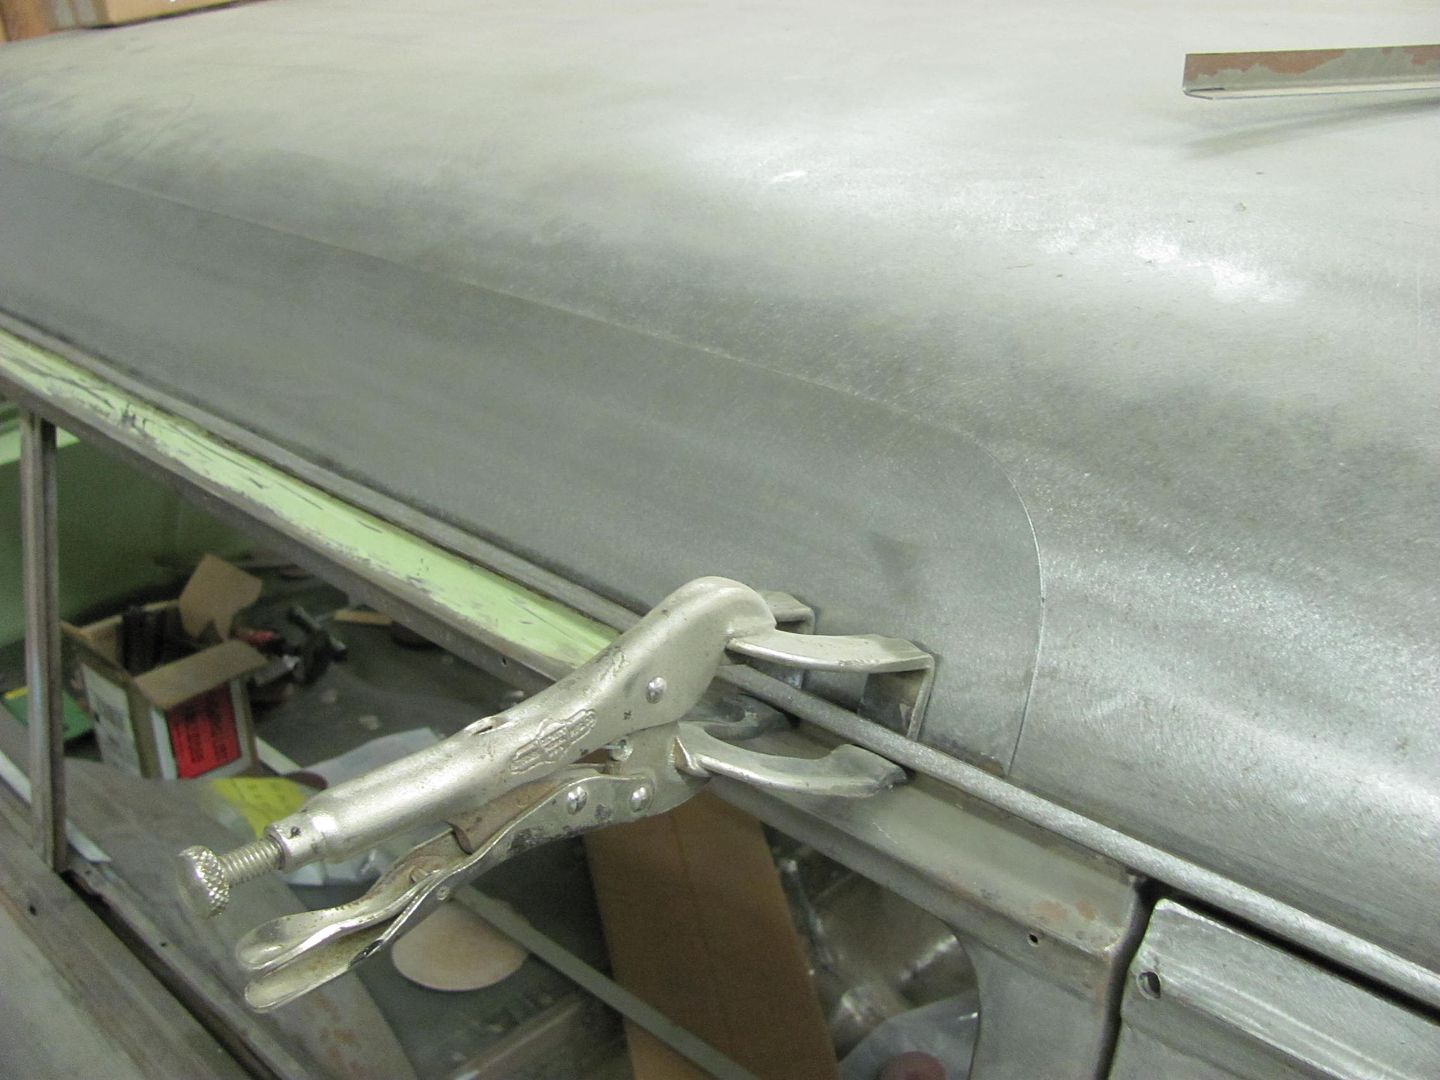
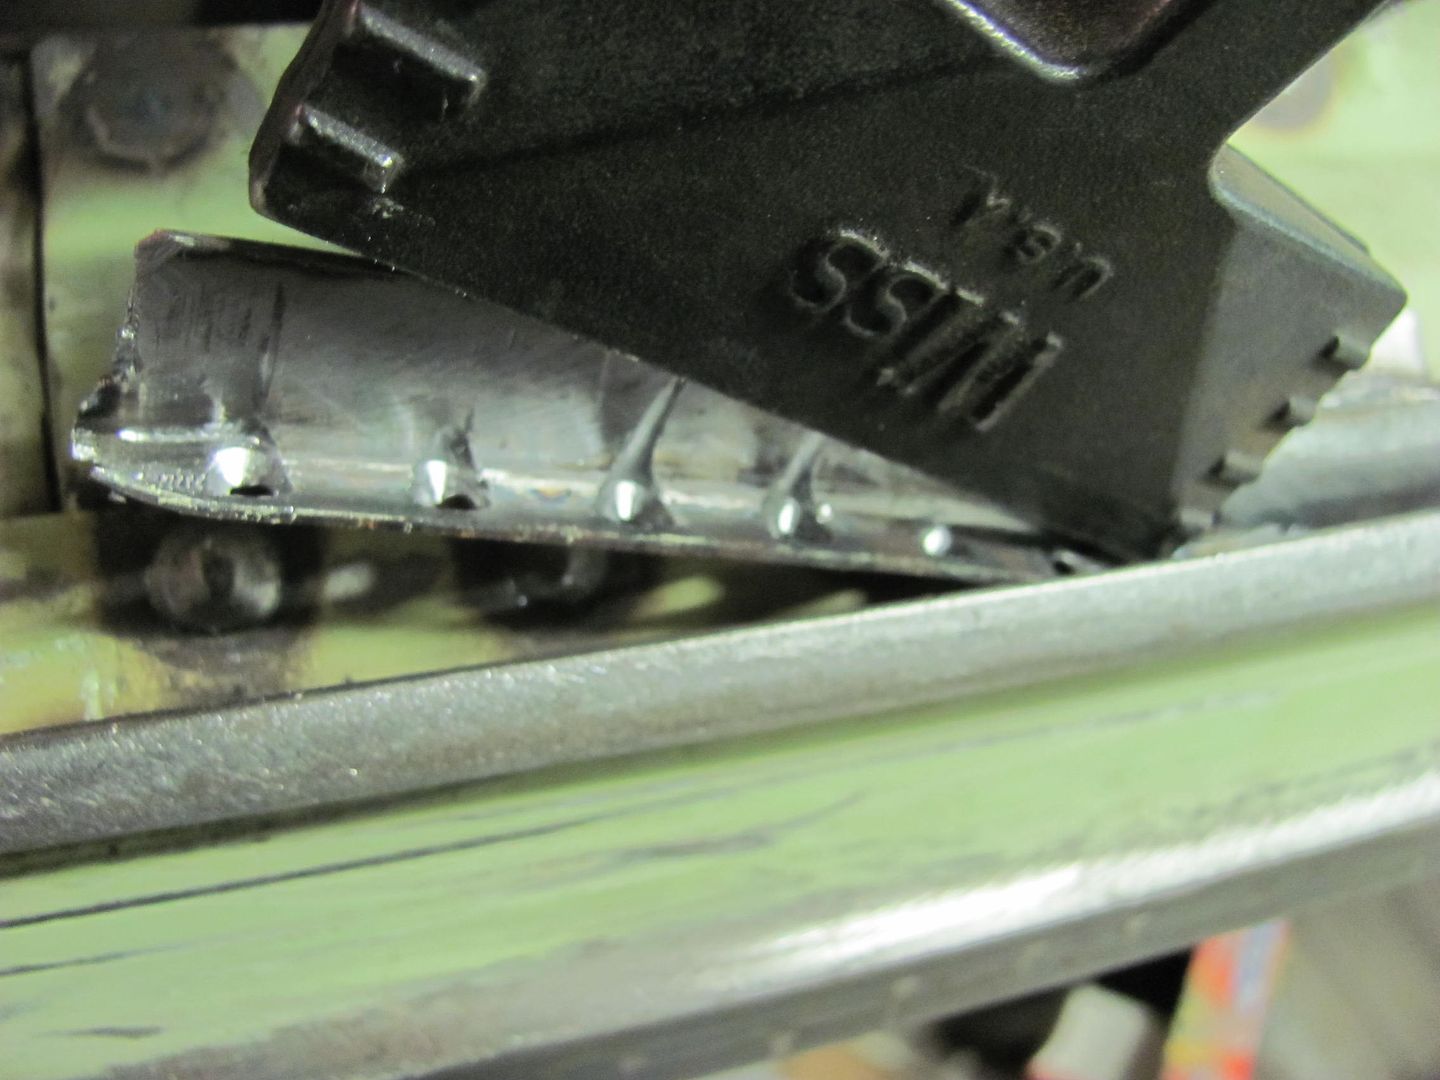
Had a couple hours to spend in the shop this evening, so I decided to mark out the roof for re-repairing.
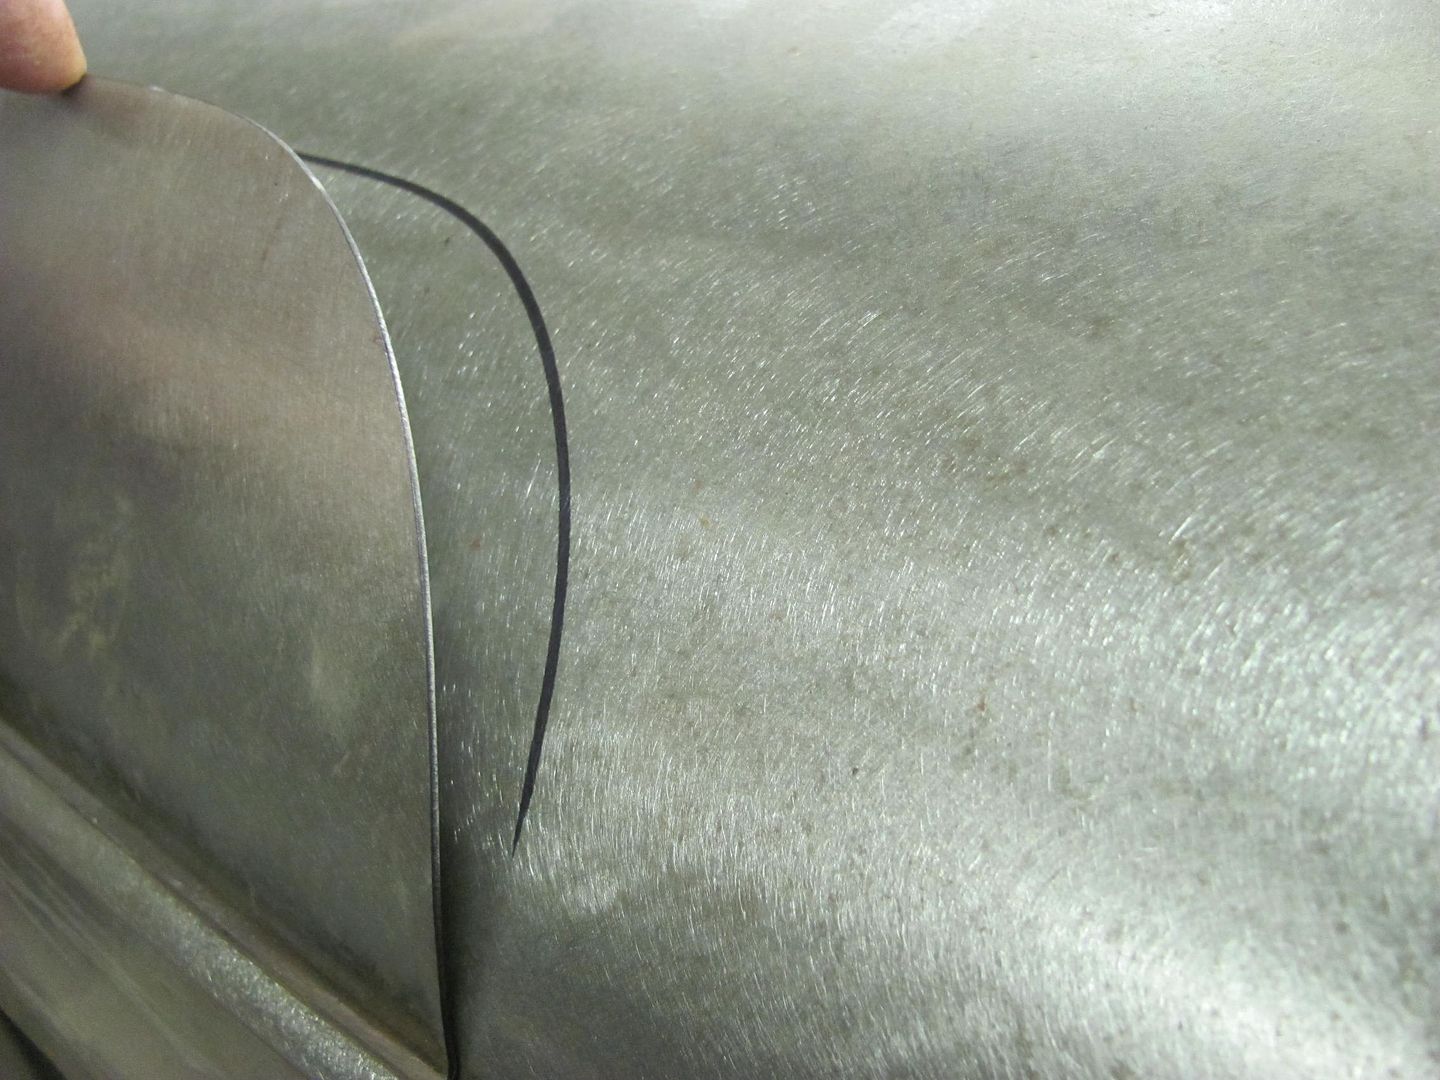
Then another line was dropped down about 1/4" to be used for the "rough cut". A cutoff wheel was used and then trimmed with the snips. The lower section was trimmed about 1/2" above the drip rail..
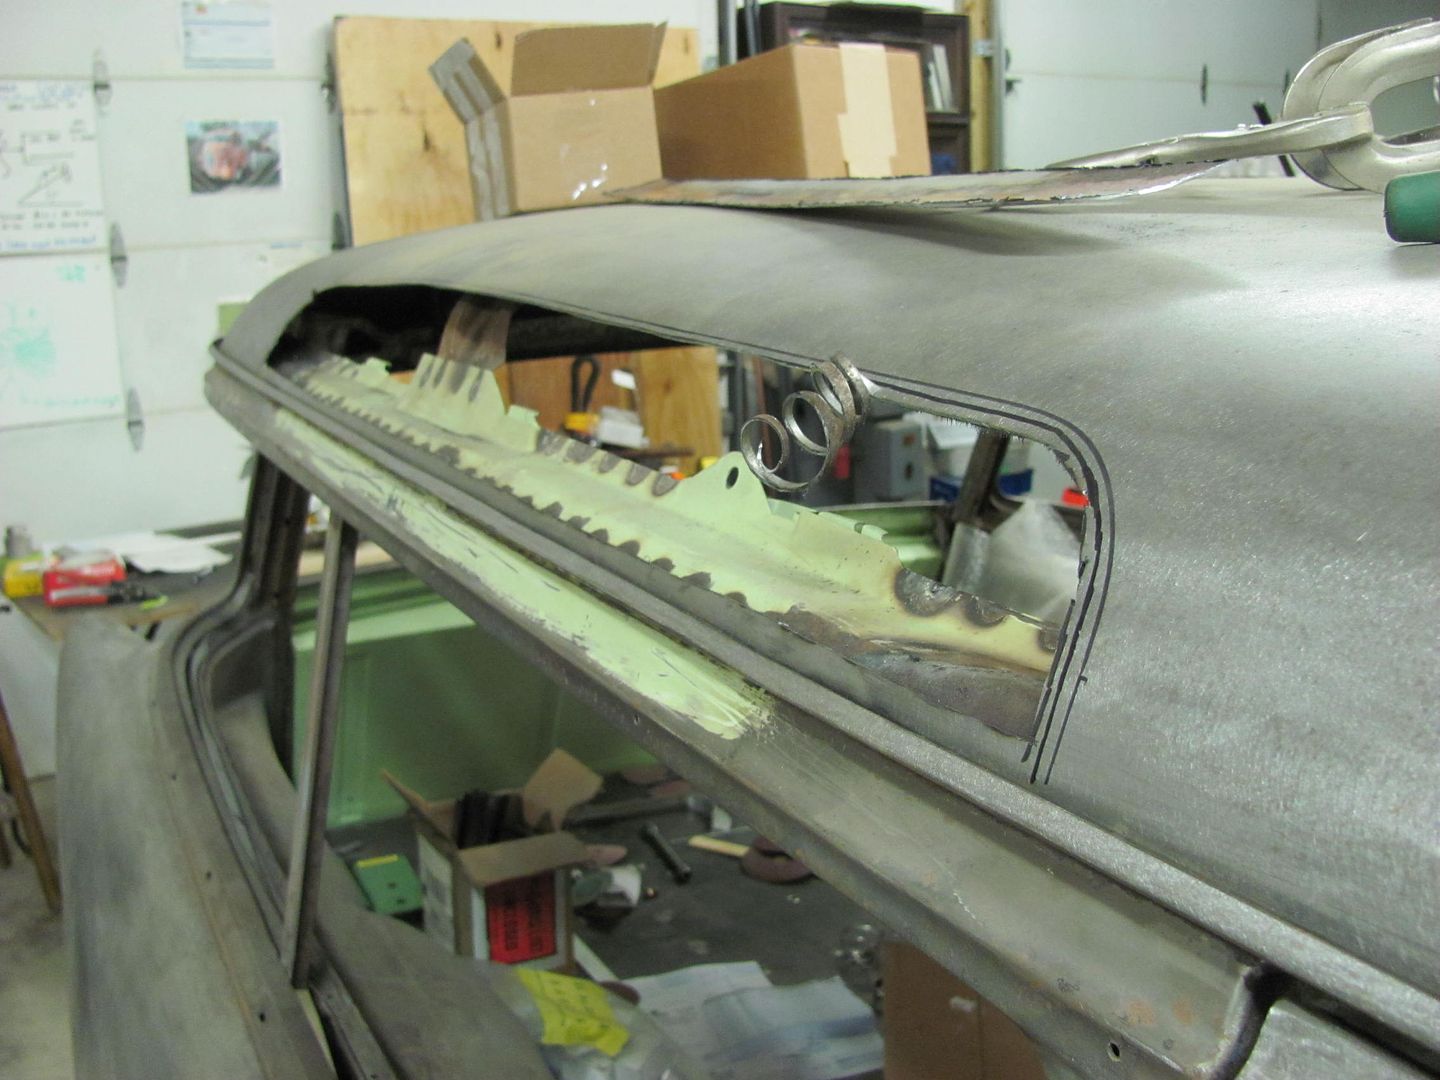
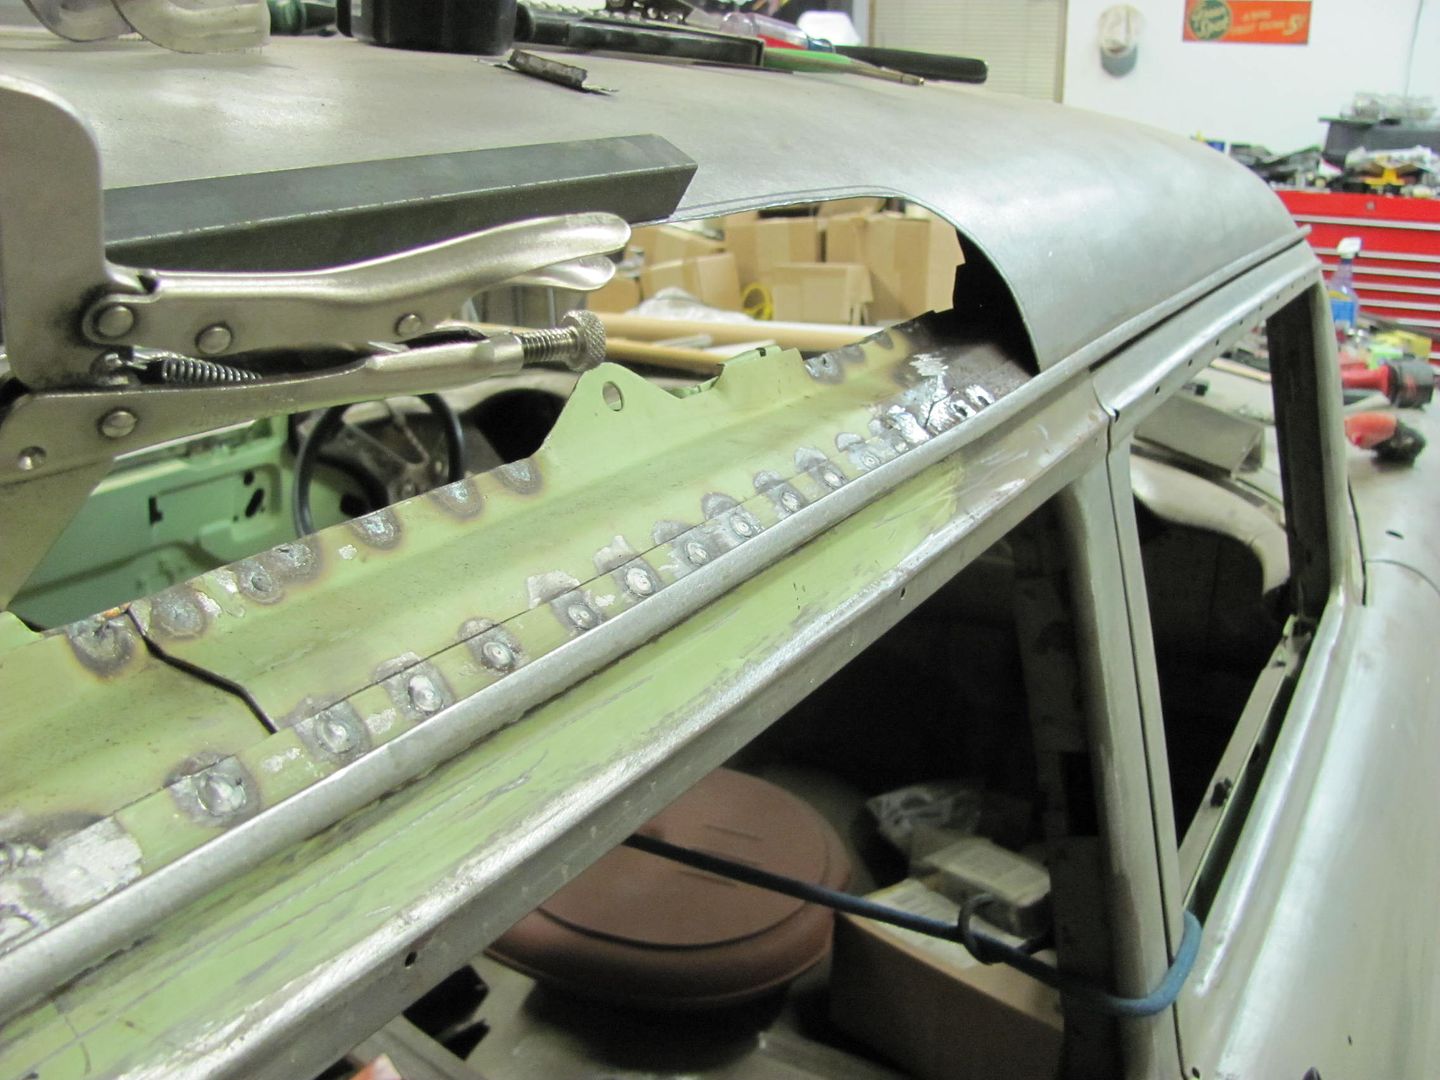
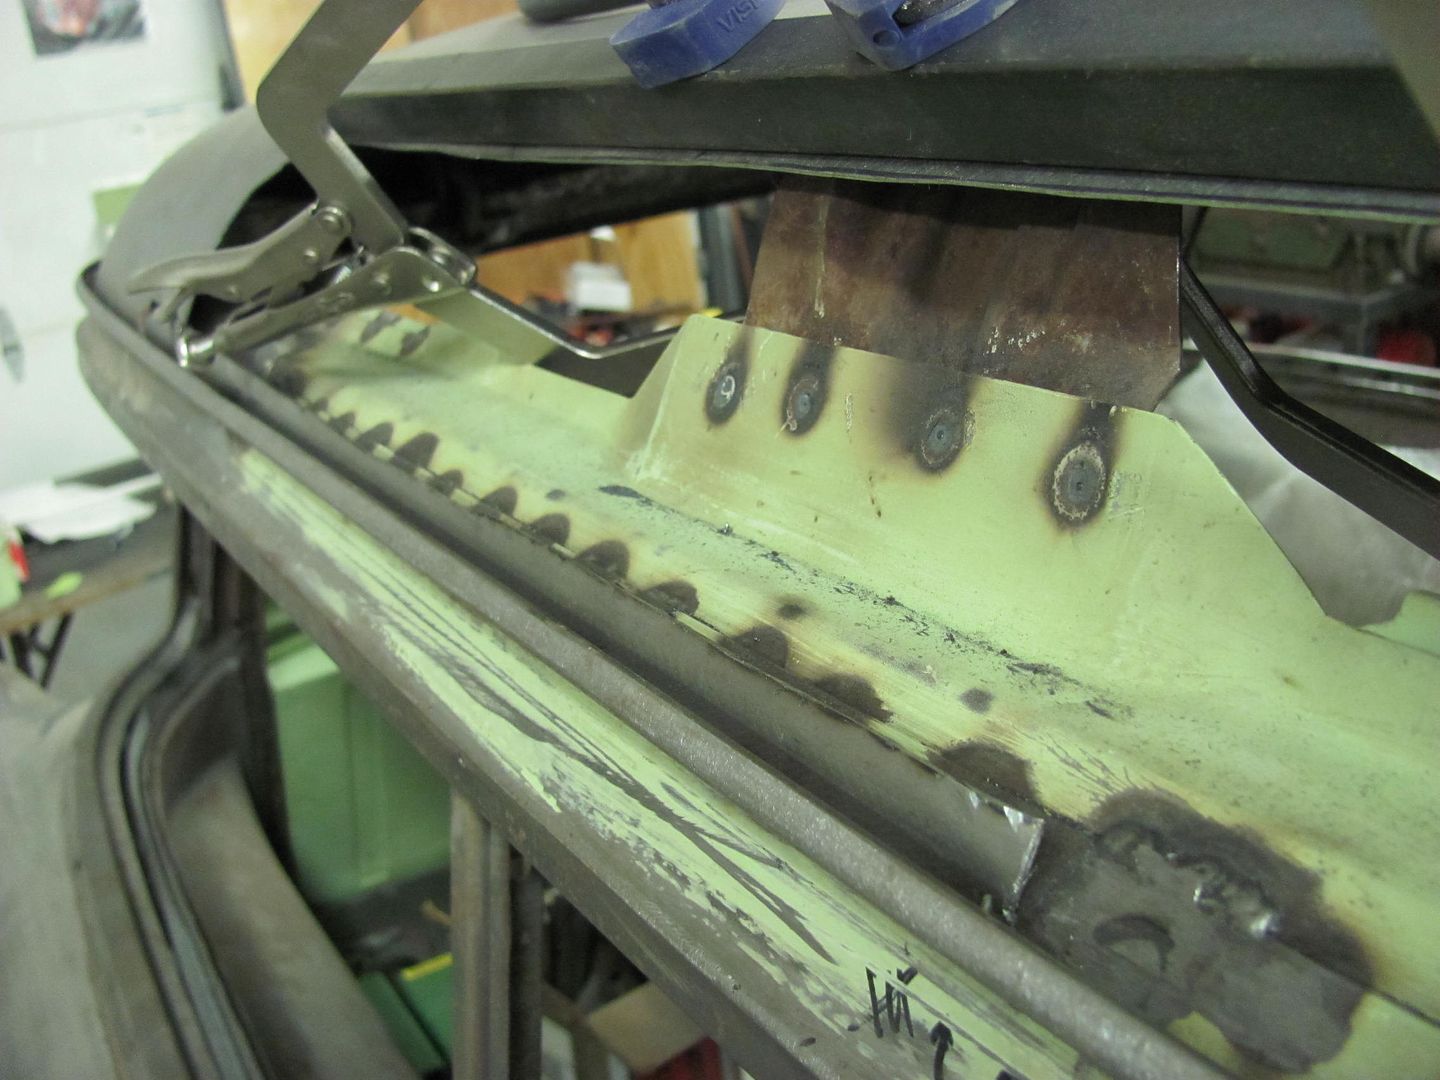
To start, a section was marked off just wider than my sheet metal pliers. Then the spot welds, which were visible from the top, were drilled. A cutoff wheel was used to grind through the end(s) of the section being removed. Then the sheet metal pliers used to rock the panel back and forth to break the spot welds loose.
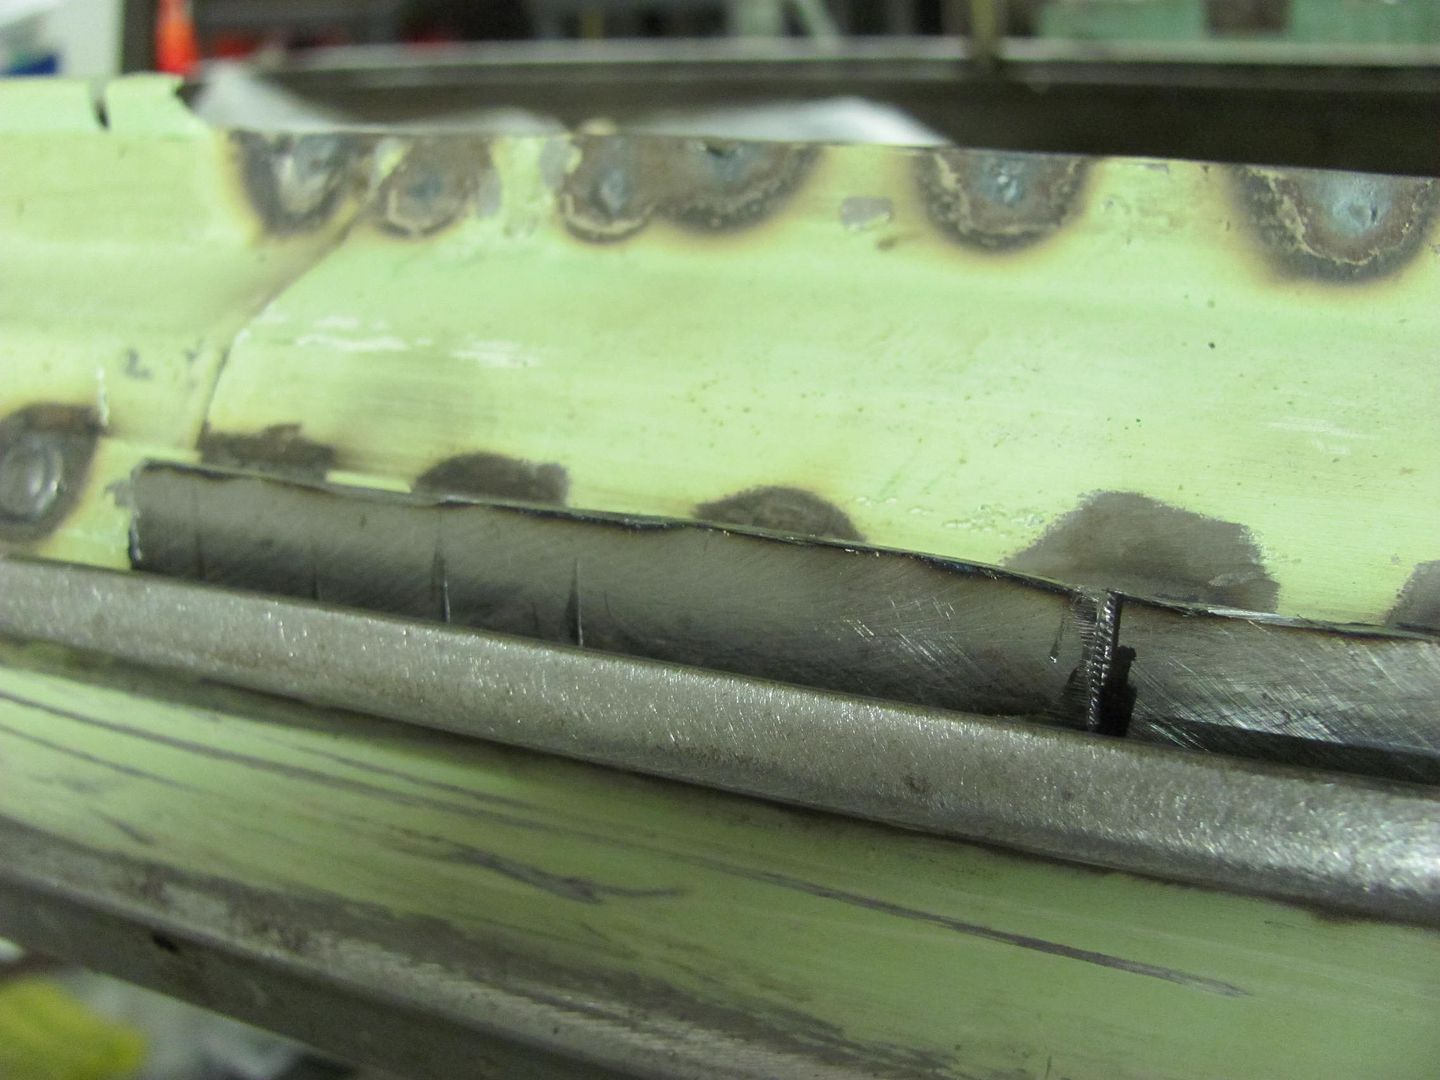
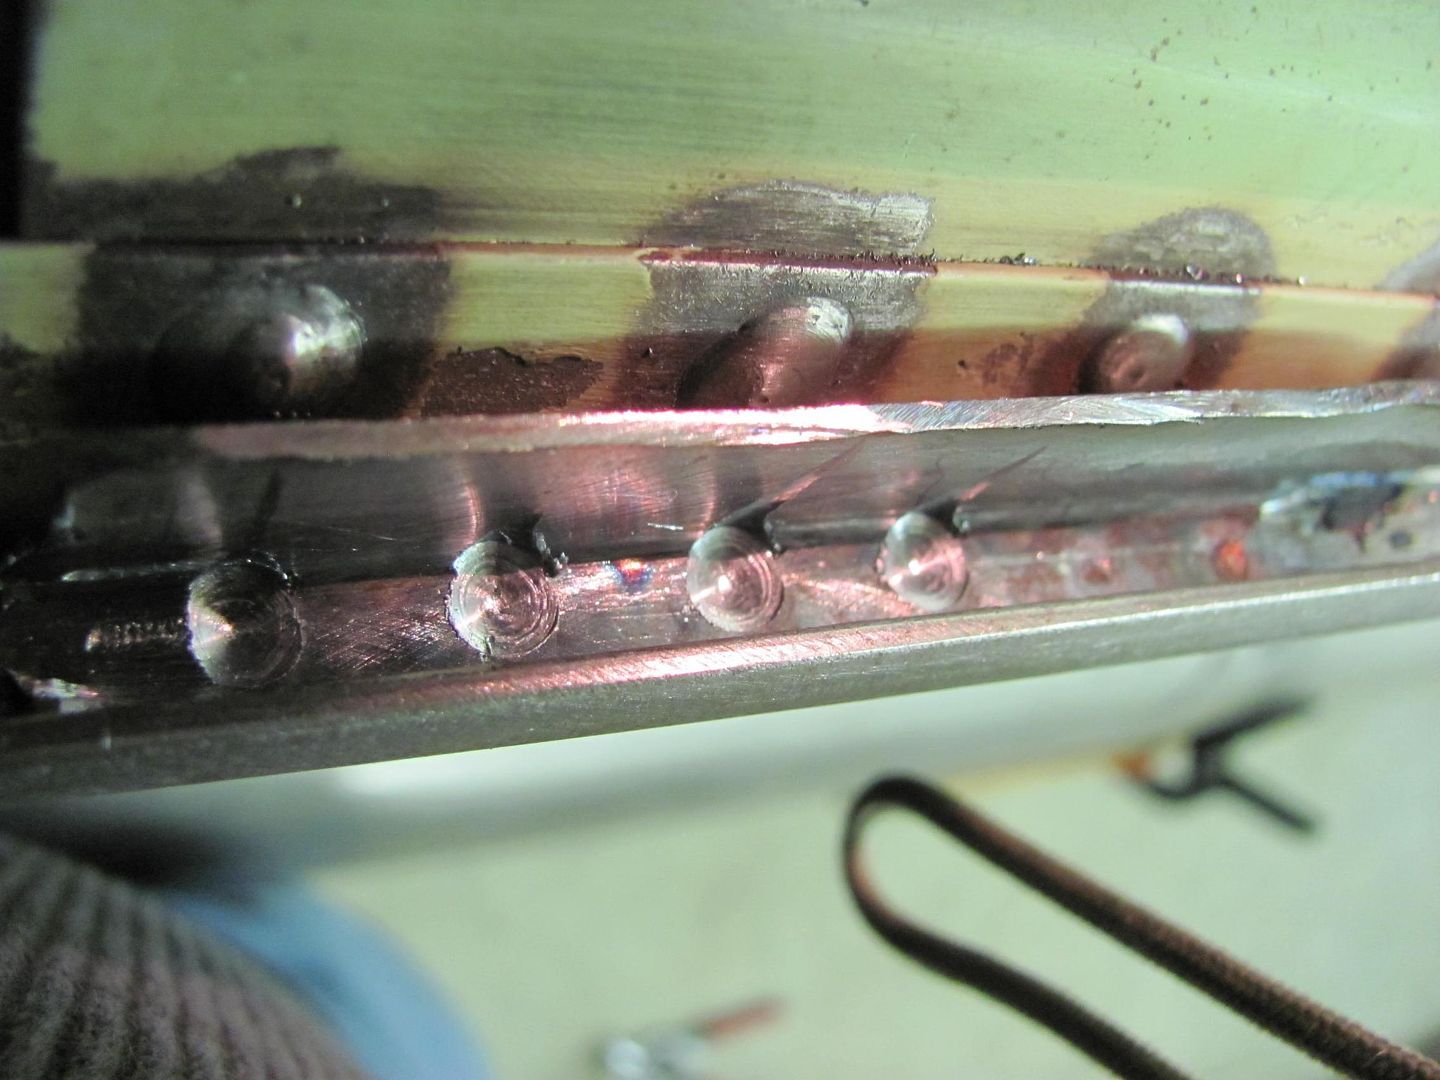
Got about half of it removed, we'll save the rest for later so I can get some primer on the inside of some of the lift gate parts and the roof skin patch.

Had a couple hours to spend in the shop this evening, so I decided to mark out the roof for re-repairing.
Then another line was dropped down about 1/4" to be used for the "rough cut". A cutoff wheel was used and then trimmed with the snips. The lower section was trimmed about 1/2" above the drip rail..
To start, a section was marked off just wider than my sheet metal pliers. Then the spot welds, which were visible from the top, were drilled. A cutoff wheel was used to grind through the end(s) of the section being removed. Then the sheet metal pliers used to rock the panel back and forth to break the spot welds loose.
Got about half of it removed, we'll save the rest for later so I can get some primer on the inside of some of the lift gate parts and the roof skin patch.
UKCHRIS
Member
Very nice
aggierailroad
Well-known member
To start, a section was marked off just wider than my sheet metal pliers.
This is how you know a guy knows what he's about. Working with a plan that's within the limitations of his tools. (not to say you can't work outside of your tools!) Rather, planning ahead to make it easier on yourself.
Always a pleasure to read about your work.
awdblazer
Well-known member
what is that green paint you keep on using?
House of Kolor epoxy primer, KP2CF. The only issue I have ever had with it is a reaction with Ospho about 15 years ago. After a few months of the fresh paint sitting in the sun (think car shows) the paint had an issue with small circles appearing in the finish as the primer was delaminating from the Ospho treated metal (owner applied, not me). A call to the tech line verified that yes, this primer does not like rust converters. That is the first and last time I have sprayed something where a rust converter was used. I typically cut out rust and replace it with fresh metal. This primer likes clean, abraded metal just fine.
Last edited:
Kevin54
MEMBER EMERITUS
Robert......Is there a particular reason that you used a large radius on the corners of the patch panel instead of just using a square corner? I should rephrase that as I know that there is a reason, but can you explain it to this dummy!!!!
One of the downsides to welding with a MIG is that in order to weld sheetmetal and get good weld penetration each and every time, we are virtually forced to do so by welding "dots" at a higher amperage setting than you normally would with a full weld pass. Try this welding a full pass and the weld will start to burn away the parent metal as the panel gets hot. Try using the factory suggestions on your welder with dot welding and you'll have weld dots sitting high up on the surface with no penetration, looking like a mud dauber has been there. The downside to this "dot" welding method is that the weld dot and HAZ surrounding it will shrink, each and every time. By comparison, a TIG or O/A fusion weld with absolutely tight joints and no filler, can be done as one continuous pass from one end of the joint to the other. The benefit here is that the weld and HAZ heat up and cool down progressively as you weld, so the shrinking effects are less than you see with a MIG dot shrinking circumferentially around each dot.
Make no mistake, you can still get similar/acceptable results using the MIG, but it will require planishing each dot to stretch the affected area back out, then grinding down each dot so it will be out of the way for the next welded dot to be planished. Just by virtue of the planishing and grinding process, the other methods are very much a cleaner, faster, and preferred method if you can master the fusion process and not need filler rod. I am still working on that ability myself, hence still using my MIG crutch. I should clarify that using these two processes with filler rod can also give a softer, easier to work weld, but someone who can't walk and chew gum at the same time may have issue with sitting there too long while feeding filler, so if that's the case, the HAZ can be wider and more inconsistent than that of a properly done MIG weld. All operator dependent.
Now that all that background info is laid, the major issue with welding into a tight corner, regardless of which process being used, is that the shrinking effects will compound (stack up?) on the inside corner, in some cases making it that much more difficult to stretch and relieve the stresses to get rid of the puckering/warp issues. By having a wide, sweeping radius, it gives us more of a balance on either side of the weld, for less effort in planishing to get the weld and HAZ back where it should be.
The downside to this "dot" welding method is that the weld dot and HAZ surrounding it will shrink, each and every time. By comparison, a TIG or O/A fusion weld with absolutely tight joints and no filler, can be done as one continuous pass from one end of the joint to the other. The benefit here is that the weld and HAZ heat up and cool down progressively as you weld, so the shrinking effects are less than you see with a MIG dot shrinking circumferentially around each dot. Make no mistake, you can still get similar/acceptable results using the MIG, but it will require planishing each dot to stretch the affected area back out, then grinding down each dot so it will be out of the way for the next welded dot to be planished. Just by virtue of the planishing and grinding process, the other methods are very much a cleaner, faster, and preferred method if you can master the fusion process and not need filler rod. I am still working on that ability myself, hence still using my MIG crutch
. I should clarify that using these two processes with filler rod can also give a softer, easier to work weld, but someone who can't walk and chew gum at the same time may have issue with sitting there too long while feeding filler, so if that's the case, the HAZ can be wider and more inconsistent than that of a properly done MIG weld. All operator dependent. Now that all that background info is laid, the major issue with welding into a tight corner, regardless of which process being used, is that the shrinking effects will compound (stack up?) on the inside corner, in some cases making it that much more difficult to stretch and relieve the stresses to get rid of the puckering/warp issues. By having a wide, sweeping radius, it gives us more of a balance on either side of the weld, for less effort in planishing to get the weld and HAZ back where it should be.
Last edited:
DieselDent
Well-known member
Howdy neighbor! Amazing work, my fab skils have improved from reading this thread.