To avoid these ads, REGISTER NOW!

MP&C Shop Projects

OP
M

MP&C

Well-known member
Joined
Oct 21, 2009
Messages
4,396
Location
Leonardtown, MD
Thanks to the mods for getting the thread all squared away, they have far too many personalities to deal with on a daily basis, and on occasion mine's not the best either. :willy_nil

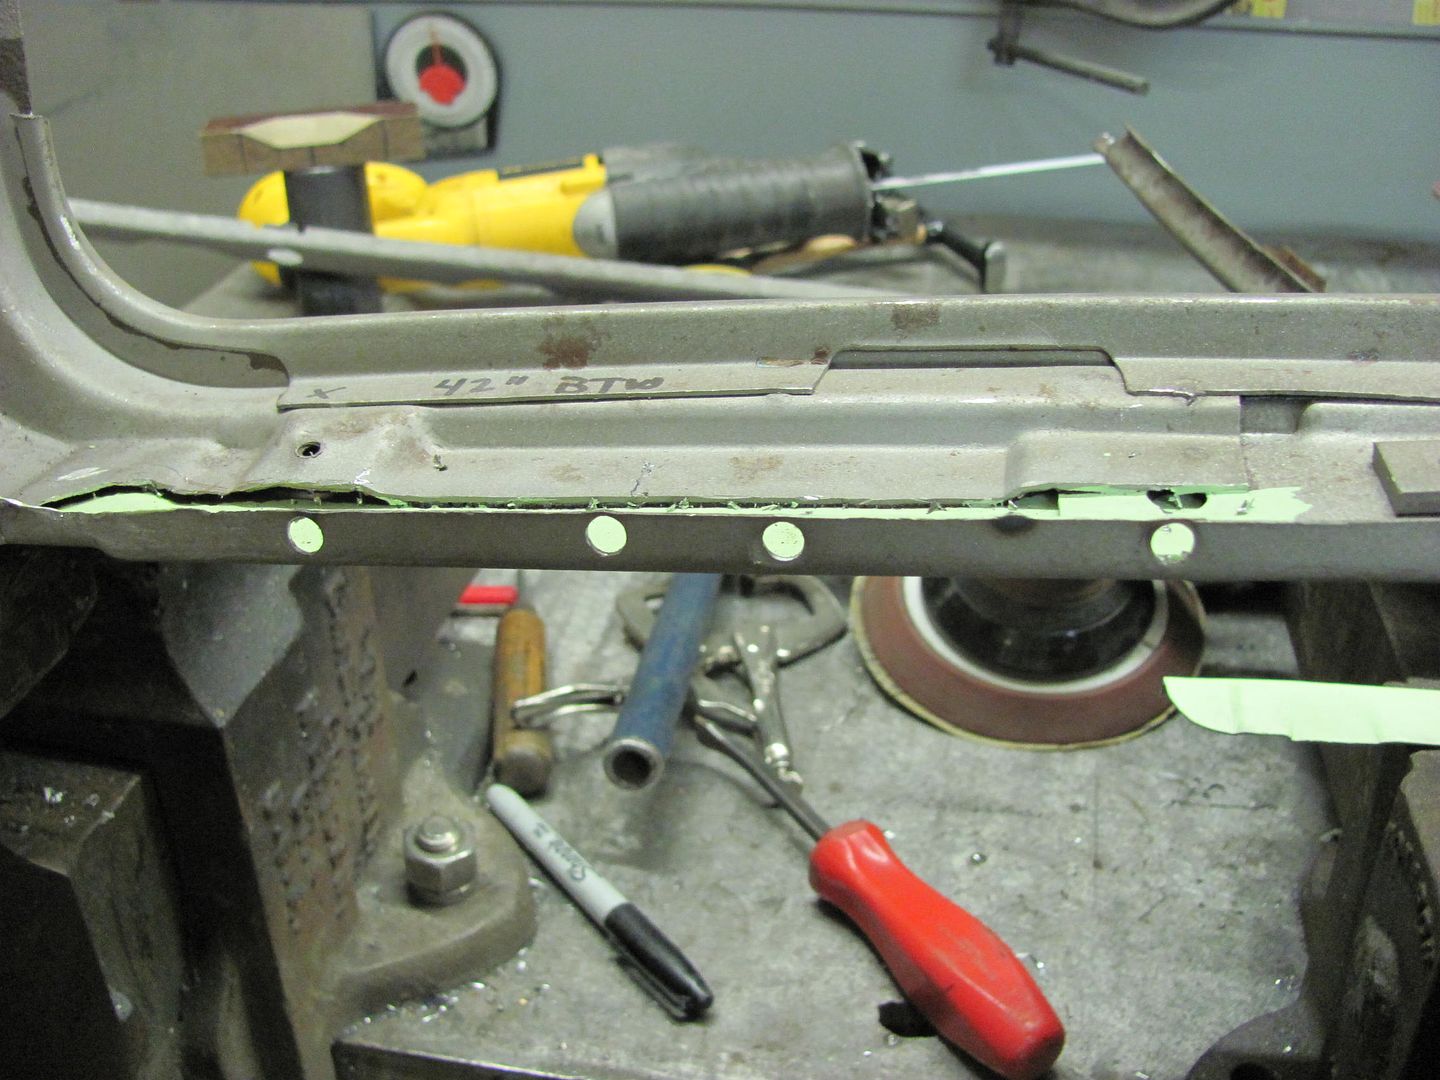
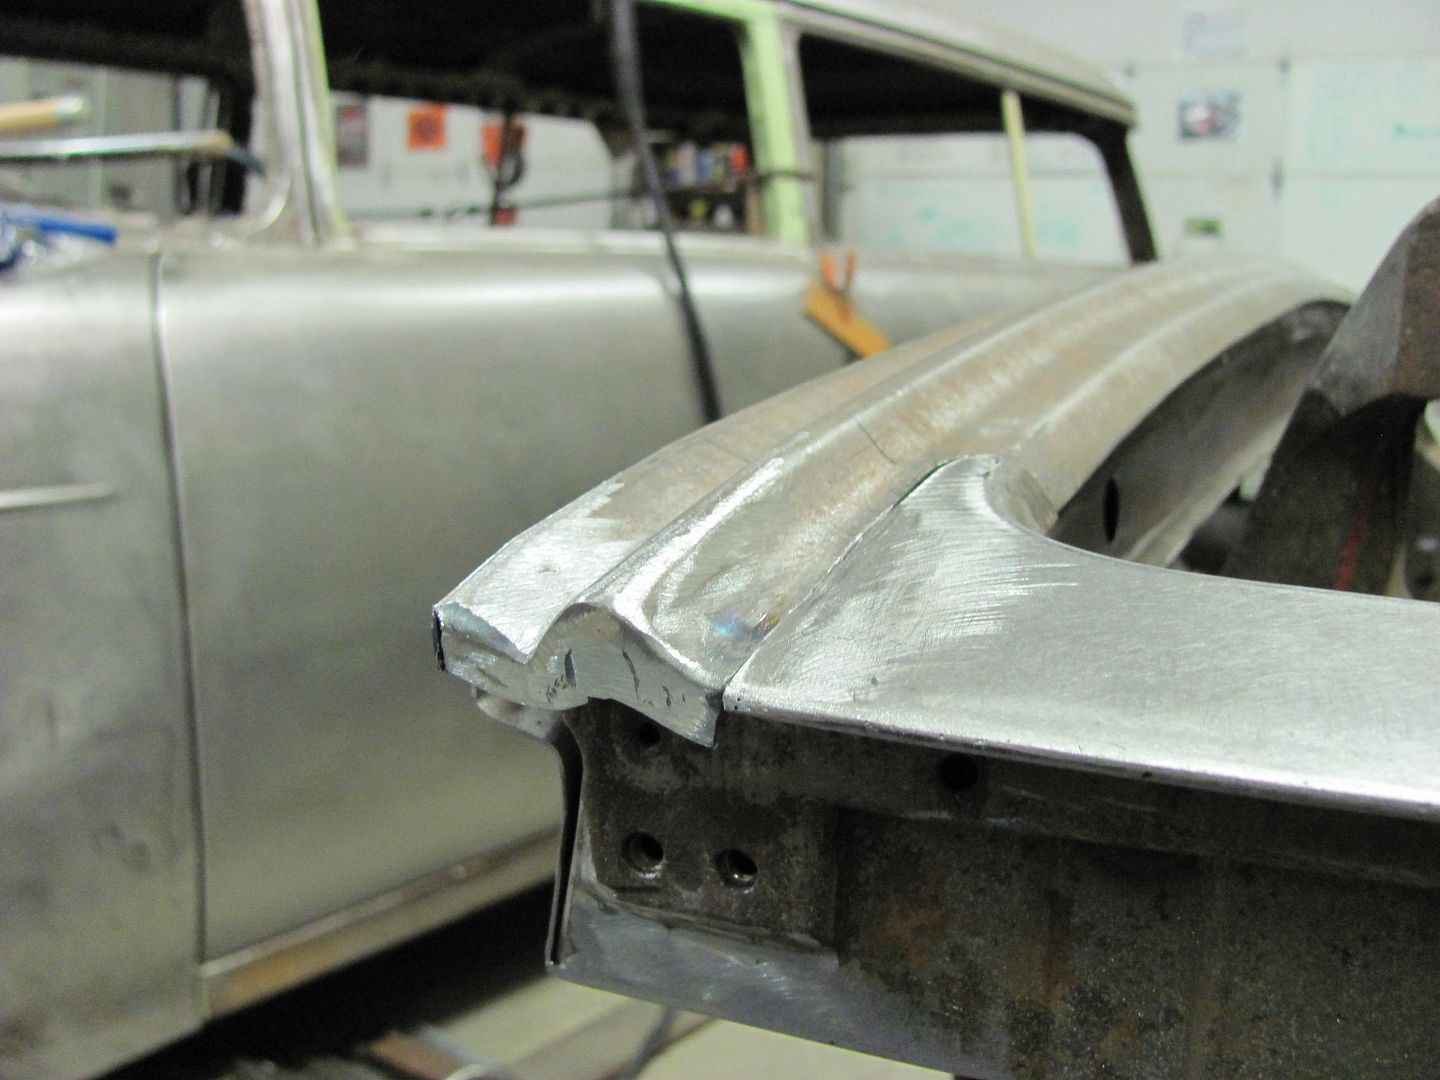
Glad to have the thread back in the Fabrication Forum, hope we have found a permanent home here. While waiting for the epoxy primer to cure another day so we can weld in the last repair patch, I though I'd post up a thread on tuck shrinking, which shows how to inexpensively effect a repair in those trouble spots, like windshield corners...


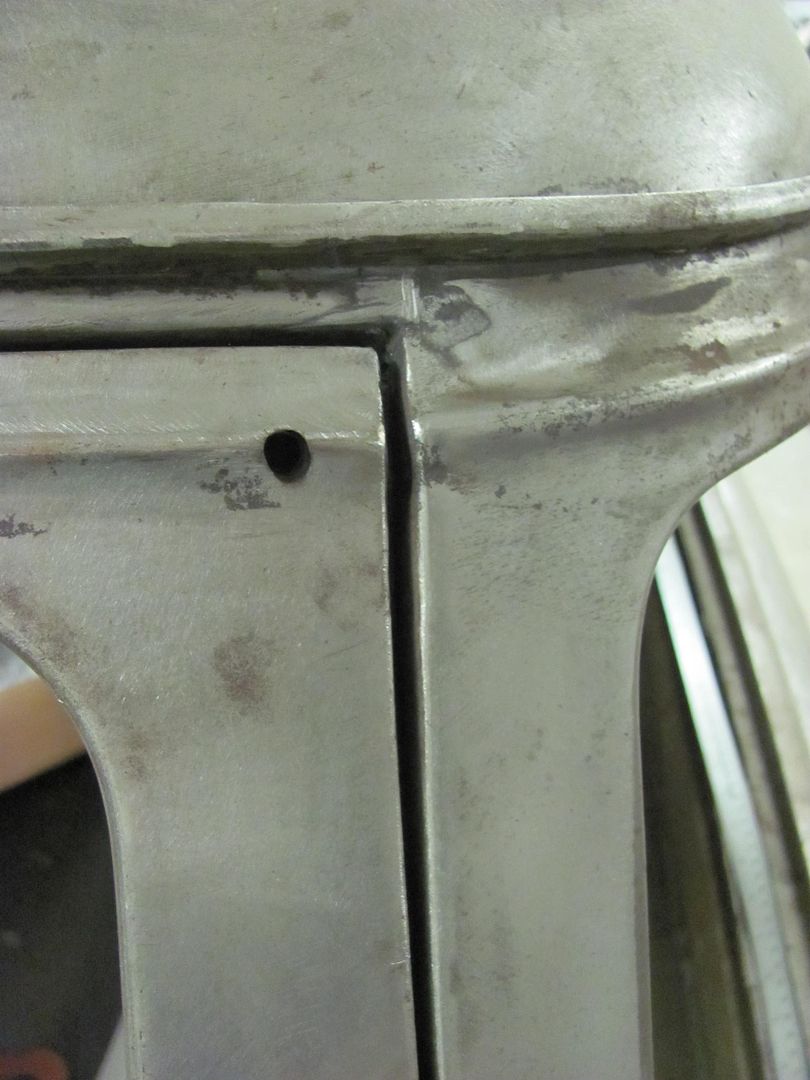
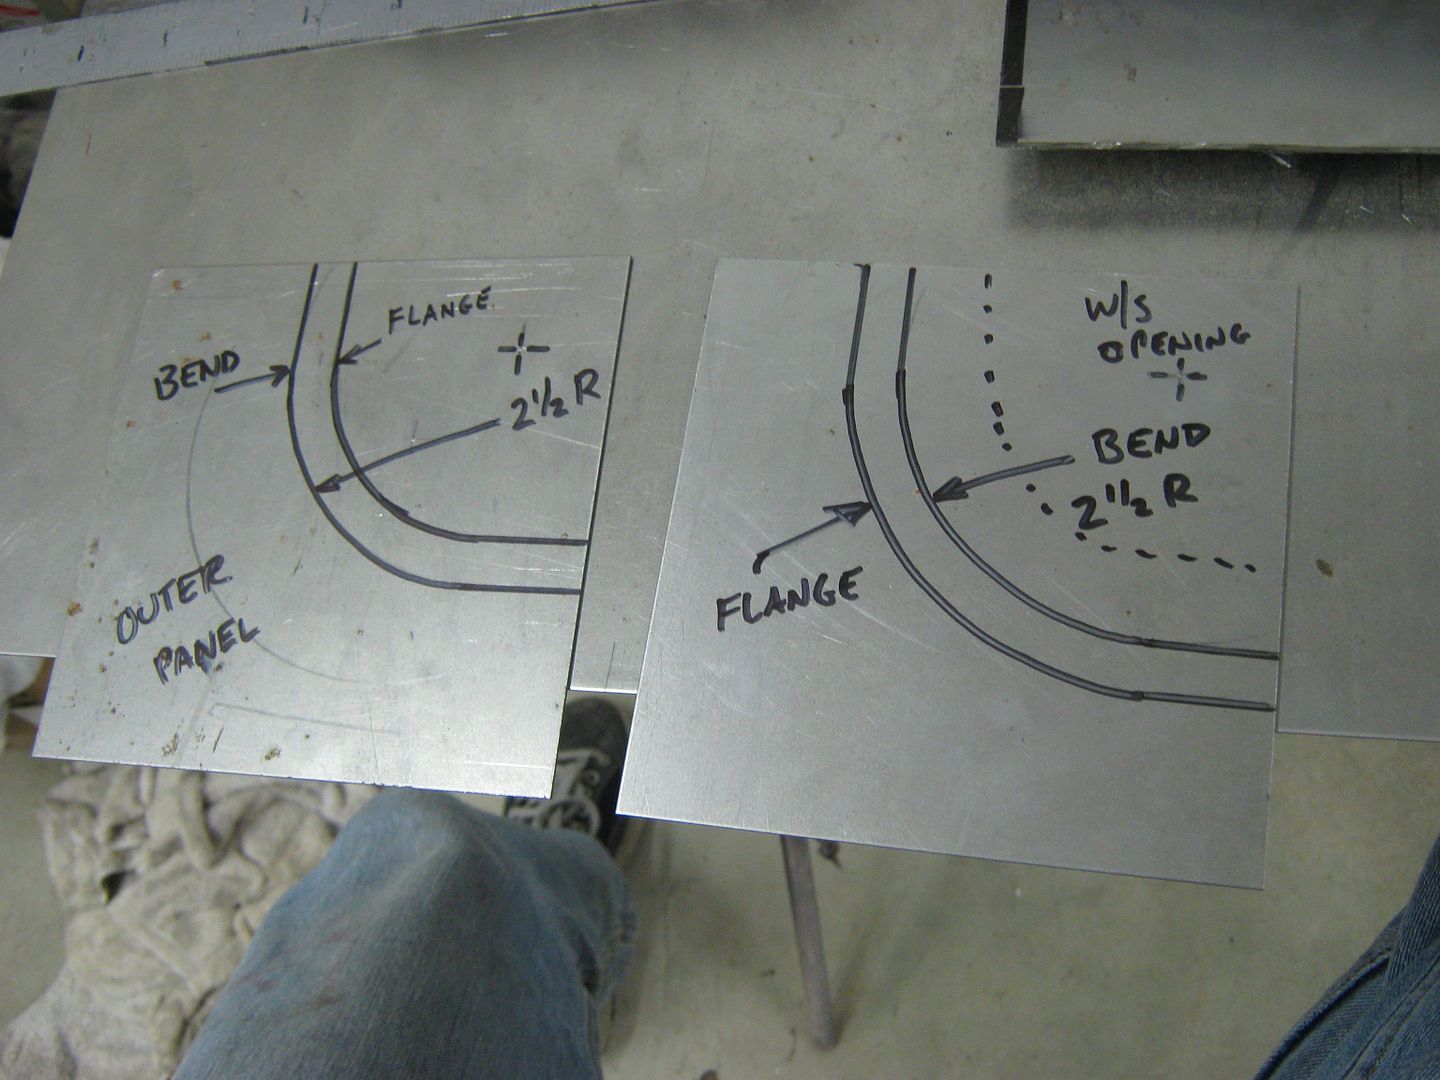
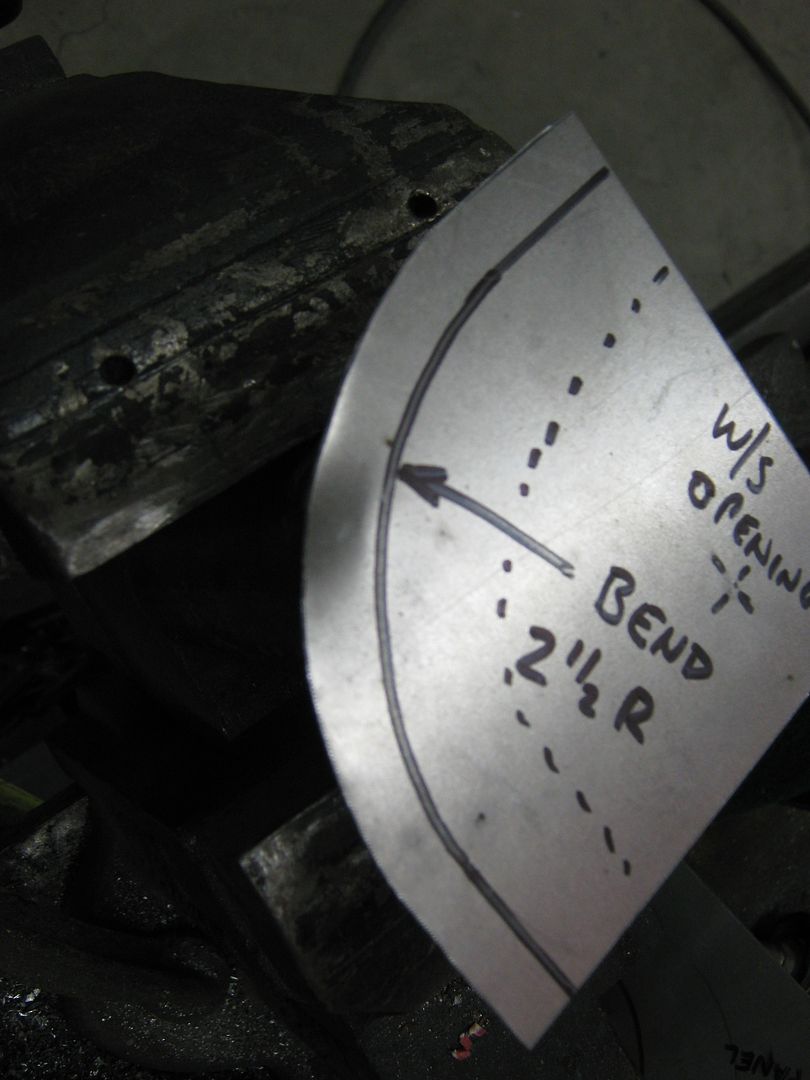
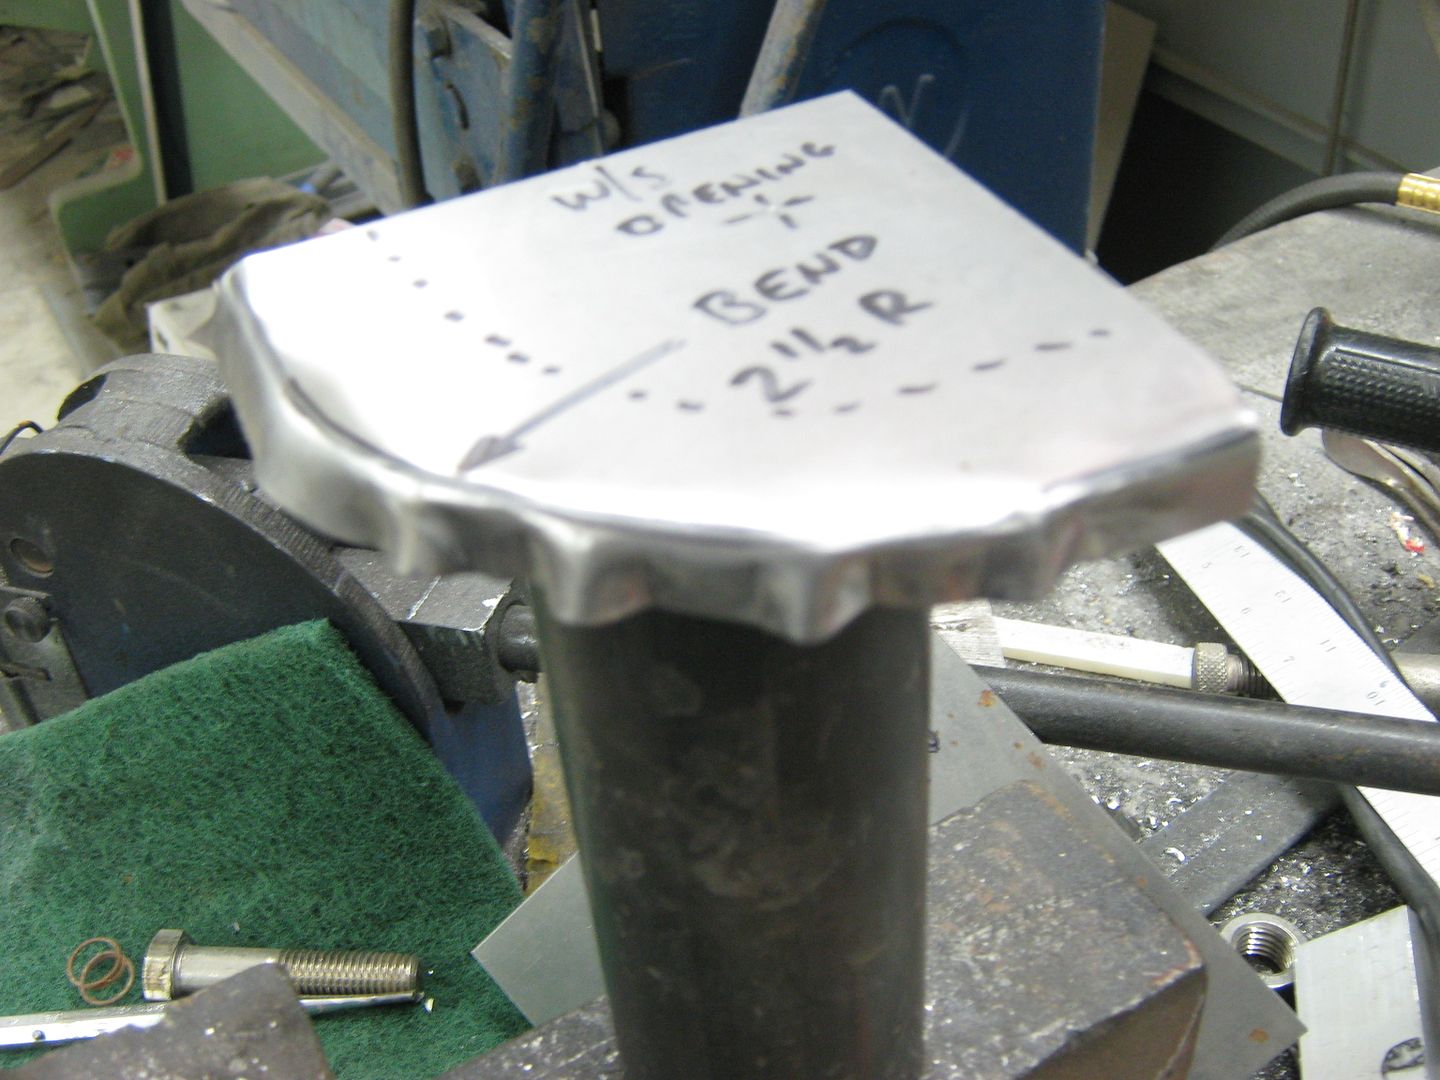
I just so happen to have a 52 sitting here for a sample, although my w/s is still intact (in the way), so I'm guessing at about a radius of 2.5"


Picture038-2.jpg


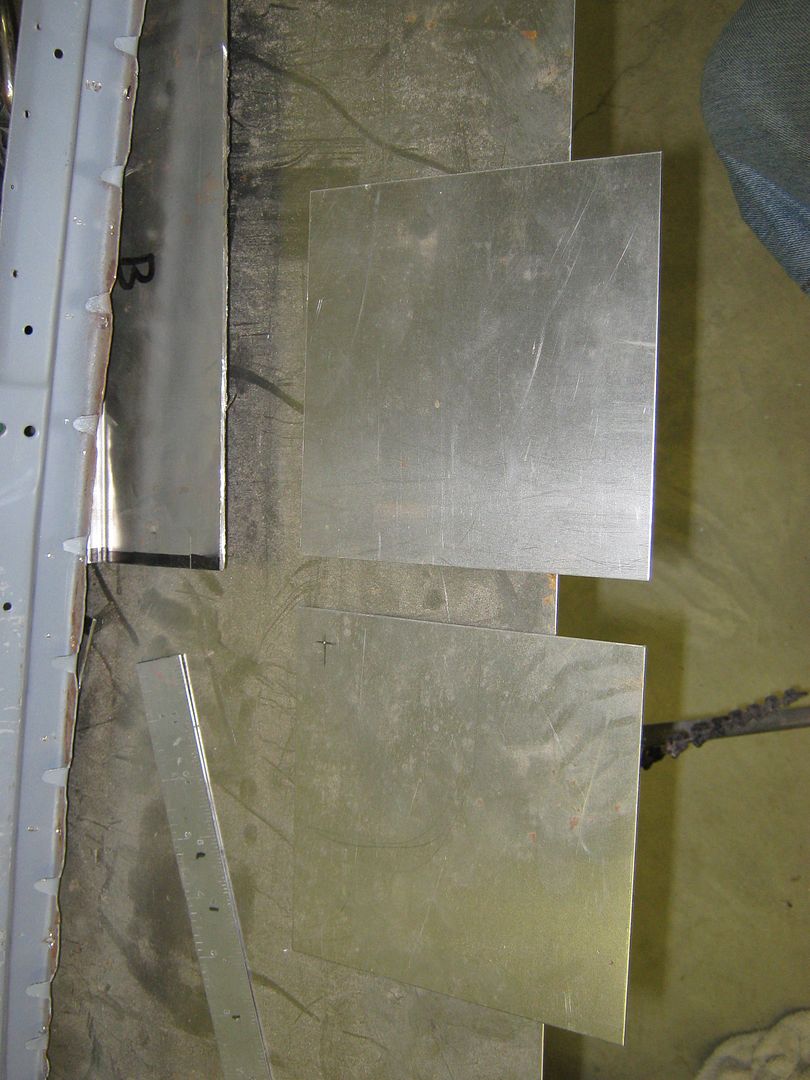
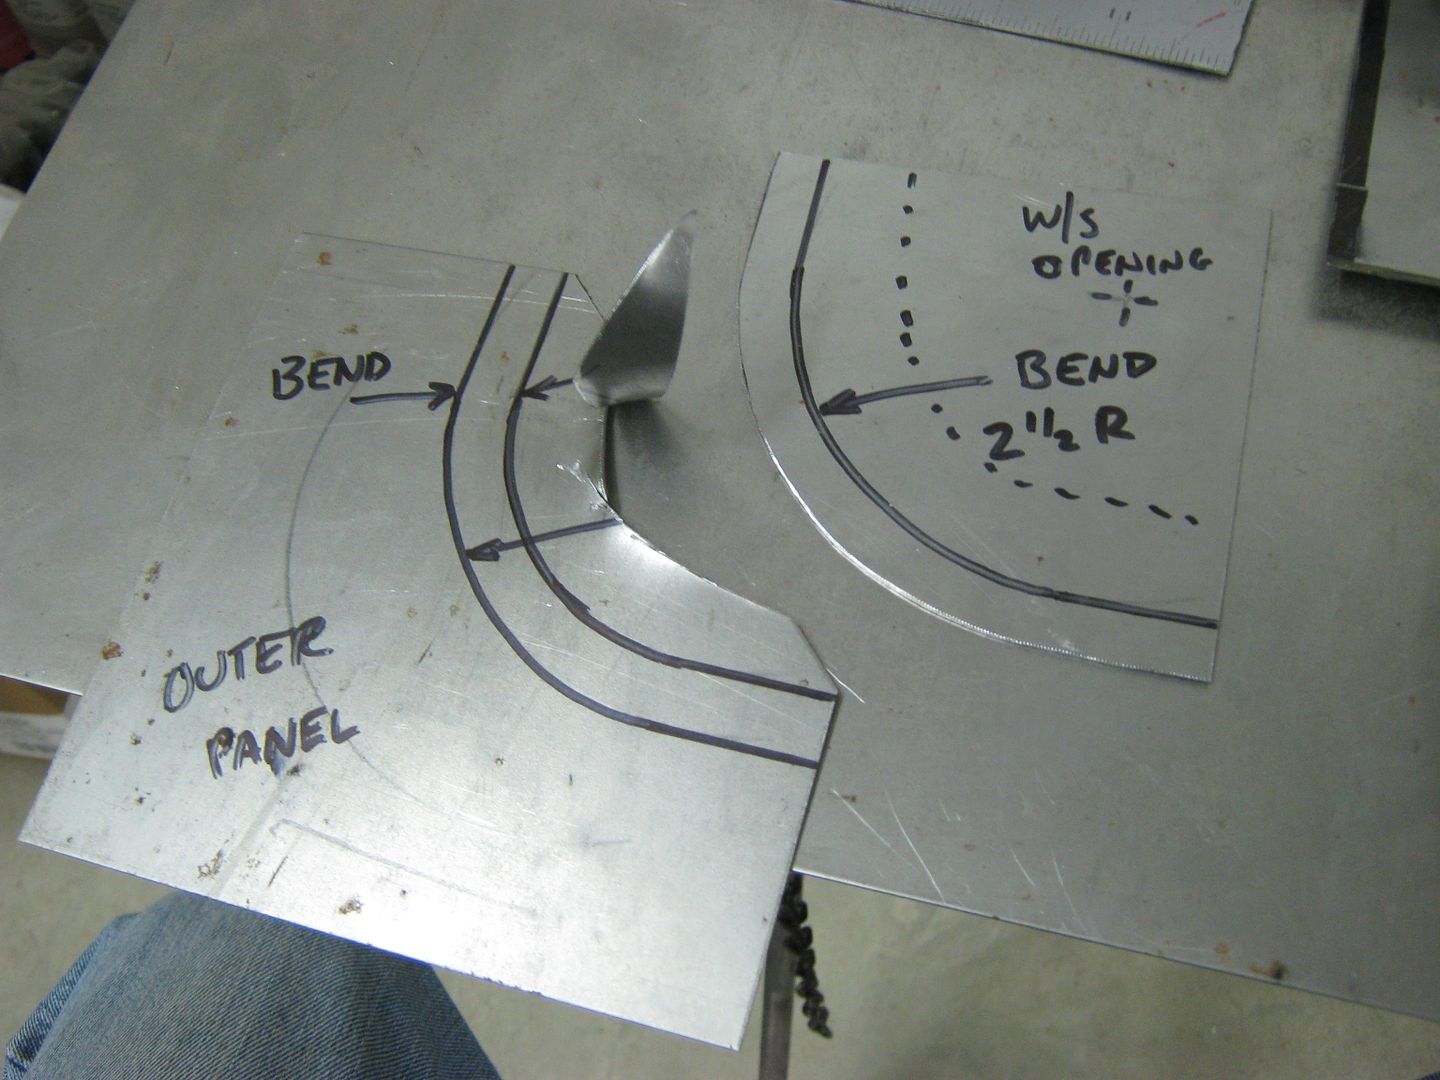
I'll use some 5-1/2" square pieces to make the inner and outer corners. This is 18 ga CRS. For the sake of demonstration, I'll use a compass, but for an actual repair the radius would be patterned off the vehicle. Here I used a center punch to keep the compass point from slipping.


Picture039-2.jpg


Picture041-2.jpg


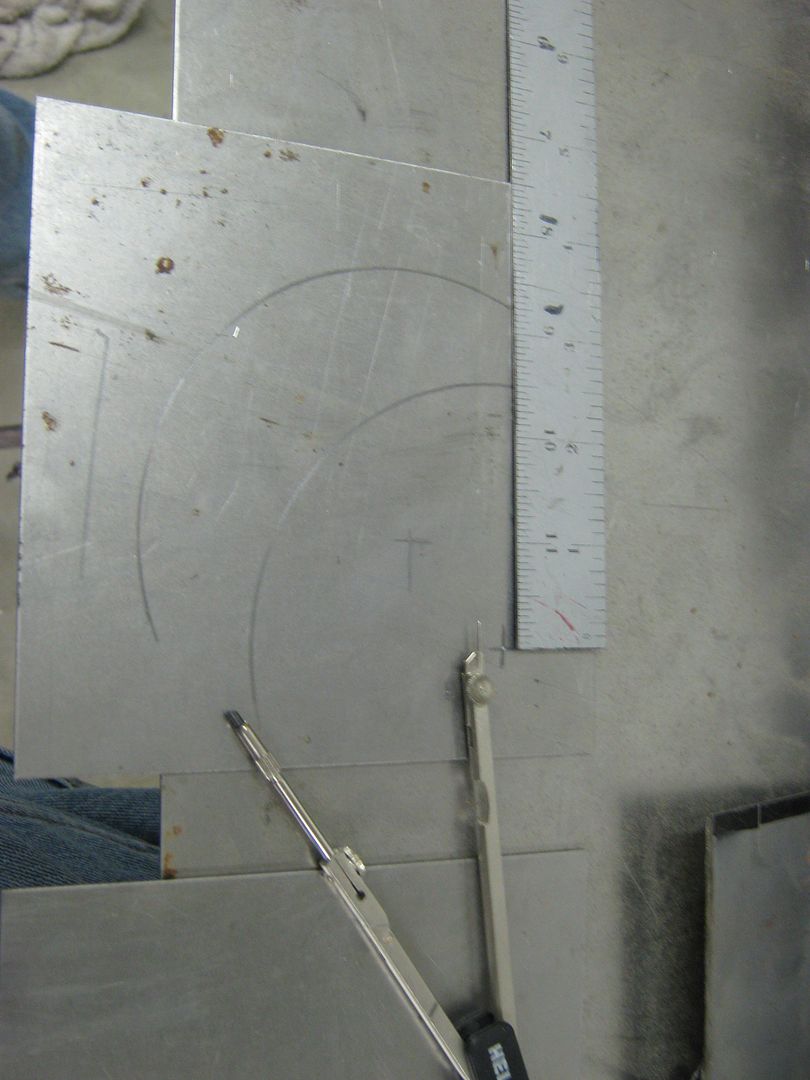
Now mark this out with a sharpie, we'll want to be able to see the mark for awhile


Picture042-2.jpg


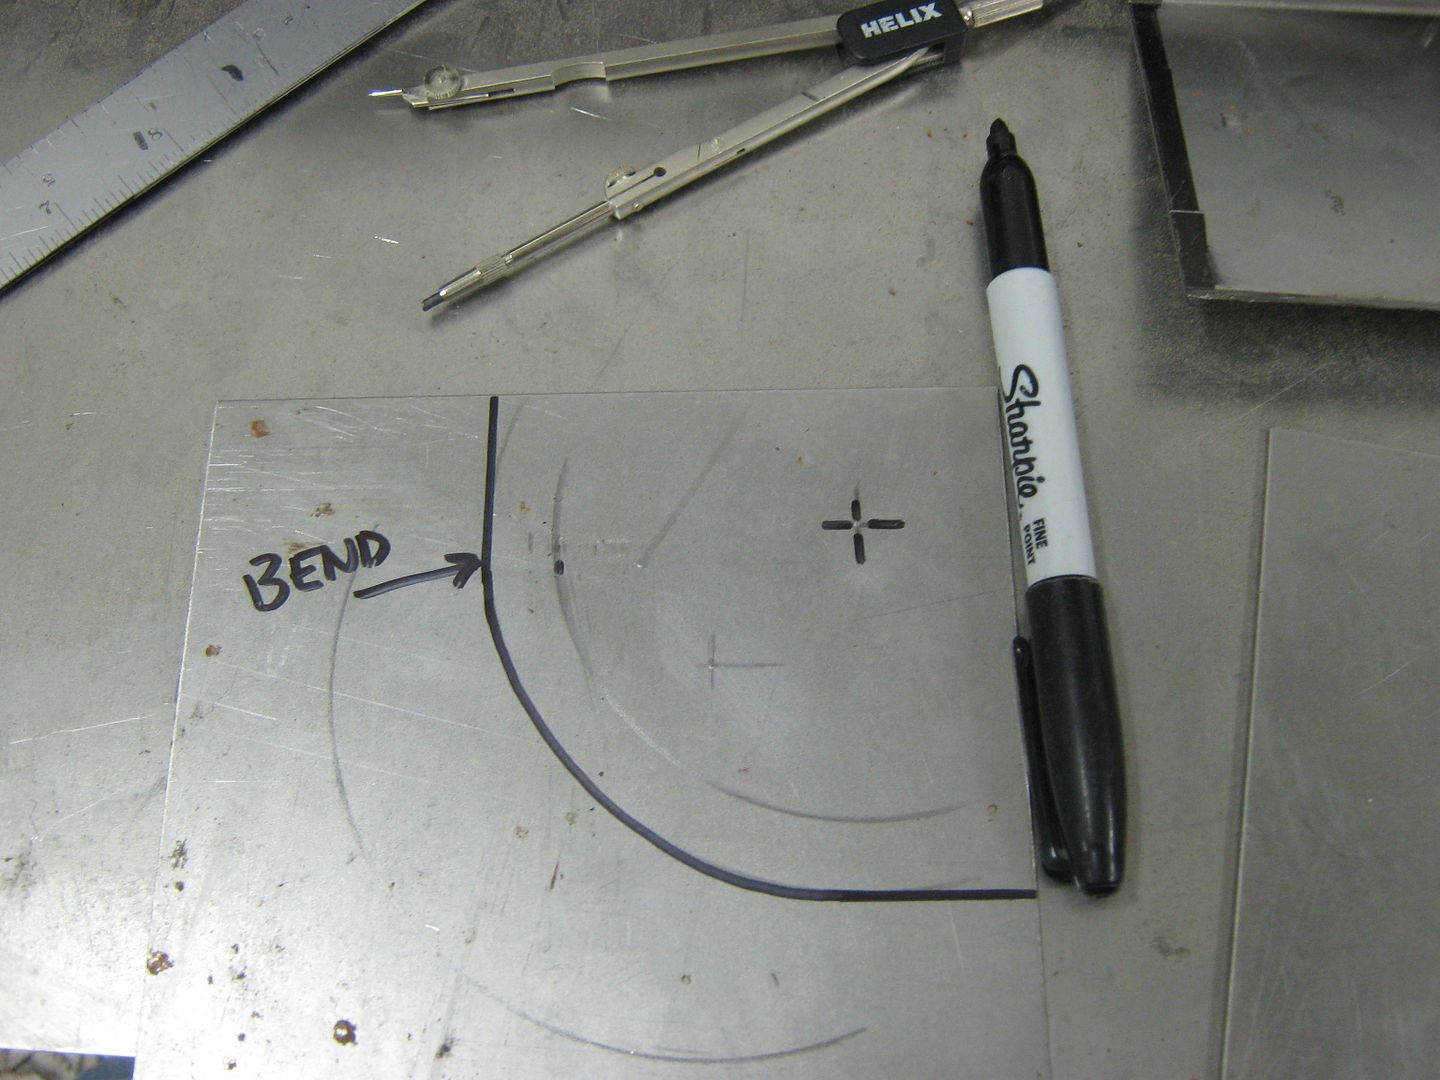
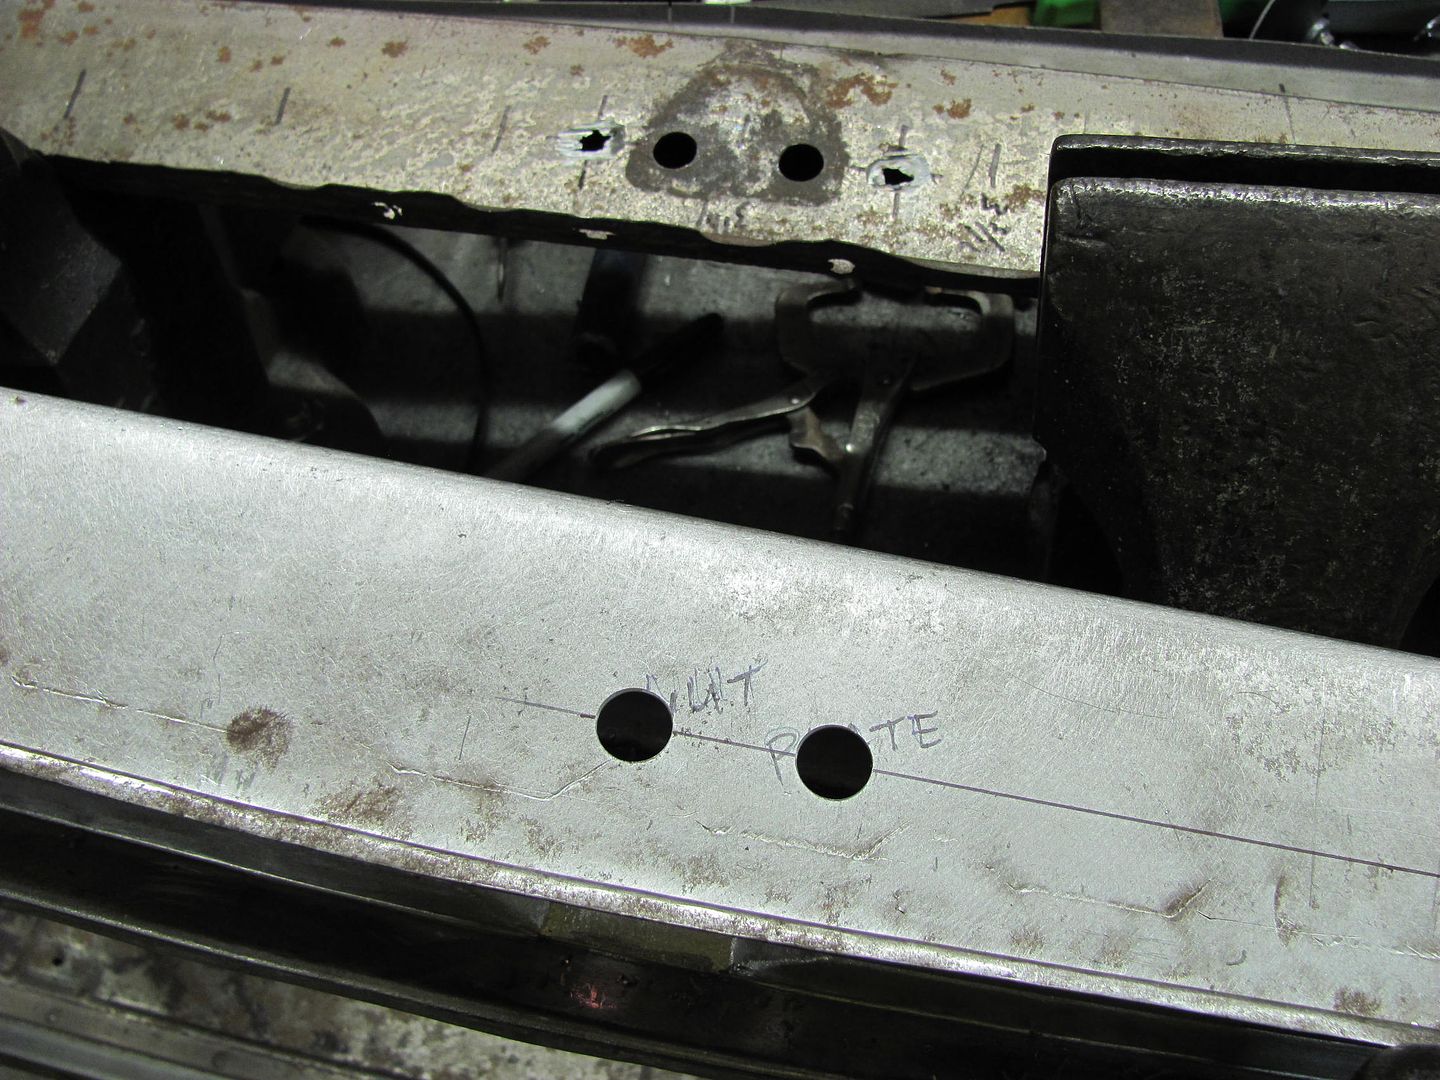
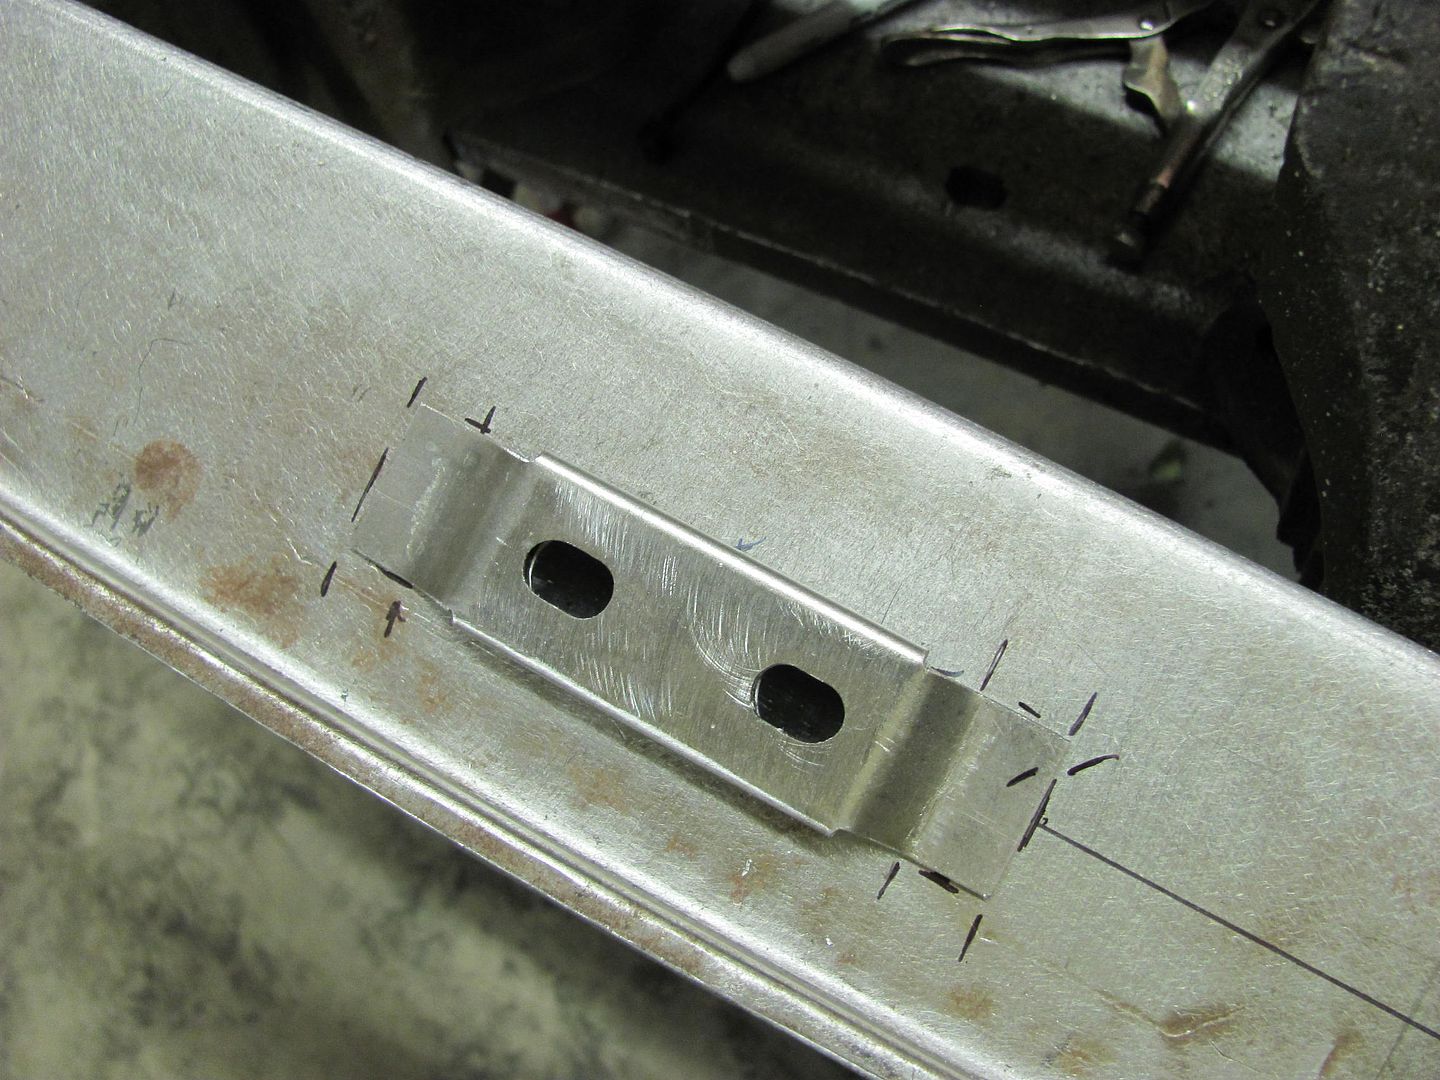
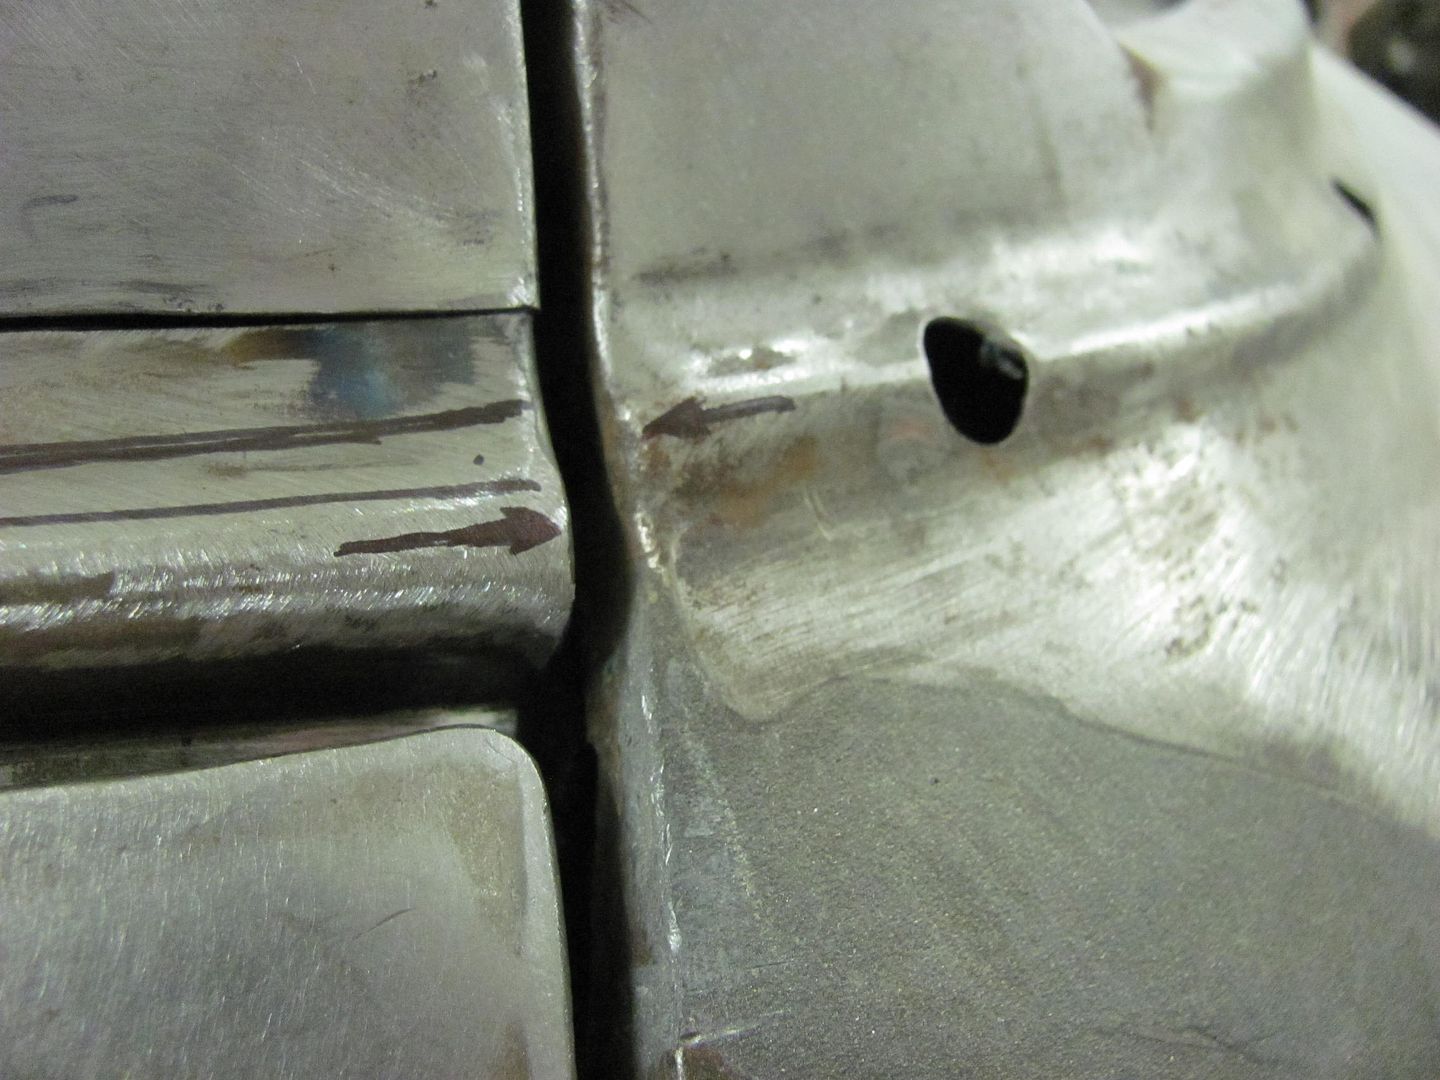
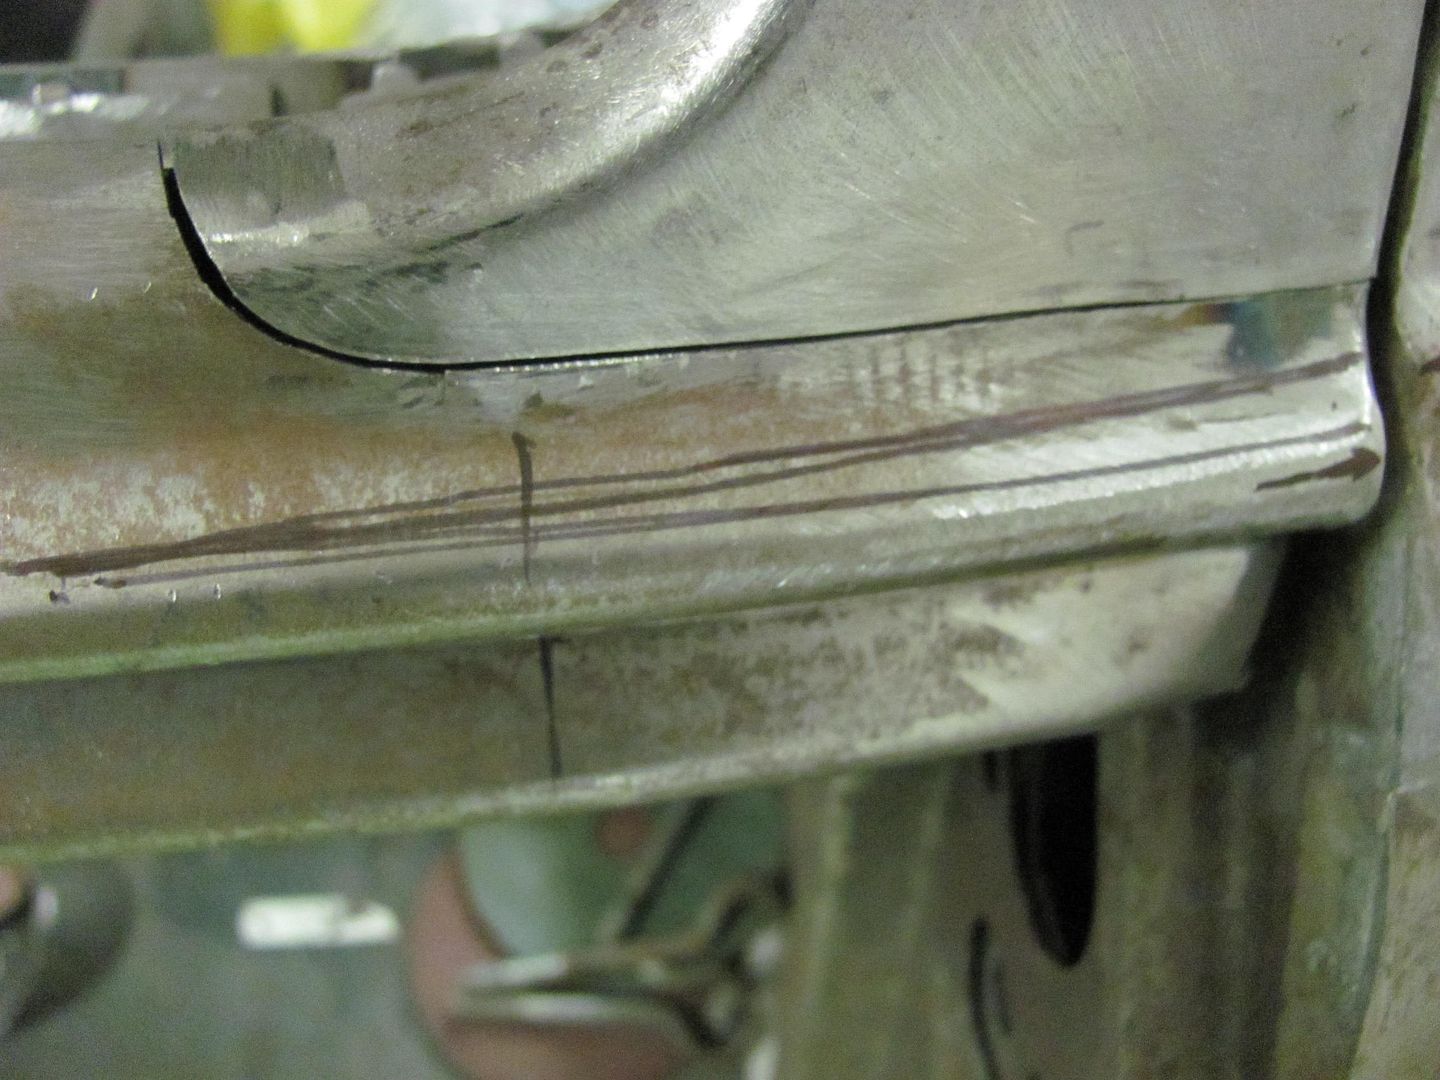
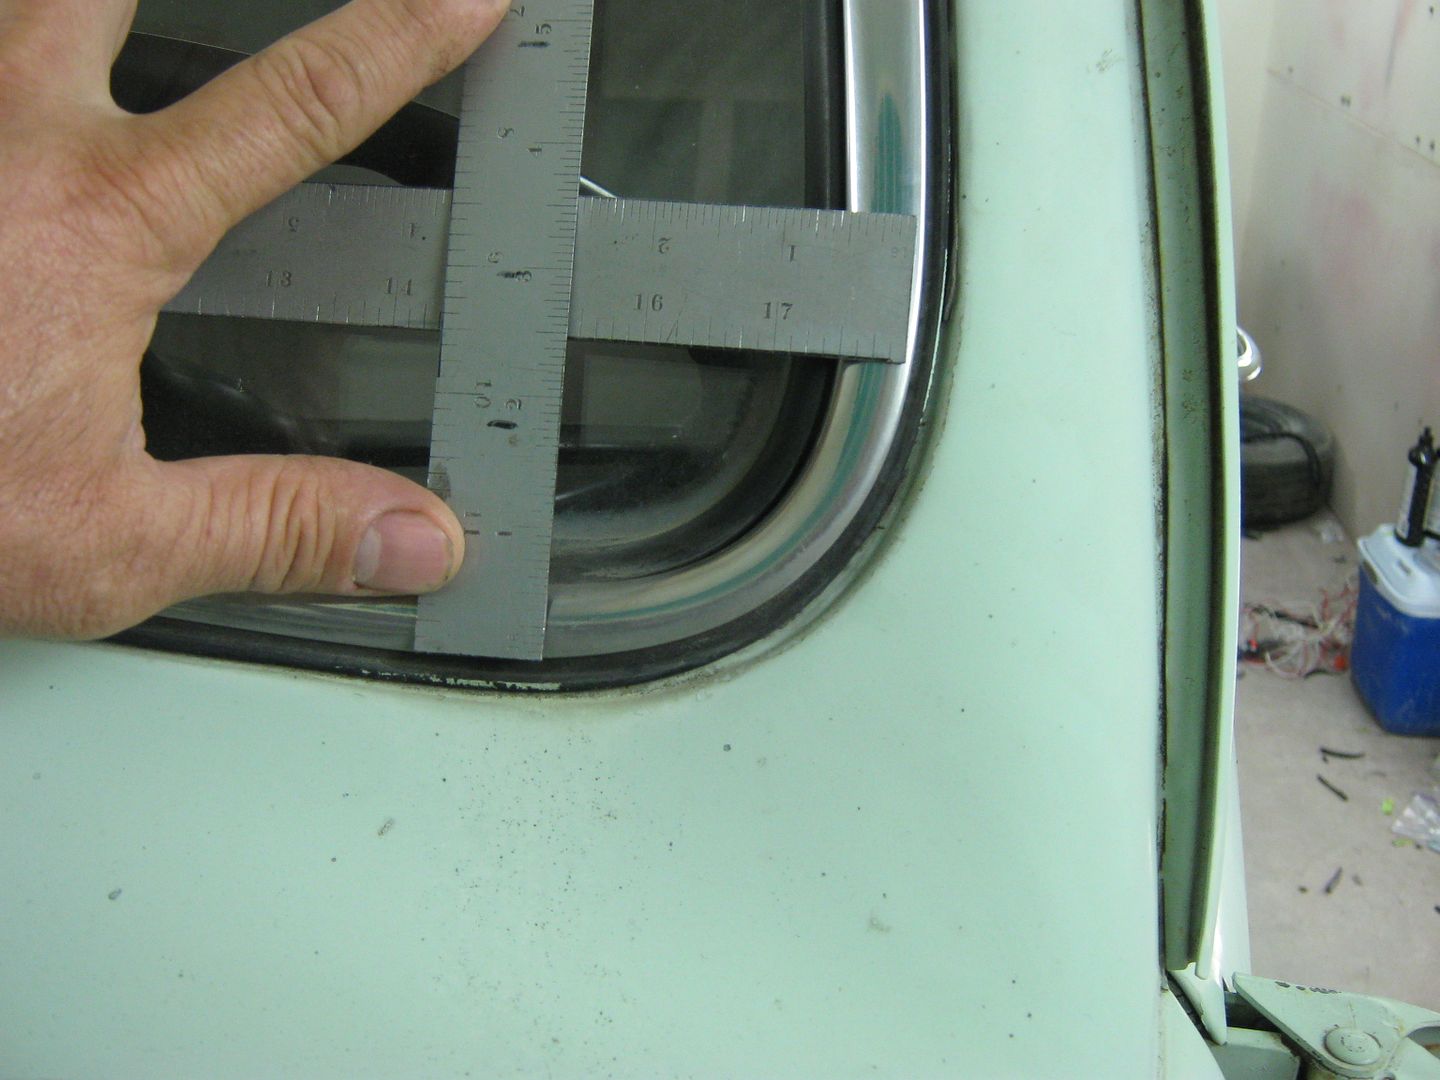
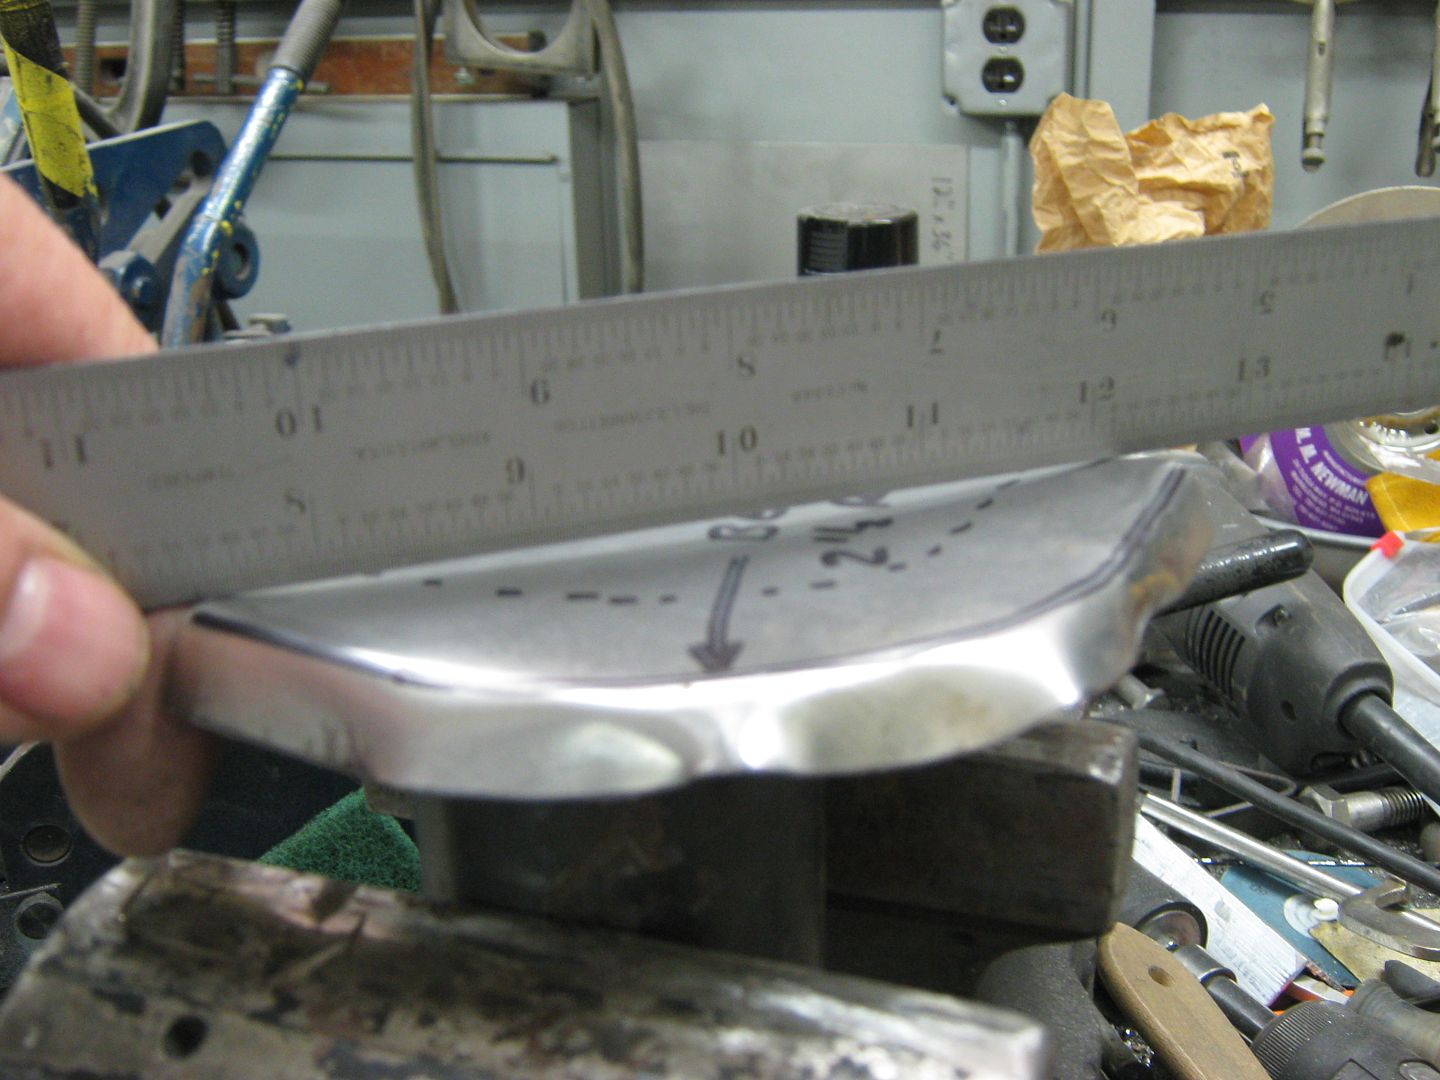
Now take the measurement of the depth of the windshield mounting flange. If it sets back from the outer edge say, 3/4", I'd make the flanges on each of these corner repairs 1/2" to allow some trimming.


Picture043-1.jpg


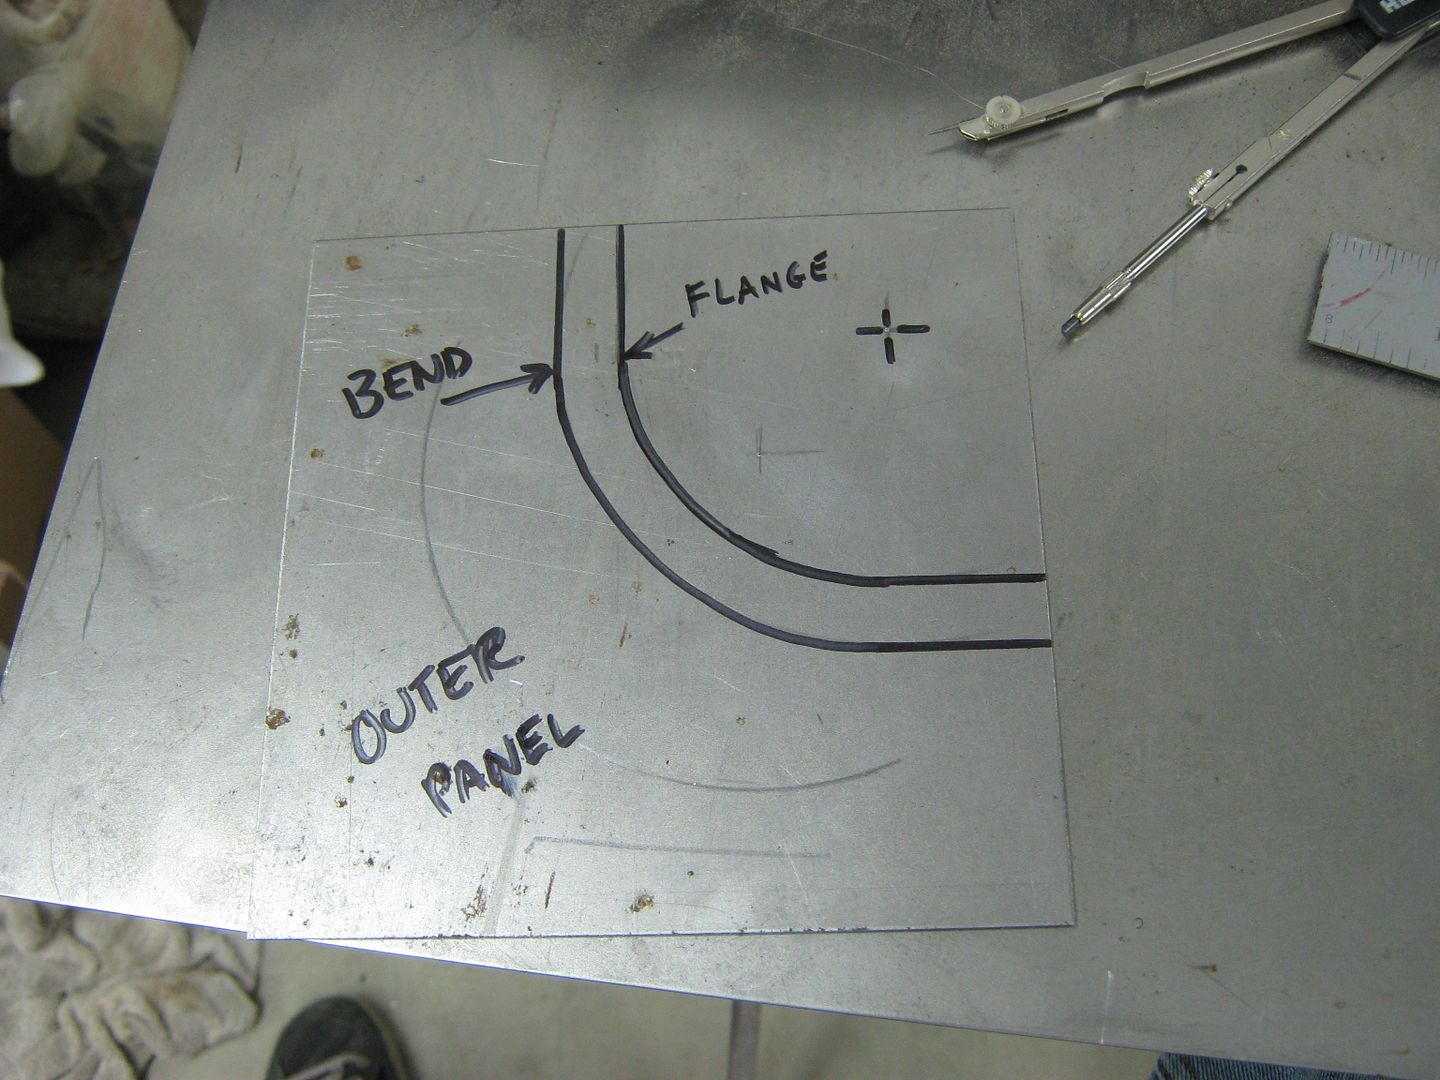
Now repeat for the other piece.


Picture044-1.jpg


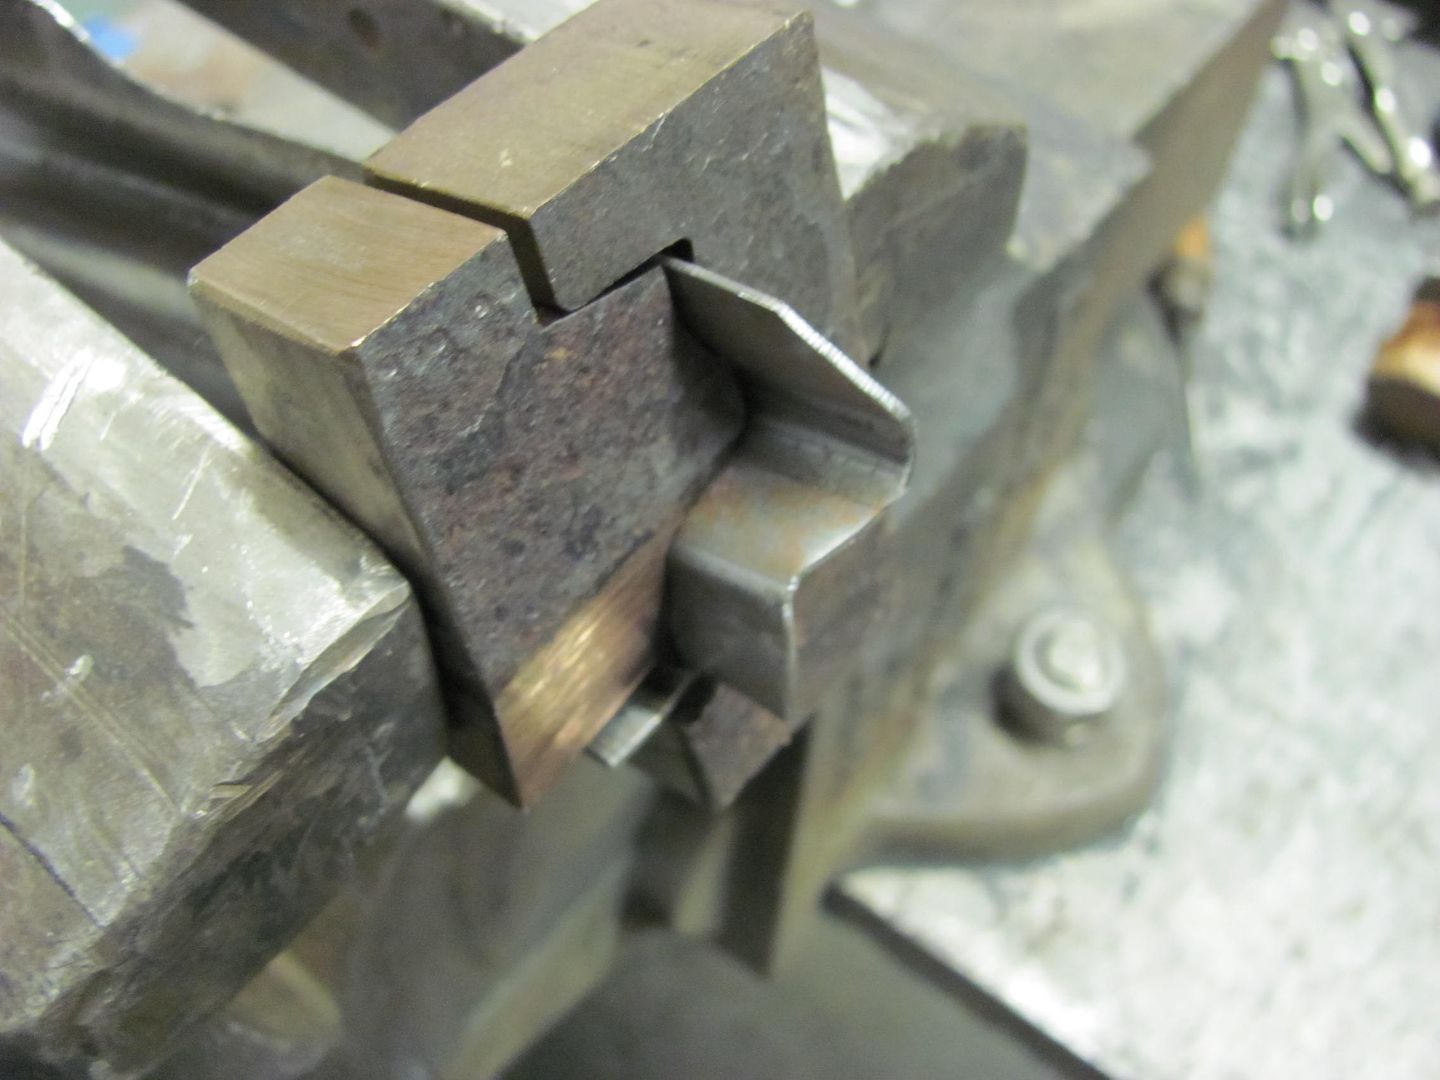
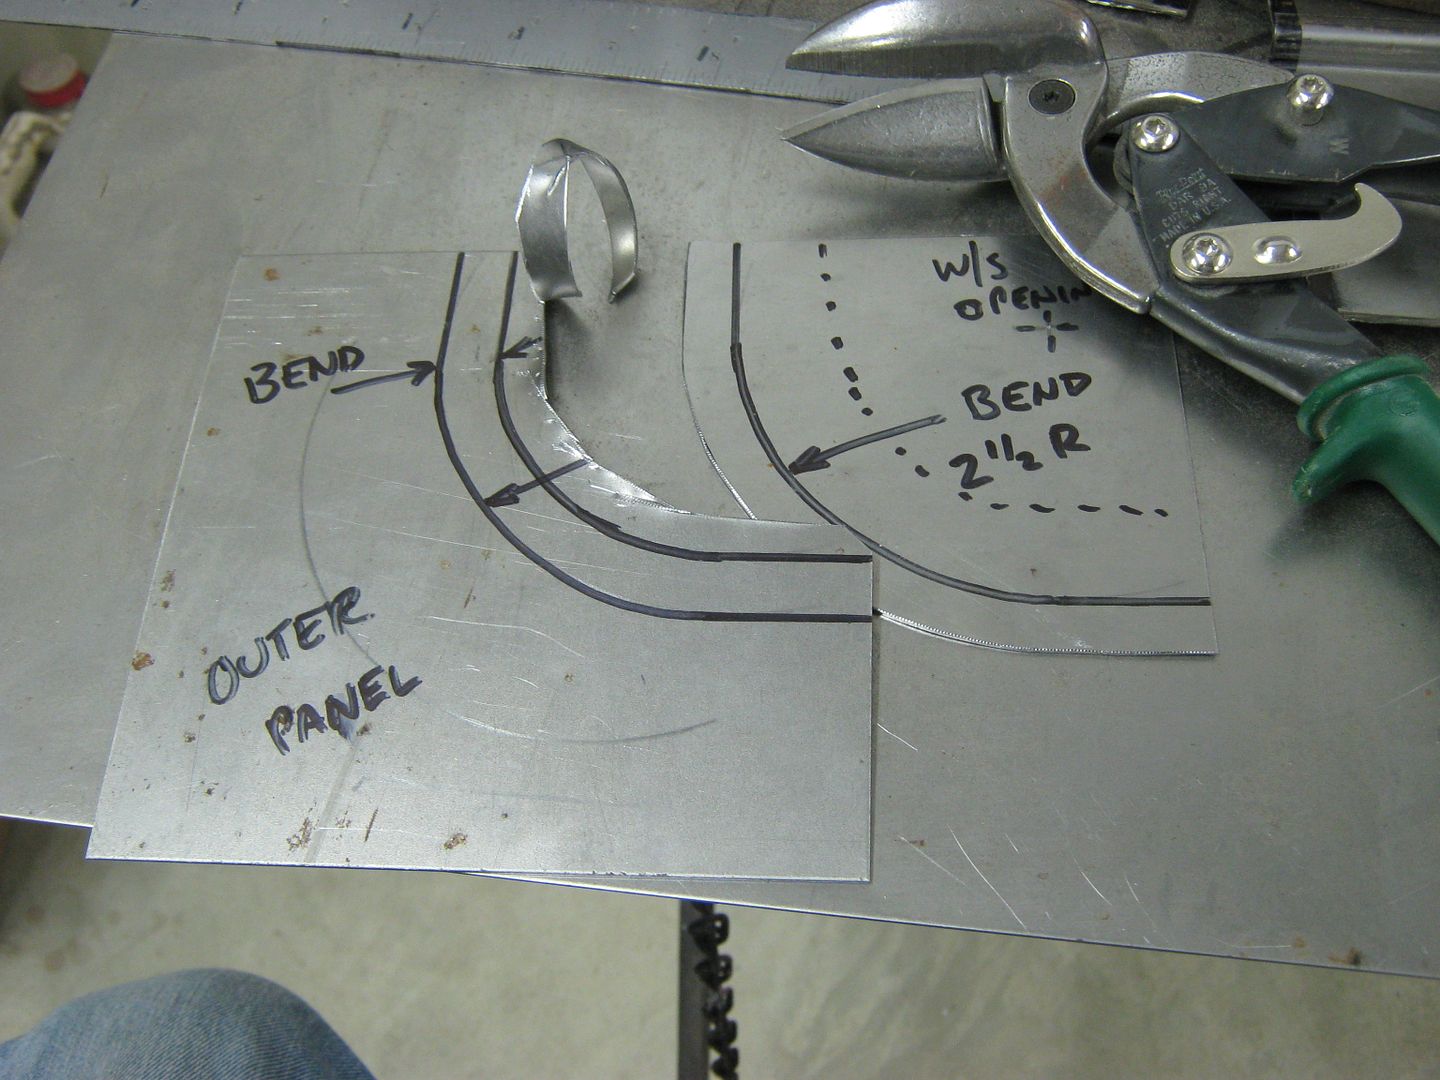
When trimming the excess of an inside corner with tin snips, you'll find multiple cuts will help you to get rid of the bulk so the final cut is pretty accurate.


Picture045-2.jpg


Picture046-2.jpg


Picture047-2.jpg


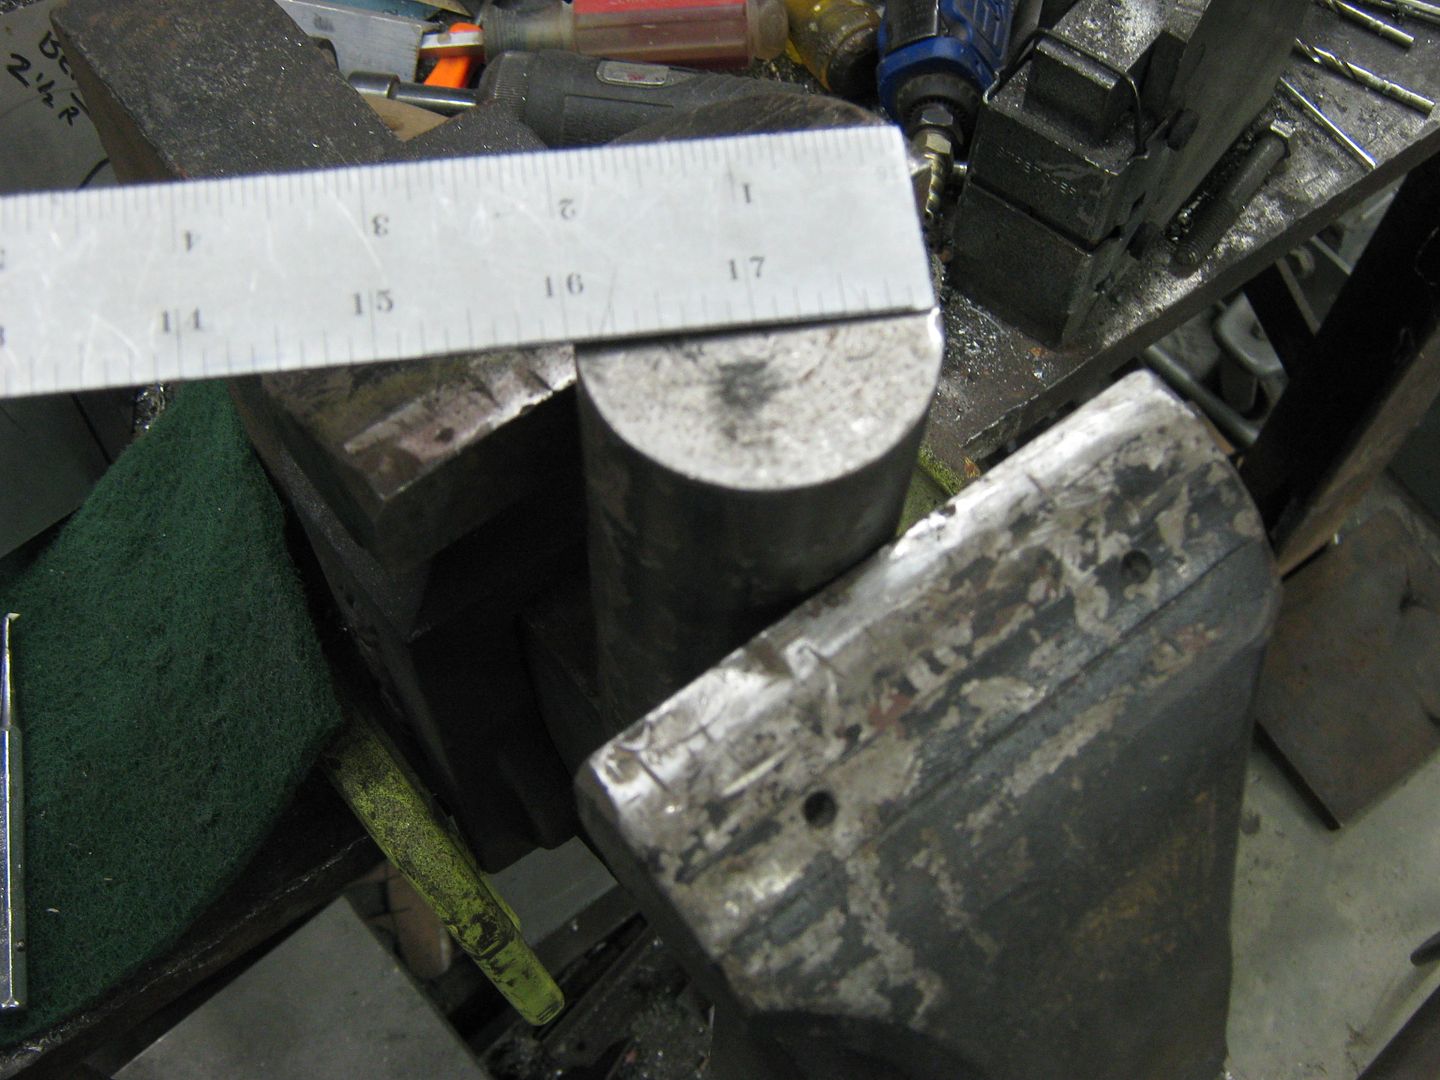
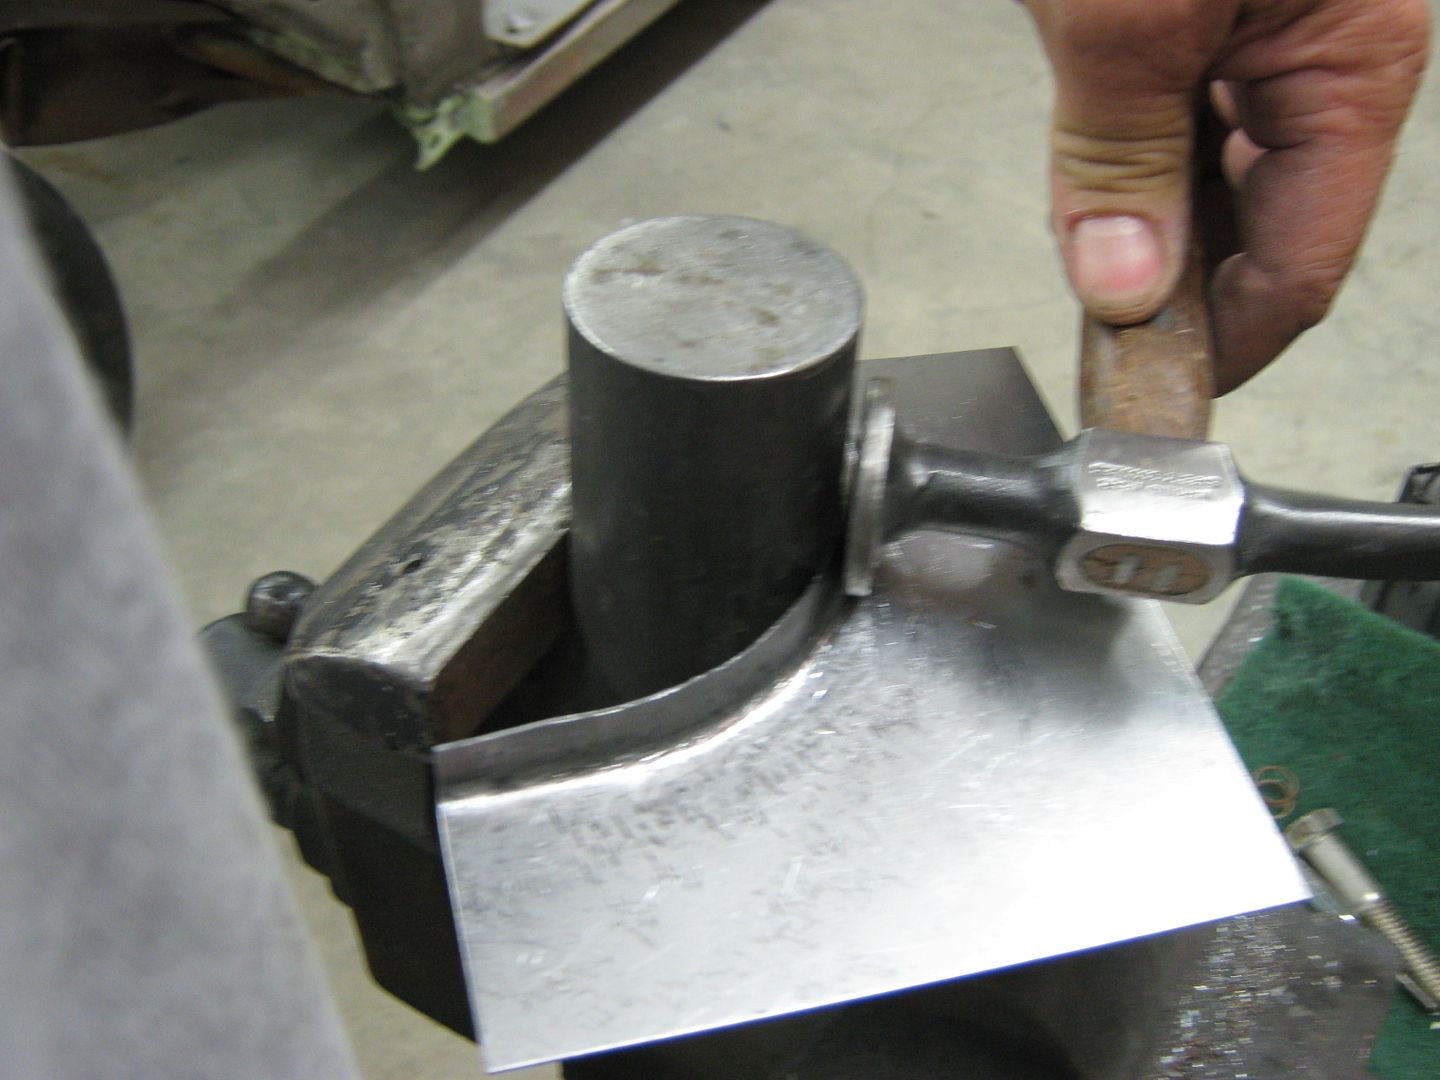
Here's my 2" dia anvil. As technical as this stuff is you can use whatever is handy and works.


Picture048.jpg


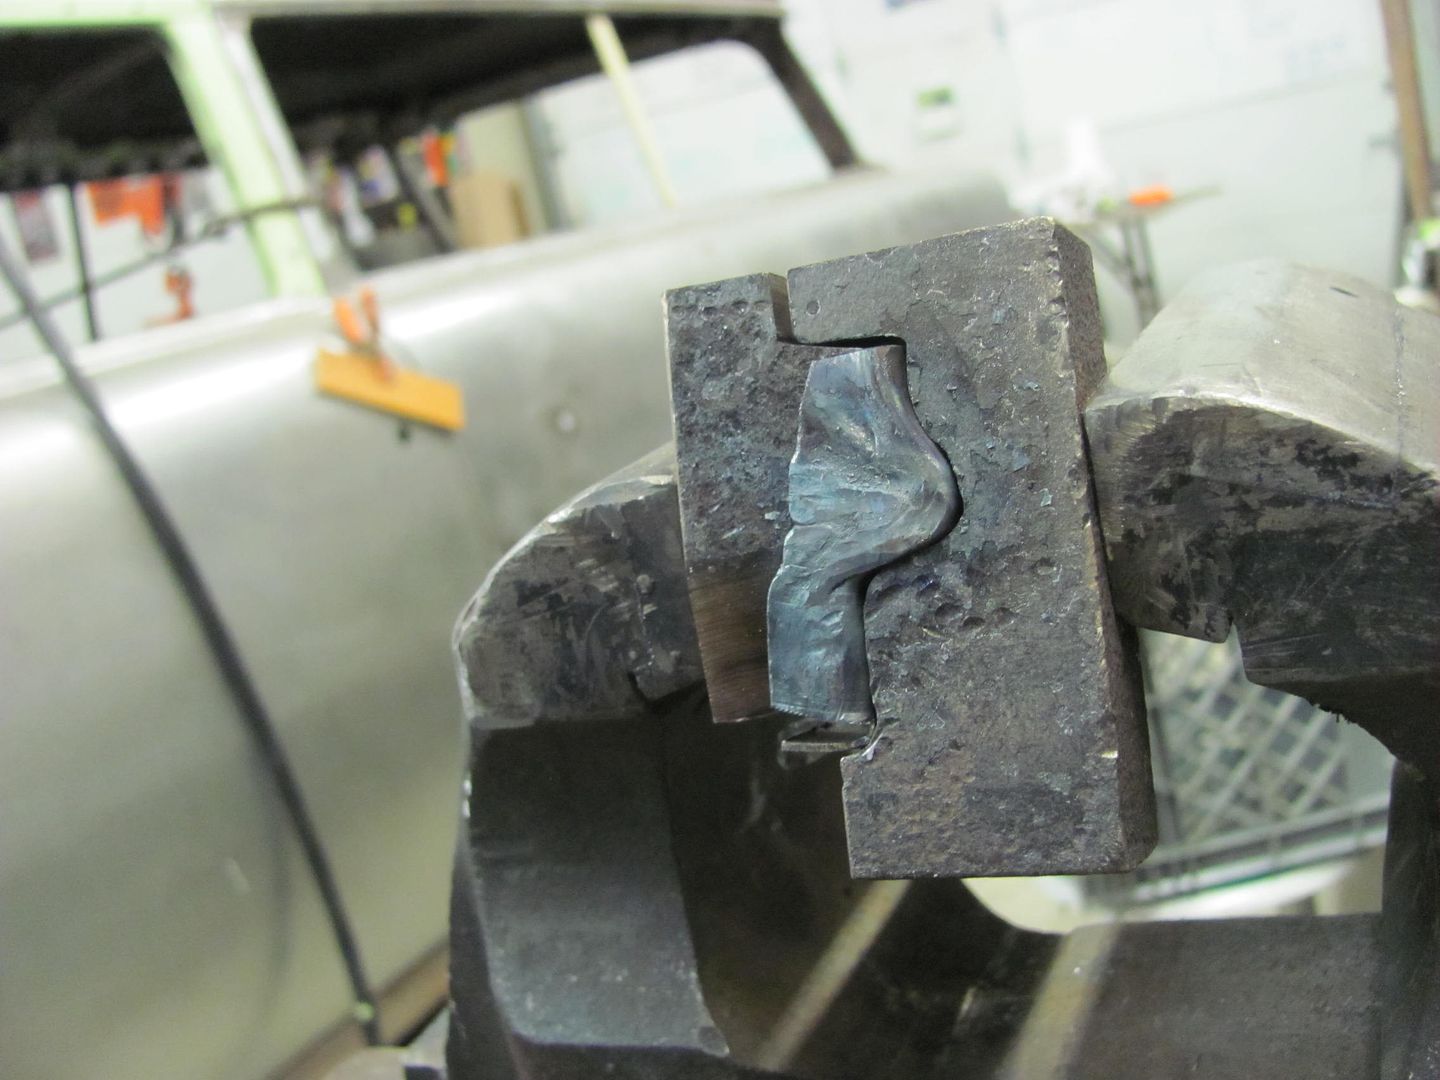
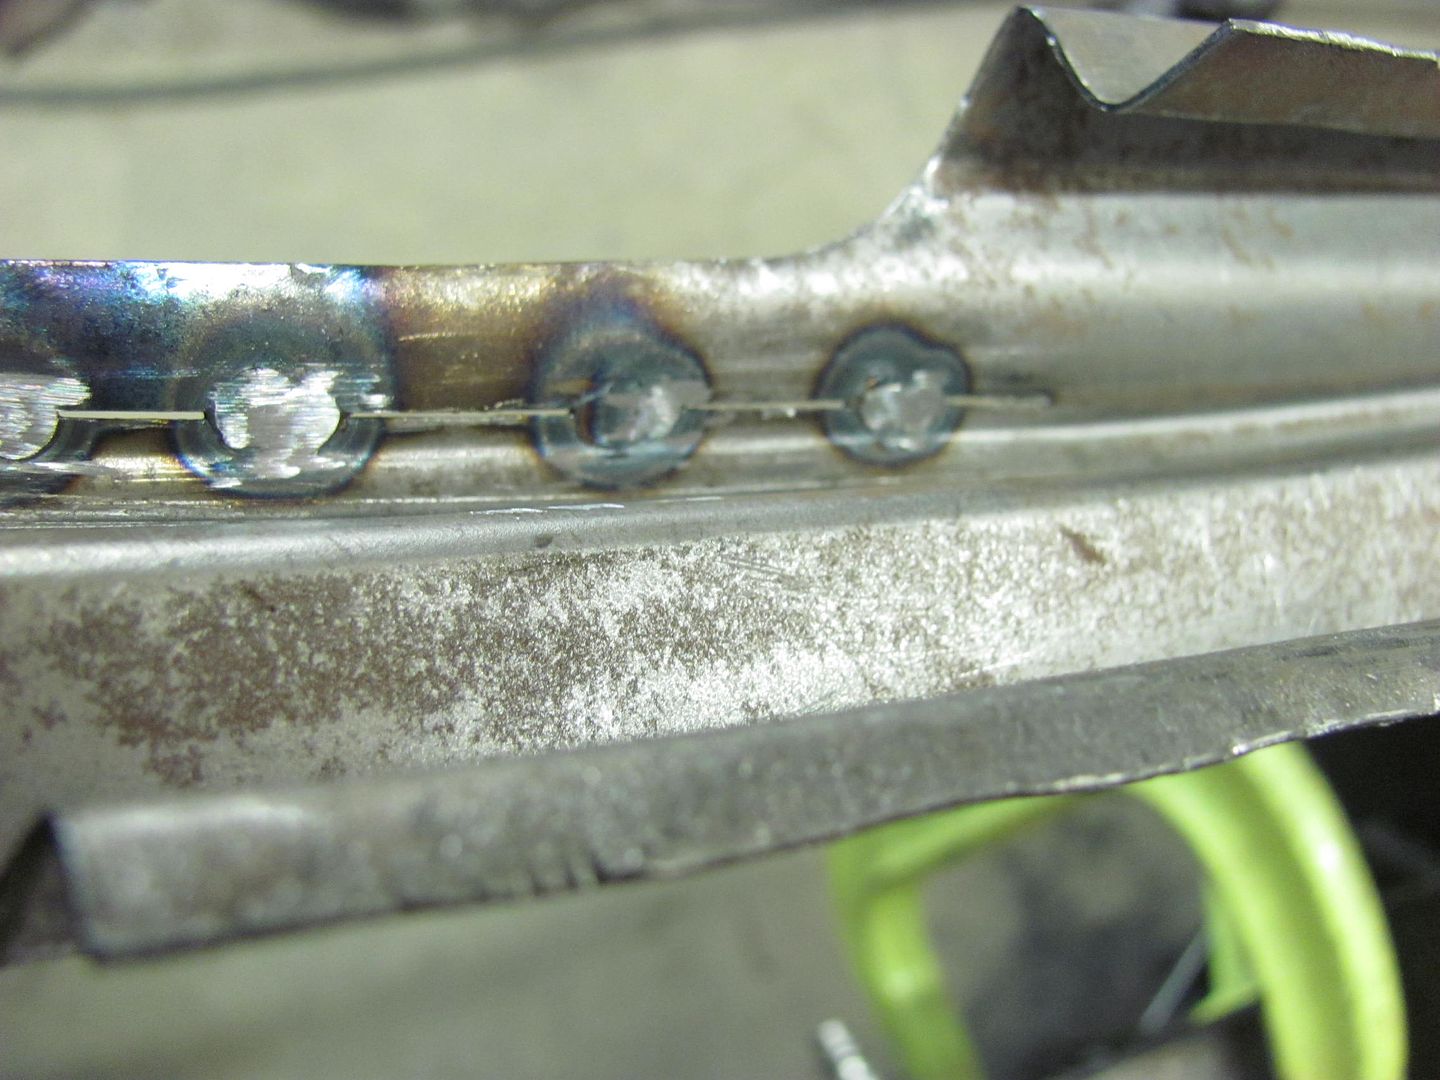
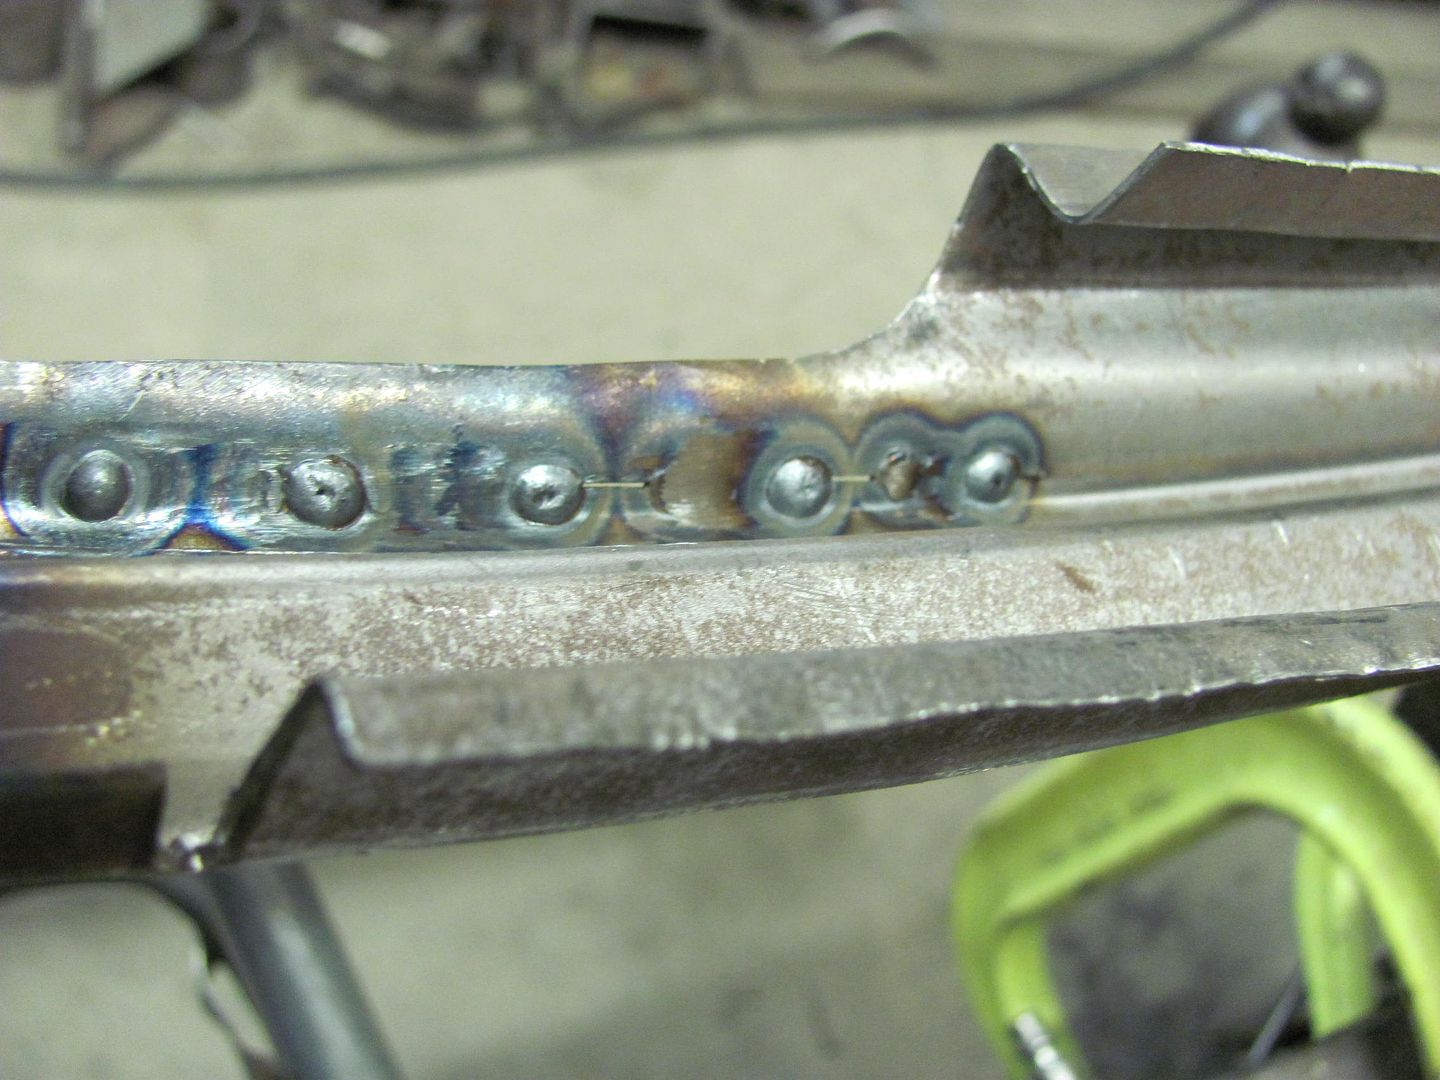
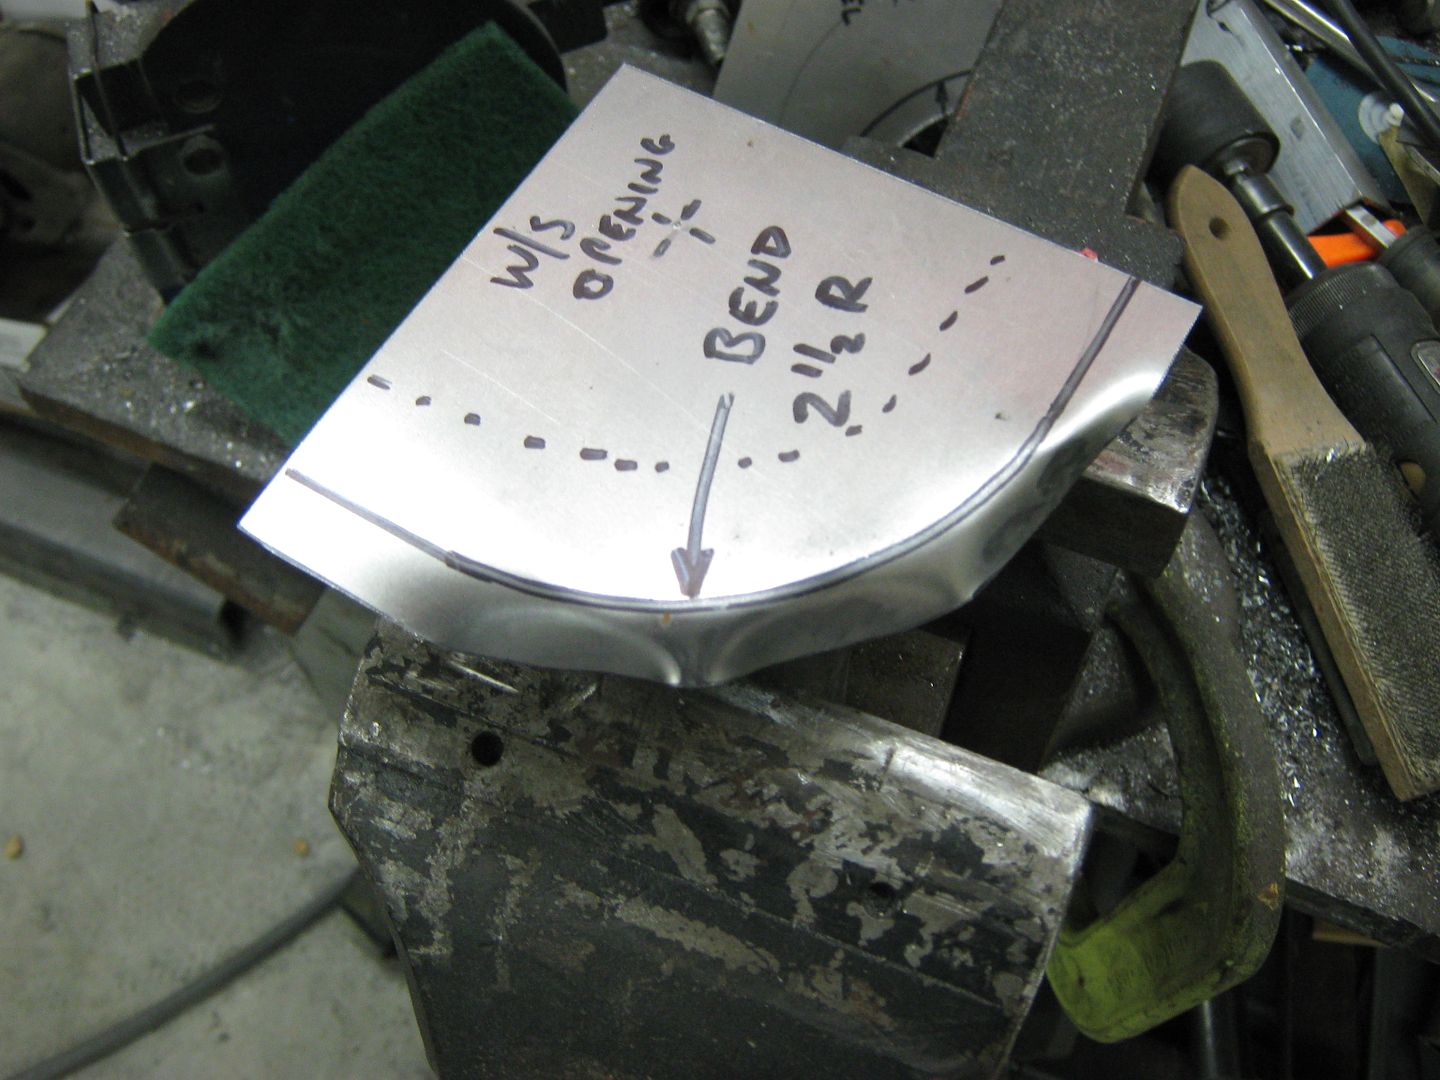
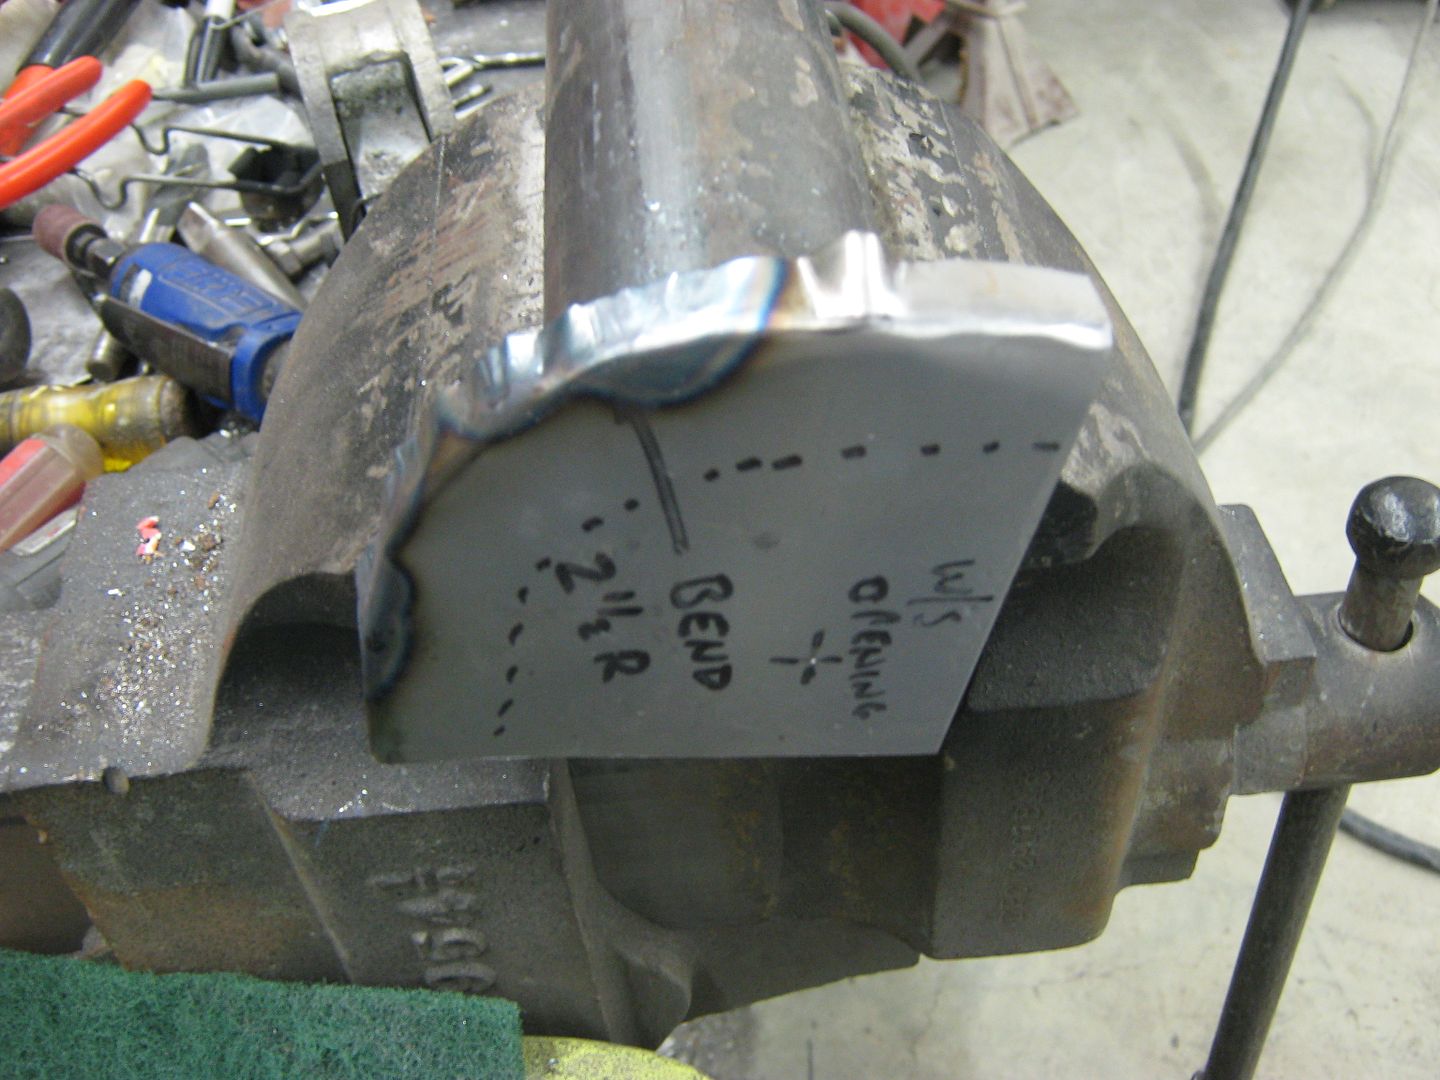
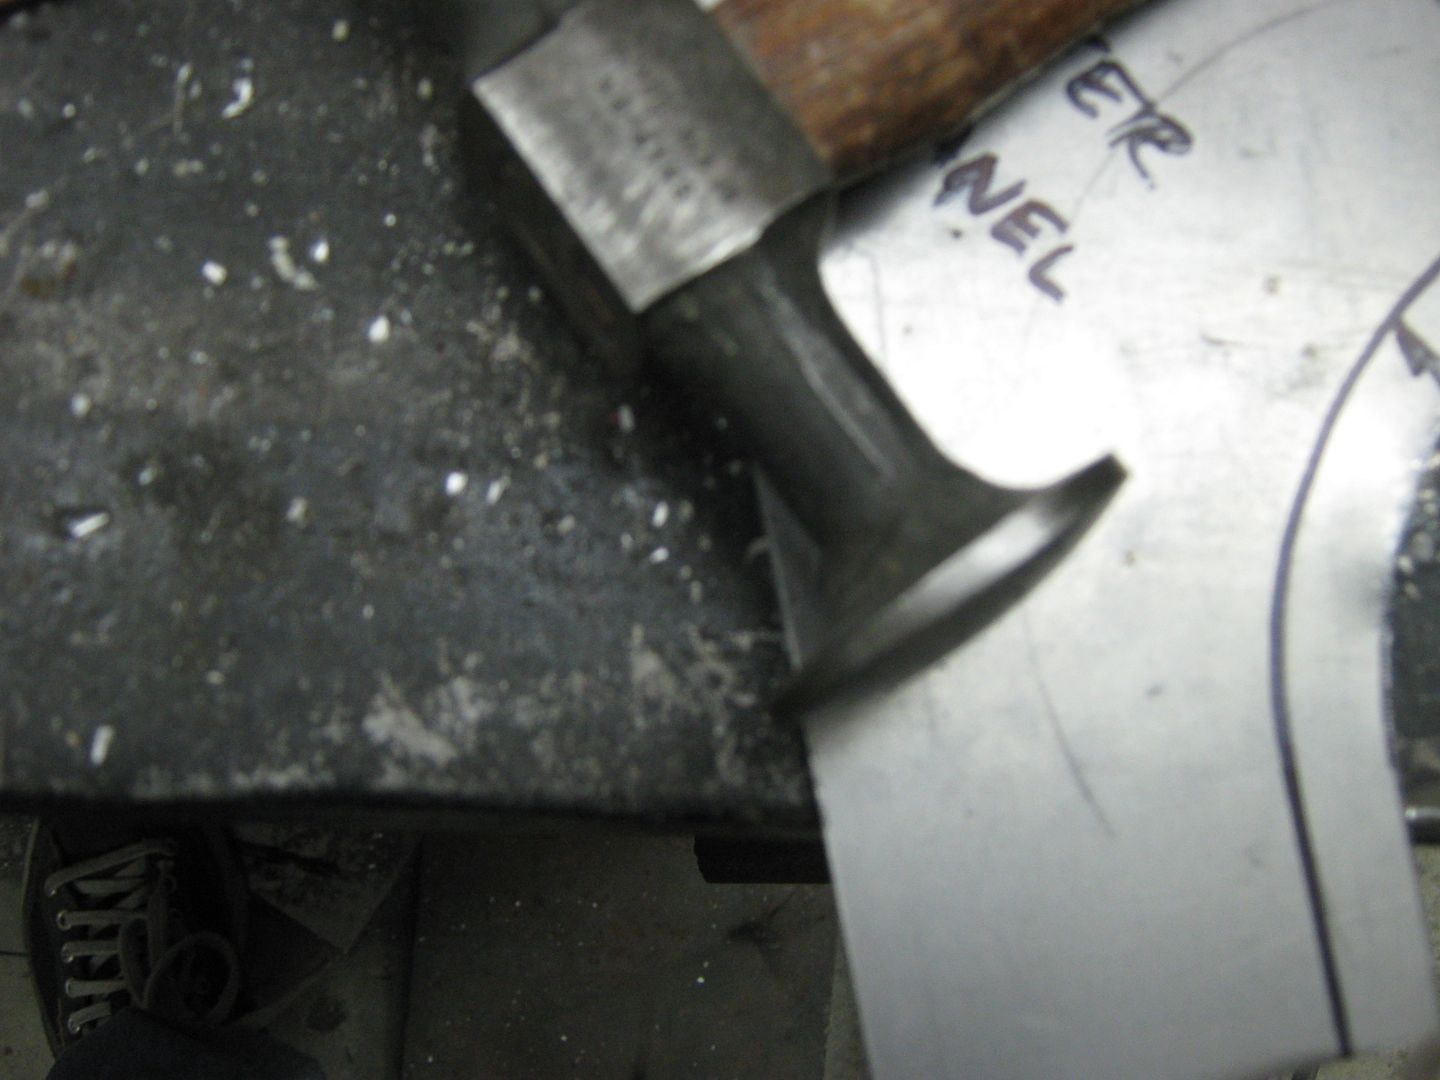
I keep the line up top where I can see what's going on. The first tap with the hammer will show if you are off from your bend line, as you can see. This will show where you are so you can readjust your placement with the next tap, if needed.


Picture049-1.jpg


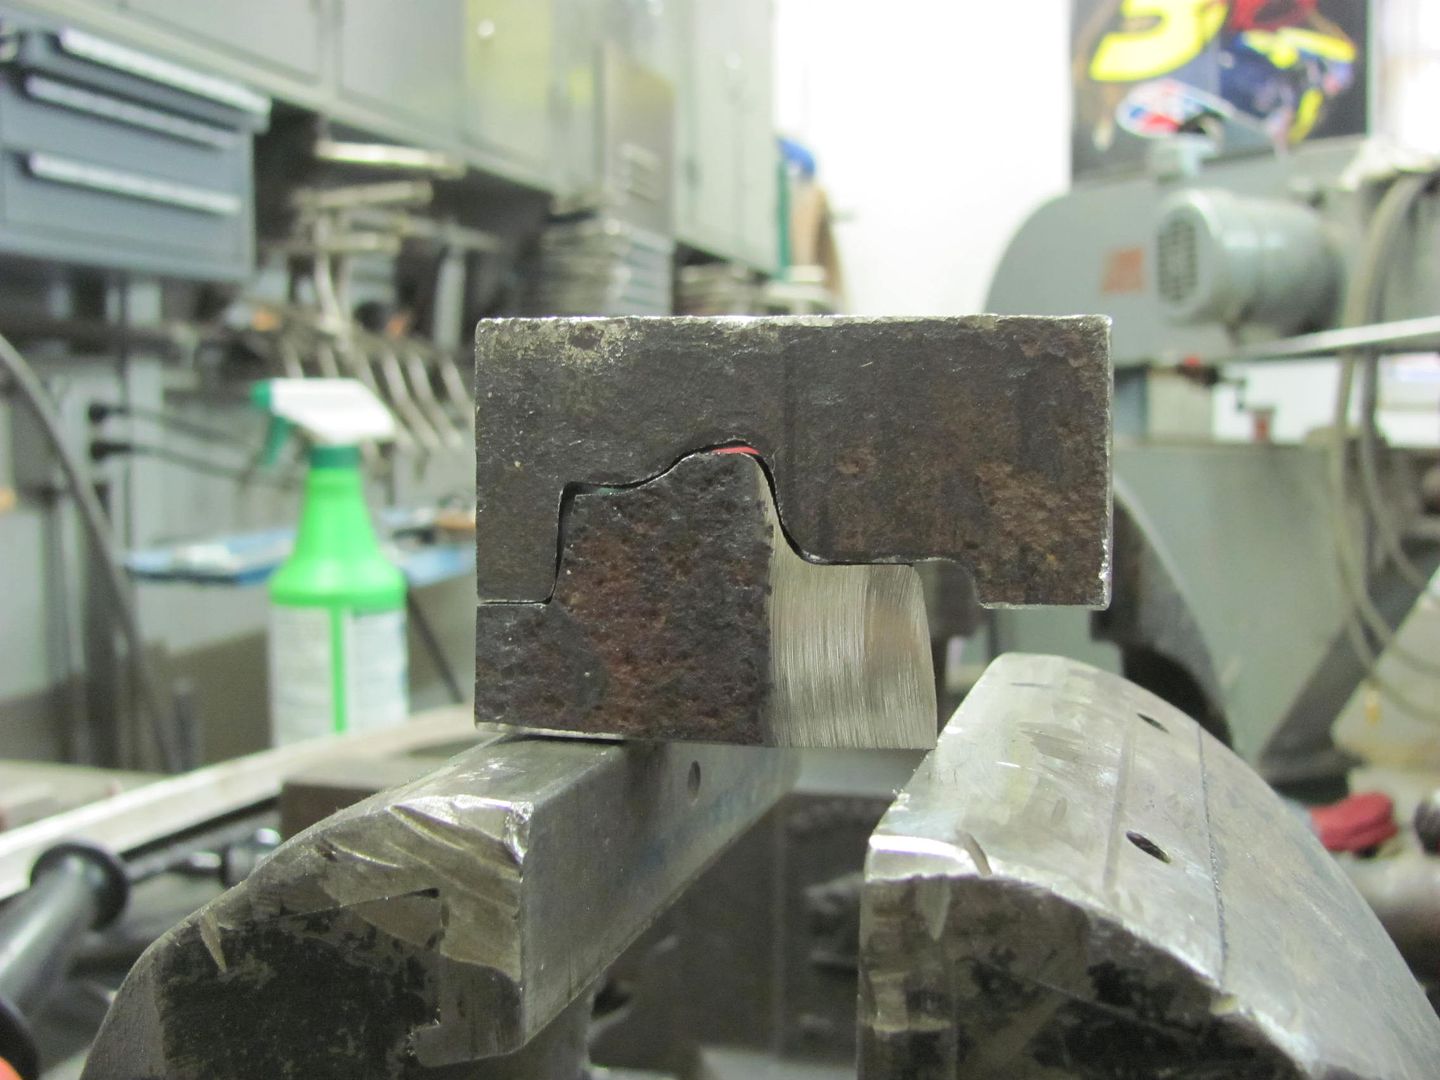
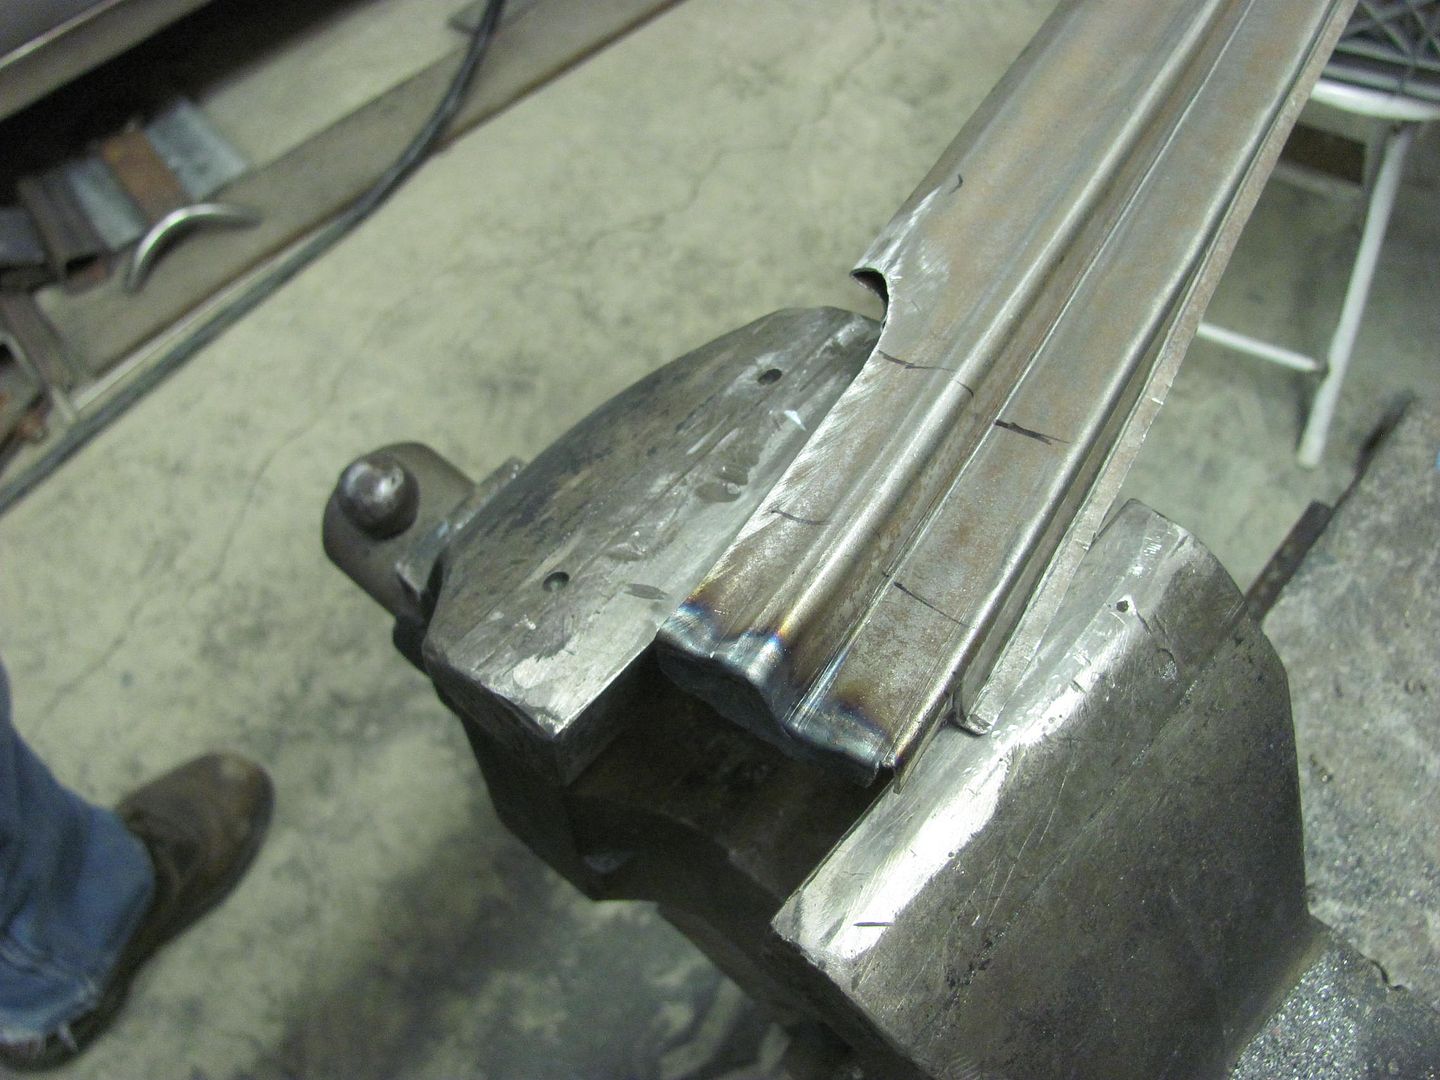
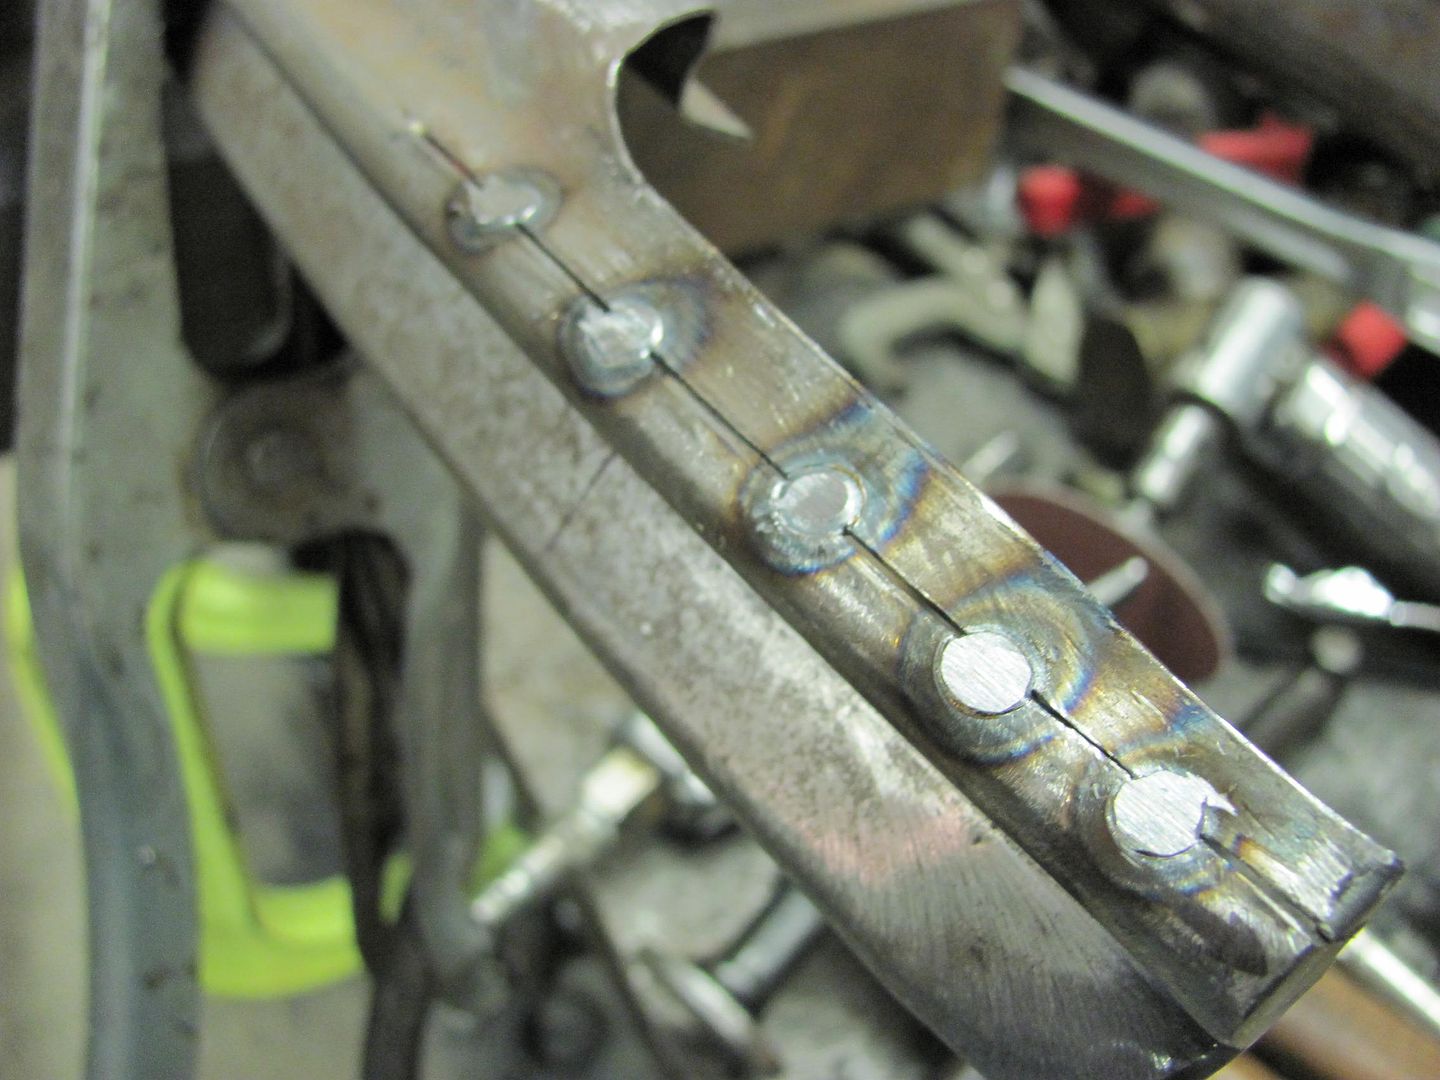
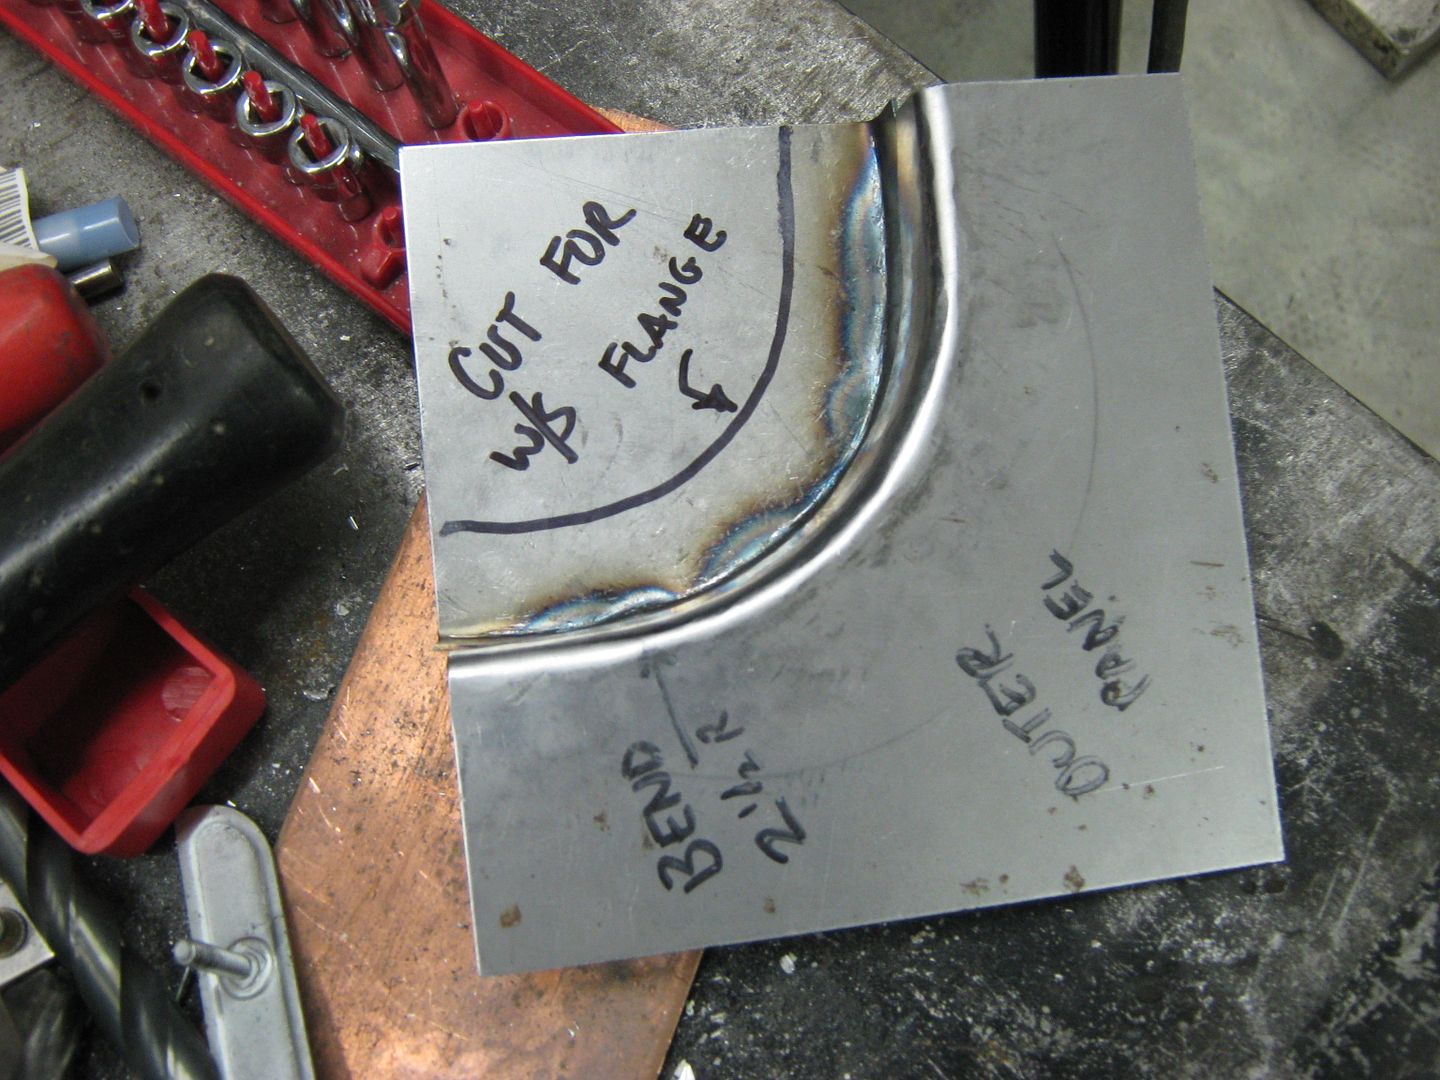
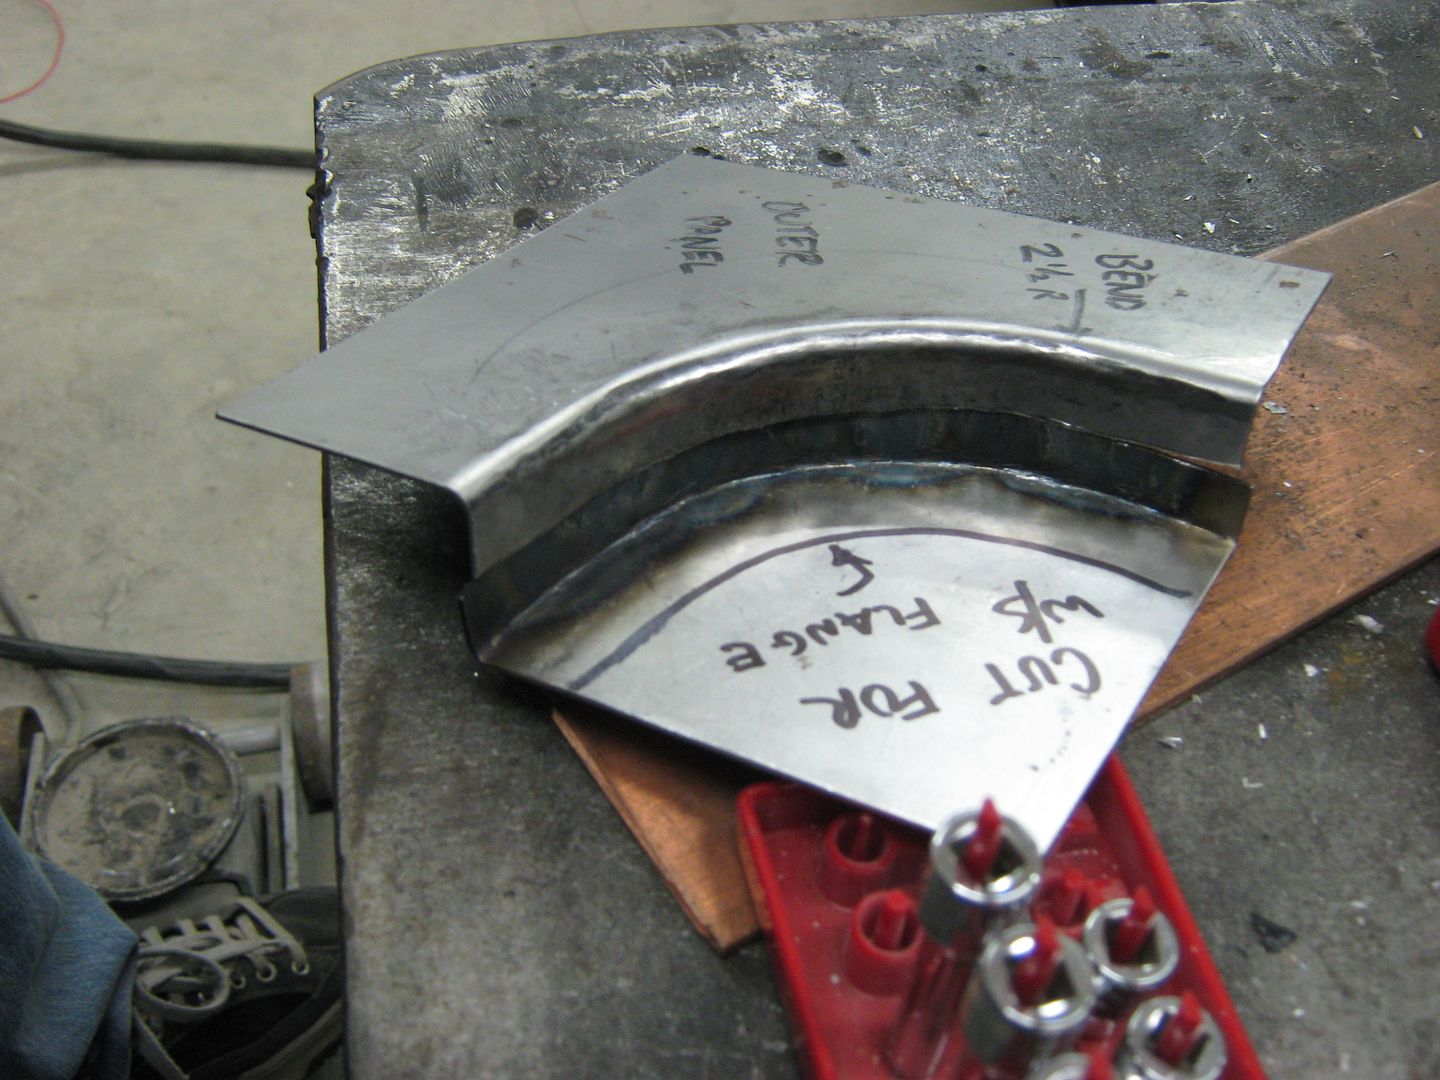
Looking at the above picture, you can see that the length of our bend line is shorter than the outer perimeter of the flange it is going to form. In essence, once you try to make a 90 degree bend, this excess metal will have a tendency to push the outer corners up.


Picture050-1.jpg


Picture051-1.jpg


Picture052.jpg


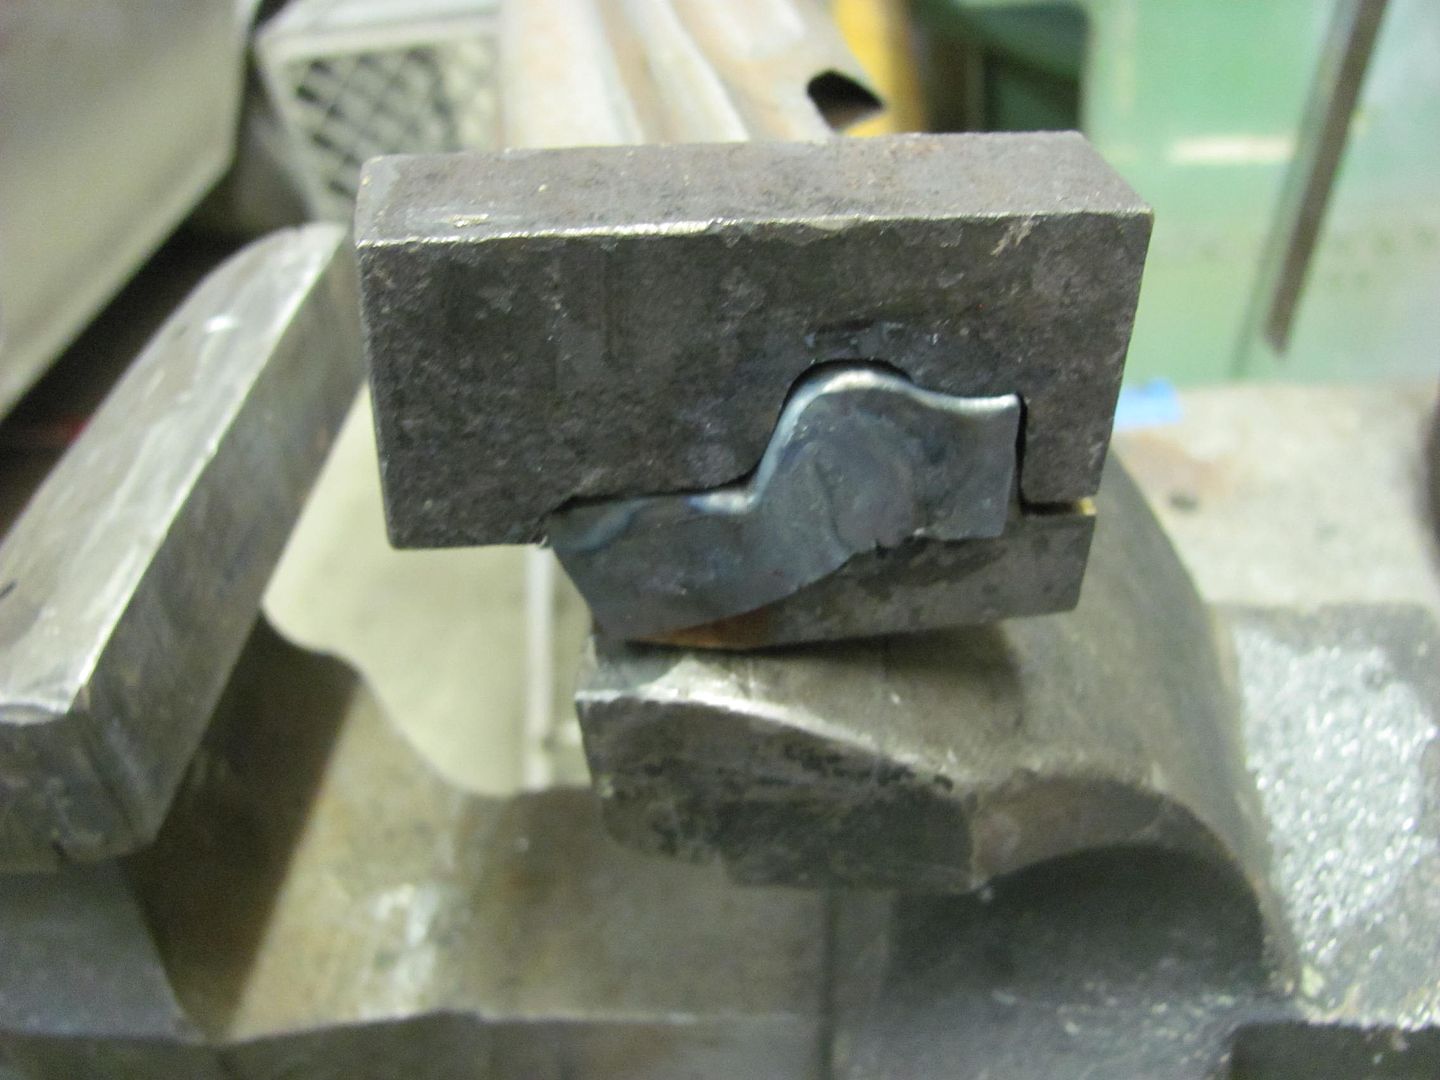
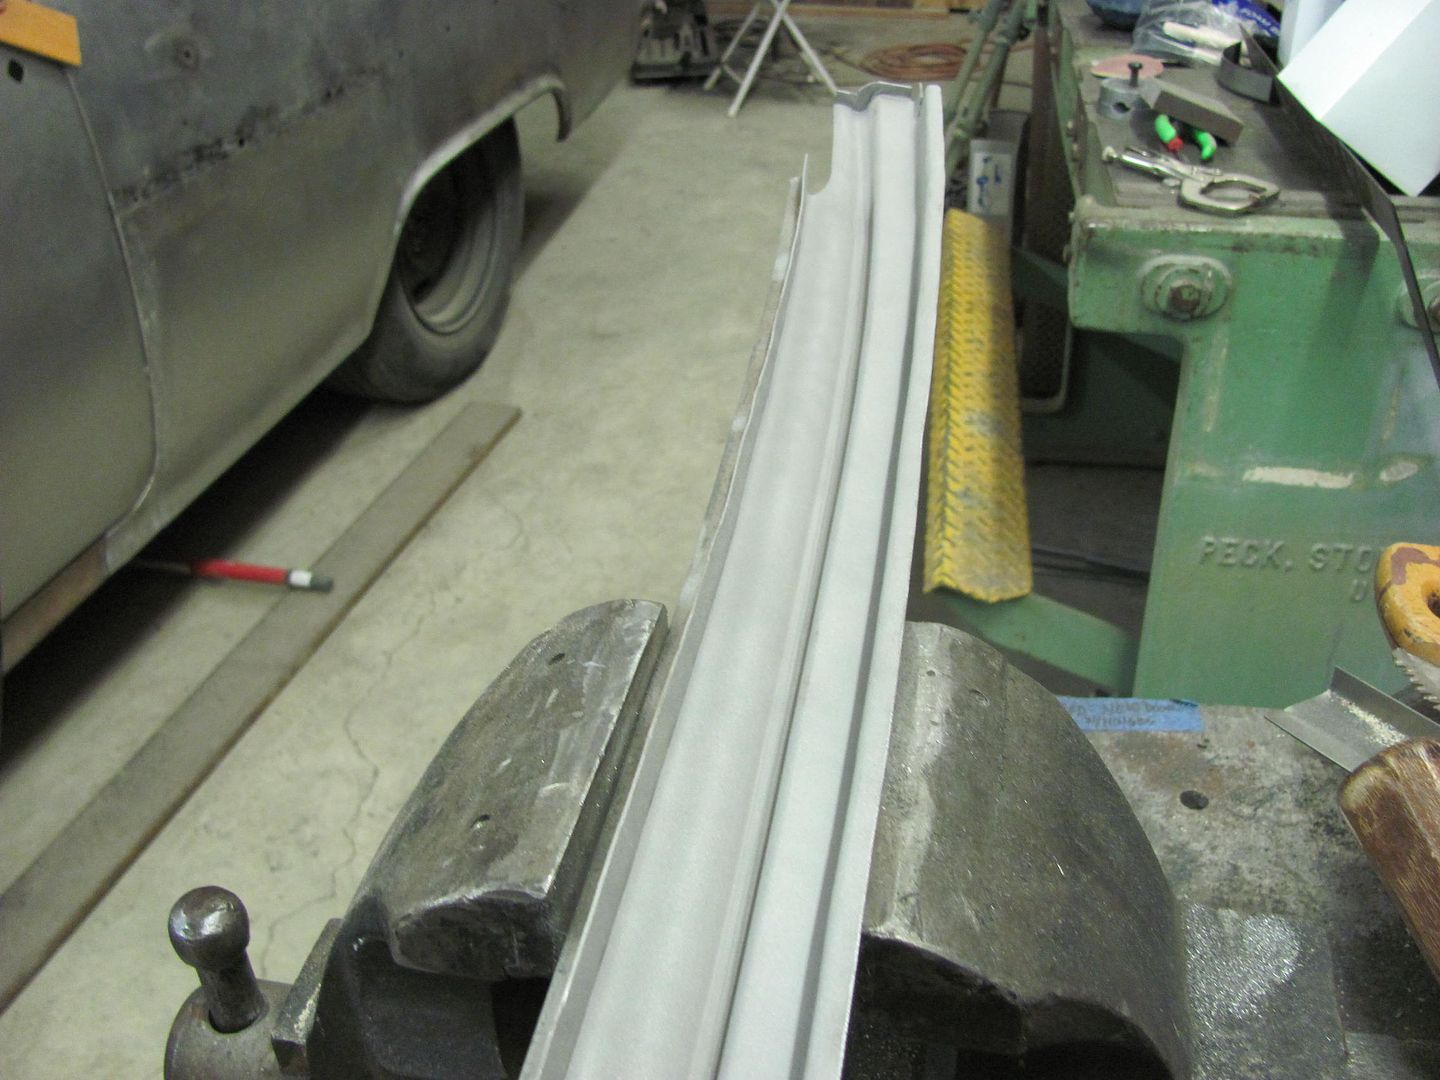
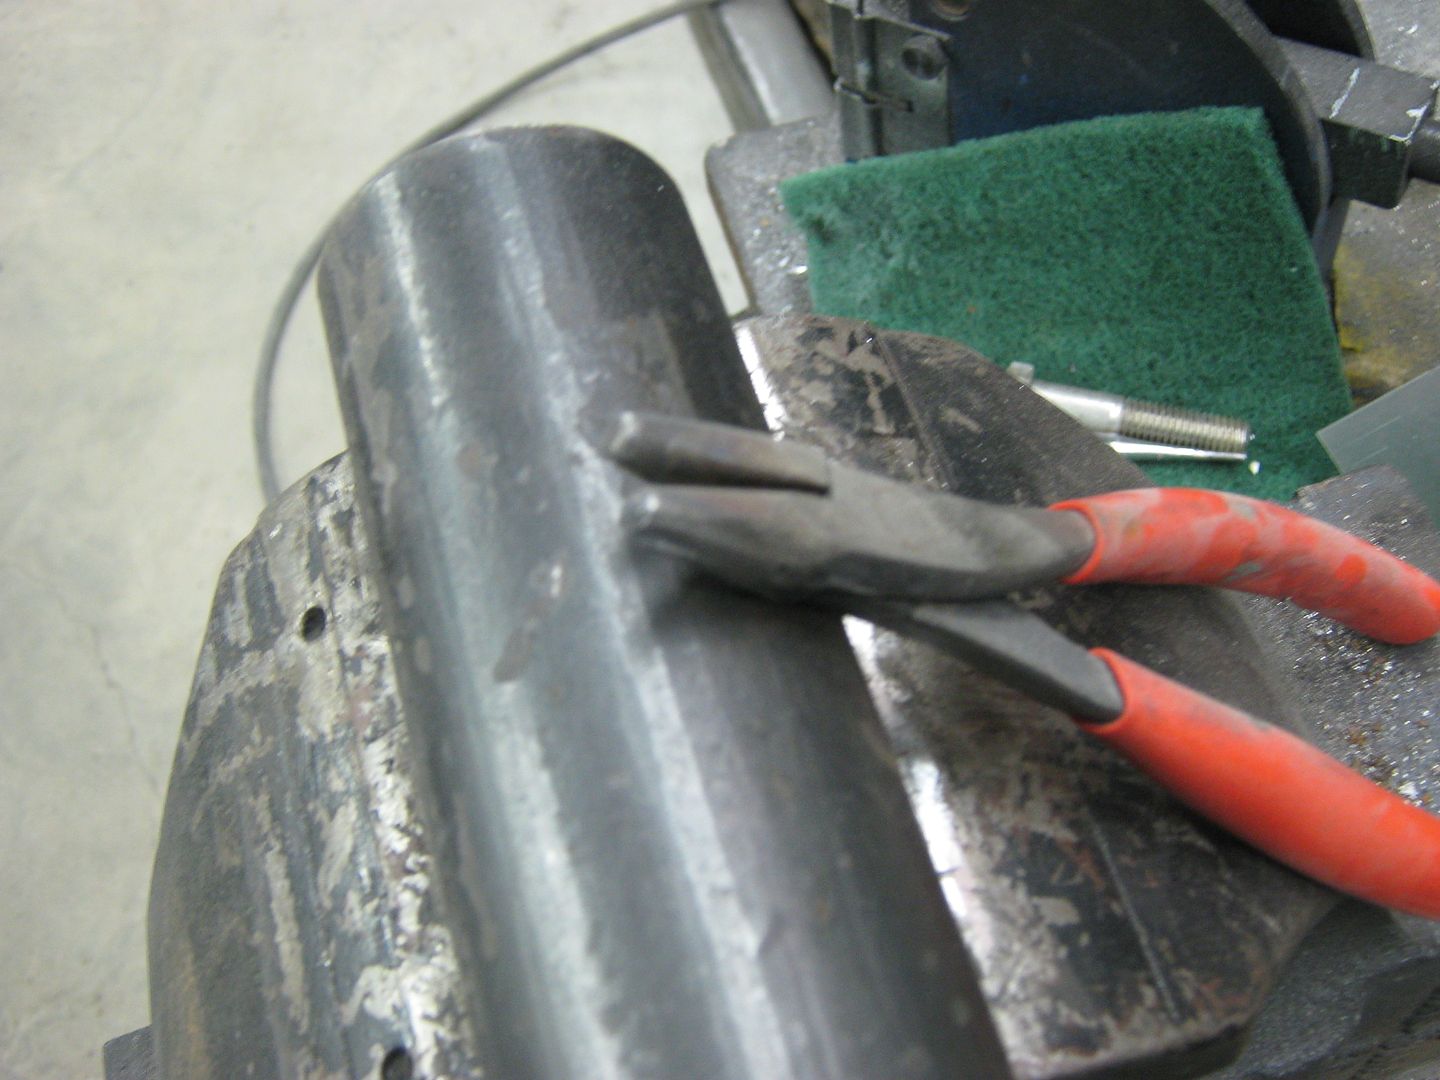
....so we'll need some shrinking here to bring things flat again. We'll need what's called a "tucking tool", and I have made one here out of a large pair of needle nose I never used for anything else. Please note that all sharp edges of the pliers have been rounded off to prevent cutting the metal.


Picture053-1.jpg


Picture054.jpg


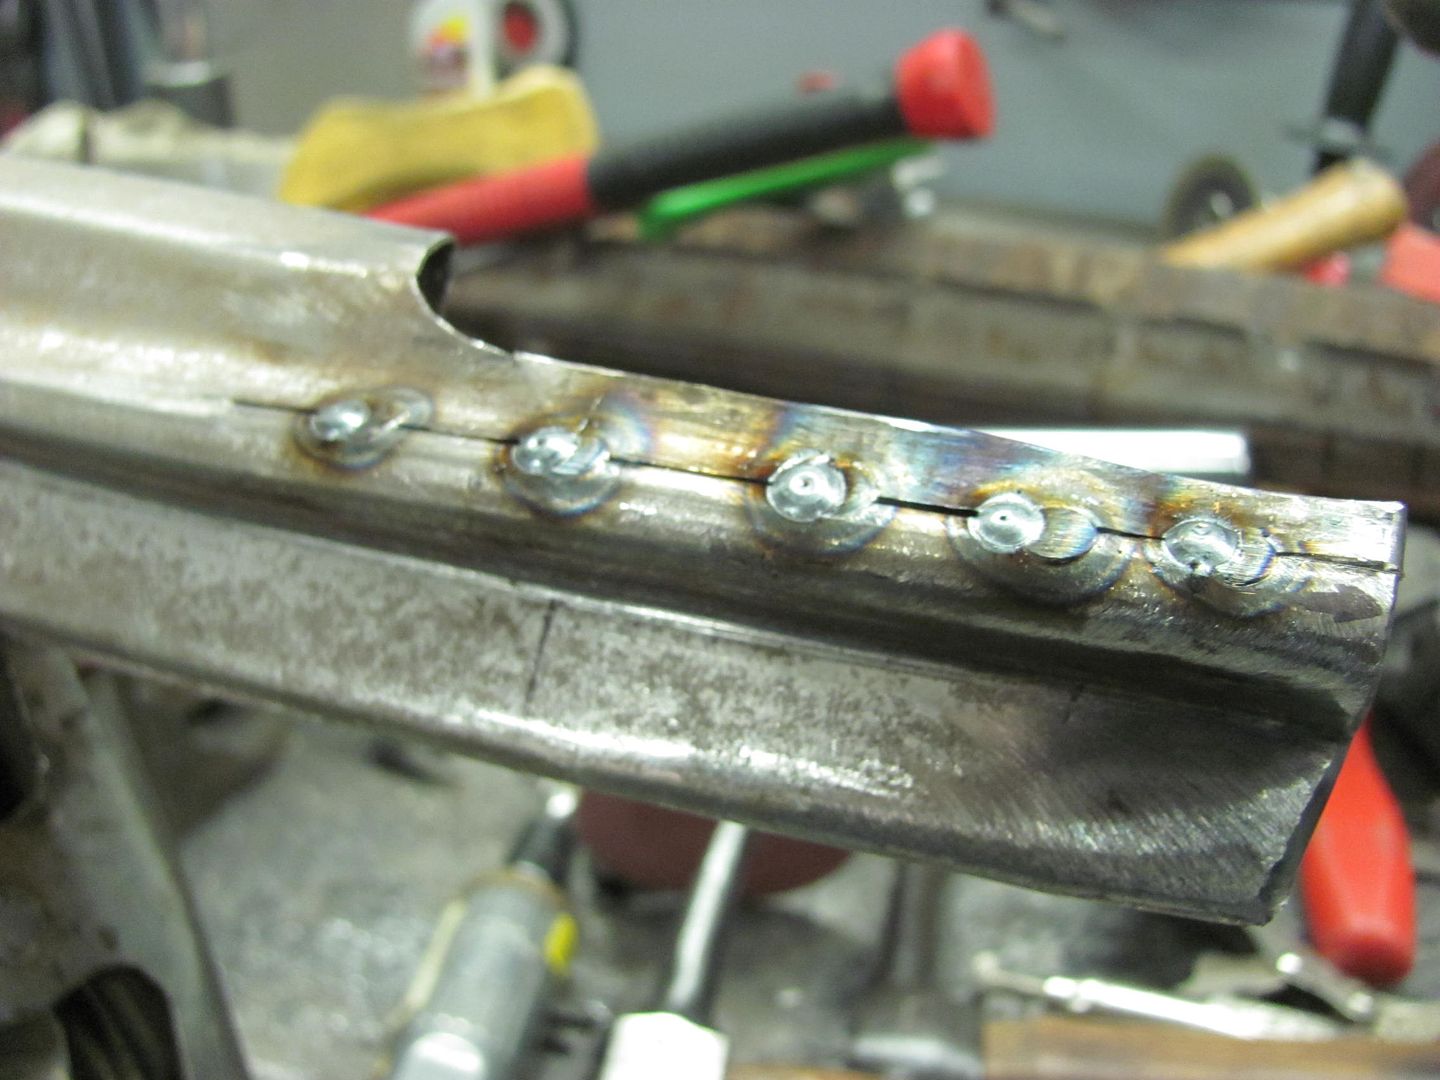
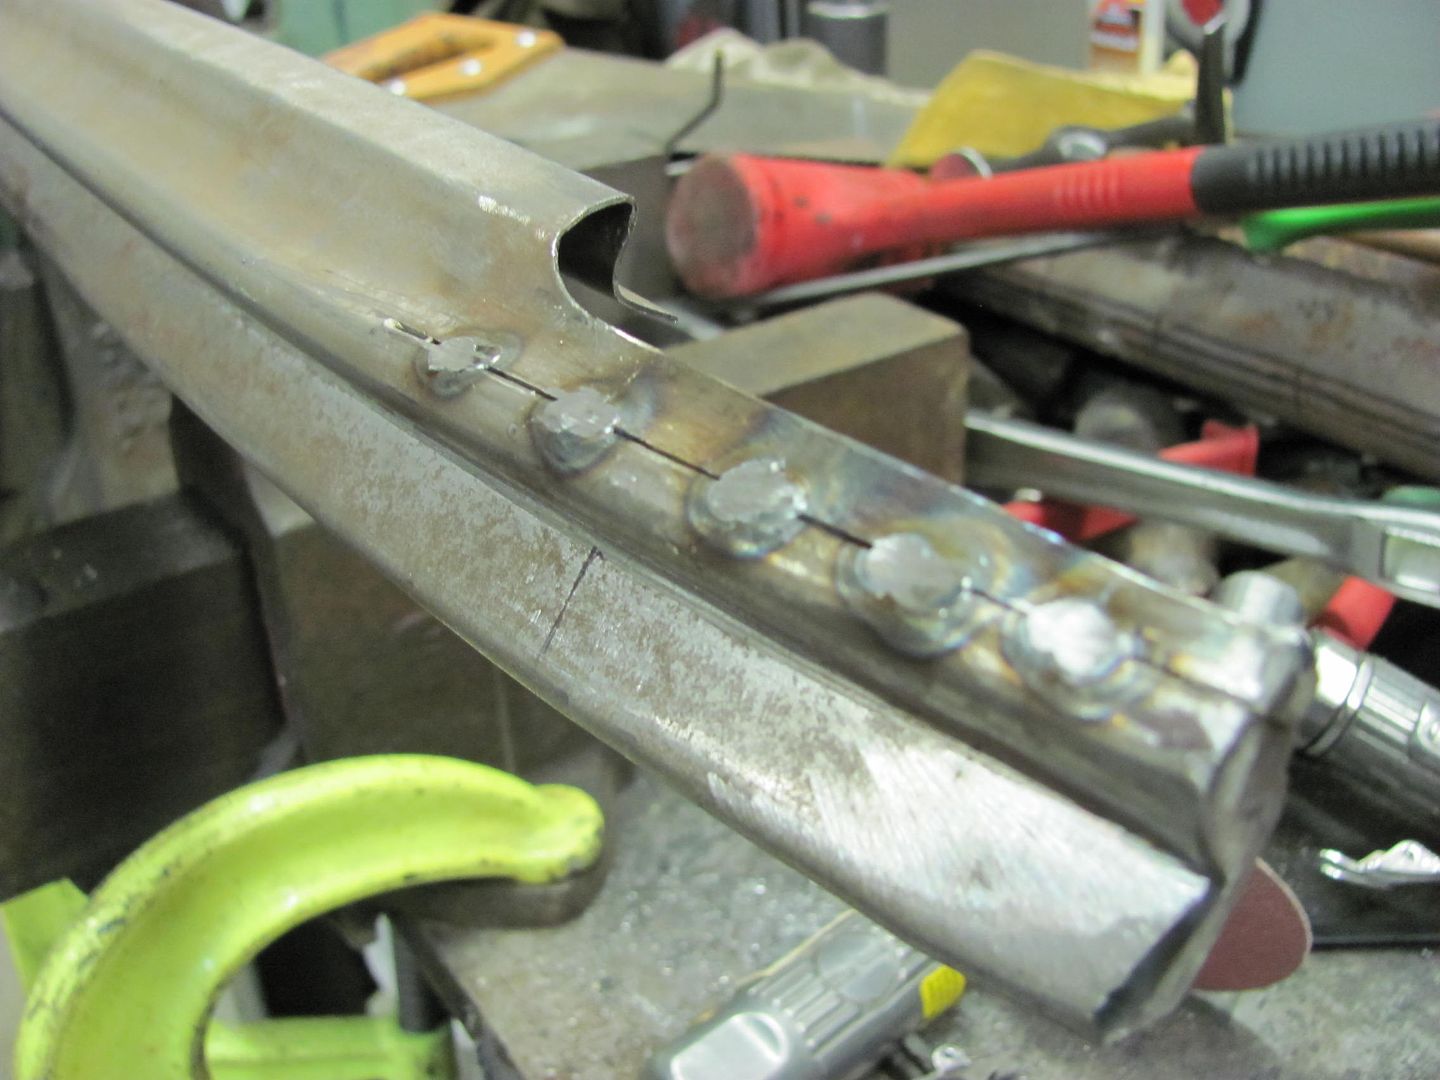
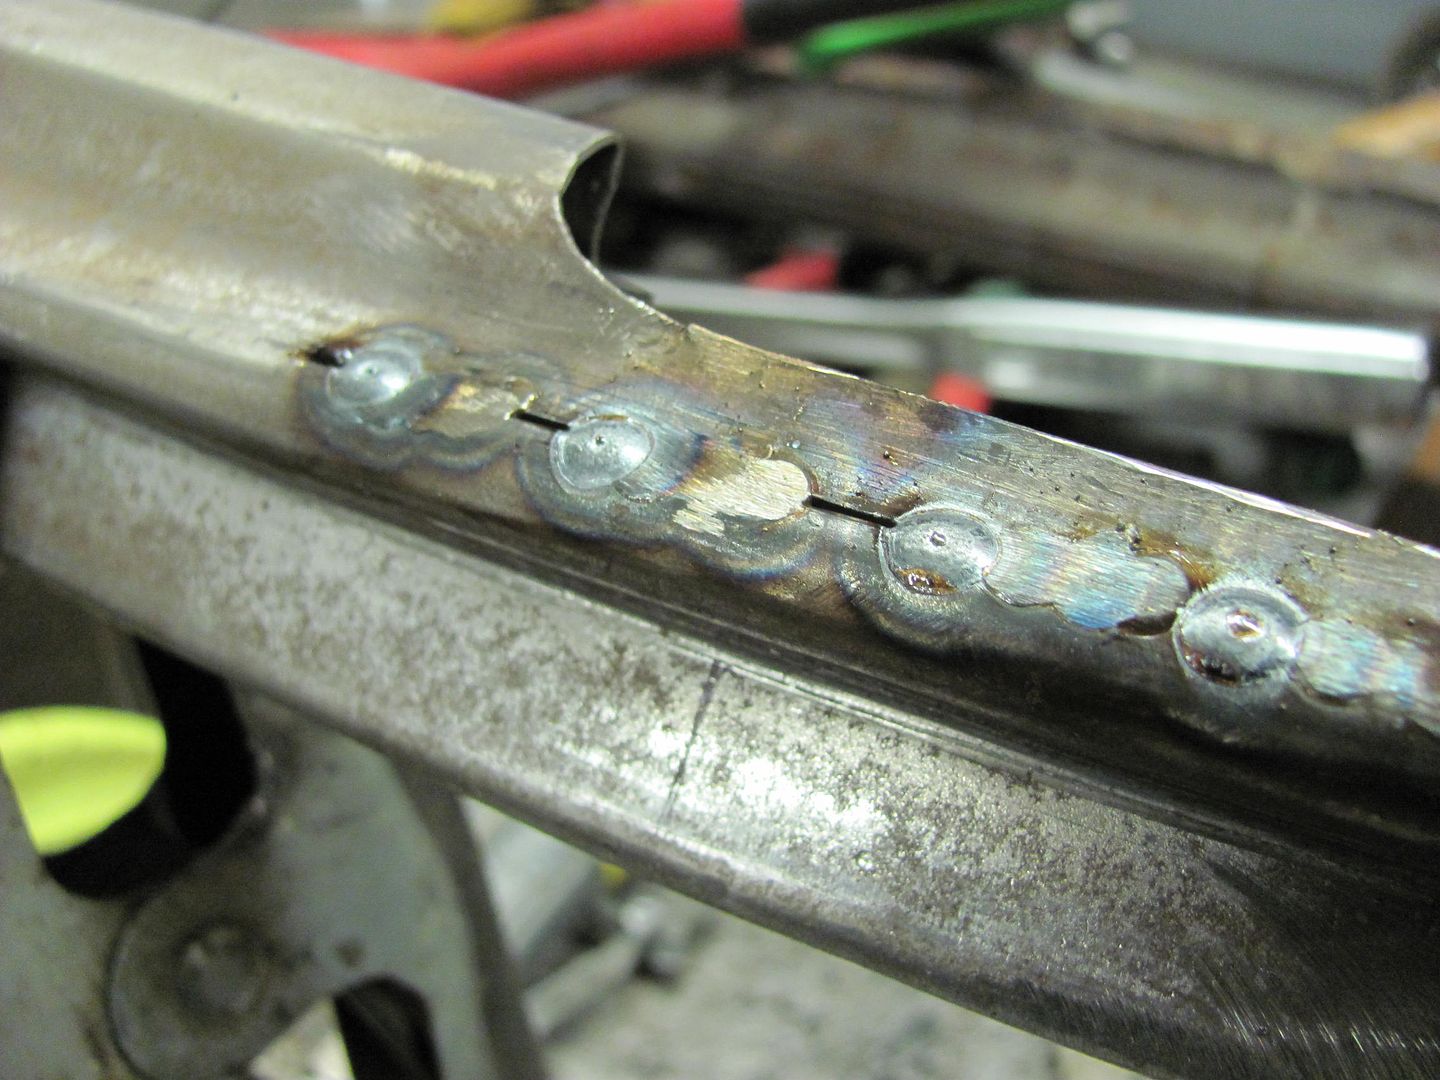
After using the tool to make some "tucks", the object is to heat up the high spot of the tucks, place the two lower edges of the tucks so they are resting against your rounded "anvil", and using a flat hammer, tap the high spot back into itself (flatten it out) repeat as necessary until the panel flange is bent to the degree you want, and the panel is flat across.


Picture057.jpg


If you're working by yourself, be sure to have a good, secure means to hold your heating device, like a BFG tire.


Picture058.jpg


Picture060.jpg


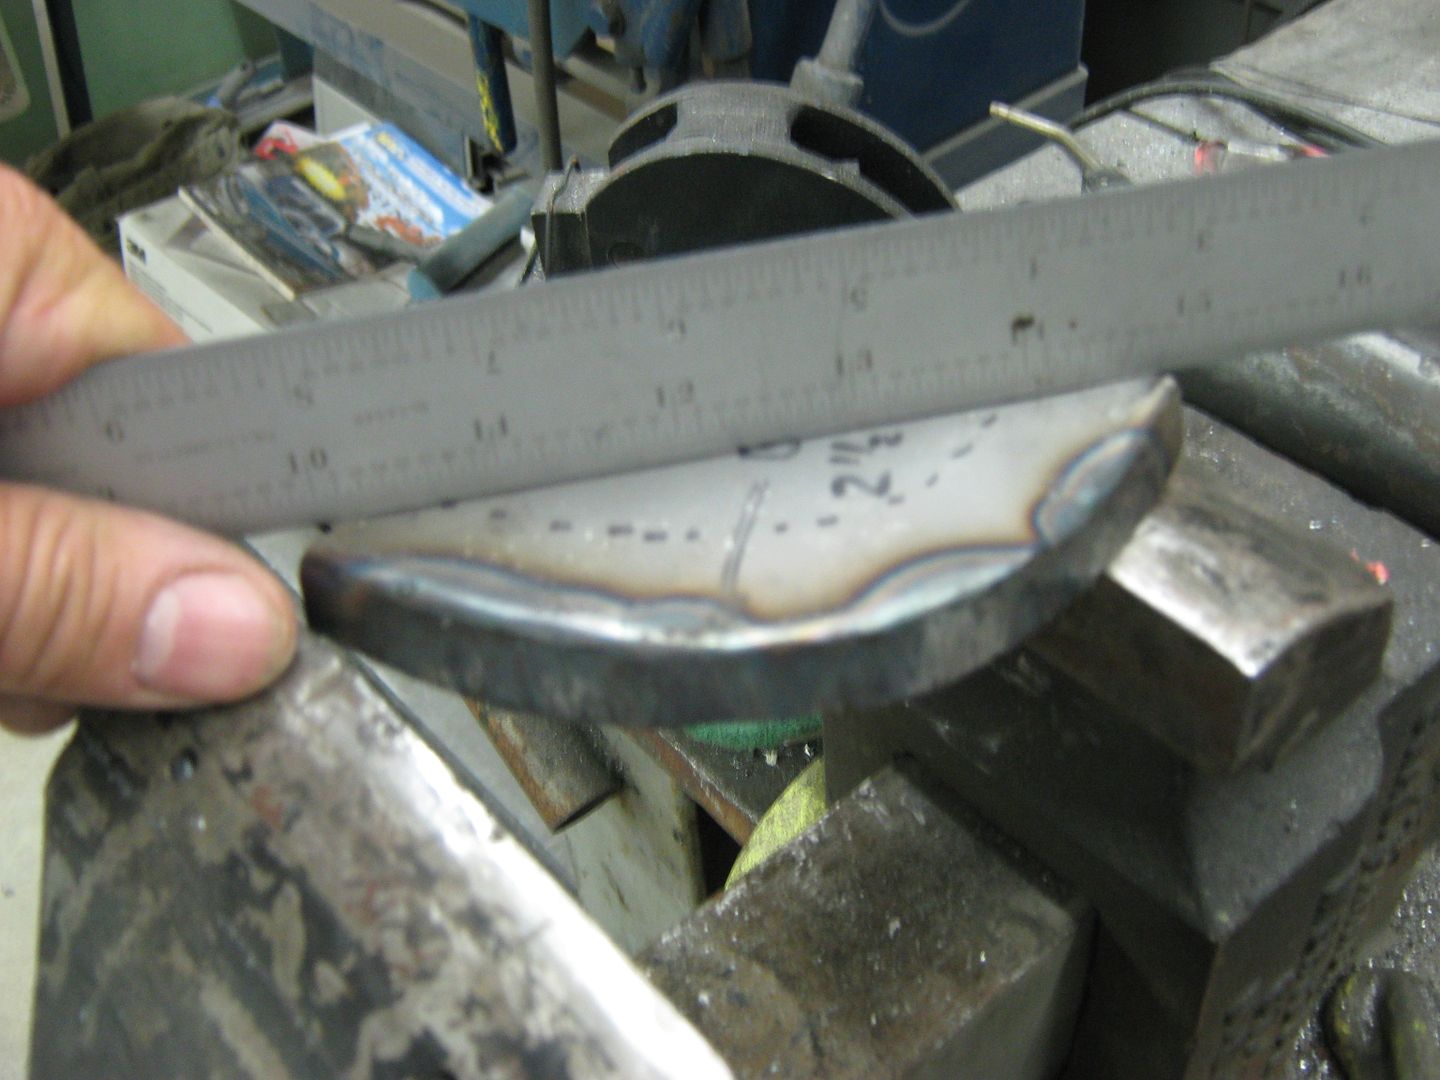
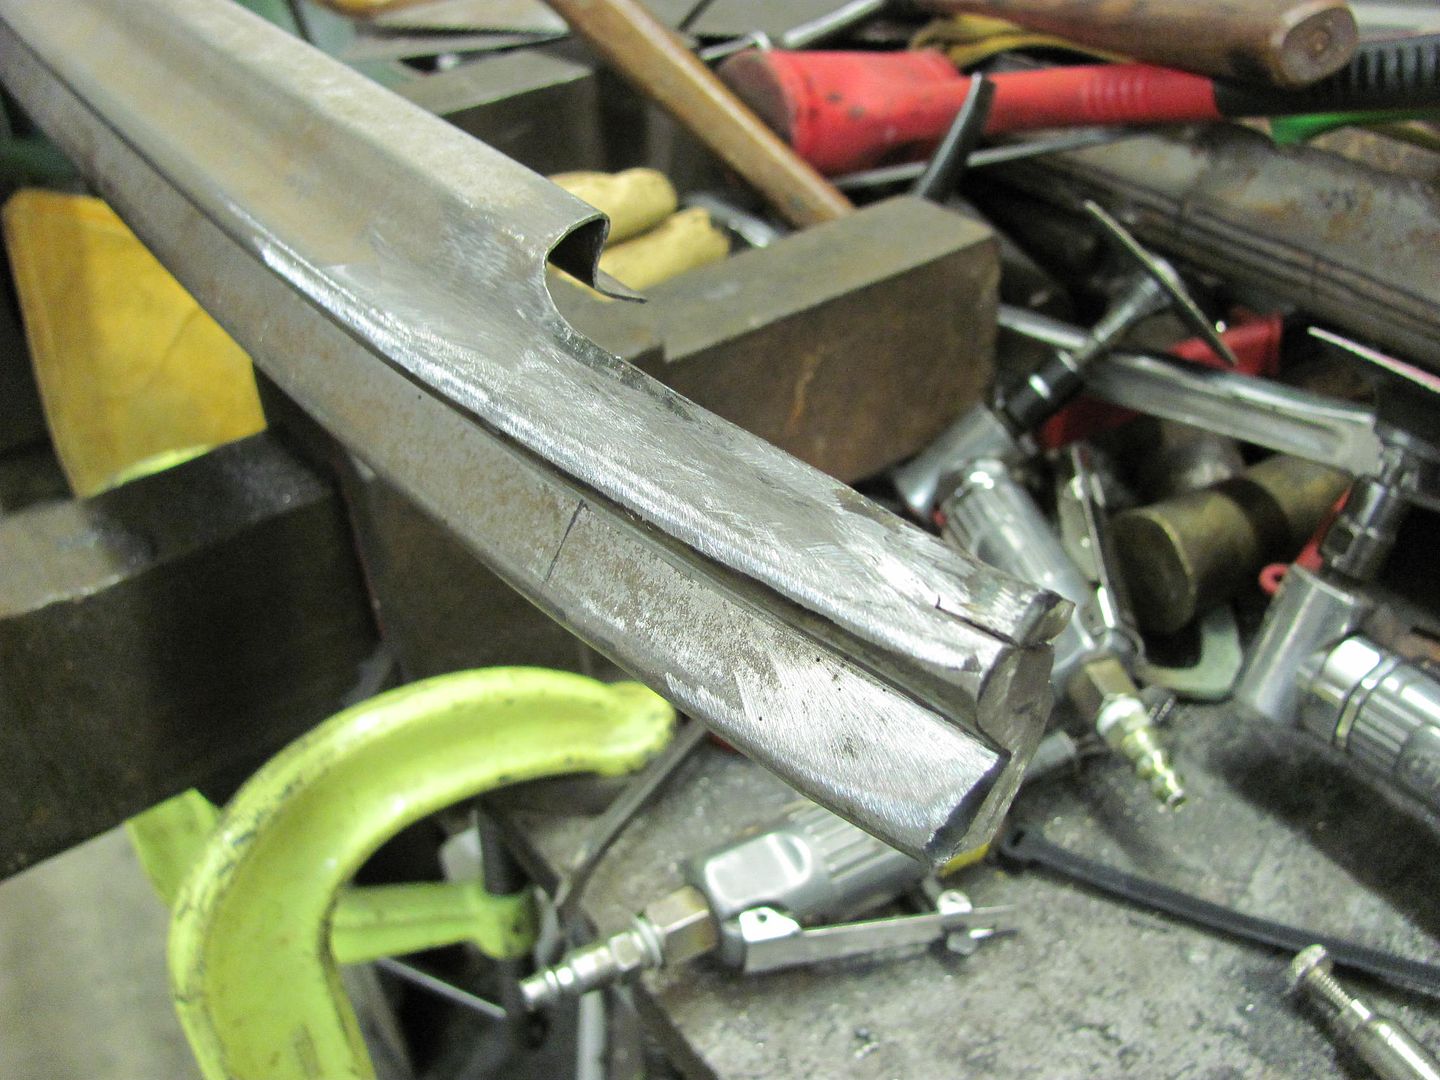
Much better than before, now for the outer piece. This has a slight radius, so I'll do some more grinding on the welding table to provide one:


Picture061.jpg


Picture062.jpg


Picture064.jpg


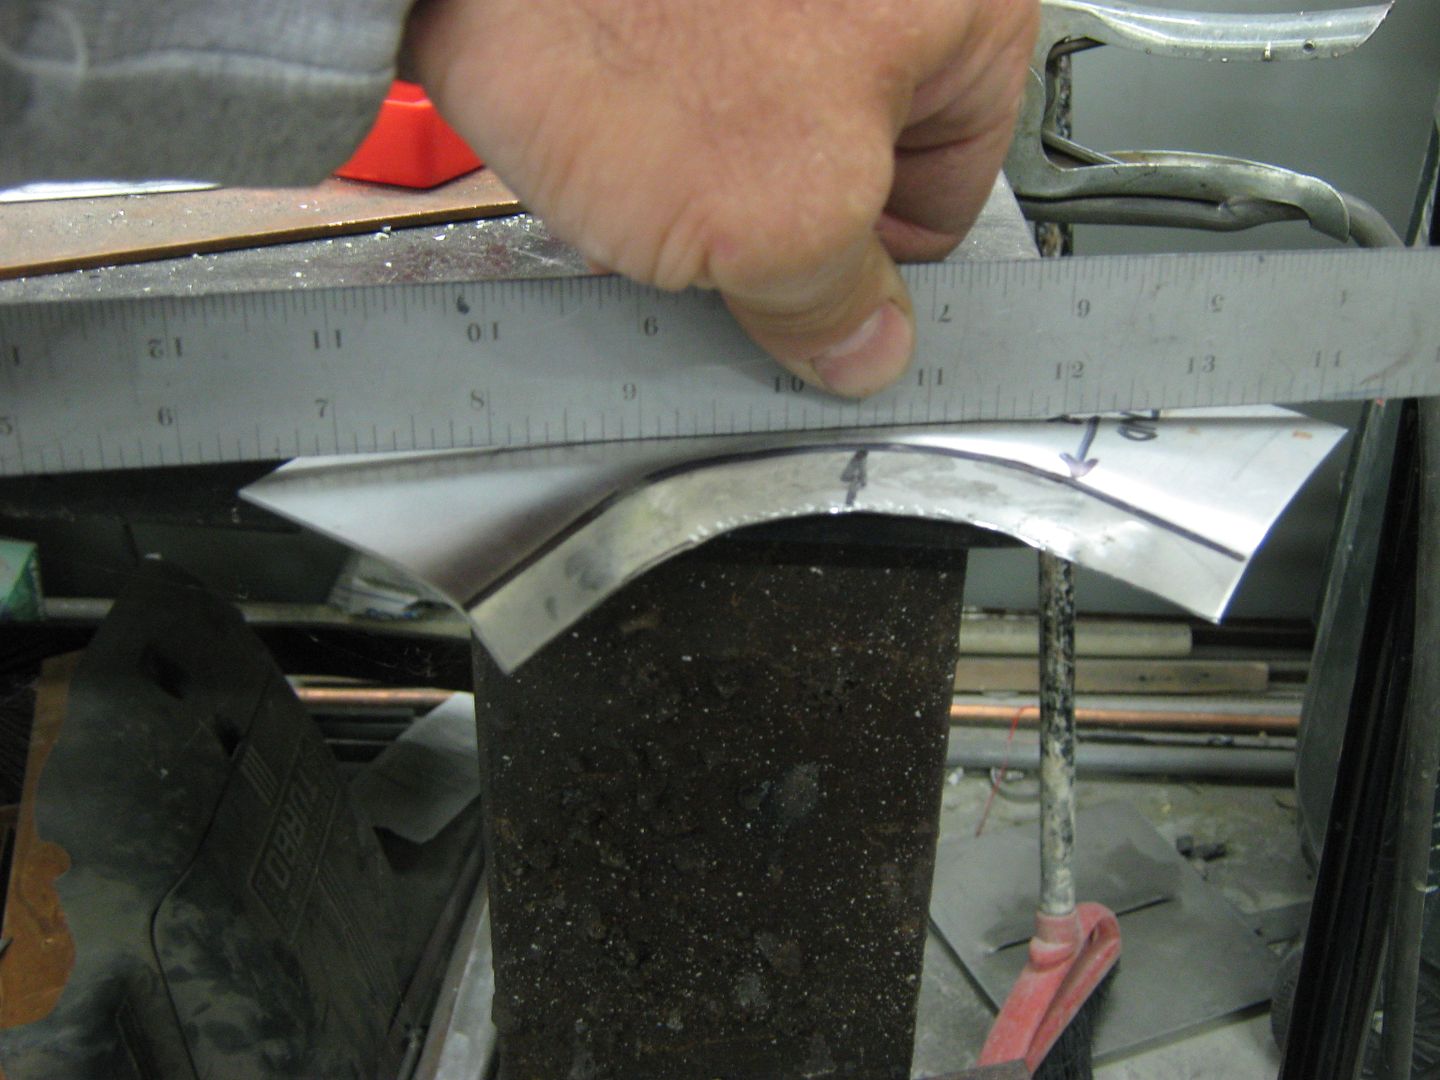
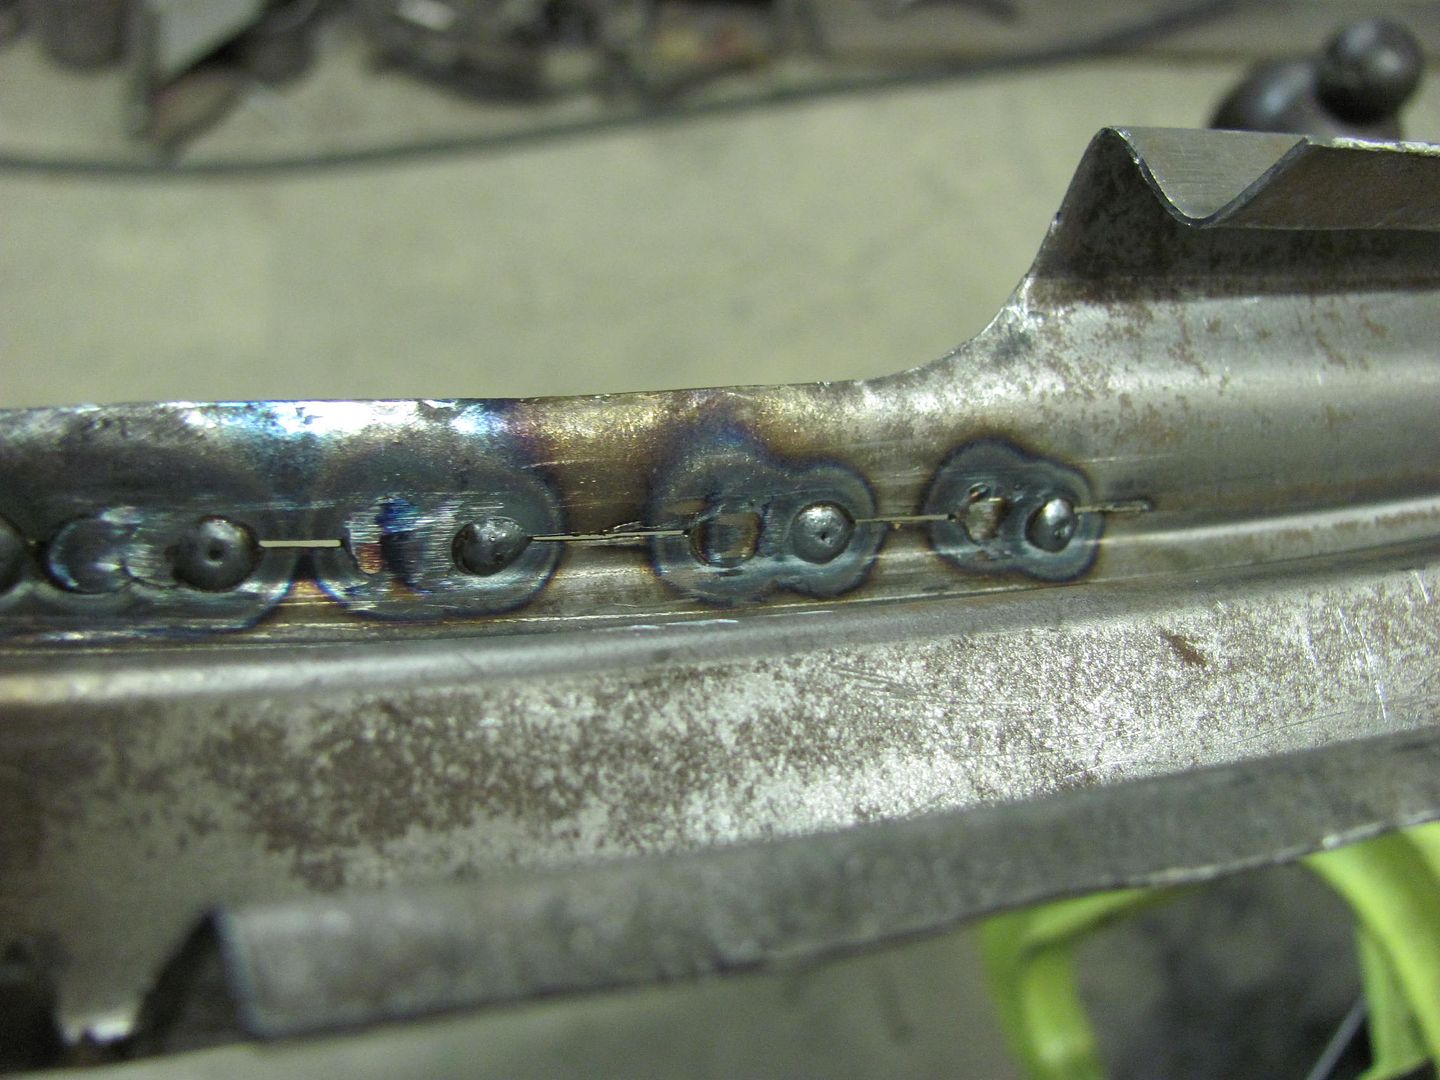
As before, the bend line is of different length than the outer flange perimeter. Here the outer dimension is shorter, so it will have a tendency to pull the panel downward as the bend occurs. To get rid of this issue, we will need to stretch the metal, and a slightly crowned hammer will help out.


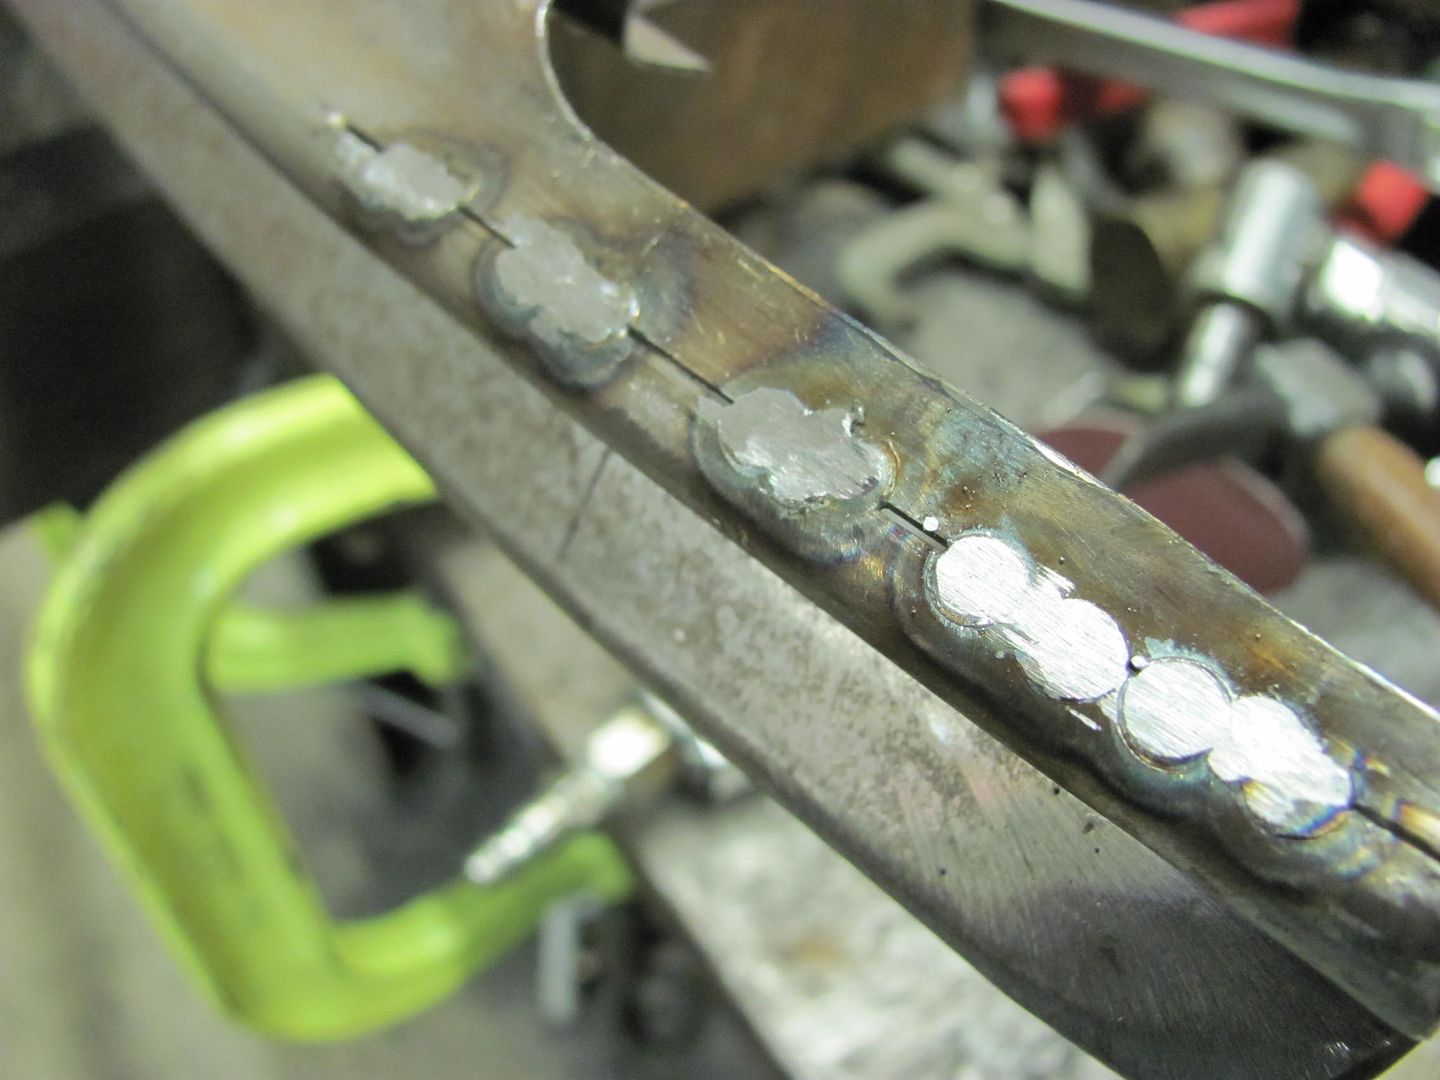
Place the flange on a flat surface and using the hammer, work the area, especially the outer perimeter where it is shorter, this needs more stretching.


Picture065.jpg


Picture067.jpg


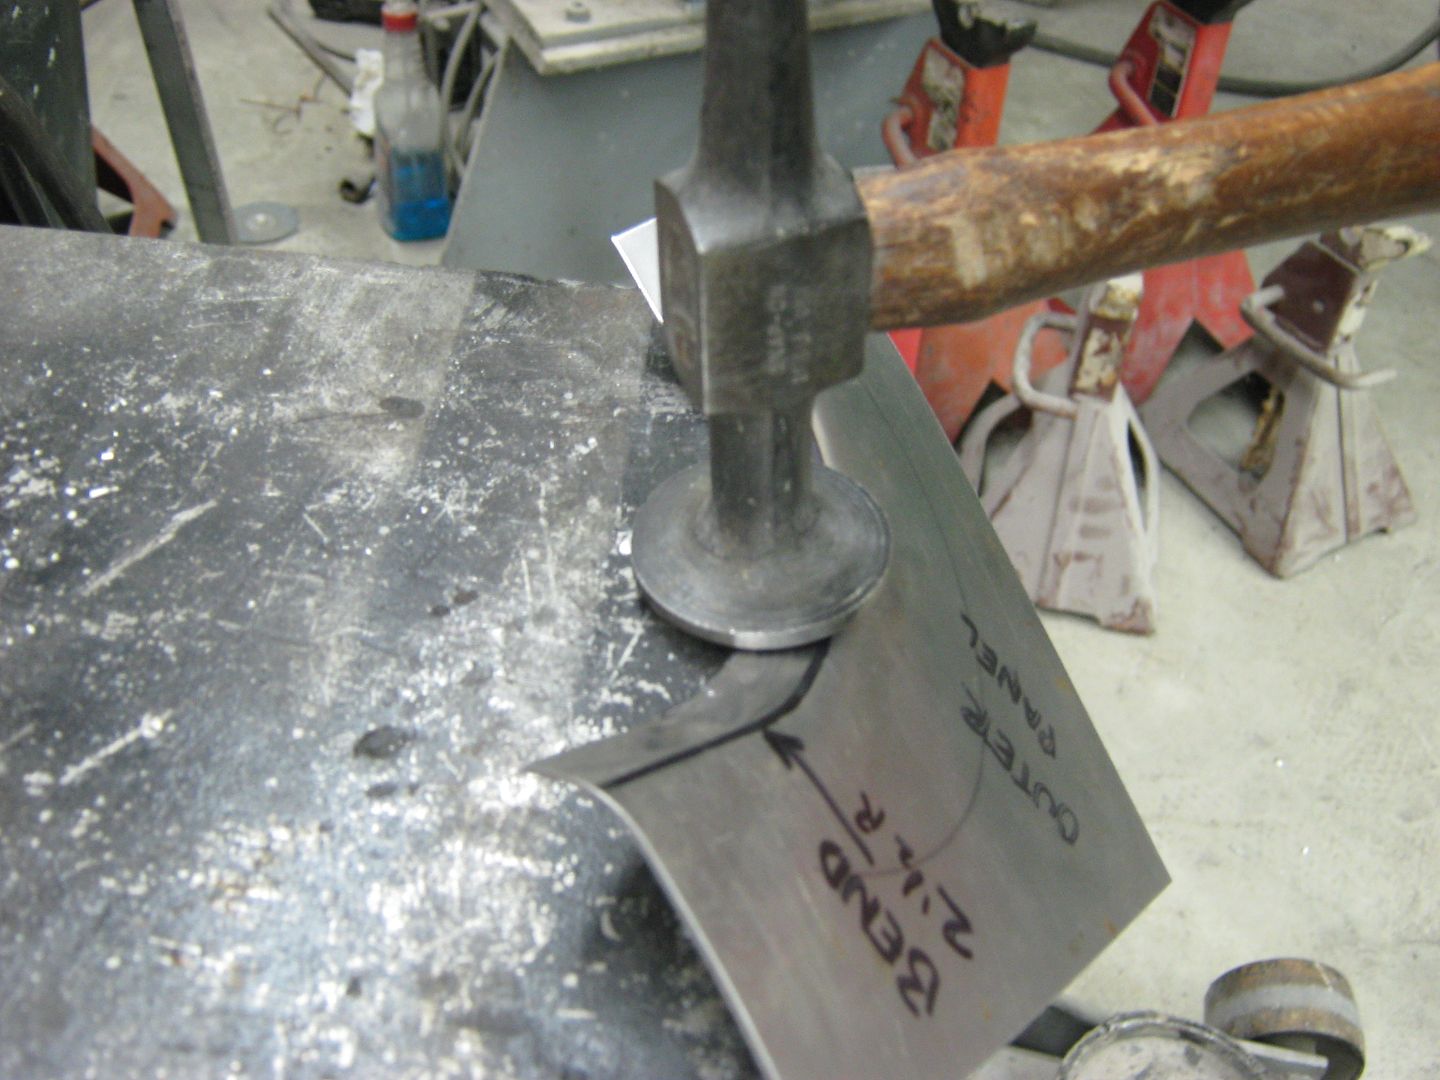
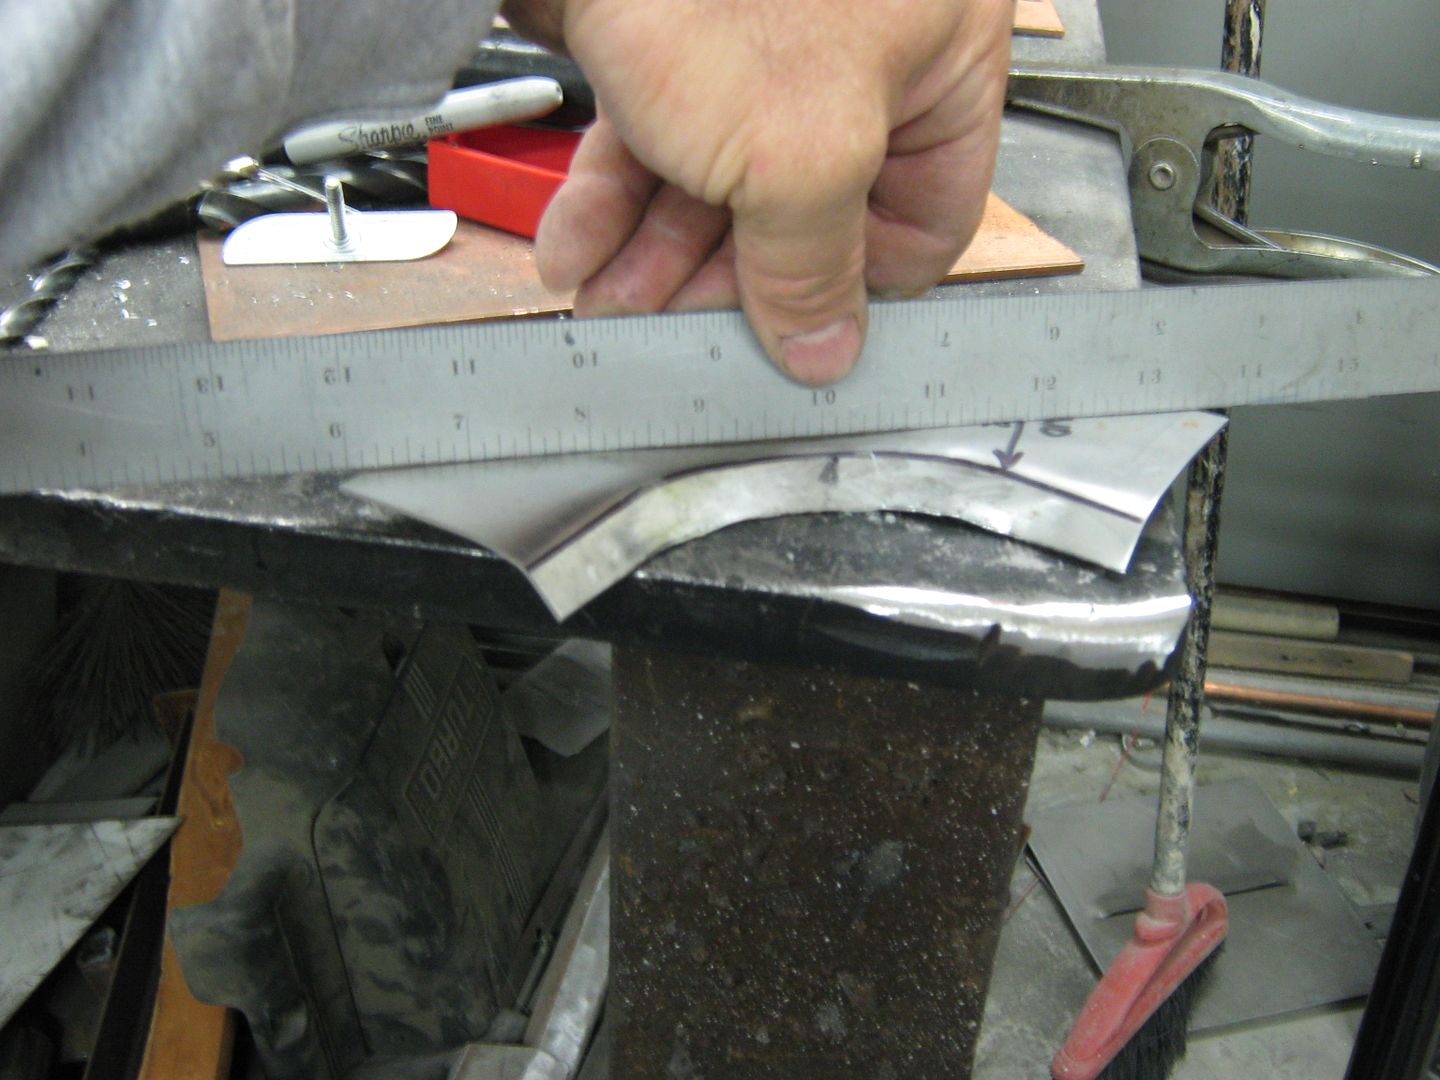
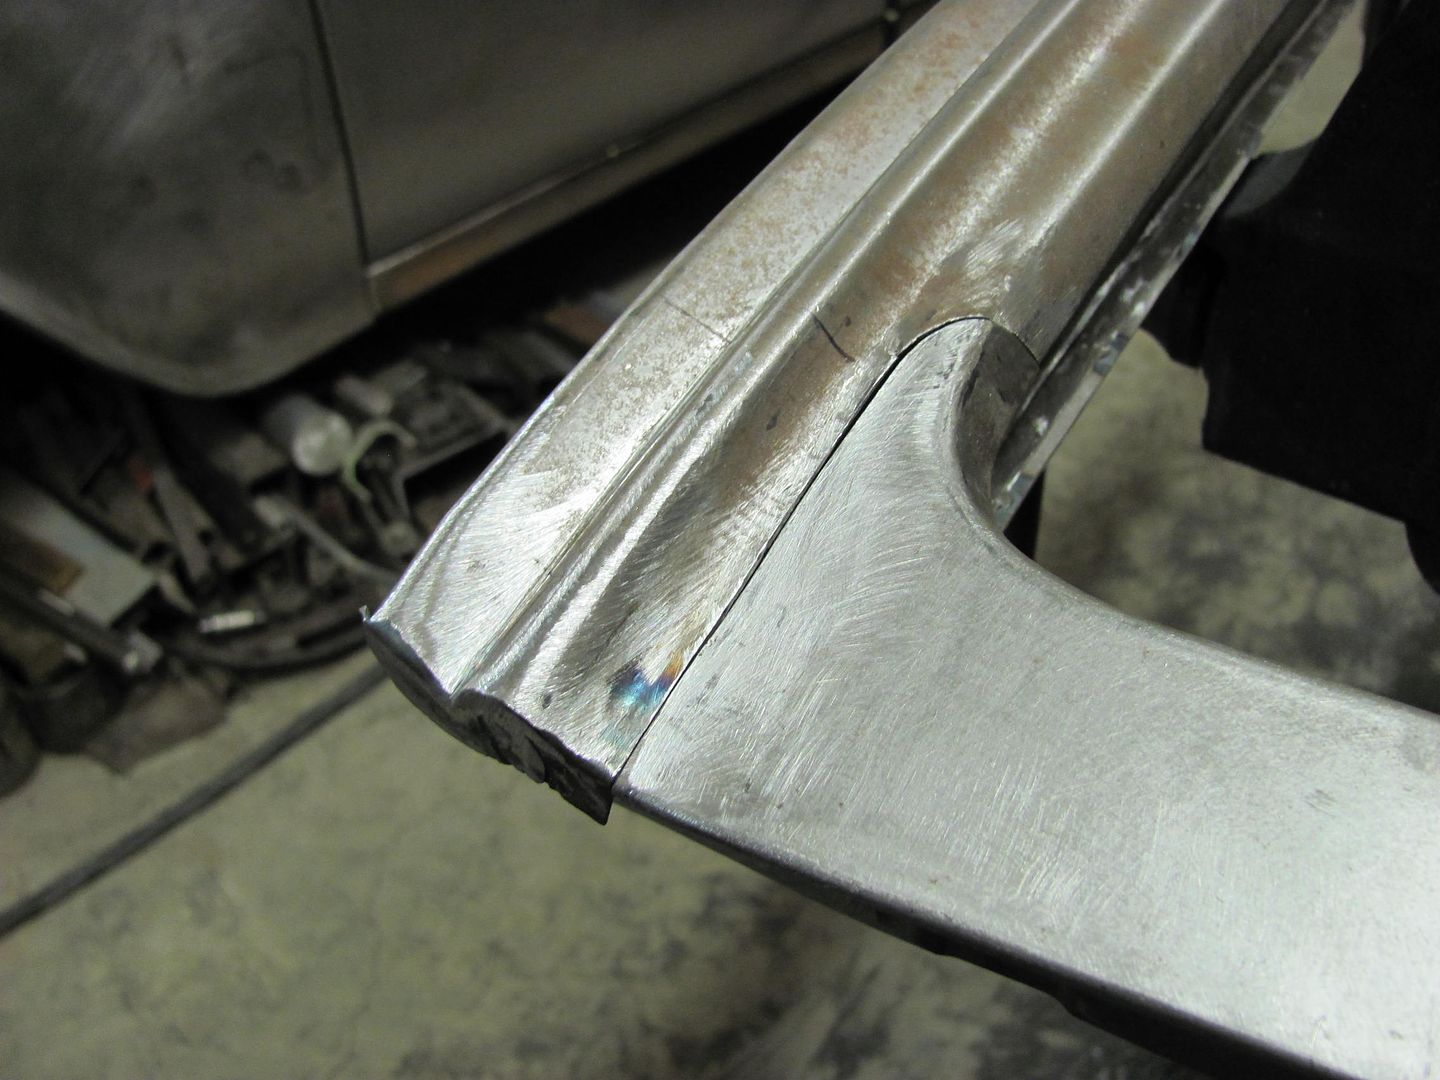
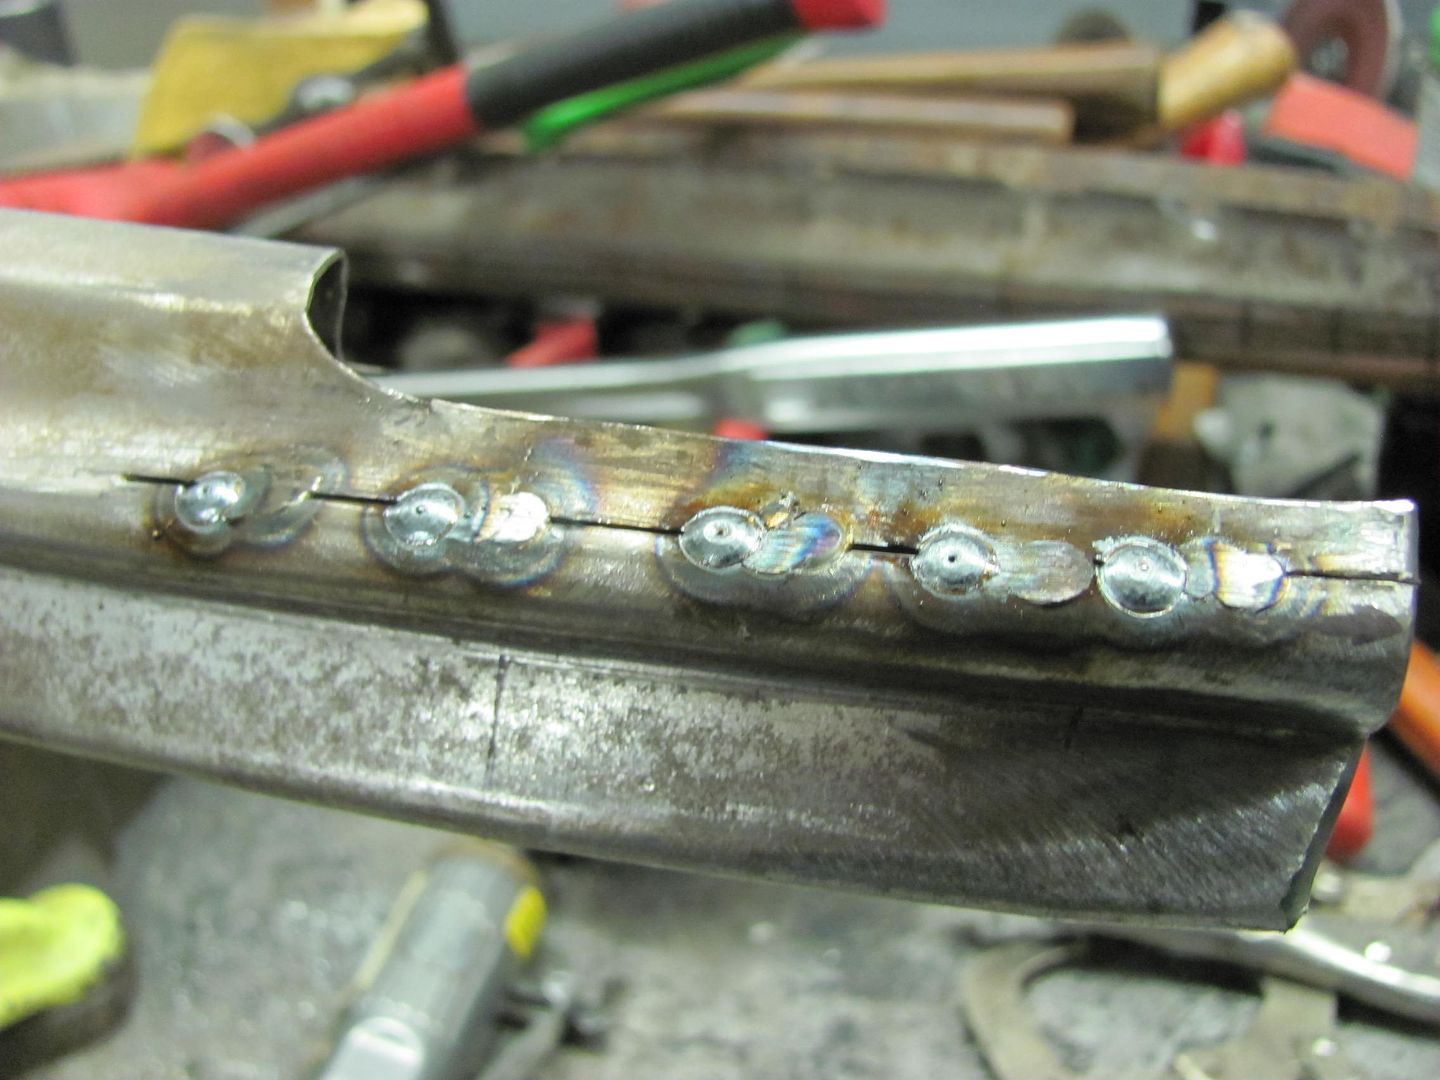
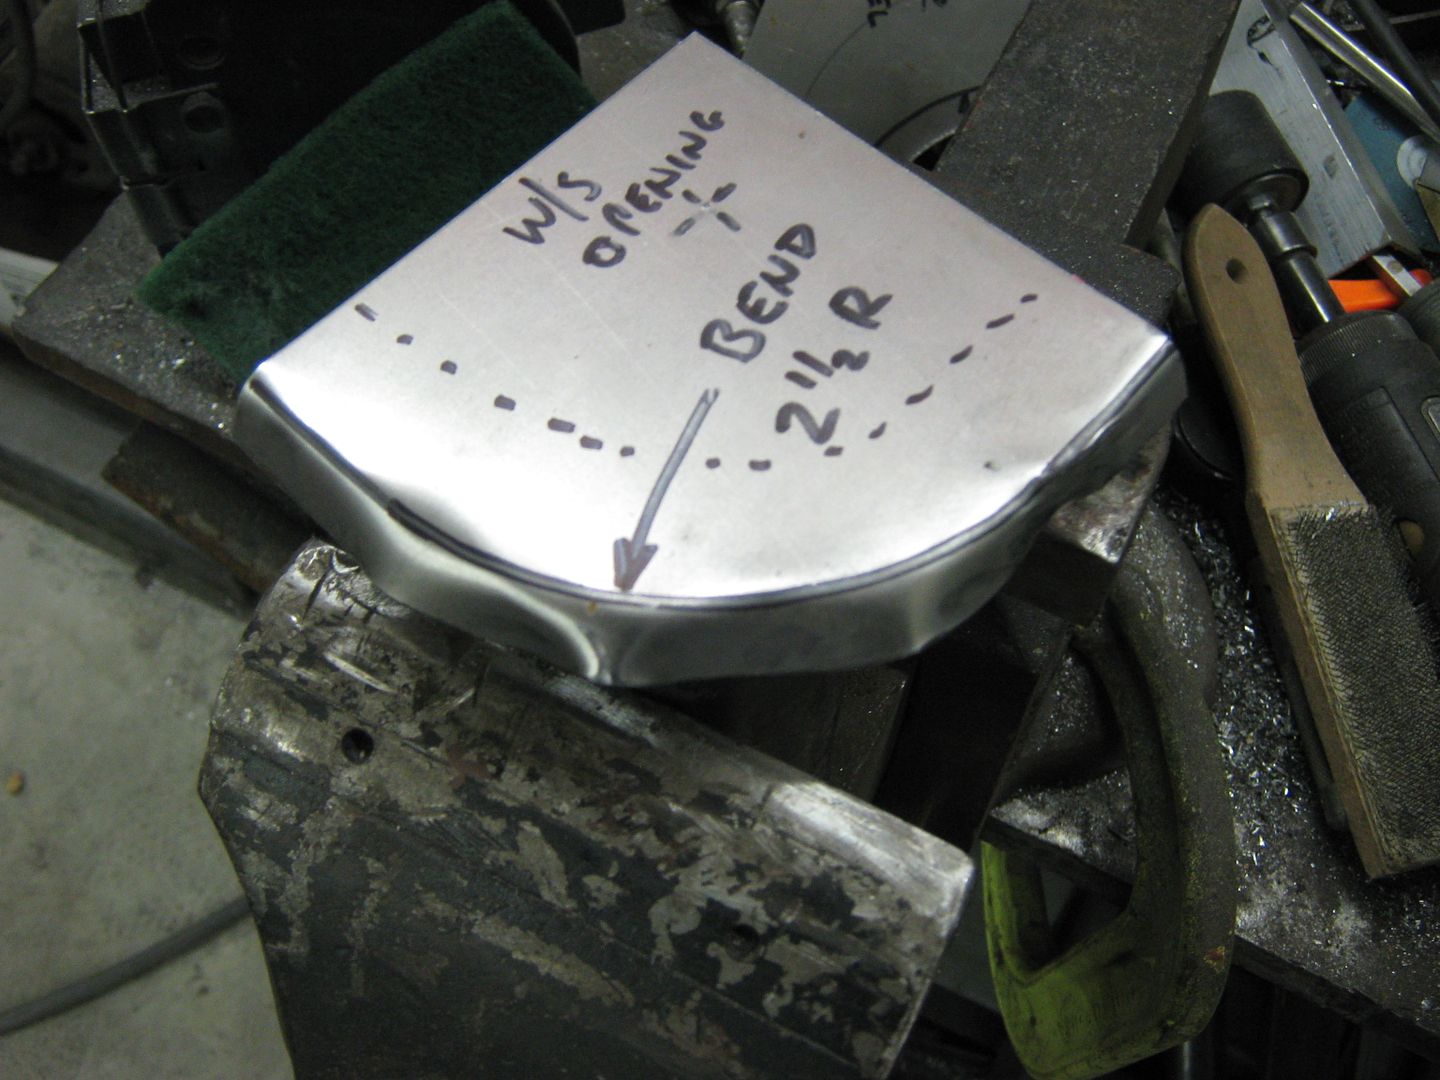
It doesn't take long to notice an improvement. Keep working as needed until you have the correct bend you're looking for.


Picture068.jpg


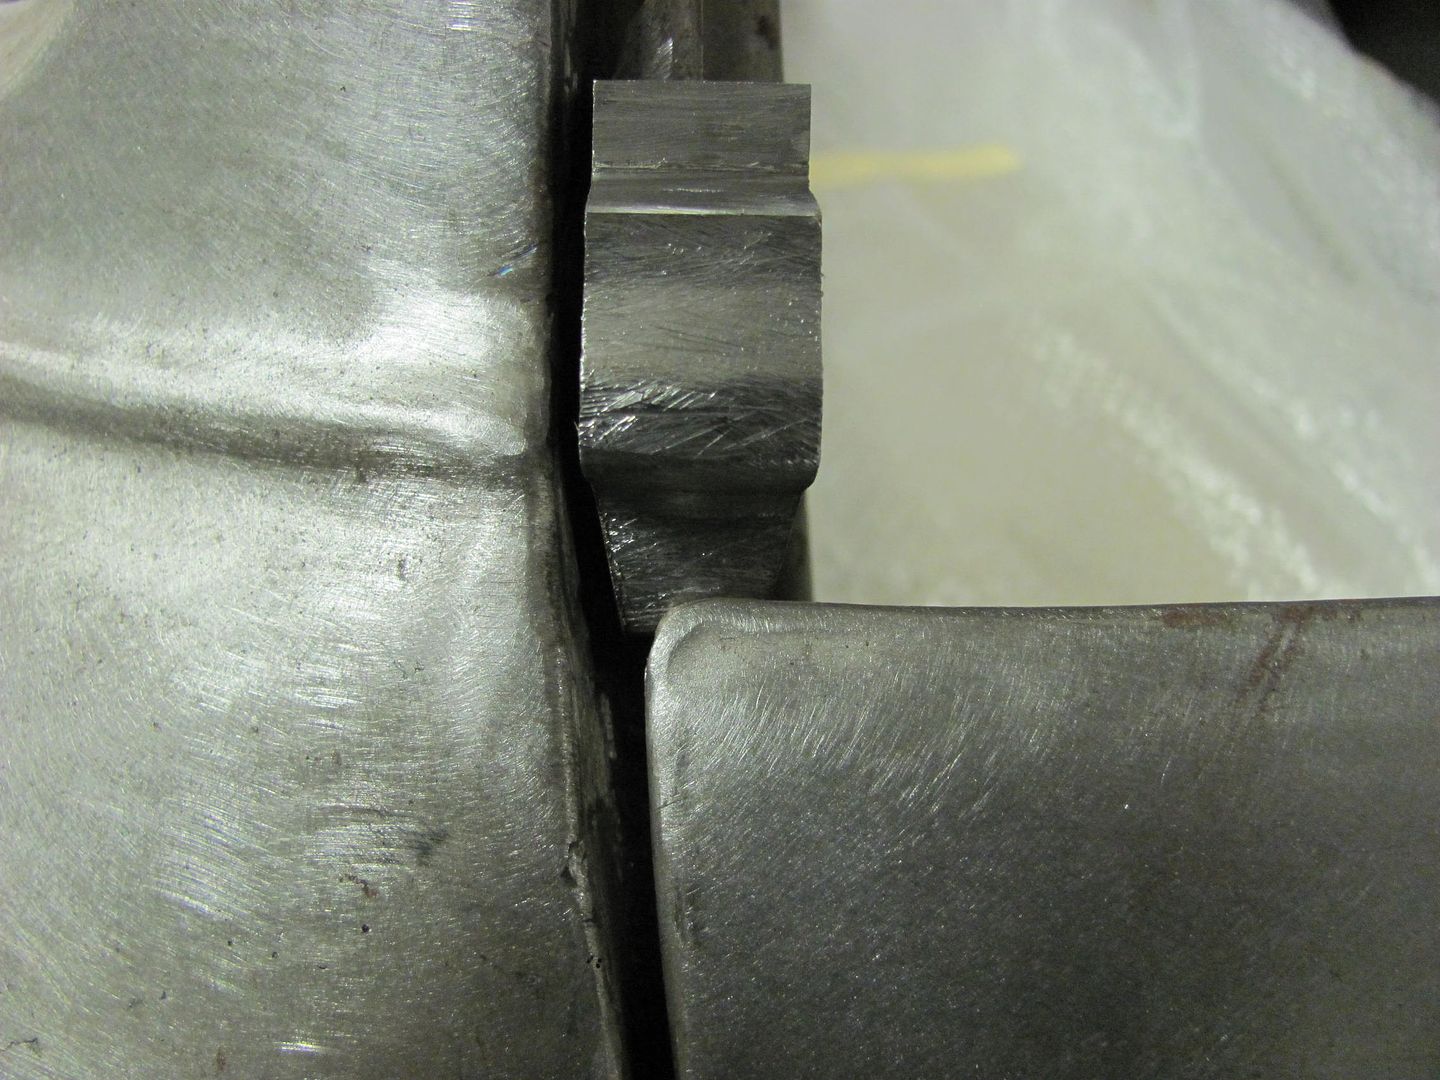
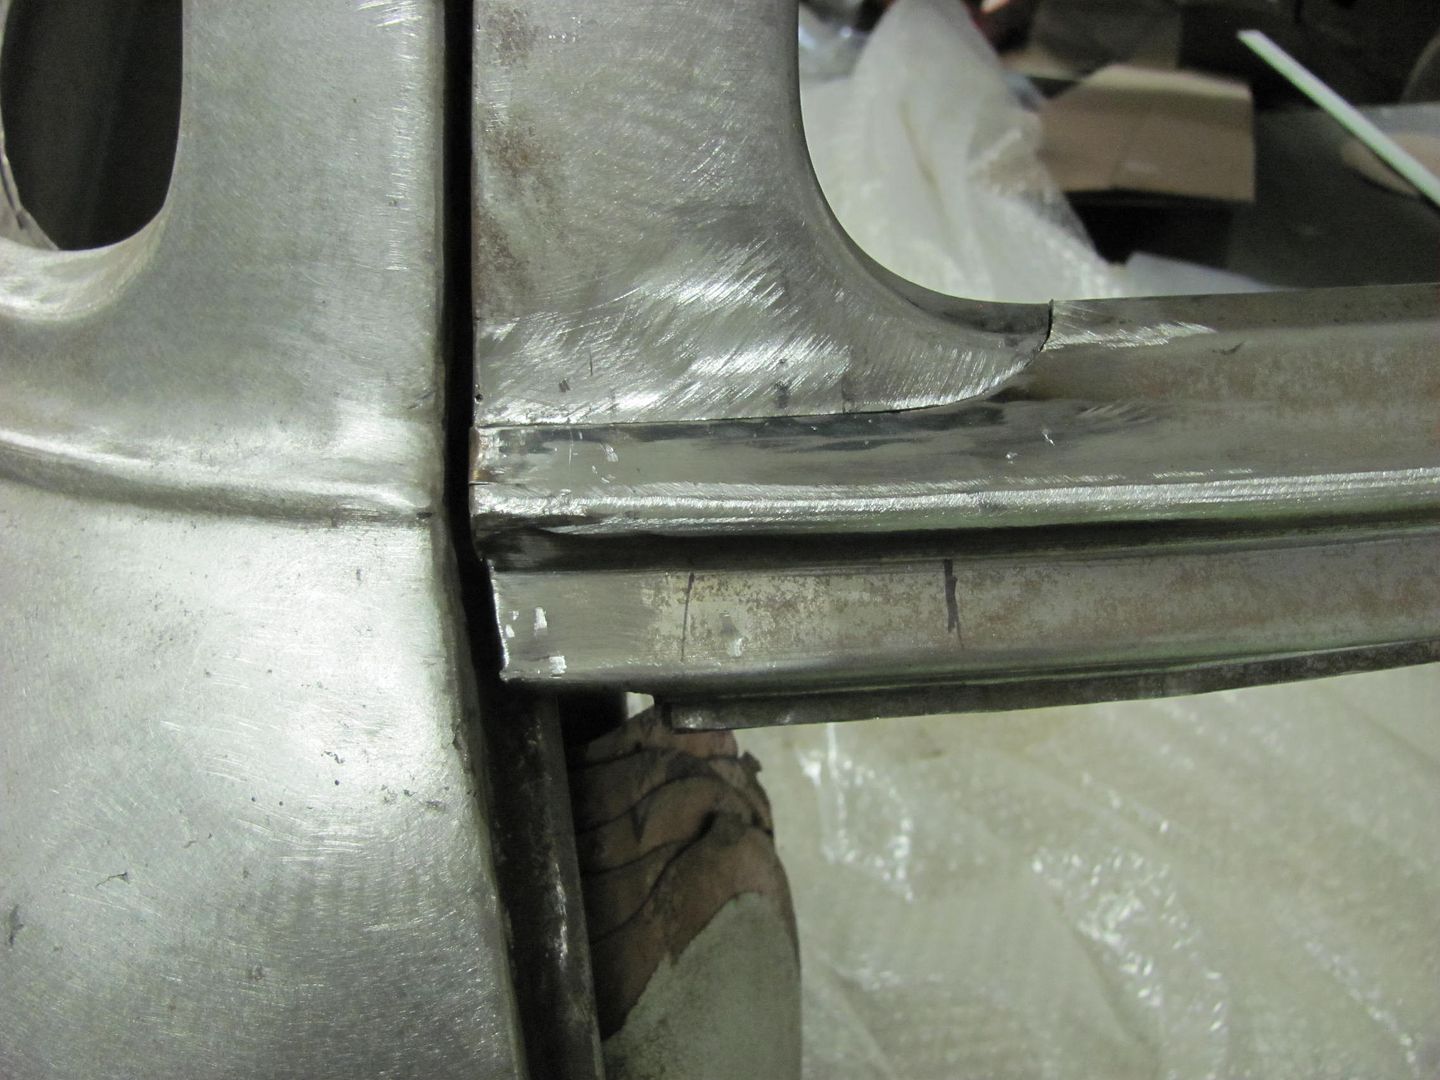
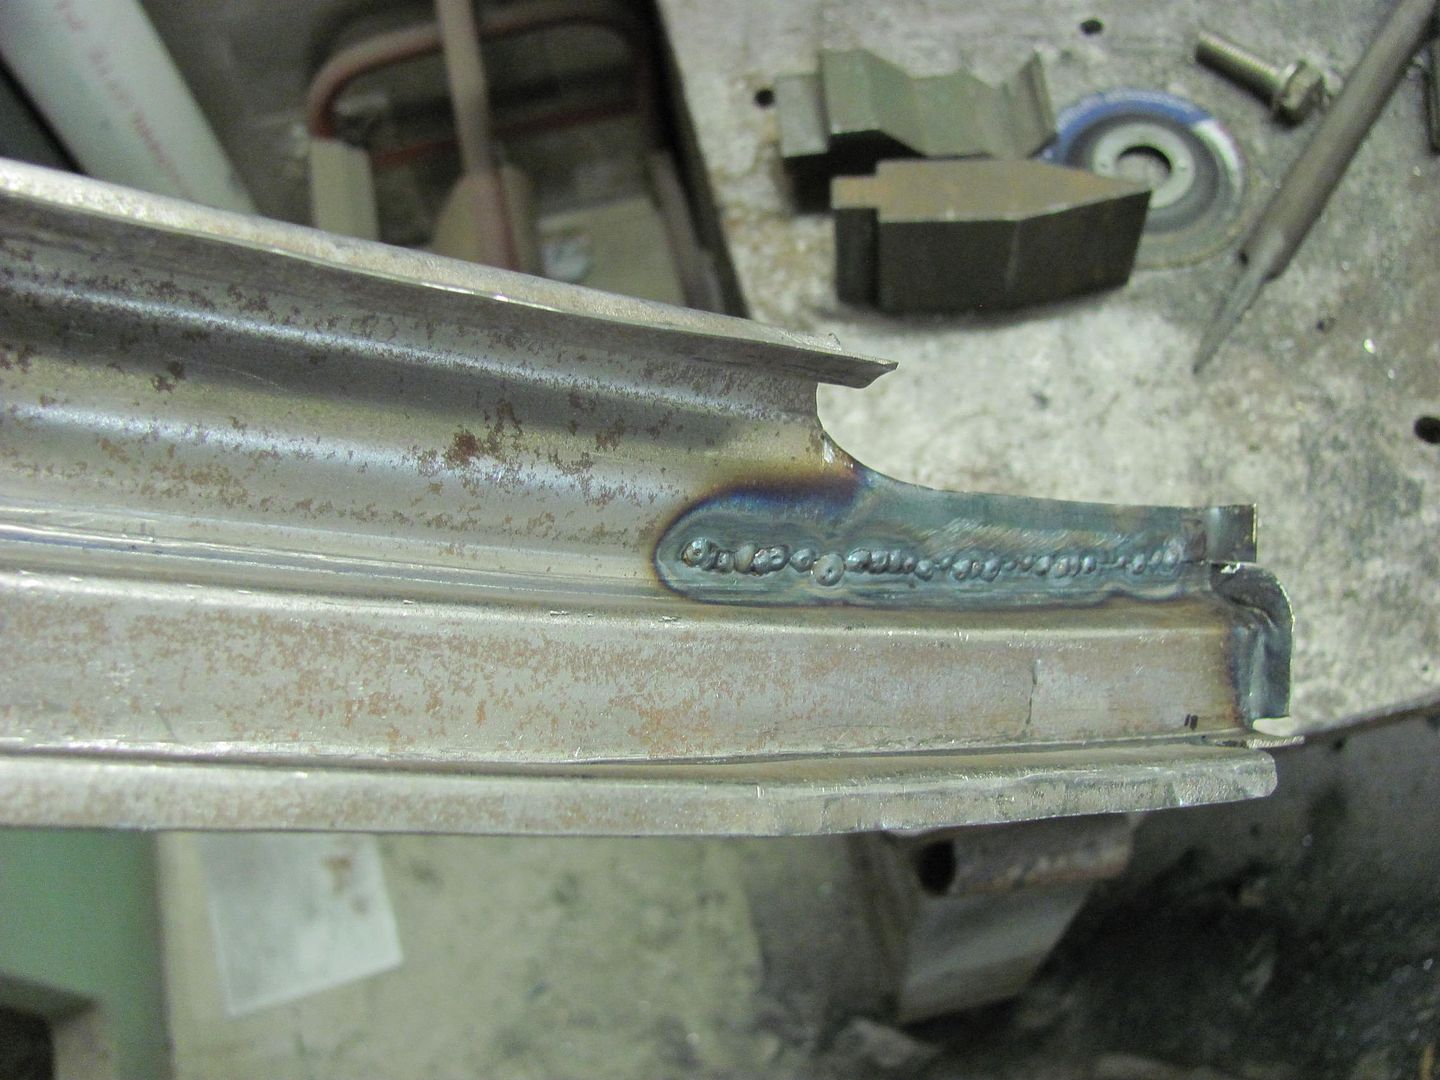
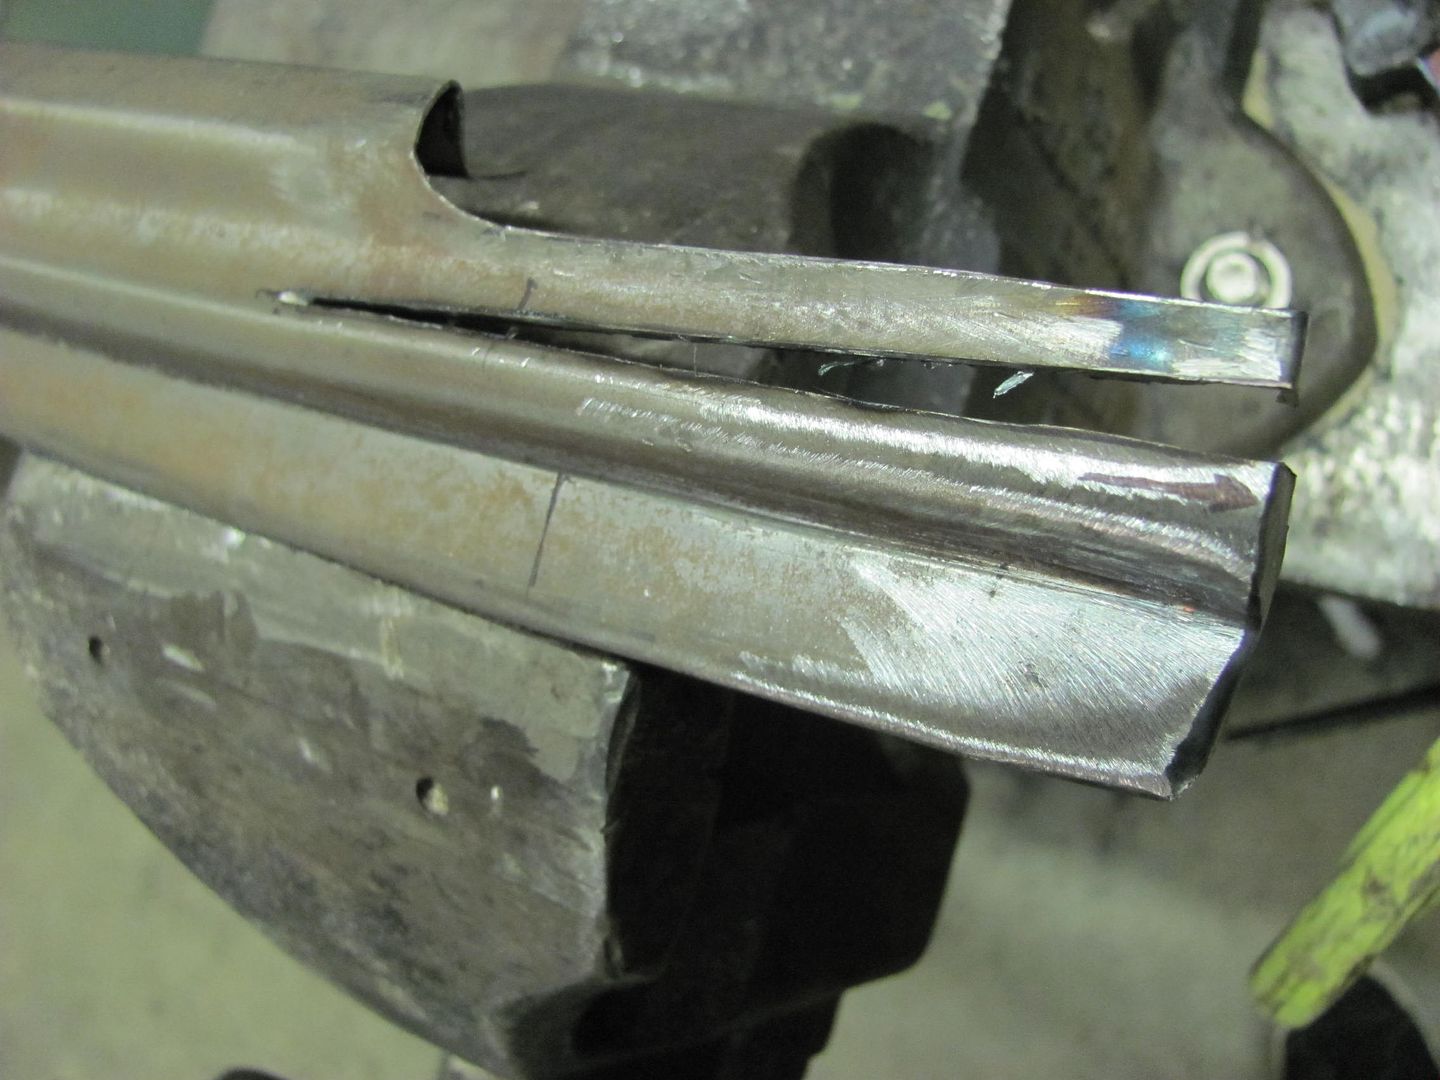
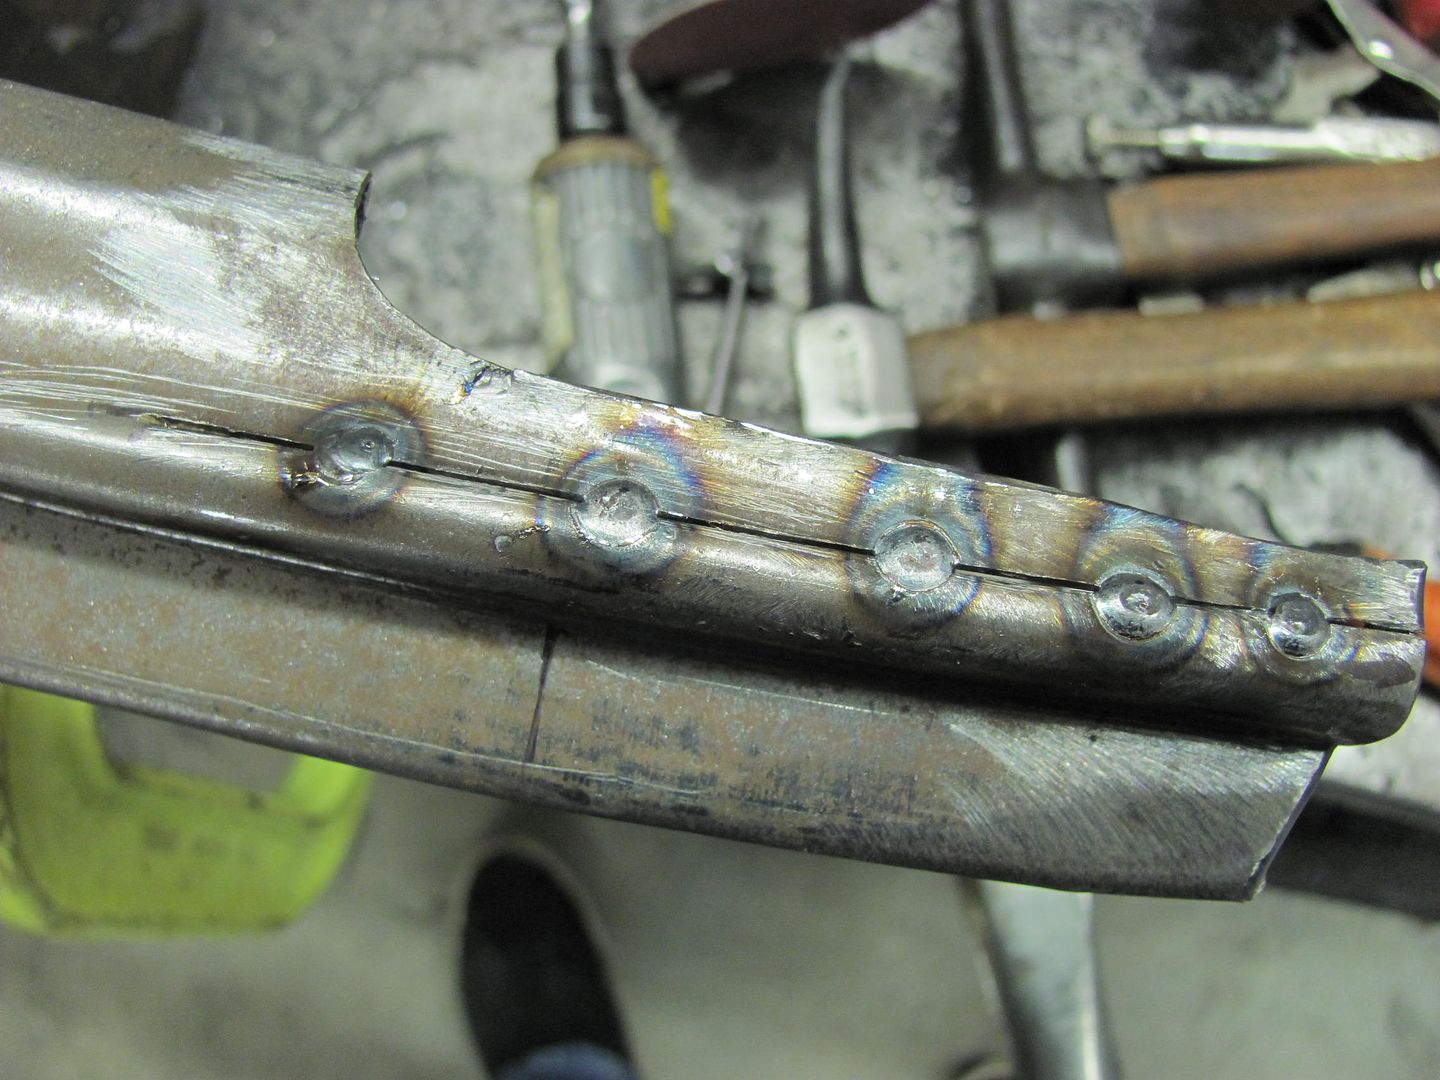
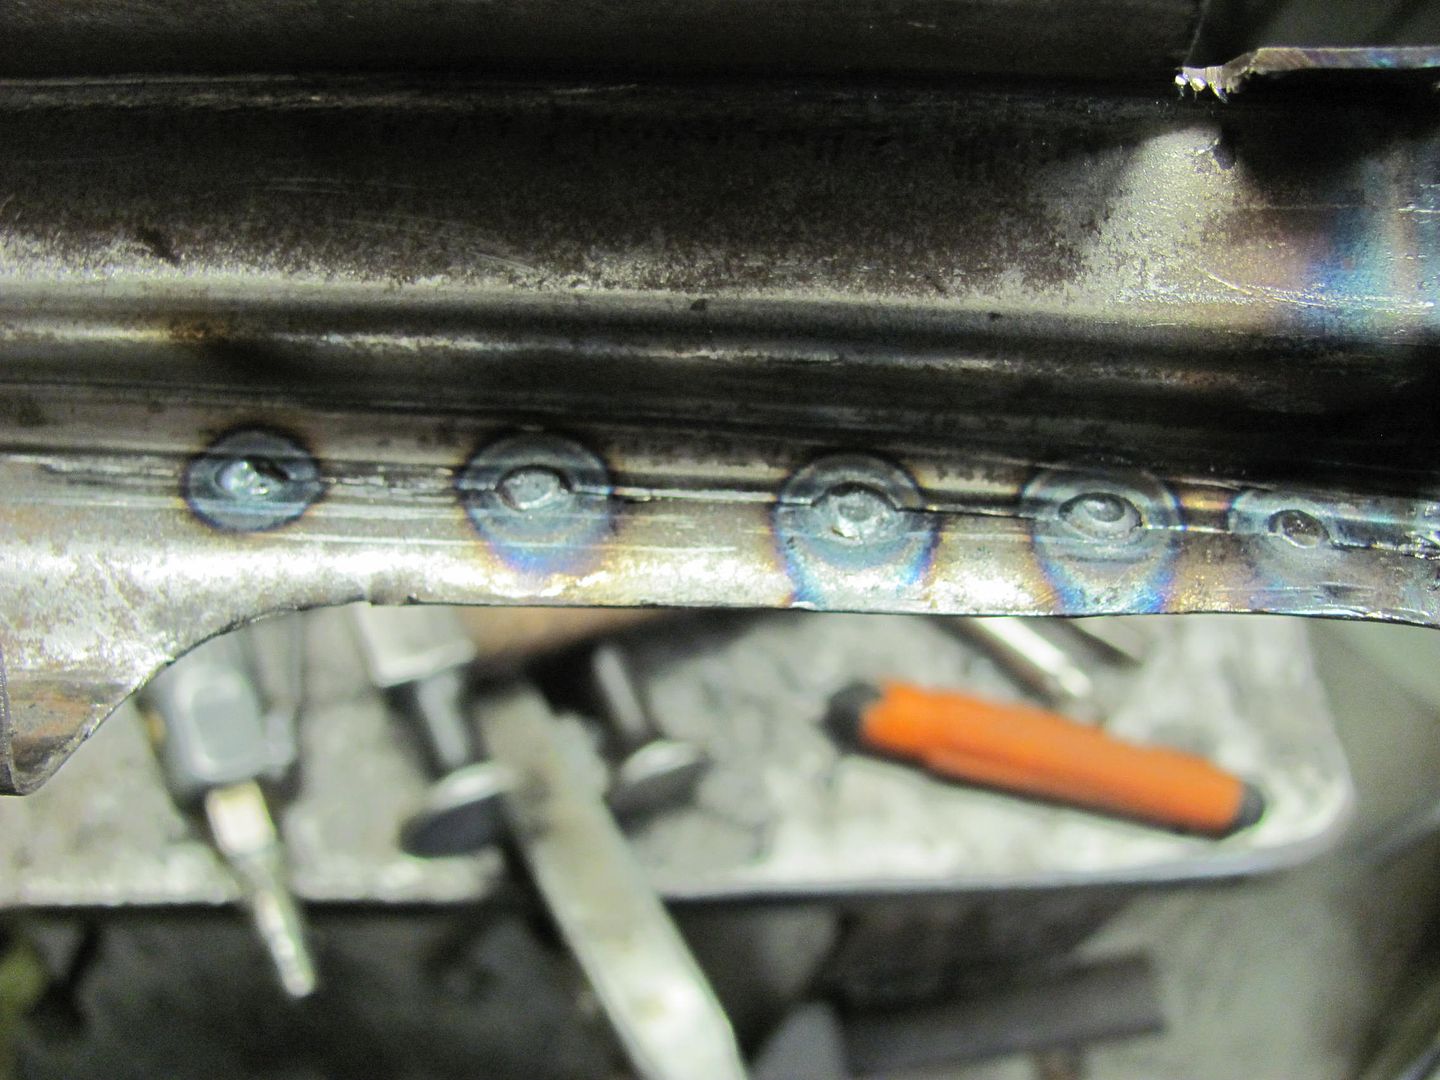
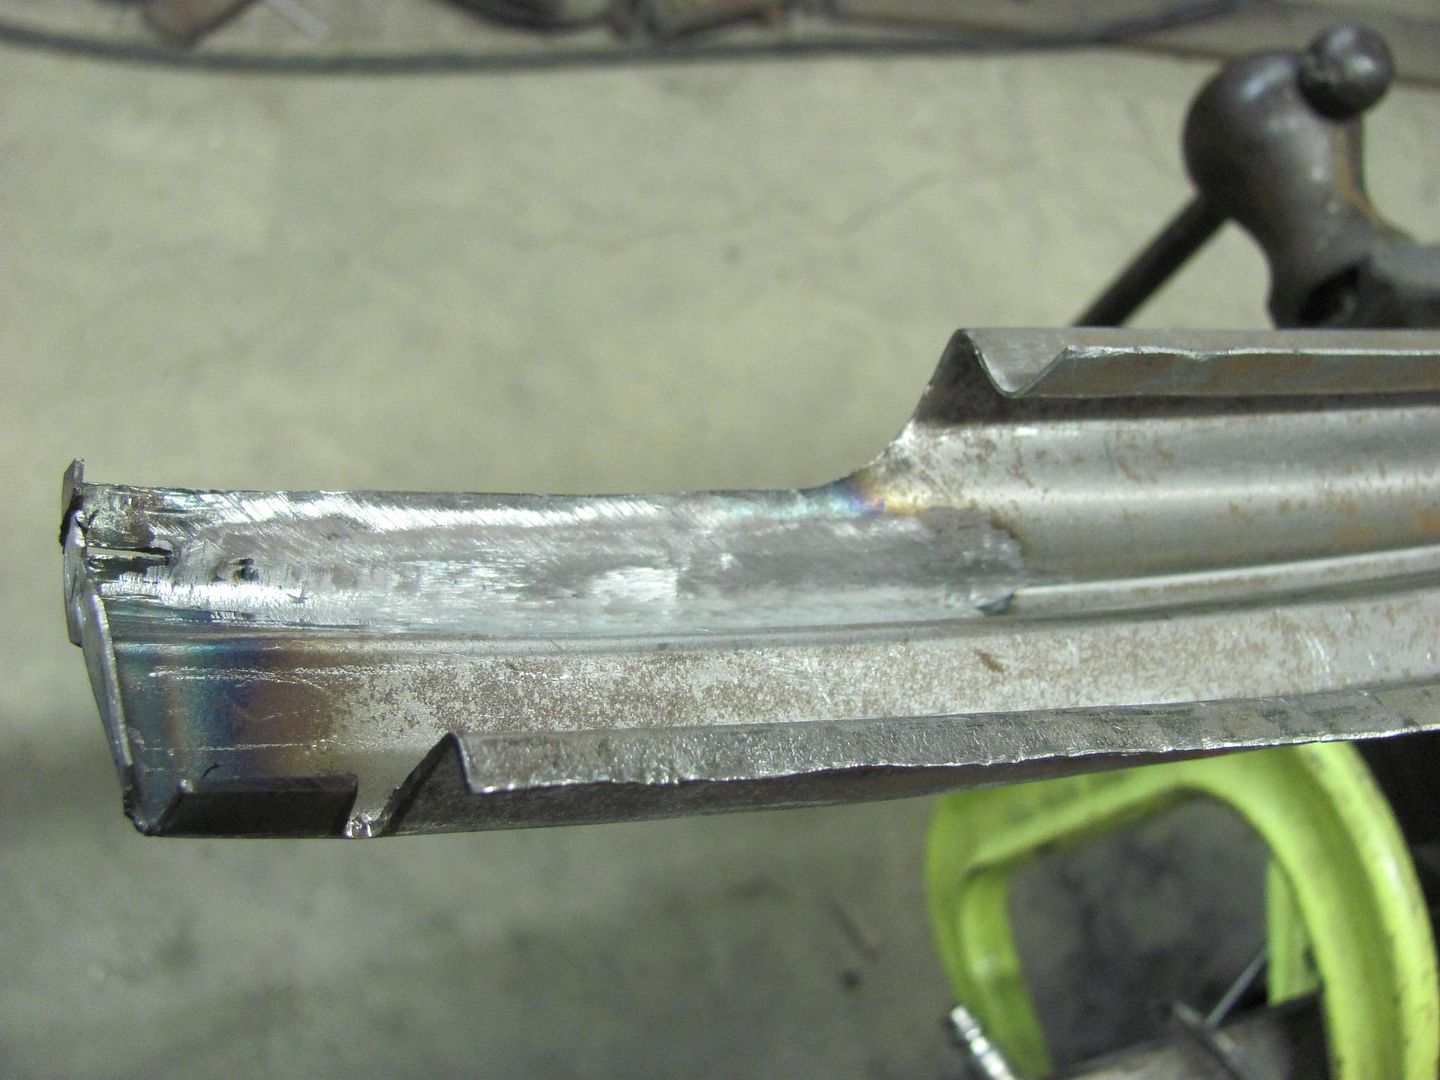
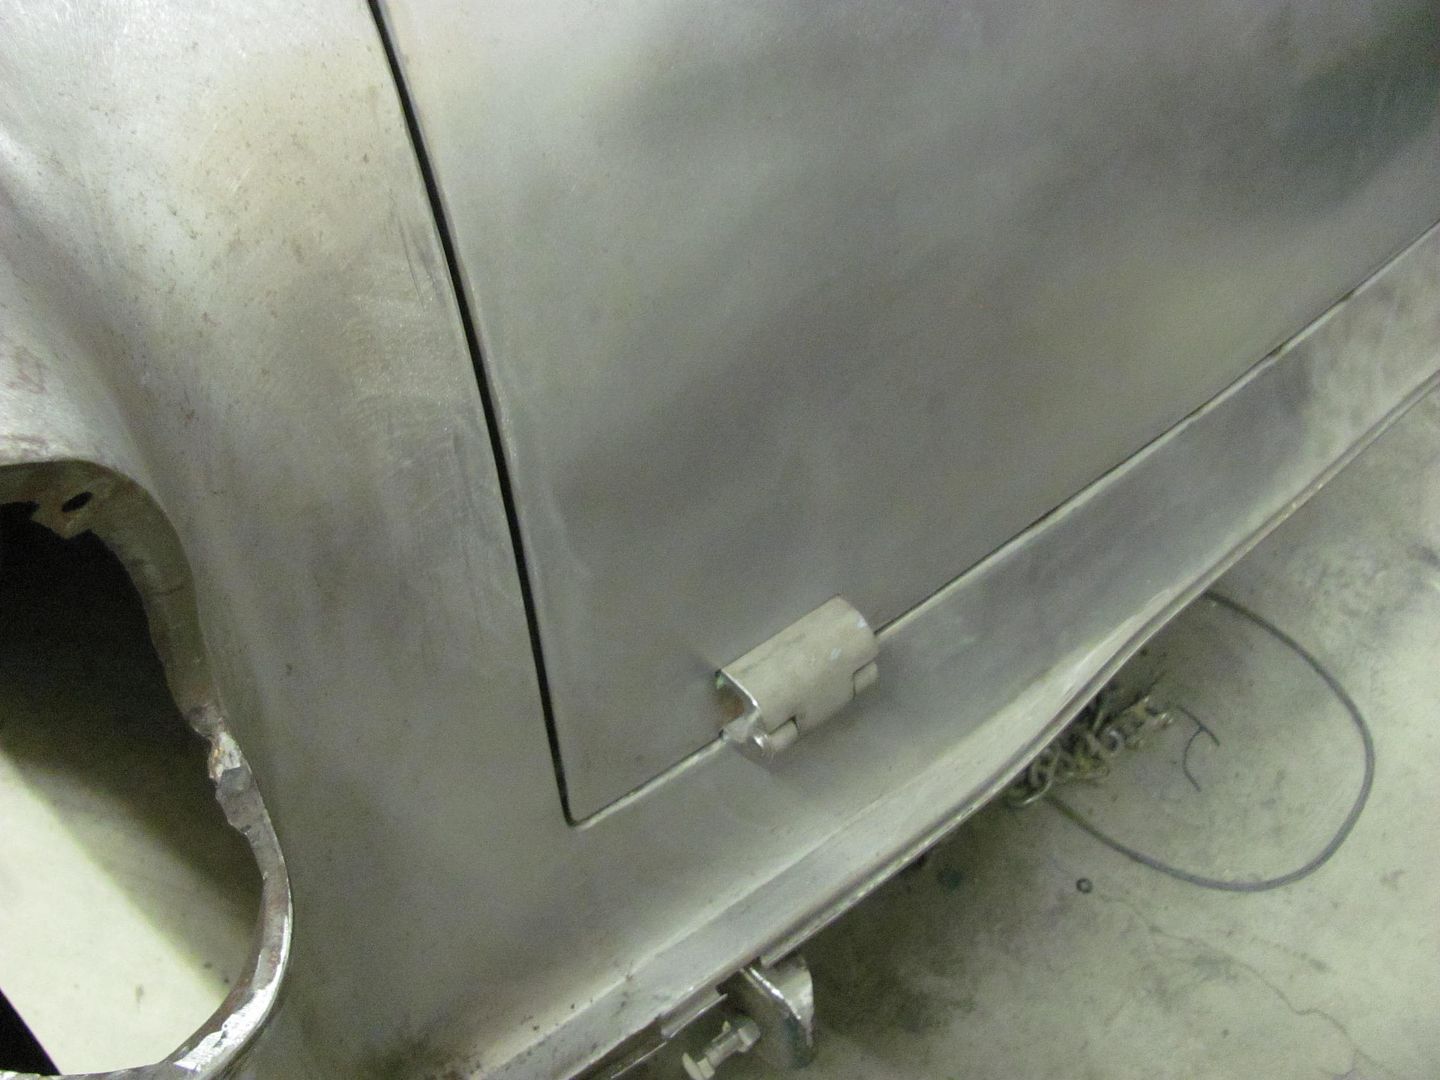
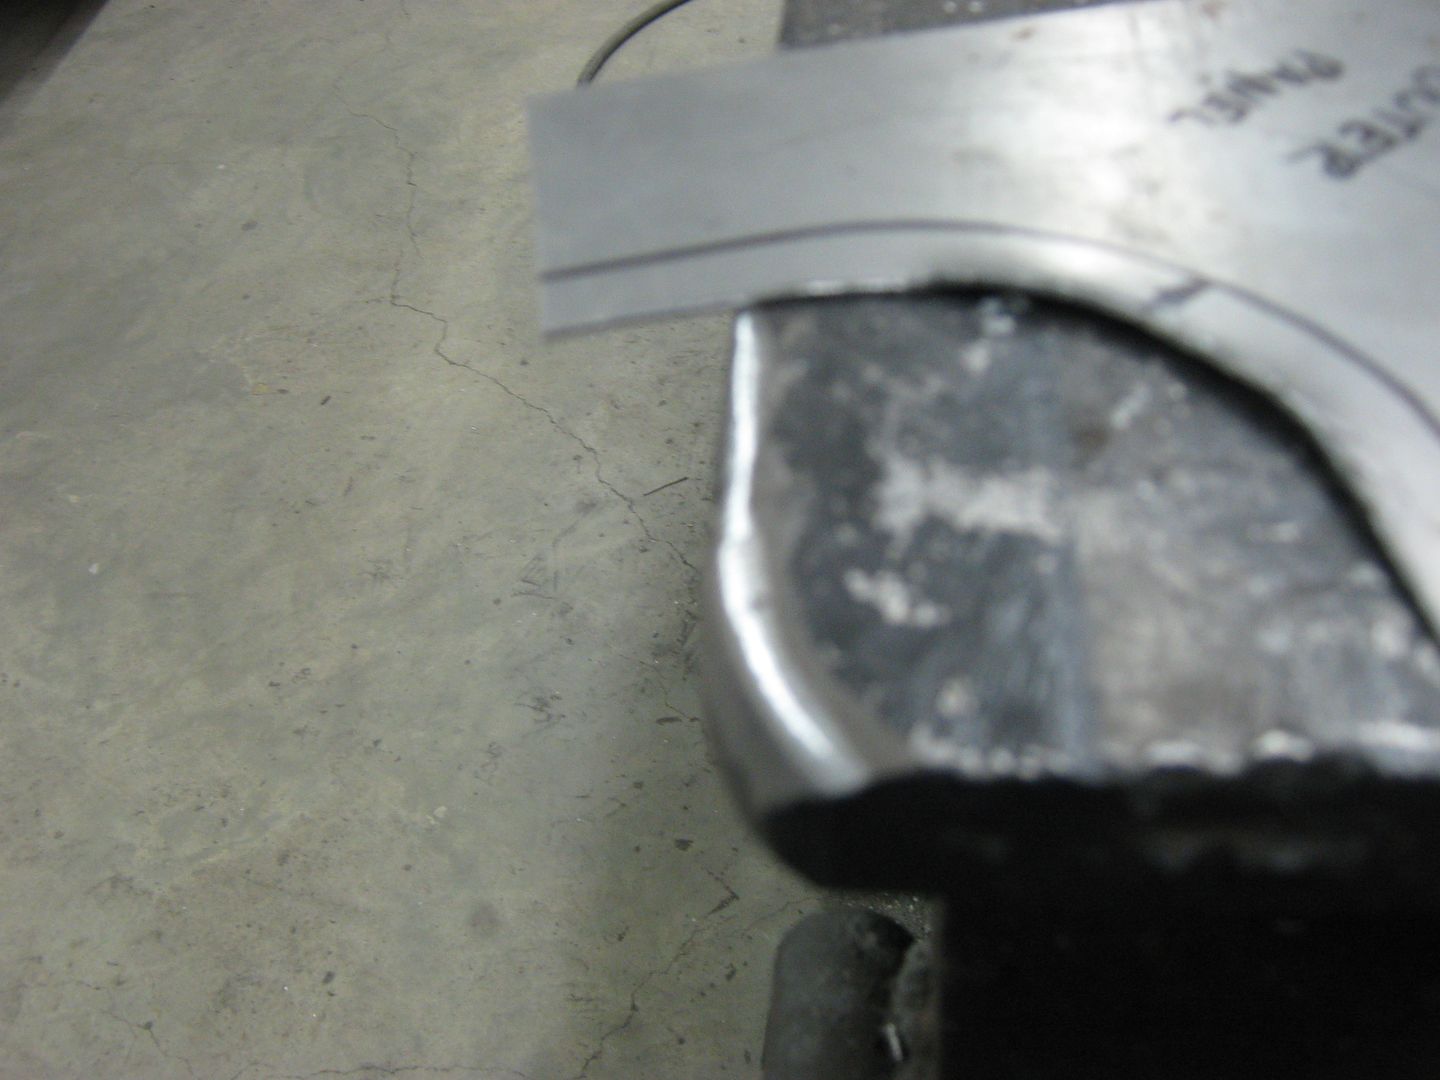
Here I'll normally trim one flange to a nice straight cut, position the other so you have your correct offset, and scribe and trim the other. Weld together, Dress (grind) the welds, and install.


Picture070.jpg


Picture071.jpg


Picture072.jpg


And there you have it, windshield corner repairs on a budget......
 
Last edited:
To avoid these ads, REGISTER NOW!

GSEninja

Well-known member
Joined
Oct 17, 2013
Messages
95
Just spent the majority of the afternoon reading through this and I have to say, AMAZING work through and through!! You've definitely inspired me to pull the car cover off the Mach 1 and tackle that once again...

Thanks for the tips, pictures and videos!
 
OP
M

MP&C

Well-known member
Joined
Oct 21, 2009
Messages
4,396
Location
Leonardtown, MD
I think it has about 6 different tips for a wide variance in flame size and heat. It appears more efficient as it burns less fuel. It does come with a cutting tip and roller assy, but I have never used it to comment... Overall a pretty nice piece..
 
OP
M

MP&C

Well-known member
Joined
Oct 21, 2009
Messages
4,396
Location
Leonardtown, MD
Larry, I guess the biggest advantage is all the different tips allows you to tailor the flame to the job requirement. Typically for welding you would want a soft flame, which would put your gas pressures between 2 and 5 lbs. More important than the torch, you would want multi-stage regulators instead of single stage, which will give you a steadier pressure at these low settings for more consistency in your flame. With the different tips it has, you can select the one appropriate for the job and still maintain the low pressure settings. Some guys find the aluminum housing cumbersome and adding weight, if you haven't used a torch then you wouldn't have this pre-disposition, but then others have removed the housing to remove the weight and use it that way. I believe their name is Cobra torch now, they are normally sold at the larger auto swap meets like Carlisle and Hershey. If you attend those, you should be able to find a dealer and kick the tires before you buy. I think there is also a dealer on the metal sites, do a search there on Cobra torch and you should find them as well as additional info.
 

NASTYZEN

Well-known member
Joined
Jun 11, 2010
Messages
2,823
Location
St-Colomban,Que. Canada
Nice to see this thread was moved to it's home again. The mods had a moment of :willy_nil but now all is as it should be.:thumbup:


I had one of those torches way back when I had partners..It was called a Dillon torch. Looked exactly the same as yours. It also had an attachment for flame cutting.
I think it's strong points are the different tips and the flame cone is almost double the length that of a regular torch, probably shields the weld area more. I used it for welding Aluminum.
I have my old plain Victor torch now. Works well for me and was cheap.
If I had a Dillon, I would use it. I wont fork out the dough for a new one.
 

gipraw

Well-known member
Joined
Apr 25, 2013
Messages
1,033
Location
Cypress, TX
Robert - thanks for that walk through. I am getting ready to tackle that same issue on a project and that verified my thought process for me. Now if I could only pull it off as well as you manage.

As always, your work impresses me as does your ability to document and explain what you are doing. Thanks for taking the time and effort to share.
 
OP
M

MP&C

Well-known member
Joined
Oct 21, 2009
Messages
4,396
Location
Leonardtown, MD
Thanks for the comments guys. Should have an update on the wagon later this evening. In the meantime, here is an excellent video by Bill Gibson that explains the proper use of tin snips. Myself, I have been using tin snips for well over thirty five years, but after watching Bill's video had that ah-ha moment. It made me realize what I had been doing wrong..... Good stuff.. We're never too old to learn.


joeswamp

Well-known member
Joined
Jul 25, 2007
Messages
2,418
Location
Massachusetts
Thanks for that video. I think tin snips are probably the most misused tool on the planet -- I took a course with Wray Schelin about six months ago and when he demonstrated his techniques for cutting metal, I was shocked by my own ignorance. Those things need to come with a book of instructions or something.

I have a quick unrelated question though -- when you epoxy prime small items, how do you do it? Do you actually go through the trouble of setting up the gun, cleaning it, etc? I've never used epoxy primer before and I've heard it can be very inconvenient for small stuff. Do you have a small booth to isolate your painting from the rest of the shop?
 
OP
M

MP&C

Well-known member
Joined
Oct 21, 2009
Messages
4,396
Location
Leonardtown, MD
.....when you epoxy prime small items, how do you do it? Do you actually go through the trouble of setting up the gun, cleaning it, etc? I've never used epoxy primer before and I've heard it can be very inconvenient for small stuff. Do you have a small booth to isolate your painting from the rest of the shop?


Where I do have a full size semi-downdraft booth, for small stuff like shown on the lift gate I'll just mix up some epoxy and brush it on, about two coats gives good coverage. It's not worth the electricity for the booth and solvents to clean the gun. The epoxy really doesn't care if it's sprayed, brushed, or rolled ;) so unless it is an exposed area needing wet sanding afterward, for these covered areas, do what you have to do... Sure a spray gun will give you a better, smooth finish, but once welded together, you'll never see this. Just having epoxy in there will give it better protection than the factory bare steel, so it will help to prevent re-occurrence of the same.

Yeah, I need to get up to Wray's as well. He's a smart cookie when it comes to this stuff, and does an equally good job of explaining it, from what I hear....
 
Last edited:

joeswamp

Well-known member
Joined
Jul 25, 2007
Messages
2,418
Location
Massachusetts
You heard accurately. That guy is a metalworking genius and he's extremely generous with his hard-earned knowledge. ;)
 
OP
M

MP&C

Well-known member
Joined
Oct 21, 2009
Messages
4,396
Location
Leonardtown, MD
Bill's a good instructor..


With the epoxy well cured, holes were drilled for plug welds....


Picture339-1.jpg


Then used the modified plug weld bit for cleaning out the adjacent panel...


Picture340-1.jpg


Picture342-1.jpg


Picture343-1.jpg


Cleaned spots for the plug welds...


Picture344-1.jpg


Picture345-1.jpg


Picture346-1.jpg


Picture348-1.jpg


I had some questions about how well the epoxy held up to heat from welding. The epoxy next to the weld above, where it turned brown from the heat, was allowed to cool off, then attempted to scrape the paint with my thumbnail. I thought it may scrape some off, but it held tight, not so much as a scratch.

Then I got on a roll and forgot pictures, but here's the patch all welded in....


Picture349-1.jpg


Next, drilled the holes in the lower window opening....


Picture350-1.jpg


.....and got the holes placed for the nut plate and it's plug welds...


Picture351-1.jpg


Picture352-1.jpg


Picture353-1.jpg


Hopefully tomorrow we can get some profile blocks cut out to fold over the ends of the outer piece...
 

havi

Well-known member
Joined
May 6, 2008
Messages
118
Location
Northeastern MN
Great work as always! In the recent pics, I see a table with two vises? Is there more to this table? I'm in the process of making a set-up table myself, and am looking for tips and tricks. Thanks.
 
To avoid these ads, REGISTER NOW!
OP
M

MP&C

Well-known member
Joined
Oct 21, 2009
Messages
4,396
Location
Leonardtown, MD
The Monarch vise I recently picked up at an auction for about $20, couldn't pass that up, and just clamped it there on the table. Don't know that a person would need two vises, but it has come in handy working on this lift gate having the side by side vises.


On the table, it has a 1/2 thick steel top, angles welded on for legs.
 
Last edited:
OP
M

MP&C

Well-known member
Joined
Oct 21, 2009
Messages
4,396
Location
Leonardtown, MD
Laying out the ends for trimming.....


Picture354-1.jpg


Picture355-1.jpg


Here's the piece we'll use to cut out the profile blocks, 3/4 thick steel


Picture357-1.jpg


As I am fresh out of good band saw blades, these were used....


Picture358-1.jpg


The lower piece was tapered at the bottom as the bottom of the lift gate tapers in below the bead detail..


Picture360-1.jpg


.....like so.....


Picture361-1.jpg


Not perfect, but should work just the same...


Picture363-1.jpg


Clamped in the vise.....


Picture365-1.jpg


Then some heat is applied, and hammered the high spots..


Picture366-1.jpg


Picture367-1.jpg


Picture368-1.jpg


Fitted.....


Picture369-1.jpg


Picture370-1.jpg


and the other end......


Picture373-1.jpg


Picture374-1.jpg


Picture375-1.jpg


Picture376-1.jpg


Hope to test fit everything tomorrow before all the parts get media blasted..
 
OP
M

MP&C

Well-known member
Joined
Oct 21, 2009
Messages
4,396
Location
Leonardtown, MD
Things don't always work the way you planned. Before the ends were folded, the bottom piece could never be test fit into the opening. Now with the ends folded, it was slipped over the bottom of the lift gate and it bolted into the opening. With the upper bead detail aligned, the lower was considerably off kilter. Slightly off on the contour, I guess.


Picture379-1.jpg


Picture380-1.jpg


The patch piece was marked off on both ends to bring the lower bead detail up into the car for better alignment...


Picture381-1.jpg


Here's the driver's side after cutting and welding, shows a much better alignment. Good weld penetration on the inside, the seam at the end will be finished after folding onto the lift gate..


Picture383-1.jpg


Picture384-1.jpg


Picture385-1.jpg


We may be able to save this yet..
 
Last edited:
OP
M

MP&C

Well-known member
Joined
Oct 21, 2009
Messages
4,396
Location
Leonardtown, MD
Claude, I do have a deadline but between extensive travel for the day job for the past couple years and rust issues that follow the domino effect, the deadline has been a moving target. Hope to get some primer on it by Jan.
 

LIGOOMBA

Member
Joined
Jul 4, 2013
Messages
24
Location
Matthews NC
Wow ! Incredible work ! I just stumbled upon this thread .
If I lived closer I would be camped out at your door quiet often .Truly a craftsman .
 
OP
M

MP&C

Well-known member
Joined
Oct 21, 2009
Messages
4,396
Location
Leonardtown, MD
Thanks for all the comments.

Between Thanksgiving and a slight cold afterward, I've been distracted a bit. Hope to be back in the shop in a day or so...
 
OP
M

MP&C

Well-known member
Joined
Oct 21, 2009
Messages
4,396
Location
Leonardtown, MD
Got some paint on the flying pig tonight


Picture175-3.jpg


attachment.php


I didn't feel like spending the time to media blast this thing, so it got a good coat of POR. This will make a good gag Christmas gift...
 

Attachments

  • 2014 (800x600).jpg
    2014 (800x600).jpg
    54 KB · Views: 2,106
Last edited:

pipehack

Well-known member
Joined
Feb 23, 2009
Messages
923
Location
chicago
Great work. I really like this thread. How do you like that Dillon/Henrob/Cobra torch. I have 2 of them. One set up for cutting, which I've never used yet and the other set up for welding and brazing. I got them at an estate sale and a flea market for next to nothing. Just pointing that one out so guys don't think I spent $700.00 on torches. I really enjoy gas welding. It's slow and deliberate. Not like MiG welding which I also have. It's just too fast for me on some projects.
 
OP
M

MP&C

Well-known member
Joined
Oct 21, 2009
Messages
4,396
Location
Leonardtown, MD
Great work. I really like this thread. How do you like that Dillon/Henrob/Cobra torch. I have 2 of them. One set up for cutting, which I've never used yet and the other set up for welding and brazing. I got them at an estate sale and a flea market for next to nothing. Just pointing that one out so guys don't think I spent $700.00 on torches. I really enjoy gas welding. It's slow and deliberate. Not like MiG welding which I also have. It's just too fast for me on some projects.

I need to practice more with the Henrob, but IMO it does offer better "fine tuning" of the flame than the typical O/A setup. Mine also has the cutting attachment, but don't think I've ever used it.


Sorry to all the followers for my short hiatus from the shop, my trusty 16 year old truck has been having transmission issues for the past few months. My wife refused to put any more money into it, saying we should put any funds into a new(er) one. So we have been doing the truck shopping deal for the past couple-three weeks. In all the ebay ads, Craigslist ads, etc, I've found that a 2011 F250 with fairly low miles were in such high demand that they were only 6 to 7 thousand cheaper than something brand new with no miles (given the rebates and year end clearance sales). So we figured the new one was the way to go.. When I got home from the dealer Monday night after doing paperwork, I posted the dually on CL. It was sold and going out the driveway before 10 am the following morning... Just in time to clean up the driveway, as I picked up the new one two hours later..

Out with the old...

Picture366.jpg


In with the new....

Picture401.jpg


And with the truck shopping headaches behind us, we can get back in the shop tomorrow...
 
Last edited:

don long

Well-known member
Joined
Mar 31, 2012
Messages
8,841
Location
southern california
Nothing like a new truck to get one motivated
And red to boot (nice)

I have been missing those metal fab lessons
So please lets get back to it next year.
Thanks
Don
 
OP
M

MP&C

Well-known member
Joined
Oct 21, 2009
Messages
4,396
Location
Leonardtown, MD
Worked on the other end of the lower patch today, to fix the mis-alignment of the beltline trim...


Picture380-1.jpg


Made a relief cut....


Picture403-1.jpg


Picture404-1.jpg


Rear view shows full weld penetration....


Picture406-1.jpg


Welds were planished, then ground to just above panel surface, and next weld overlapped, and repeat. The overlapping helps to eliminate any missed welds/pin holes.


Picture408-1.jpg


Picture409-1.jpg


Picture410-1.jpg


Picture411-1.jpg


Picture412-1.jpg


Picture413-1.jpg


Picture414-1.jpg


Picture415-1.jpg


Picture416-1.jpg


Picture417-1.jpg


All done and cleaned up....


Picture418-1.jpg


Picture419-1.jpg


......for a much better fit..


Picture420-1.jpg


Then media blasted the inside in preparation for some epoxy primer...


Picture425.jpg


.....and did some adjustment of the tailgate fitment.


Picture422.jpg


Picture423.jpg
 

Beefbuzz

Well-known member
Joined
Feb 17, 2013
Messages
72
Location
Idaho
I have been at this for hours and I am only on page 18 but it is 4am here and I have to rip myself away so that I don't see the sun come up.

So inspiring, words are not enough...
 

Kevin54

MEMBER EMERITUS
Joined
Jan 12, 2005
Messages
29,341
Location
Urbana, Ohio
Robert...I just have to say that your thread just blows me away with the attention to detail and the explanations are just fantastic!!! I know that this thread alone will make me look at things in a different way whenever I get started on my truck

I know that you've done a lot to the car, and probably have a lot to go, but any idea when some primer and paint will start hitting it?

BTW...Nice NEW Ford, and the old one was /is a great looking Ford too. Congrats on the new ride!!!
 
Last edited:
To avoid these ads, REGISTER NOW!
Top Bottom