To avoid these ads, REGISTER NOW!

MP&C Shop Projects

Kevin54

MEMBER EMERITUS
Joined
Jan 12, 2005
Messages
29,341
Location
Urbana, Ohio
Picture165.jpg


Robert....I went back and was looking through the thread with the Fairlane and I have a question. On the sail panel where you repaired everything, you removed the factory lead from the seam. Do you replace it with lead, or do you remove it all together and use some sort of polyester type filler? Maybe I didn't read far enough down to see it.
 
To avoid these ads, REGISTER NOW!

K13

Well-known member
Joined
Oct 24, 2007
Messages
2,222
Location
St. Albert, AB Canada
As I've been over-exerting/exceeding the capacity of my 20 ga apron brake, I think that will be replaced with a new machine. Either going with a box and pan or a magnetic brake....


finger-brake-bb5012f.jpg


magnetic-brake-bb4816m.jpg

Those Baileigh magnetic brakes are getting rave reviews from guys that have them. I have seen posts on various sites from 4 or 5 different guys and they all love them. Shane is a super good guy to deal with as well.
 
OP
M

MP&C

Well-known member
Joined
Oct 21, 2009
Messages
4,396
Location
Leonardtown, MD
Robert....I went back and was looking through the thread with the Fairlane and I have a question. On the sail panel where you repaired everything, you removed the factory lead from the seam. Do you replace it with lead, or do you remove it all together and use some sort of polyester type filler? Maybe I didn't read far enough down to see it.

Given the rust that occurred from the inside of the roof, I wanted to insure there were no other issues hiding under the lead. I removed all of it, and filled those "lead valleys" back in with marglas.
 
OP
M

MP&C

Well-known member
Joined
Oct 21, 2009
Messages
4,396
Location
Leonardtown, MD
OK, so I was bored this evening. I have a louver die set for my Lennox that was originally ordered and sized for .09 aluminum. Tonight I thought I'd try them out on some 18 gauge CRS to see how well it performed...

Picture007.jpg


Picture008.jpg


Picture009.jpg


Picture005.jpg
 

Kevin54

MEMBER EMERITUS
Joined
Jan 12, 2005
Messages
29,341
Location
Urbana, Ohio
Picture008.jpg


Robert...you have me lost. This isn't what's cutting the louver, but what does this do? That part with the handle I mean.

The louvers don't look like it distorted the metal at all.
 

nine4gmc

Well-known member
Joined
Mar 24, 2012
Messages
14,357
Location
Dallas
Kevin, if I'm looking at it right, the die cuts straight and the thing with the handle can be swiveled right to finish one rounded end of the louver, then left for the other side after making the straight cut the length you need it. :beer:
 
OP
M

MP&C

Well-known member
Joined
Oct 21, 2009
Messages
4,396
Location
Leonardtown, MD
^^^^^ Exactly.. Kevin, here's some pics of the upper die....


HPIM6300.jpg


louver.jpg


The process normally uses a couple passes, one to do the initial slit/cut, with subsequent passes made deeper to form the louver. After the final pass, then the handle is swung to the appropriate side on the ends to "coin" or crisp up the detail on the sides..
 
Last edited:

NASTYZEN

Well-known member
Joined
Jun 11, 2010
Messages
2,823
Location
St-Colomban,Que. Canada
Performs darn well Robert. You **** for having that Lennox.
I thought there was only Pullmax that could do that kind of work.
Show us what else that machine can do!
:beer:
 
OP
M

MP&C

Well-known member
Joined
Oct 21, 2009
Messages
4,396
Location
Leonardtown, MD
Performs darn well Robert. You **** for having that Lennox.
I thought there was only Pullmax that could do that kind of work.
Show us what else that machine can do!
:beer:

The Lennox was $1000 from a DC9 maintenance facility that Northwest Airlines was shutting down at Atlanta airport. Couldn't let it pass up for that....


Here's another fabrication done on a roof repair panel...


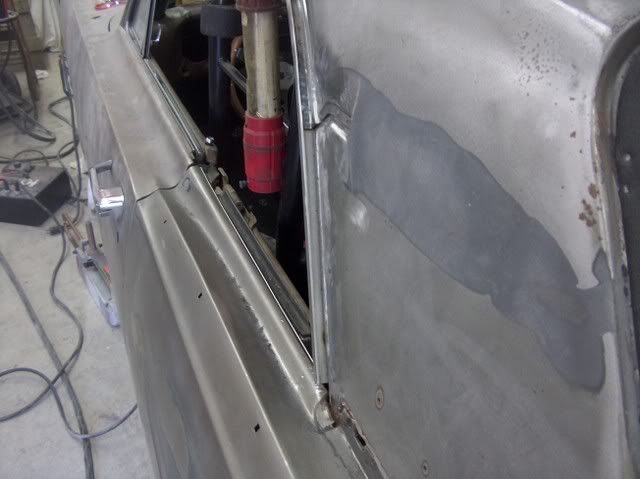
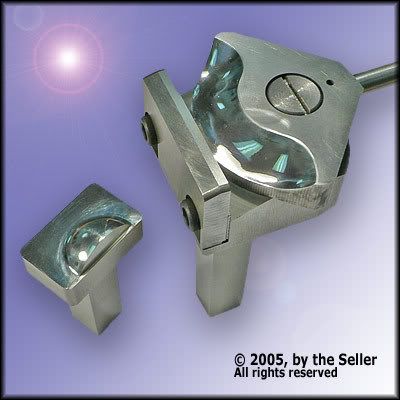
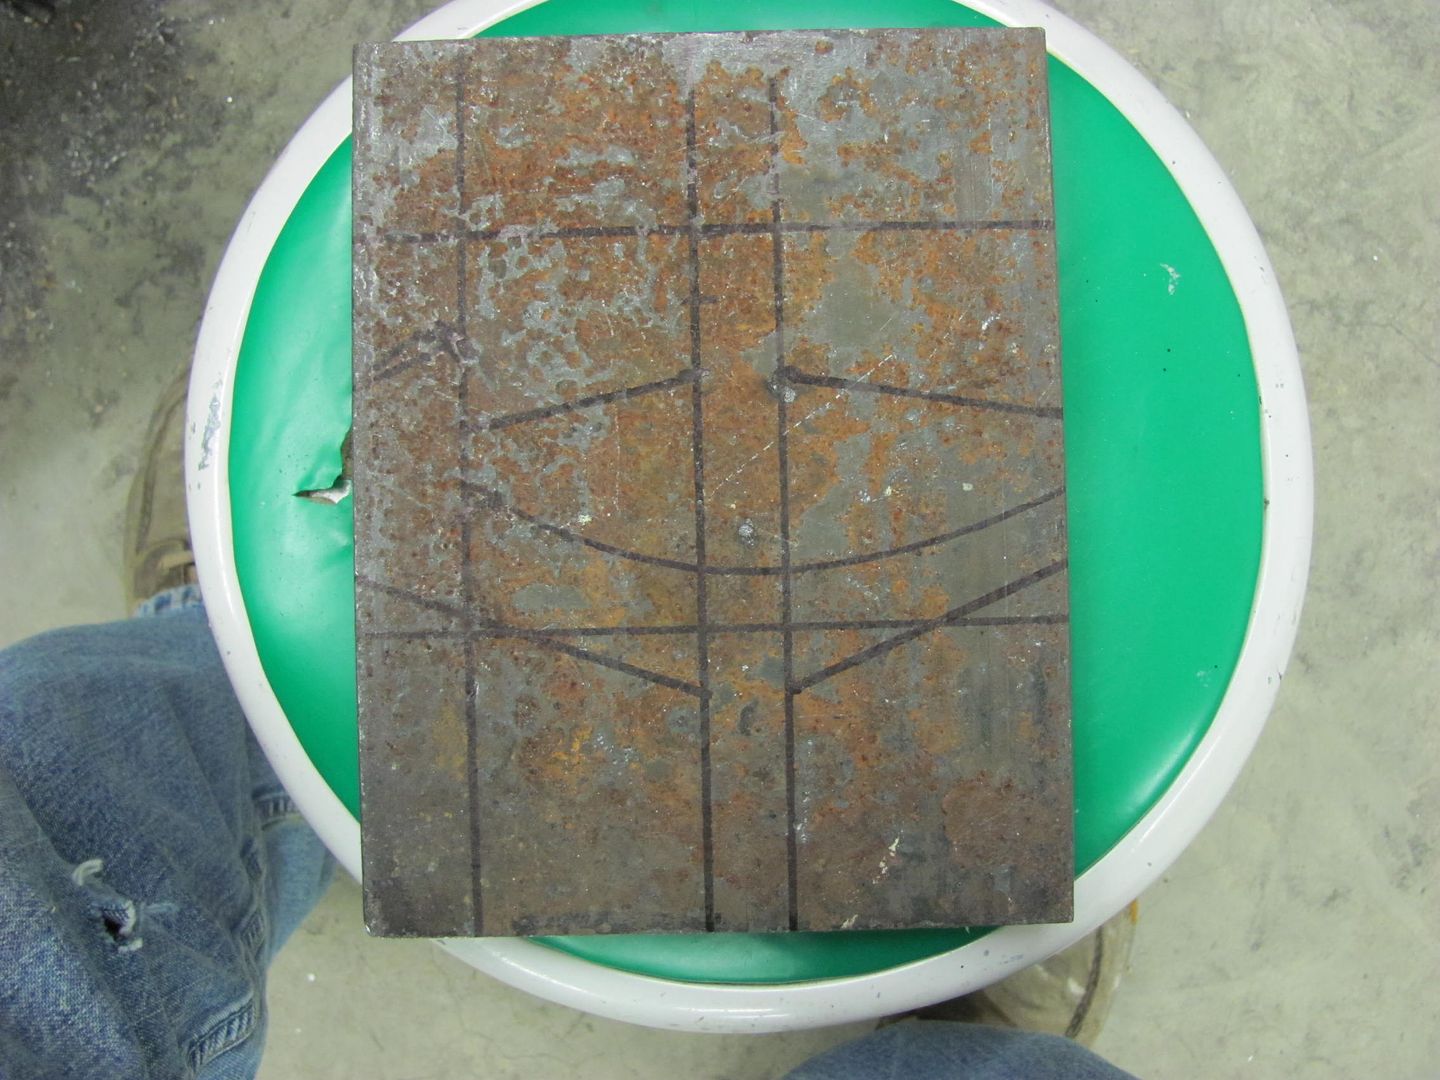
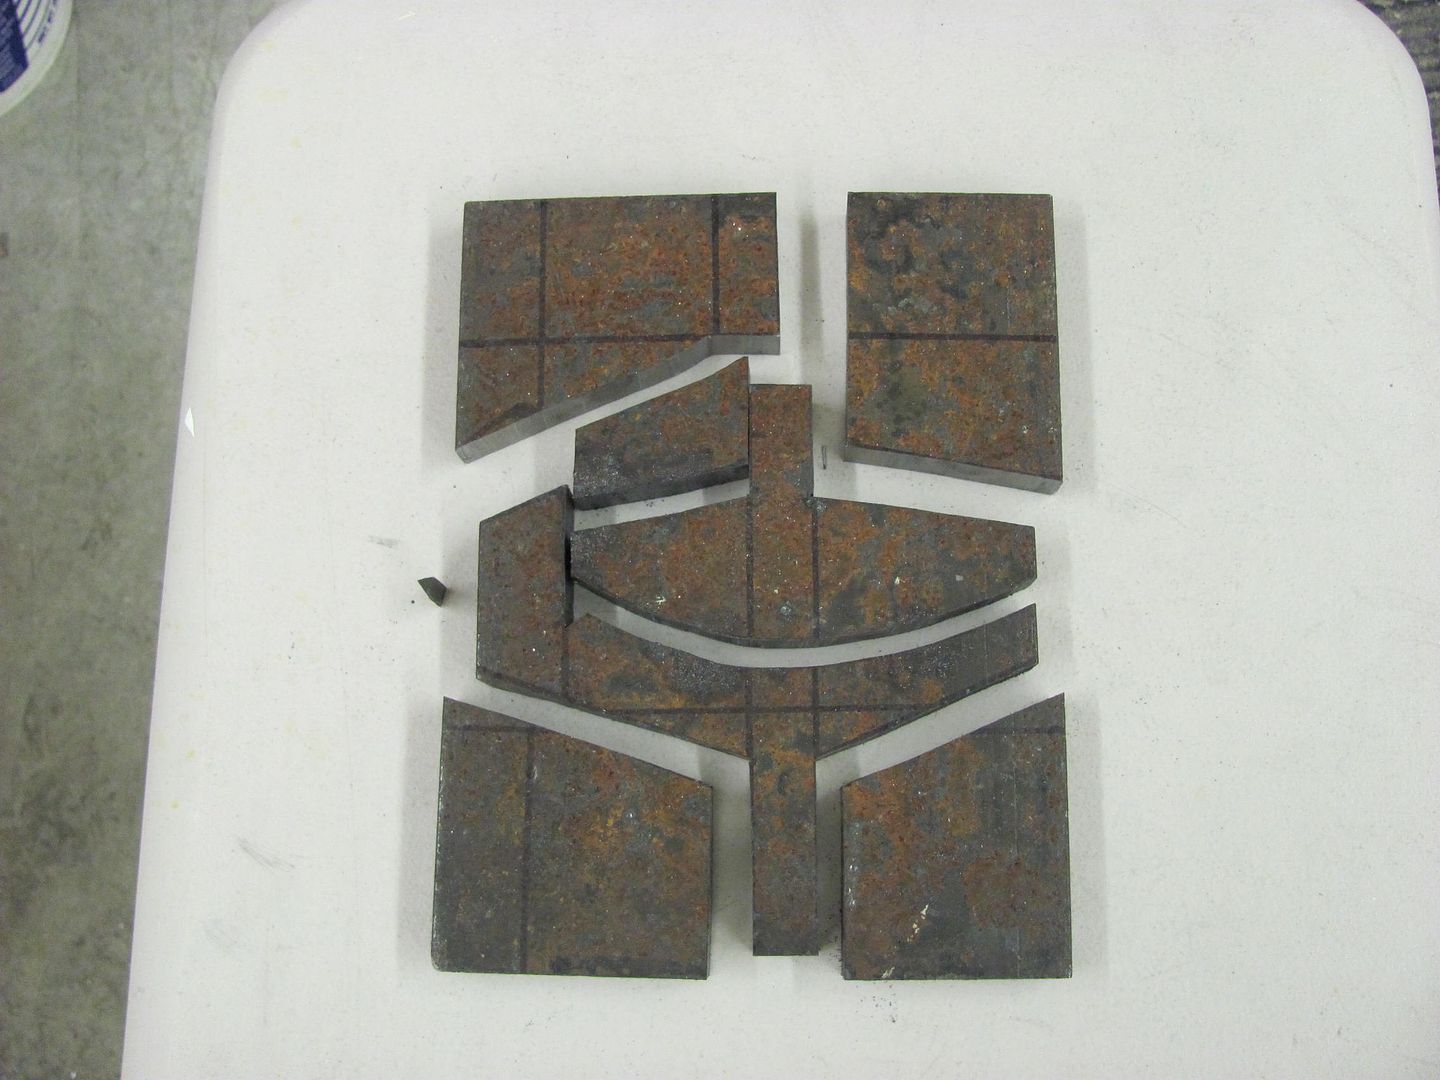
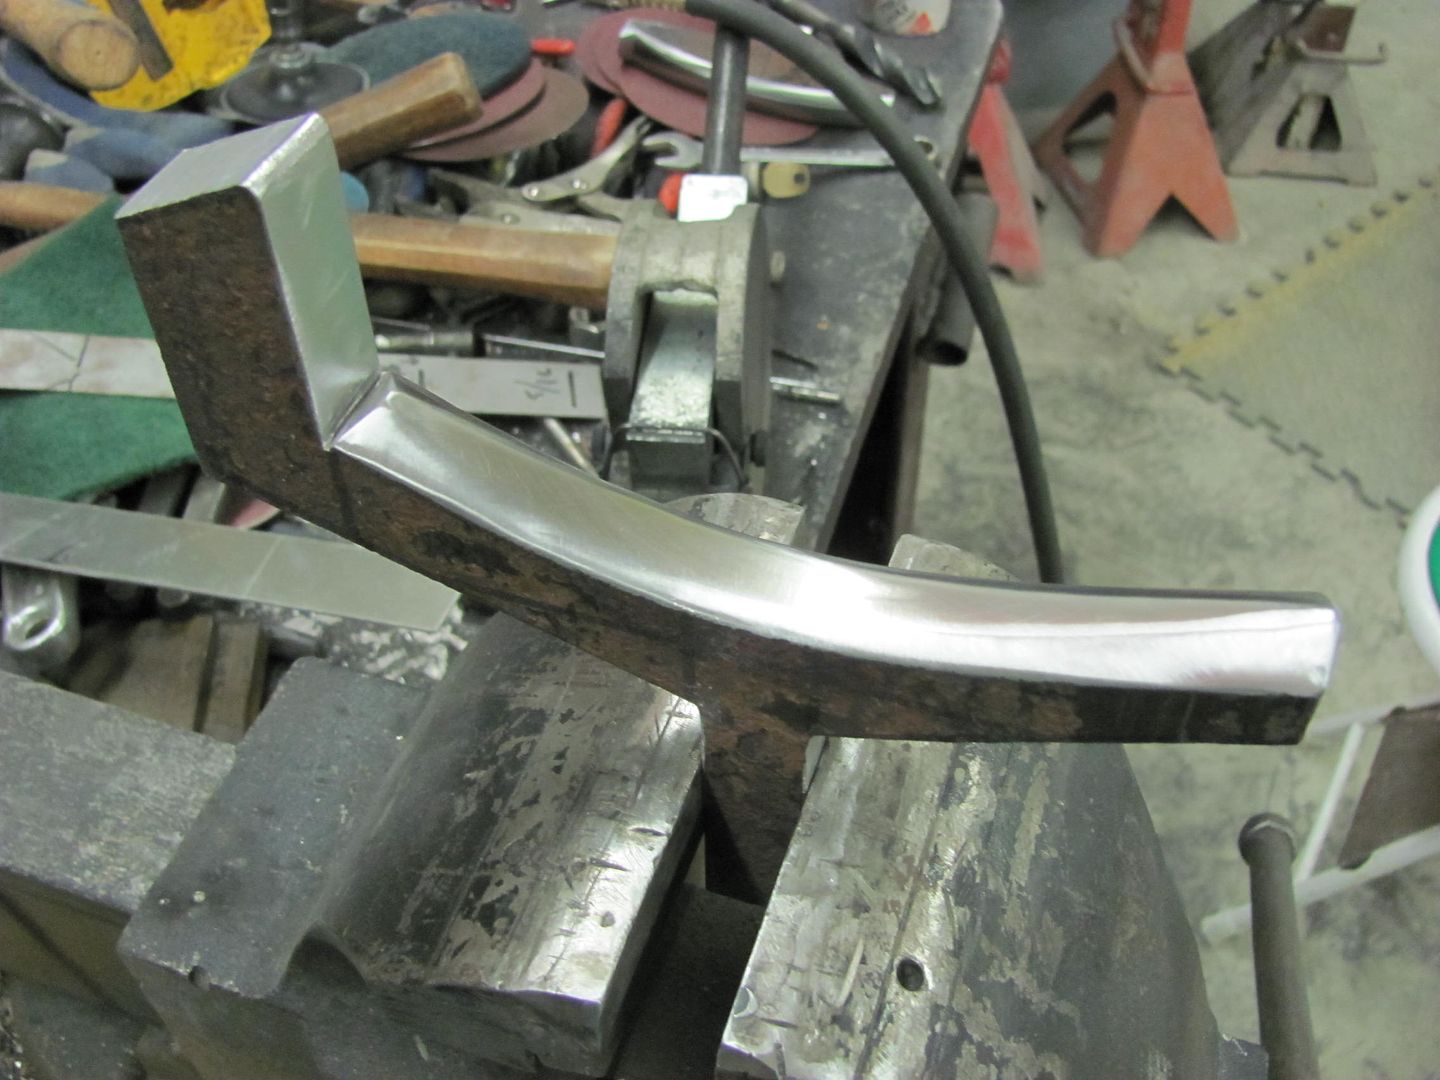
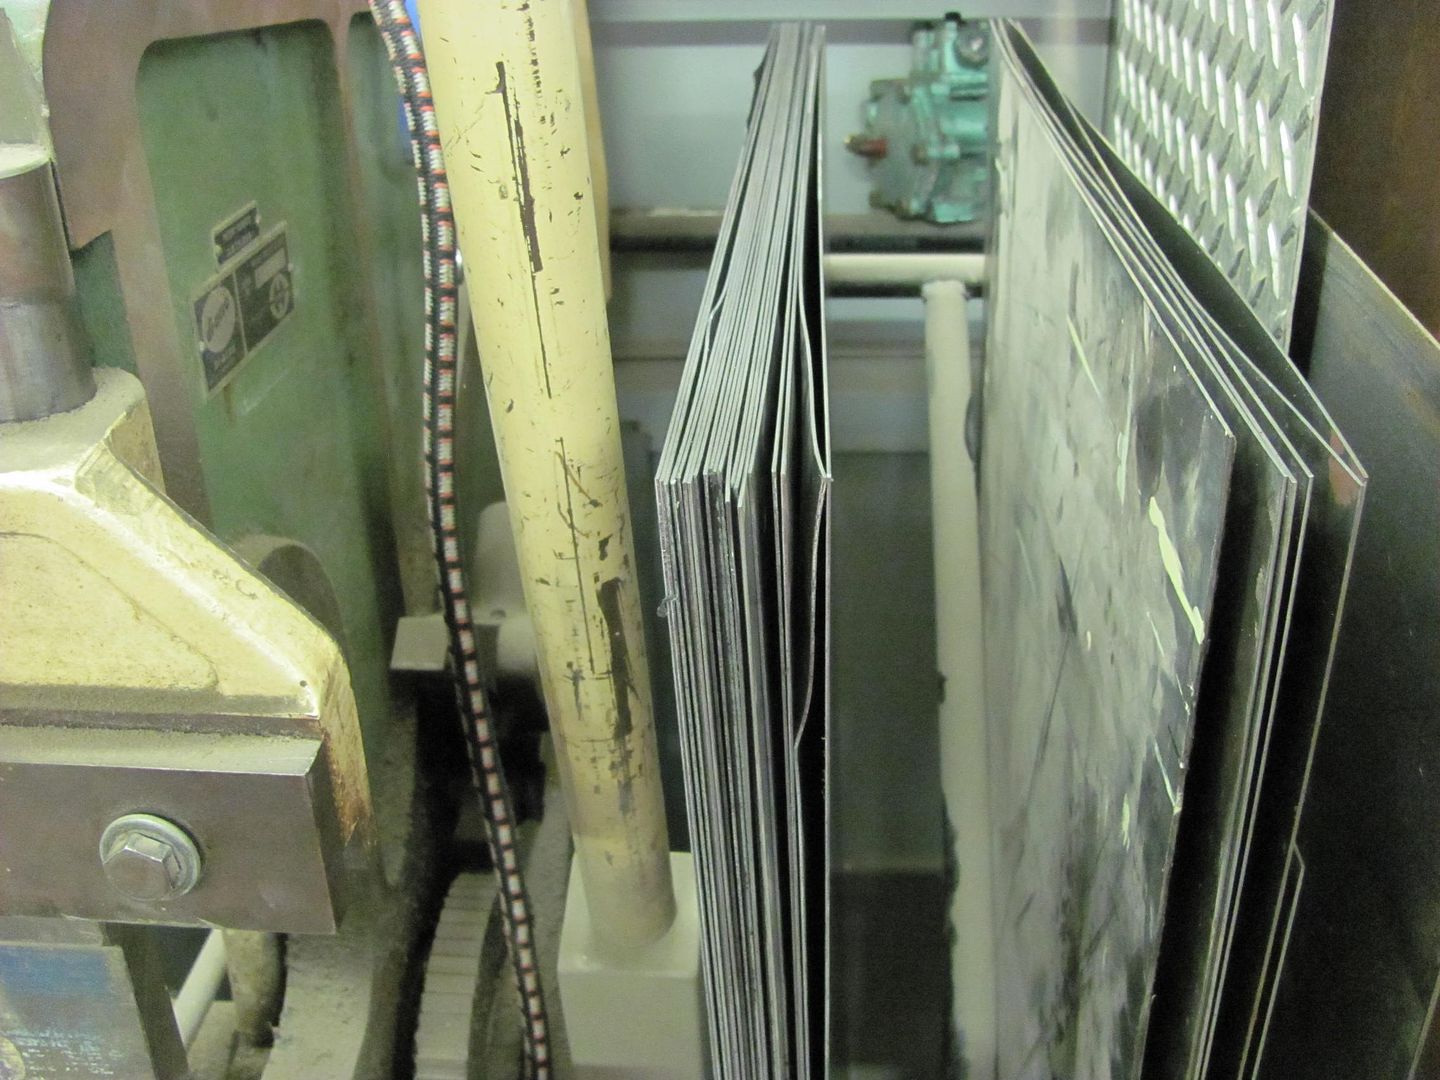
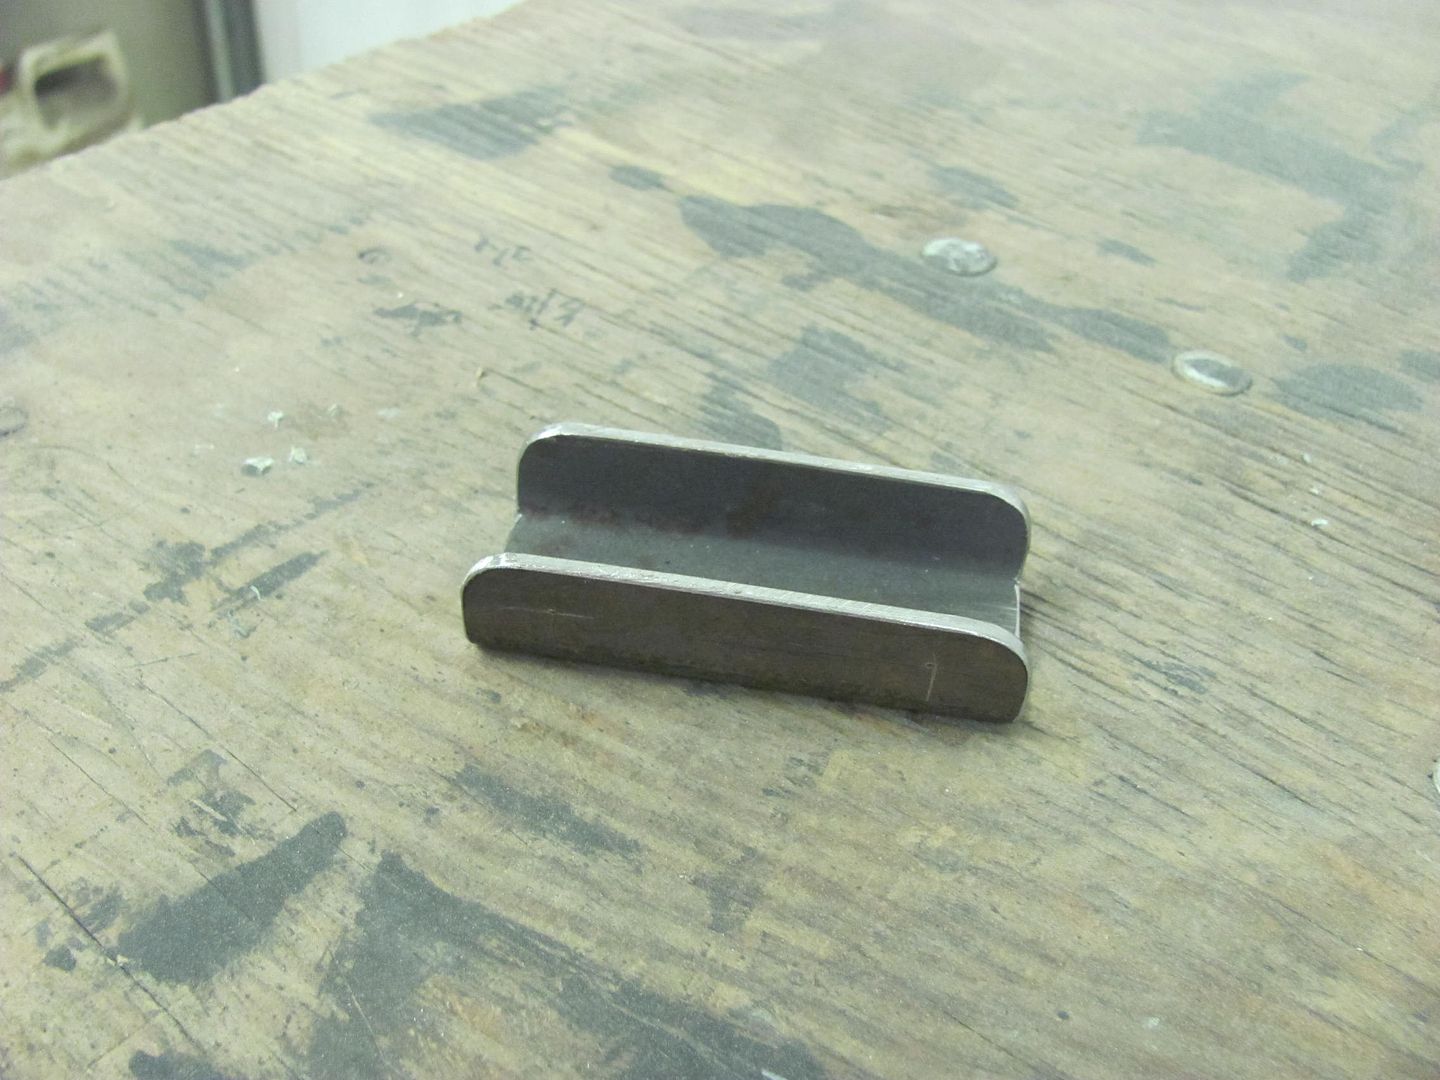
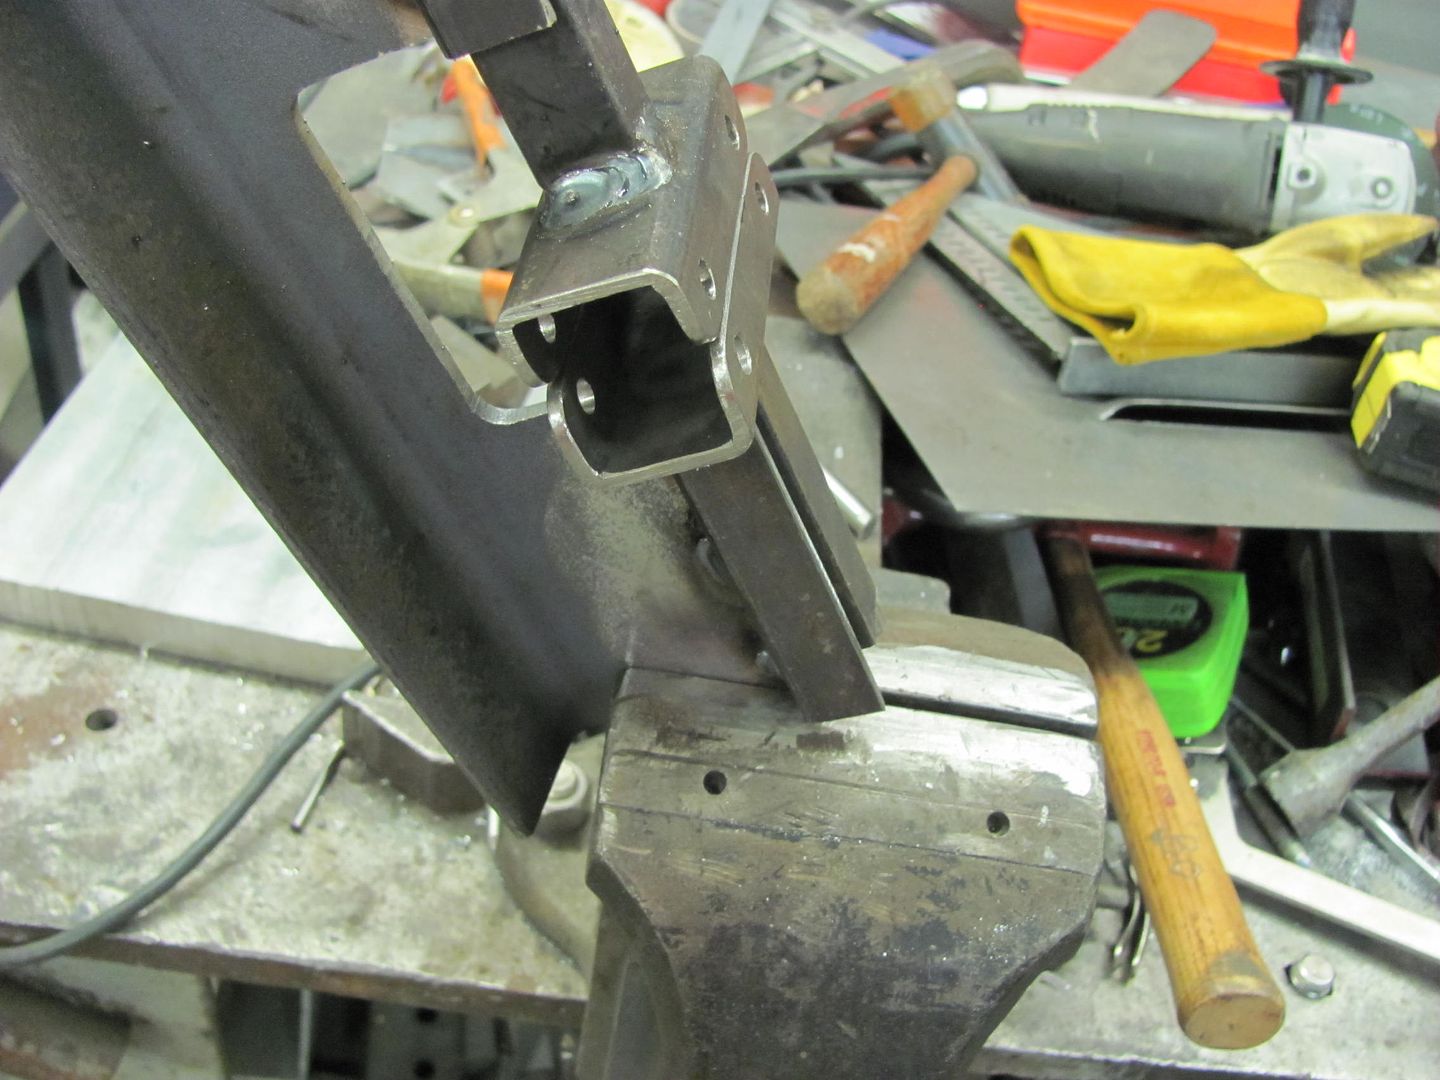
Time to make up a die to form the roof repair panel on the Lennox. First to make a profile template.....


Picture122.jpg


Picture123.jpg


Picture124.jpg


Picture125.jpg


Picture126.jpg


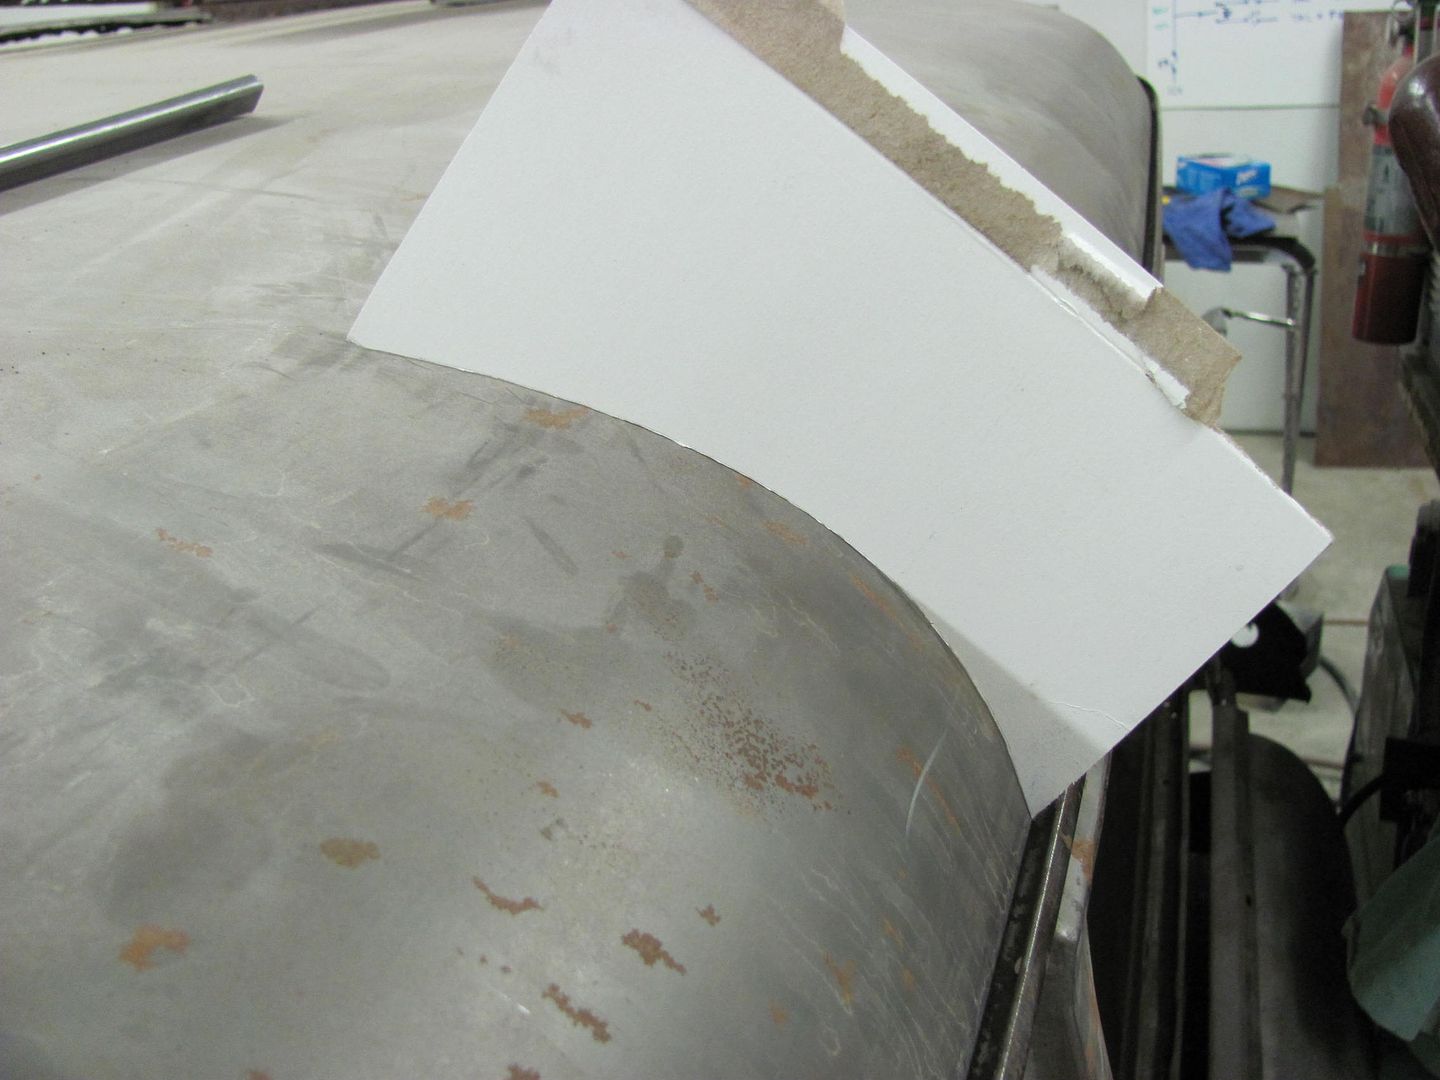
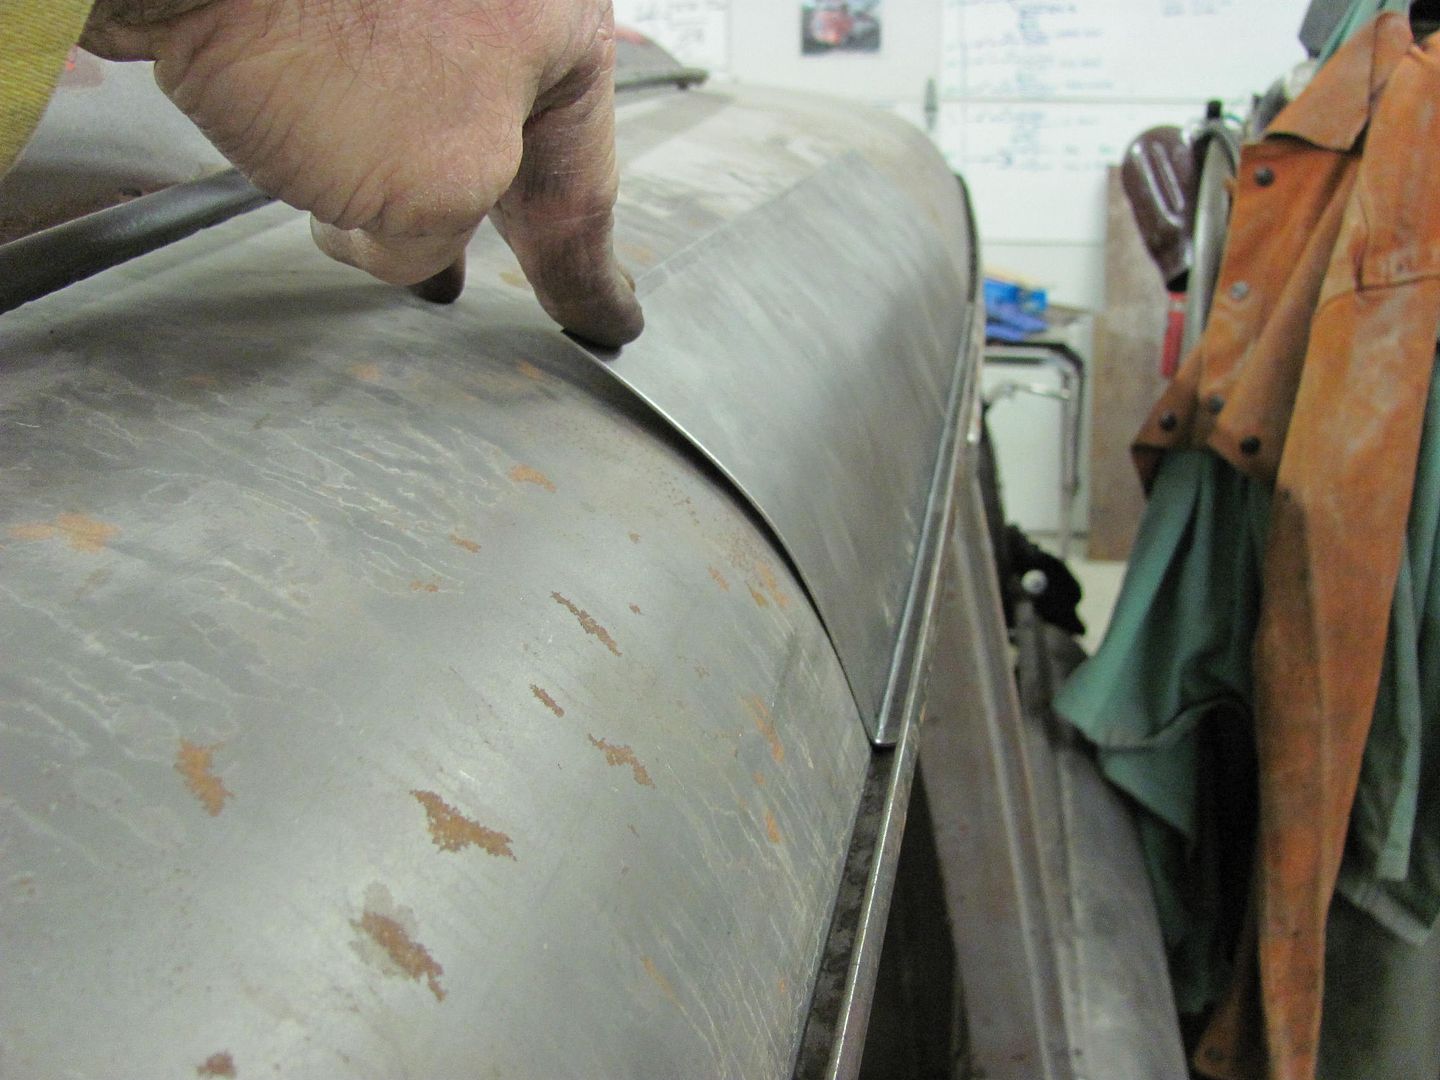
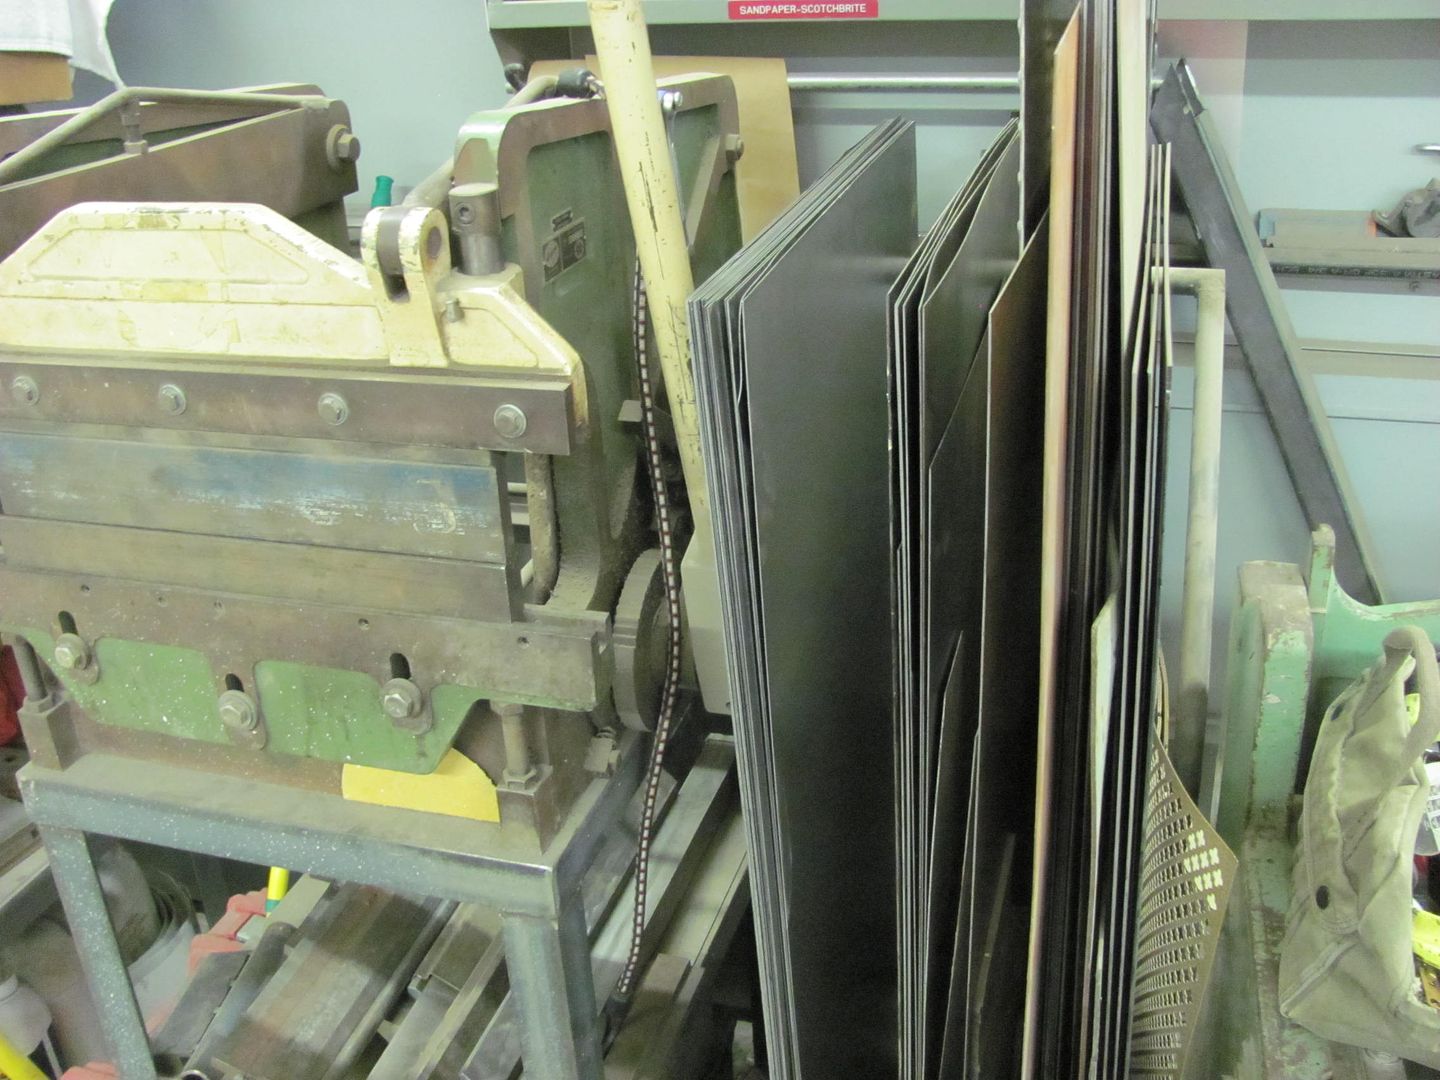
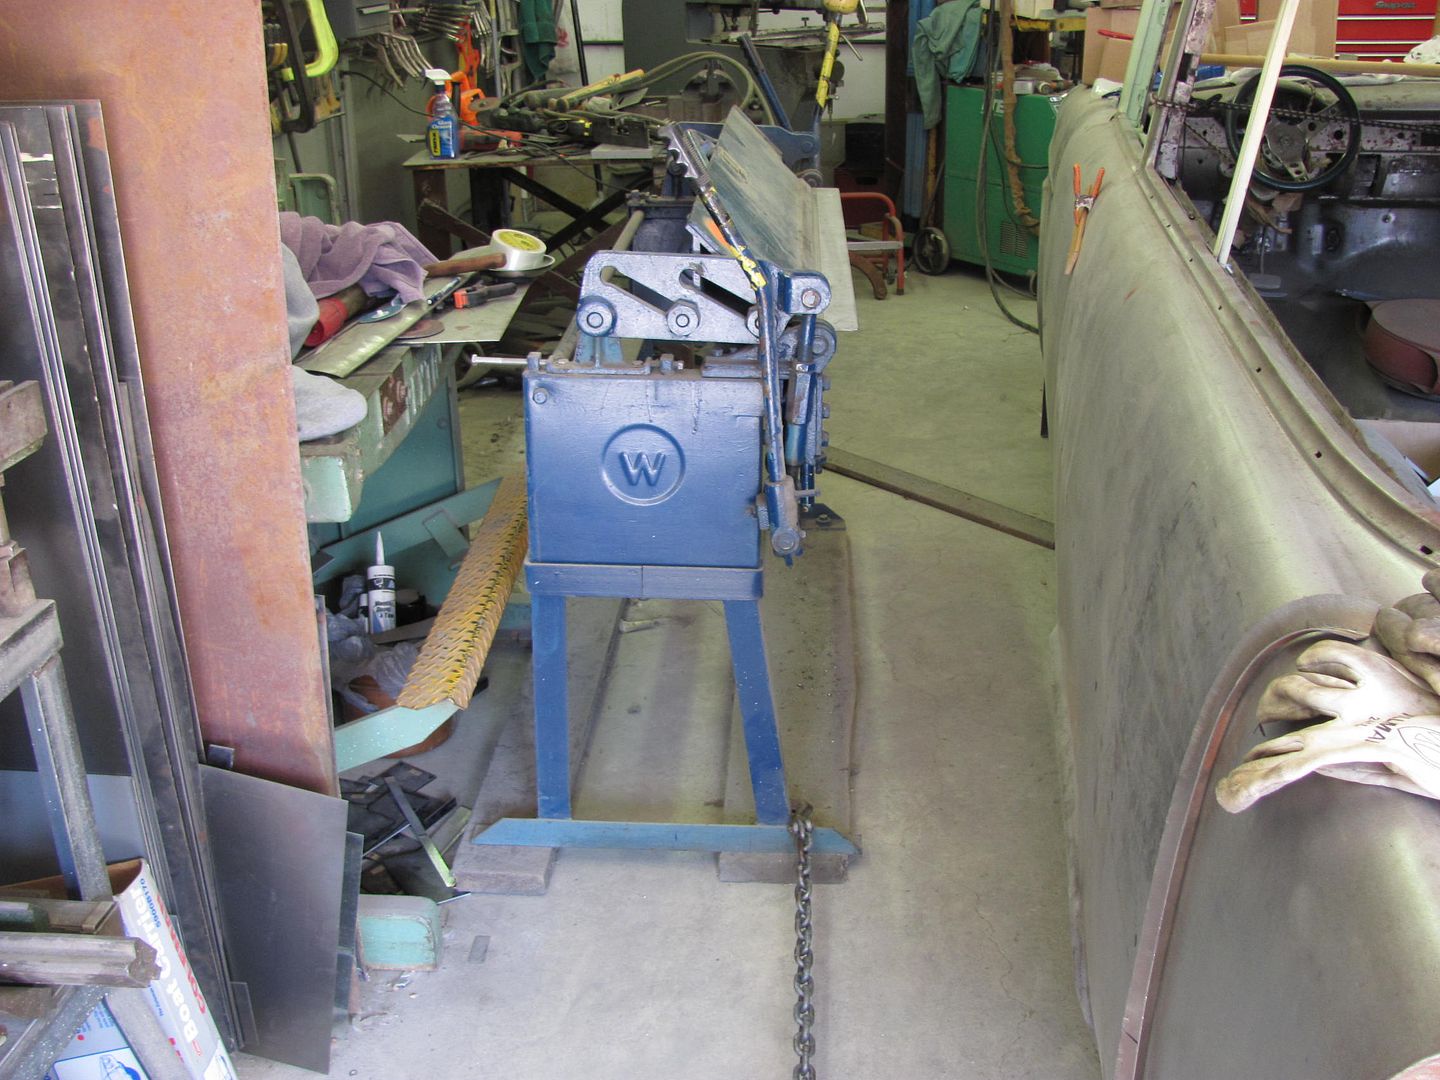
A sample piece of 19 ga is run through and test fit alongside the "model" car.....


Picture128.jpg


Picture129.jpg


It's real close, but I want to tweak the dies to see if I can get it a little closer

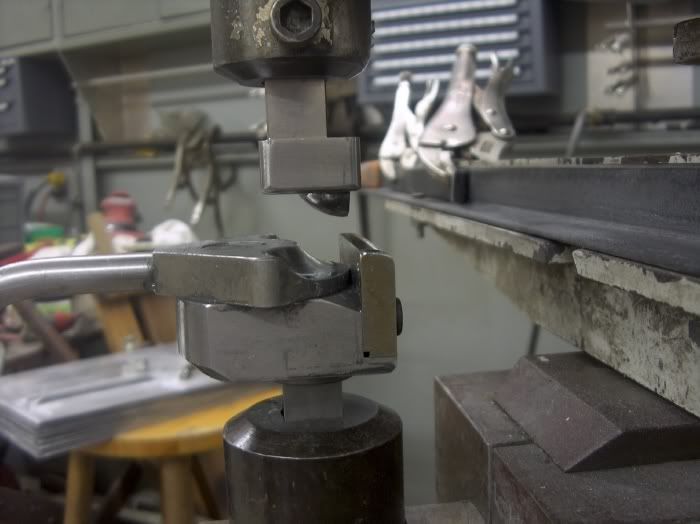
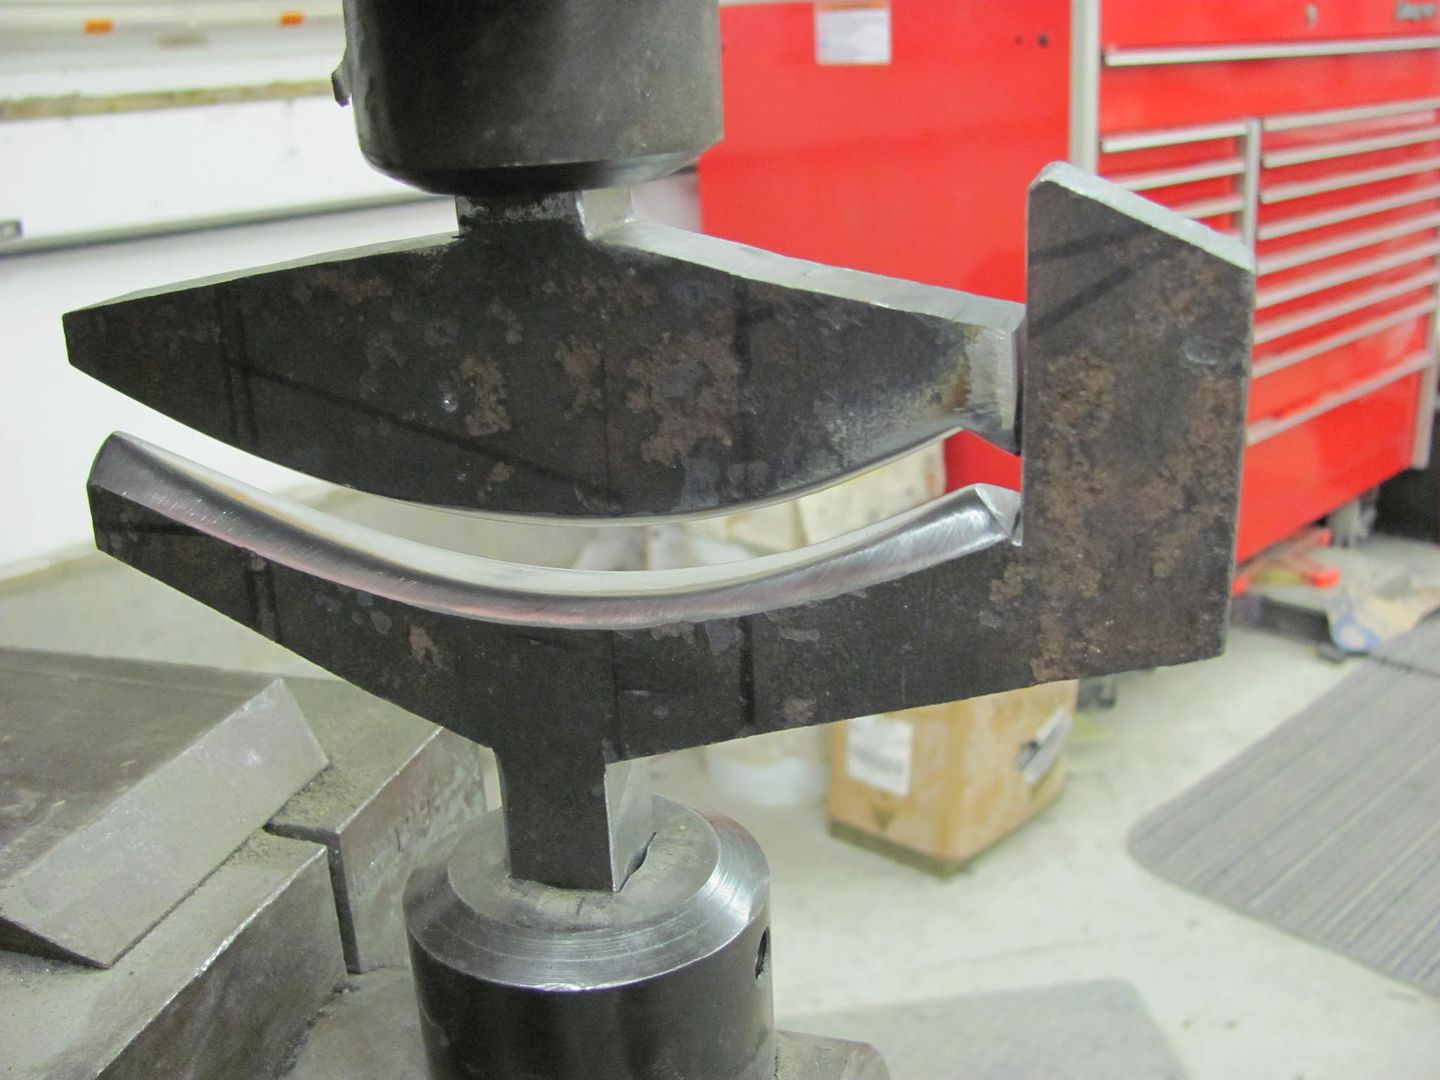
The first sample you had a tendency to flatten out as you progressed to the end, rather than maintain the same radius thoughout. Per the guys at metalmeet I needed to chamfer/radius the coming in and going out of the dies, and by passing it in and out at a slight angle, it would remedy that.


Picture133.jpg


Picture135.jpg


Picture137.jpg


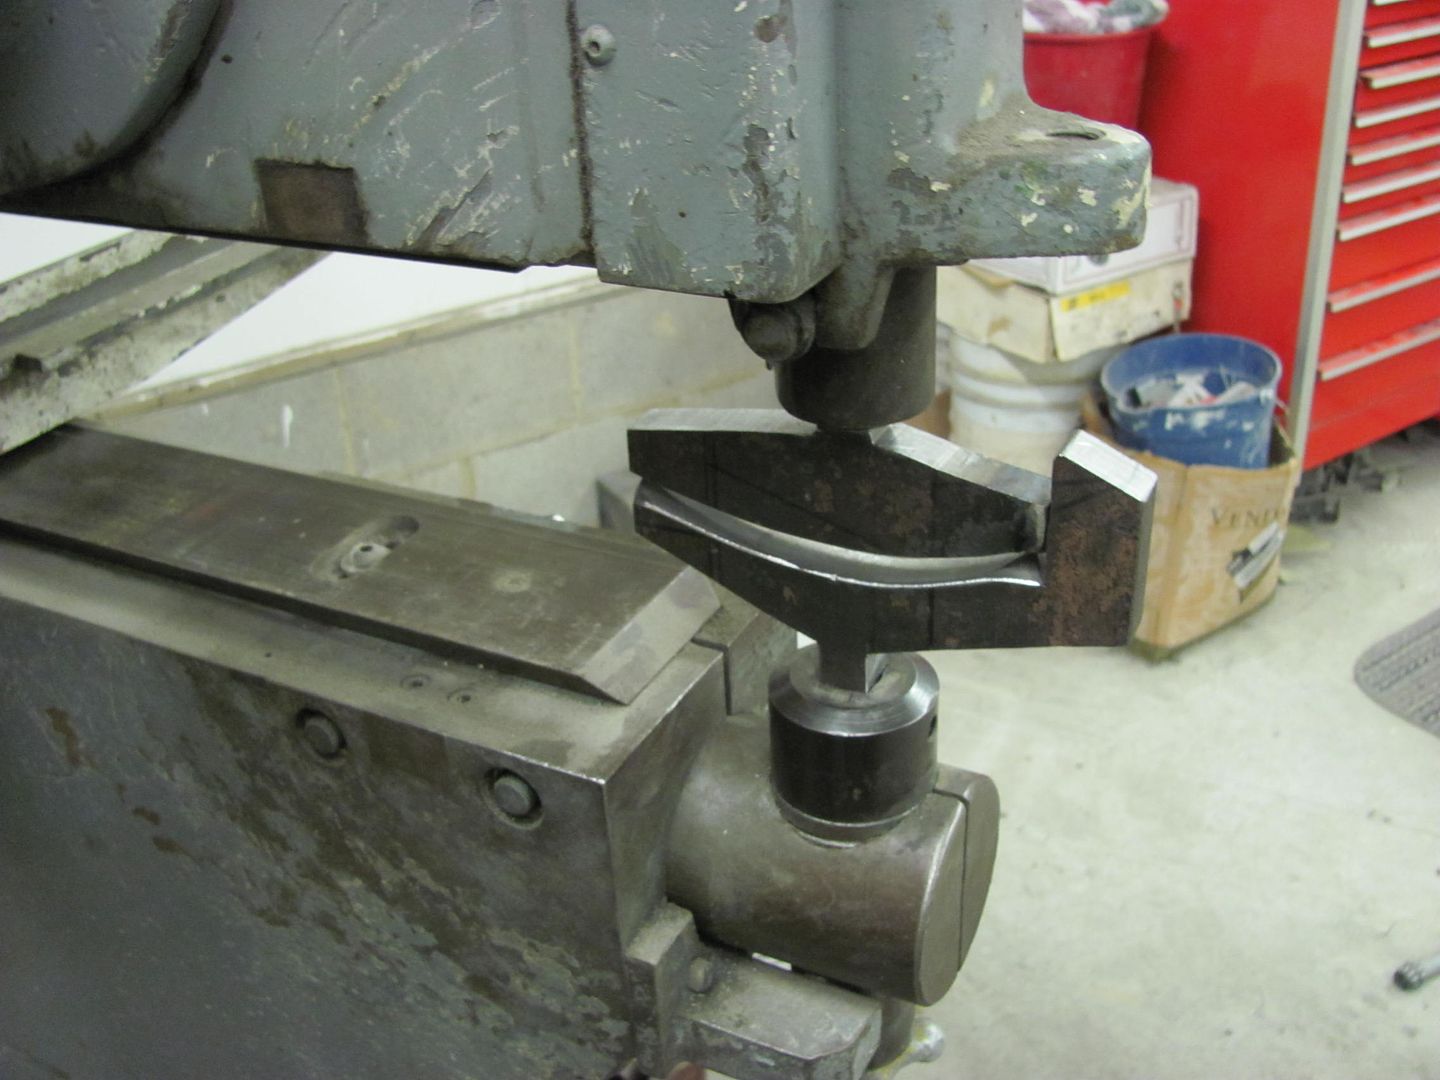
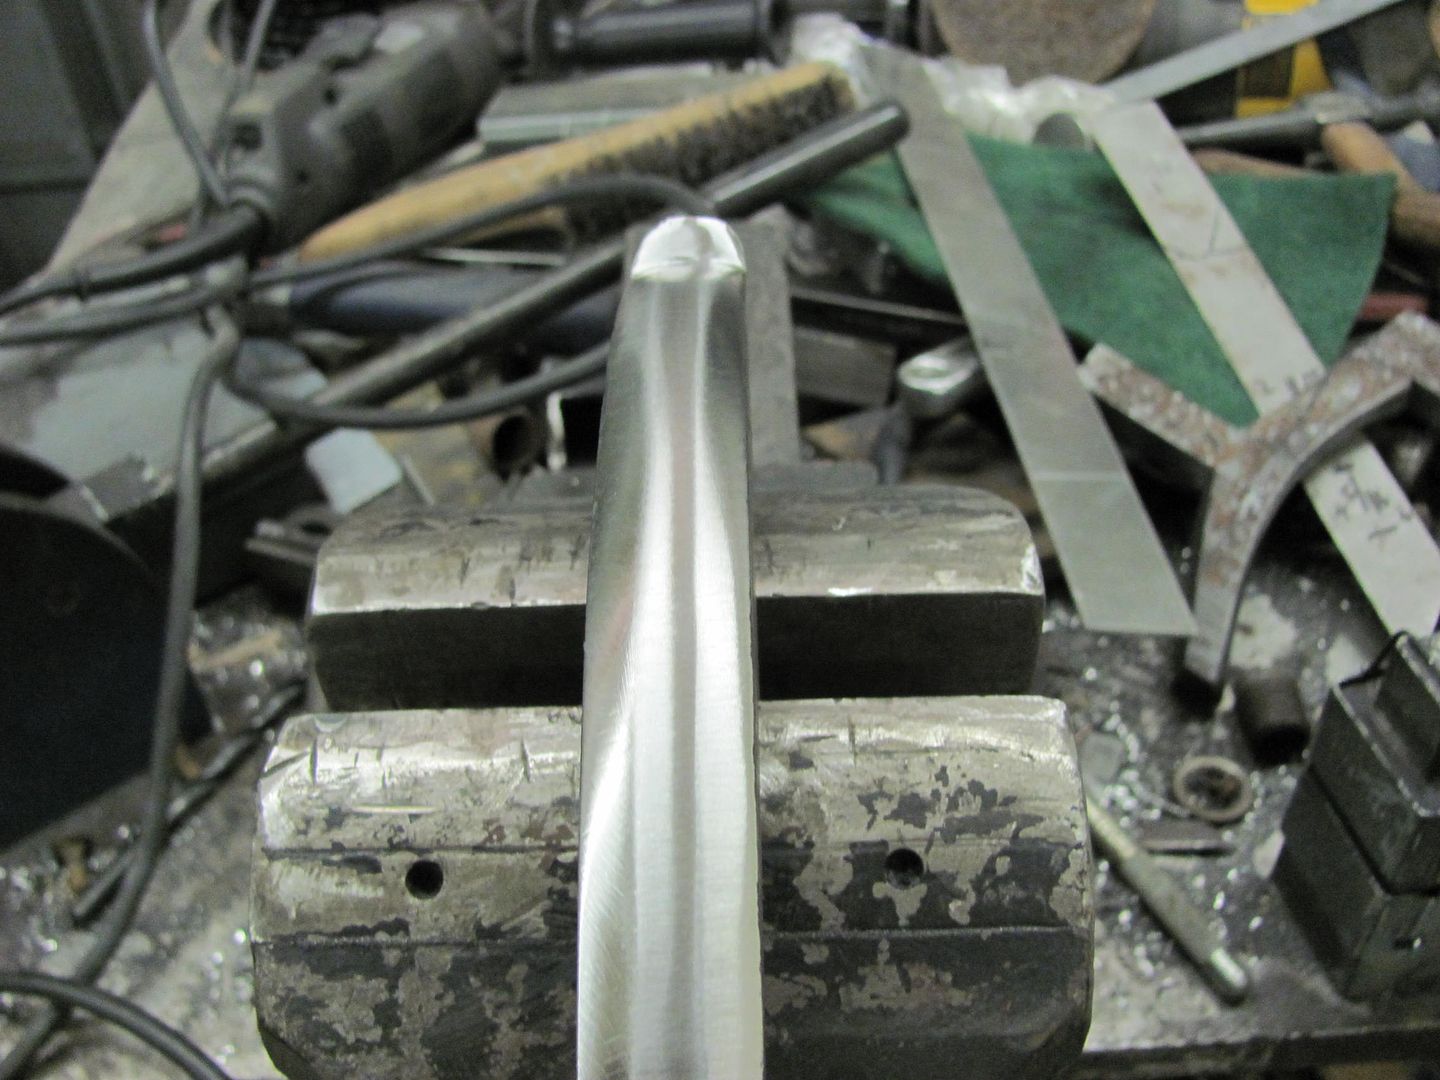
I ran a piece through and "levered down" on the panel as suggested. This does seem to help in carrying the pattern more consistently throughout the length. Then I tightened up the setting just a bit more....................................and judging by the metal waving at me along the top edge, and the marks on the dies, I have some more relief work to do as it looks like the wrong side is tight........(actually planished the top edge and stretched it)


Picture138.jpg


Picture141.jpg


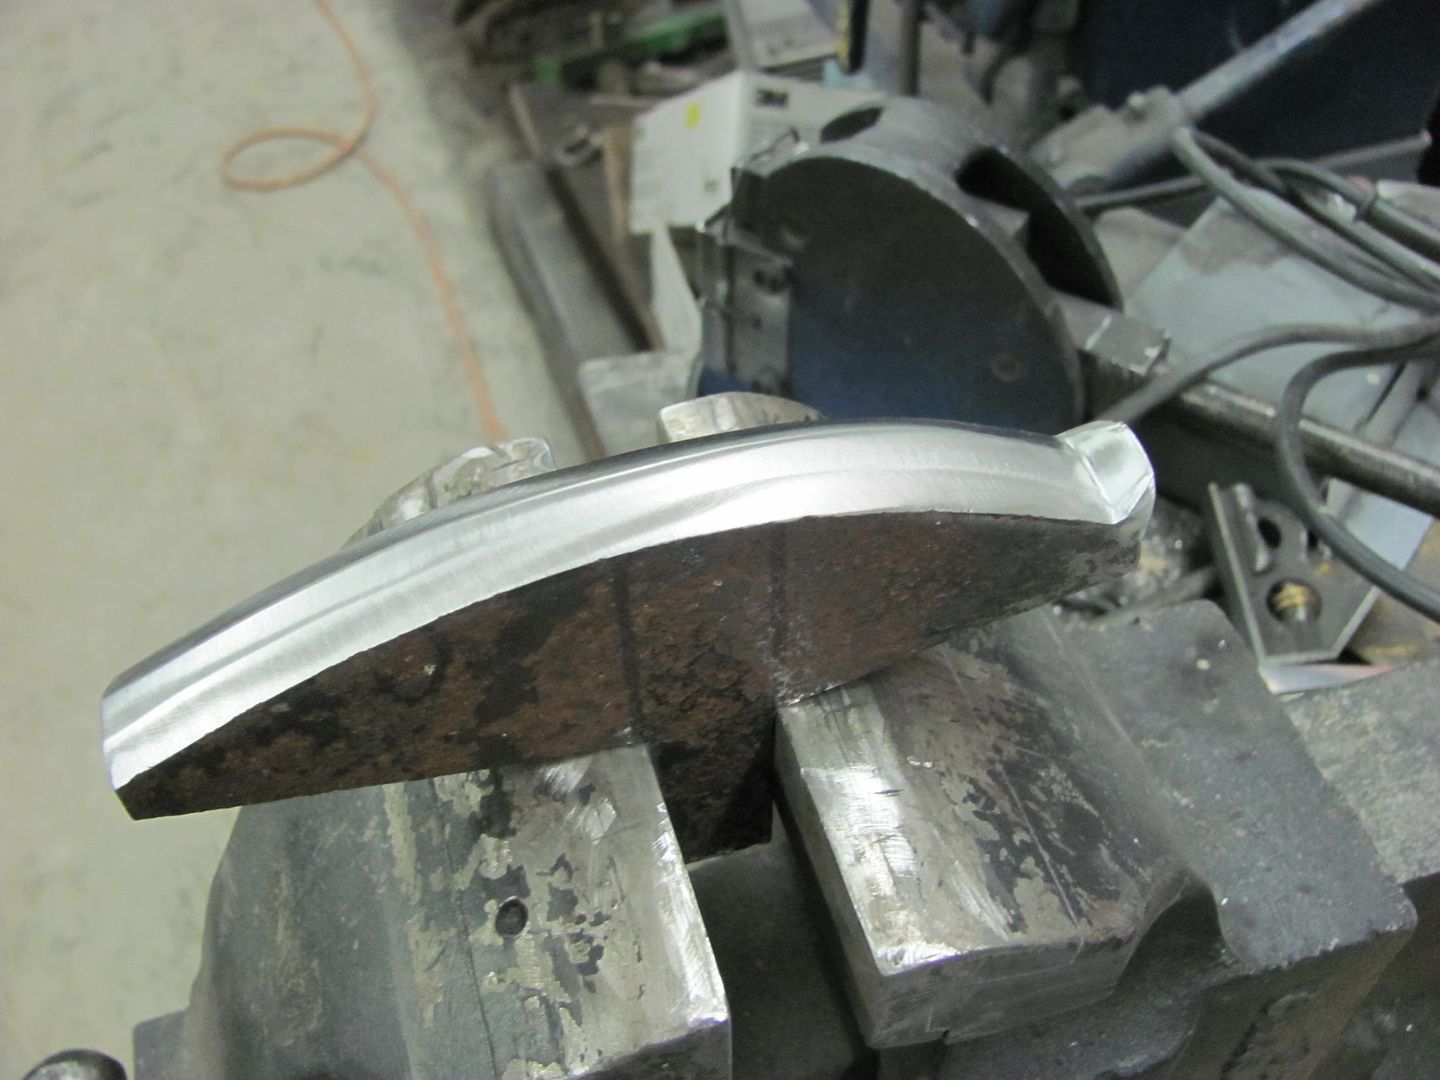
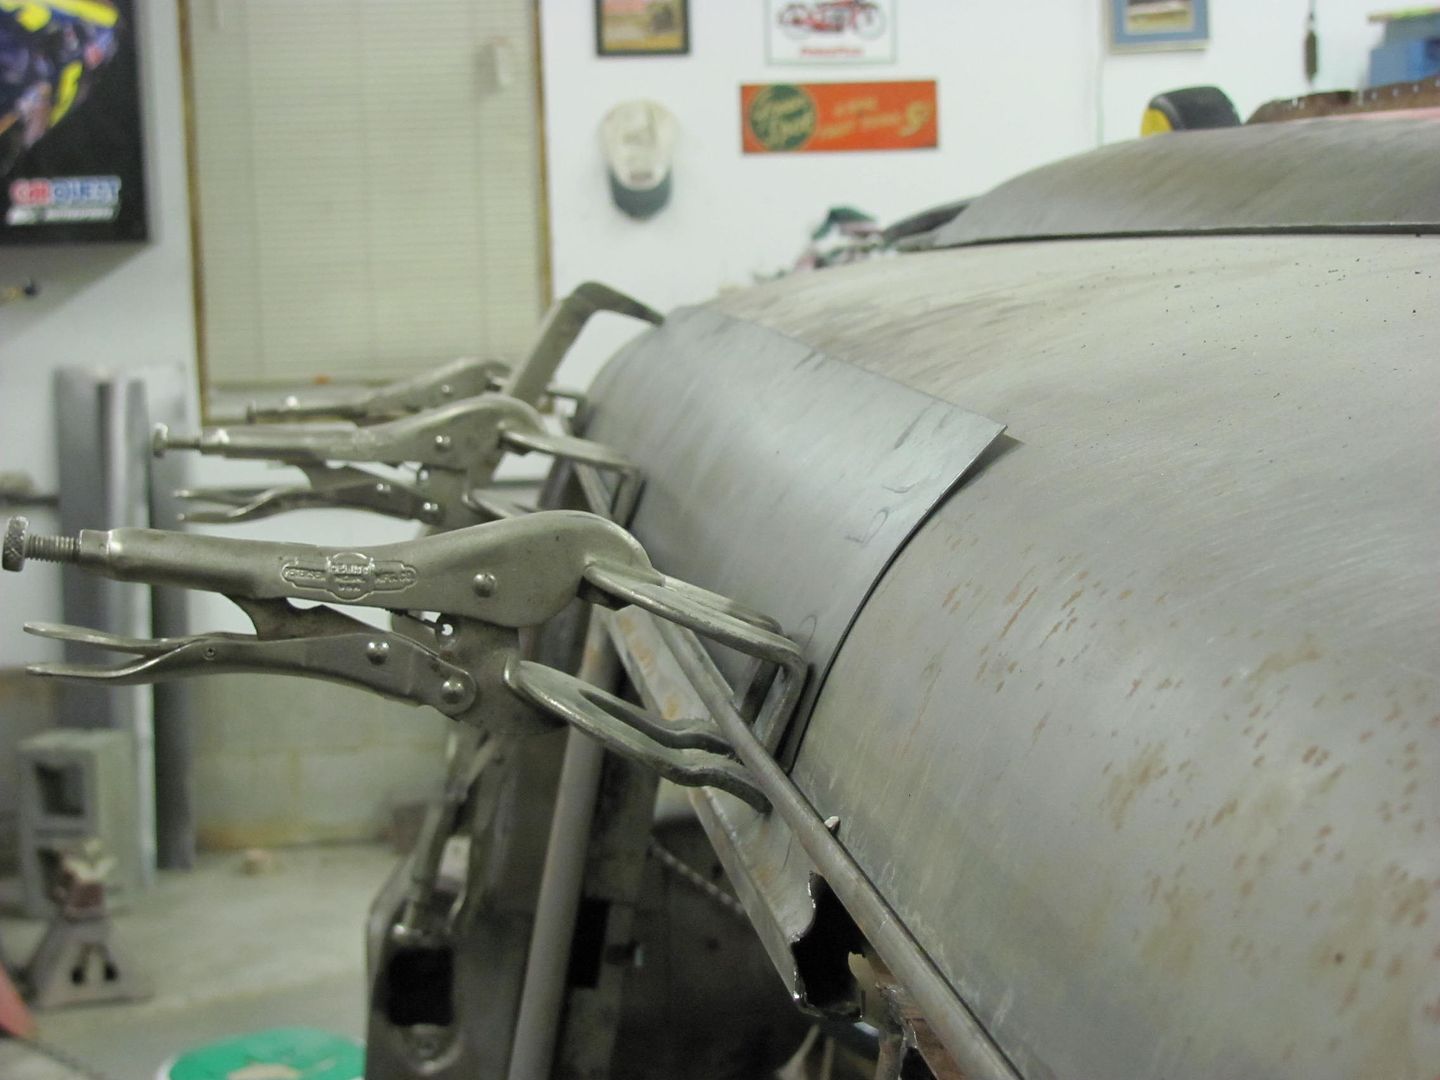
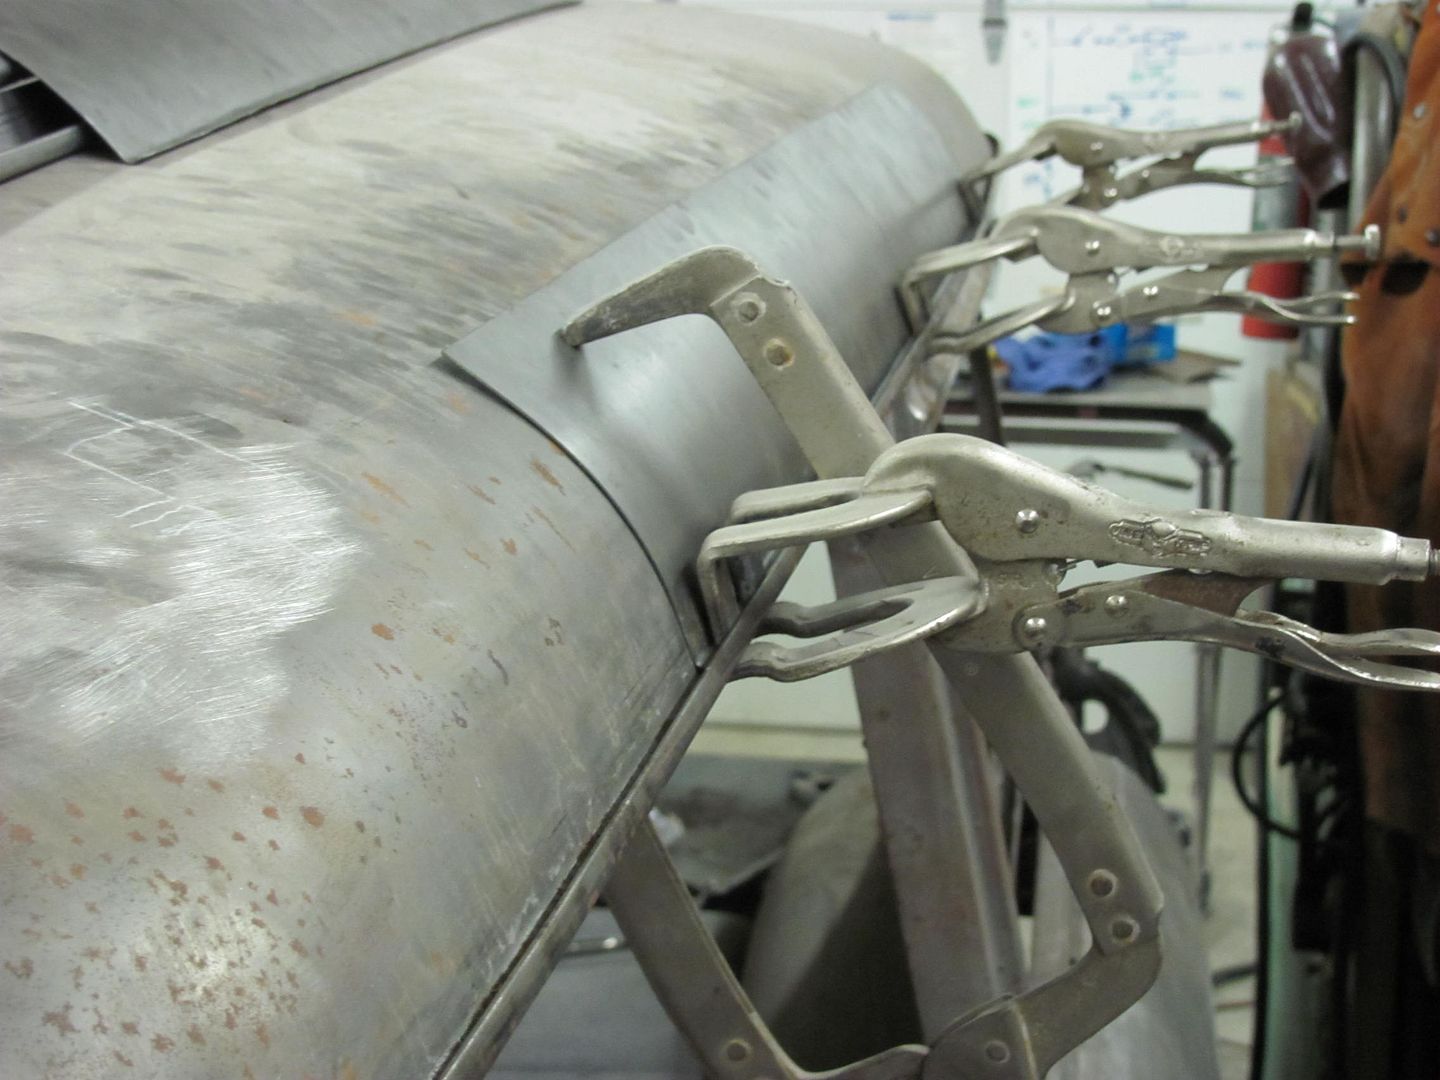
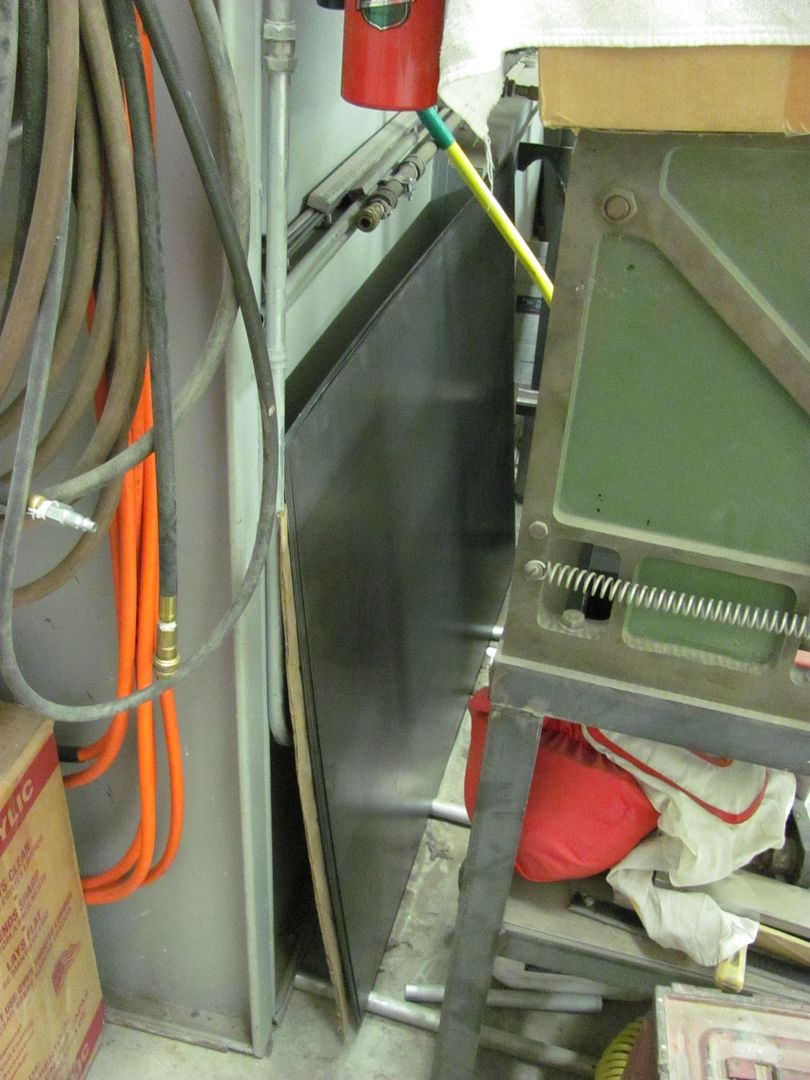
That upper part on the roof is the side that should be shrunk slightly, so I'll give these dies another whirl. I adjusted their shape and set them up in the machine and checked them with feeler gauges, still needed more taken out. Once more was enough, and I polished out the surfaces a little better this time using a scotchbrite pad on the grinder.


Picture142.jpg


Picture143.jpg


Picture145.jpg


Picture147.jpg


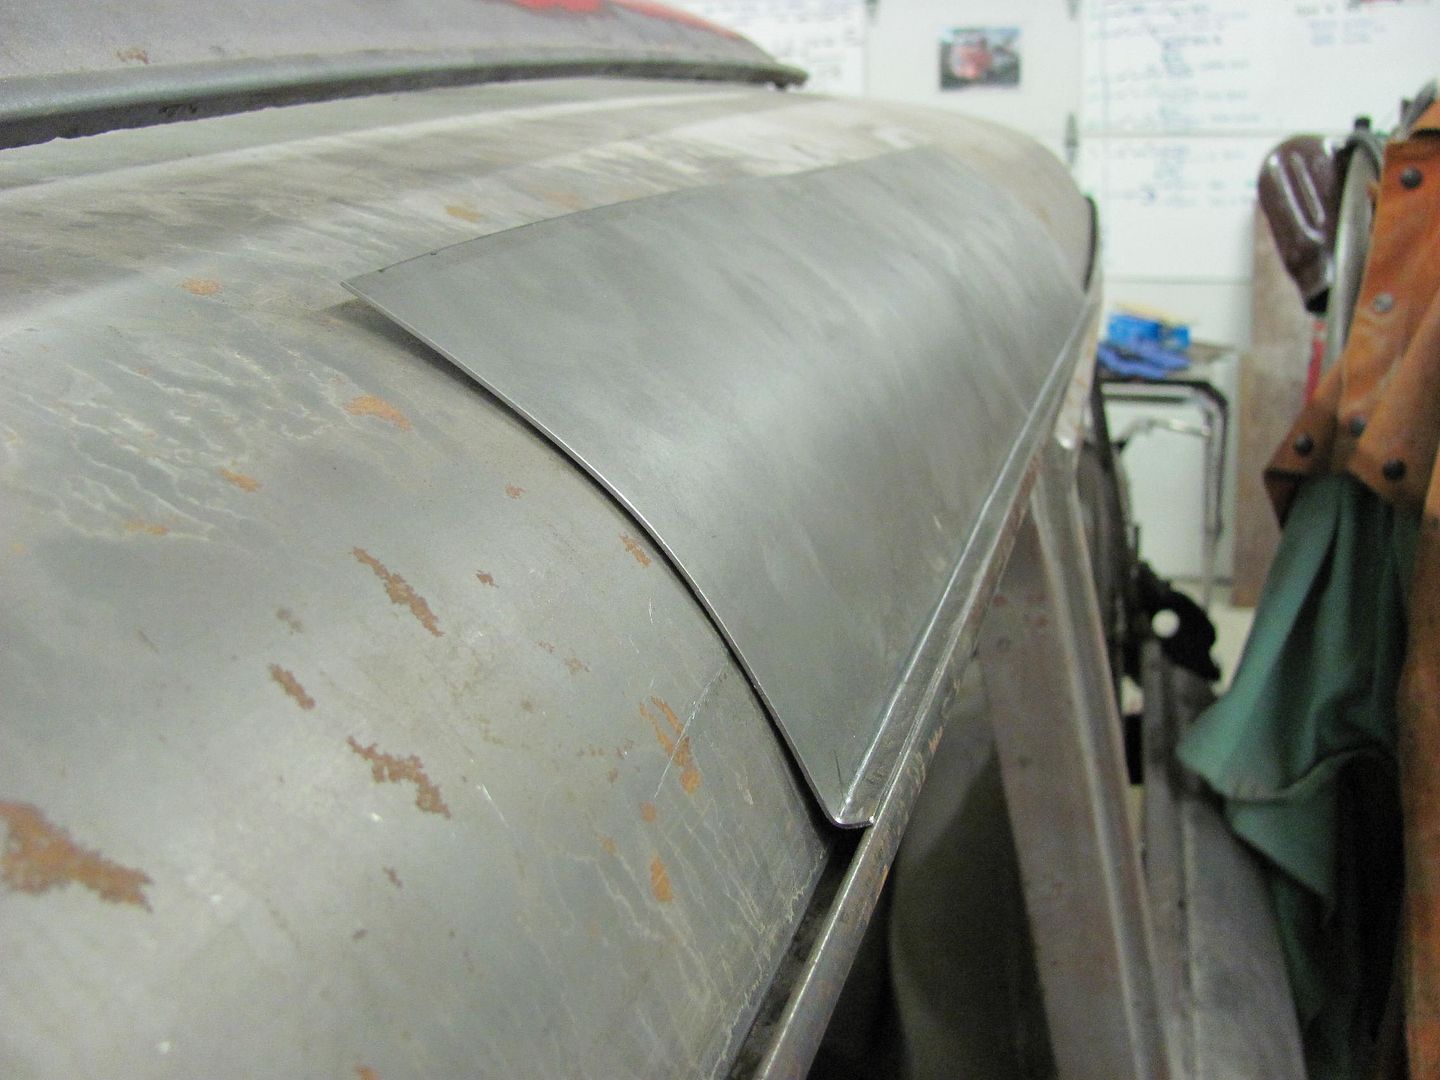
The repair panel came out much better this time.....


Picture148.jpg


Picture149.jpg


OP
M

MP&C

Well-known member
Joined
Oct 21, 2009
Messages
4,396
Location
Leonardtown, MD
Well, we had a good streak going, but it was bound to happen sooner or later. Had another bus panel that needed replacing & painting. Today is about 75 degrees, low humidity, what more could you ask for.....


Picture011-1.jpg


Picture013-1.jpg


Picture015-1.jpg


Picture017-1.jpg


And with this repair, we have used up the rest of the gallon of yellow, so the next bus incident will require new paint!
 
Last edited:
OP
M

MP&C

Well-known member
Joined
Oct 21, 2009
Messages
4,396
Location
Leonardtown, MD
The other task for today was to fab up a welding fixture for making various tooling for the Lennox.


Picture018.jpg


Picture019.jpg


Picture020.jpg


Picture021.jpg


Picture022.jpg


Picture023.jpg


Picture024.jpg


Next on the list will be to make some generic dies holders.. in 3/4 wide (plywood), 1" (small sheet of phenolic on hand) and 1-1/2 (for the Delrin). I need to continue the rust repair of the 55's upper gate onto the outside skin, which will require duplicating the beltline feature. Something tells me these die holders will come in handy...


Picture025.jpg
 
OP
M

MP&C

Well-known member
Joined
Oct 21, 2009
Messages
4,396
Location
Leonardtown, MD
Thanks Mike!

Well there is more forming work on the horizon for the upper tailgate, so today I made a road trip to DE and picked up some 19ga CRS as I was fresh out. Dropped off a few sheets in Frederick and brought the rest home. Most was cut into 2' x 4' sheets, as that is plenty big for most of my patch panels, and a few were left in 3' x 4' for some possible hinged hoods/hood sides.


Picture026-2.jpg


Picture027-2.jpg


Picture028-2.jpg
 
To avoid these ads, REGISTER NOW!

36racin

Active member
Joined
Jul 23, 2013
Messages
32
Location
Gonzales, La
Robert,
You have got to stop posting threads like these(just kidding). Absolutely amazing what you do. I wish I had 1/10th of your skills and a few of your tools too!!! If you were not so far away I'd be waiting to see your skills on my body work. I'm sure there are body men(and women too) closer to my location with your skills. Just finding that person is the problem.

Thank you for taking the time to post your work and projects. We all enjoy seeing the new additions so we can learn alittle.

Todd
 
OP
M

MP&C

Well-known member
Joined
Oct 21, 2009
Messages
4,396
Location
Leonardtown, MD
Thanks for the comments guys...

Larry, still going to be in NOVA?


Got my care package from TP tools on Friday, so spent a few minutes installing the new glass....


Picture029.jpg


Picture030.jpg


Is there any wonder I couldn't see what I was doing?


Picture031.jpg


Then I used the welding fixture to fab up some Ron Naida inspired insert holders for the Lennox...


Picture032.jpg


Picture033.jpg


Picture034.jpg


Picture035.jpg


Picture037.jpg


Picture039.jpg


Next will be to make some inserts to match the contour of the rear lower edge of the upper tailgate..
 
OP
M

MP&C

Well-known member
Joined
Oct 21, 2009
Messages
4,396
Location
Leonardtown, MD
The new one has a protective film applied on the inside, came that way. The last one it was an option and I didn't get it. looking through this one, the film does add a wavy distortion to the view. If it was still an option, I probably wouldn't get it just to have a non-distorted view. The last one was a good 5 years old... The "glass" is tempered glass..
 

36racin

Active member
Joined
Jul 23, 2013
Messages
32
Location
Gonzales, La
Robert,
What kind of media do you use in your cabinet? Just purchased and installed a used Trinco 30" Dry Blast cabinet and vacuum canister yesteday. I was thinking glass beads and not sand. Any suggestions? I have access to a portable sand blaster for heavy corroded items.
Going to replace the glass on front and under the light on it as well and reseal everything. Clean out the vacuum canister and get new media before I start using it.

Todd
 
OP
M

MP&C

Well-known member
Joined
Oct 21, 2009
Messages
4,396
Location
Leonardtown, MD
Todd, I buy it from a local machine shop, they get it by the pallet load...


photobucket-9746-1378770229276.jpg


photobucket-5603-1378770306719.jpg


Keep in mind that for a machine that recycles from the hopper, the more you put in there, the more weight and compaction, the harder it is for the siphon to pick up the media. Hence, I normally use only about 1/4th of a bag, if that...
 
Last edited:

Kevin54

MEMBER EMERITUS
Joined
Jan 12, 2005
Messages
29,341
Location
Urbana, Ohio
Humidity also makes a difference. If your media gets damp, it won't want to cycle through the blaster. I make sure that if it's really humd, I won't leave the lid or doors open.

We had a great blaster at work, but in the summer, the humidity would just kill things.
 

ihredo4

Well-known member
Joined
Sep 3, 2009
Messages
1,575
Location
100 miles W of Daileyville in Idiotnois
WOW For someone who tries to metalwork and makes scrap what you do kind of makes me sick. Sick of looking at my failed attempts that is. LOL AMAZING work my friend. You talk your way thru the process like we can all replicate what you are doing. I think I can, I think I can, I think I can but KNOW I CAN'T! Thanks man for sharing your knowledge. Its truly inspirational.
 

36racin

Active member
Joined
Jul 23, 2013
Messages
32
Location
Gonzales, La
Thanks for the help with the blaster guys. This one had been neglected. The media hopper had a 5 gallon bucket of media in it along with alot of big debris and trash. And the vacuum canister had even more dust in it than that. I'm going to give everything a good cleaning, repair what broken then give it a whirl. I was told the regulator was bad so I'll check and replace that as well if its bad. Should I put a water trap just ahead of the regulator?

Thanks,
Todd
 
OP
M

MP&C

Well-known member
Joined
Oct 21, 2009
Messages
4,396
Location
Leonardtown, MD
The other consideration for a media cabinet is to make sure you have enough compressor to keep up with the cfm consumption of the blast nozzle. If the compressor is too small and constantly running with little chance to cool off, it will put out superheated air, generating even more moisture in the system.
 

rshadd

Well-known member
Joined
Dec 29, 2009
Messages
1,598
Location
Doylestown, PA
I just spent the last two and a half hours reading this thread from the beginning. I'm fascinated at the high level of craftsmanship and all the attention to detail. Thanks for taking the time to explain and show how metalwork is done by a true master. Love all the great pictures.
 
Last edited:

36racin

Active member
Joined
Jul 23, 2013
Messages
32
Location
Gonzales, La
The other consideration for a media cabinet is to make sure you have enough compressor to keep up with the cfm consumption of the blast nozzle. If the compressor is too small and constantly running with little chance to cool off, it will put out superheated air, generating even more moisture in the system.

Robert,
I recently purchased a used Sandborn Black Max 5hp 200 psi two stage compressor. Not really sure of the cfm's of it. Can't really find any infor on it. I'm thinking it should handle quite well.
I saw another GJ thread about air line systems and will install using some of the methods I saw on it for my shop. Trying to get shop in shape to get my car rebuild going.

Todd
 
Last edited:
OP
M

MP&C

Well-known member
Joined
Oct 21, 2009
Messages
4,396
Location
Leonardtown, MD
Well I got a phone call yesterday (Thurs) from FEDEX letting me know I had a package showing up today at their freight depot... the new brake from Baileigh! On the way back home from picking it up, I remembered I need to make room. One phone call and the old brake was sold, with a truck on the way. Here we are, home safe and sound....


Picture040-1.jpg


Brake extraction device....


Picture044-1.jpg


Picture045-1.jpg


The new owner had shown up in his truck before I even got it to the door....


Picture046-1.jpg


....and in with the new...


Picture047-1.jpg


Picture048-1.jpg


This even gives me a bit more space so I can upgrade the 137L to a larger shear that will cut 48" wide... maybe next year..


Picture049-1.jpg


I did get the power connected and a small sample bent, but didn't have much time to test it out as we had a Blue Crabs baseball game to attend this evening. More to follow....
 
To avoid these ads, REGISTER NOW!
Top Bottom