To avoid these ads, REGISTER NOW!

MP&C Shop Projects

OP
M

MP&C

Well-known member
Joined
Oct 21, 2009
Messages
4,396
Location
Leonardtown, MD
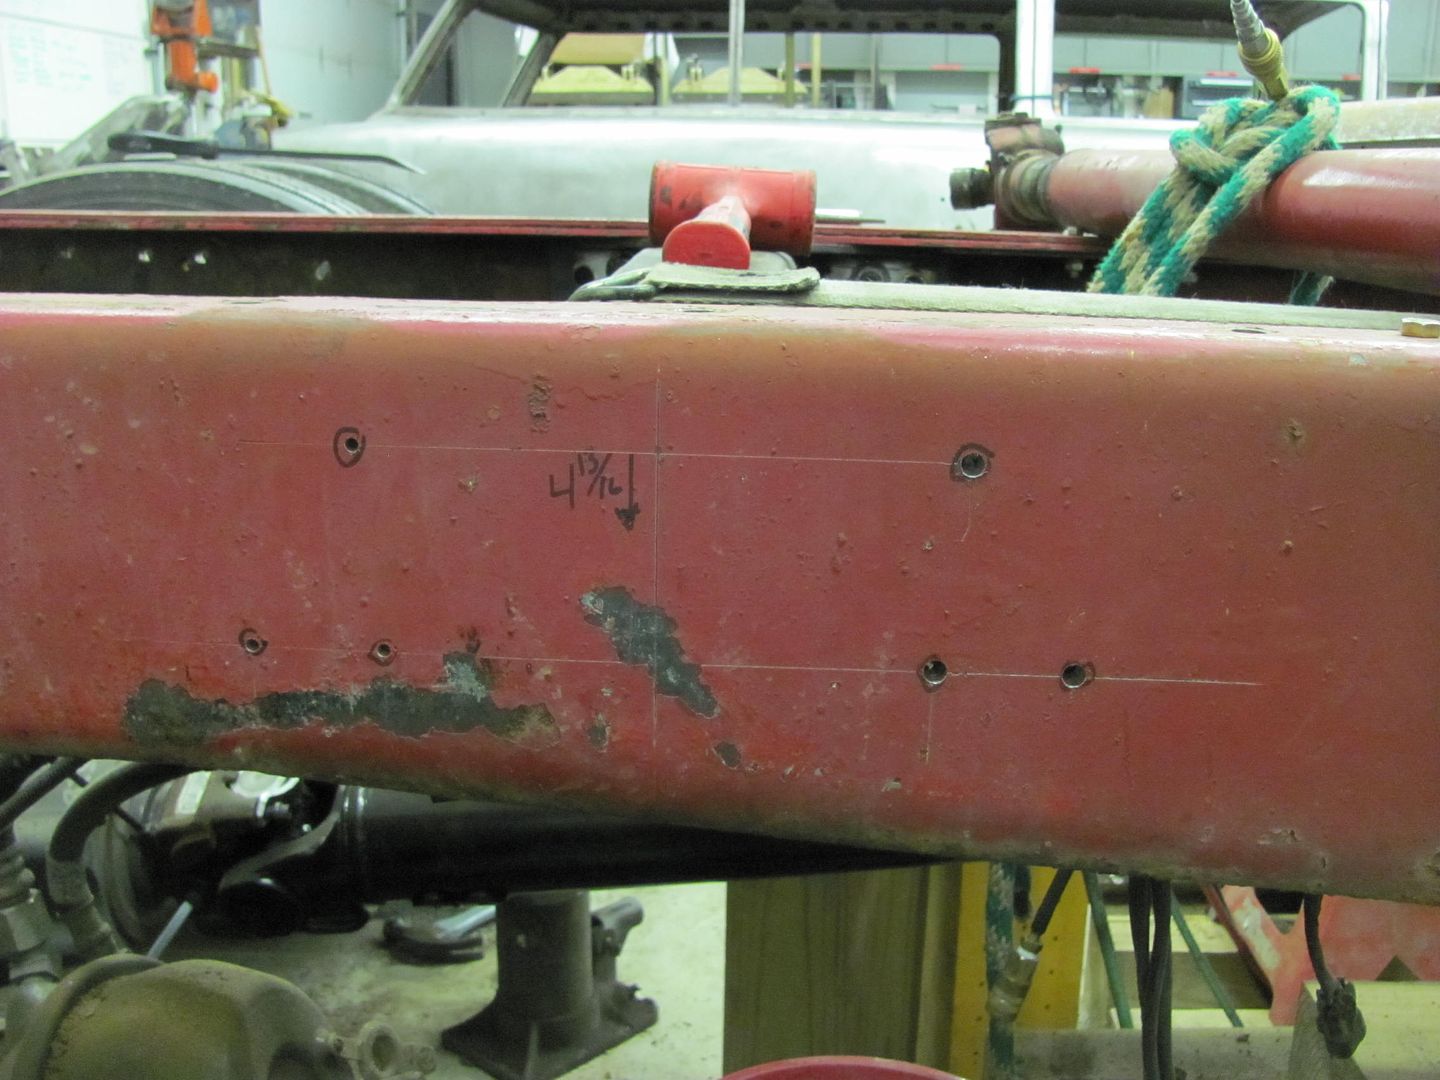
Today's work in the shop was to fix my niece's boo boo. She was backing up and too concerned about the car parked too close beside her that she missed the big honking F350 behind her.


Picture346.jpg


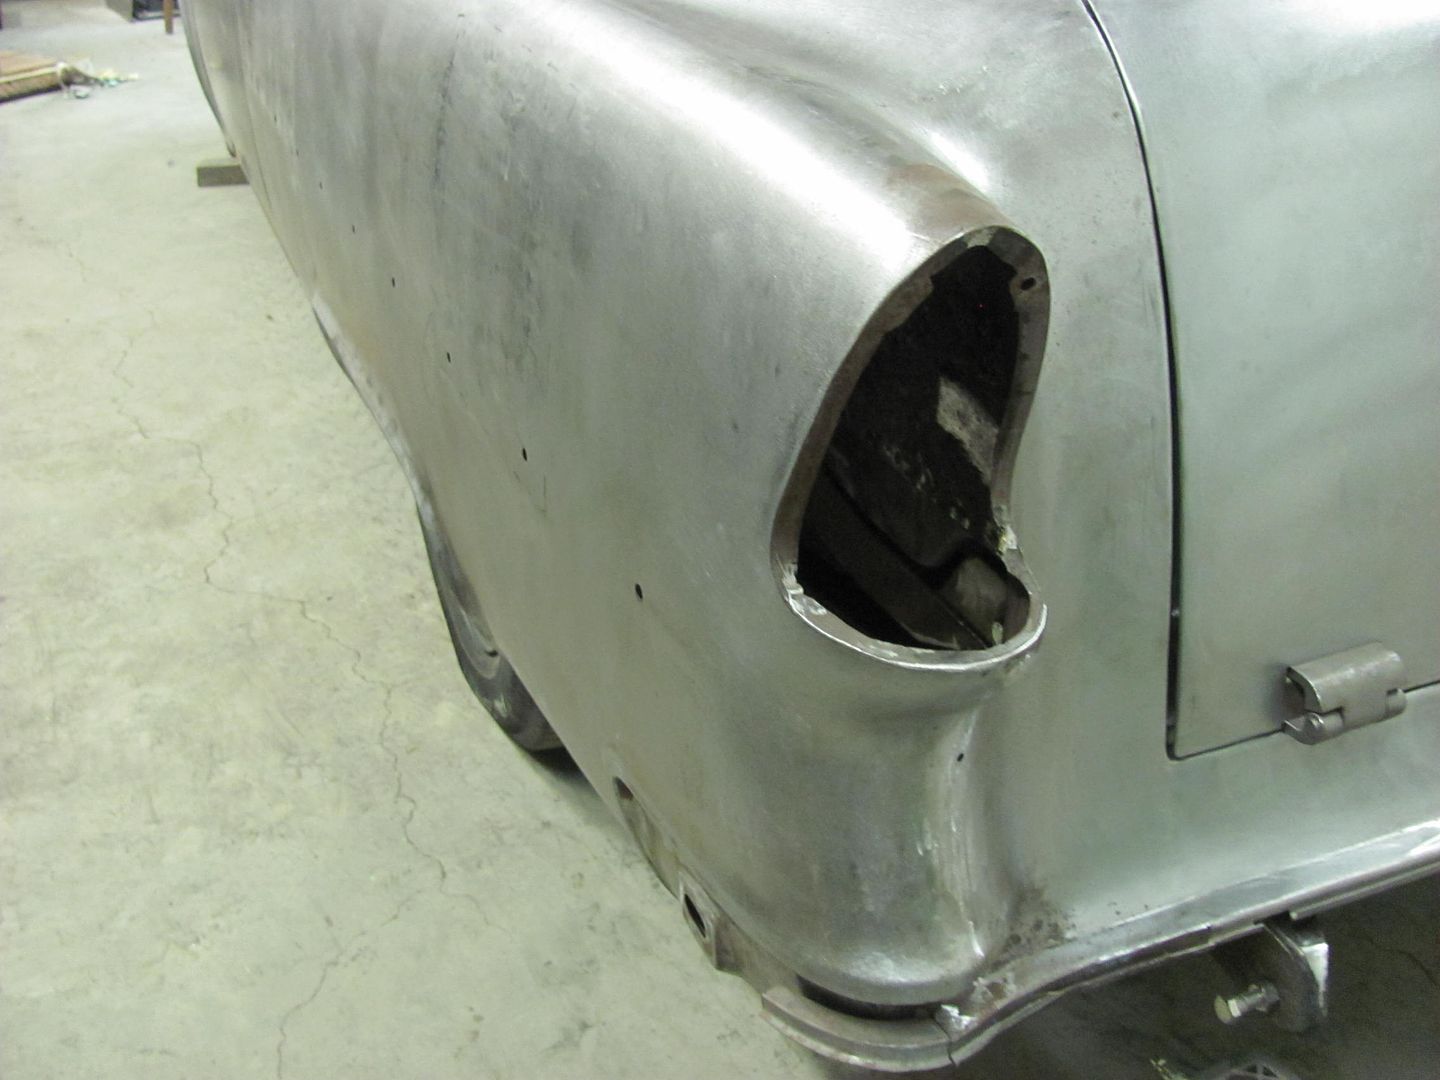
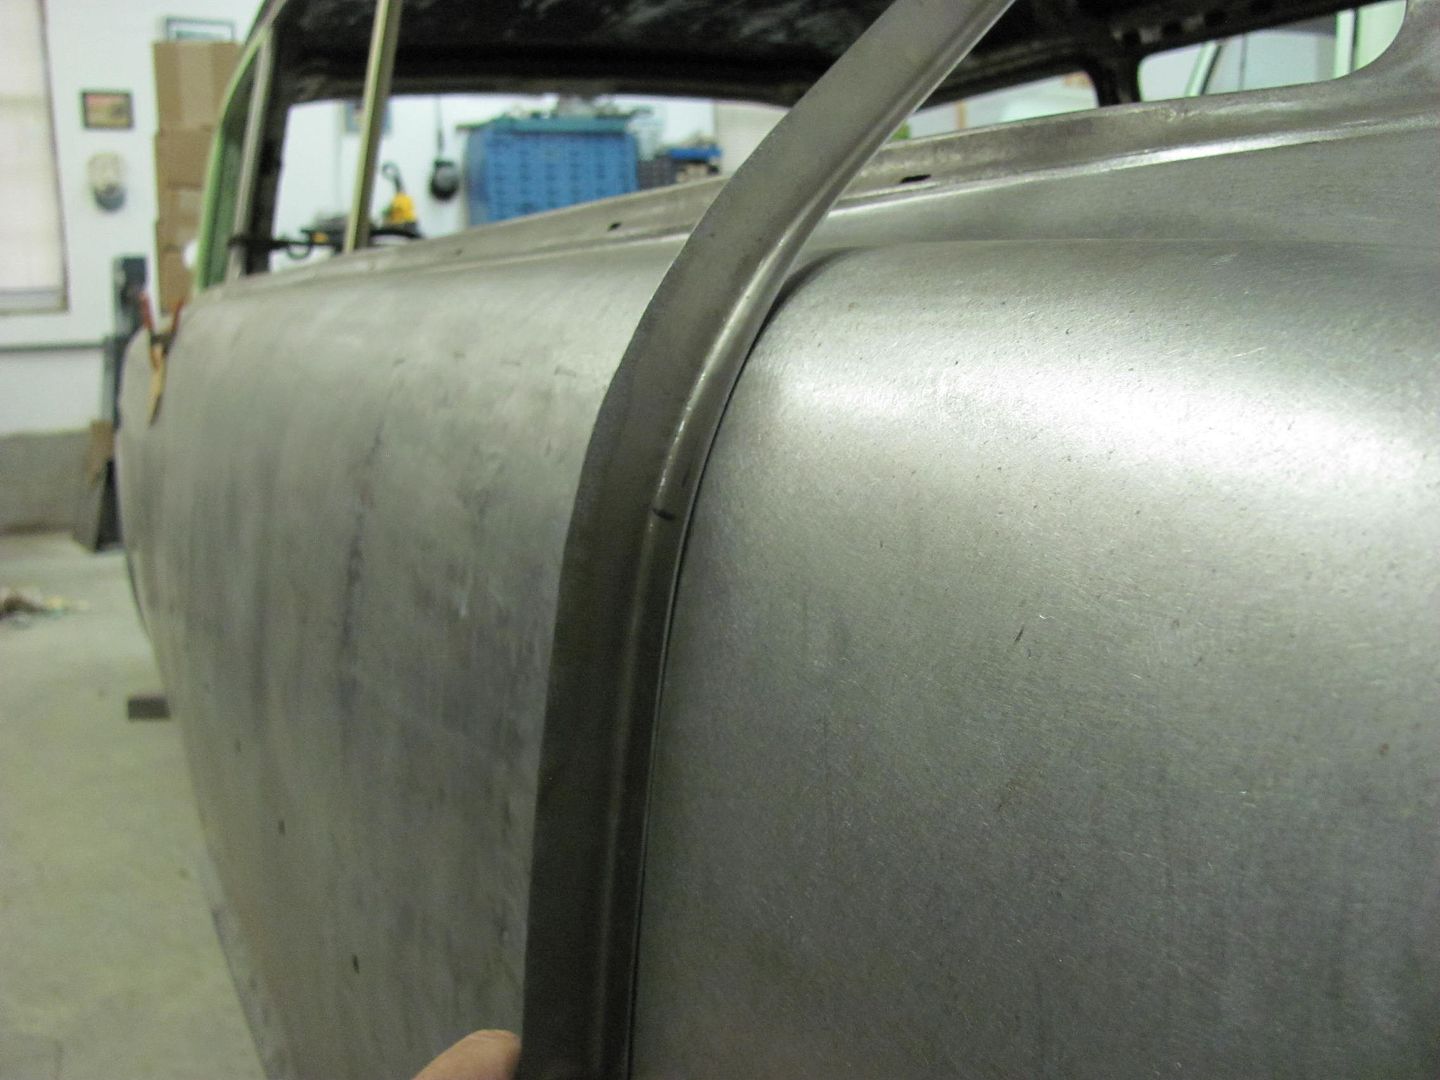
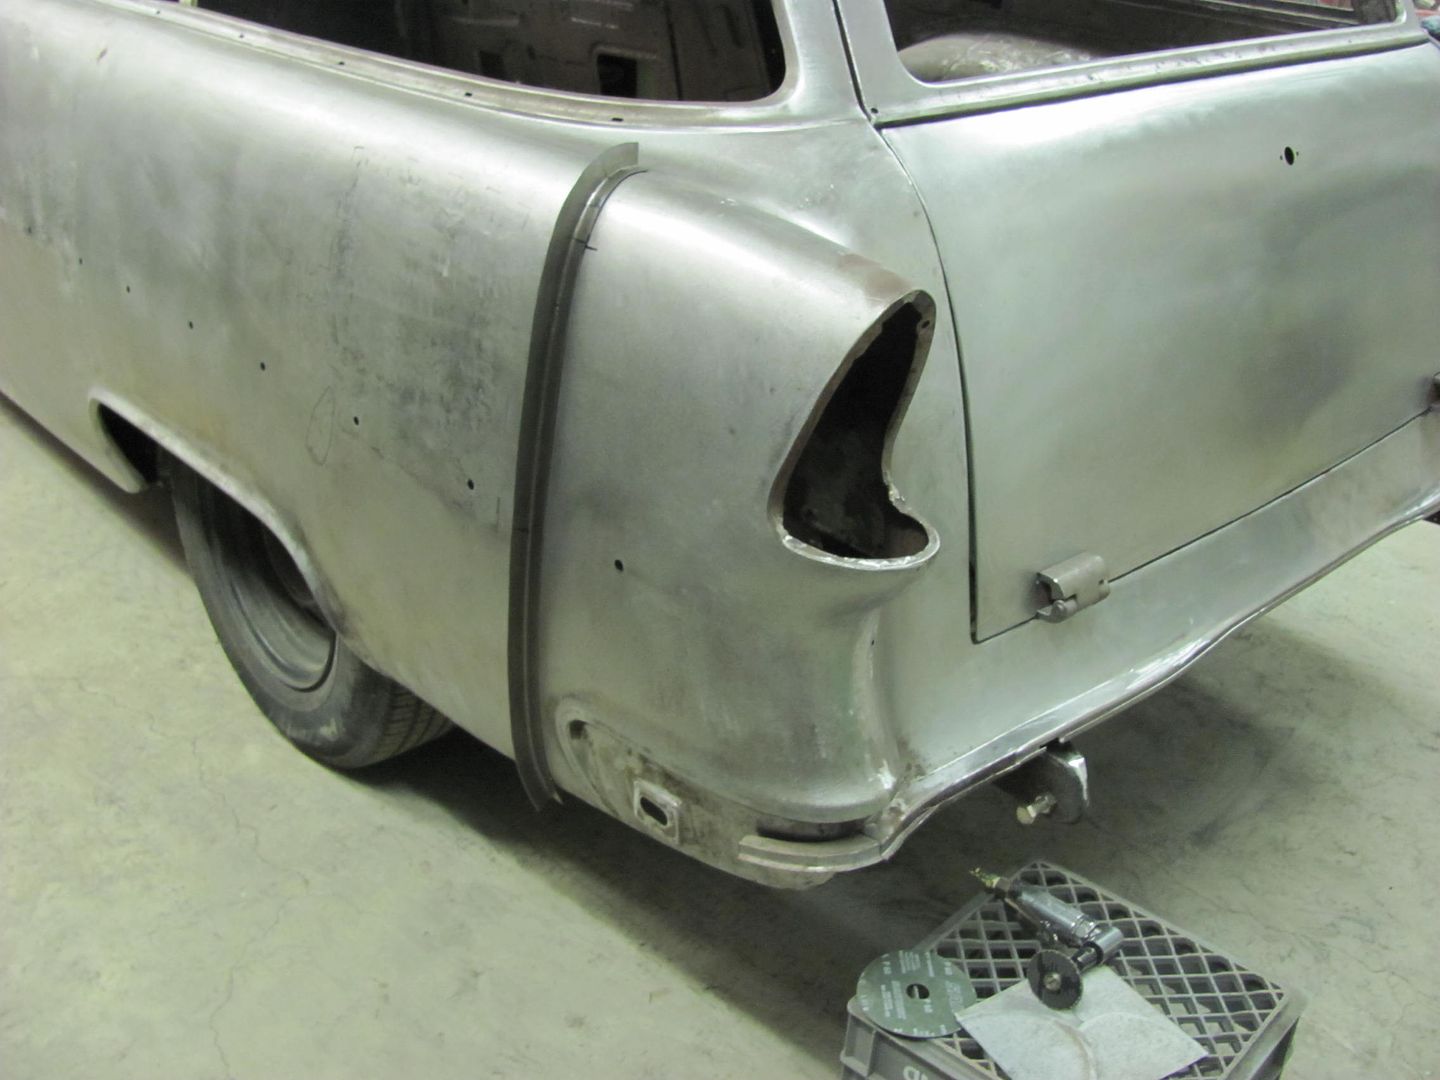
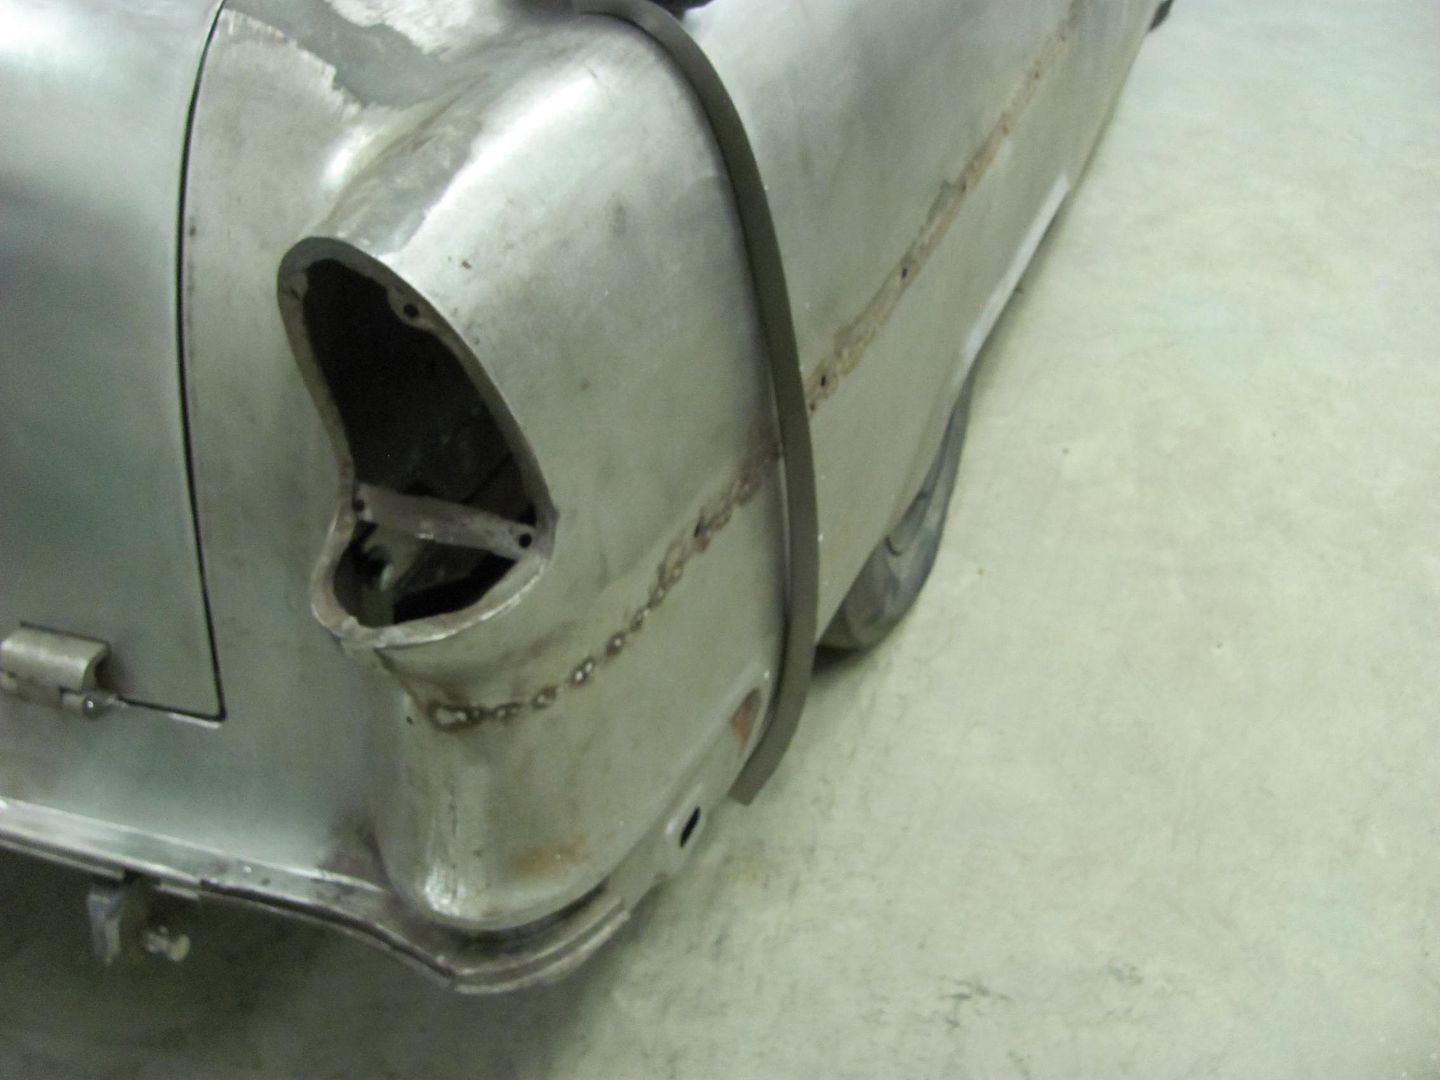
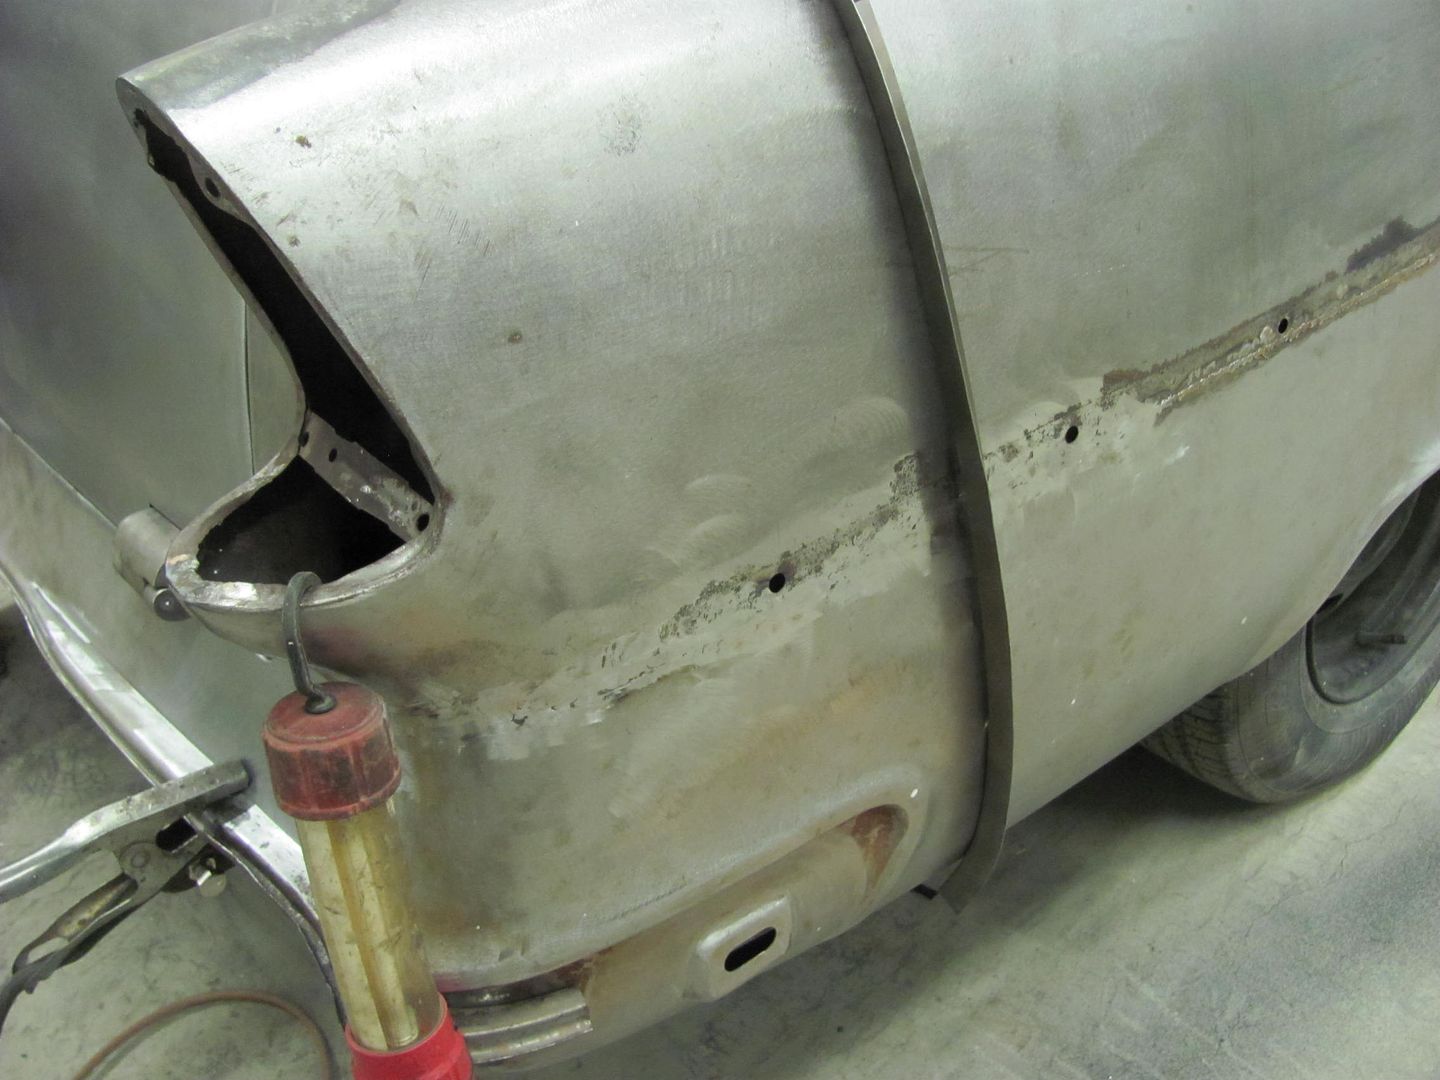
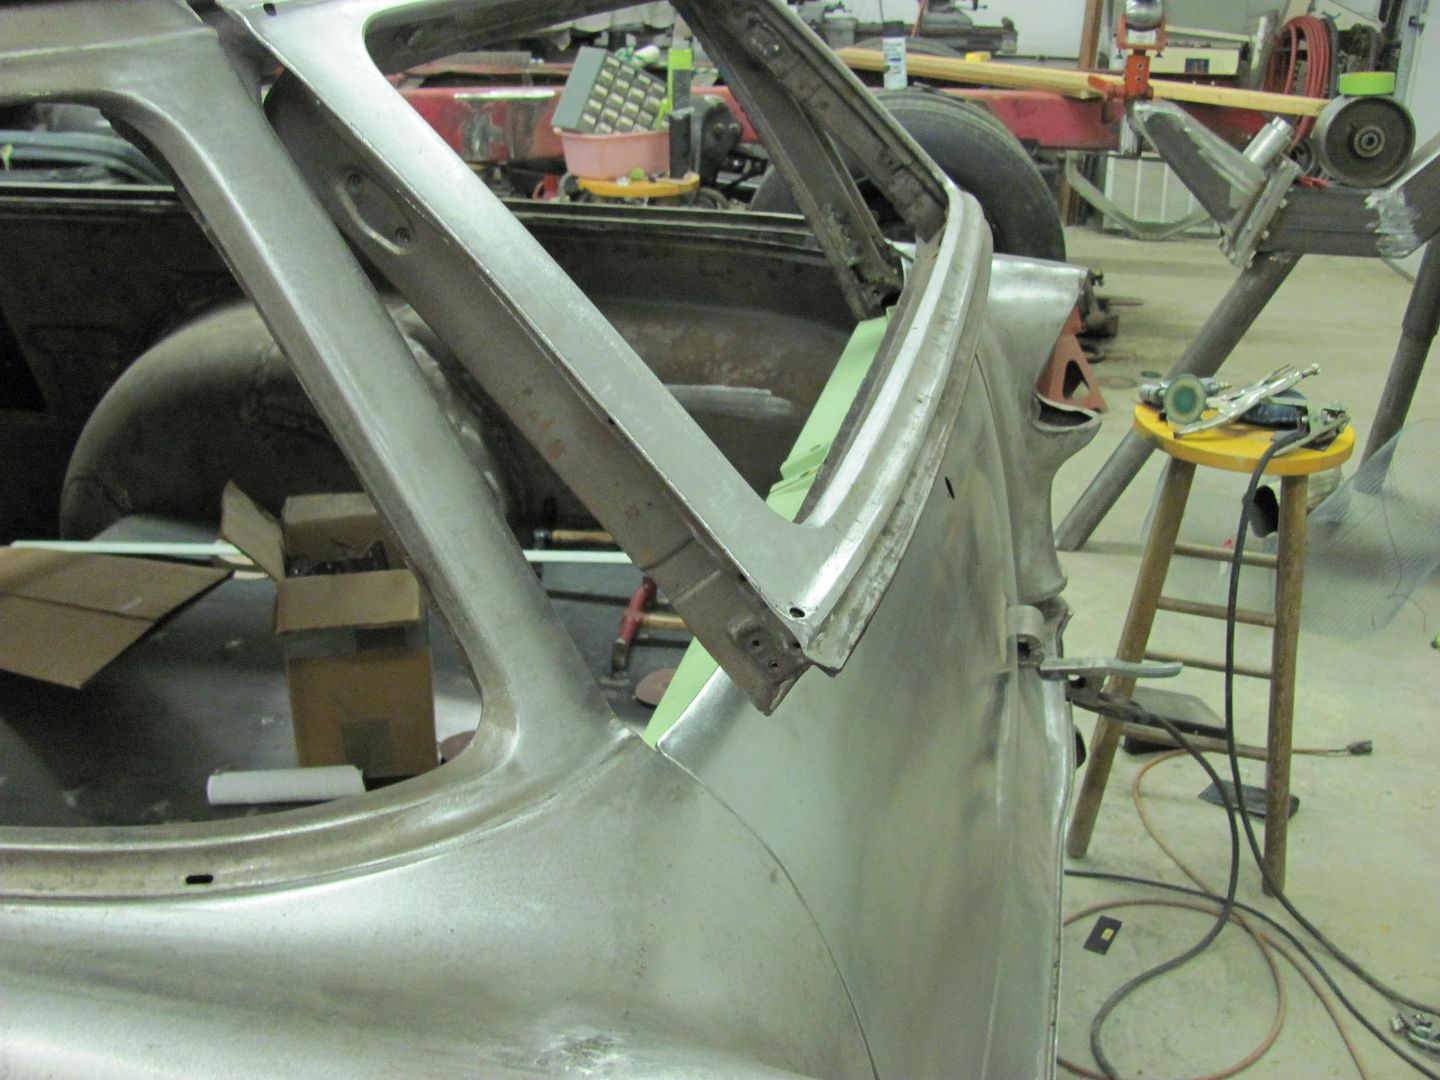
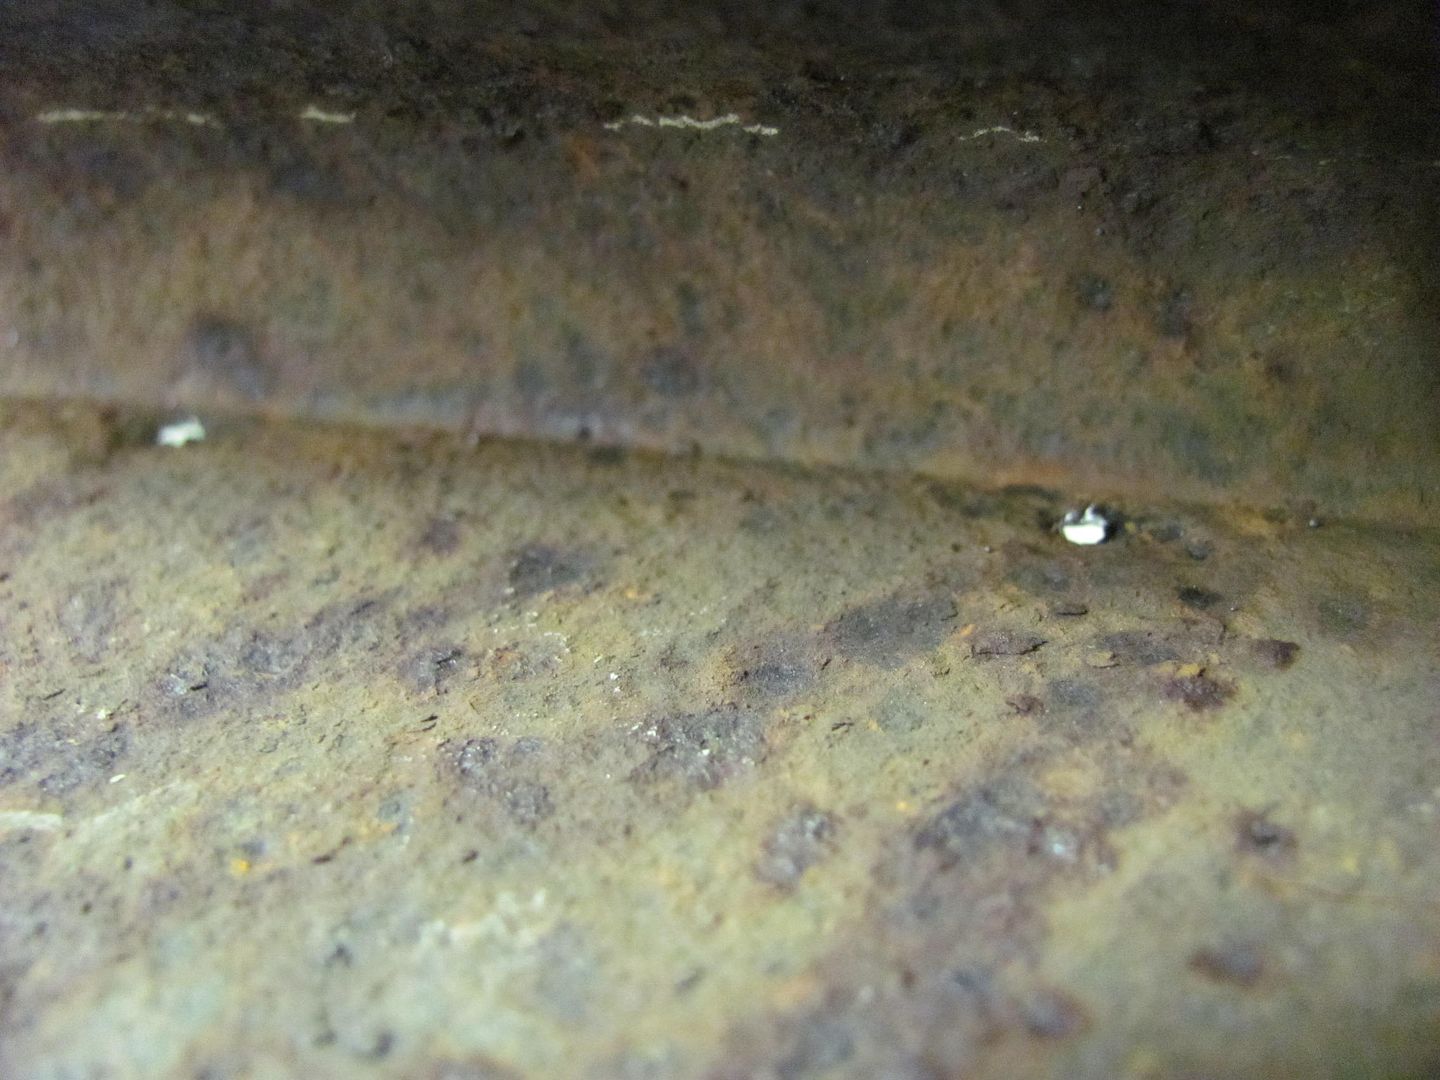
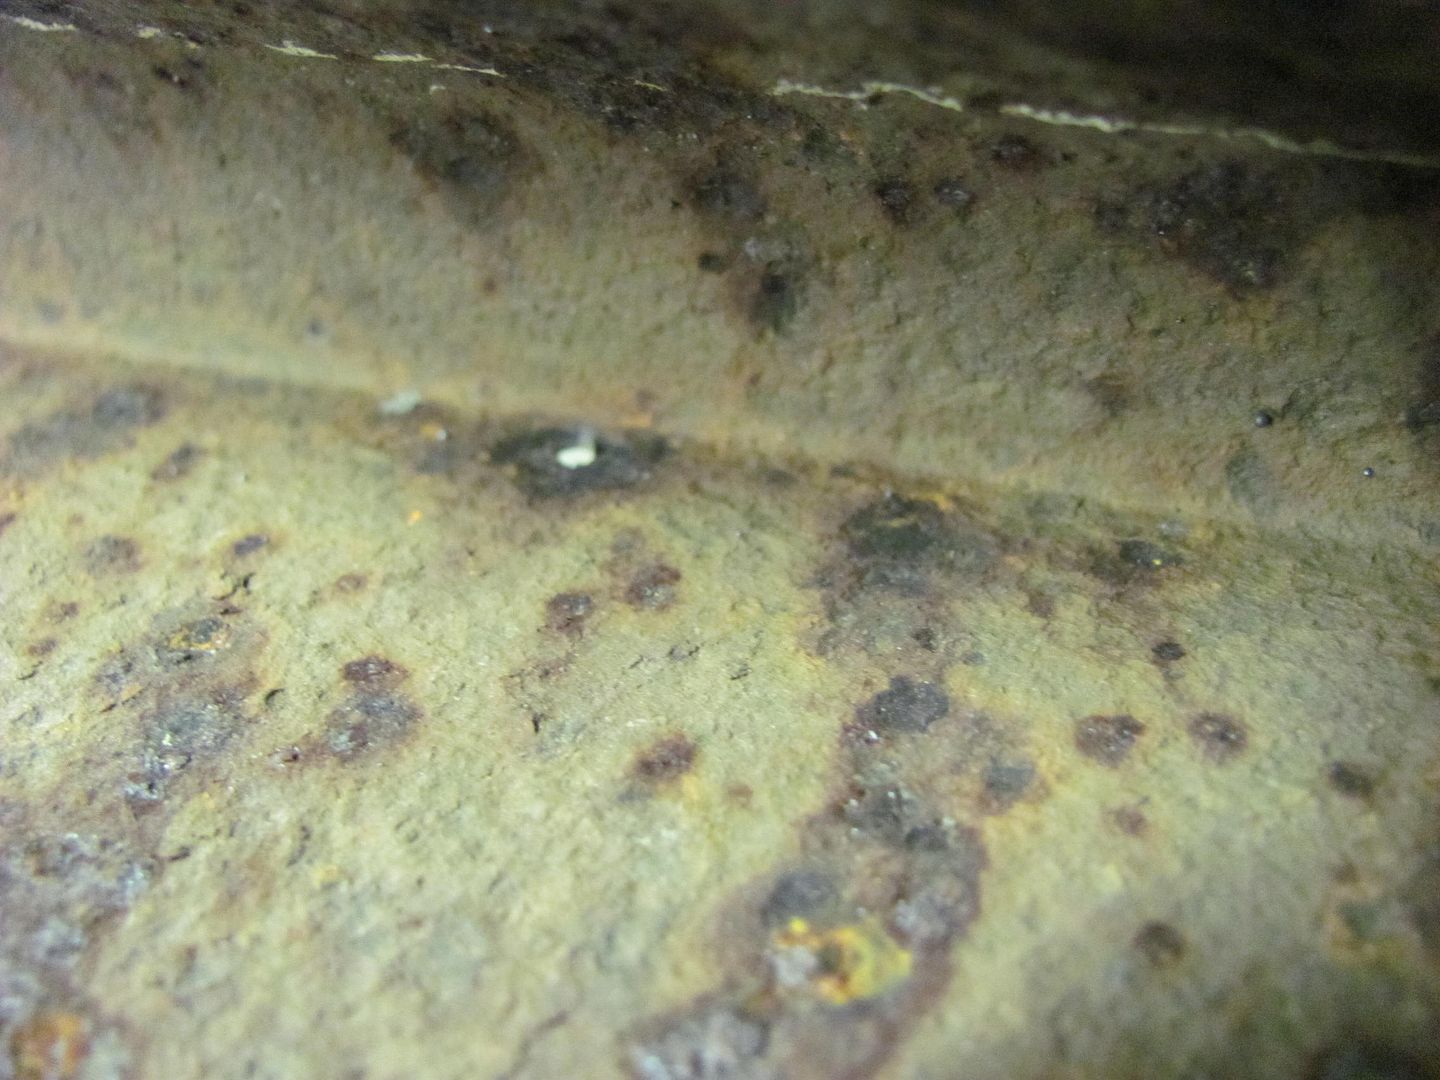
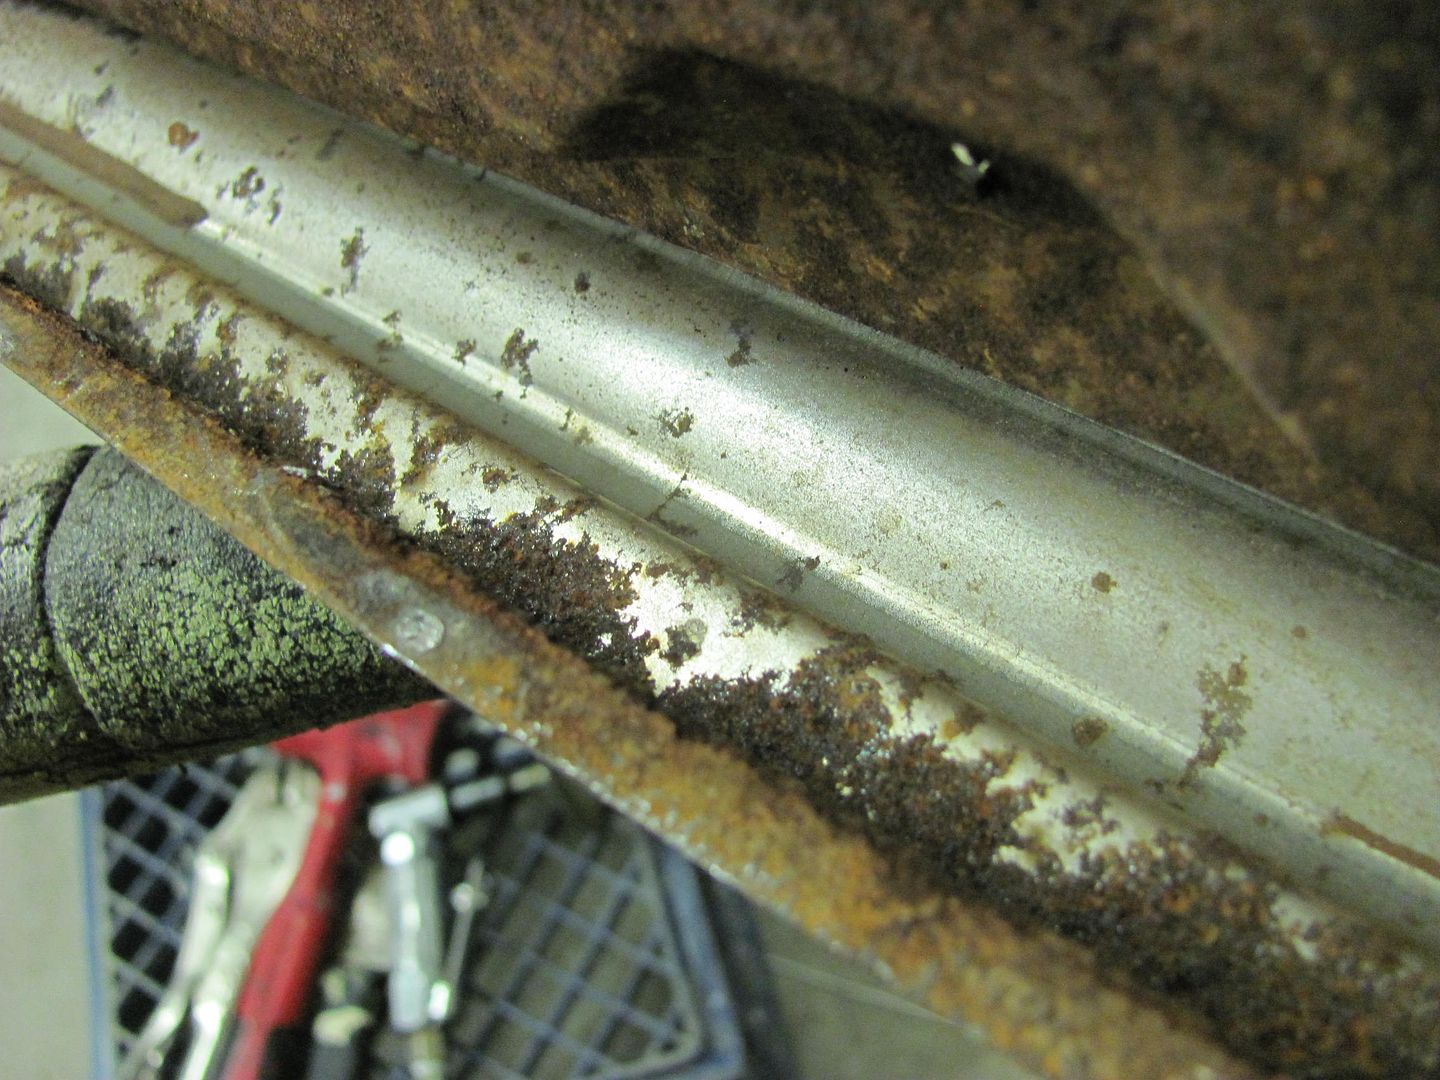
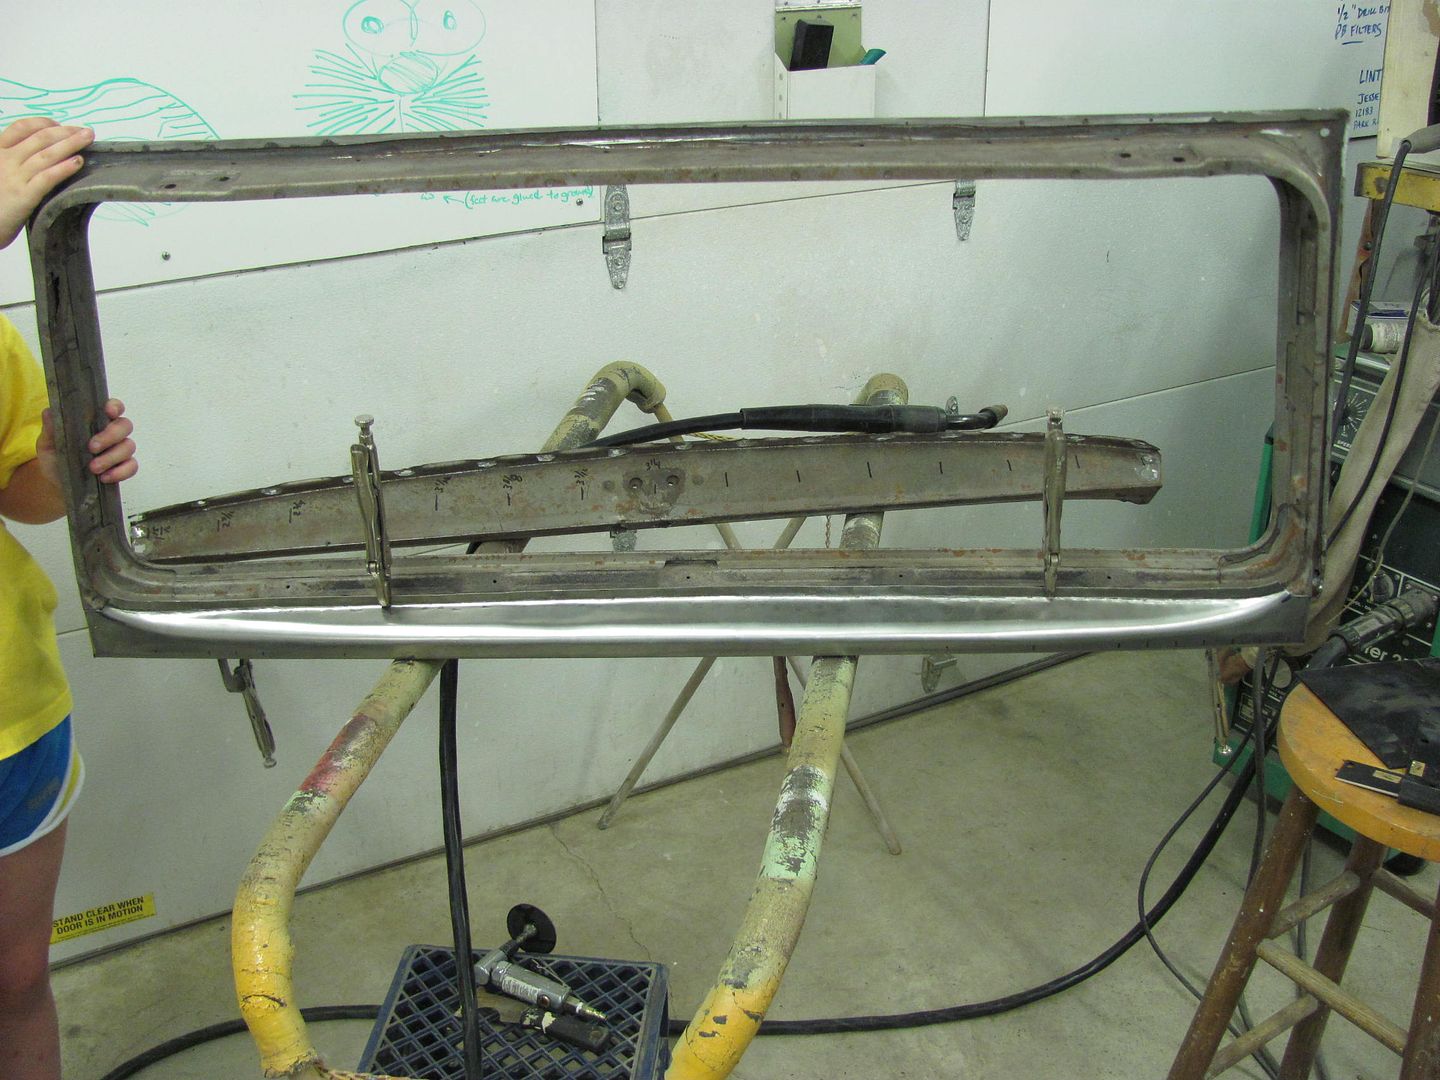
The F350 got a slight bend in the license plate out of the deal.. :lol_hitti Here's the other side for comparison..


Picture345.jpg


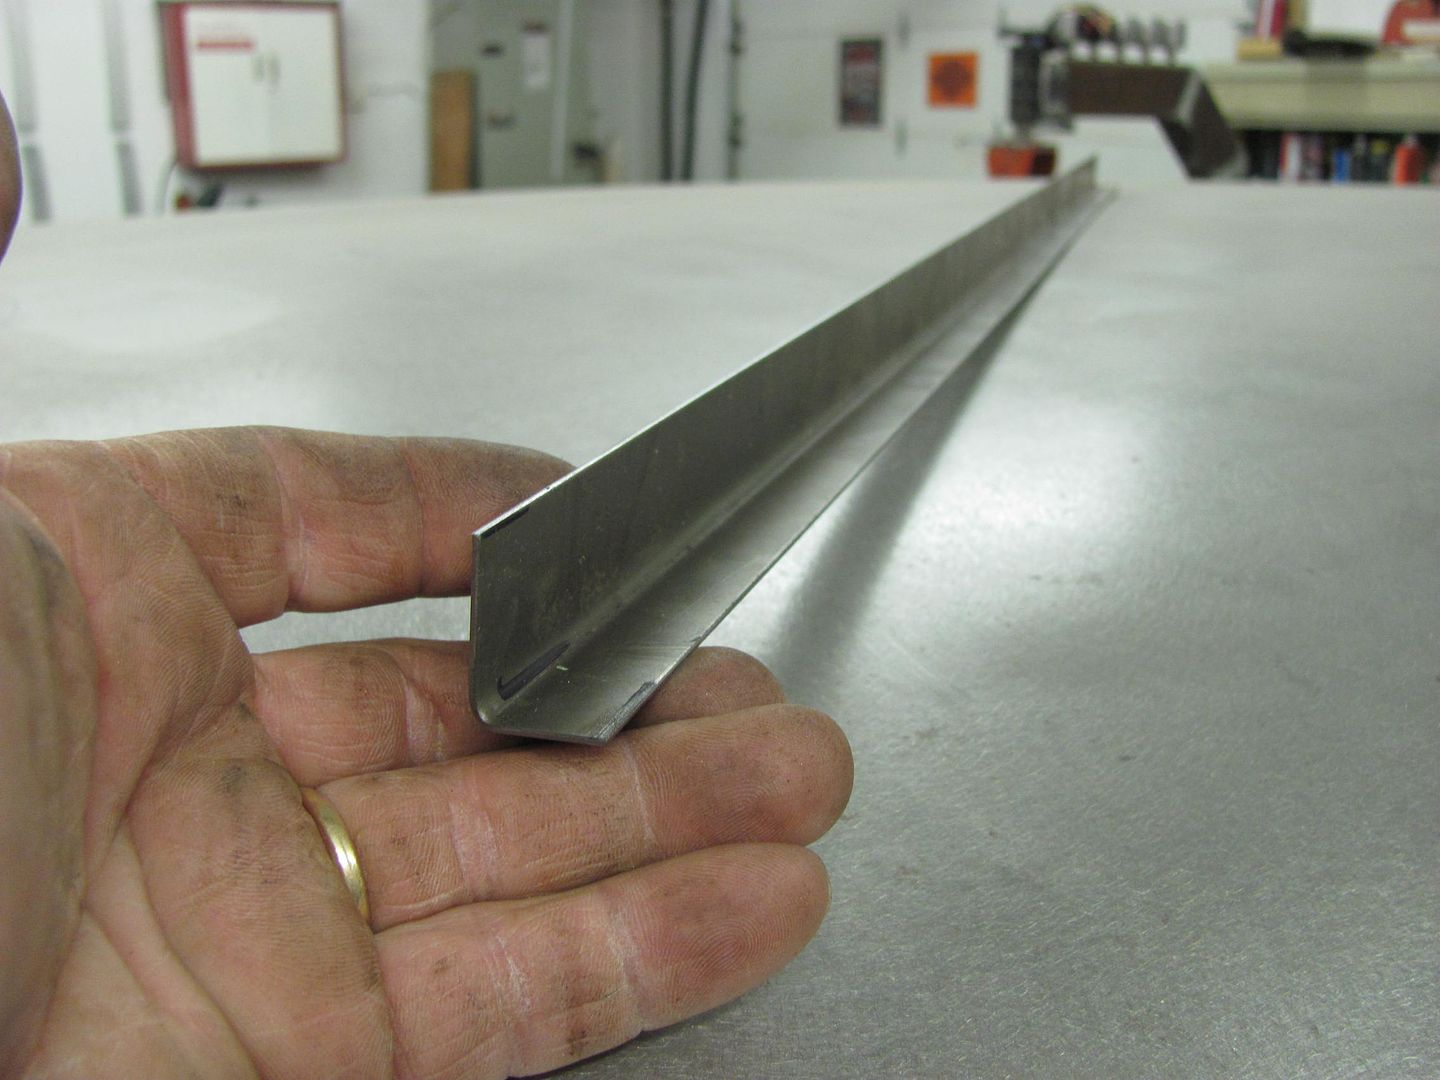
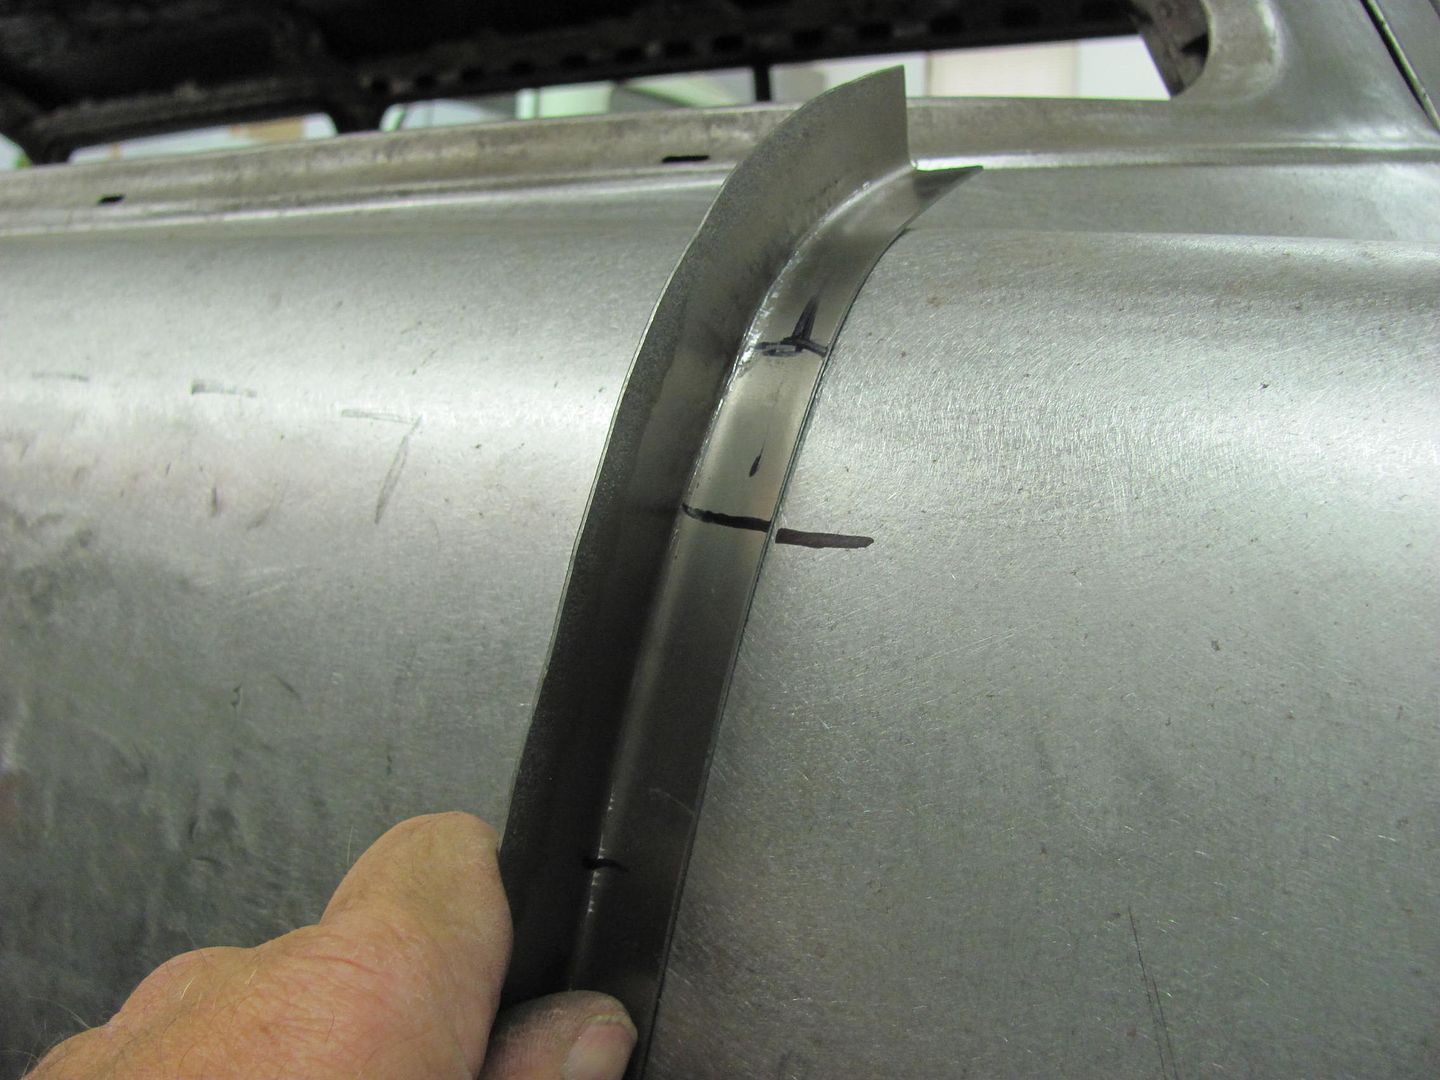
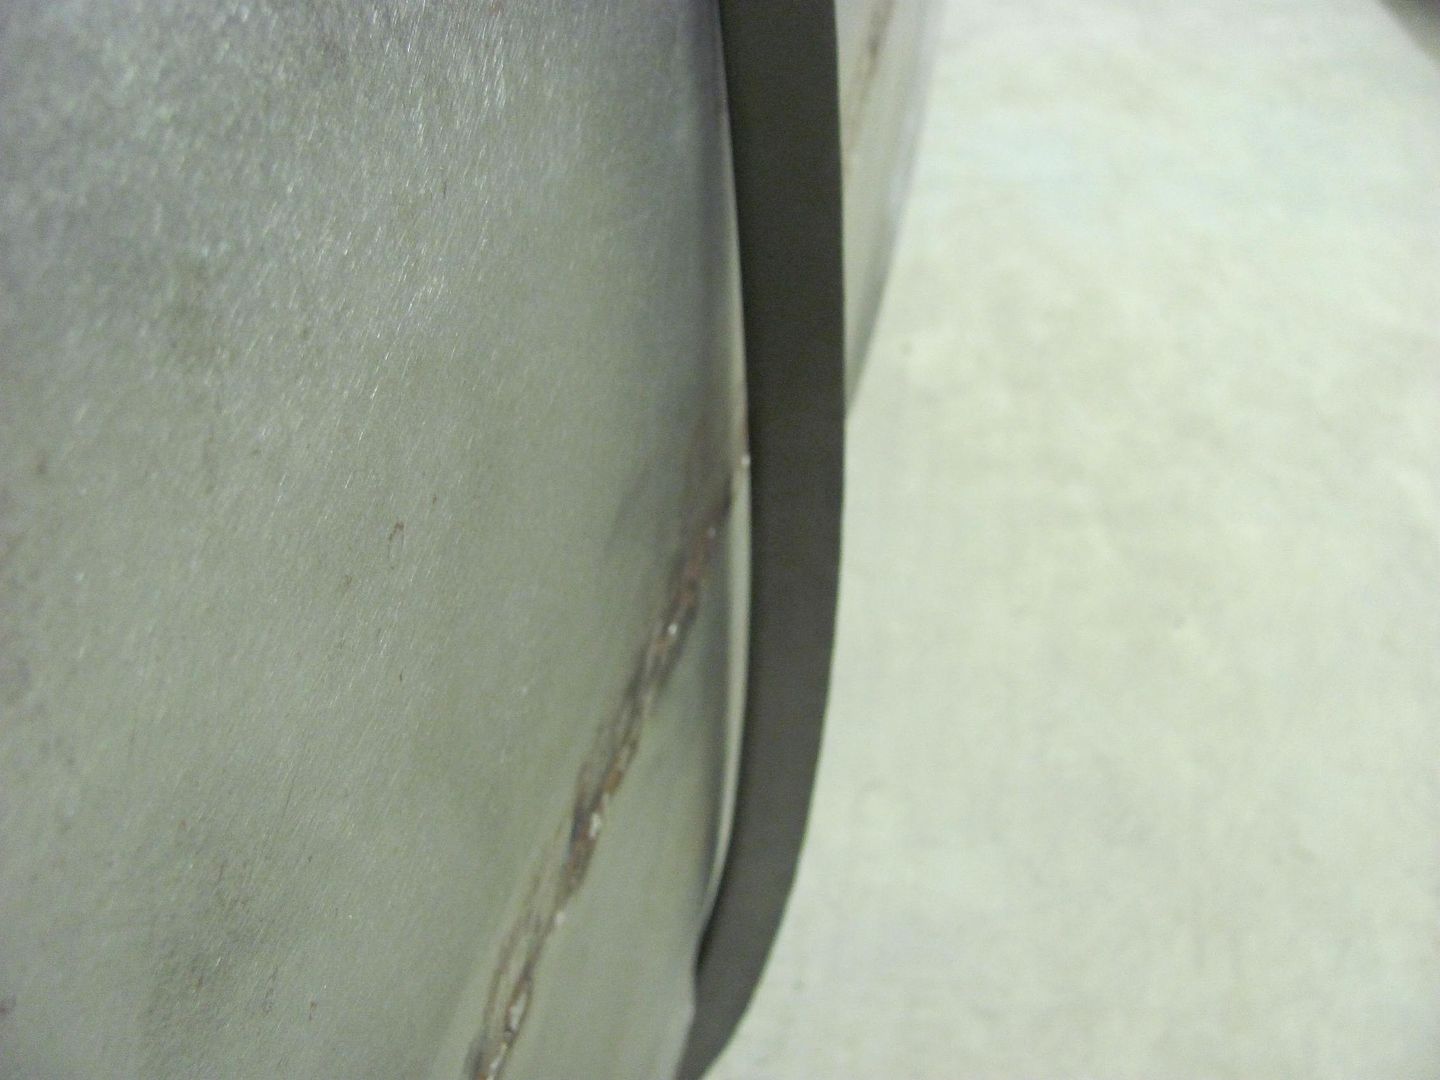
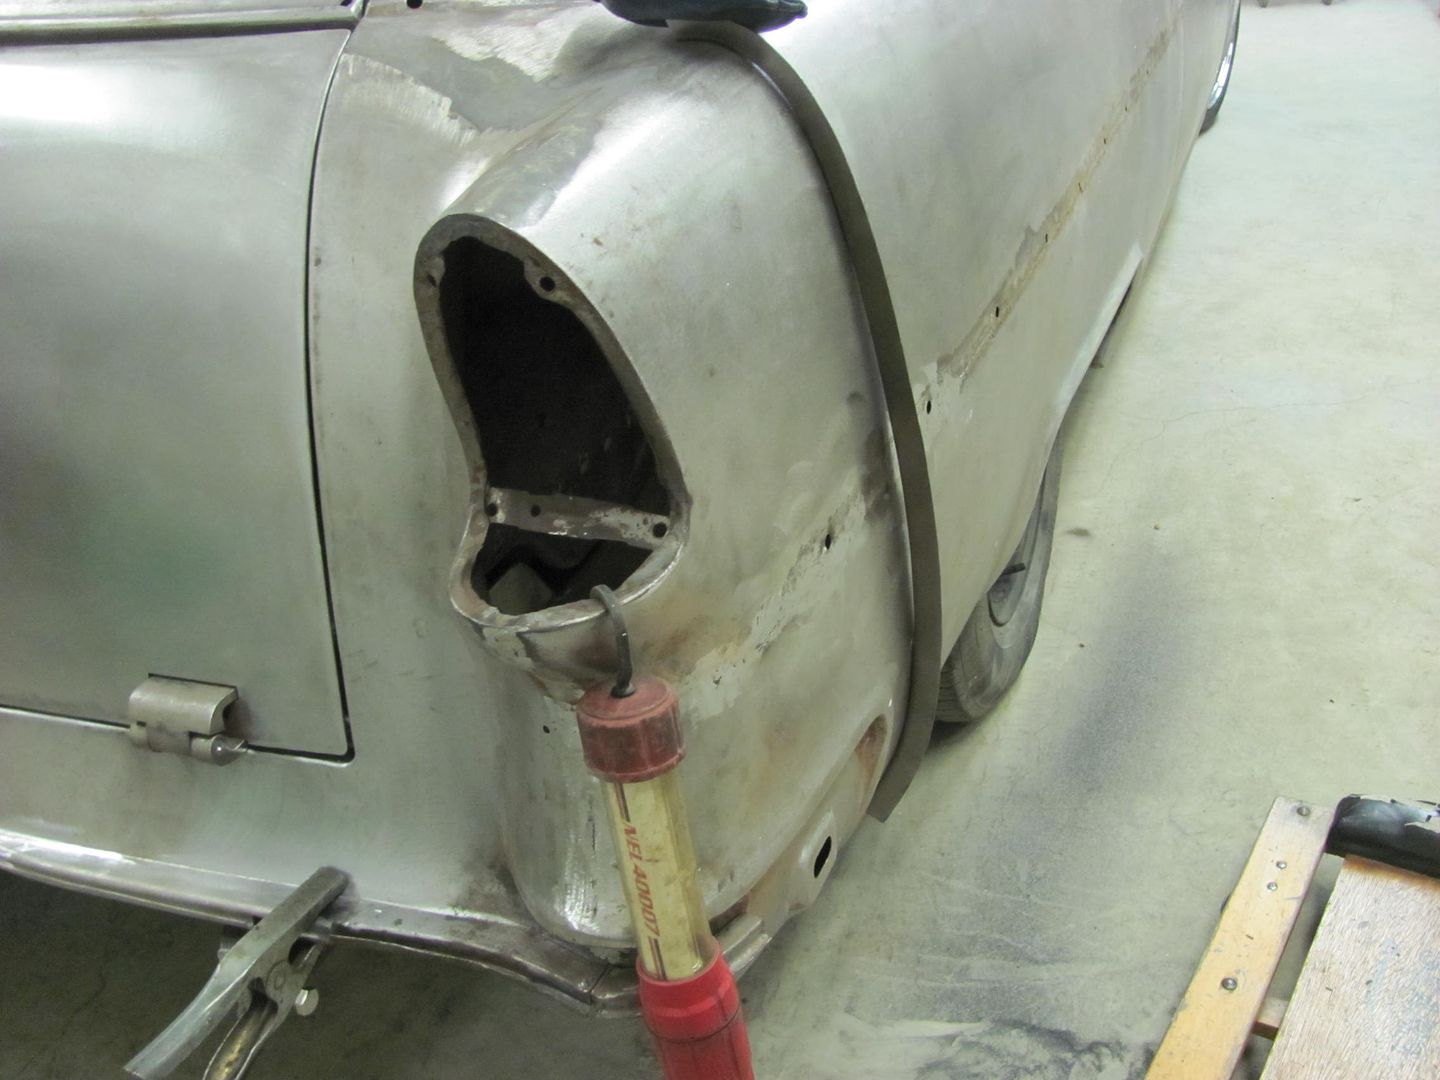
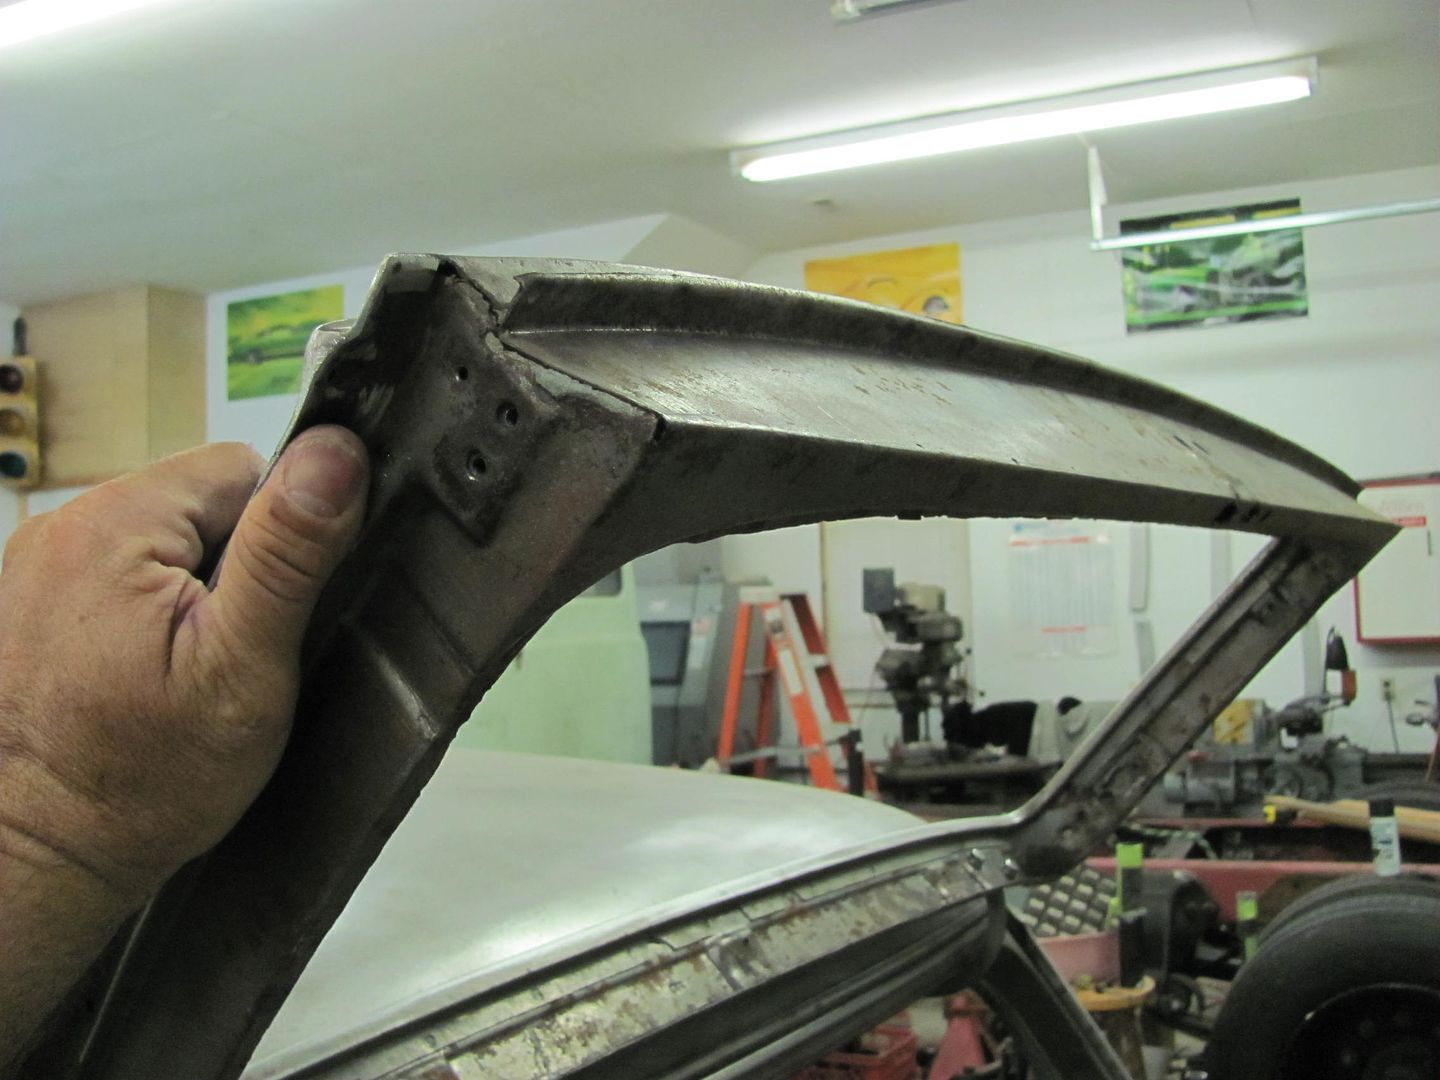
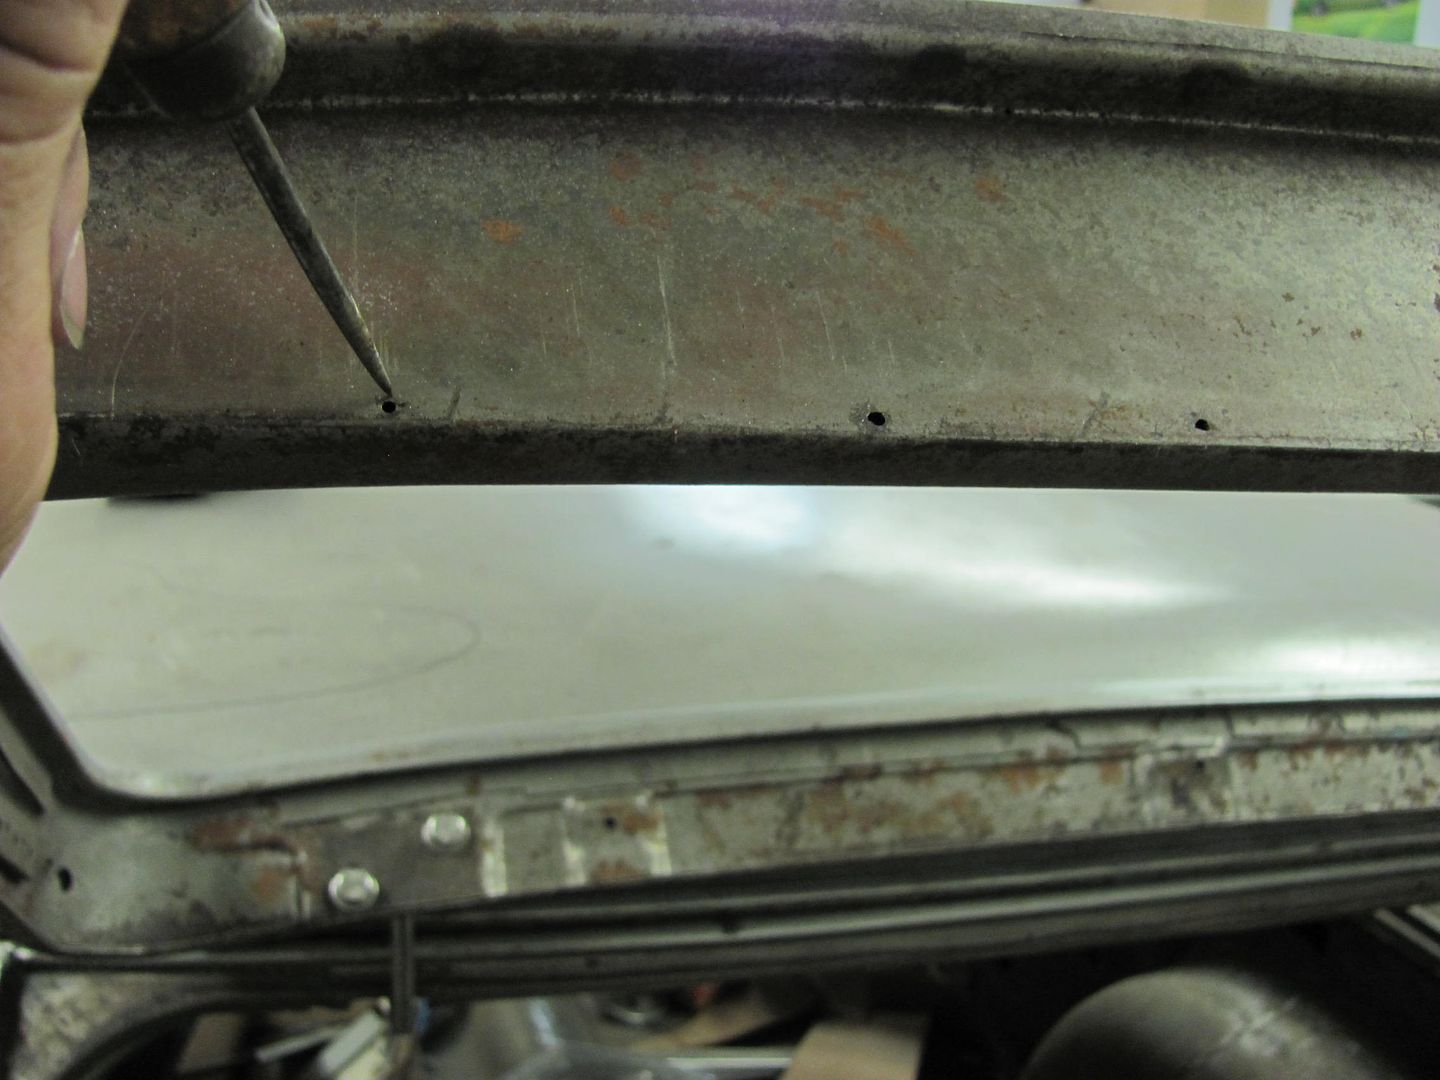
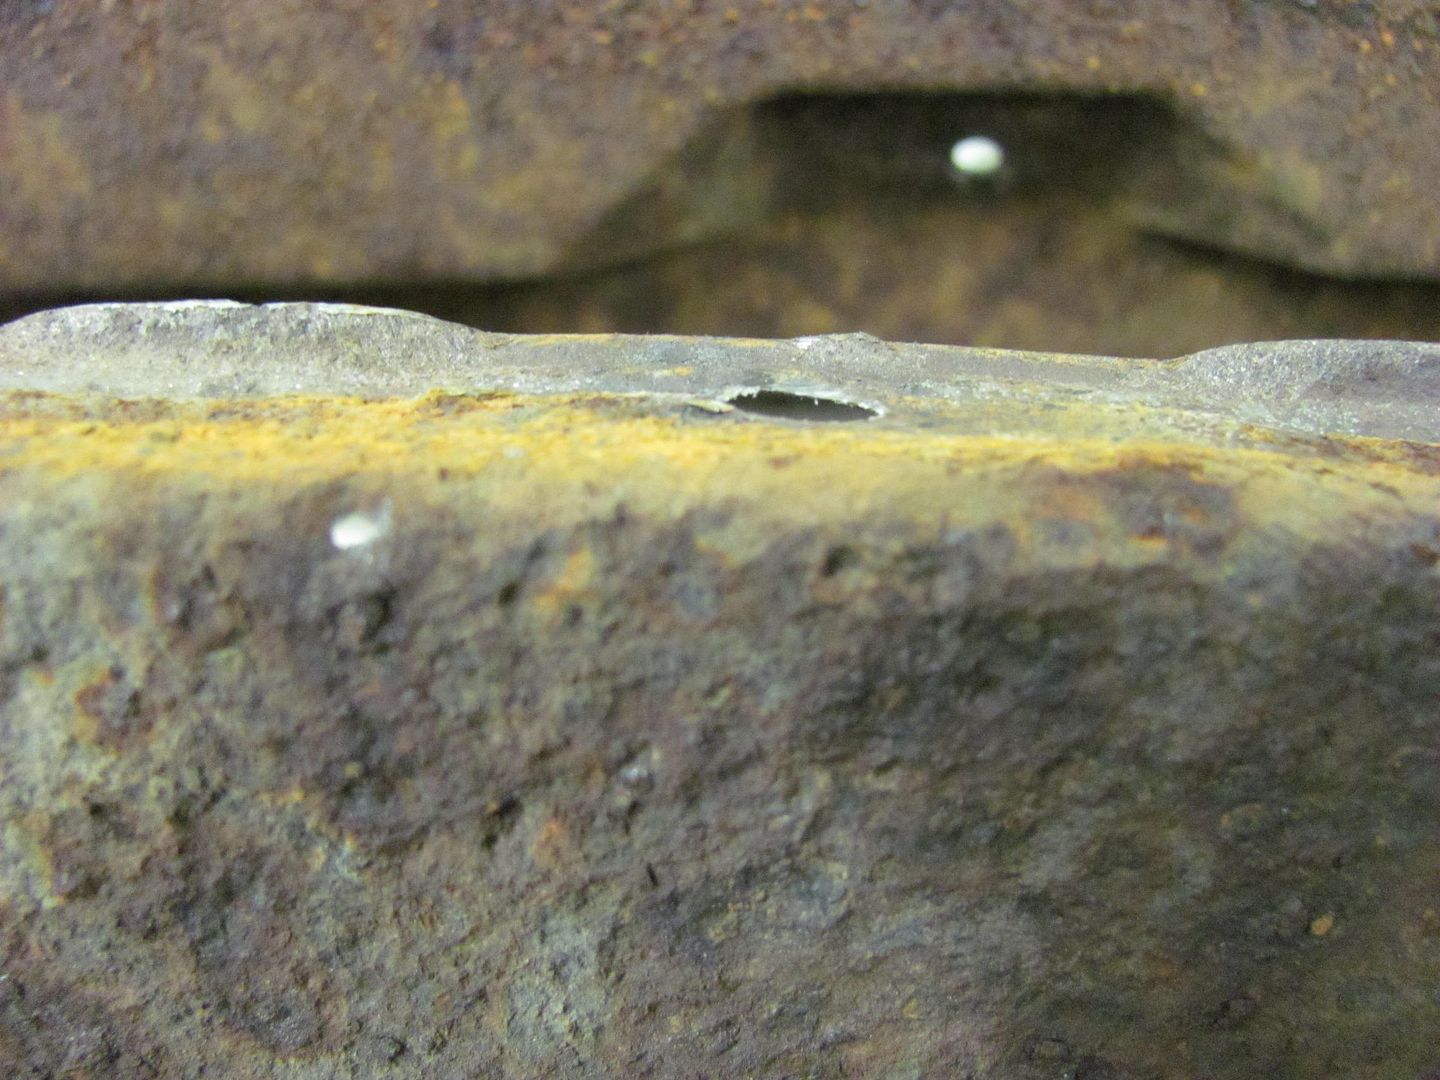
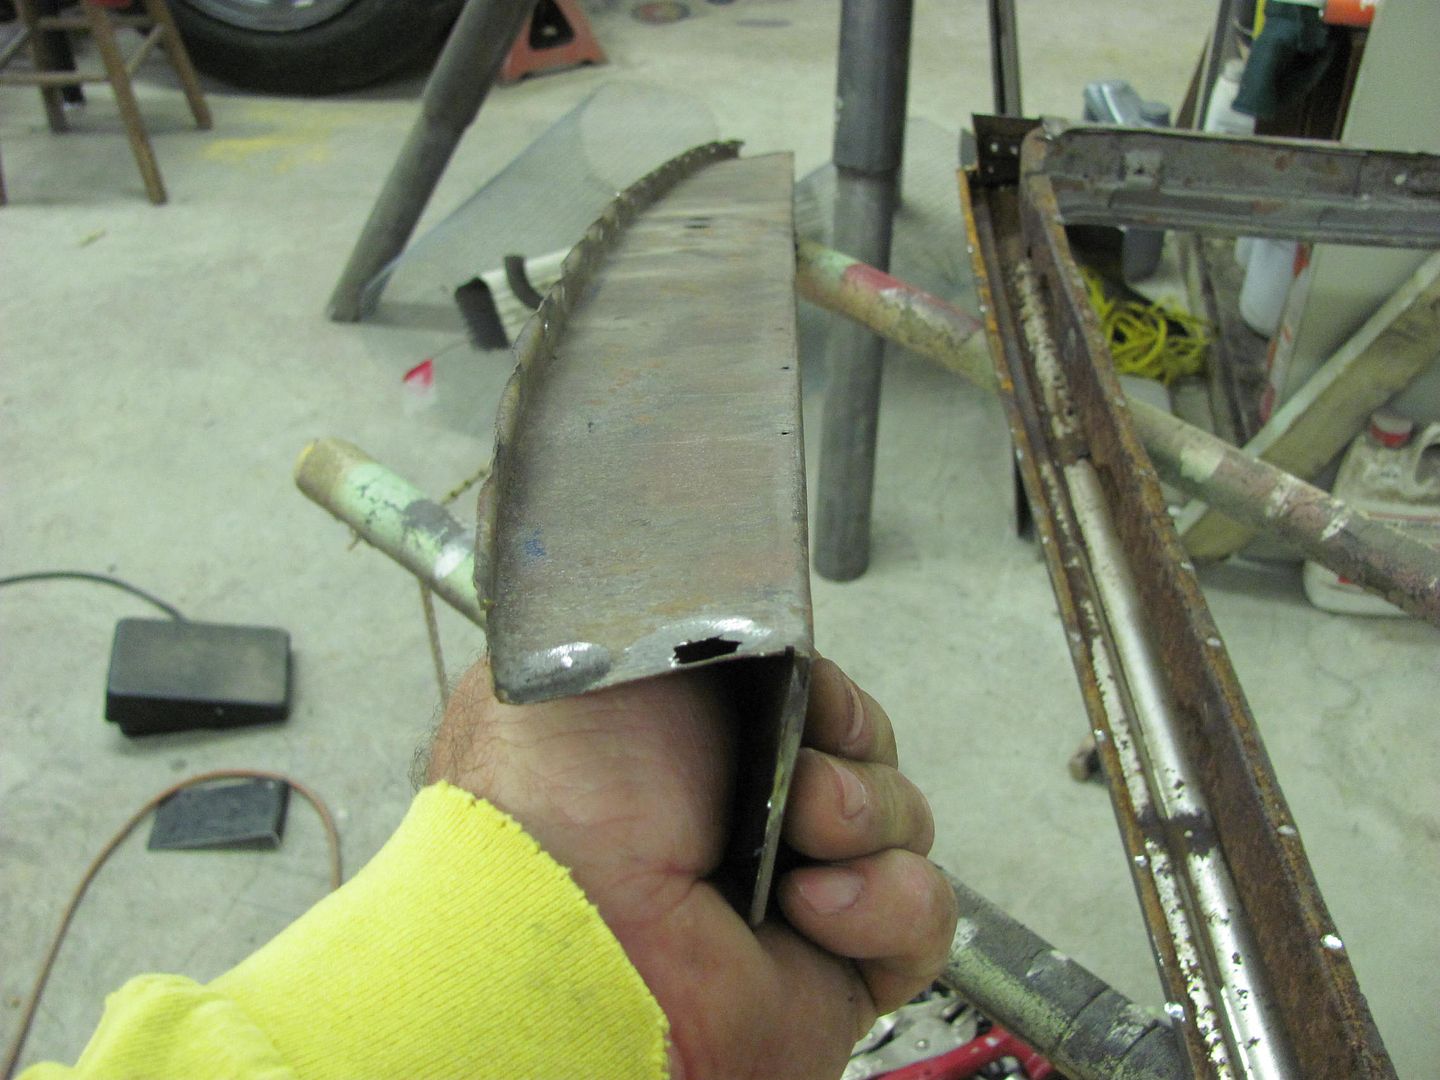
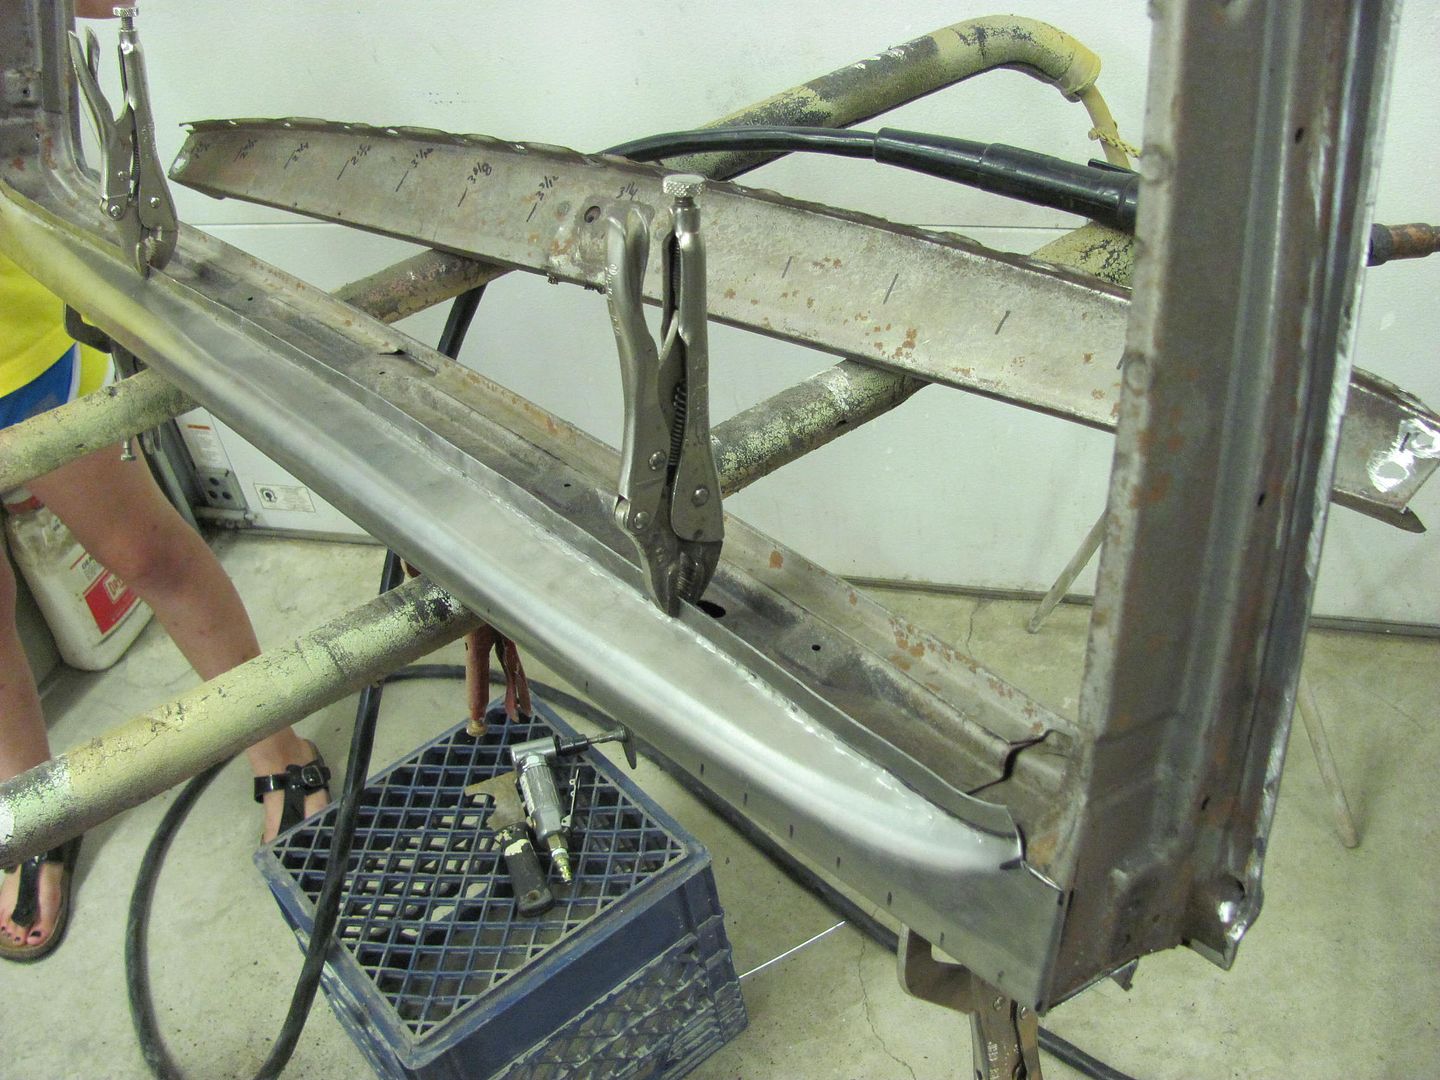
First to open things up to work.........


Picture348.jpg


Picture349.jpg


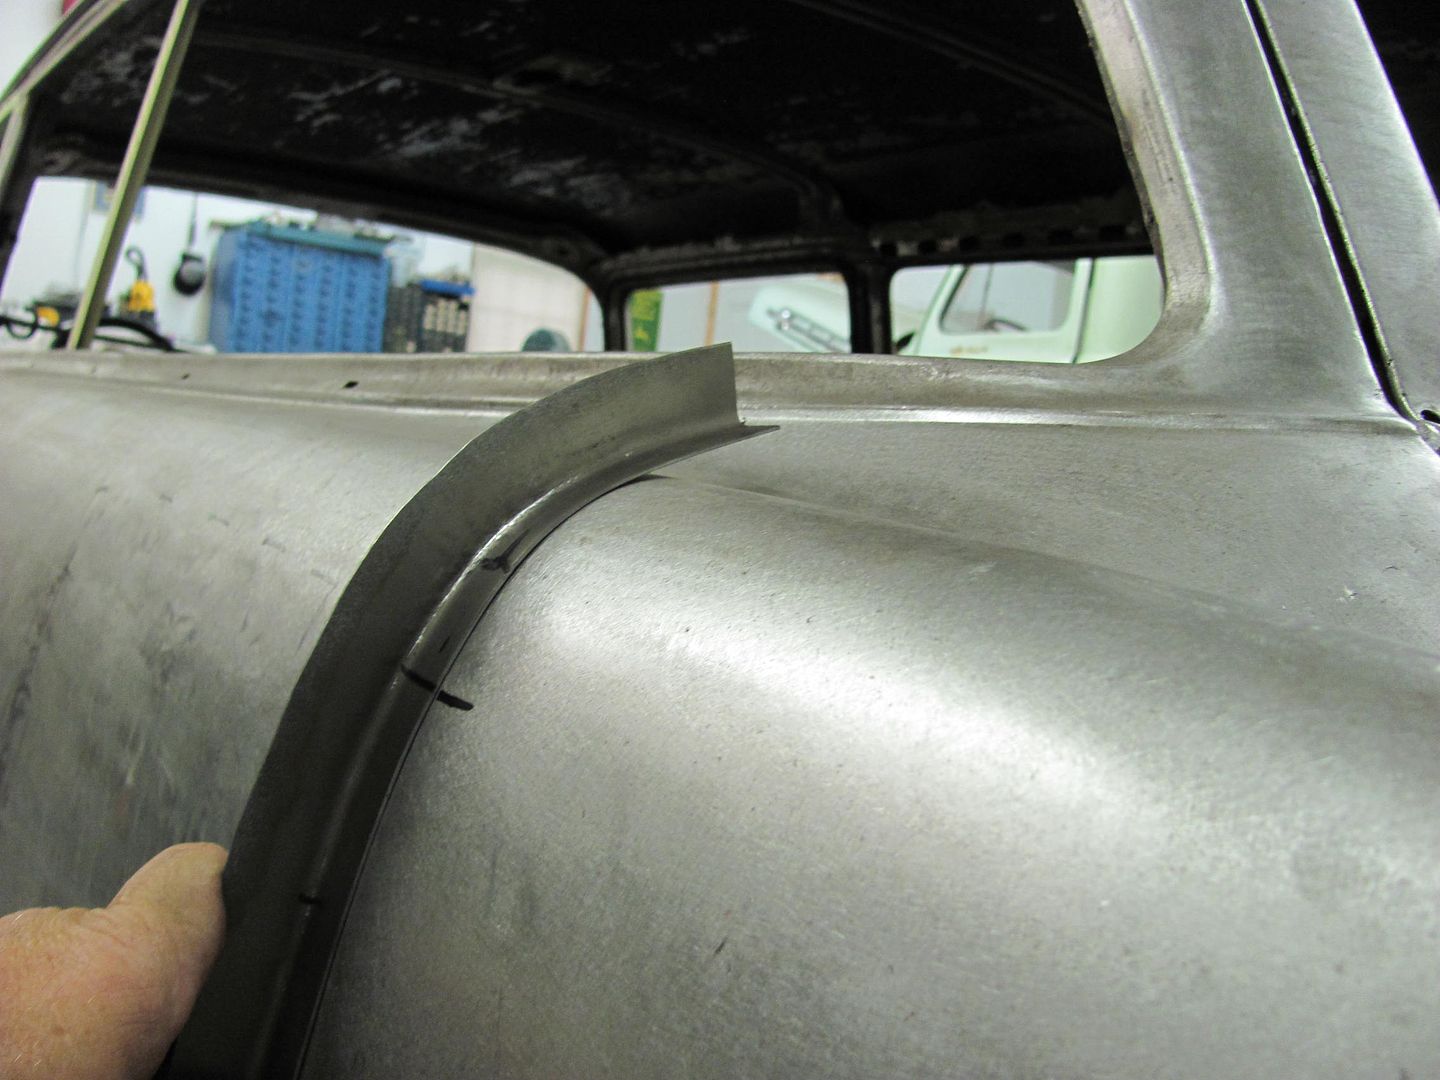
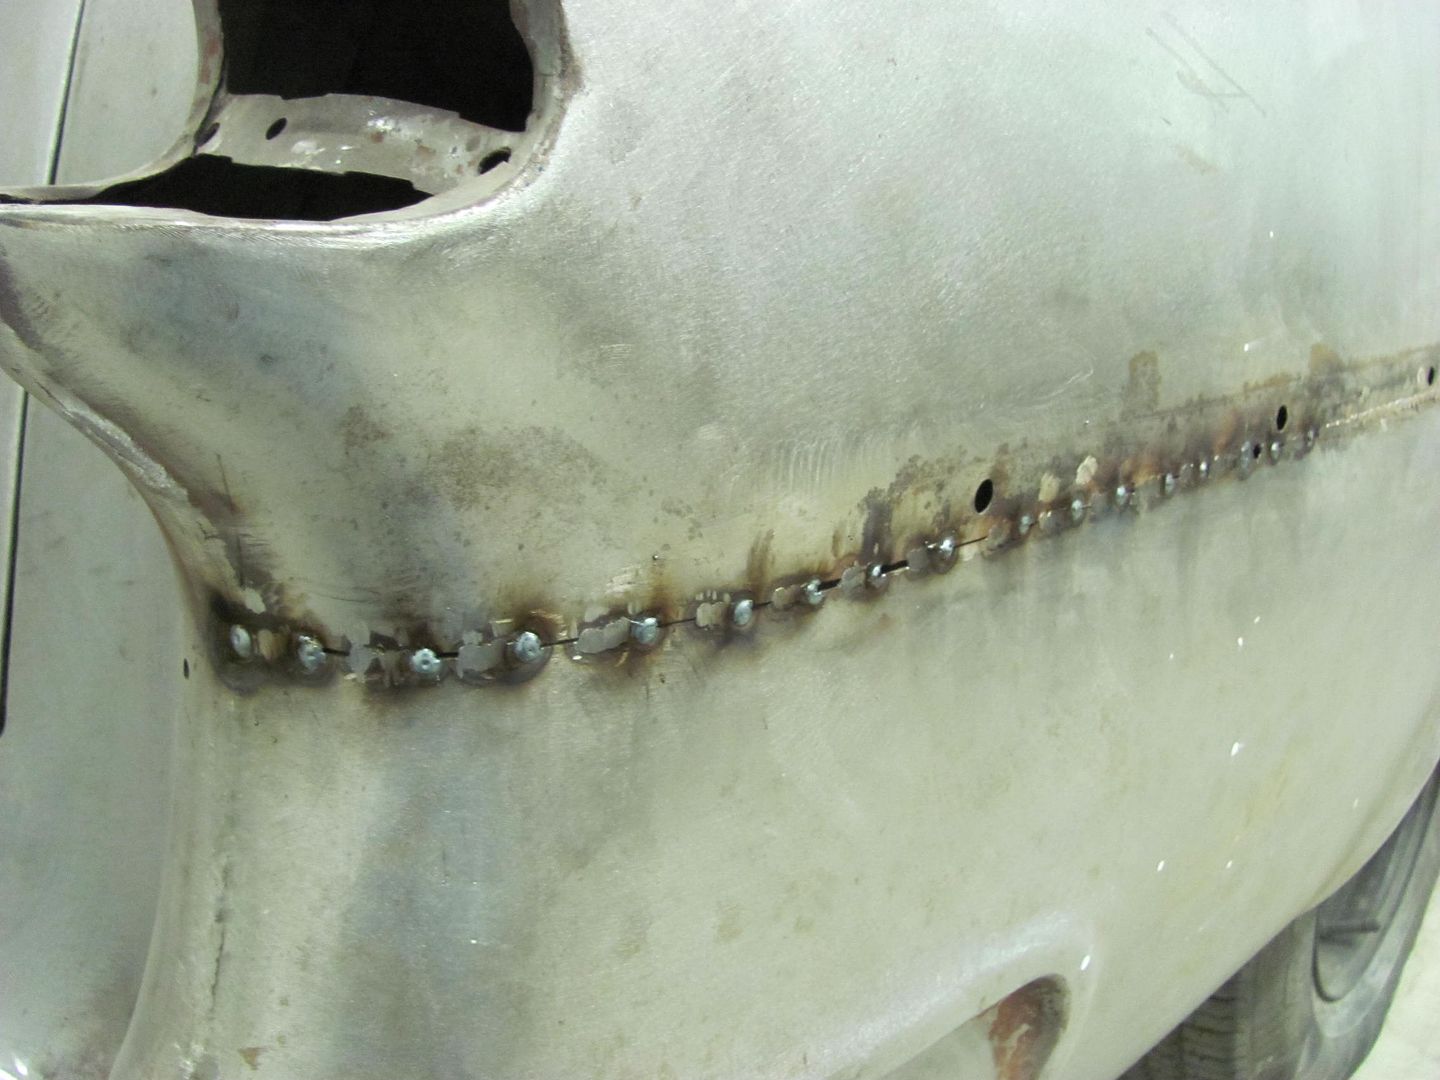
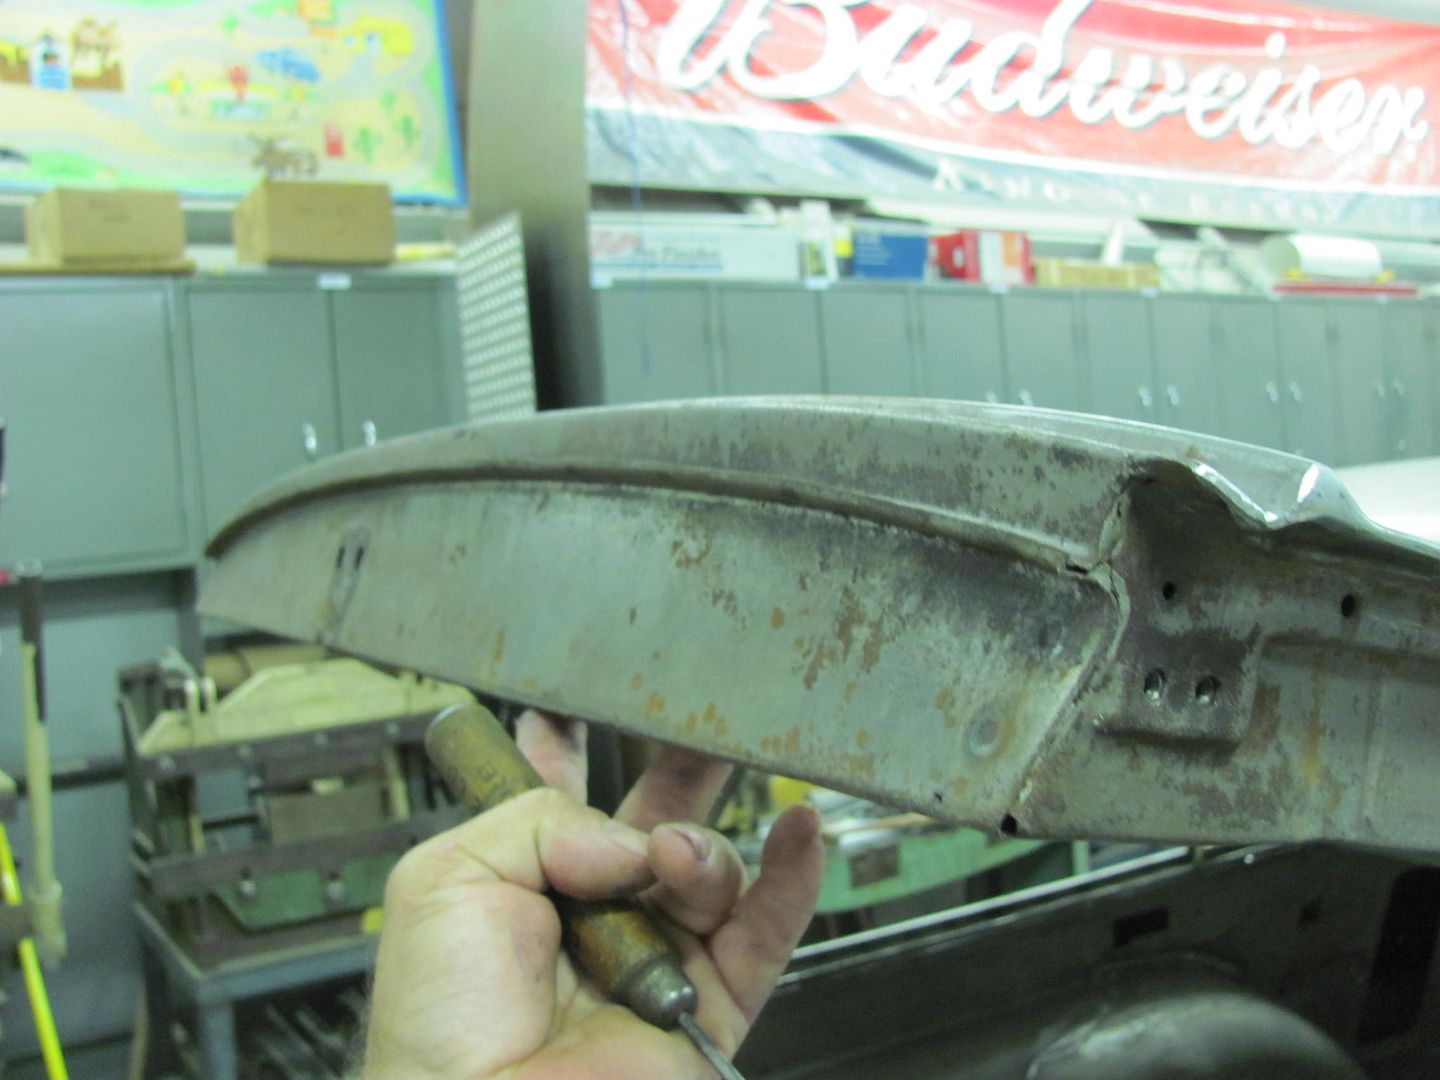
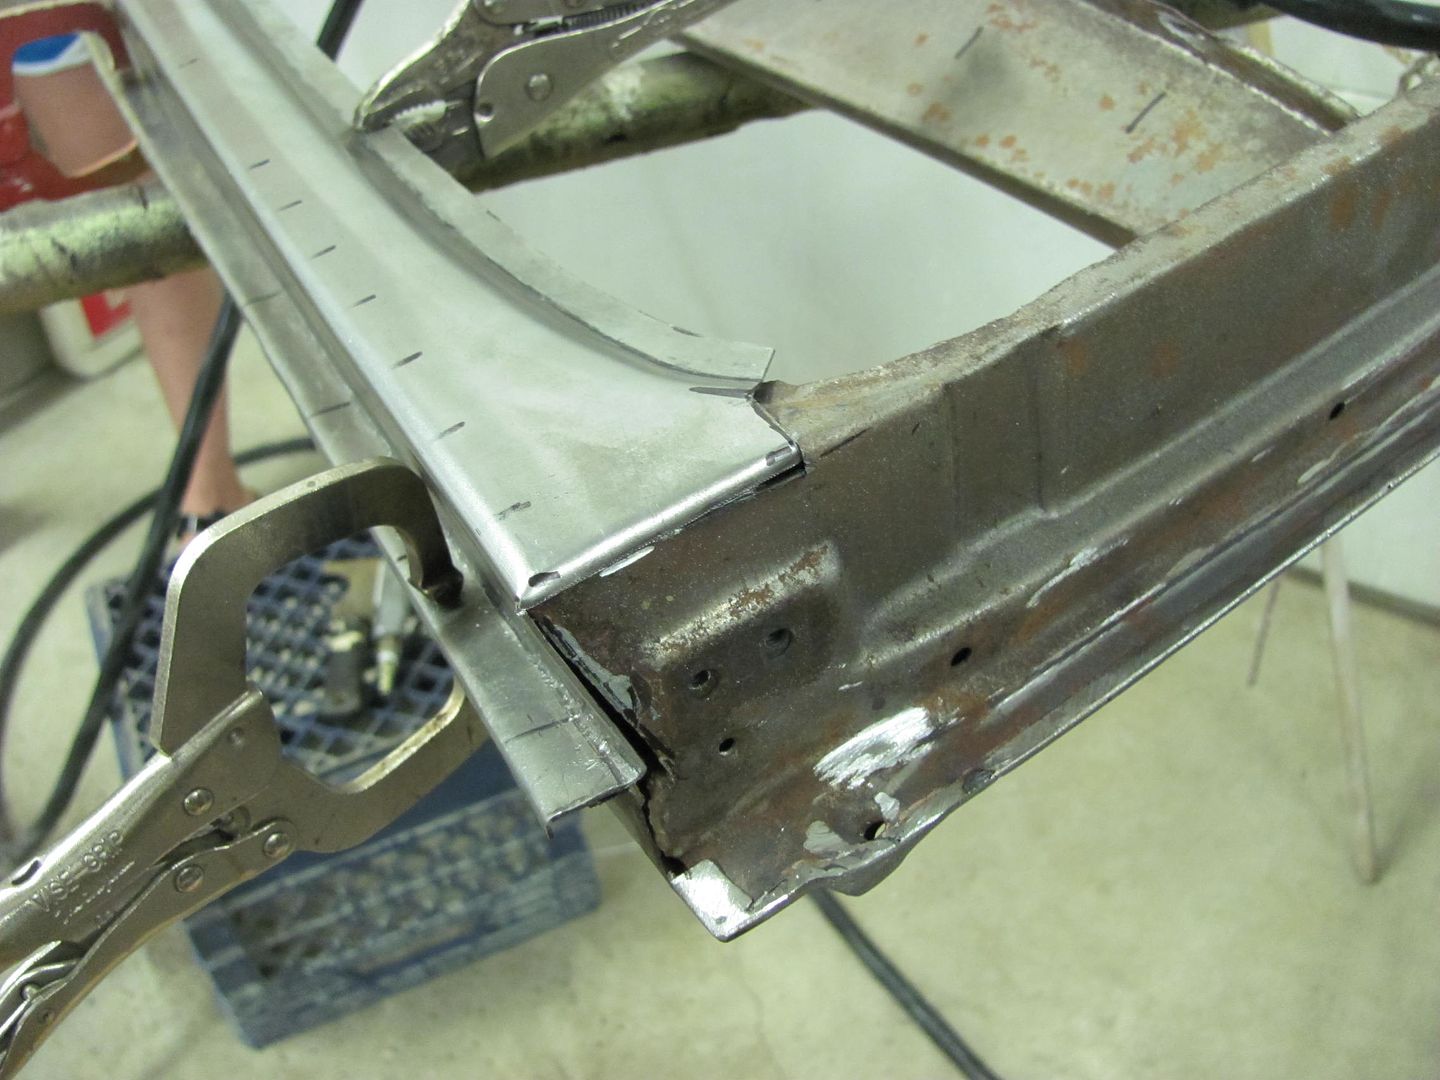
Then to start unfolding the lapped metal...


Picture351.jpg


Picture355.jpg


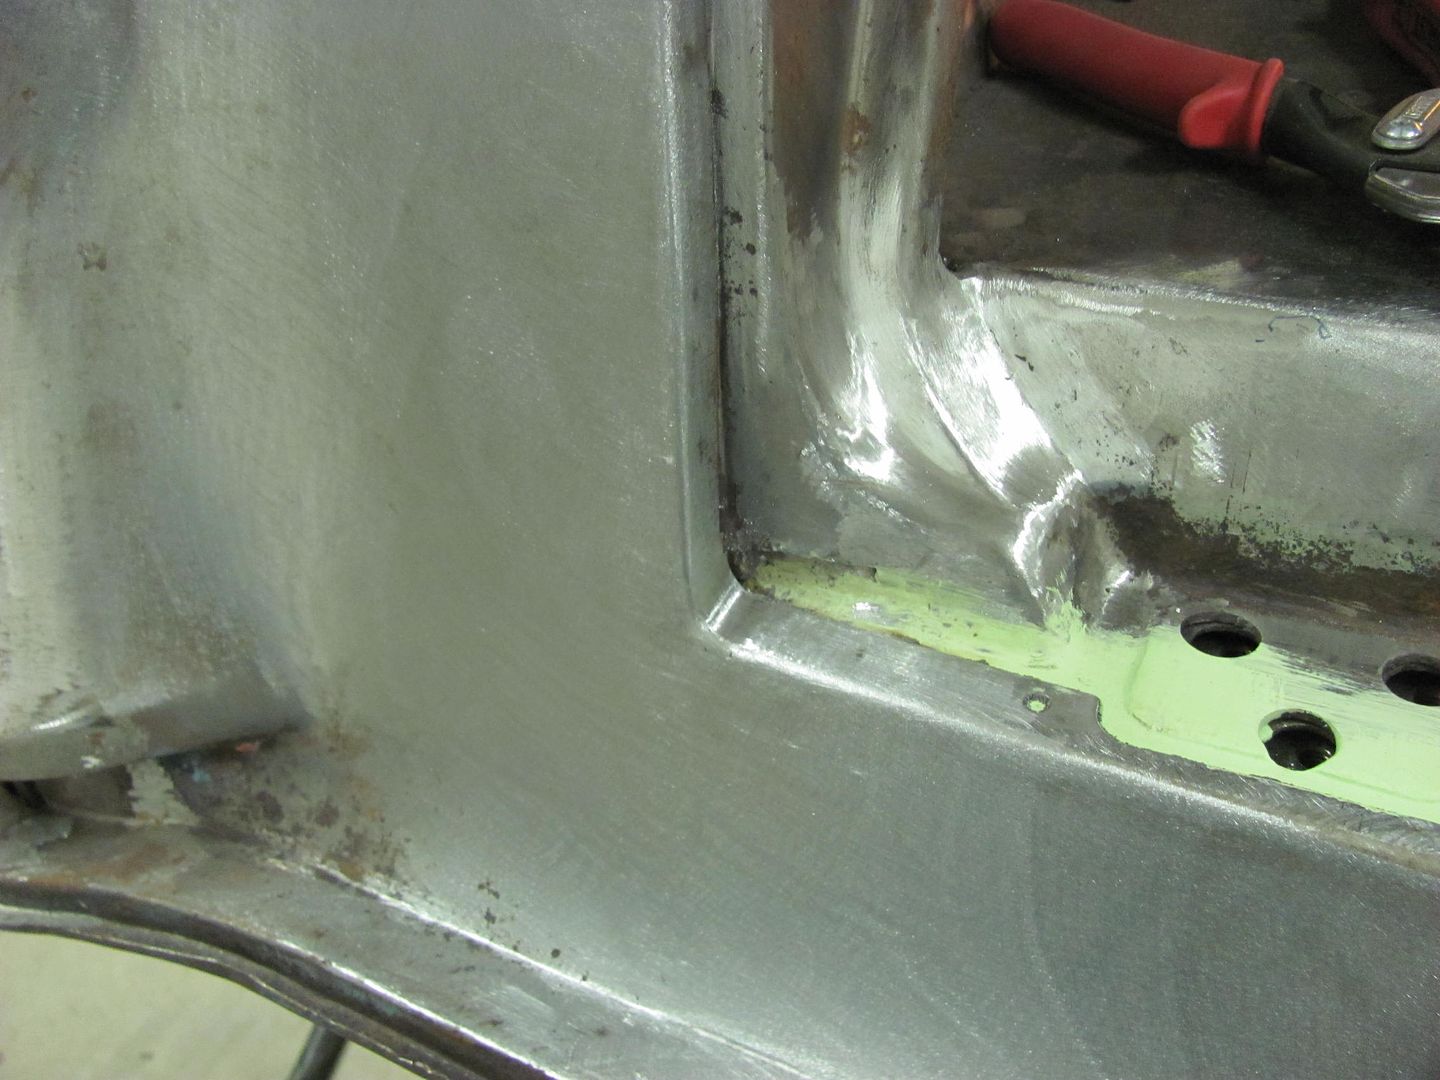
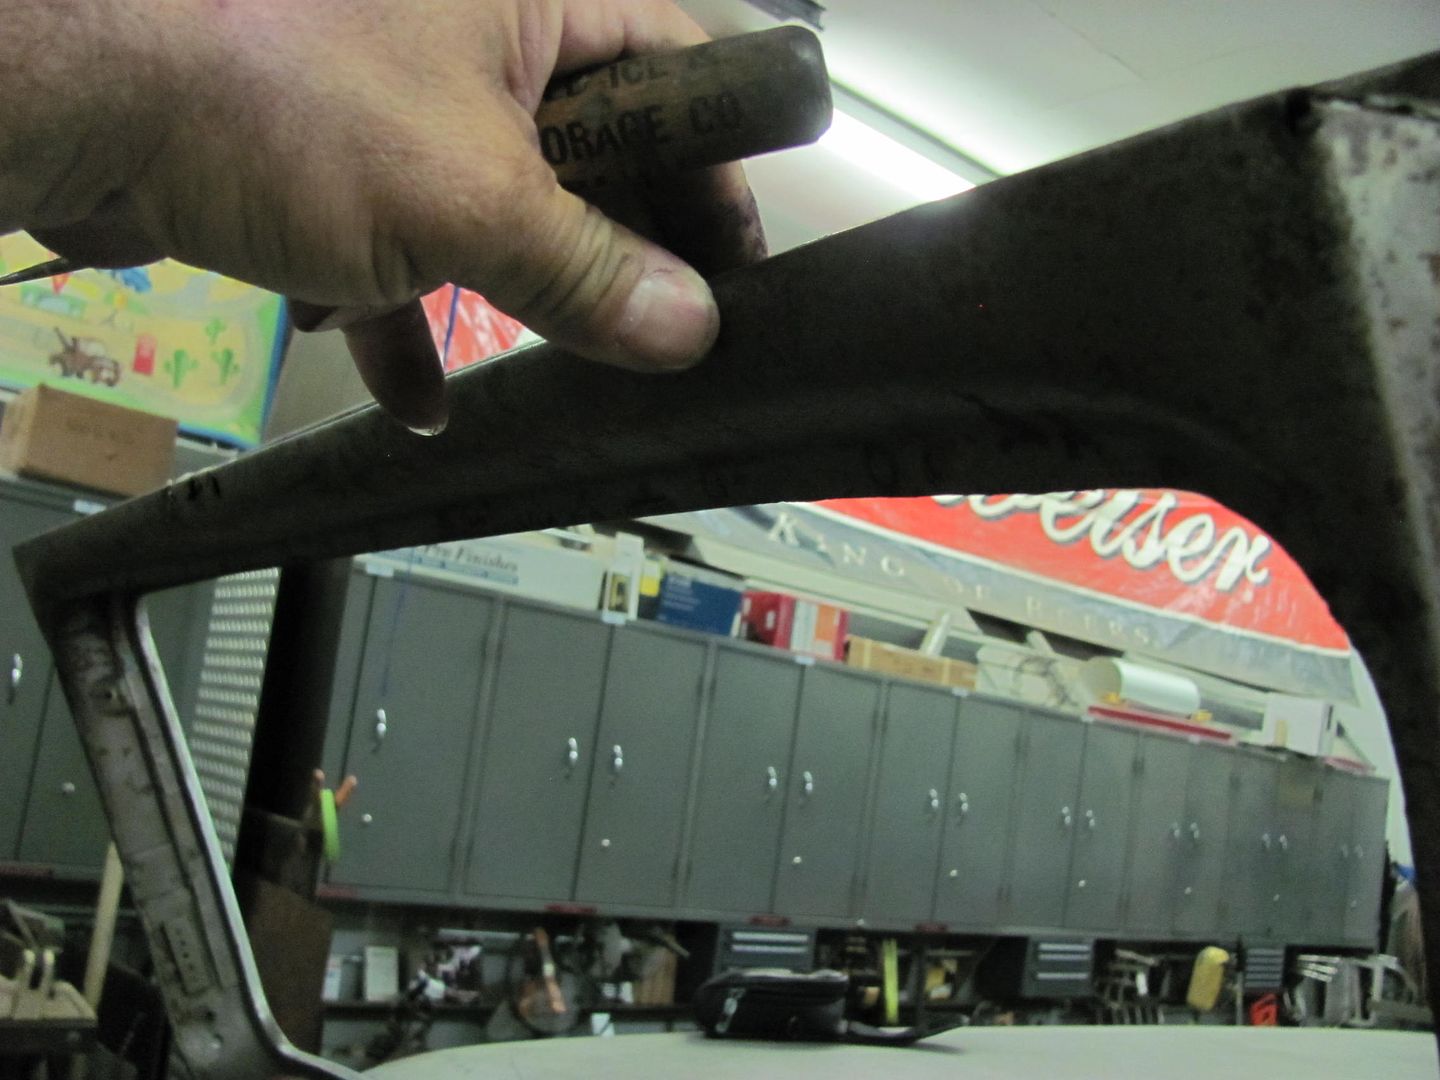
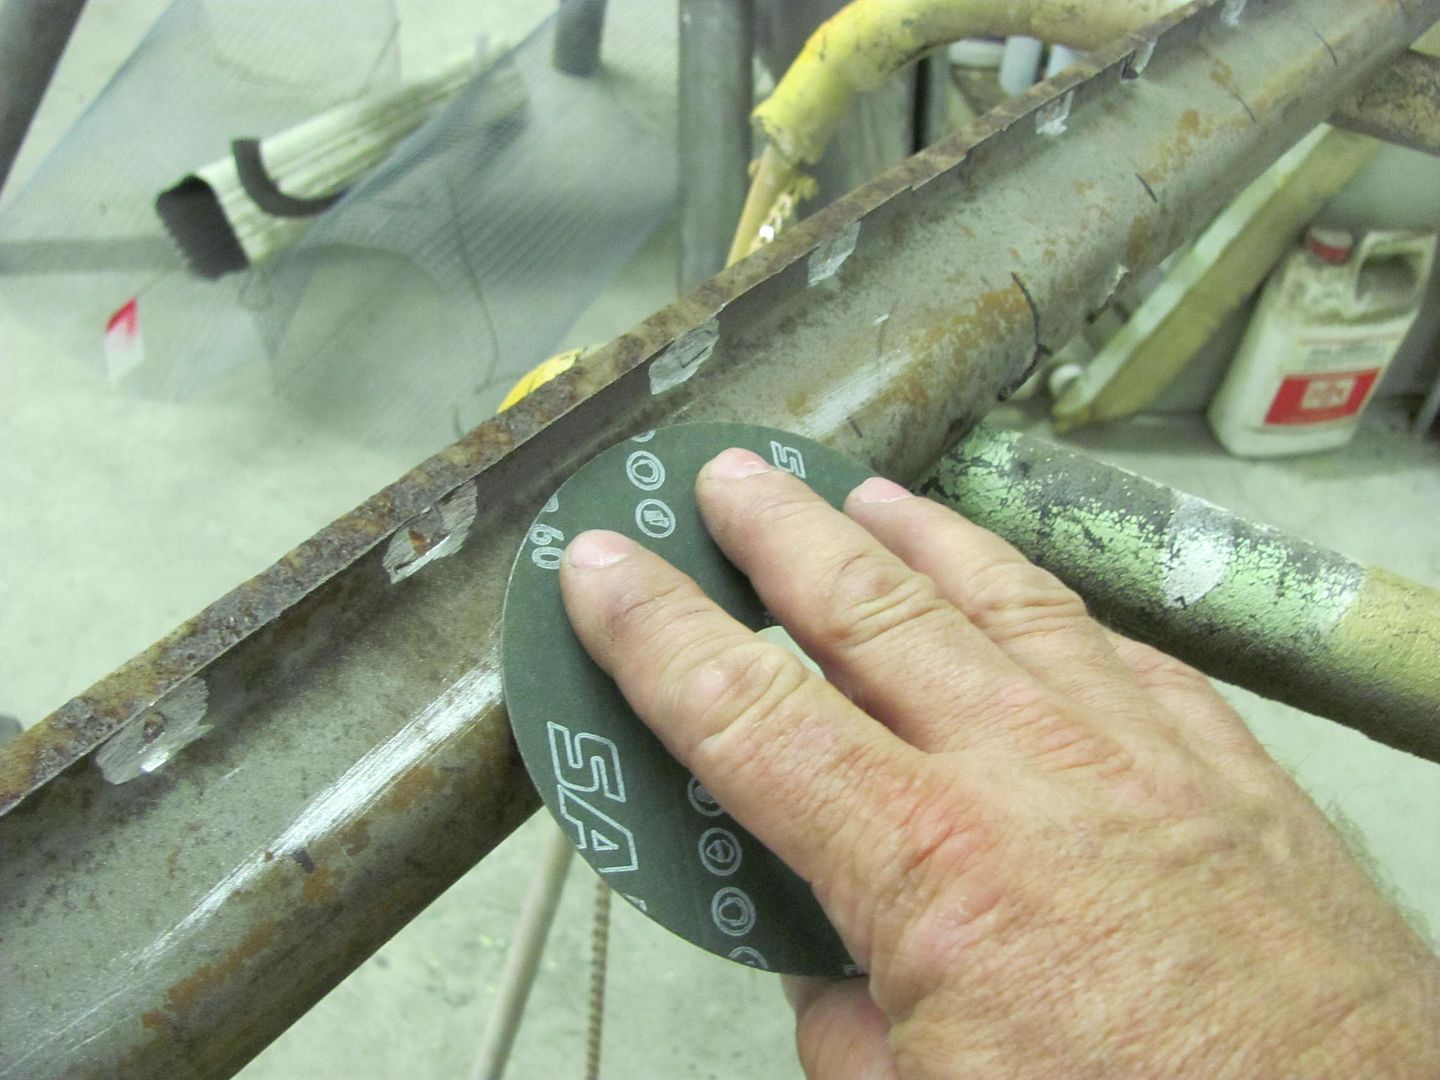
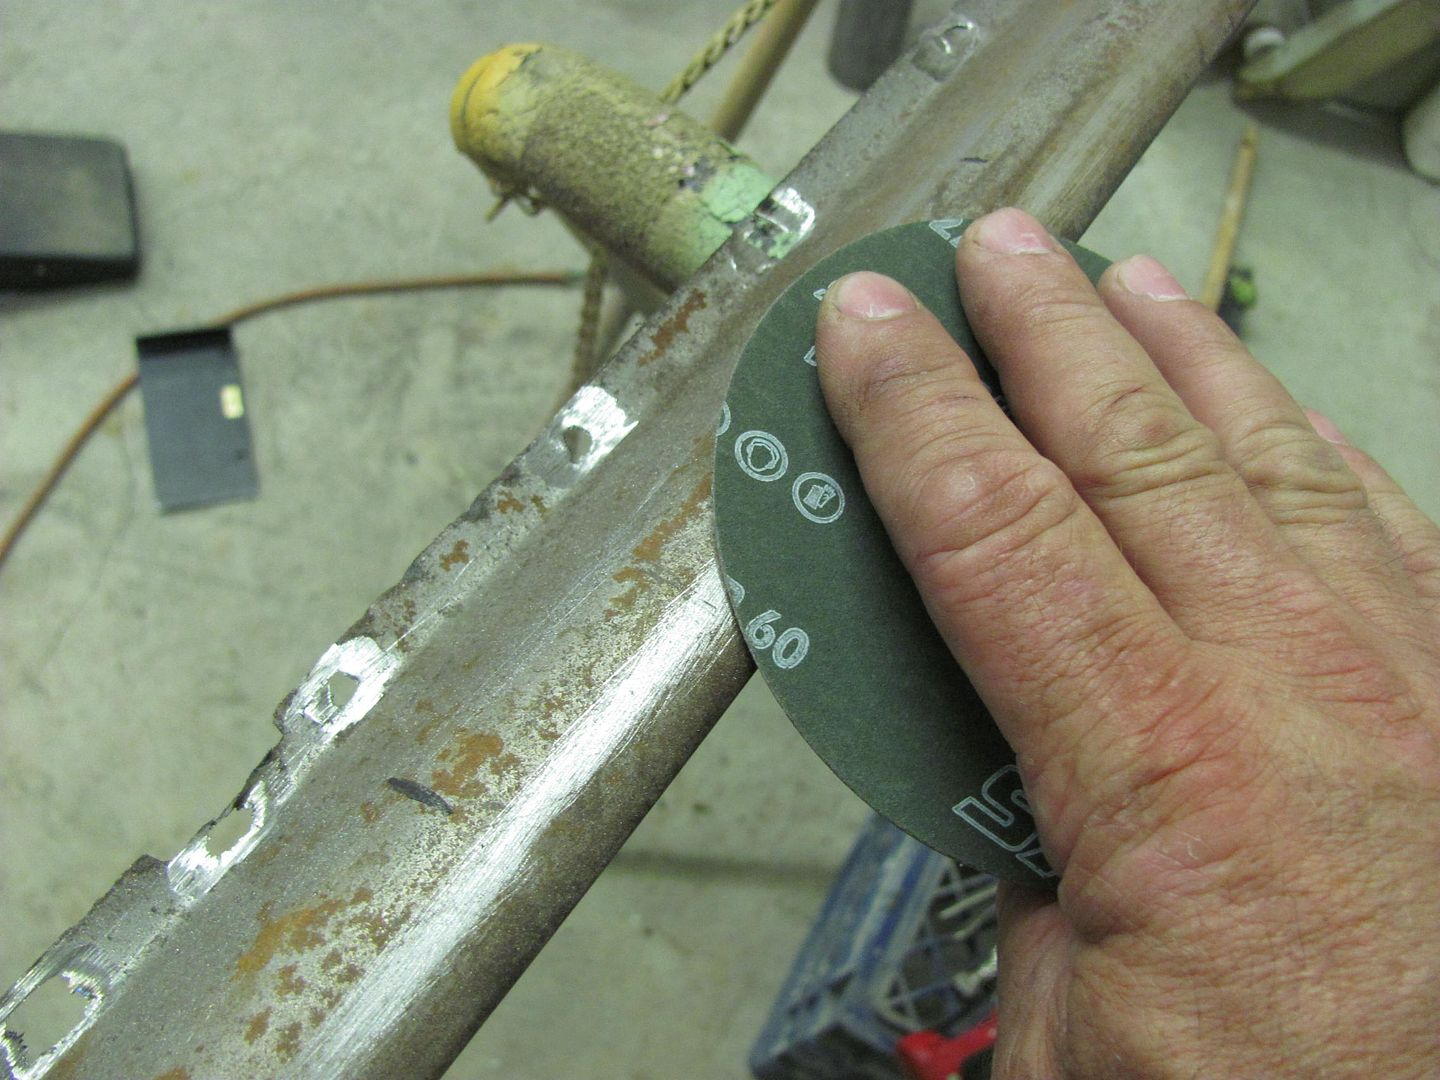
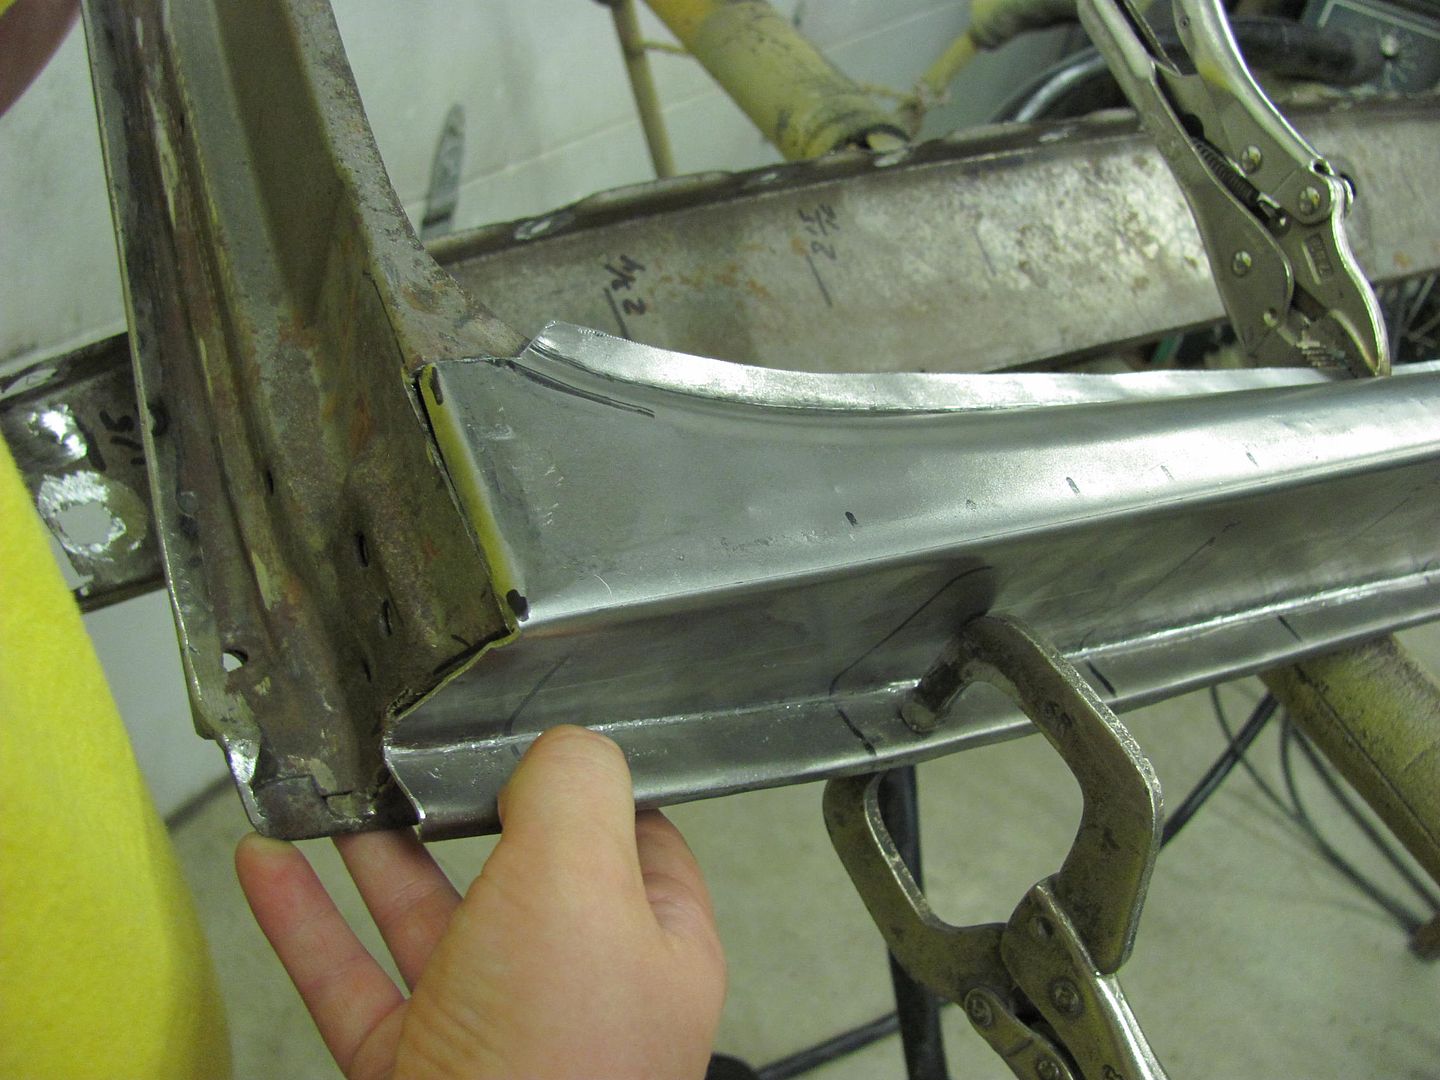
Checking our progress...


Picture357.jpg


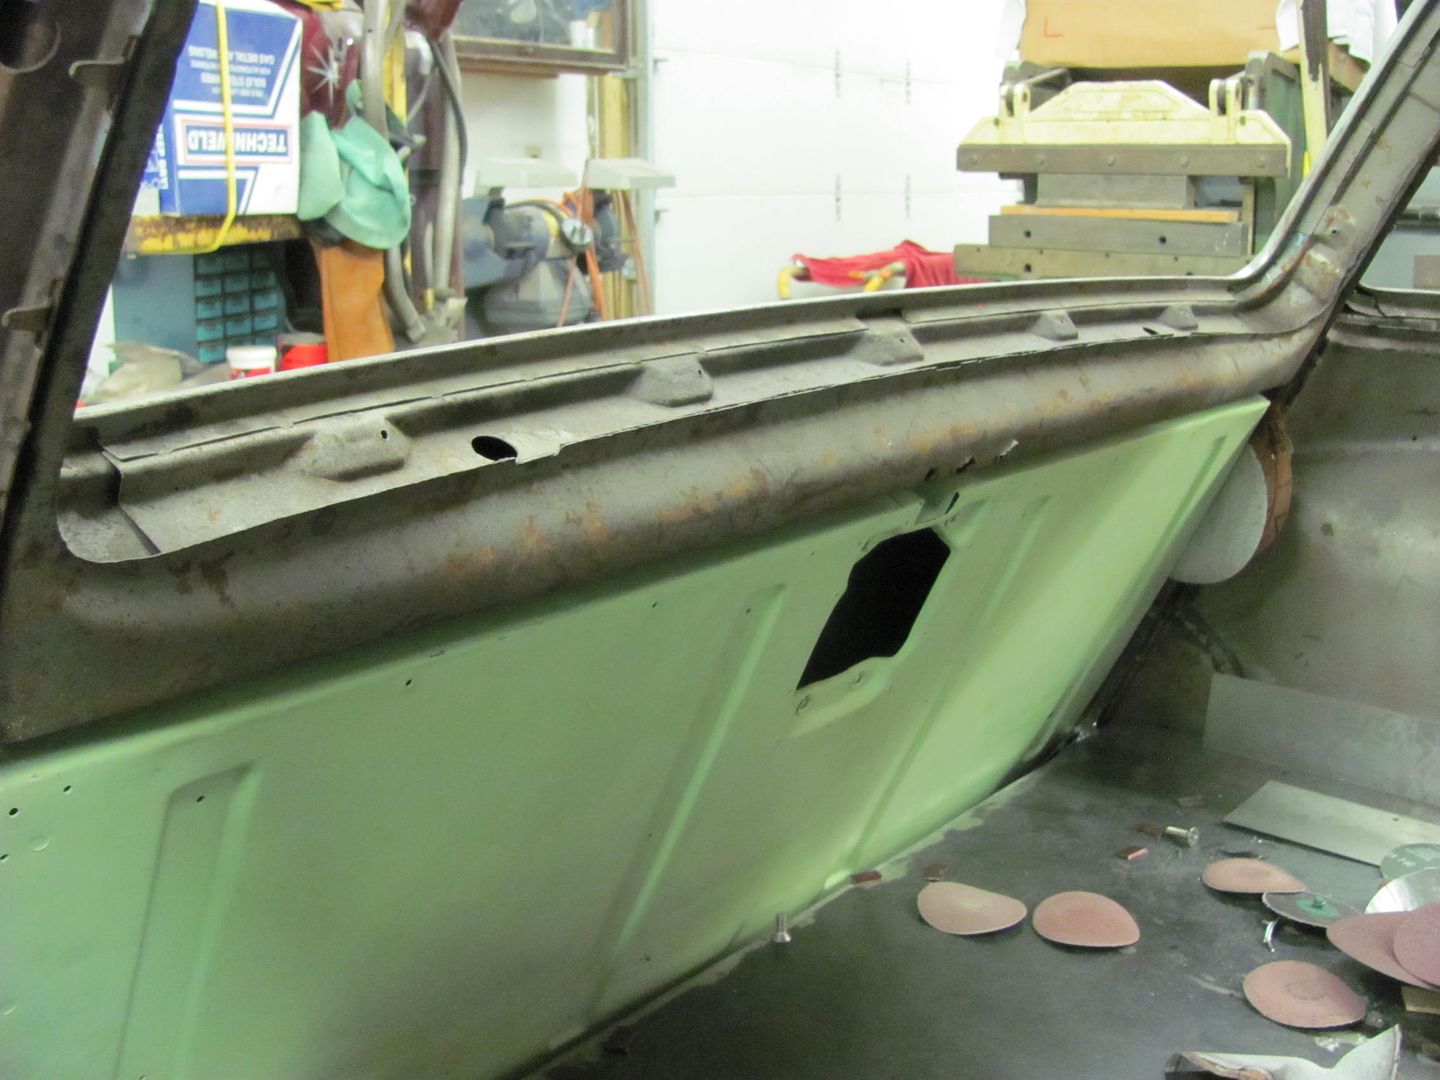
Some dent puller action...


Picture358.jpg


Picture359.jpg


Checking progress...


Picture361.jpg


Picture362.jpg


Picture363.jpg


Picture365.jpg


And finishing things off with a skim of Evercoat 416...


Picture366.jpg


Which was sanded and then we applied some epoxy primer... Don't mind the brush strokes, they'll get sanded out in a few hours. This should hold it until she gets it painted later this year..


Picture367.jpg


Picture368.jpg


Picture370-1.jpg


Picture372.jpg
 
Last edited:
To avoid these ads, REGISTER NOW!

yucholian

Well-known member
Joined
Jul 7, 2009
Messages
240
Location
Monroe, WA
I've never see the type of dent puller you're using.
I've only see the stud welder type, how does yours work?
 
OP
M

MP&C

Well-known member
Joined
Oct 21, 2009
Messages
4,396
Location
Leonardtown, MD
I've never see the type of dent puller you're using.
I've only see the stud welder type, how does yours work?


Oops...missed your question.. This is a SnapOn dent puller, the consumable "throwing star" heats and fuses to the panel, then use the built-in slide hammer to pull. A quick twist normally releases it, ready for the next one. The tool also has a heating tip. useful in shrinking.
 
Last edited:

alpinewhite

Well-known member
Joined
Aug 4, 2012
Messages
1,315
Location
Orange County, California, USA
This is a SnapOn dent puller, the consumable "throwing star" heats and fuses to the panel, then use the built-in slide hammer to pull. A quick twist normally releases it, ready for the next one. The tool also has a heating tip. useful in shrinking.
Model number please as I'd like to read about it. Thanks.
 
OP
M

MP&C

Well-known member
Joined
Oct 21, 2009
Messages
4,396
Location
Leonardtown, MD
Picture374.jpg


Picture375.jpg


I bought this used, and if I had to pay new Snap-on prices I probably wouldn't have this one, as it is pricey. But the heating tip has shown to be handy in shrinking. Although it doesn't shrink as much as using the torch, to me this slows things down a bit for a better panel read, and it is an aim and push the trigger, so no fumbling around with laying a torch down and grabbing the hammer and dolly. When you are primarily working by yourself, you gravitiate towards methods that are more user friendly to a one person effort. :willy_nil
 
OP
M

MP&C

Well-known member
Joined
Oct 21, 2009
Messages
4,396
Location
Leonardtown, MD
Worked today to finish up the weld seam on the passenger quarter panel. First, I wanted a profile template to check the crown of the panel. As the rear half of the driver's quarter was NOS, this would make a good template....


Picture362.jpg


Picture364.jpg


Picture365.jpg


Picture366.jpg


Adding an alignment mark to the quarter....


Picture367.jpg


Picture368.jpg


Picture369.jpg


Using the profile template against the welded seam of the passenger side, we can see the low area along the center. This is a typical problem with using "half quarters", welding through the center of panel tends to flatten out this low crown area. A full quarter with the welded seam up top where there is a bit more crown tends to not have as much of a "flattening" effect.


Picture370.jpg


Picture371.jpg


Finishing the welds and checking with the profile template.....


Picture372.jpg


Picture374.jpg


Still shows some more crown needed through the middle of the panel, will do some more planishing tomorrow...


Picture373.jpg
 
Last edited:
OP
M

MP&C

Well-known member
Joined
Oct 21, 2009
Messages
4,396
Location
Leonardtown, MD
Headed to an auction tonight, snagged a Monarch 229 vise...


Picture379.jpg


As compared to the Parker...


Picture380.jpg


Picture384.jpg


Picture381.jpg


Are these British in origin?
 

e-tek

Well-known member
Joined
Dec 19, 2007
Messages
10,690
Location
Saskatoon, SK
Good idea making that template for the quarter. That is always a PITA problem when welding in patch panels. Is the back-side open - or is the floor right there?
 
OP
M

MP&C

Well-known member
Joined
Oct 21, 2009
Messages
4,396
Location
Leonardtown, MD
Good idea making that template for the quarter. That is always a PITA problem when welding in patch panels. Is the back-side open - or is the floor right there?


I have enough room to the rear of the tire to use a body hammer on the inside into the shot bag on the outside. So although the back side isn't completely open, there is quite a bit of room... I'll try to get a shot of it when I work on it again.

What did you use to get into the shallow radius to clean up the welds? I can't picture how to do that with the tools I have.


I have about a half dozen or so straight and angle die grinders, with various cutoff wheels, grinders, roloc discs, etc, two of which have drum sanders. One is 1-1/2" diameter, the one used in the pic above is the 3/4" diameter drum sander.
 

honda_fox3

Well-known member
Joined
Jun 14, 2013
Messages
327
I hate threads like this! The whole time I look I'm thinking that I should be working on a resto (I have a '70 caddy sitting in the shed) but I have to remind myself how much I hate body work before I get too carried away :)
 
OP
M

MP&C

Well-known member
Joined
Oct 21, 2009
Messages
4,396
Location
Leonardtown, MD
Got tired of looking at the shop truck in pieces, so tonight I finally got the other frame rail drilled....


Picture025-2.jpg


Picture026-2.jpg


Picture027-2.jpg


Picture028-2.jpg


Next on the list, to install the air tanks and run the lines...
 
OP
M

MP&C

Well-known member
Joined
Oct 21, 2009
Messages
4,396
Location
Leonardtown, MD
Next on the list for the wagon, the upper gate. It has a similar stance as the lower gate when closed, and as such, water lays along the inner window frame at the bottom.


Picture375.jpg


Picture376.jpg


Ice pick test....


Picture378.jpg


The lower bend is fairly flat, going to a tipped flange in the form of an arc, the inside has some compound curves going to the window opening flange...


Picture379.jpg


Picture380.jpg


Picture381.jpg


Picture382.jpg


I'll get this bottom cut out next week and attempt to form it in one piece, flange to flange, for a easier job of replacing..
 
Last edited:
OP
M

MP&C

Well-known member
Joined
Oct 21, 2009
Messages
4,396
Location
Leonardtown, MD
Took the upper gate off tonight...


Picture383.jpg


My tool of choice for removing spot welds is a 3" x 1/16 cutoff wheel. I also use the premium wheels made for stainless steel. It's worth the extra money when you don't have a brown cloud in the shop, like the el cheapo wheels leave, nothing but resin wearing away.

The upper layer of metal will start to turn blue when it gets thin and hot, letting you know you're getting close to the next layer. When you have a blue circle with shiny metal in the center, you are now in the second layer, grind around the blue a bit more and pry the layers apart..


Picture385.jpg


With all the spot welds removed, here's what we find inside...


Picture386.jpg


Picture388.jpg


Picture389.jpg


Note the deep pits. The big problem with just welding a hole closed is you don't know where the next pit is lurking, ready to break through your new paint.


Picture391.jpg


Funny, with all the rust and scale inside, then you find this area of bare steel nice and shiney..


Picture387.jpg


The inside will get media blasted to insure there is no more lurking issues and then epoxy primered before re-assembly.


Here's a better look at the shape we'll need...


Picture392.jpg


Picture393.jpg
 
Last edited:
OP
M

MP&C

Well-known member
Joined
Oct 21, 2009
Messages
4,396
Location
Leonardtown, MD
To start the layout on the new metal, I wanted to find the center of the radius along the window opening. By holding a sanding disc on the flats and scuffing, it showed the edges of the radius...


Picture396.jpg


Picture397.jpg


Picture398.jpg


Then laid out a pattern to be able to measure from the bottom crease...


Picture400.jpg


....and transposed it to the new sheet...


Picture401.jpg


Picture403.jpg


Picture404.jpg


The top edge was trimmed to size and the tipping wheel used to fold over the welding flange...


Picture405.jpg


Picture407.jpg


Comparison....


Picture409.jpg


The bottom was marked with the tipping wheel and folded in the apron brake. Then trimmed to size, again using the tipping wheel to fold over the welding flange...


Picture410.jpg


It's real close right now, just needs a bit of tweaking.


Picture412.jpg


Picture413.jpg


Picture414.jpg


Picture415.jpg


Picture416.jpg


Picture417.jpg


This was made using 18 ga, I think if I had the factory 19 ga metal it would have formed much easier..
 
Last edited:
To avoid these ads, REGISTER NOW!

pepi

Well-known member
Joined
Mar 27, 2013
Messages
2,883
Location
Woodstock, GA
Sure do like to see the before, in between and after shots you take of the parts you make. Like to see the tools in action, usage, I try to understand the layout process and reasoning. Scroll up and down a lot to follow, and well worth the effort. I will never do this type of free hand sheet metal work.

However the projects I do attempt incorporate some of the techniques I've observer looking over your shoulder, so to speak. Thank you for showing and sharing the details of the process, educating others as you do is appreciated here.

Killer stuff!
Greg
 

Kevin54

MEMBER EMERITUS
Joined
Jan 12, 2005
Messages
29,341
Location
Urbana, Ohio
Robert....are you just a one man shop and where did you learn all of your metal working from? I don't mean the finishing aspect, but the metal forming. I have to totally agree with what Notch stated above as I feel the same way. Your work is just over the top!!!!
 

Kevin54

MEMBER EMERITUS
Joined
Jan 12, 2005
Messages
29,341
Location
Urbana, Ohio
Picture417.jpg


Is this your niece helping you out in this pic? If you ever decide to put all of your pictures of your repairs on a CD or two, I'll buy a couple off of you just so I would have something to reference to when I get into a repair. Your work and attention to detail just blows me away. I did go back this morning and read through the Fairlane build which I totally forgot about. I bumped it to the top so that some of our new member on the site can see the awesome work that you do. IIRC, you stated that it took 11 months for the Fairlane. Do you only do one or two projects a year, or do you have other smaller projects that you work in here and there between the full days of working on a long term project?

Like I said before....if you were closer, I'd be hanging out in your shop every day, just to learn a portion of your knowledge. Back in the day when I worked on cars, wrecking yards were abundant, so any body parts were easy to come by, and very rarely did we ever have to fab a part. Just like the '55 you're working on, that car is 58 years old. Back in my day, if I would have needed something for a '55 Chevy, it was a short drive to any one of a half a dozen or so wrecking yards, the part would be 20 years old or less, and a rear quarter would be maybe $100 or less depending on the yard. Sadly those days are long gone and there are only a handful of yards around and everything is late models.

Another thing I noticed about your work, I very rarely see and filler in any of your repairs. It looks like a gallon of RAGE would last you a year or more :lol: Some of the guys I know around here, they go through that in a week. Pounding out and working a dent, really doesn't play into their repairs. Their repairs are using an 80 grit disk to rough the metal, then pile on the bondo :spit: It's great to see someone fix something the correct way and not take shortcuts. It's also great to see someone take the time to explain how to do it correctly and why it is done the way it is.
 
OP
M

MP&C

Well-known member
Joined
Oct 21, 2009
Messages
4,396
Location
Leonardtown, MD
Thanks for the comments...


Robert....are you just a one man shop and where did you learn all of your metal working from? I don't mean the finishing aspect, but the metal forming. I have to totally agree with what Notch stated above as I feel the same way. Your work is just over the top!!!!


I primarily work by myself, I have full time employment outside the shop, so at present, it is a part-time venture. My nephew has helped out on a few projects and still does on occasion, and my daughter is often called upon to provide some "rotational force" when using the bead roller. I'll add that of all of the jobs that I have done, I try to improve the methods if I need to repeat that process. Being satisfied that what you are doing is the only way to do something IMO will limit your potential. Not all panels are flat, so simply bending something in a vise will not provide an accurate replacement for crowned panels. I am also a member on allmetalshaping and metalmeet, which are good online resources that show what is possible in shaping sheet metal. Another good resource is David Gardiner's DVD, he's a coachbuilder in UK, and does a very good job of demonstrating what is possible using primarily simple hand tools.

Most of the jobs in the shop I have taken the proceeds and purchased additional equipment to increase productivity and capability. One of the biggest advantages to using machinery over working metal by hand is how it saves time. By far the biggest disadvantage is that if you don't understand what the metal is doing while shaping, the machinery does a good job of making scraps quickly.

So in all, my work has been through self taught trial and error, with online and DVD resources adding inspiration or in many cases, corrective action.


Picture417.jpg


Is this your niece helping you out in this pic? If you ever decide to put all of your pictures of your repairs on a CD or two, I'll buy a couple off of you just so I would have something to reference to when I get into a repair. Your work and attention to detail just blows me away. I did go back this morning and read through the Fairlane build which I totally forgot about. I bumped it to the top so that some of our new member on the site can see the awesome work that you do. IIRC, you stated that it took 11 months for the Fairlane. Do you only do one or two projects a year, or do you have other smaller projects that you work in here and there between the full days of working on a long term project?

Like I said before....if you were closer, I'd be hanging out in your shop every day, just to learn a portion of your knowledge. Back in the day when I worked on cars, wrecking yards were abundant, so any body parts were easy to come by, and very rarely did we ever have to fab a part. Just like the '55 you're working on, that car is 58 years old. Back in my day, if I would have needed something for a '55 Chevy, it was a short drive to any one of a half a dozen or so wrecking yards, the part would be 20 years old or less, and a rear quarter would be maybe $100 or less depending on the yard. Sadly those days are long gone and there are only a handful of yards around and everything is late models.

Another thing I noticed about your work, I very rarely see and filler in any of your repairs. It looks like a gallon of RAGE would last you a year or more :lol: Some of the guys I know around here, they go through that in a week. Pounding out and working a dent, really doesn't play into their repairs. Their repairs are using an 80 grit disk to rough the metal, then pile on the bondo :spit: It's great to see someone fix something the correct way and not take shortcuts. It's also great to see someone take the time to explain how to do it correctly and why it is done the way it is.


That's my daughter in the picture, every now and then I can talk her into helping out. The Fairlane wasn't as involved as this present job, but yes I was averaging about one project a year. With as extensive as the rust repairs have been on what has come through the door, that's about as much as you can get done on a part time basis and still keep peace with the better half.. ;) As far as the amount of filler used, I try to get the panels close enough that a small amount of glaze (I use Evercoat's 416) will fix most issues. The biggest help to minimize the use of fillers is getting the shape of the patch panel as accurate as possible before welding it in place. Not understanding metalshaping IMO leads to "mudsculpting", which is how the 55 was when it showed up here...
 
Last edited:

phartman

Well-known member
Joined
May 25, 2009
Messages
839
Location
Richmond, VA
Always something interesting going on in your shop. Thanks for posting- I enjoy watching on Jalopy Journal on the VA HAMB, too.

Pete
Richmond, VA
 

36racin

Active member
Joined
Jul 23, 2013
Messages
32
Location
Gonzales, La
New guy here. And all I can say is WOW!!! What wonderful work. You have fixed all the obvious rust issues from the outside. But on several different repairs there was rust under and behind the panels you cut open. How is the rust and corrosion in the interior of the panels and braces handled?? And the tools you have stacked up inside the rear end of the car. It would take me years to buy all those much less learn how to use them all. And your shop must be huge with all those metal working tools.

I sure wish you were closer to me because I know where I would want my car body getting straight and painted. Wonderful work.

I especially liked the video's that were added on some of the repairs. Those help a novice like me more than anything.

Thanks very much and keep posting the repairs and videos,
Todd
 

gipraw

Well-known member
Joined
Apr 25, 2013
Messages
1,033
Location
Cypress, TX
Robert - I just spent my lunch hour reading this entire thread. Amazing work sir, and thank you for taking the time to document the process for those interested in learning and understanding this better.
 
OP
M

MP&C

Well-known member
Joined
Oct 21, 2009
Messages
4,396
Location
Leonardtown, MD
Not much progress to show, but started cleaning up the parts for primer, including media blasting the inside...


Picture419.jpg


Picture420.jpg


Picture421.jpg
 

36racin

Active member
Joined
Jul 23, 2013
Messages
32
Location
Gonzales, La
Can you show me a pic of your blast cabinet. I would like one for my shop as well. What would be the optimal size one for a homeowner shop with cleaning up parts for a vehicle. What media are you using?

Thanks,
Todd
 
OP
M

MP&C

Well-known member
Joined
Oct 21, 2009
Messages
4,396
Location
Leonardtown, MD
Picture175.jpg


Skat Blast 1536 Champion, holds the tailgates fine, doors & fenders for smaller cars.. I've also had a hood off an MG in there. I'll have to get back to you on the media. I was using fine black beauty, but have switched to another brand that I buy from a local machine shop.
 
OP
M

MP&C

Well-known member
Joined
Oct 21, 2009
Messages
4,396
Location
Leonardtown, MD
As I've been over-exerting/exceeding the capacity of my 20 ga apron brake, I think that will be replaced with a new machine. Either going with a box and pan or a magnetic brake....


finger-brake-bb5012f.jpg


magnetic-brake-bb4816m.jpg
 
To avoid these ads, REGISTER NOW!
Top Bottom