To avoid these ads, REGISTER NOW!

MP&C Shop Projects

BrewFabInd.

Member
Joined
Jan 27, 2015
Messages
22
Icredible work sir. You are definitely a master at what you do. Incredibly informative and an interesting read. Definitely appreciate the time and effort you put into the updates, processes, and detail!
 
To avoid these ads, REGISTER NOW!
OP
M

MP&C

Well-known member
Joined
Oct 21, 2009
Messages
4,396
Location
Leonardtown, MD
Thanks for all the comments and questions fellas!


would like to know how you make the radius on the box brake.......details please....


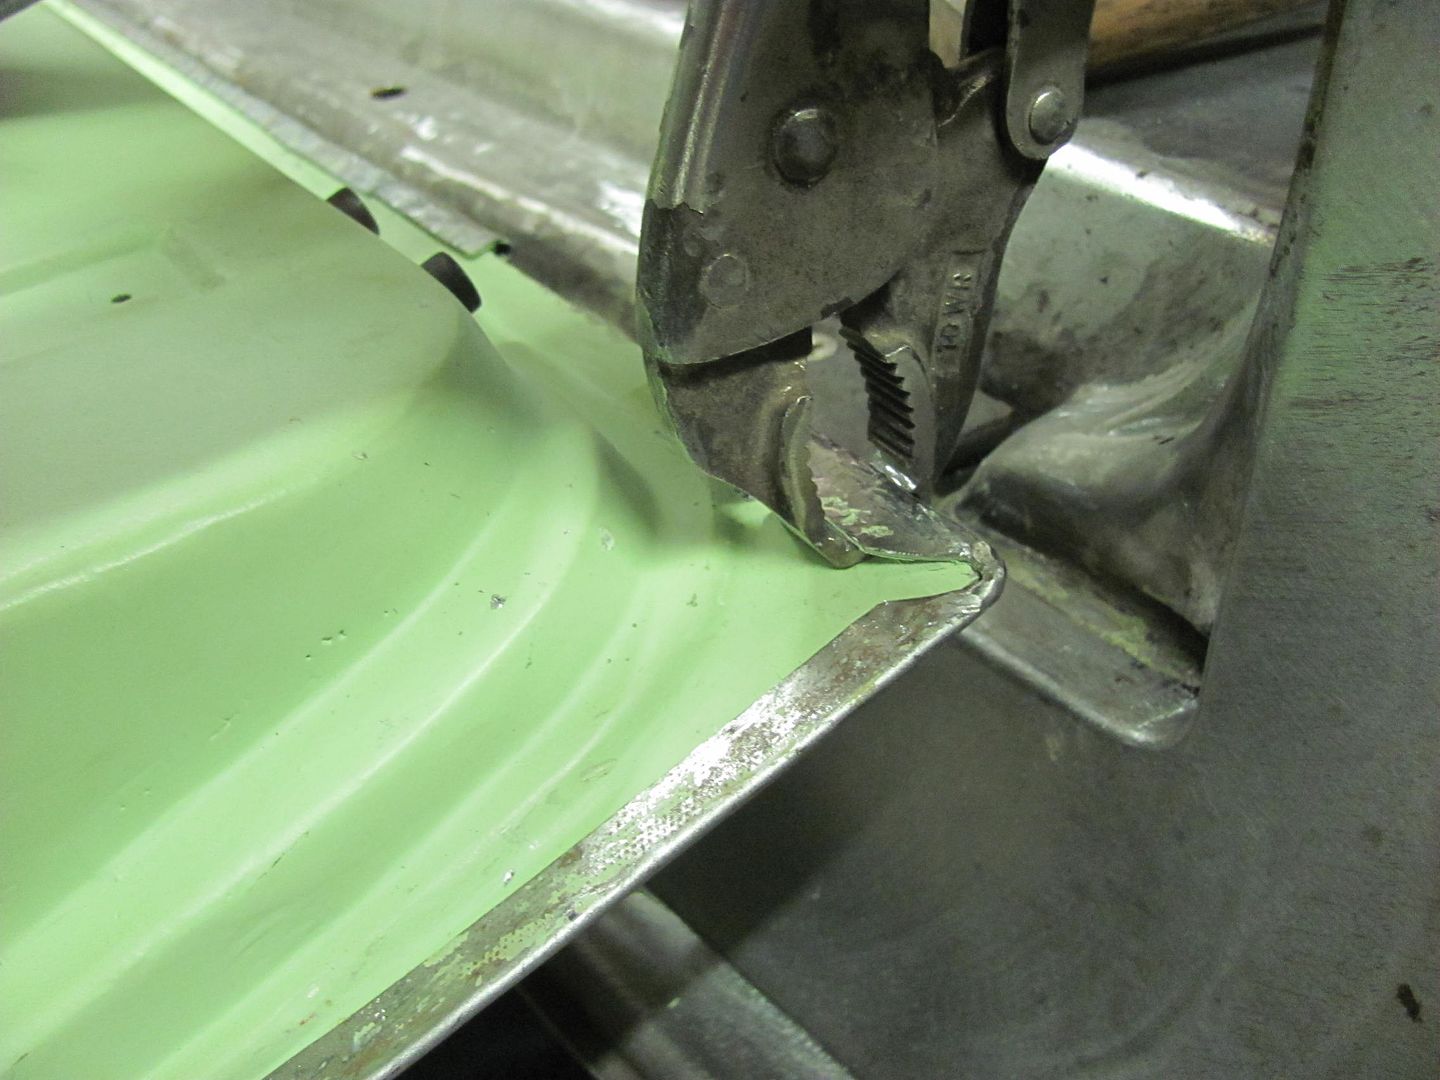
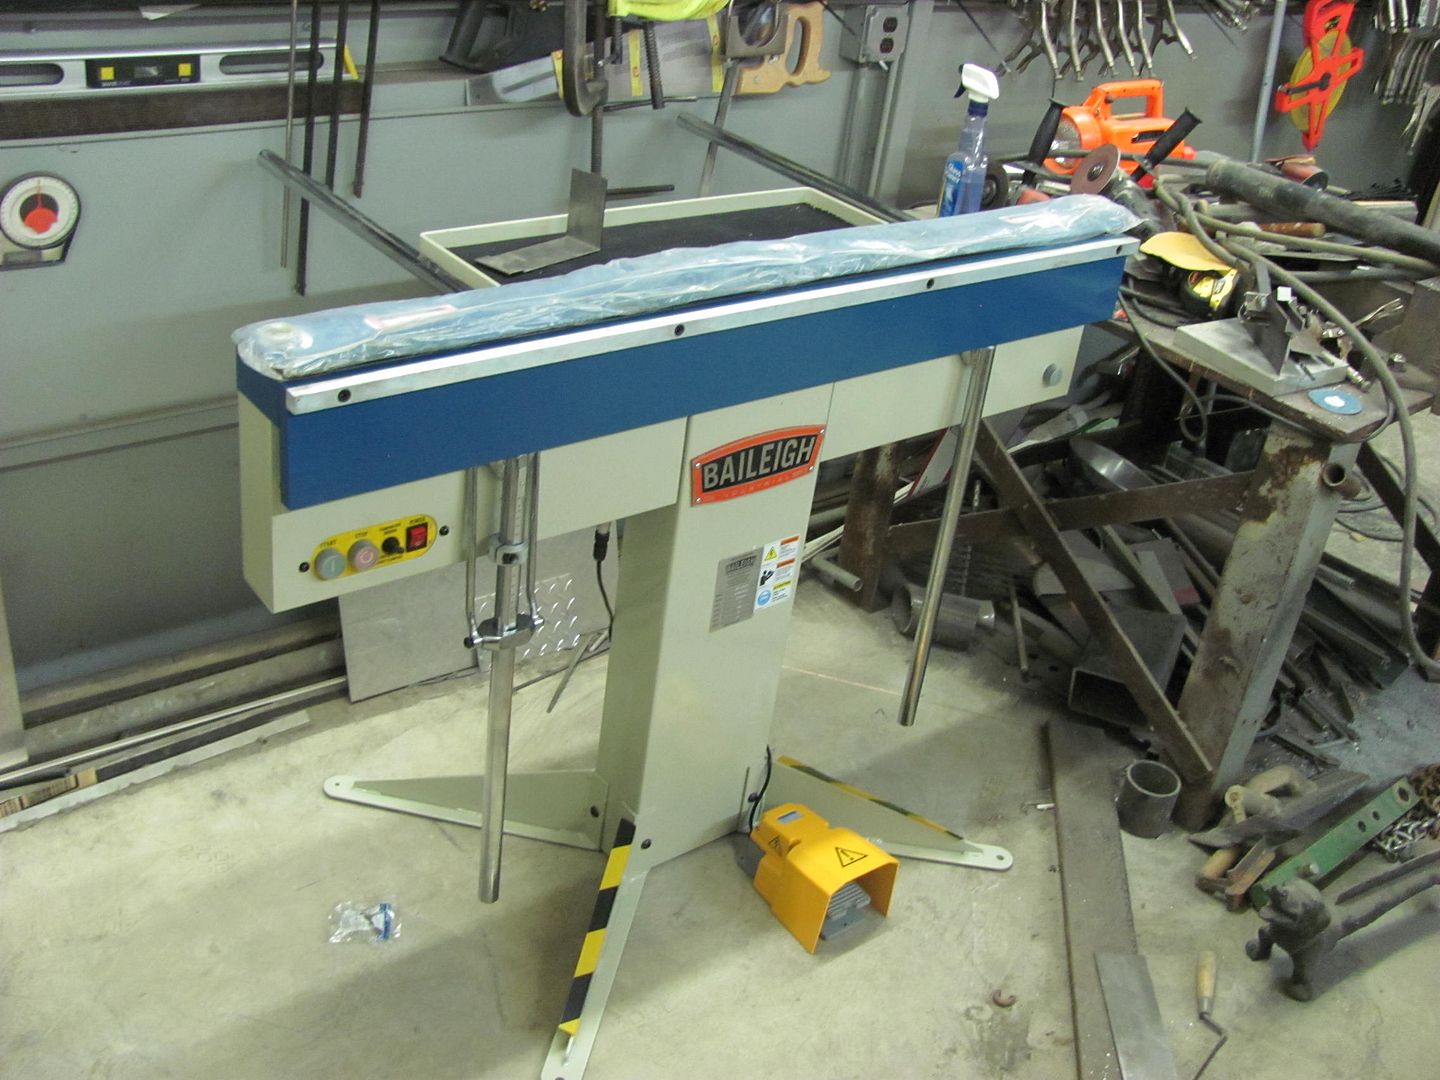
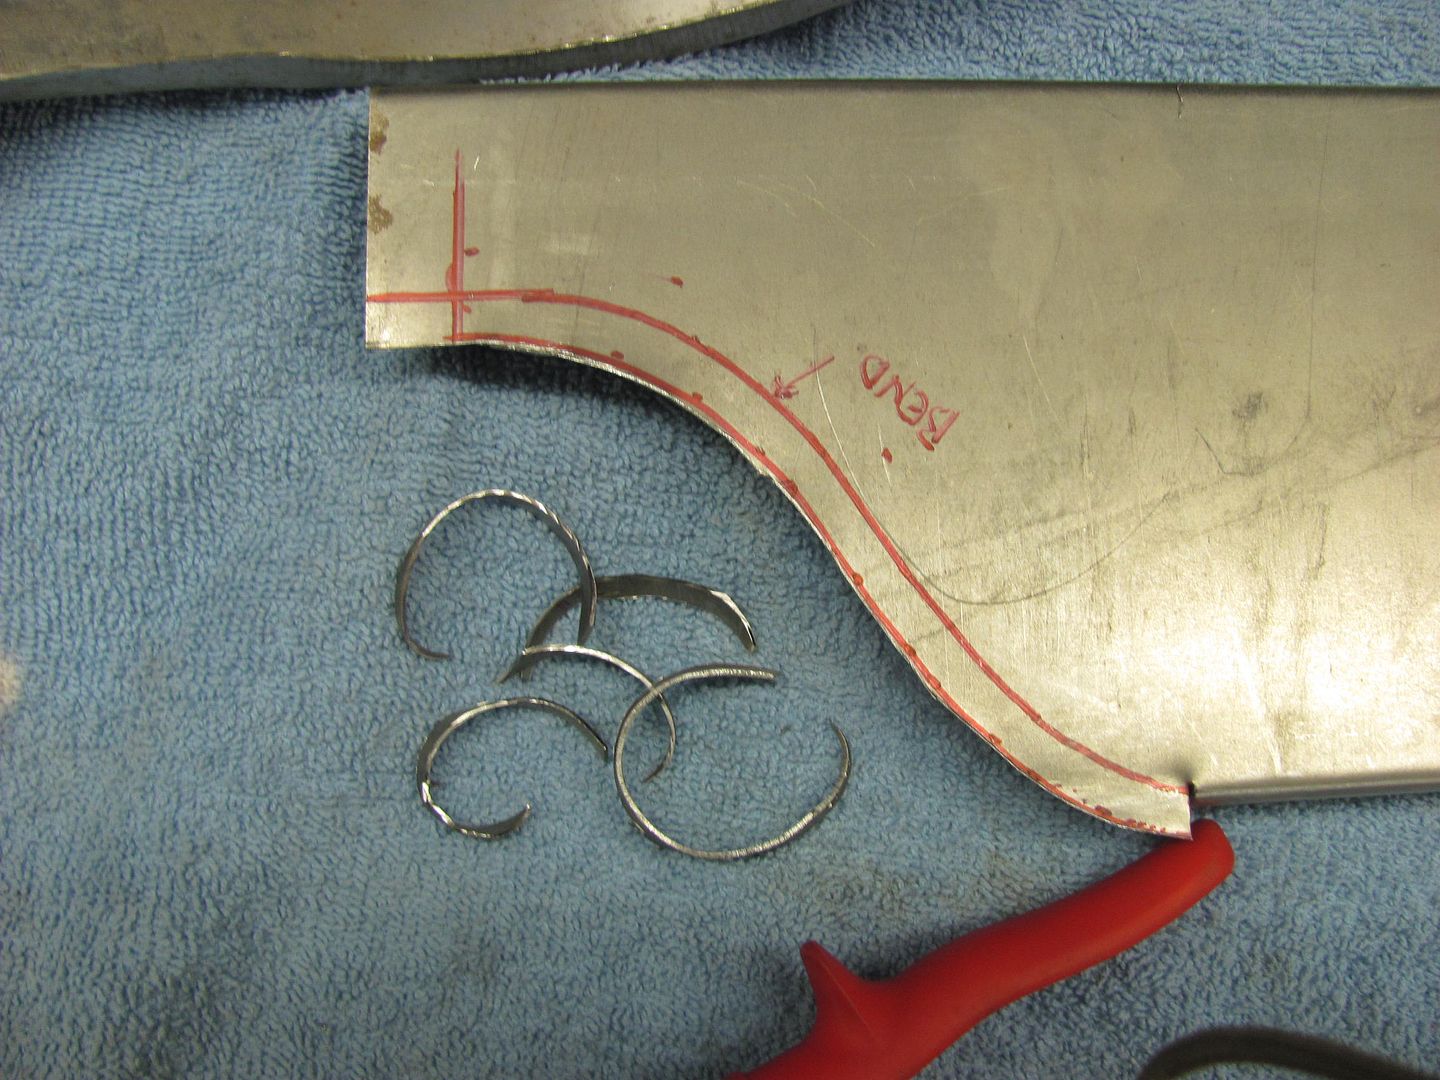
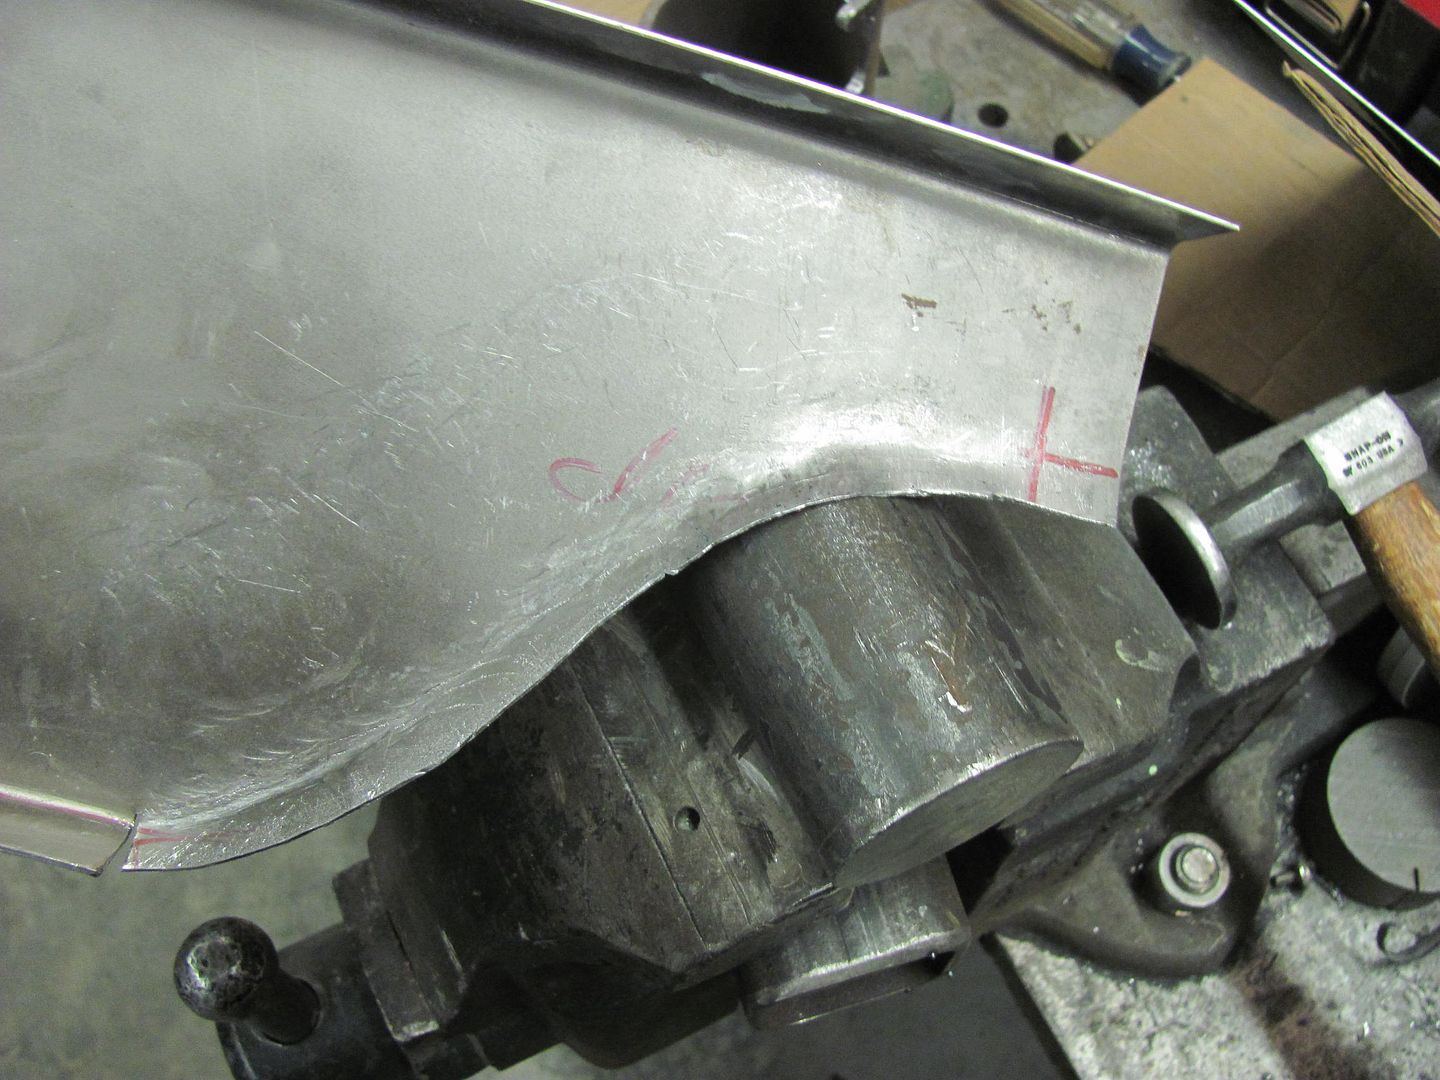
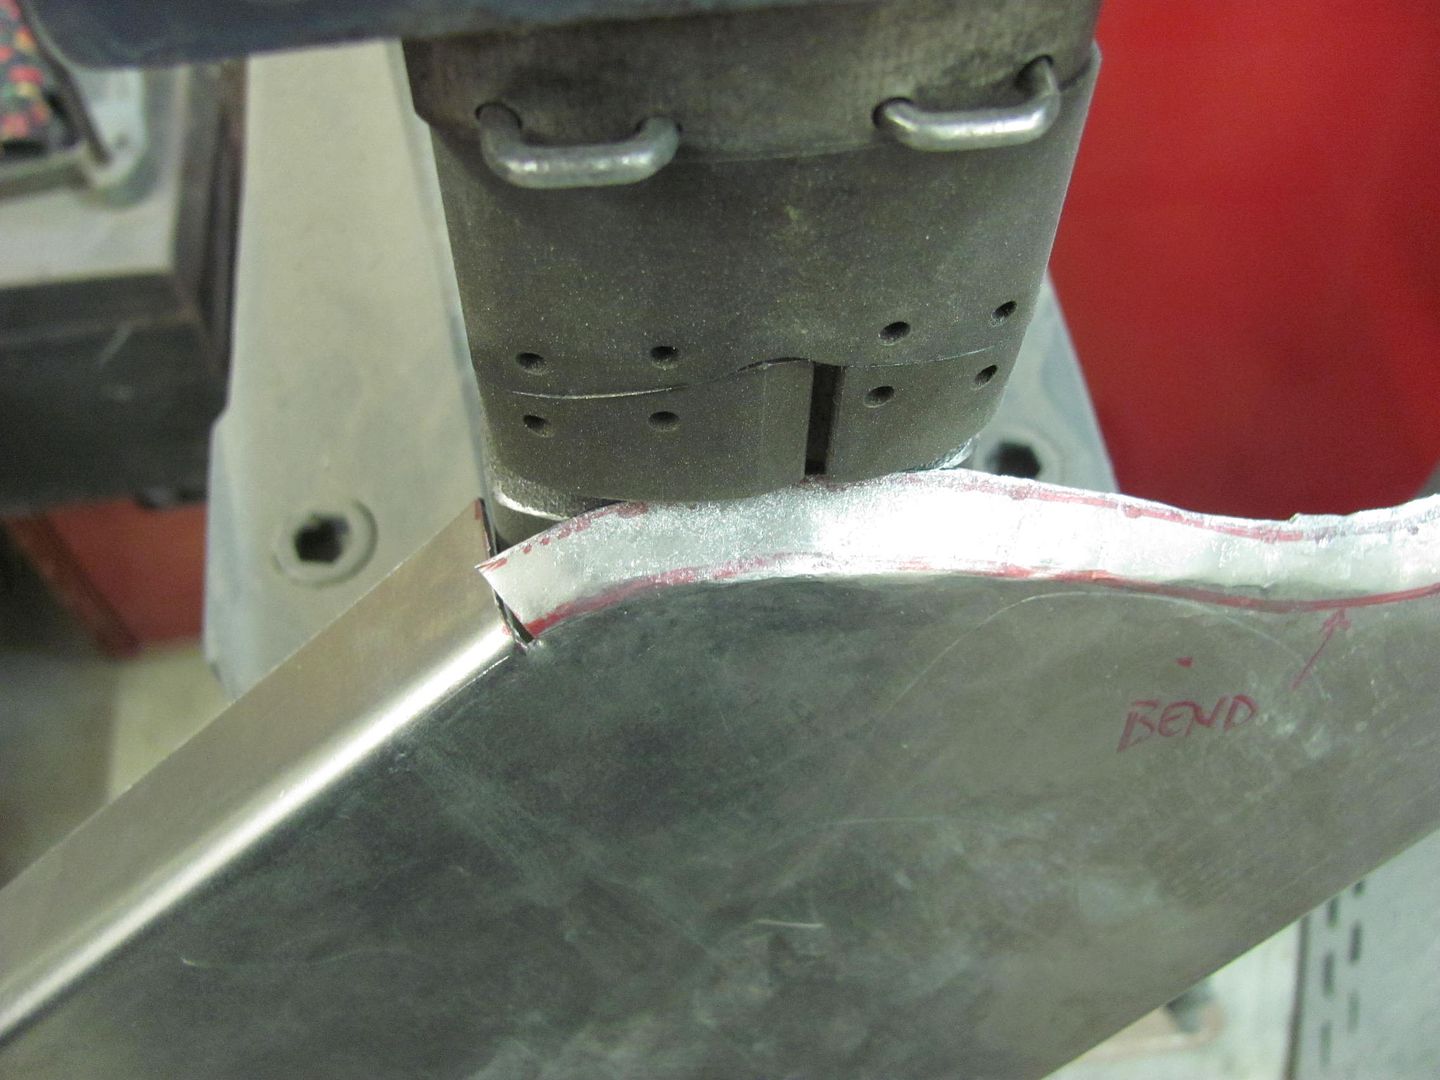
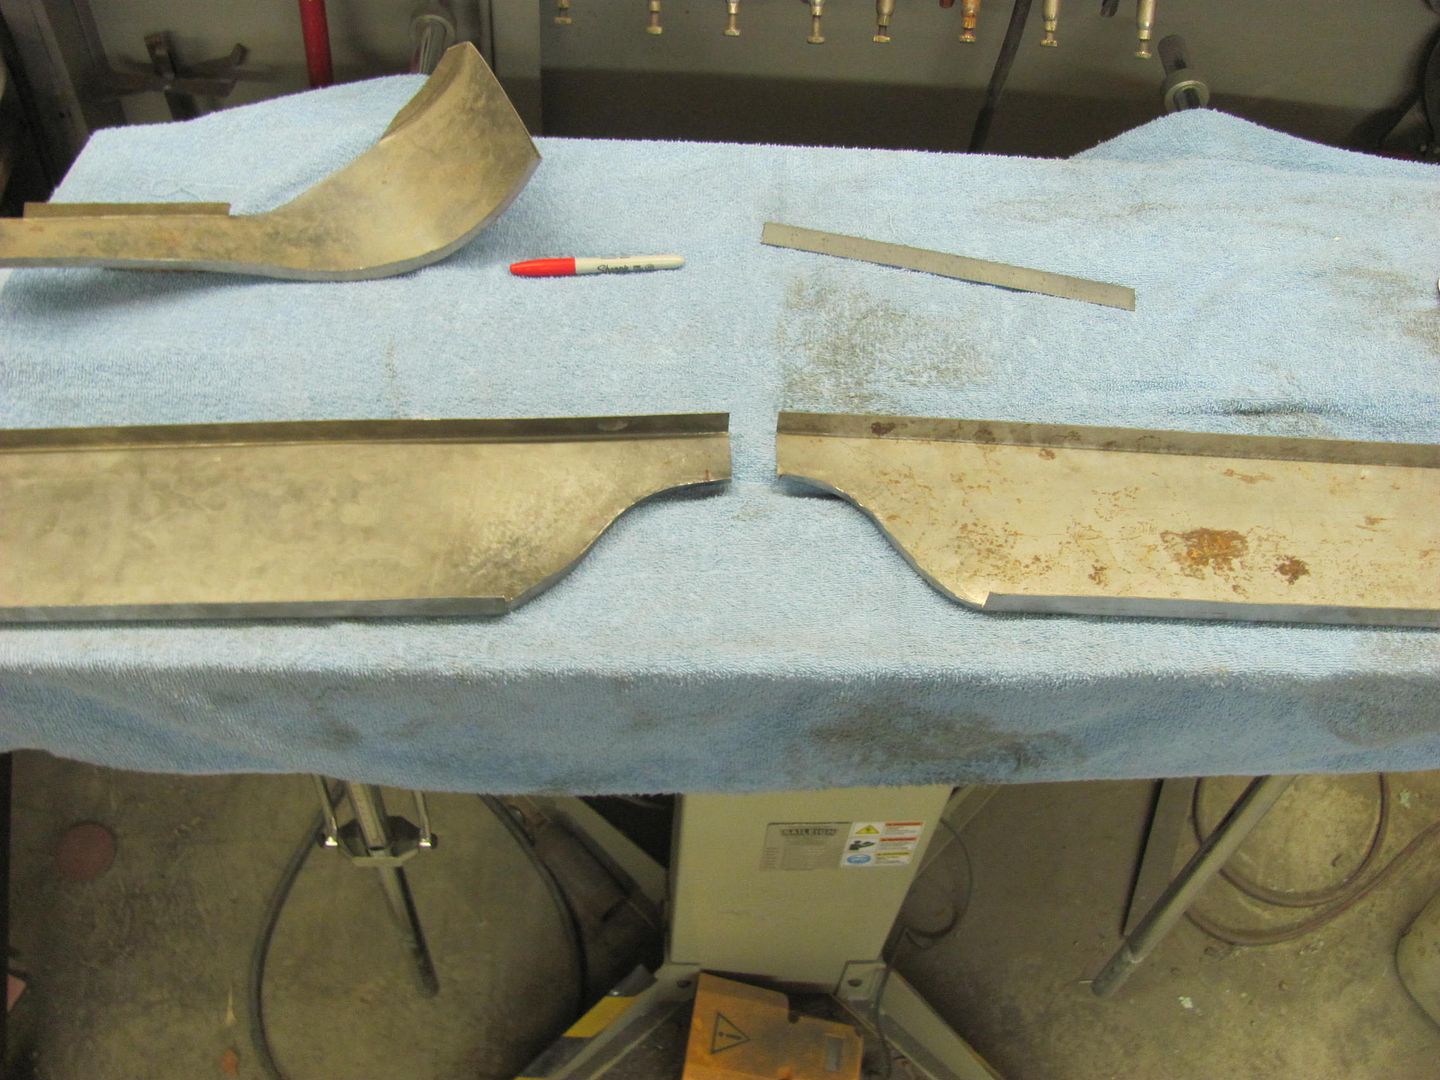
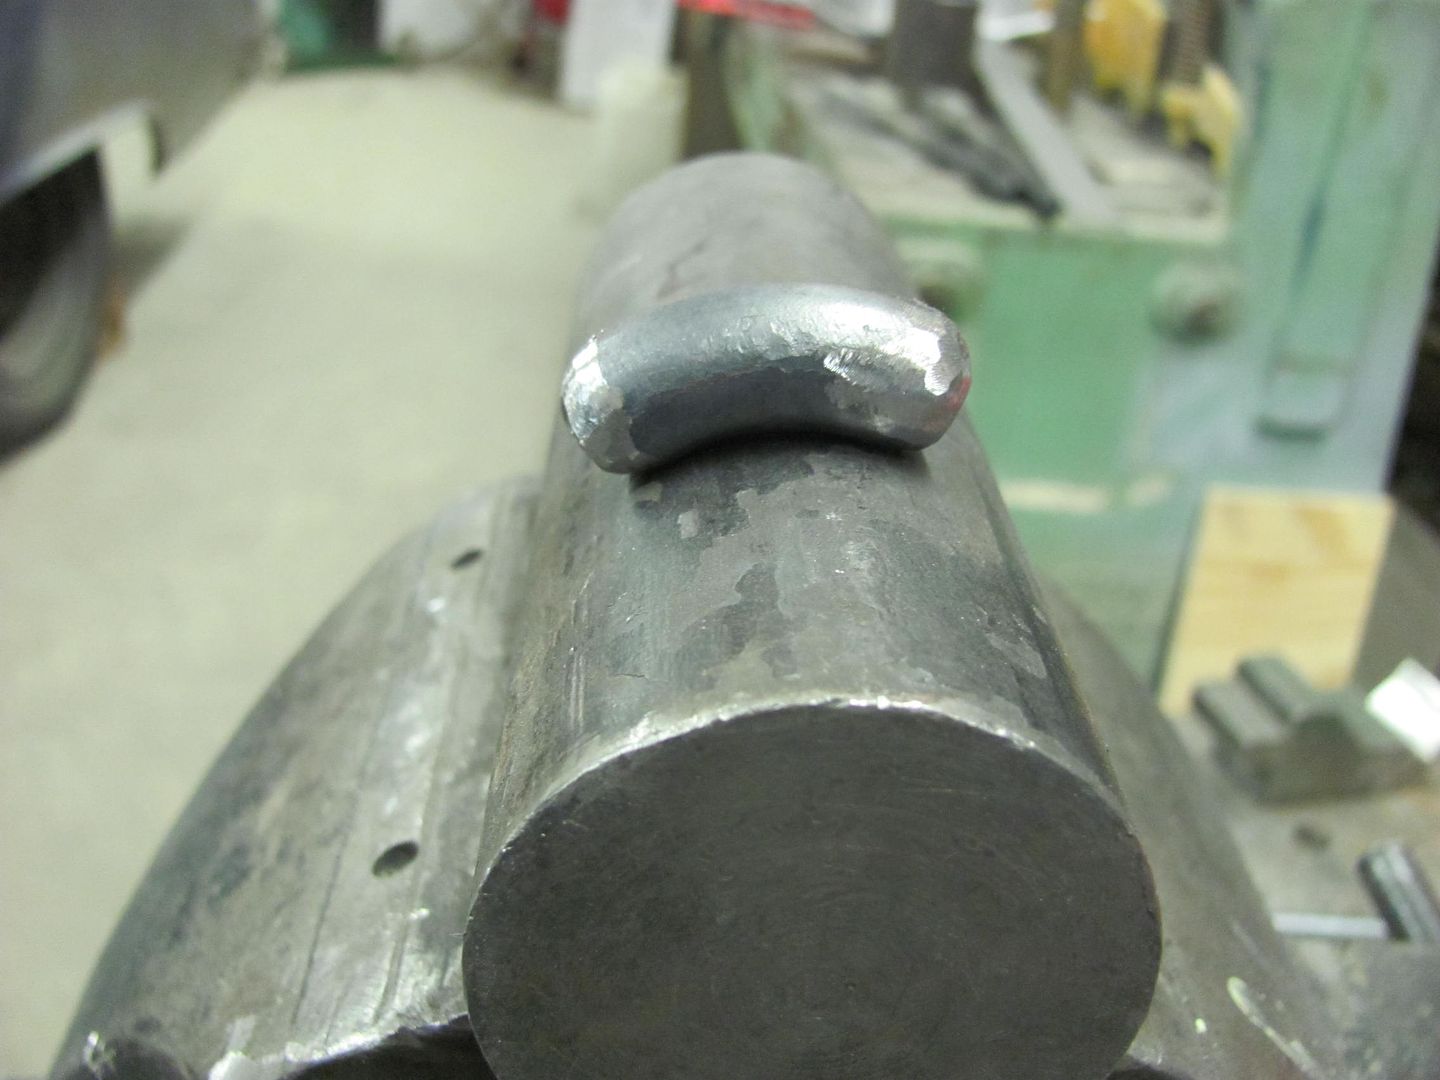
As stated, the brake is a magnetic brake. Dies shapes are pretty much up to your imagination, they are very versatile in that you don't have the "truss" of the upper apron in the way. So as was shown, I used a narrow vee die to locate and hold the rod from moving, rod placed in front to act as the radius former. This is the company promotional video that may do a better job of explaining than me writing it...

https://www.youtube.com/watch?v=zWvMW1Zxoyc


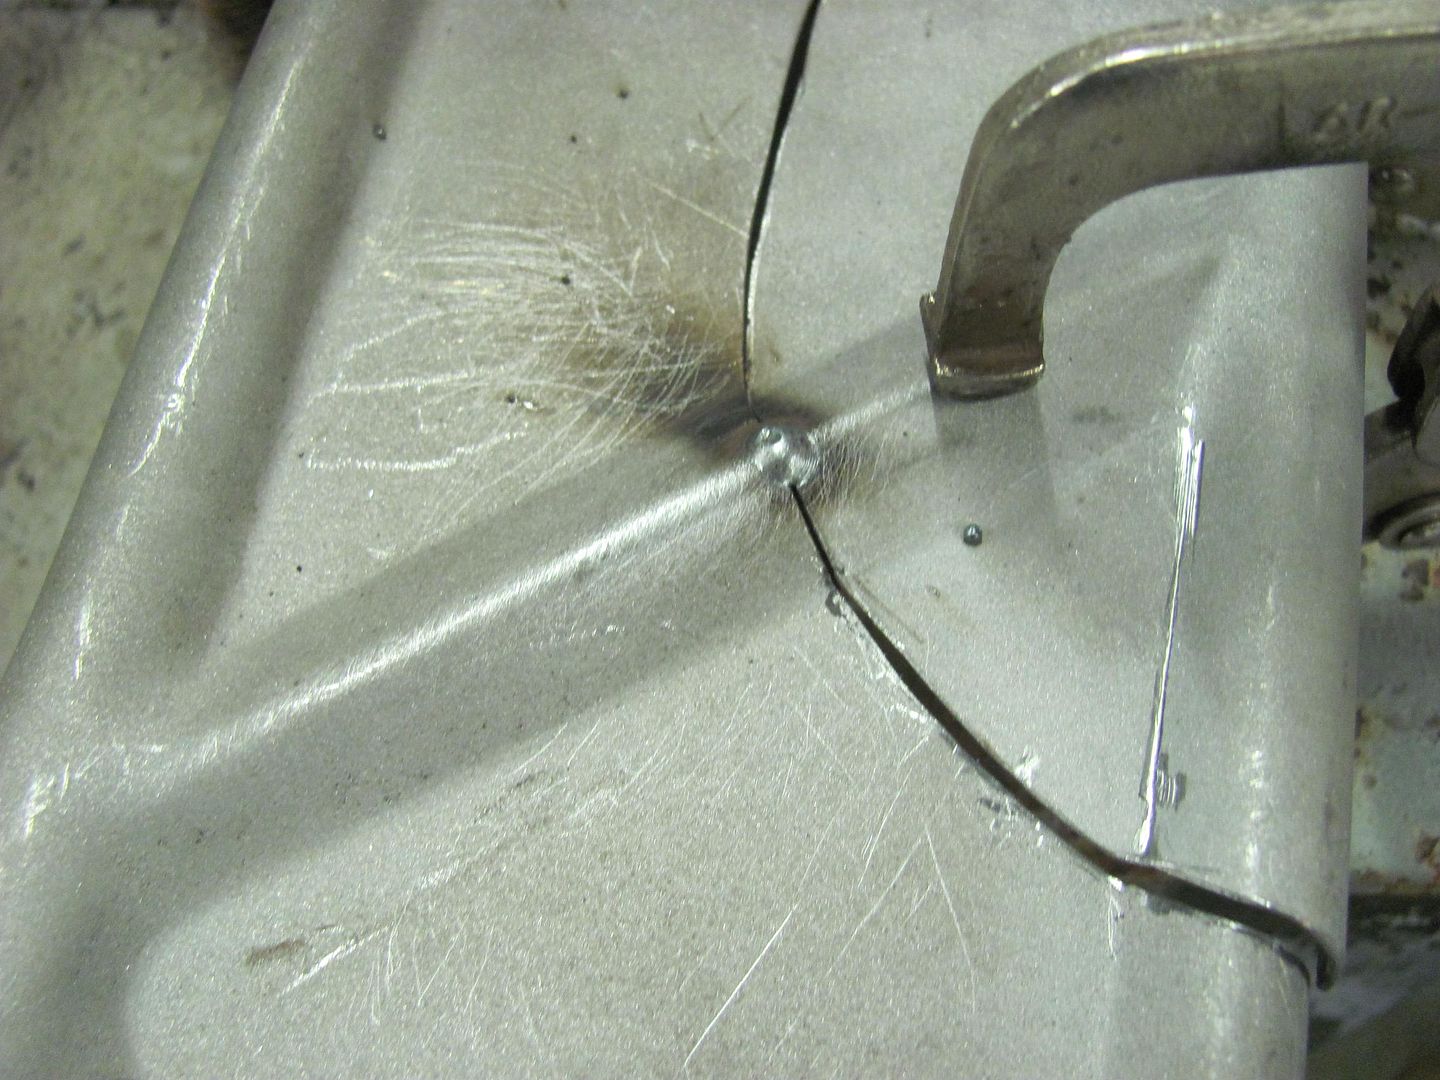
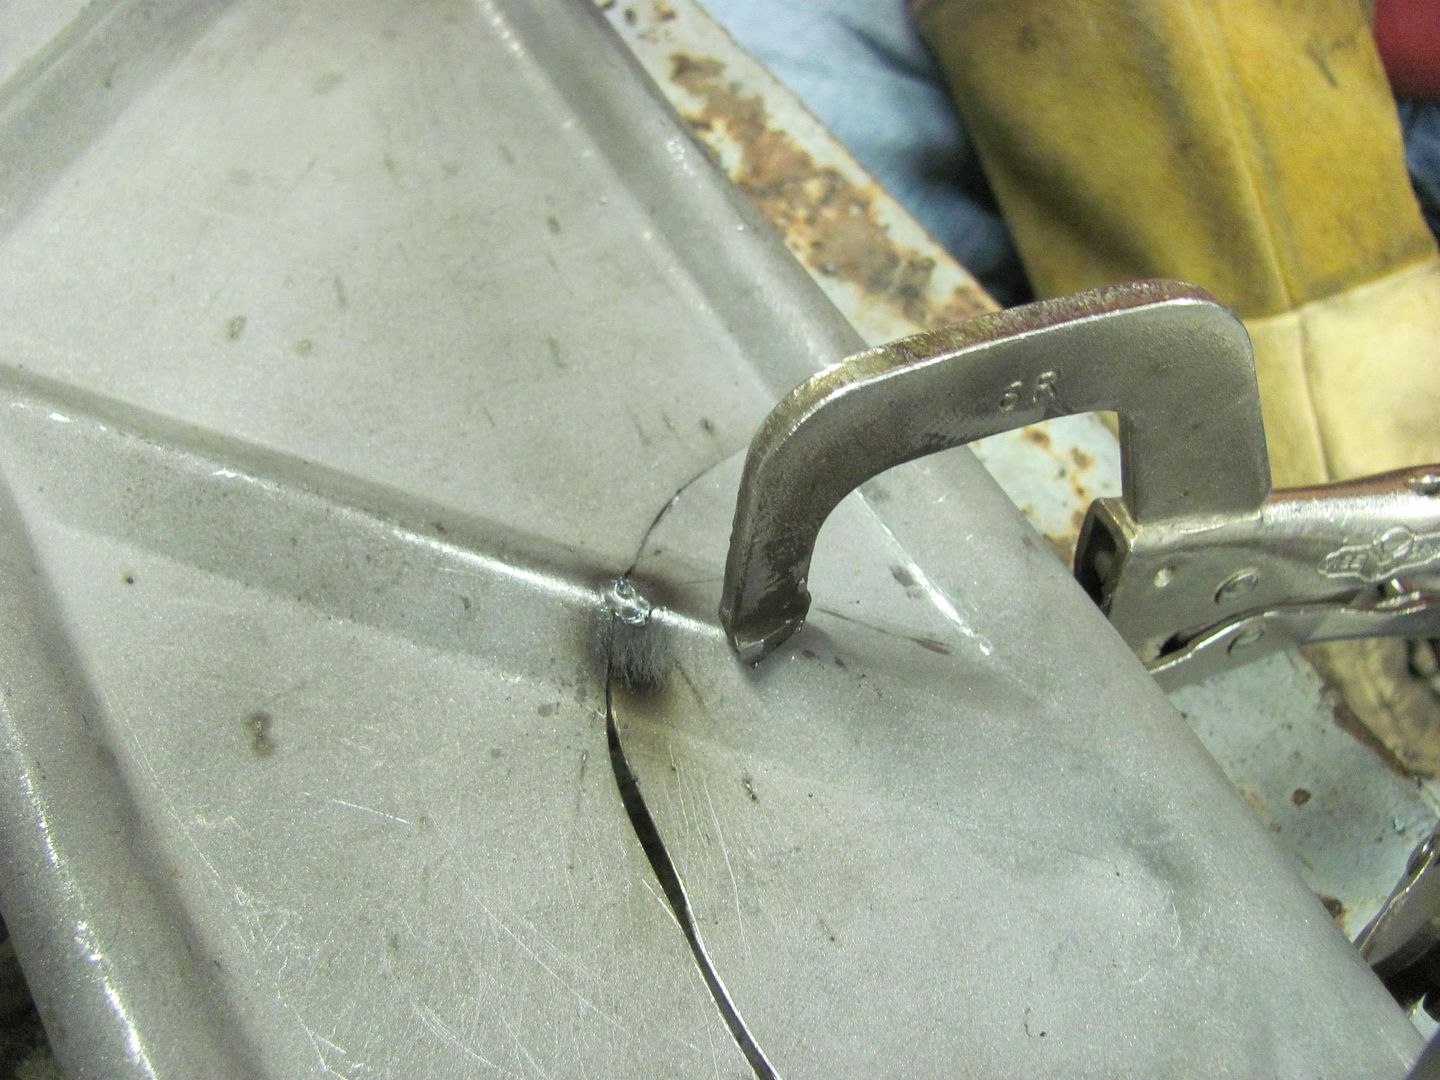
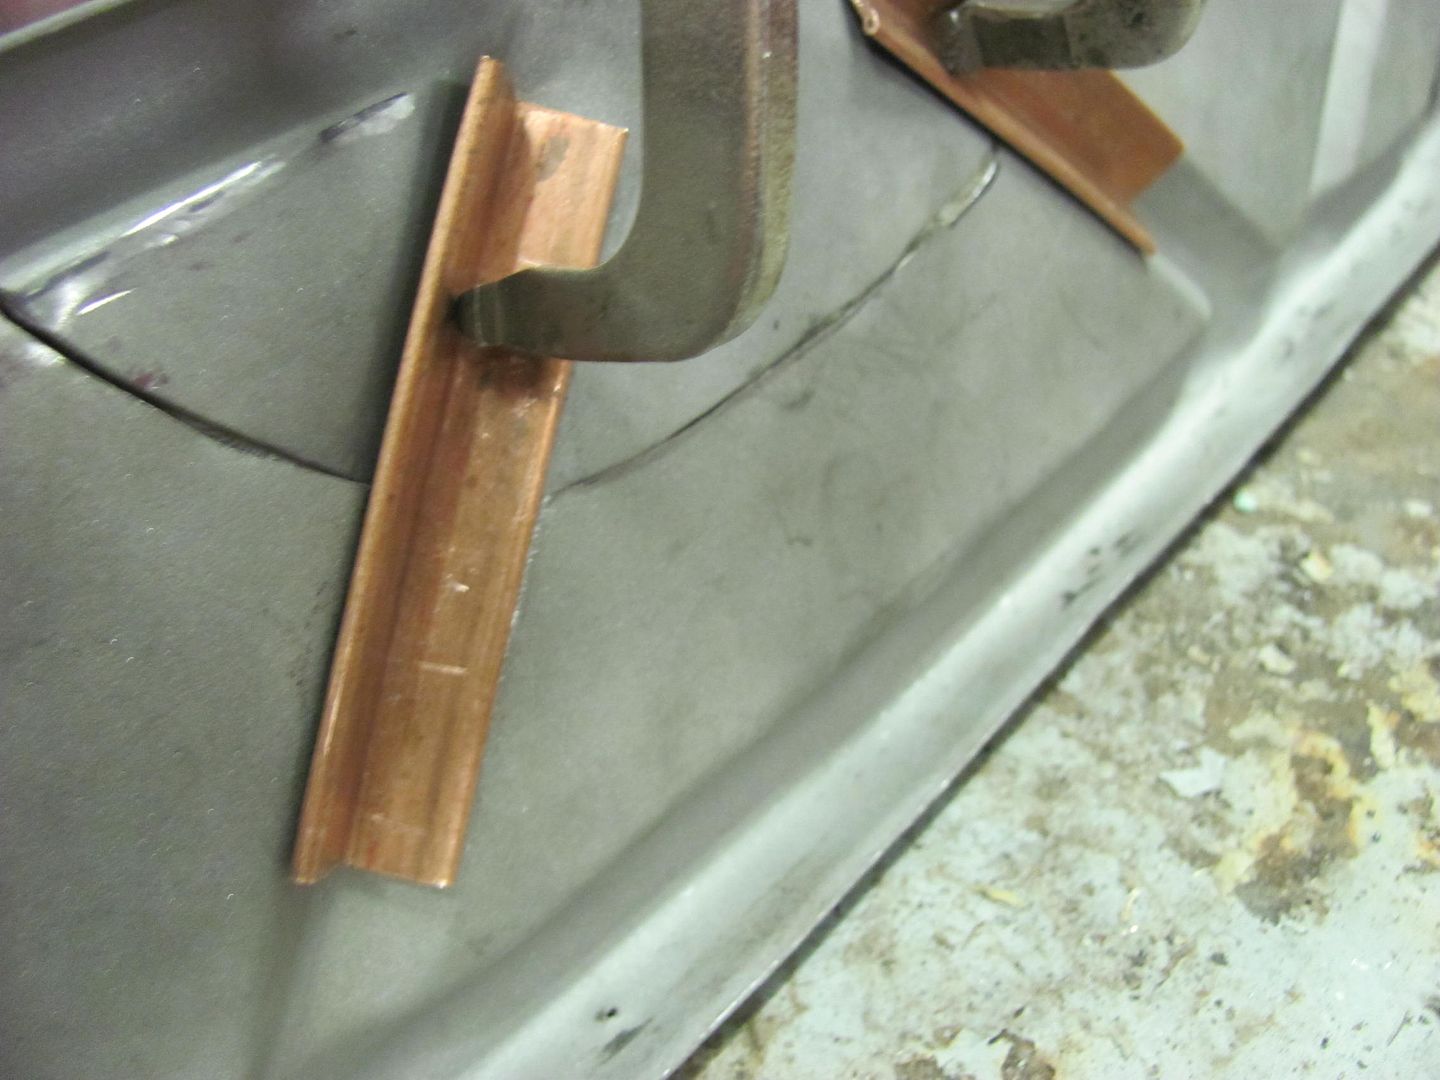
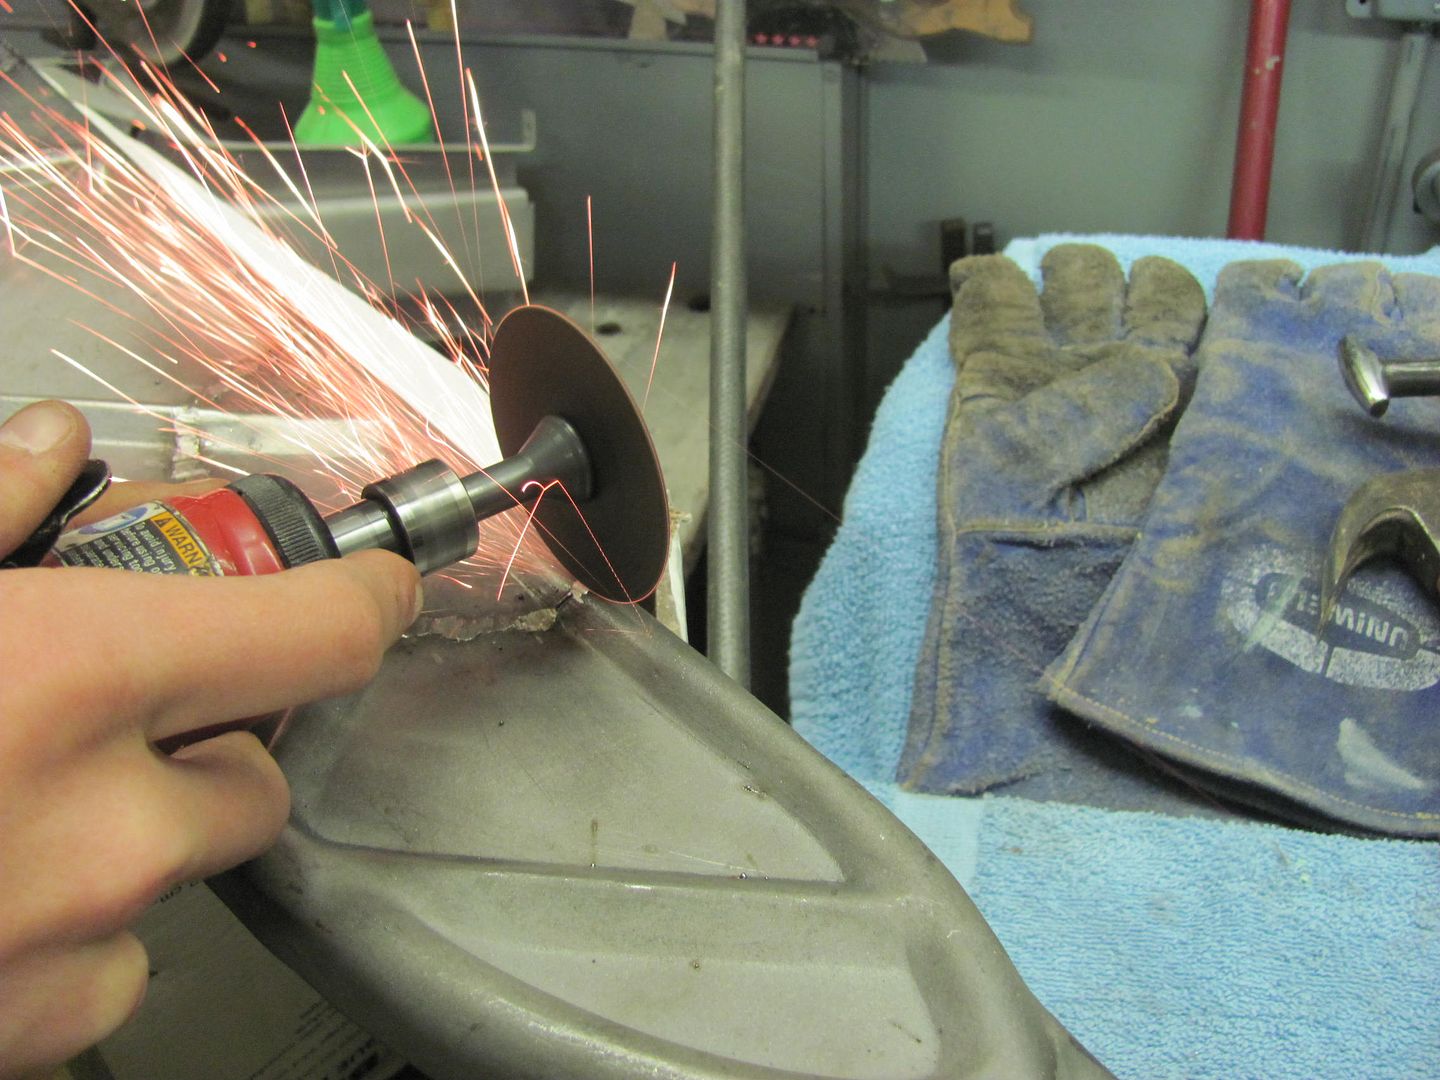
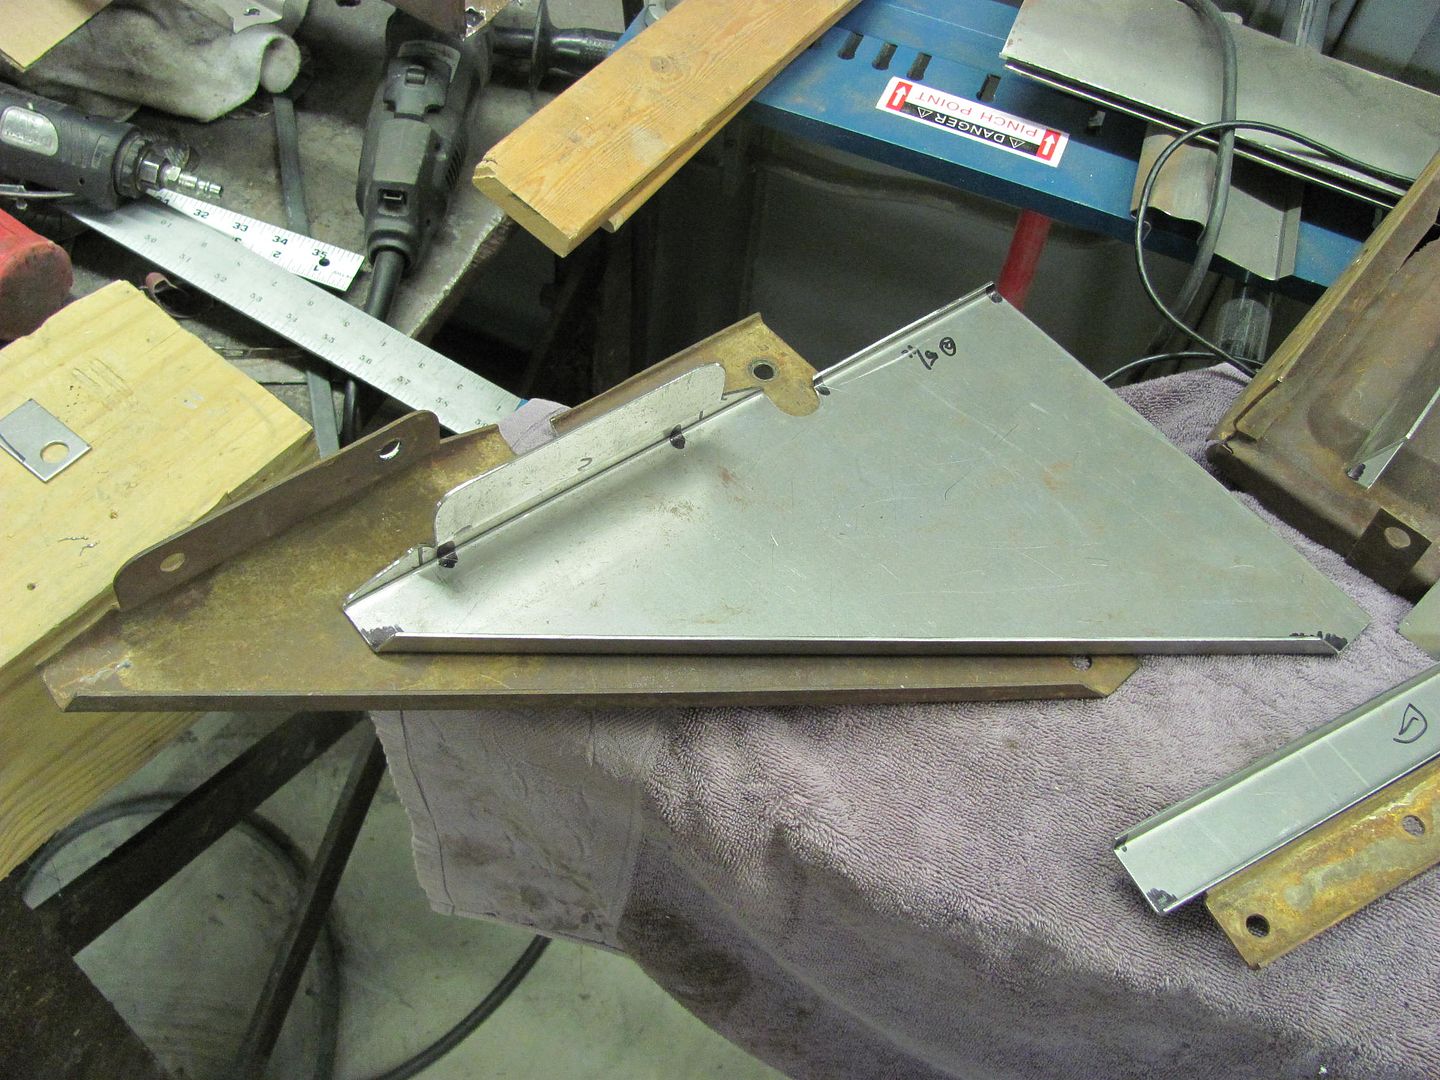
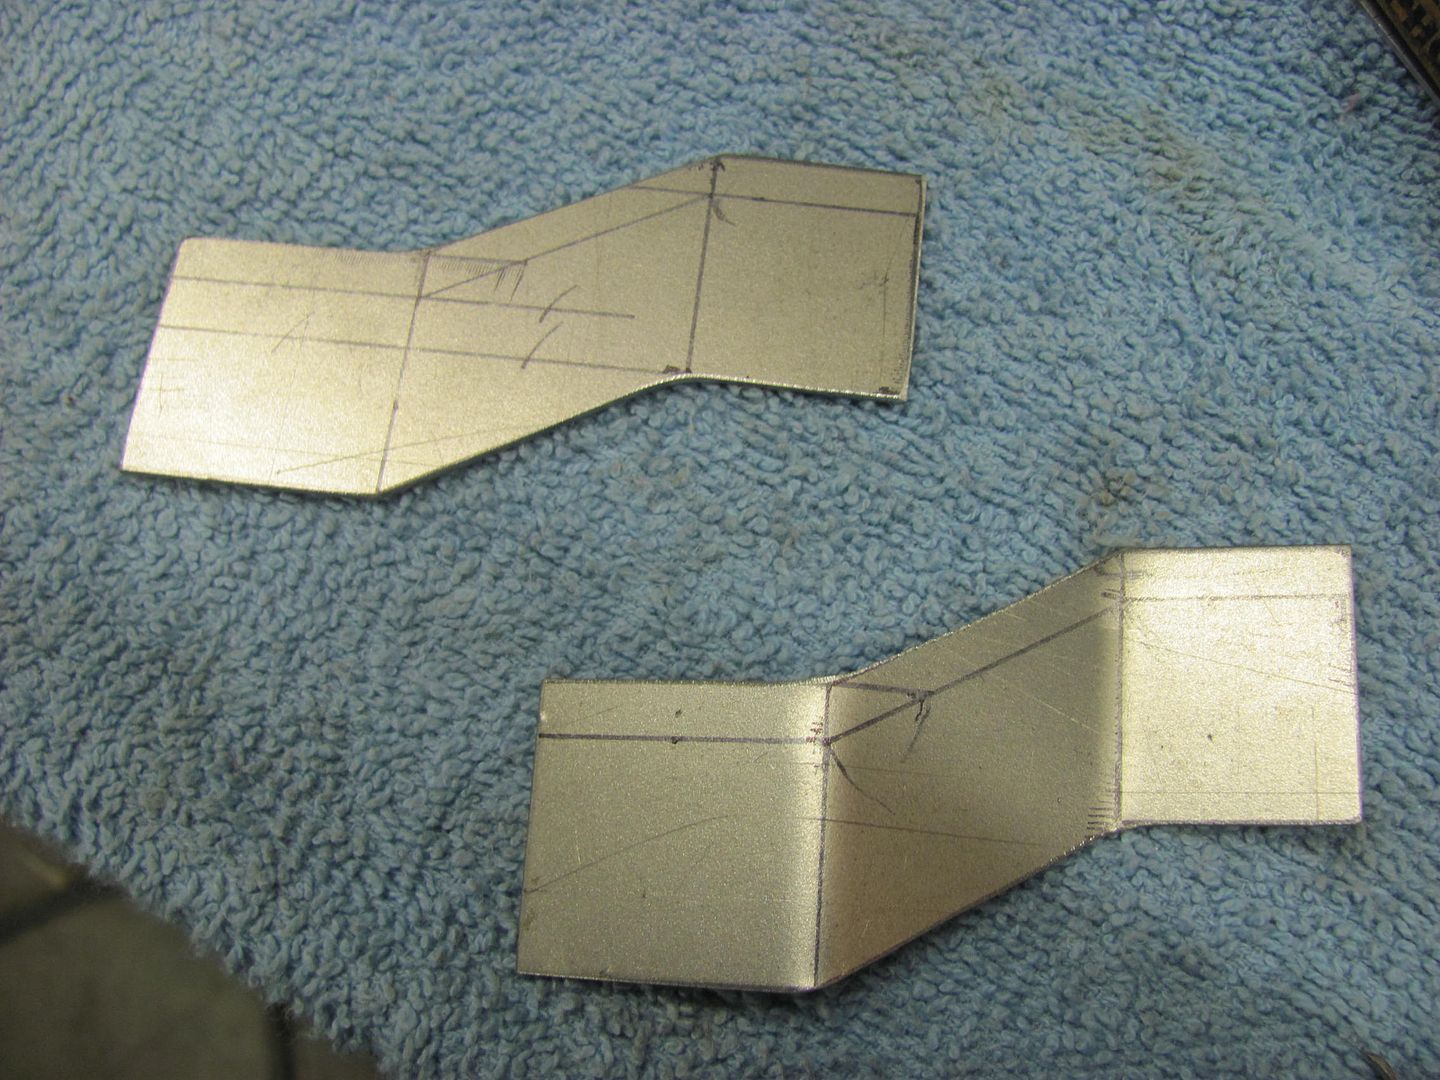
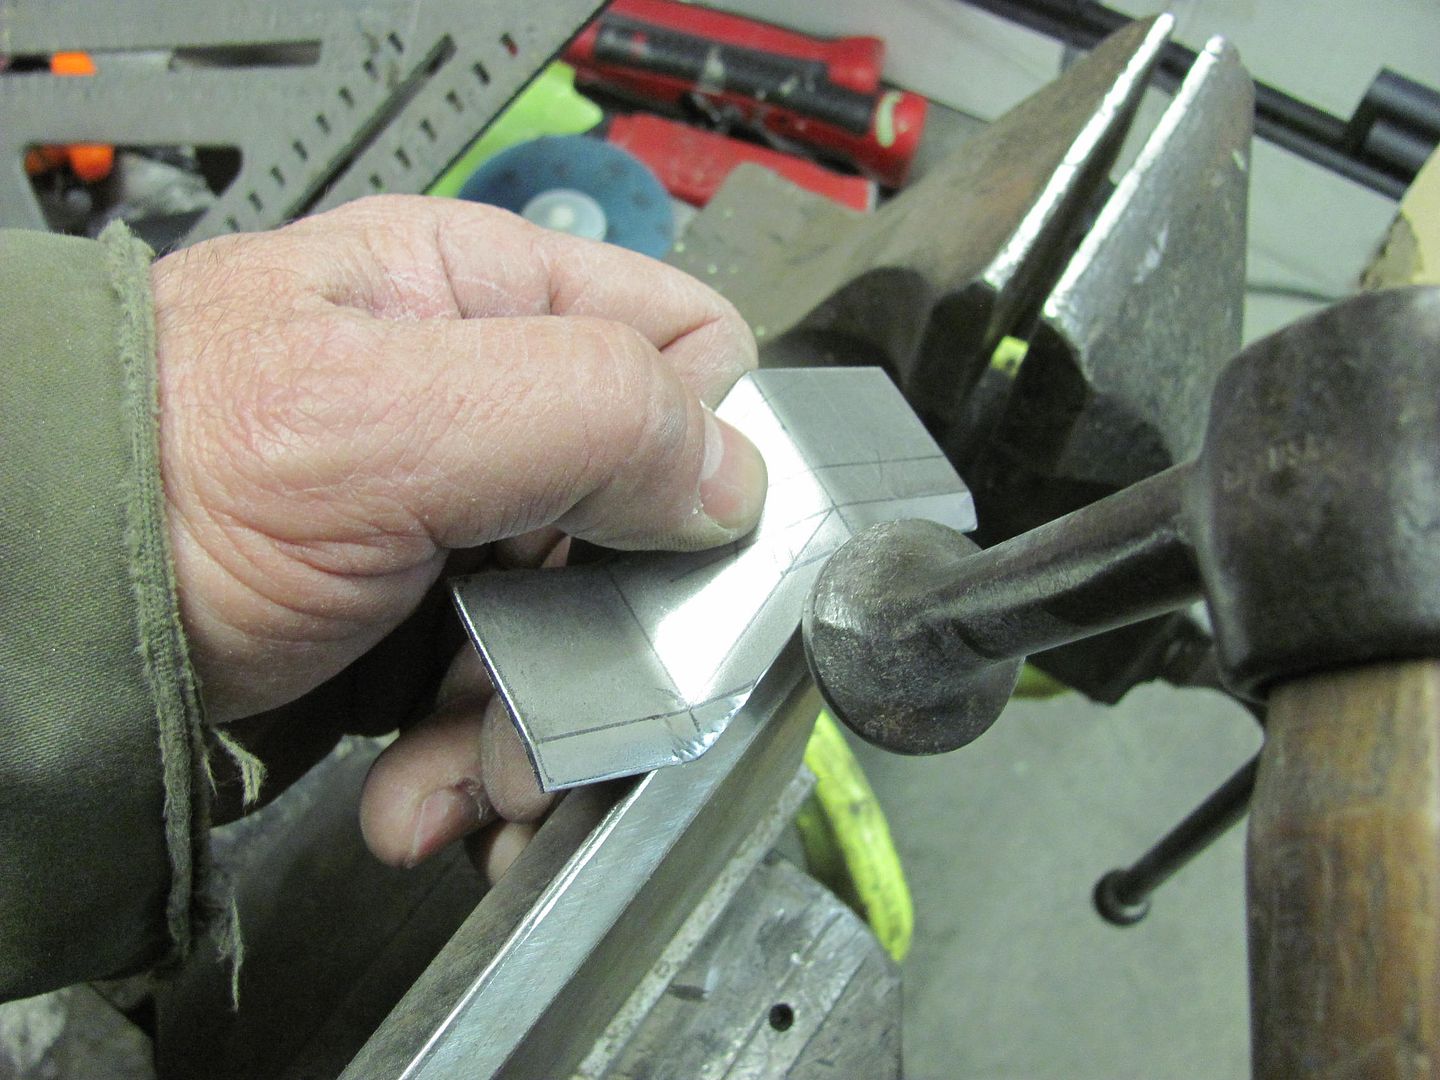
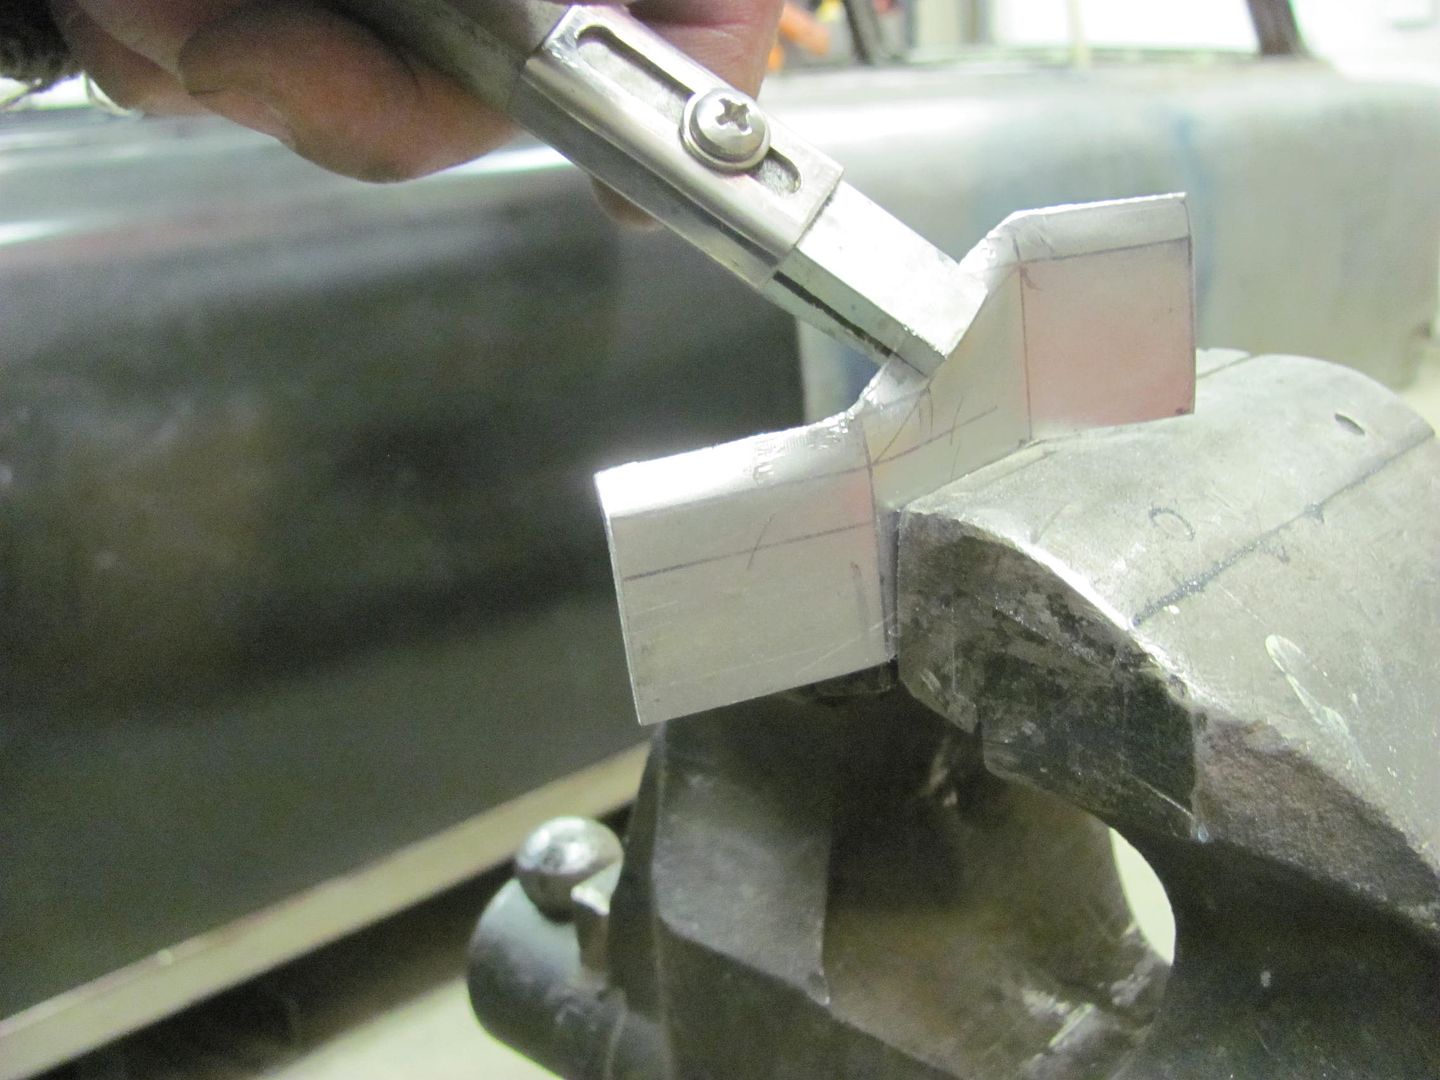
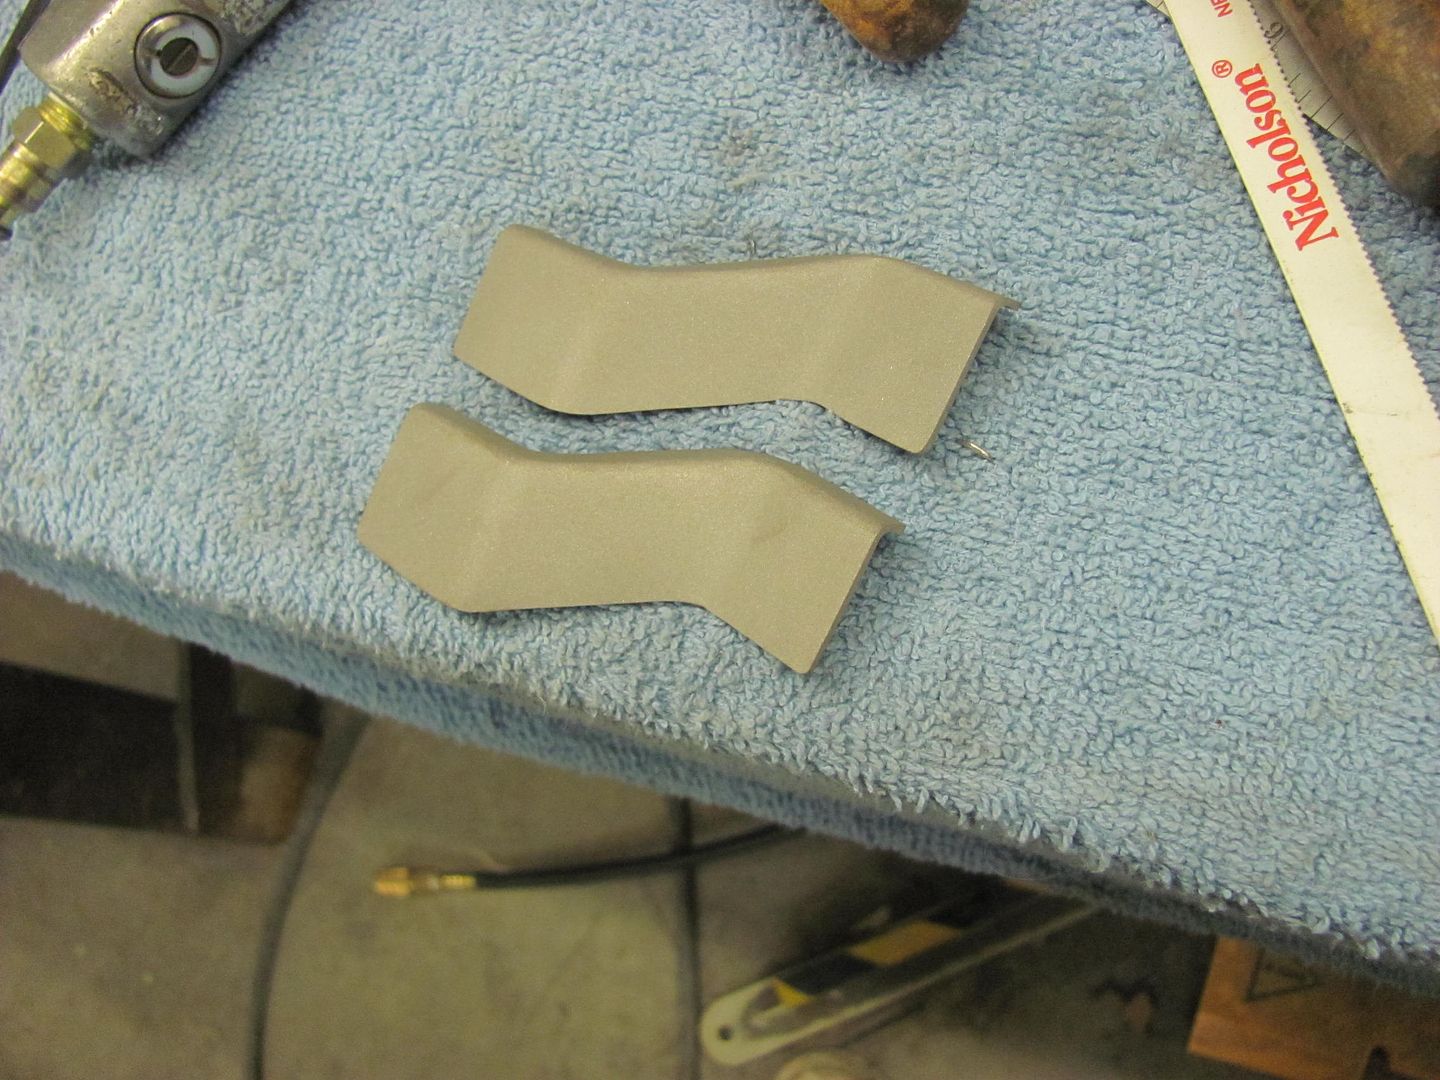
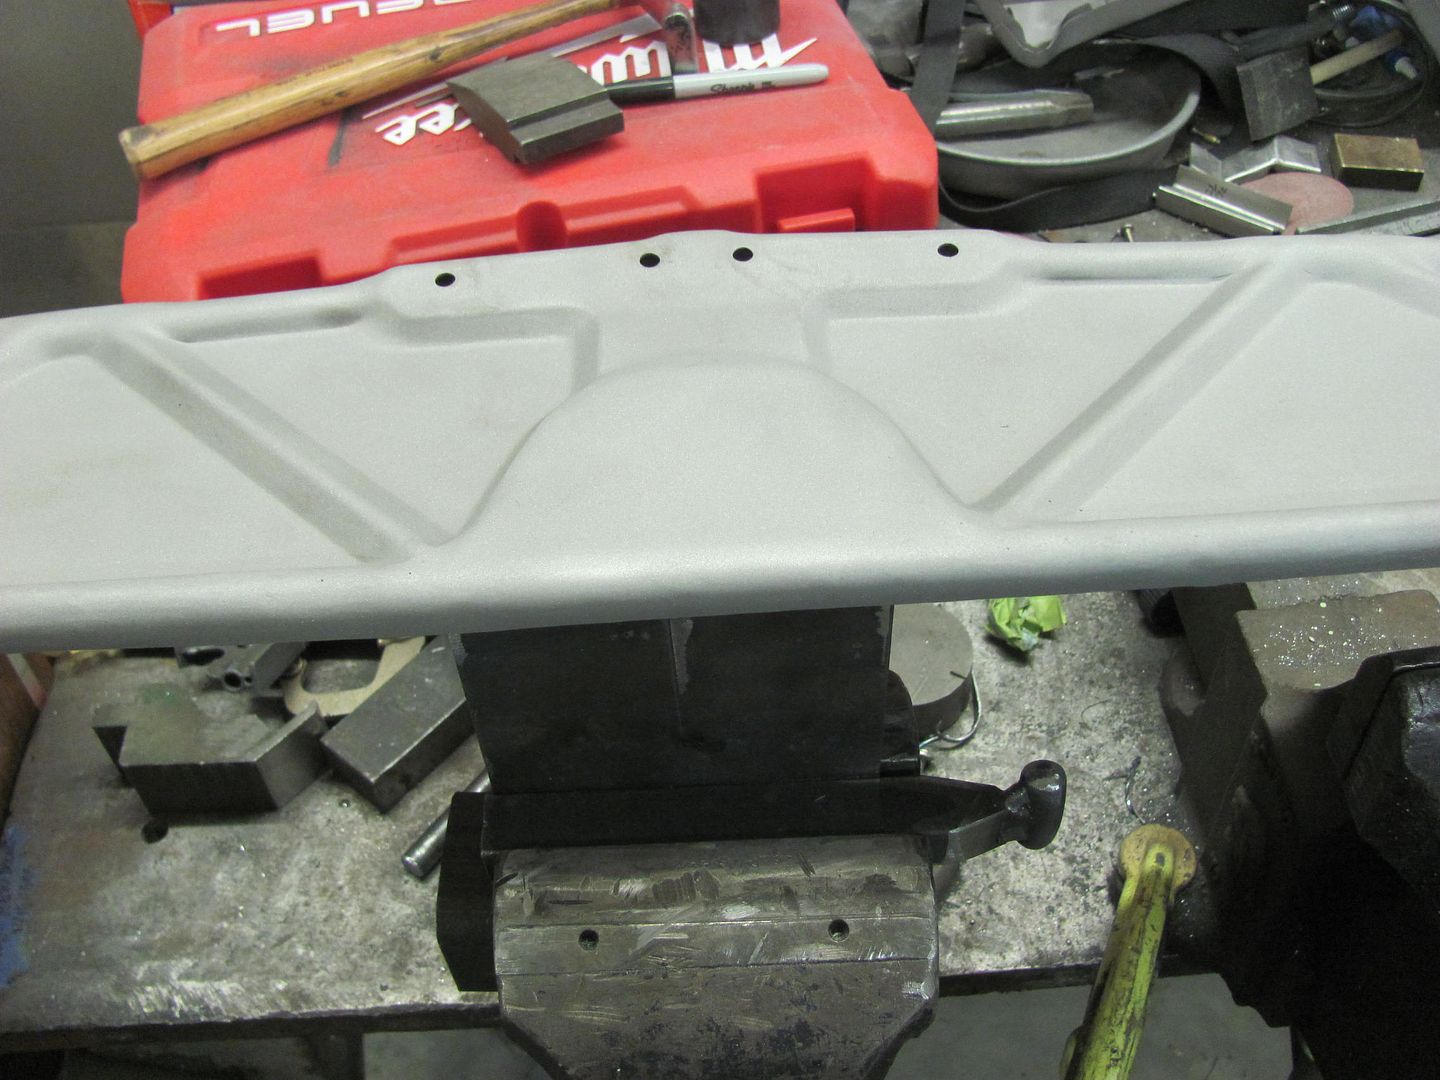
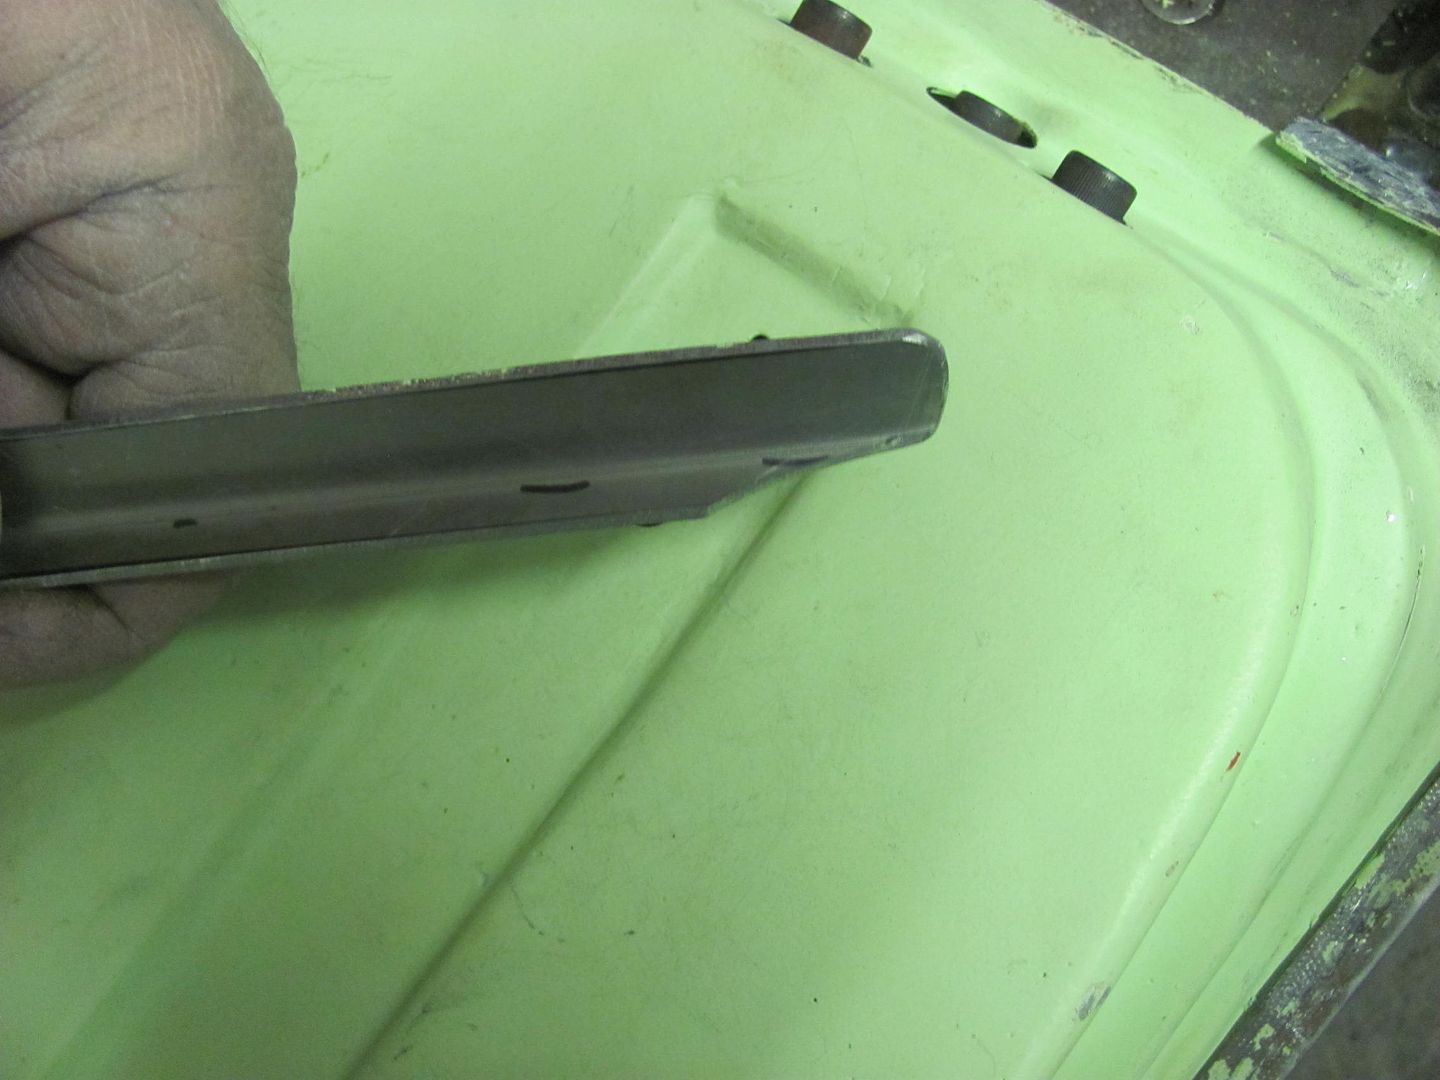
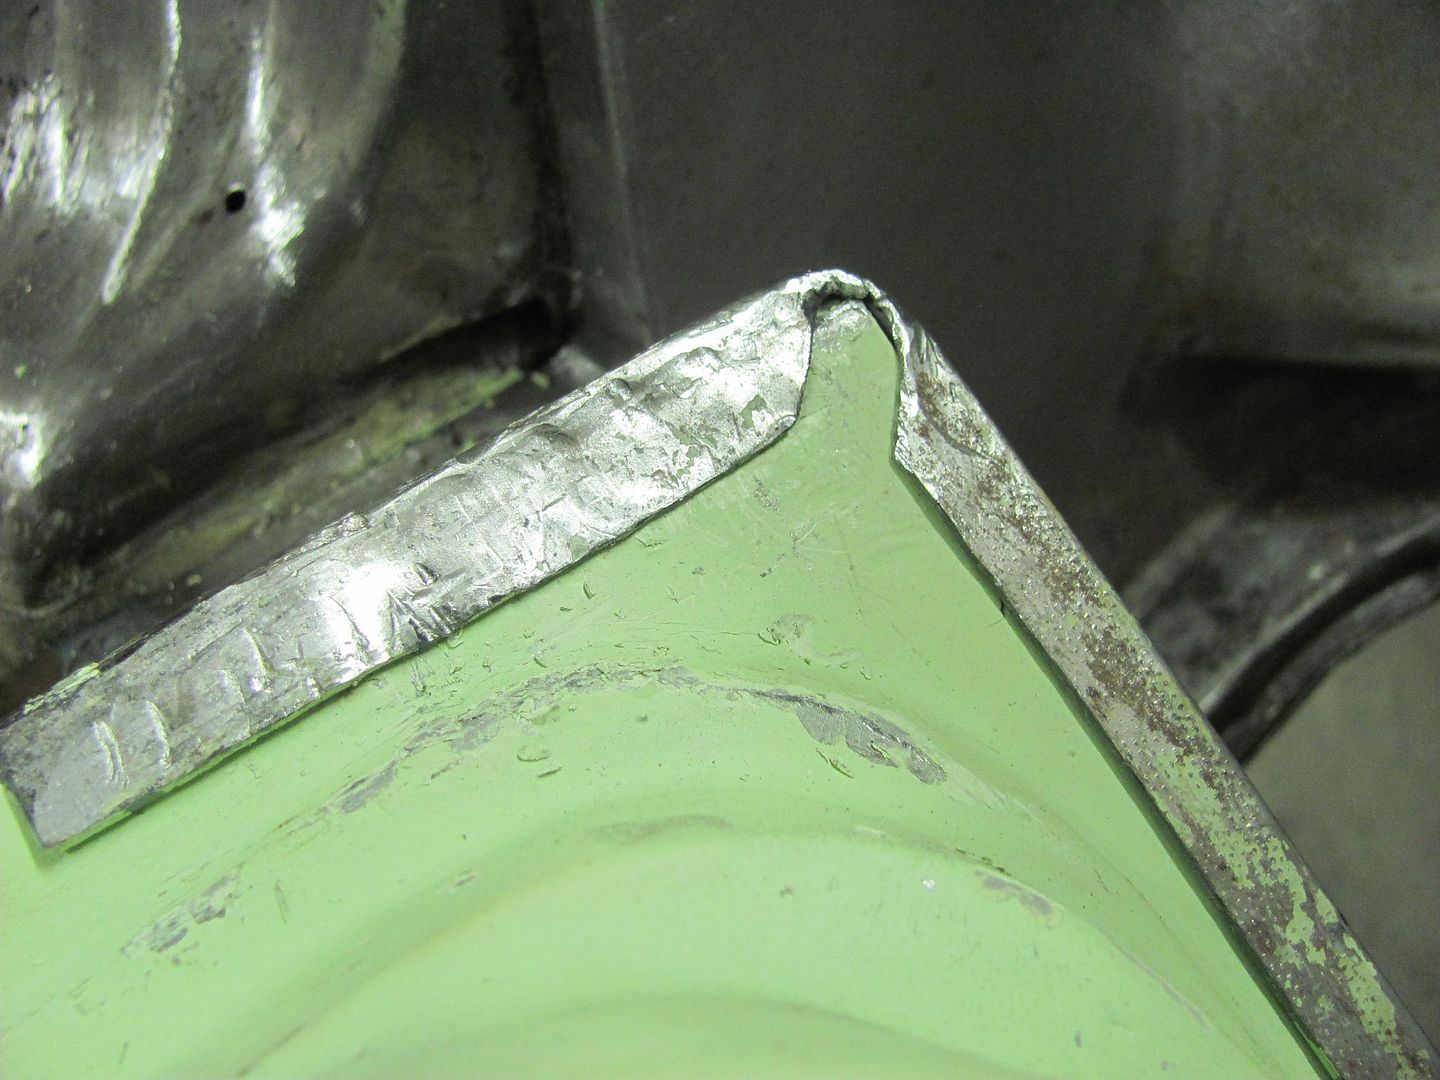
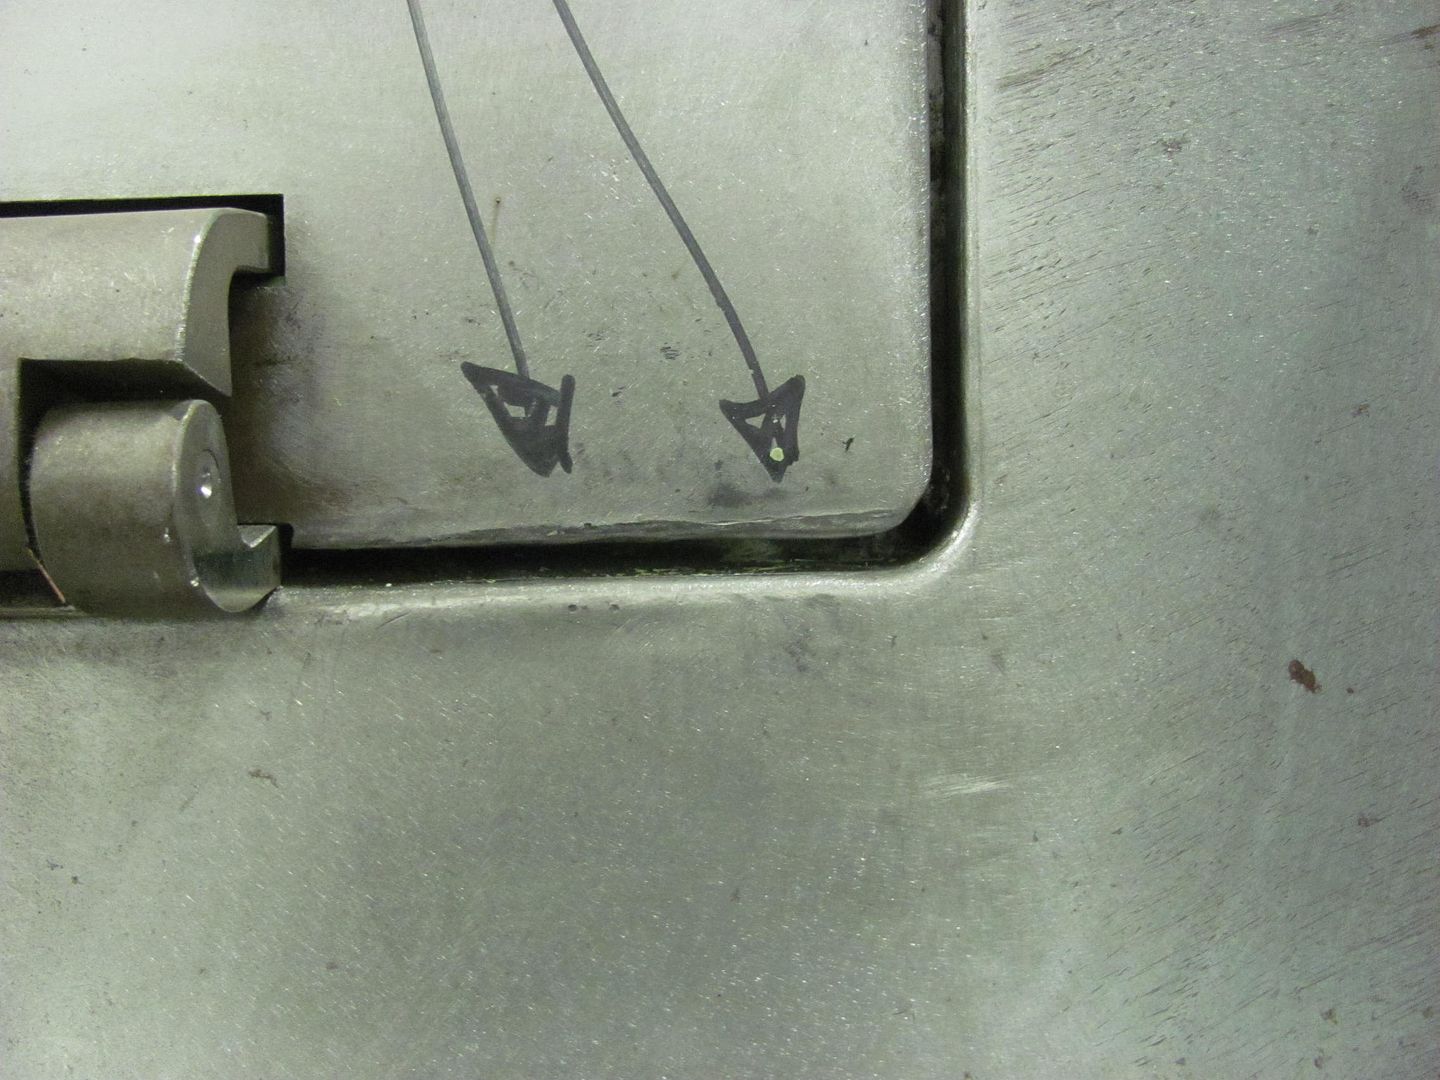
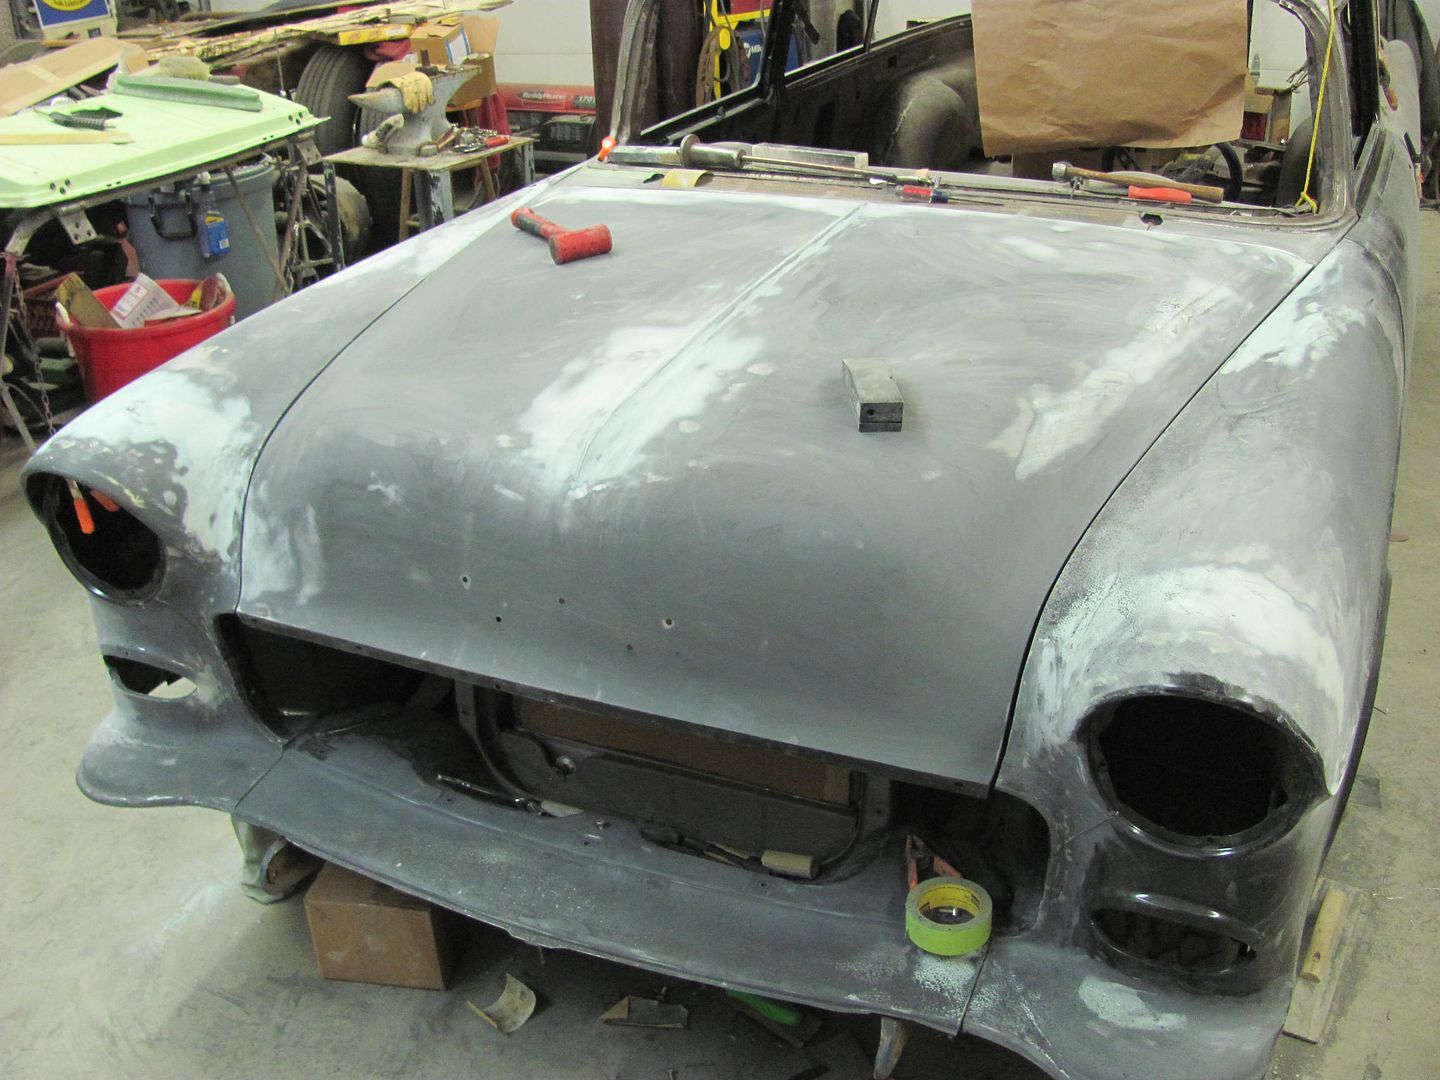
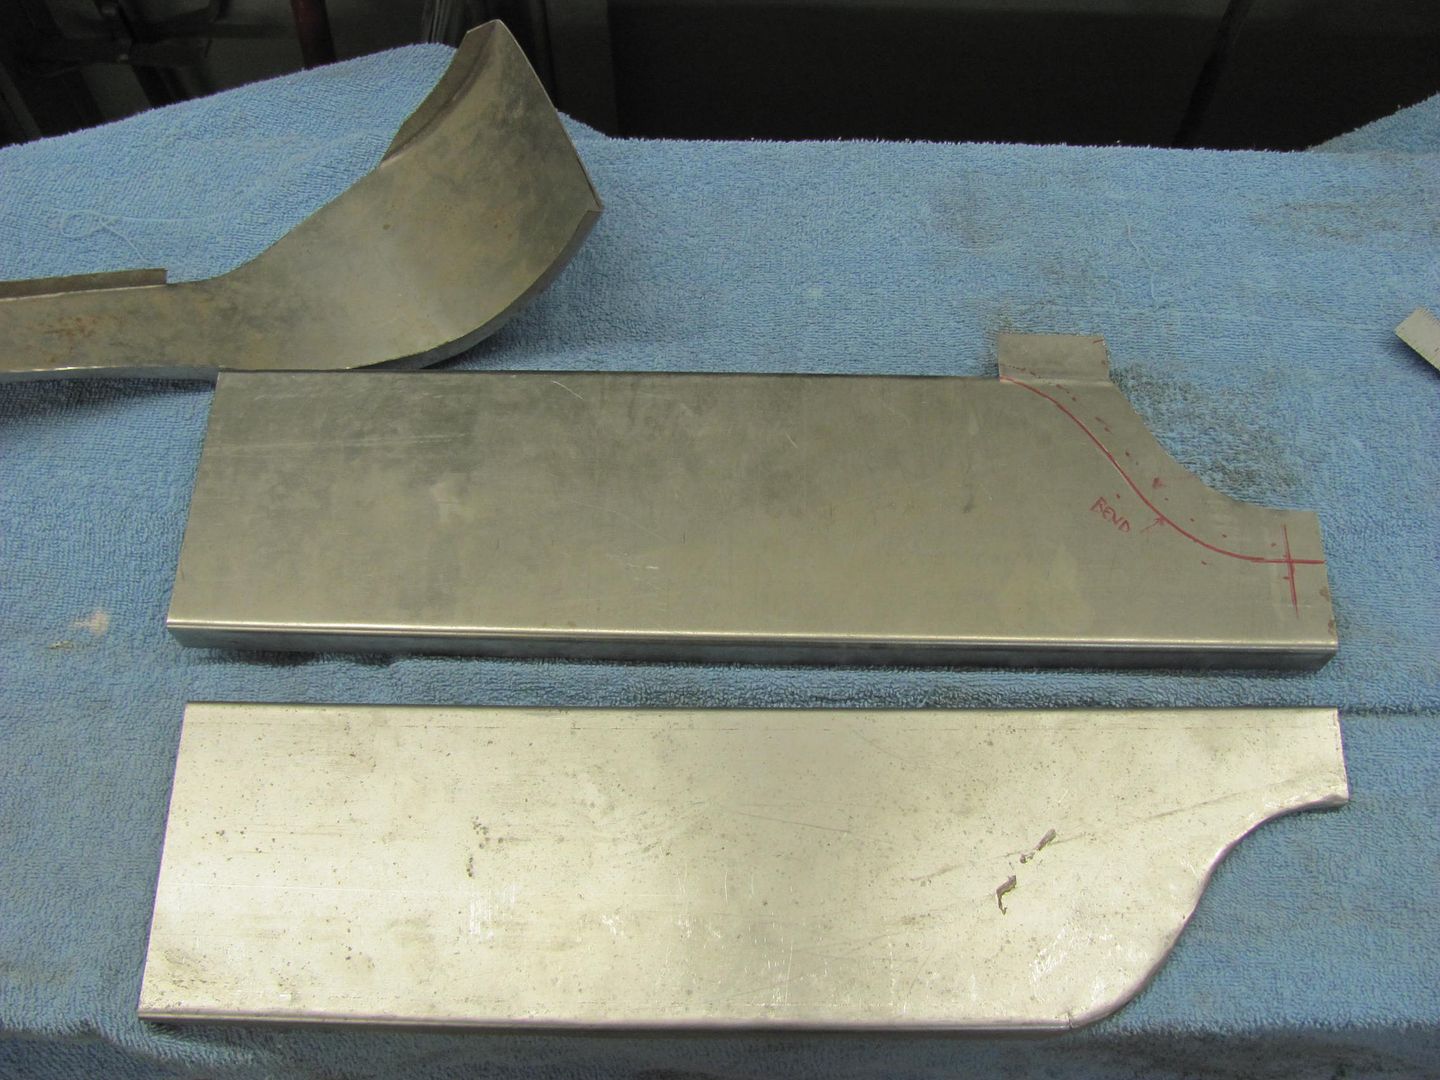
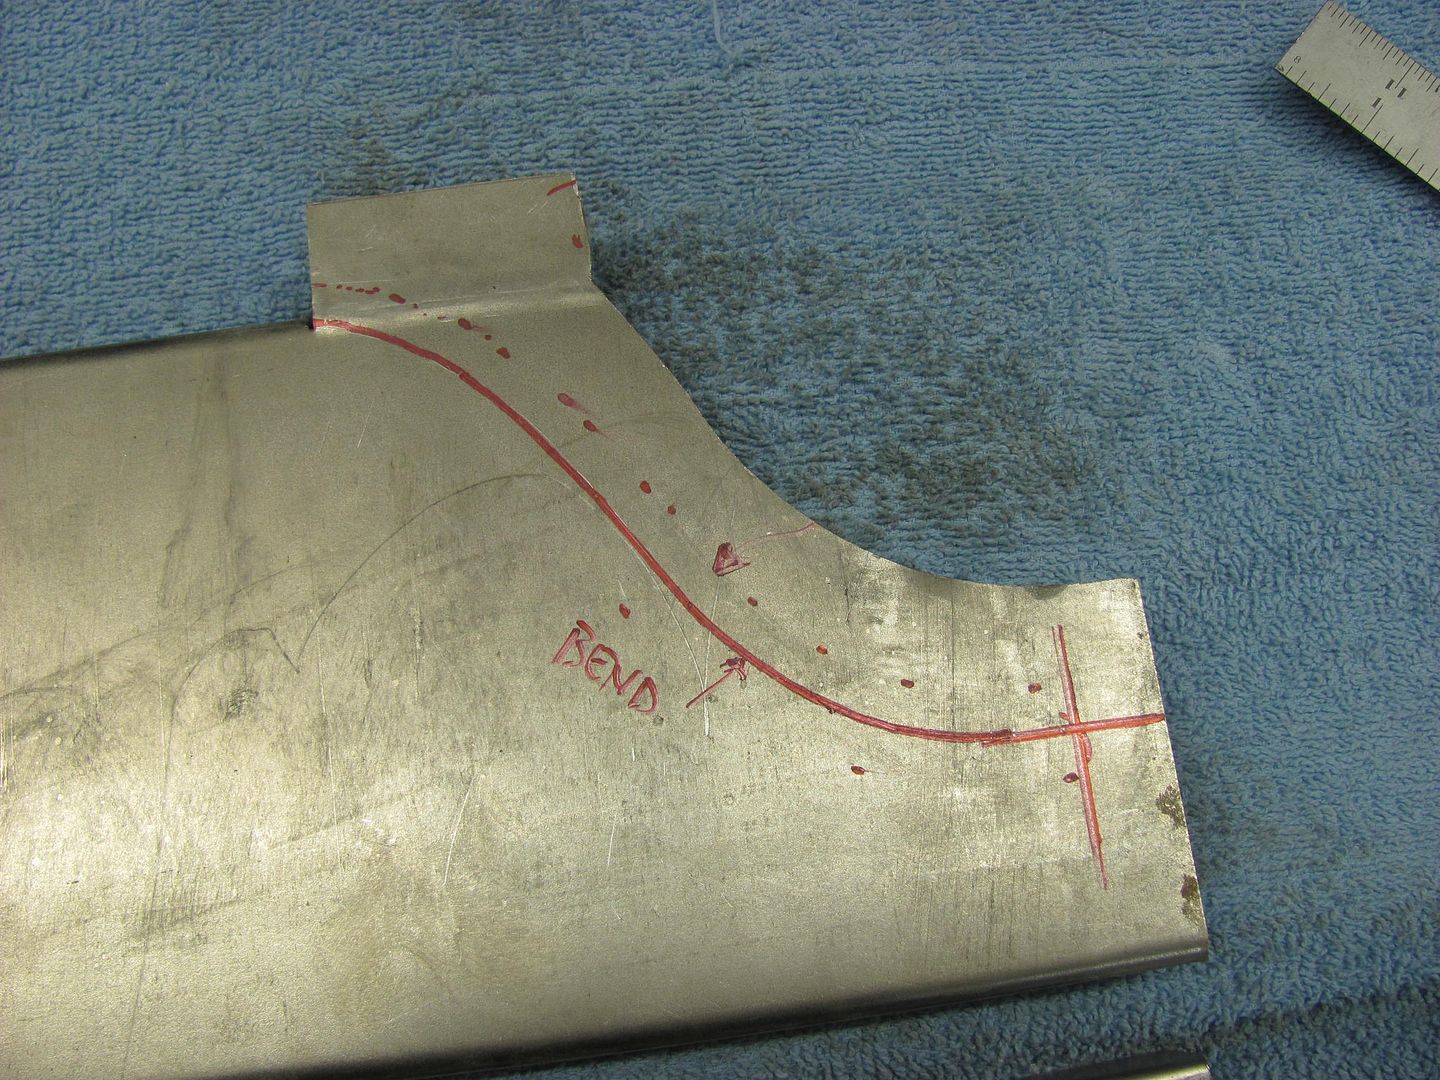
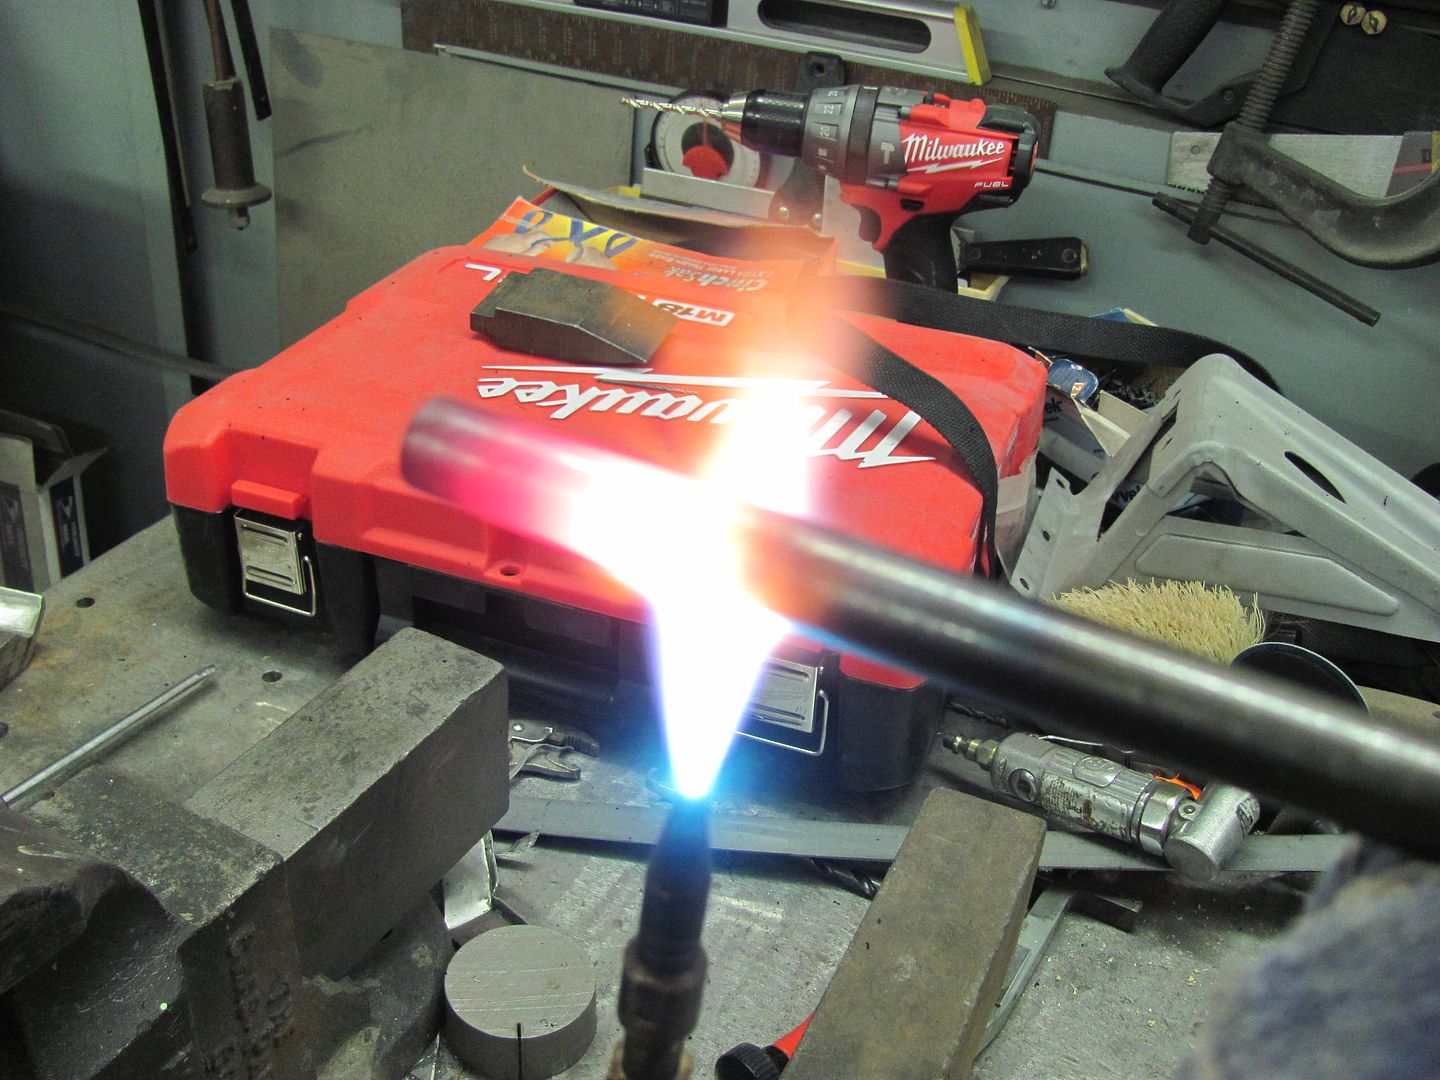
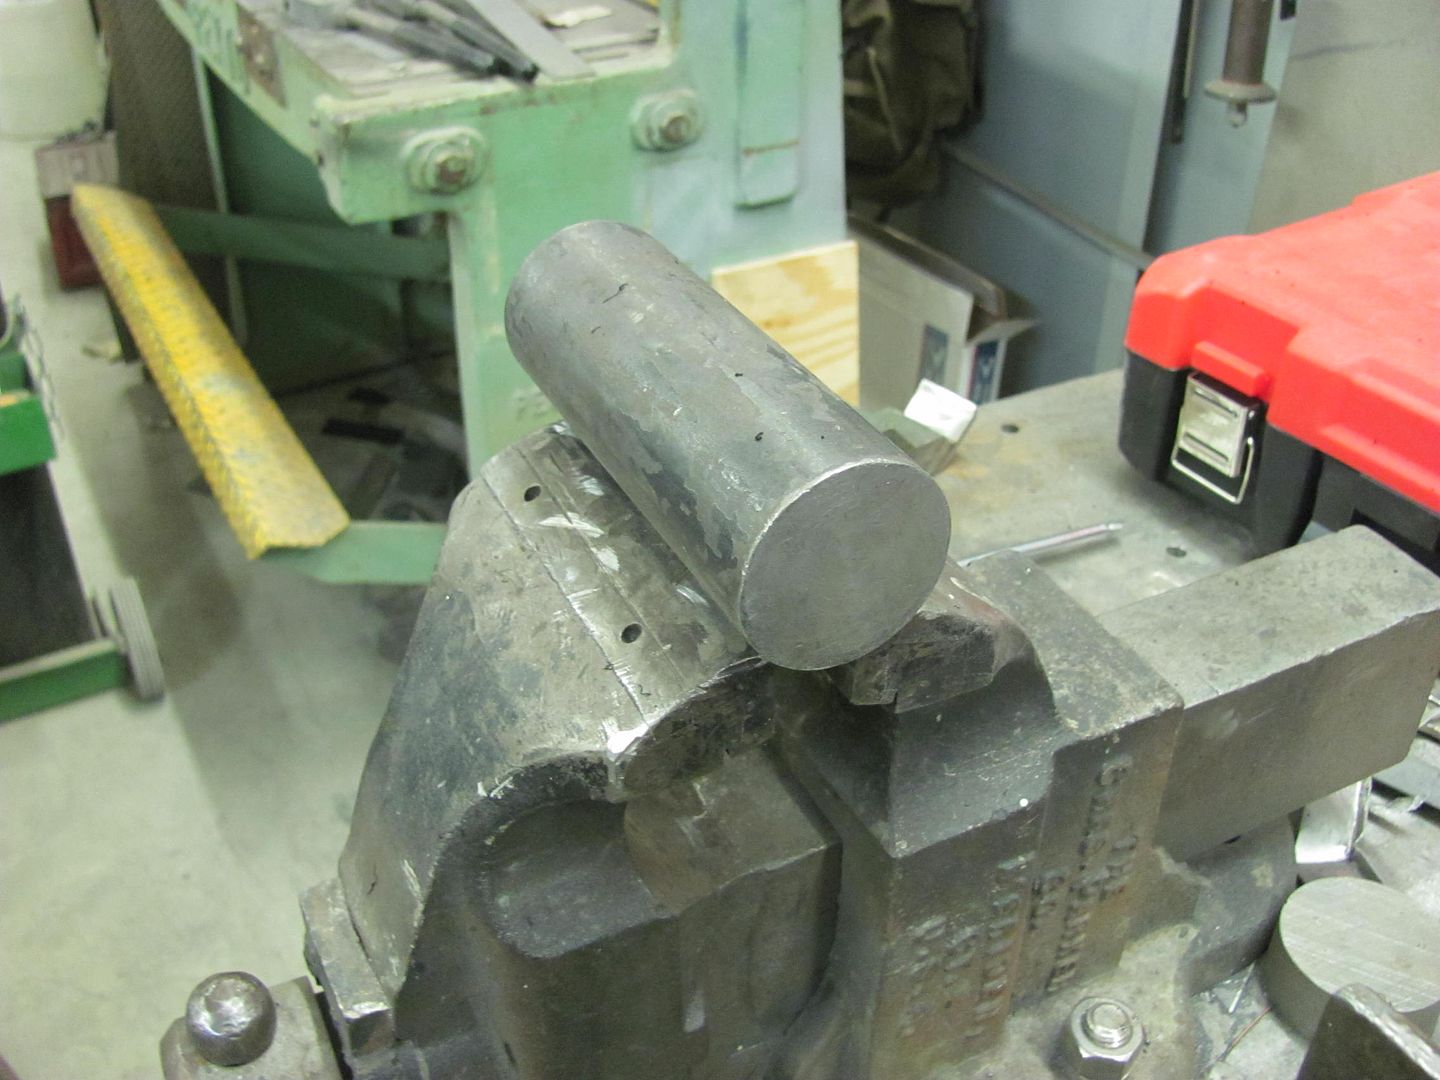
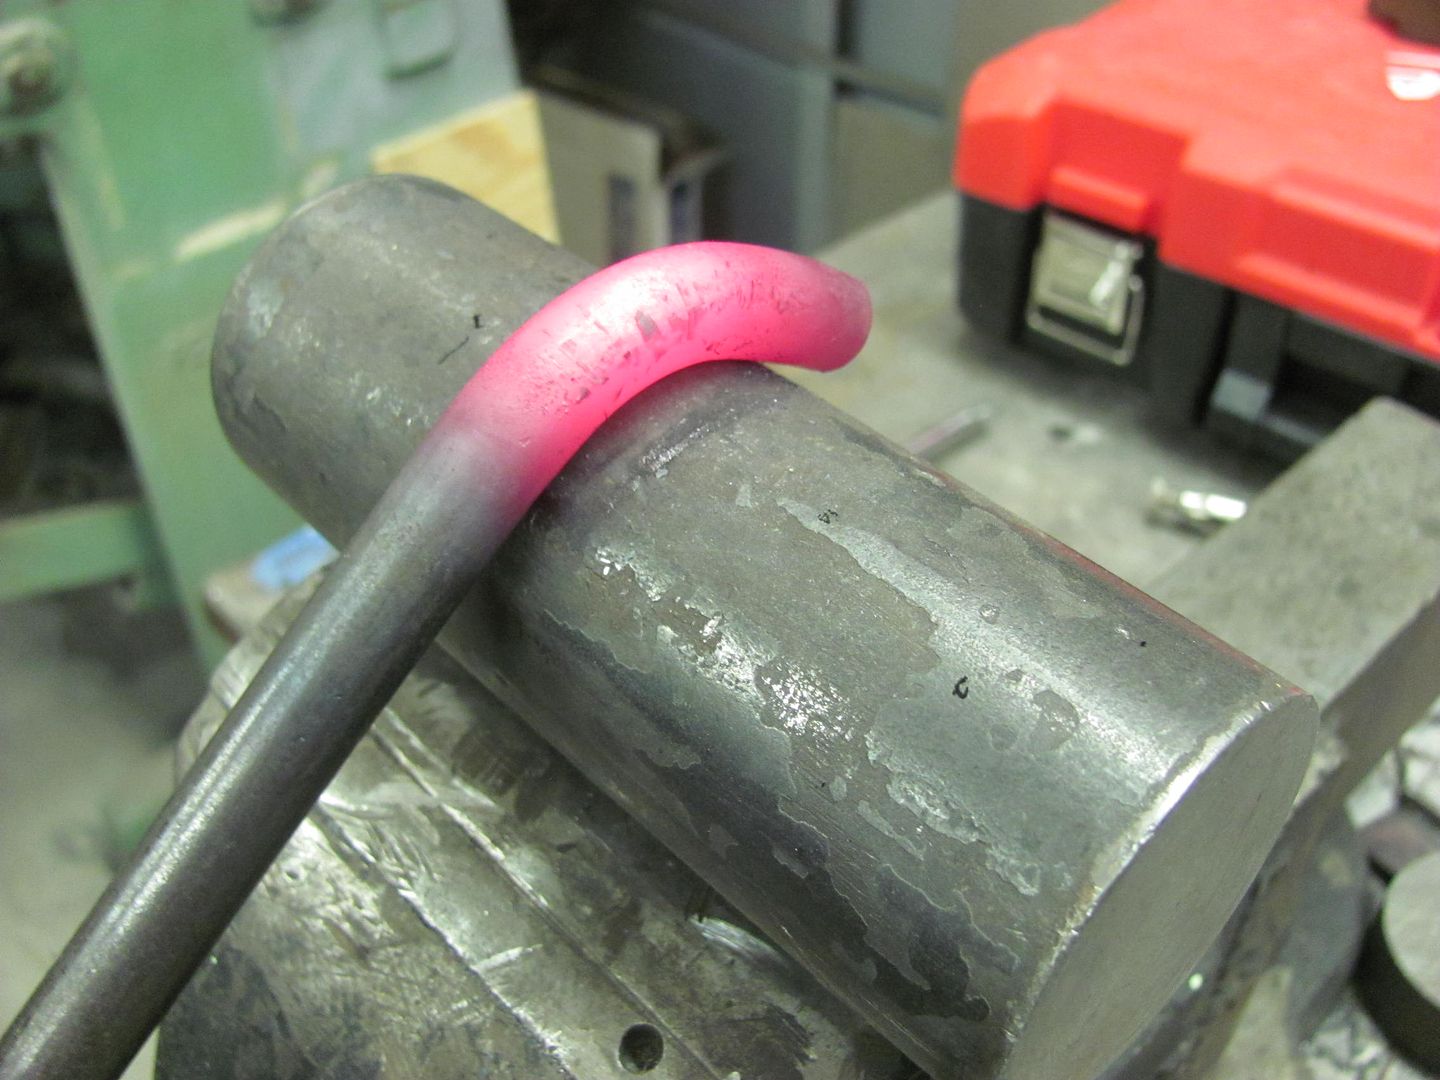
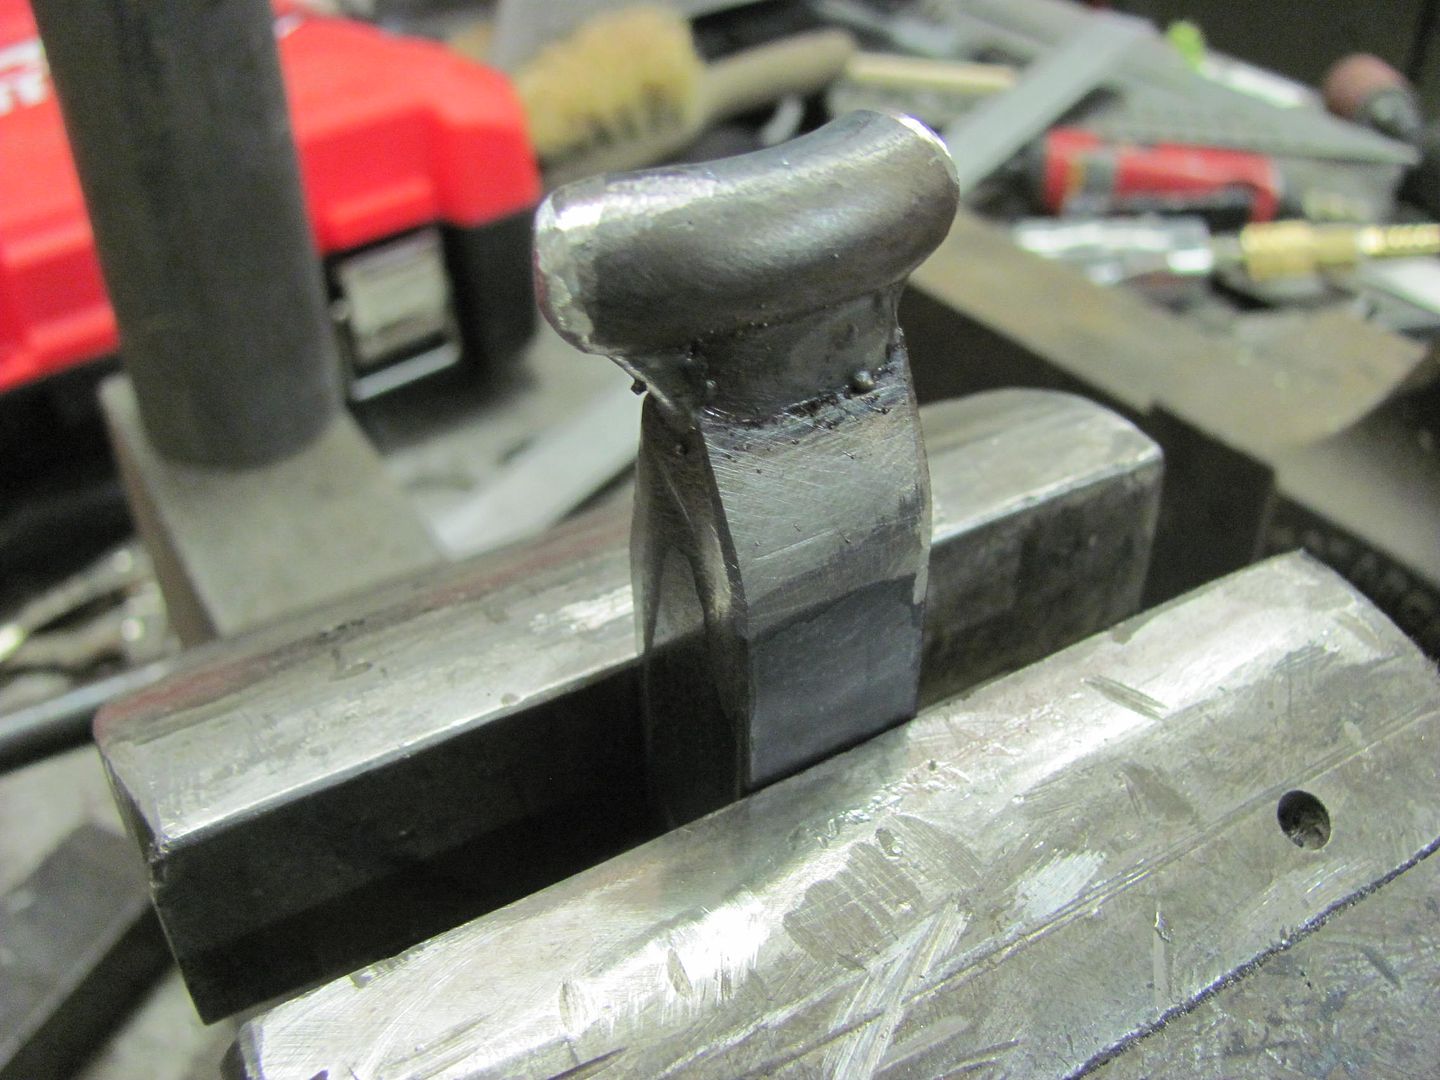
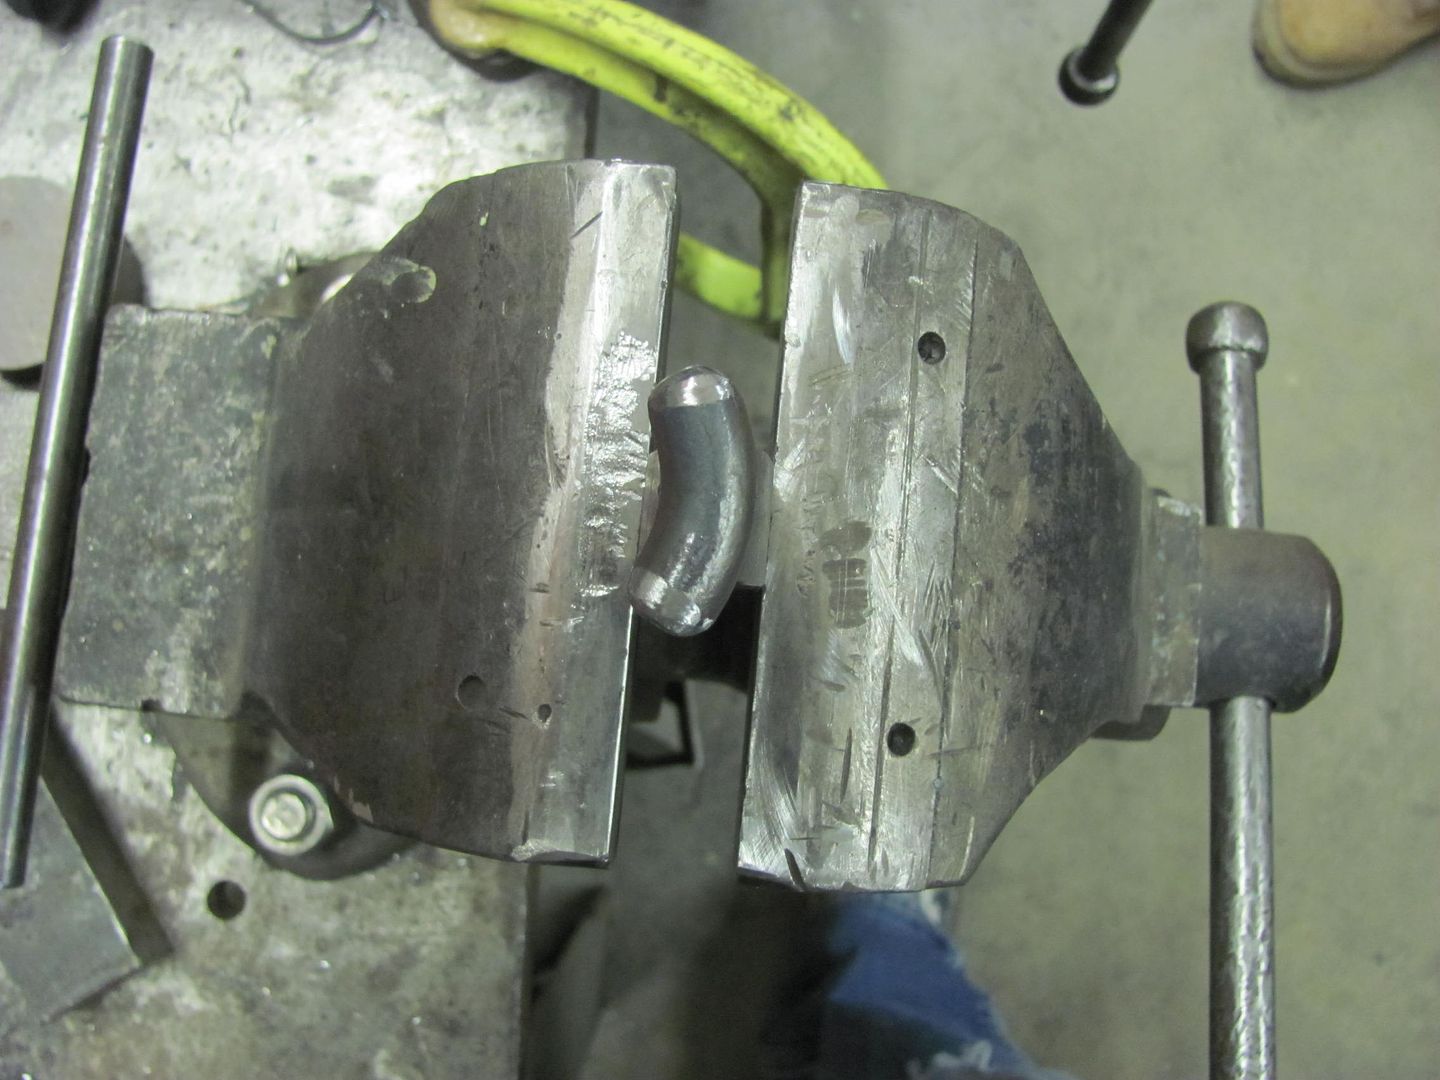
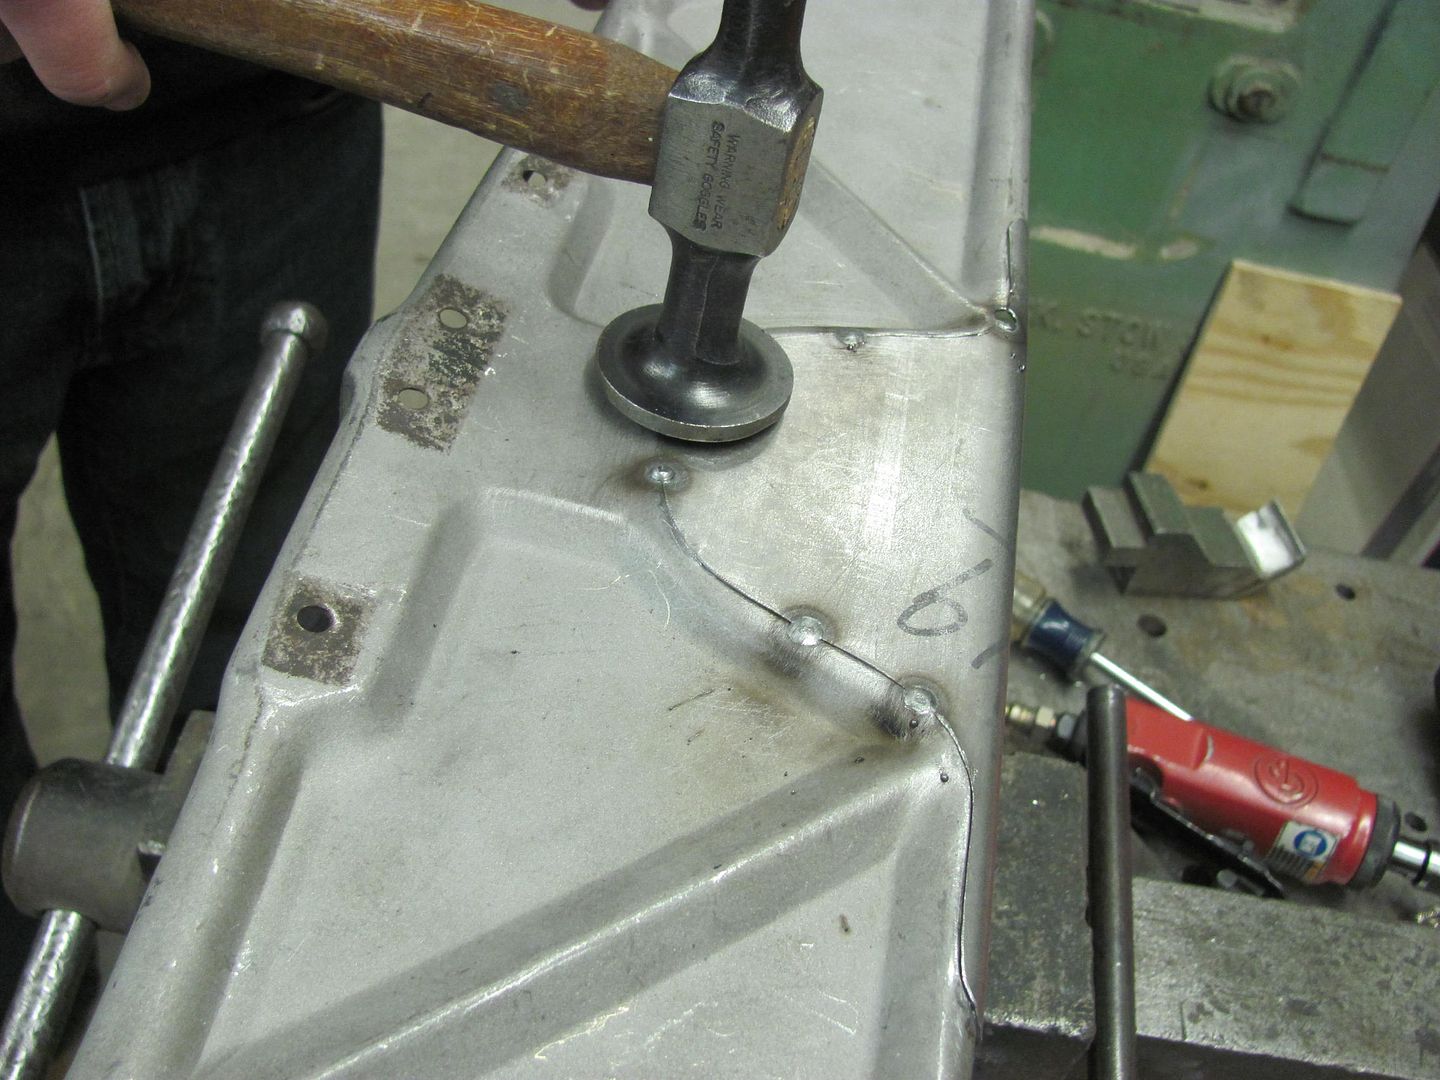
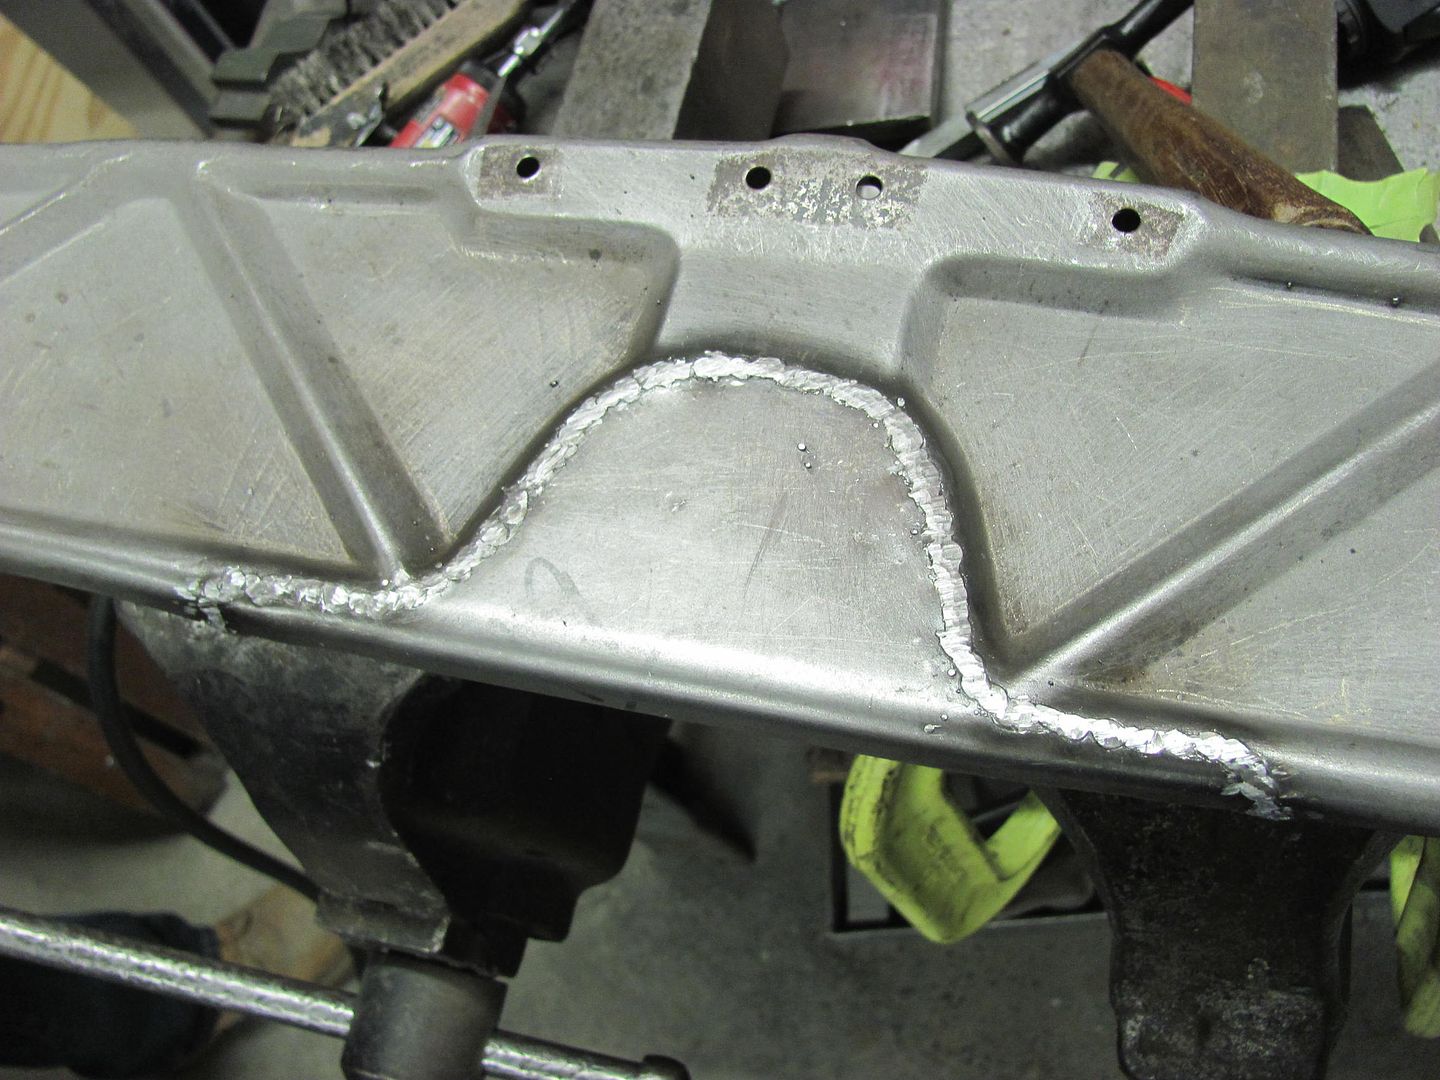
Today Kyle needed to start some welding on the hood brace, so while he was getting set up with the welder, I started making him an anvil that he could use to planish the weld dots inside the radius voids..


Heat applied...


Picture%202085.jpg


Picture%202086.jpg


Picture%202087.jpg


Picture%202090.jpg


Picture%202092.jpg


Picture%202093.jpg


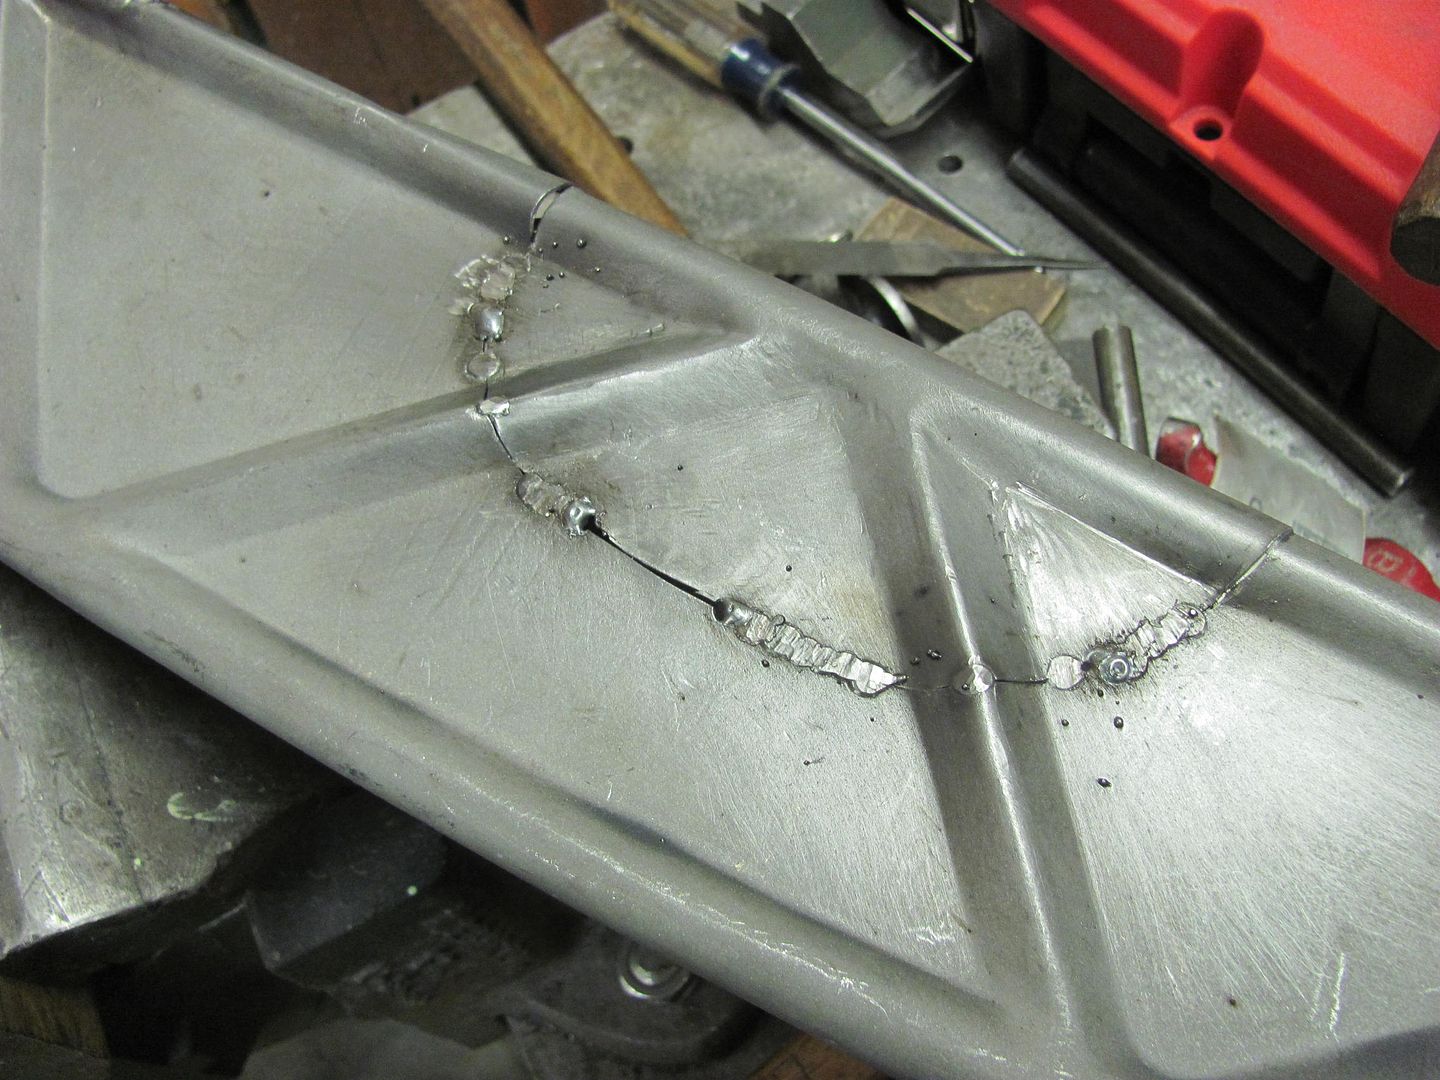
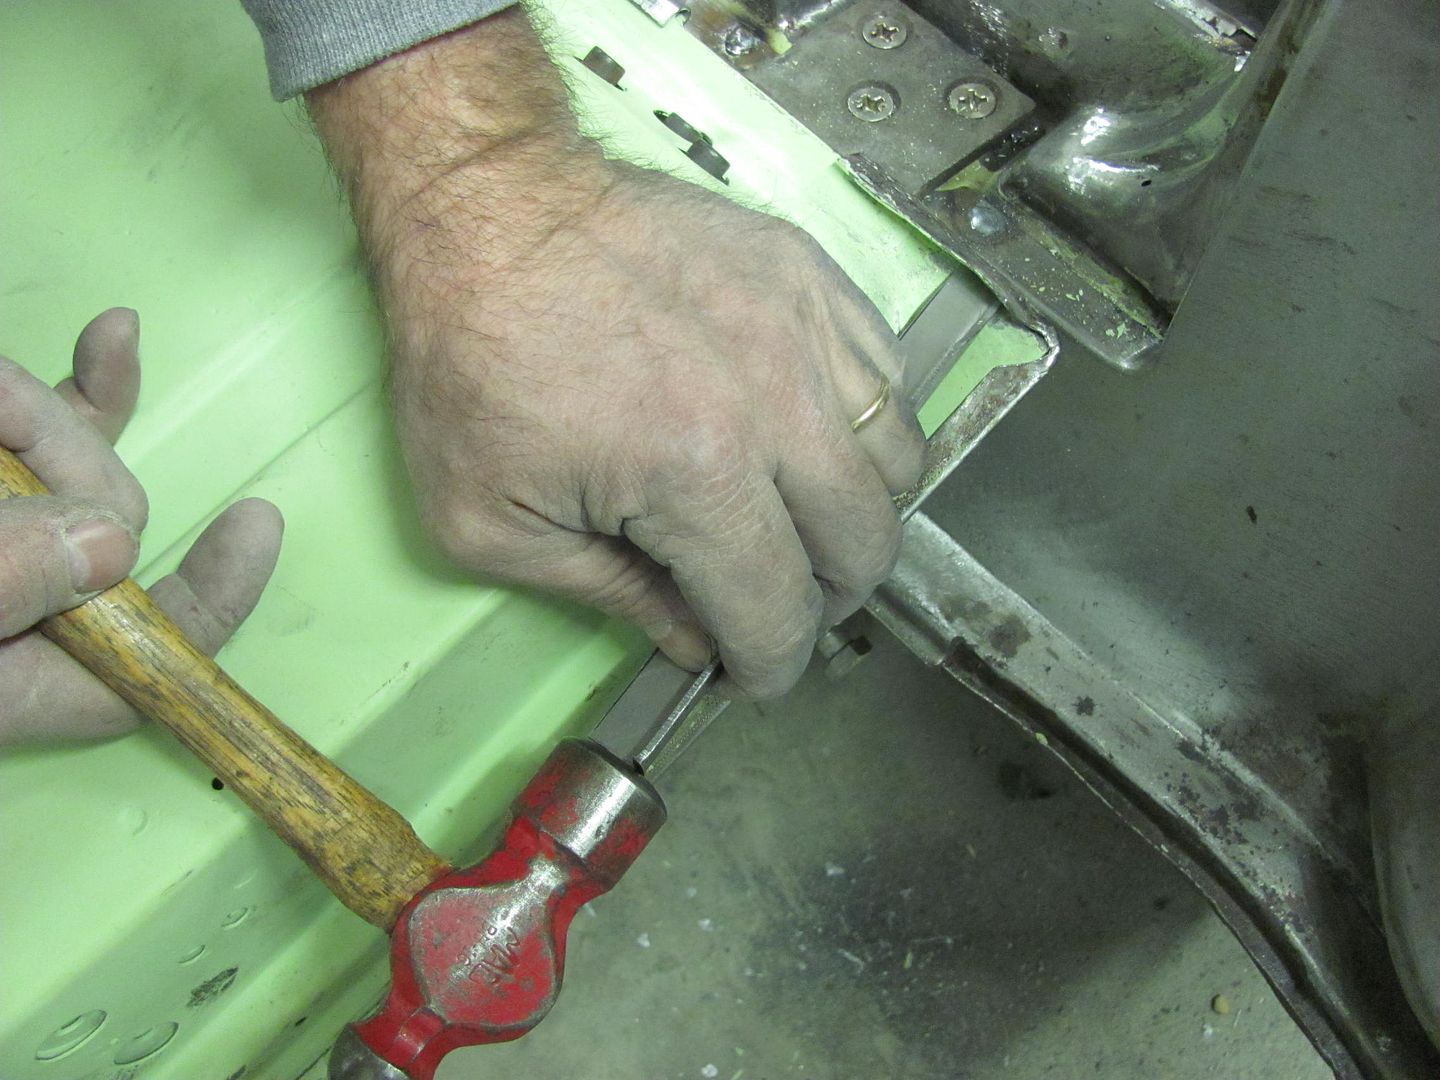
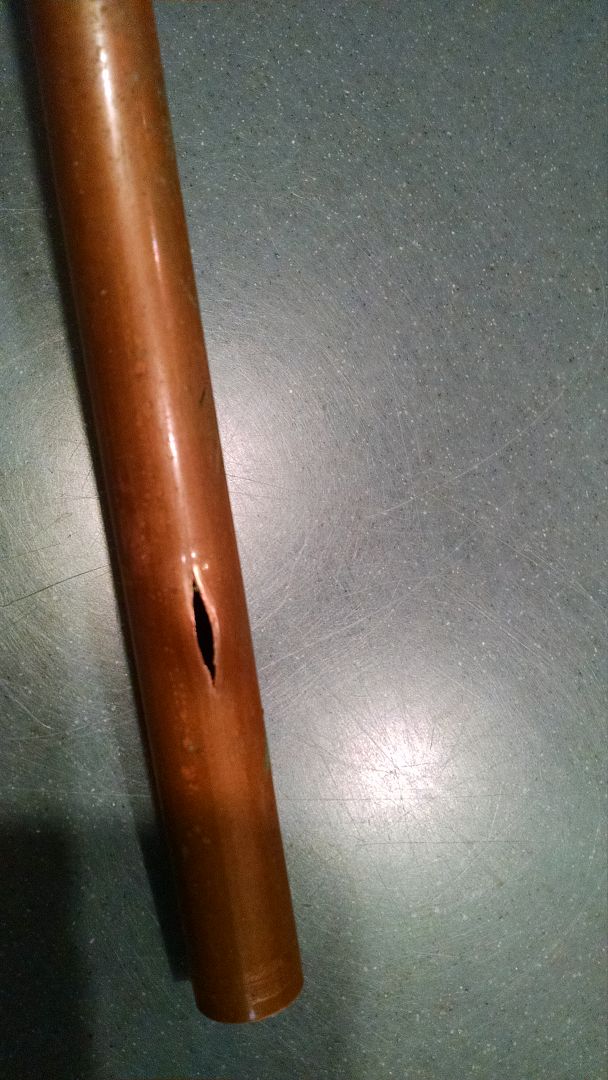
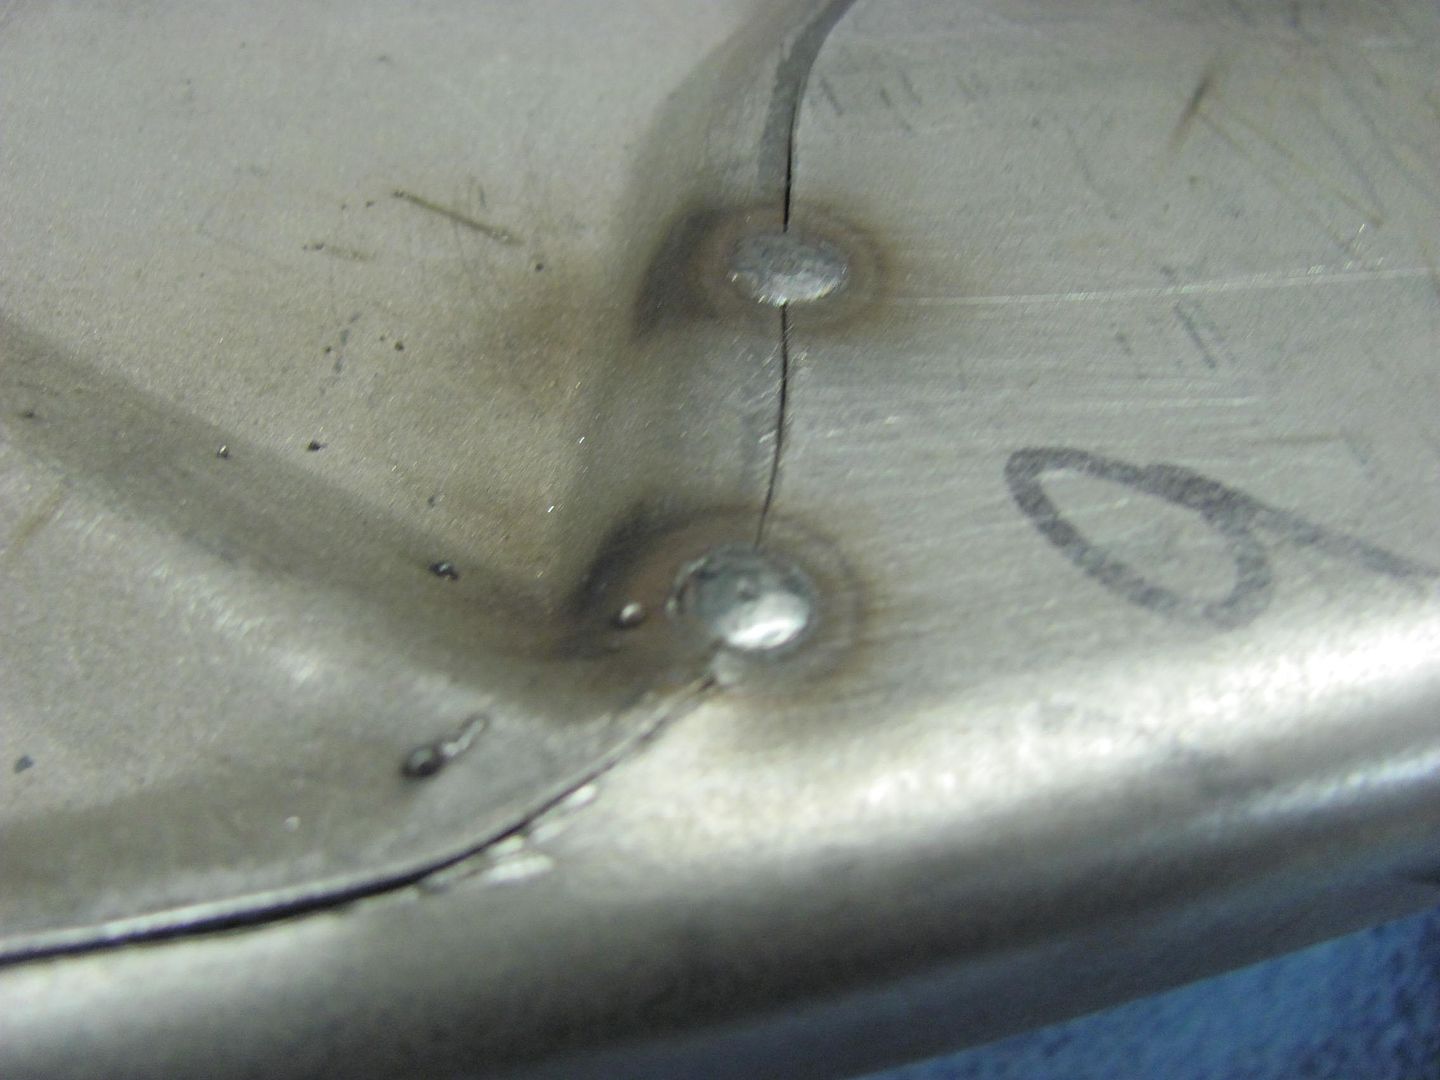
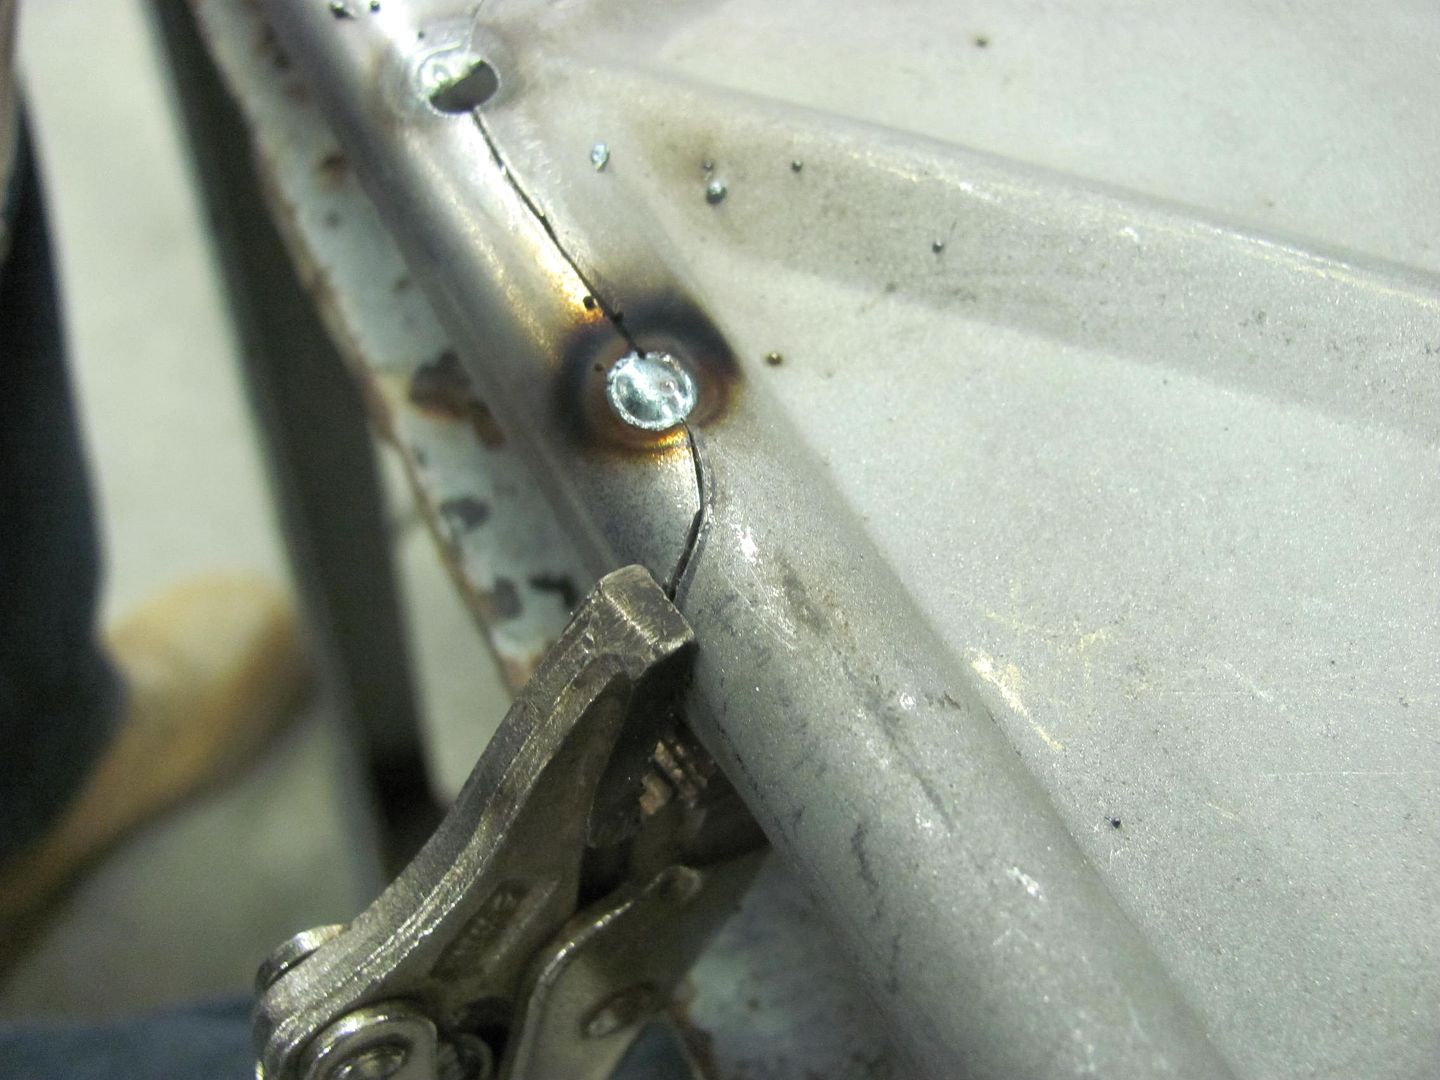
Kyle's first job at welding sheet metal, he's a quick learner. He did have a couple spots that didn't like the heat and blew a hole, but he did a real nice job in getting those fixed as well.


Picture%202089.jpg


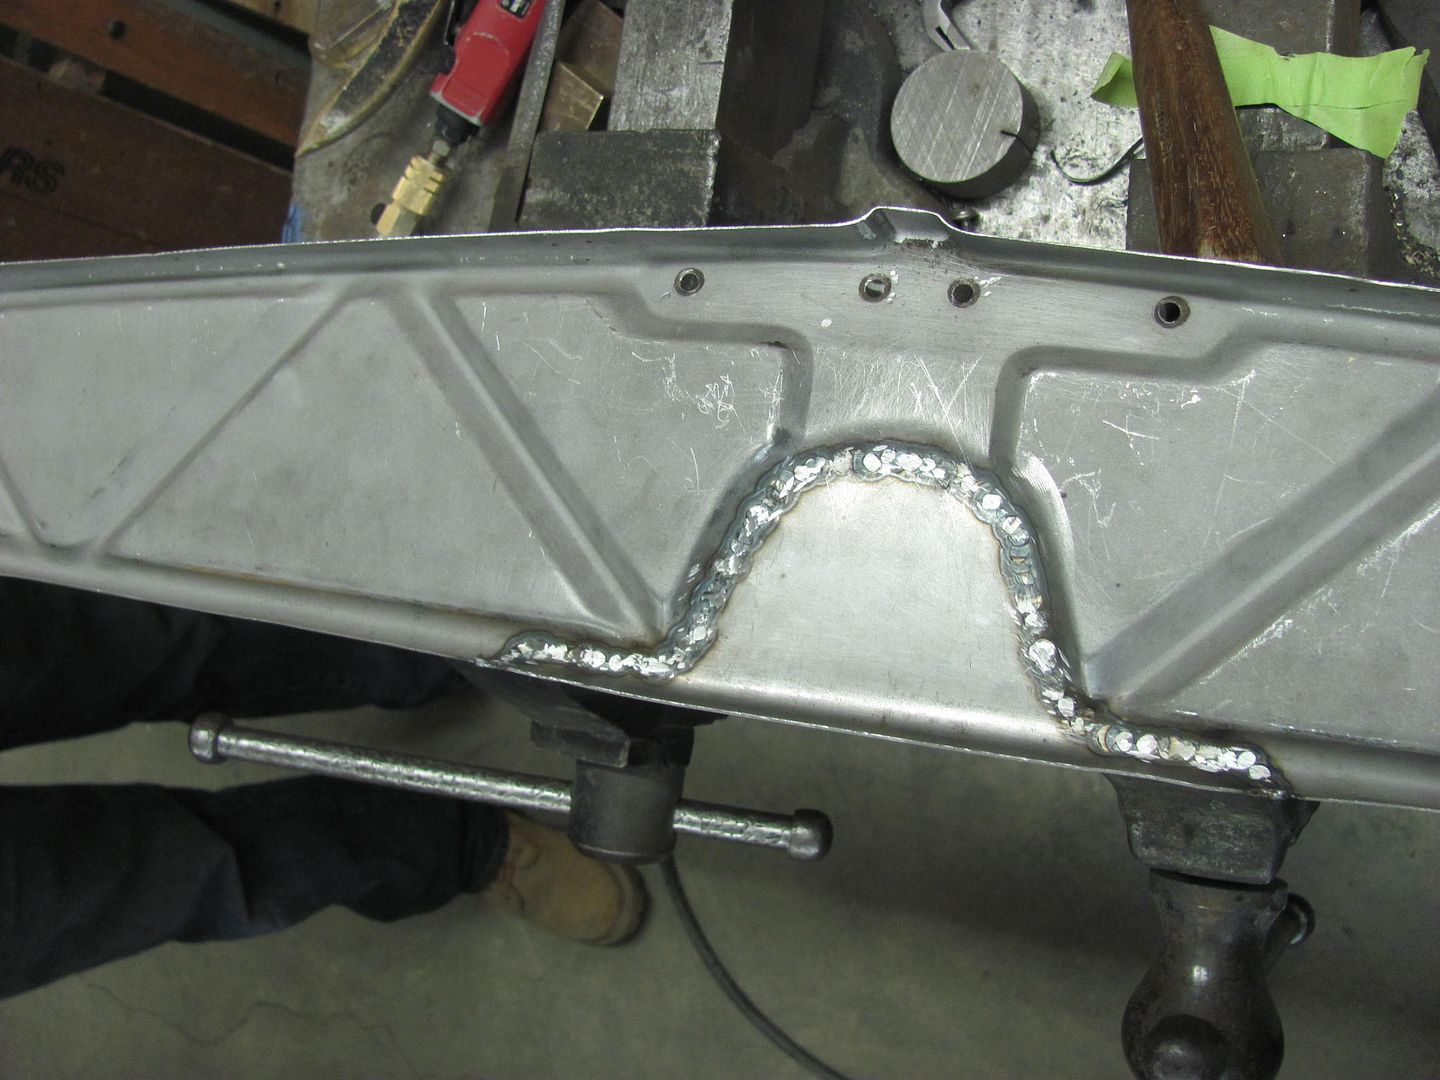
Planishing weld dots on the new "anvil"..


Picture%202095.jpg


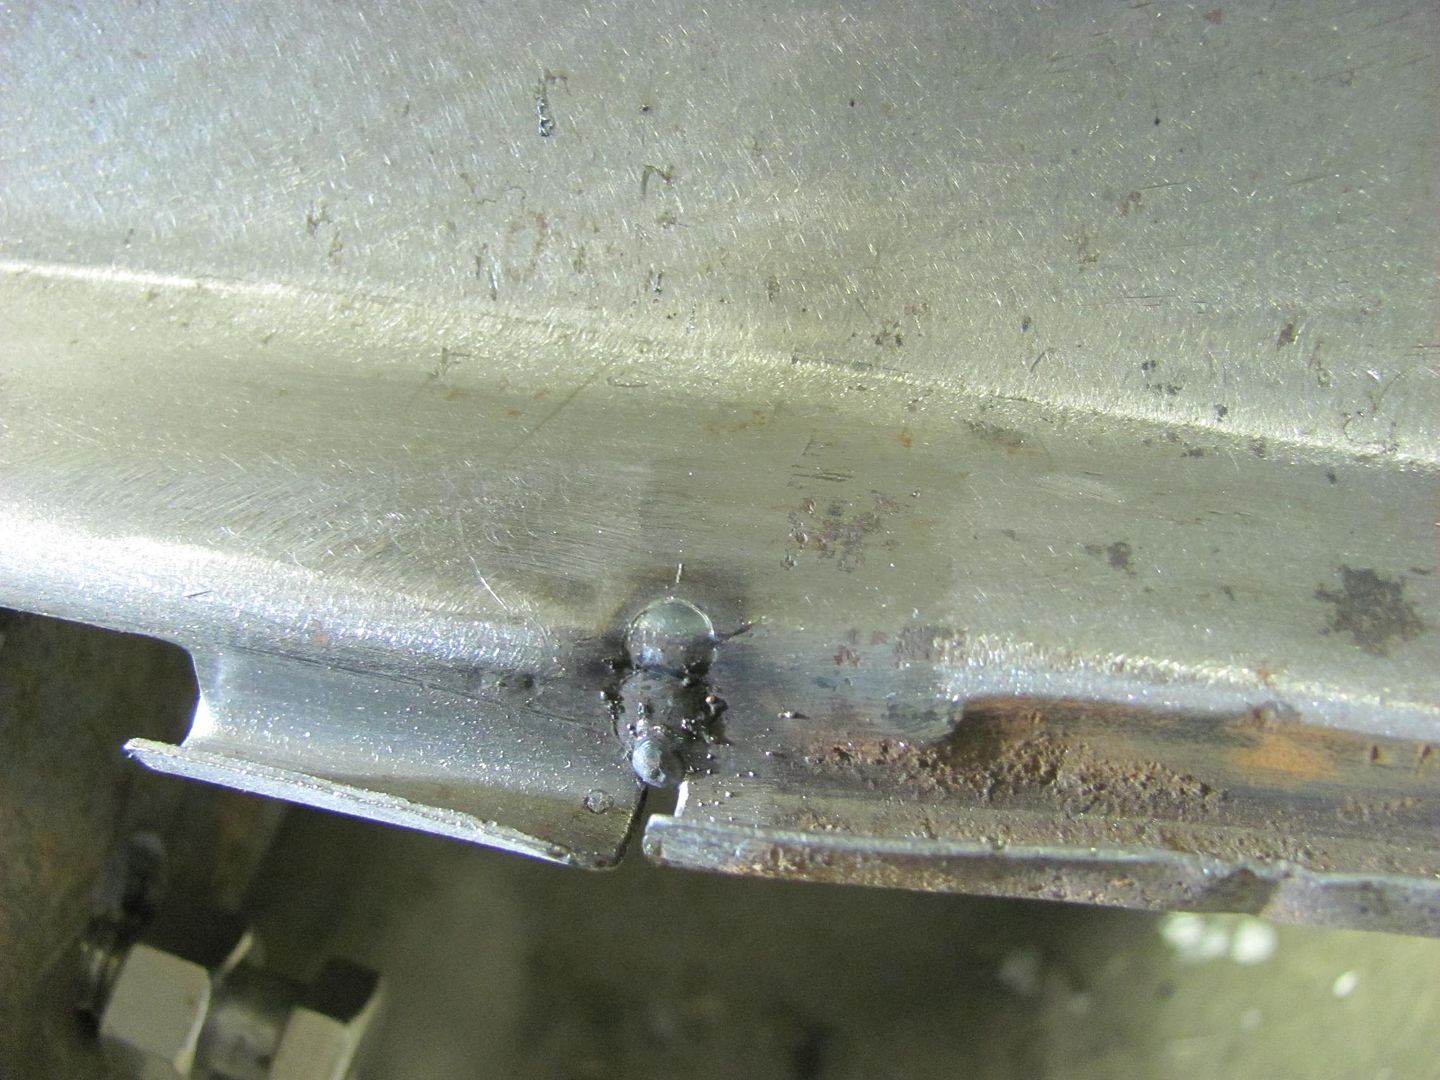
Full weld penetration...


Picture%202096.jpg


Picture%202097.jpg


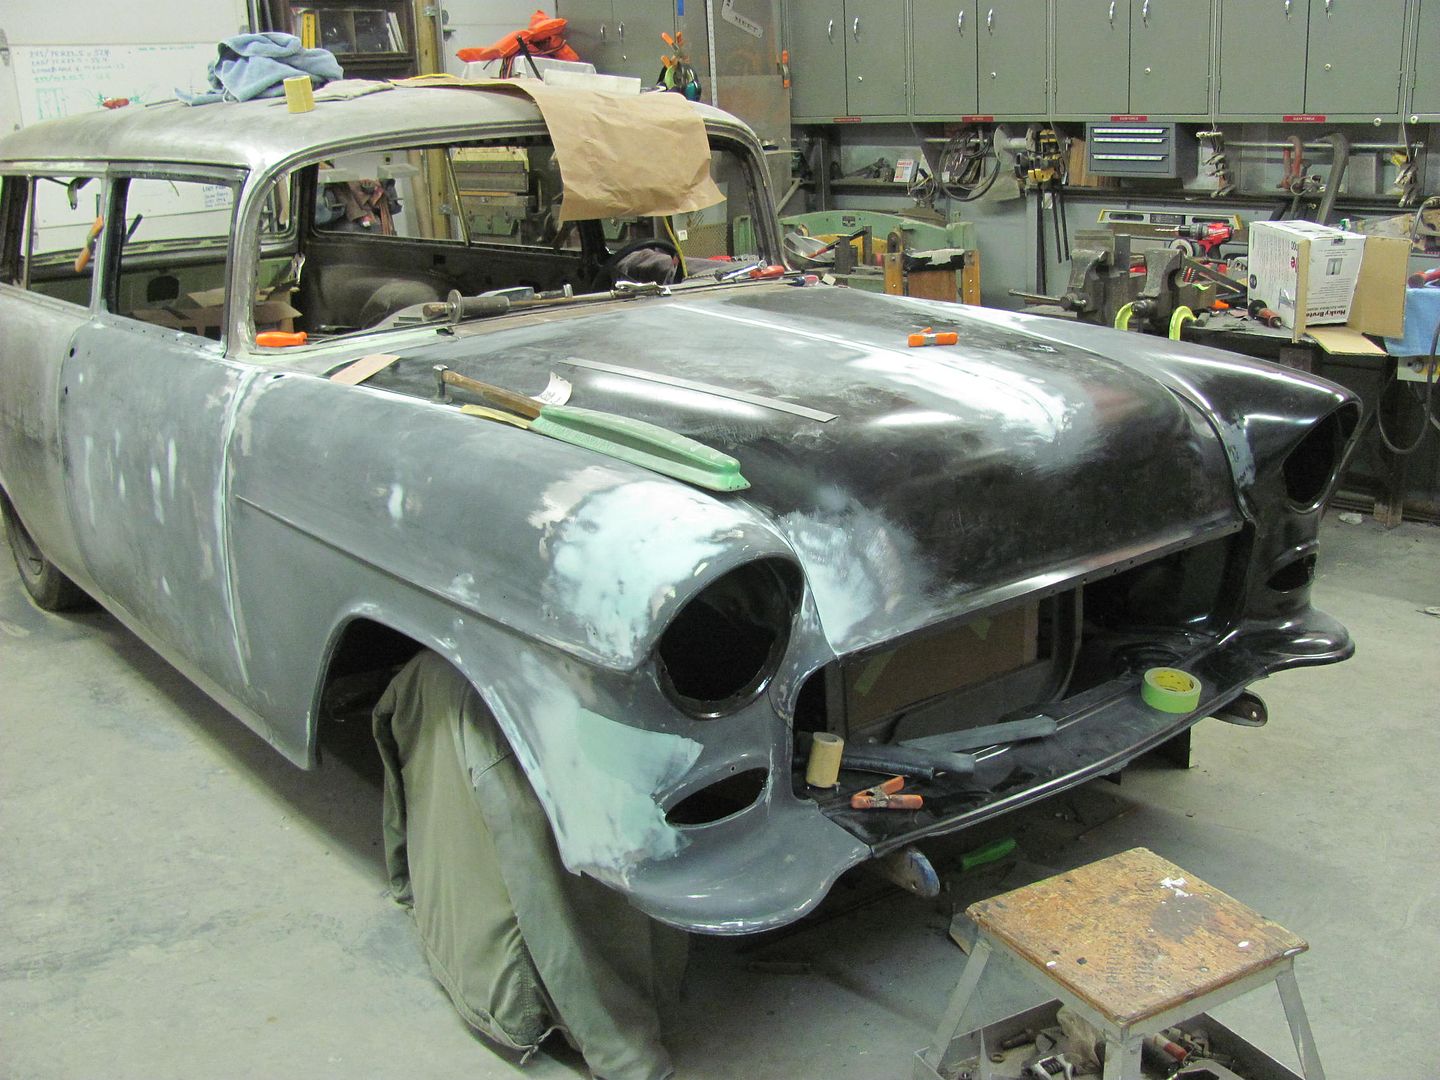
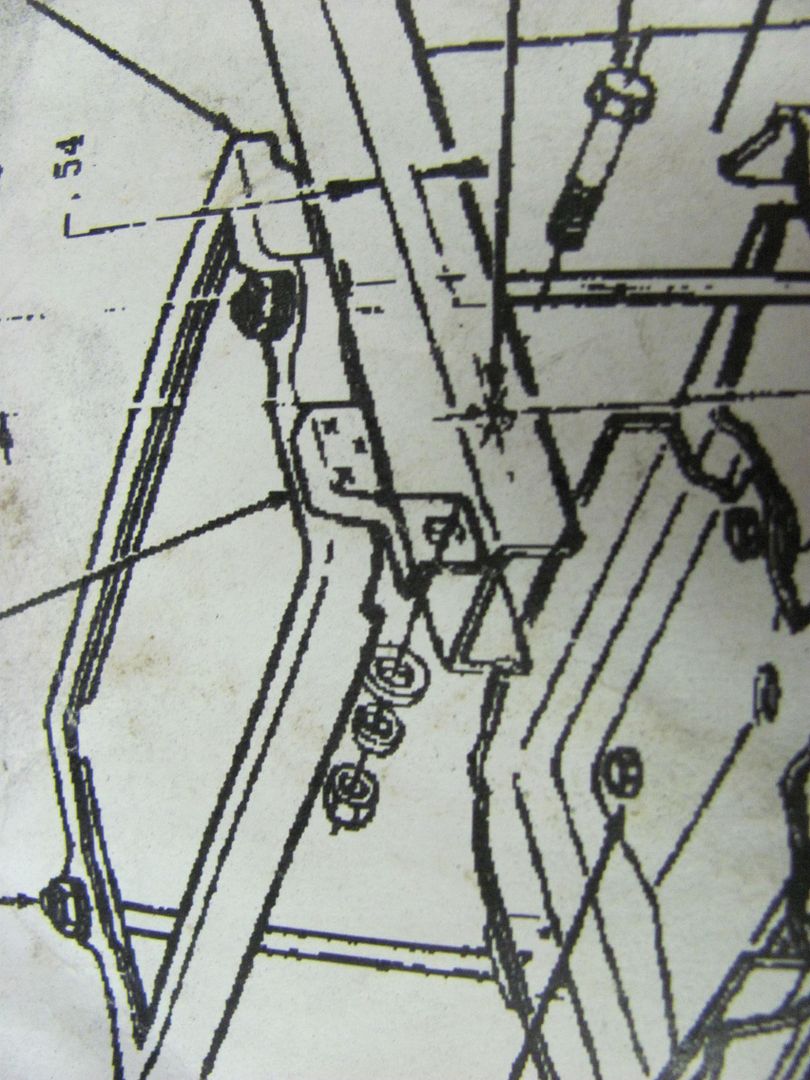
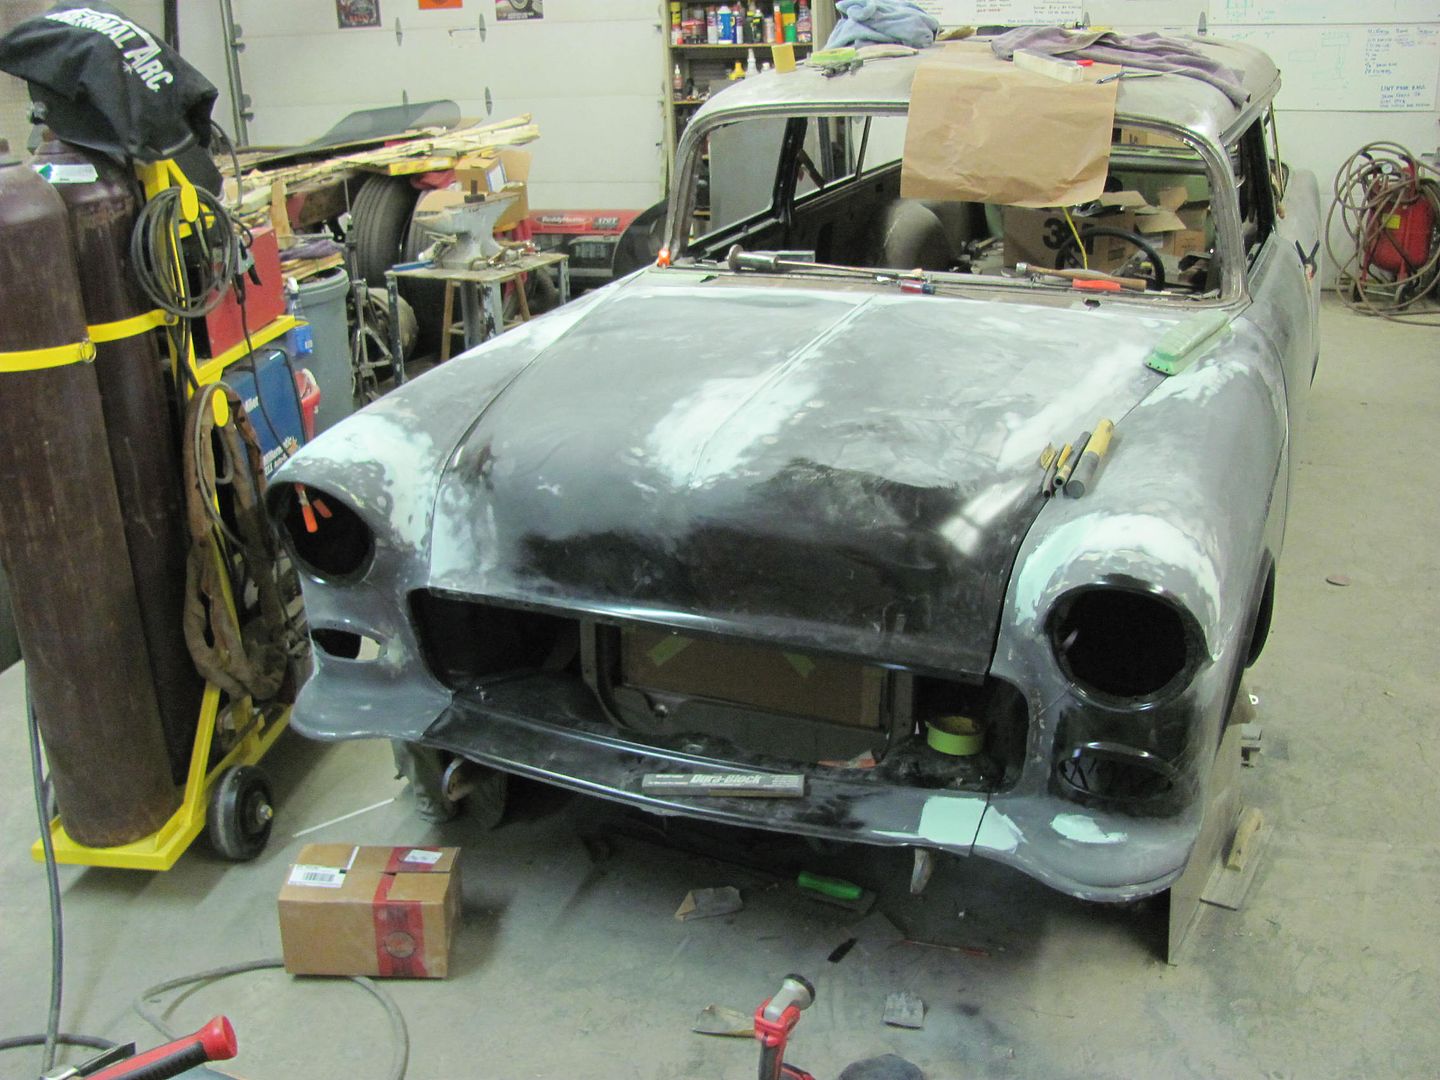
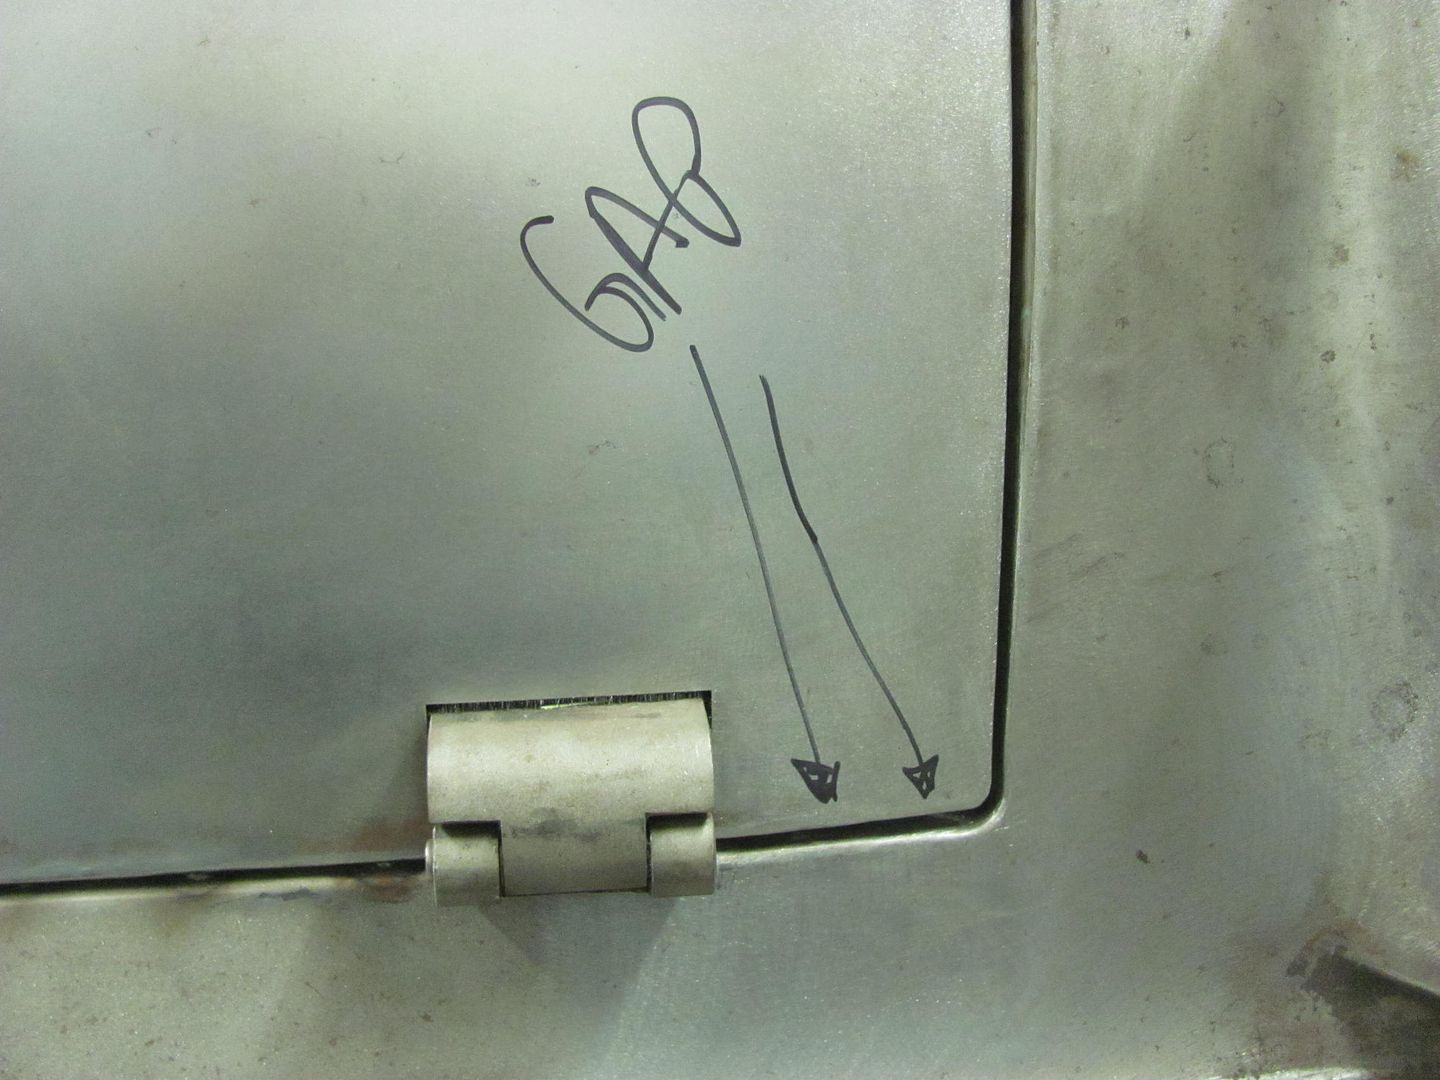
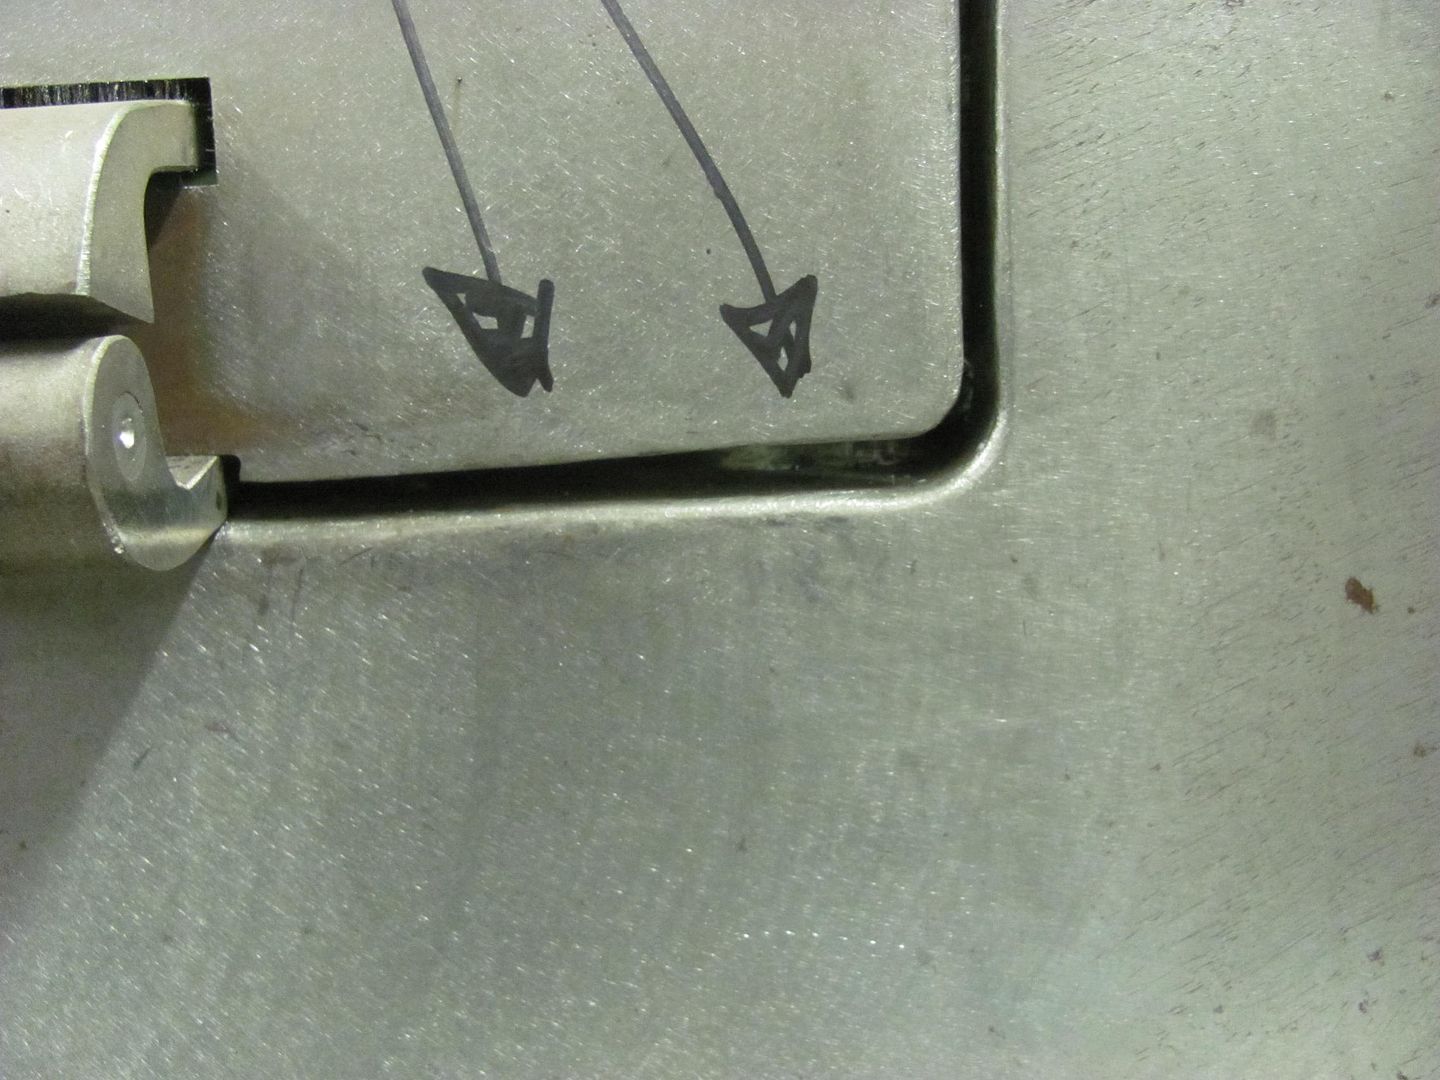
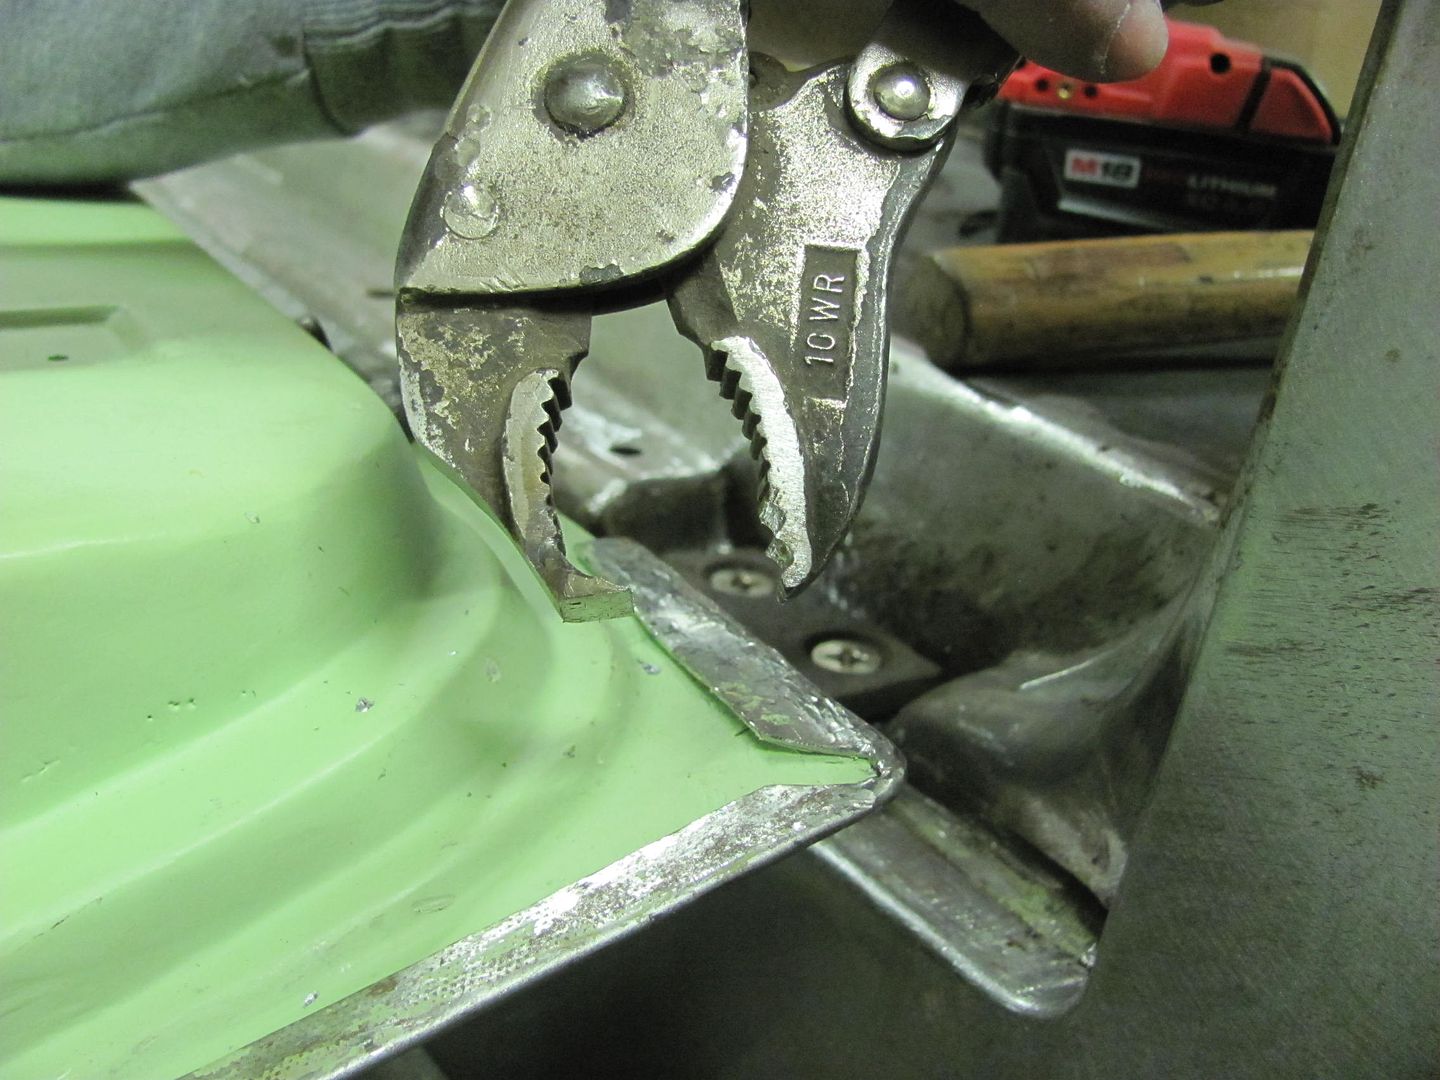
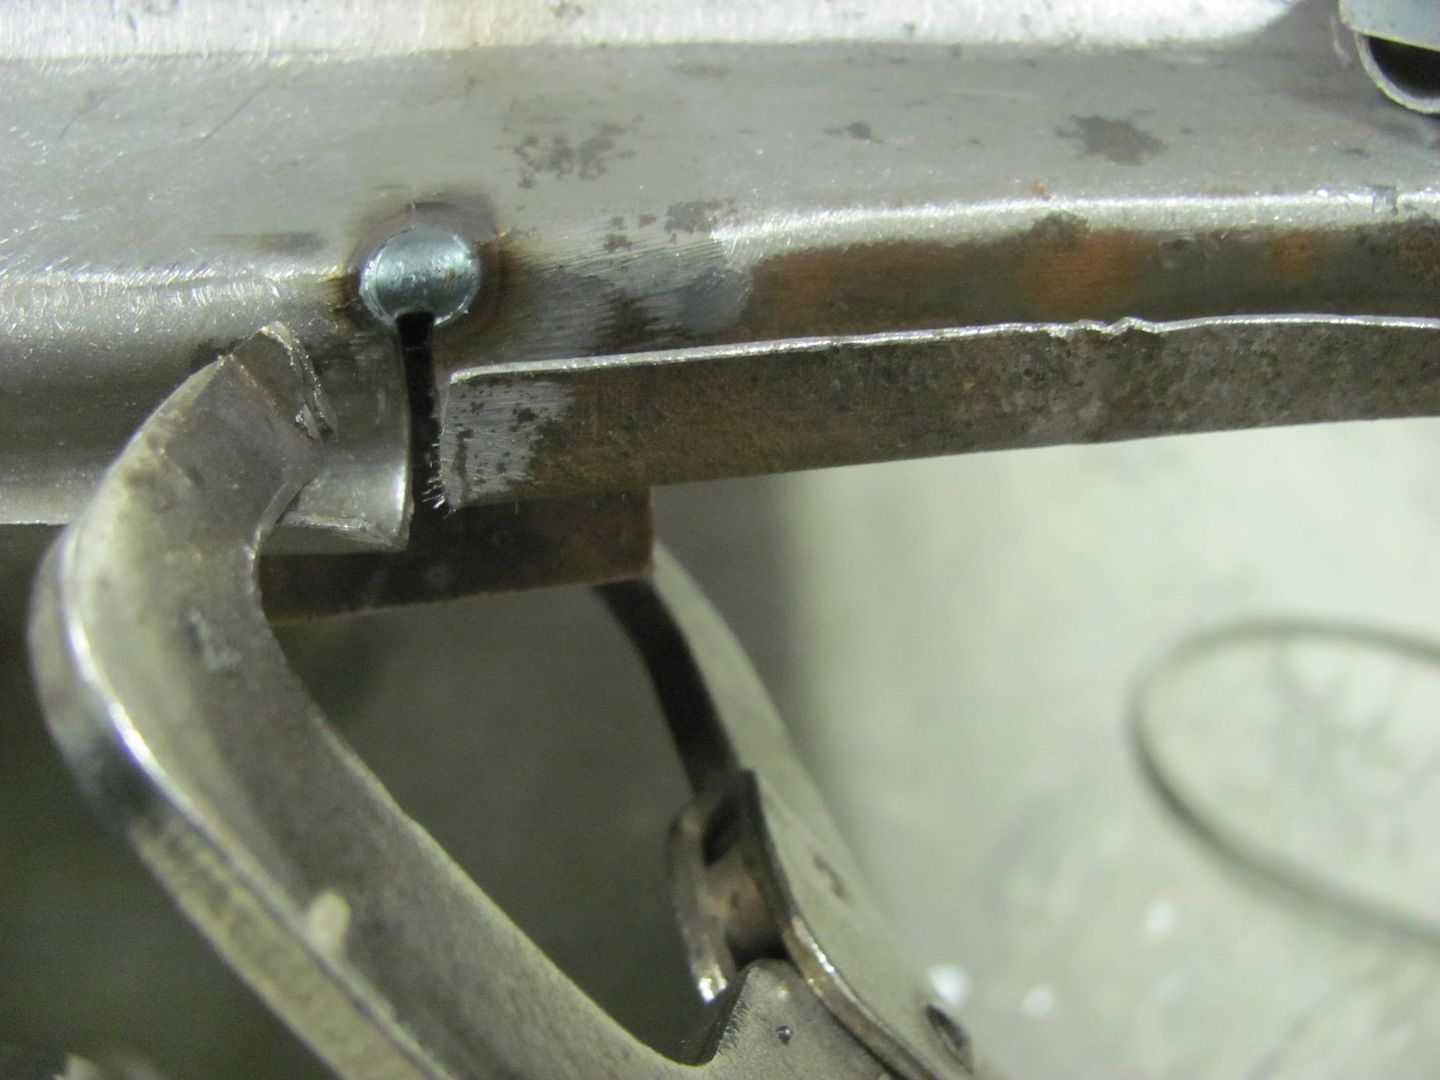
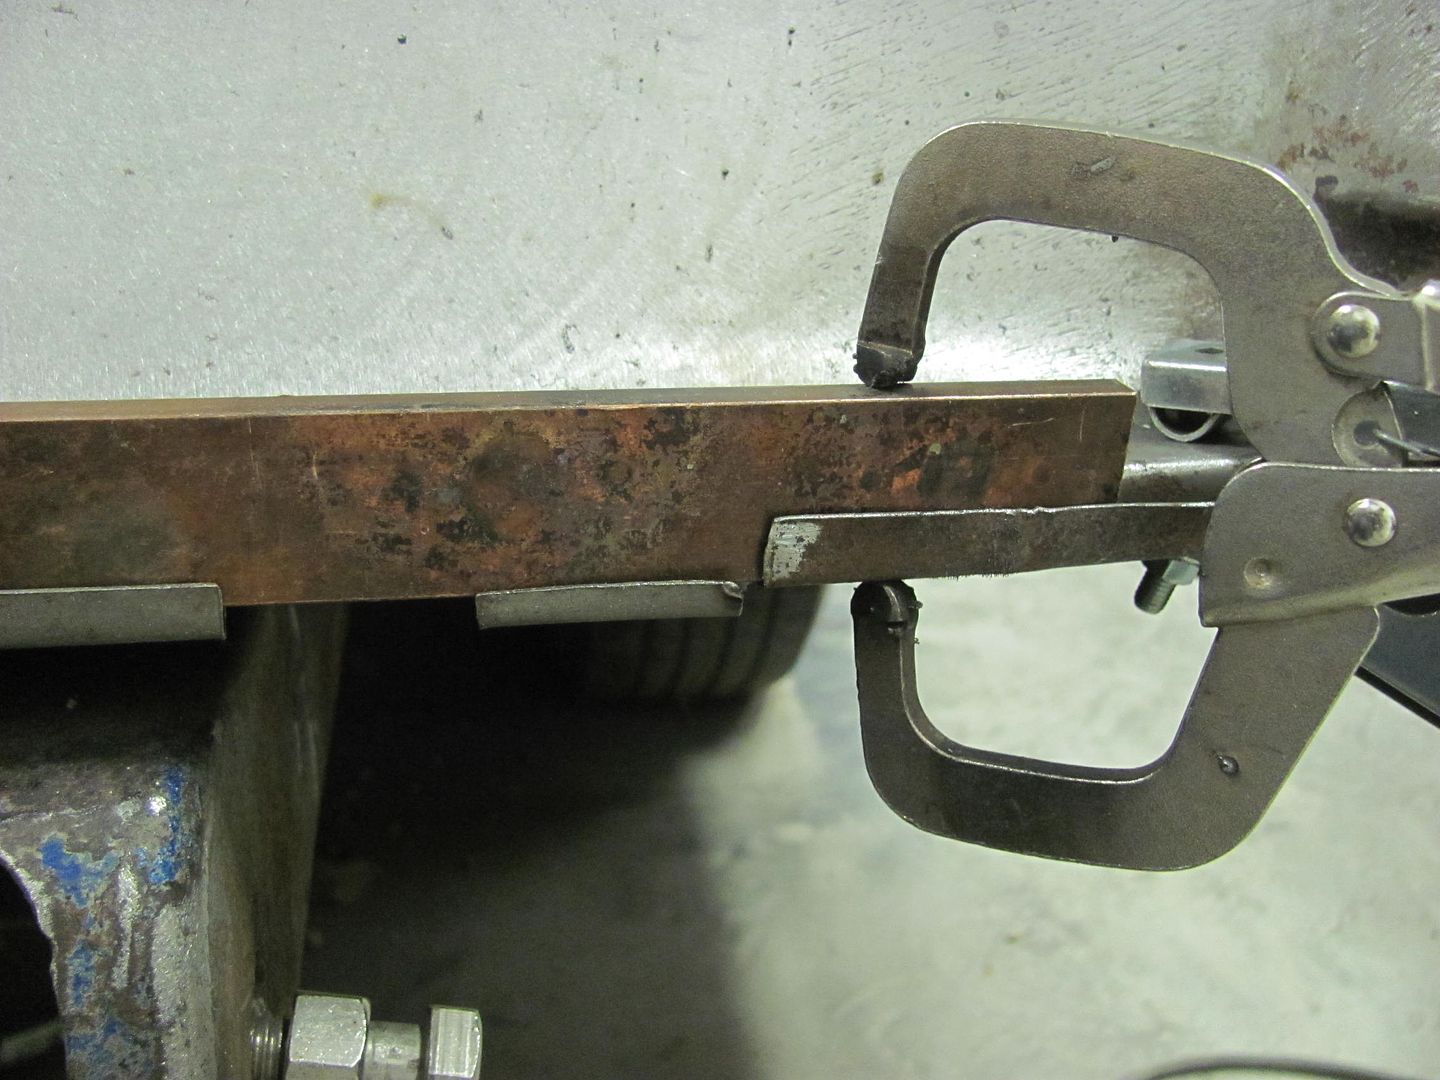
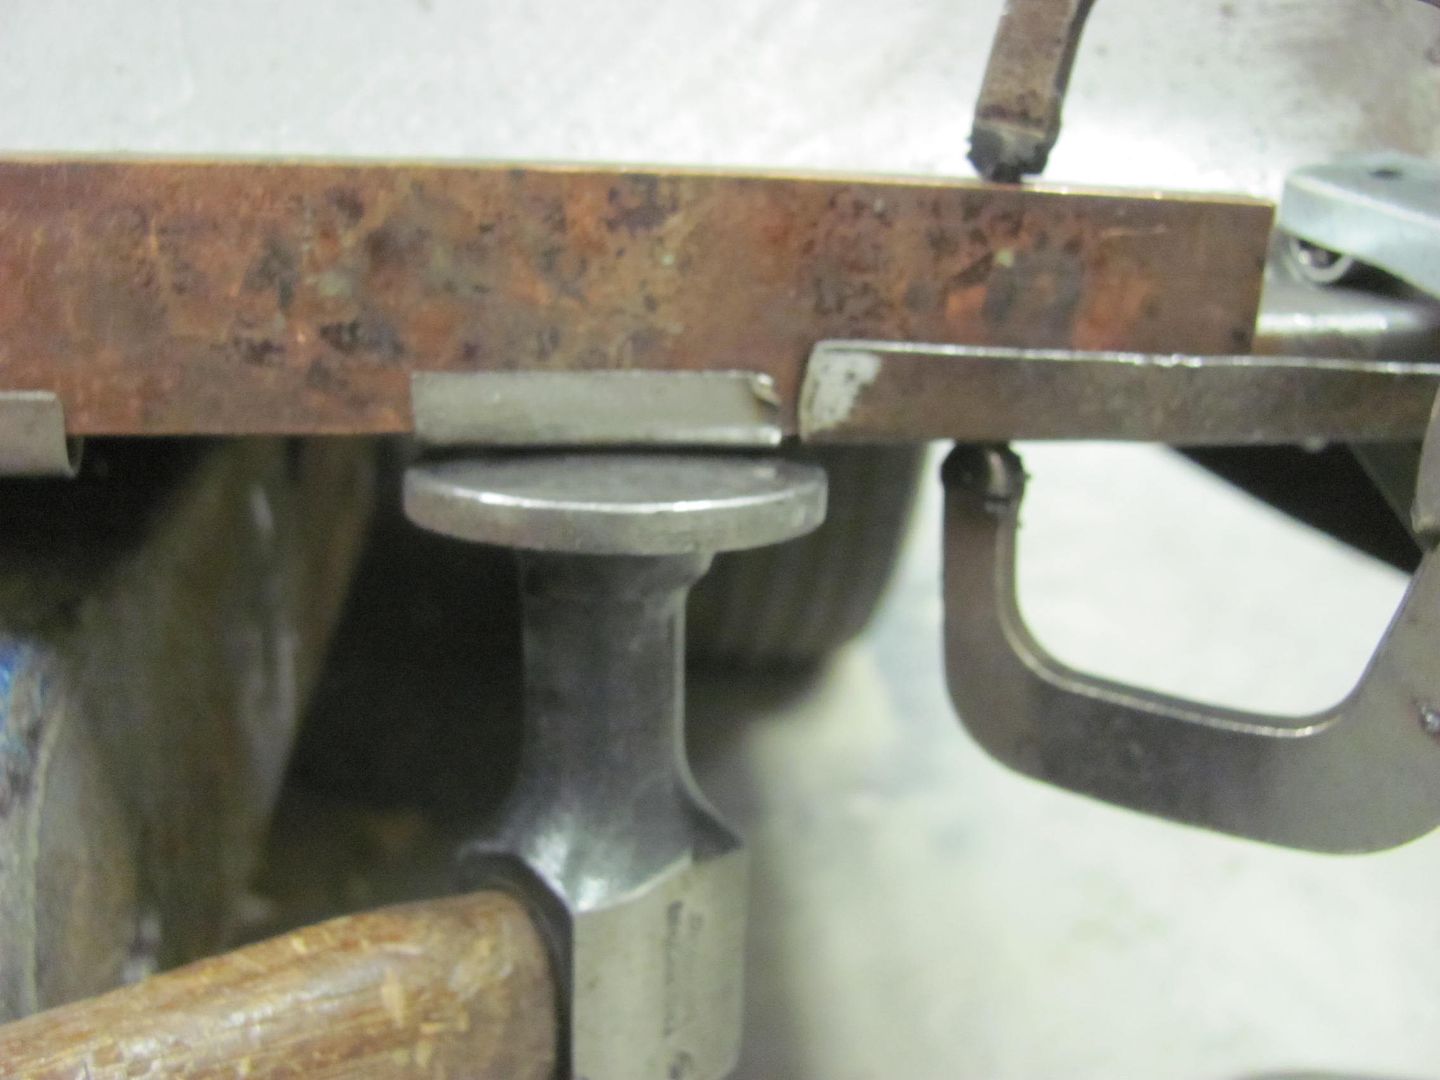
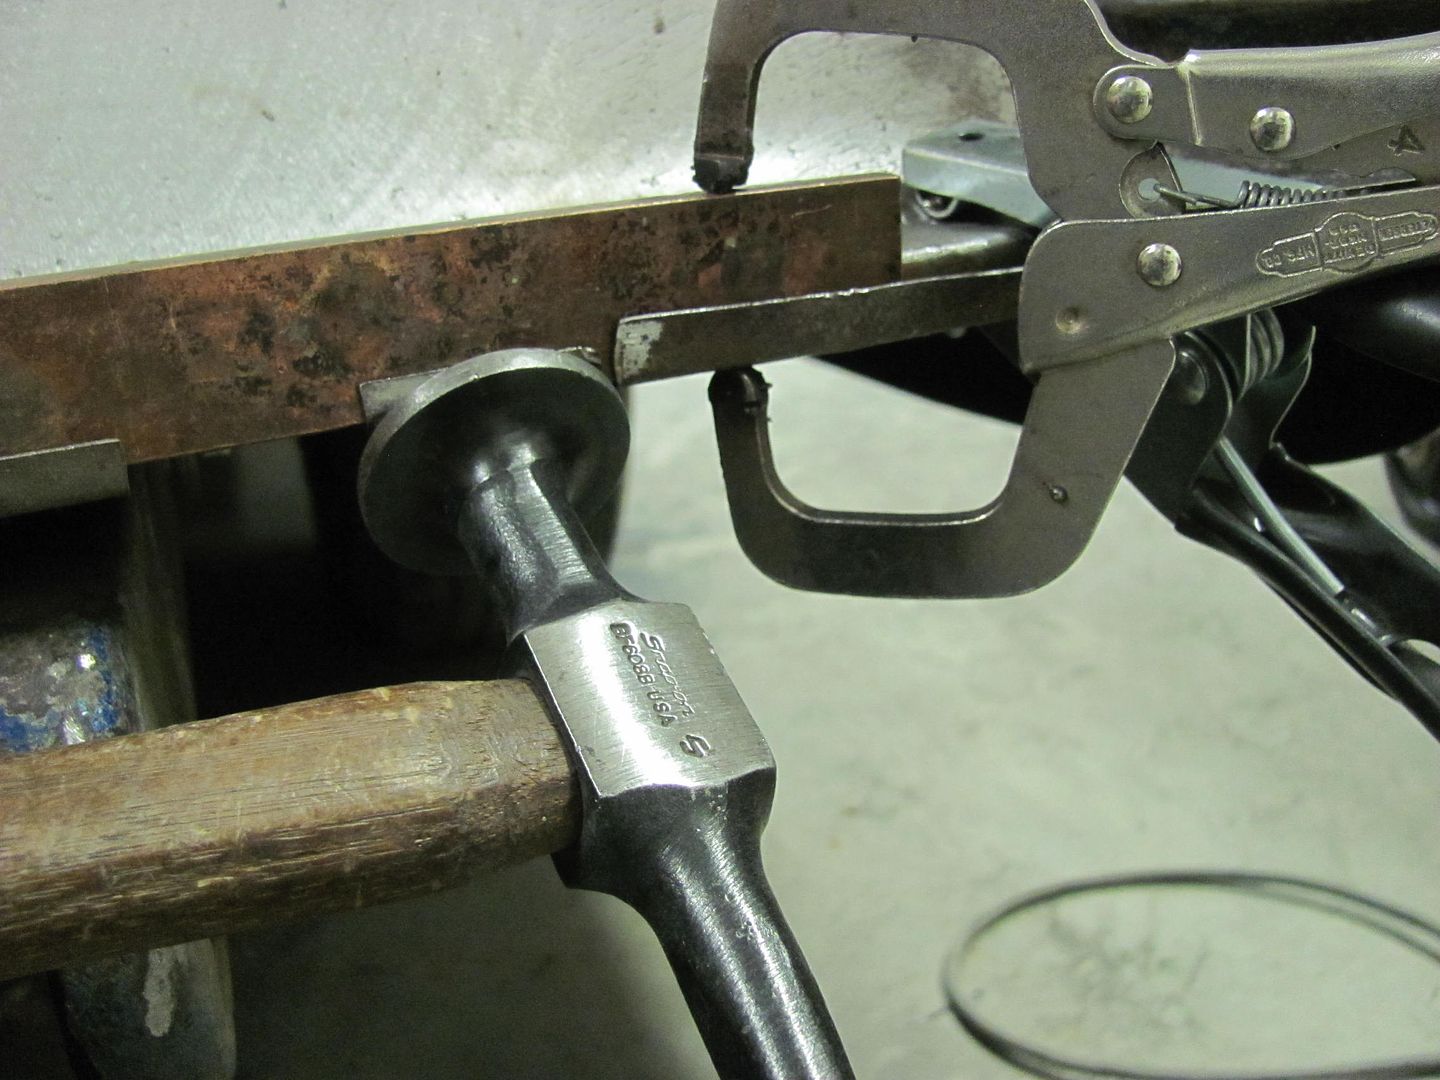
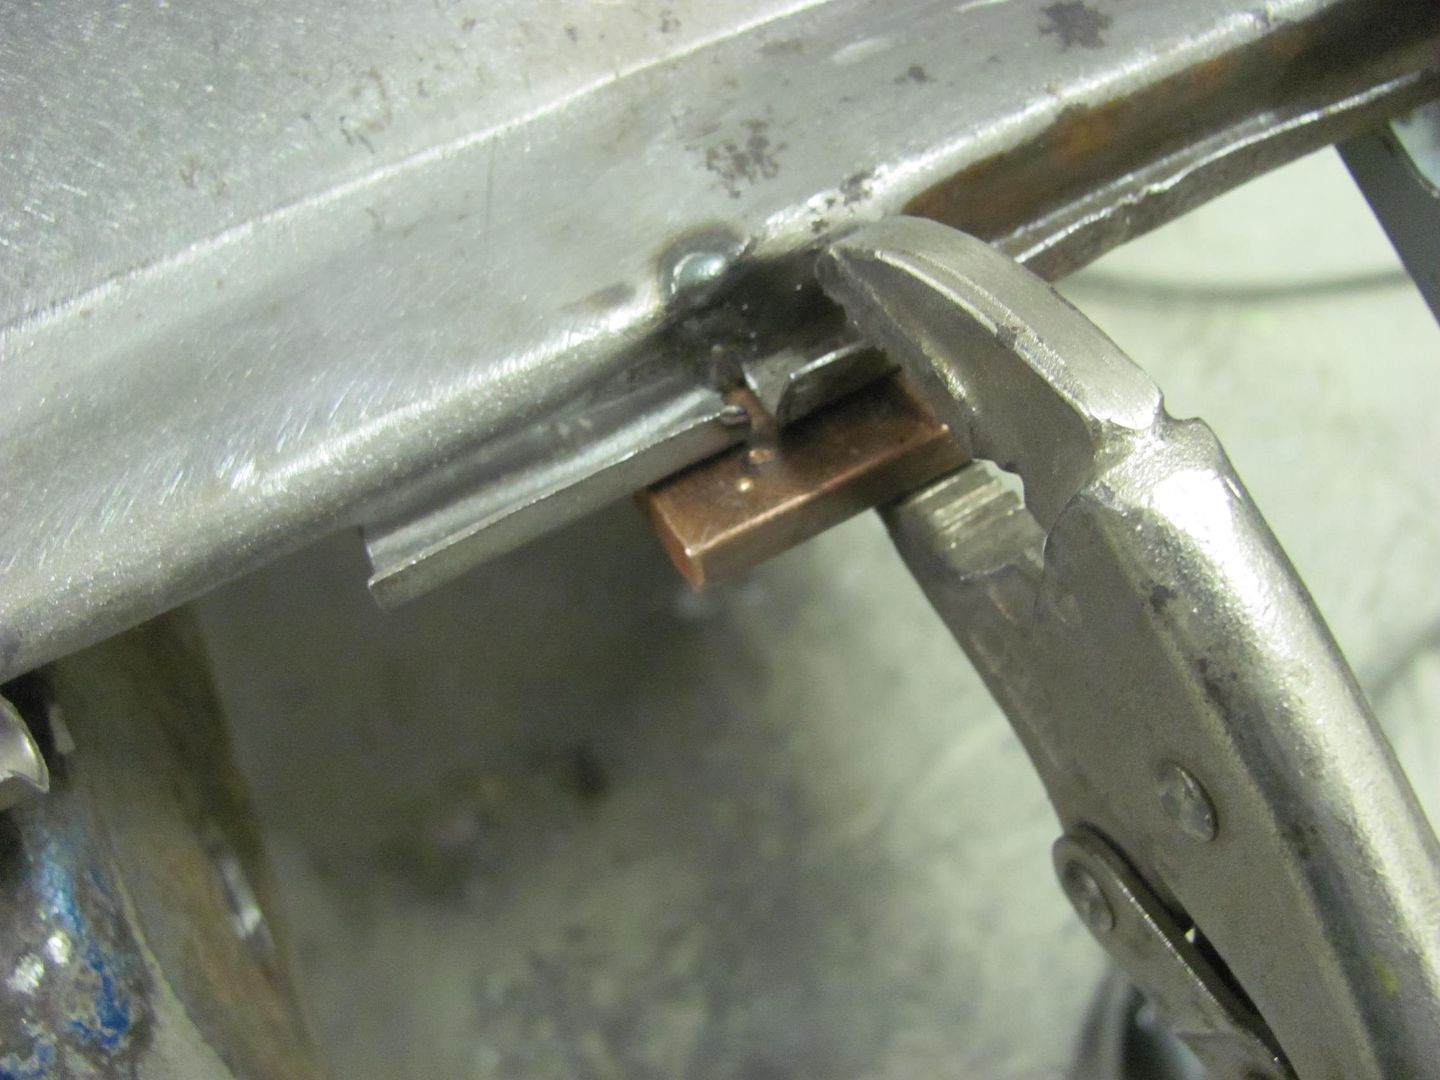
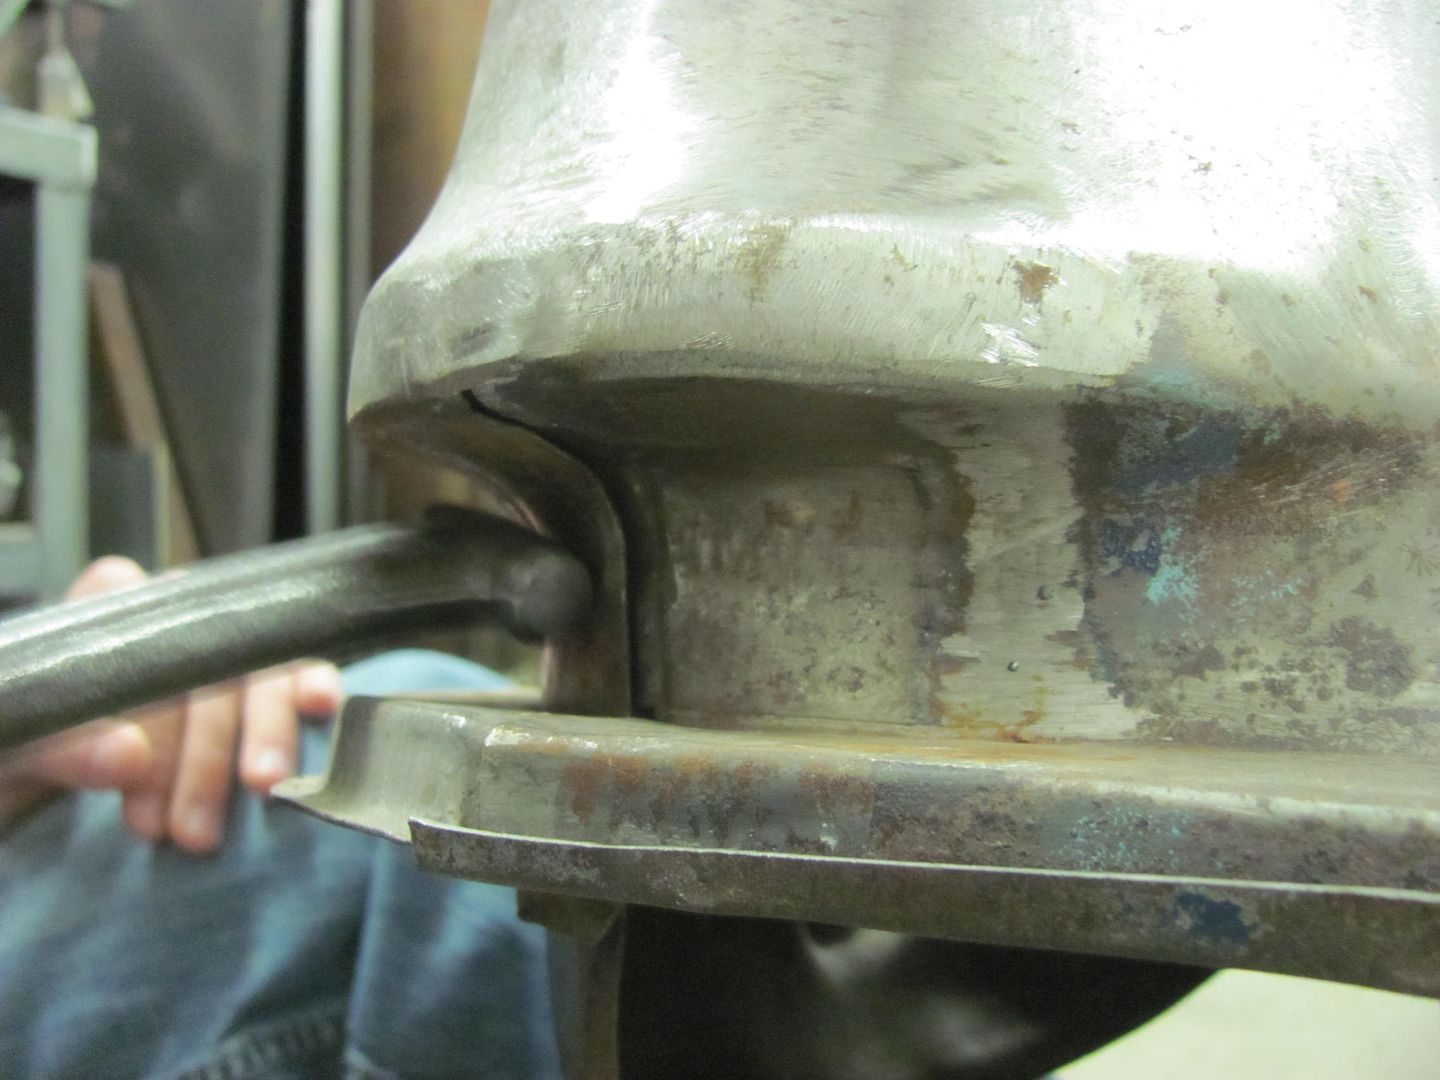
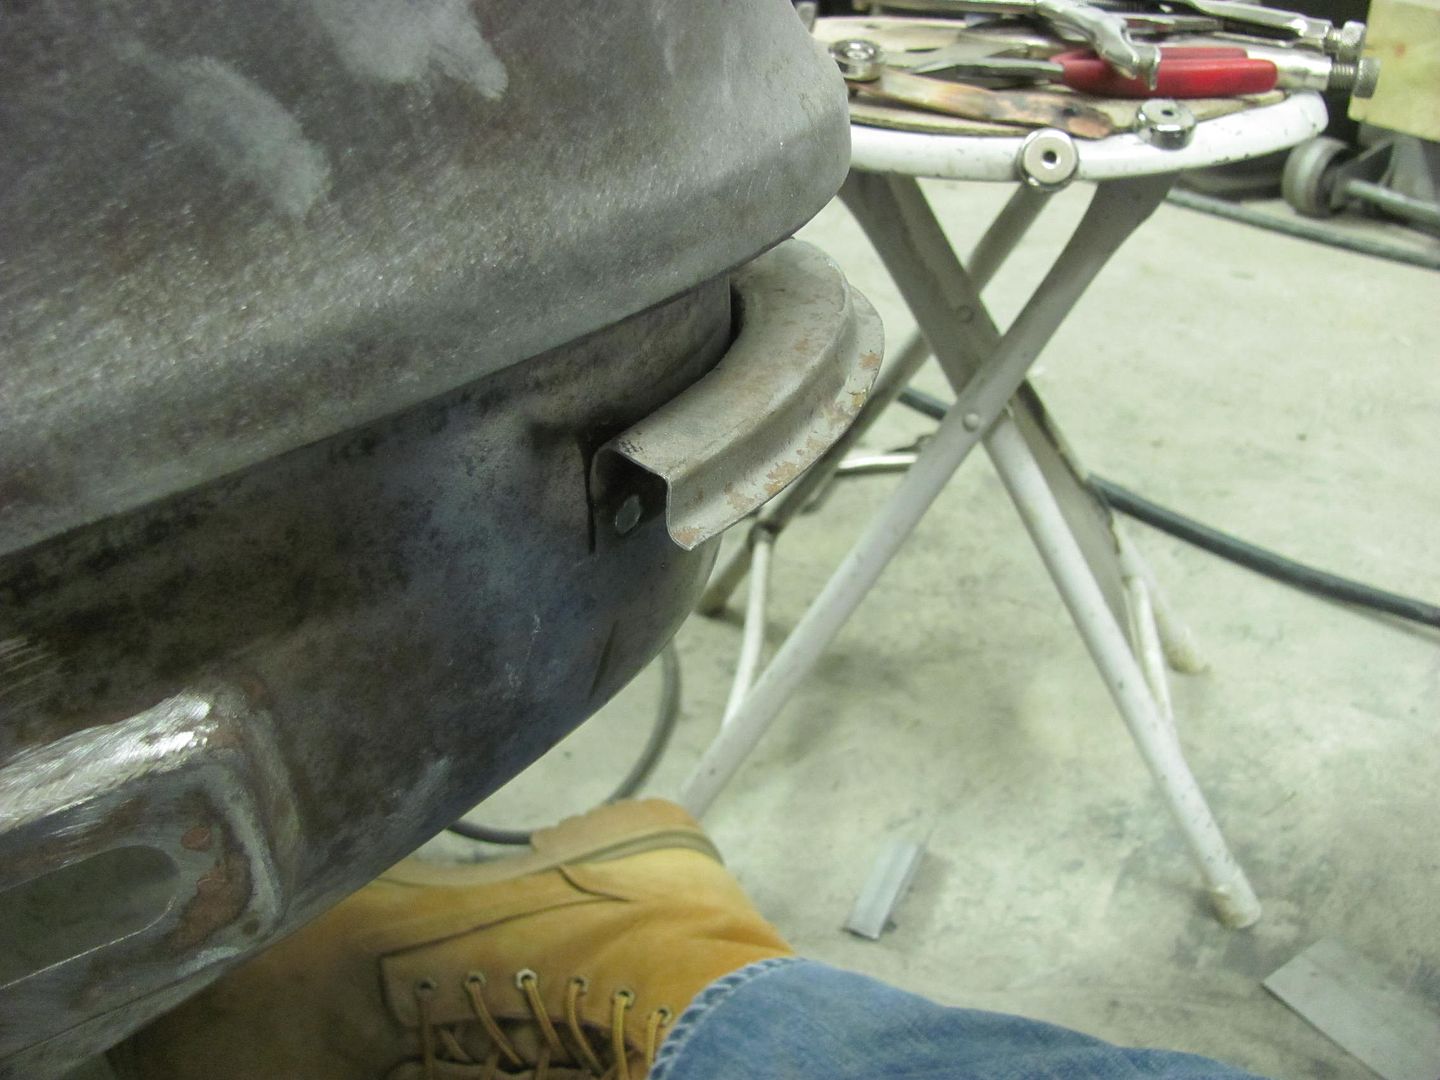
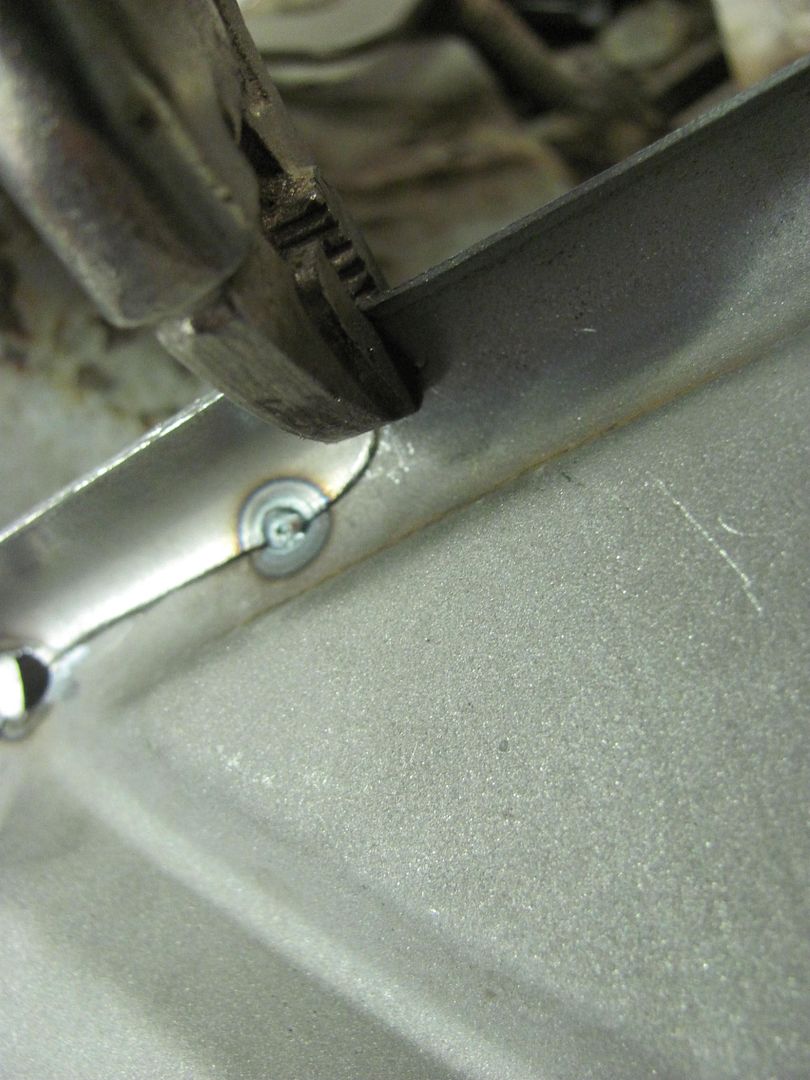
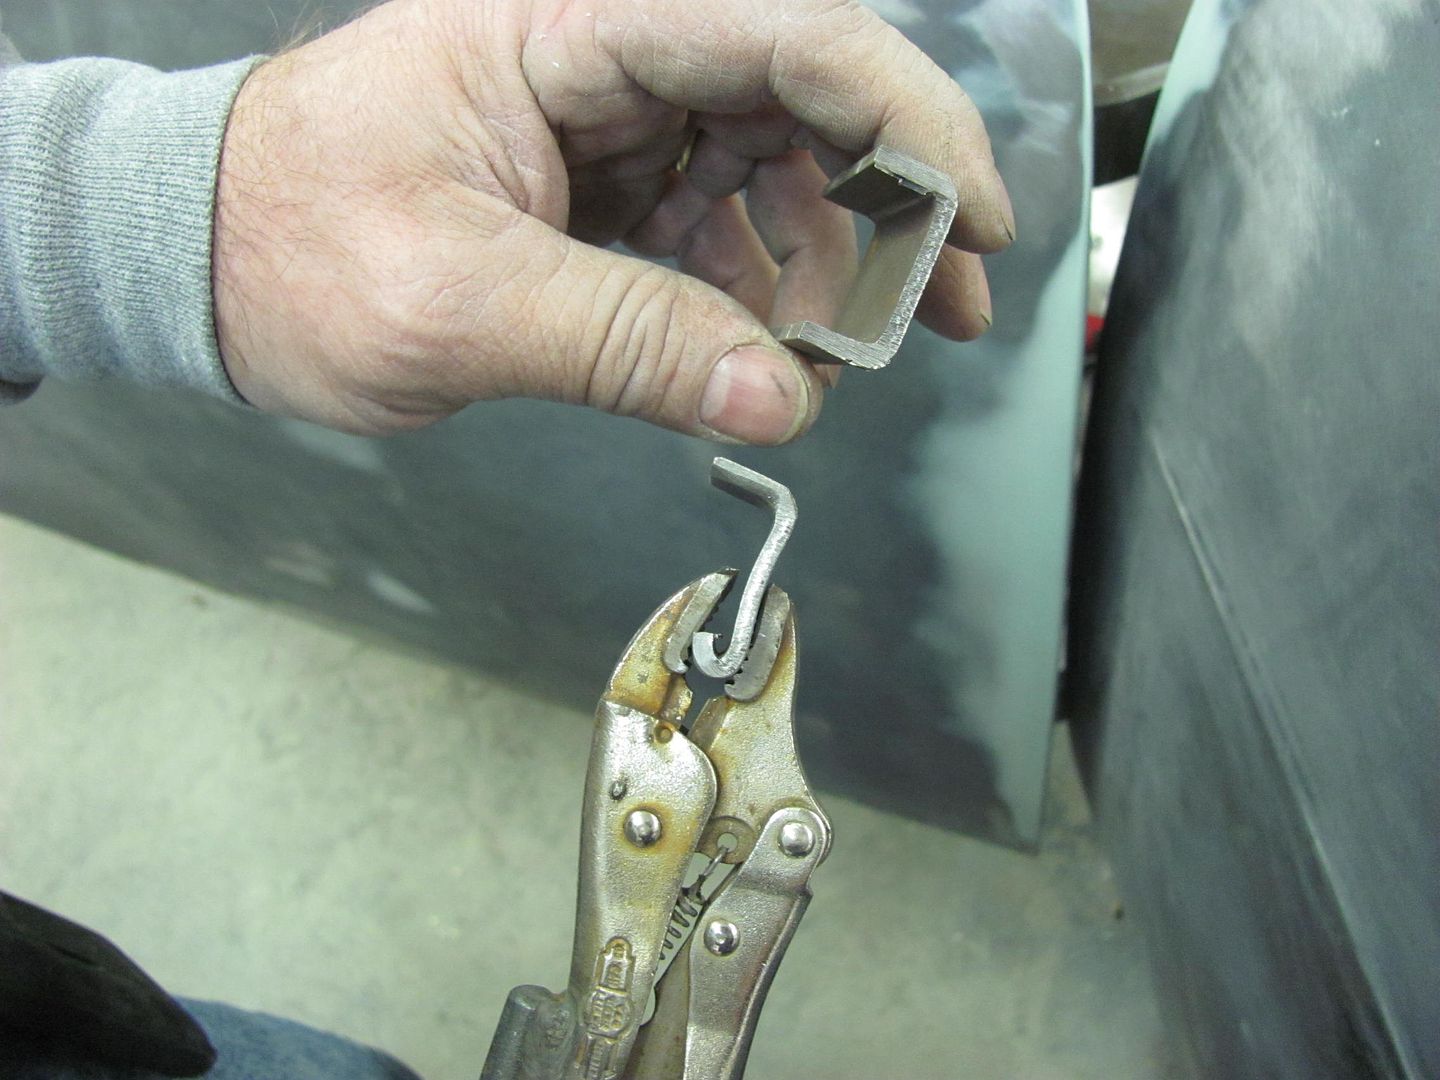
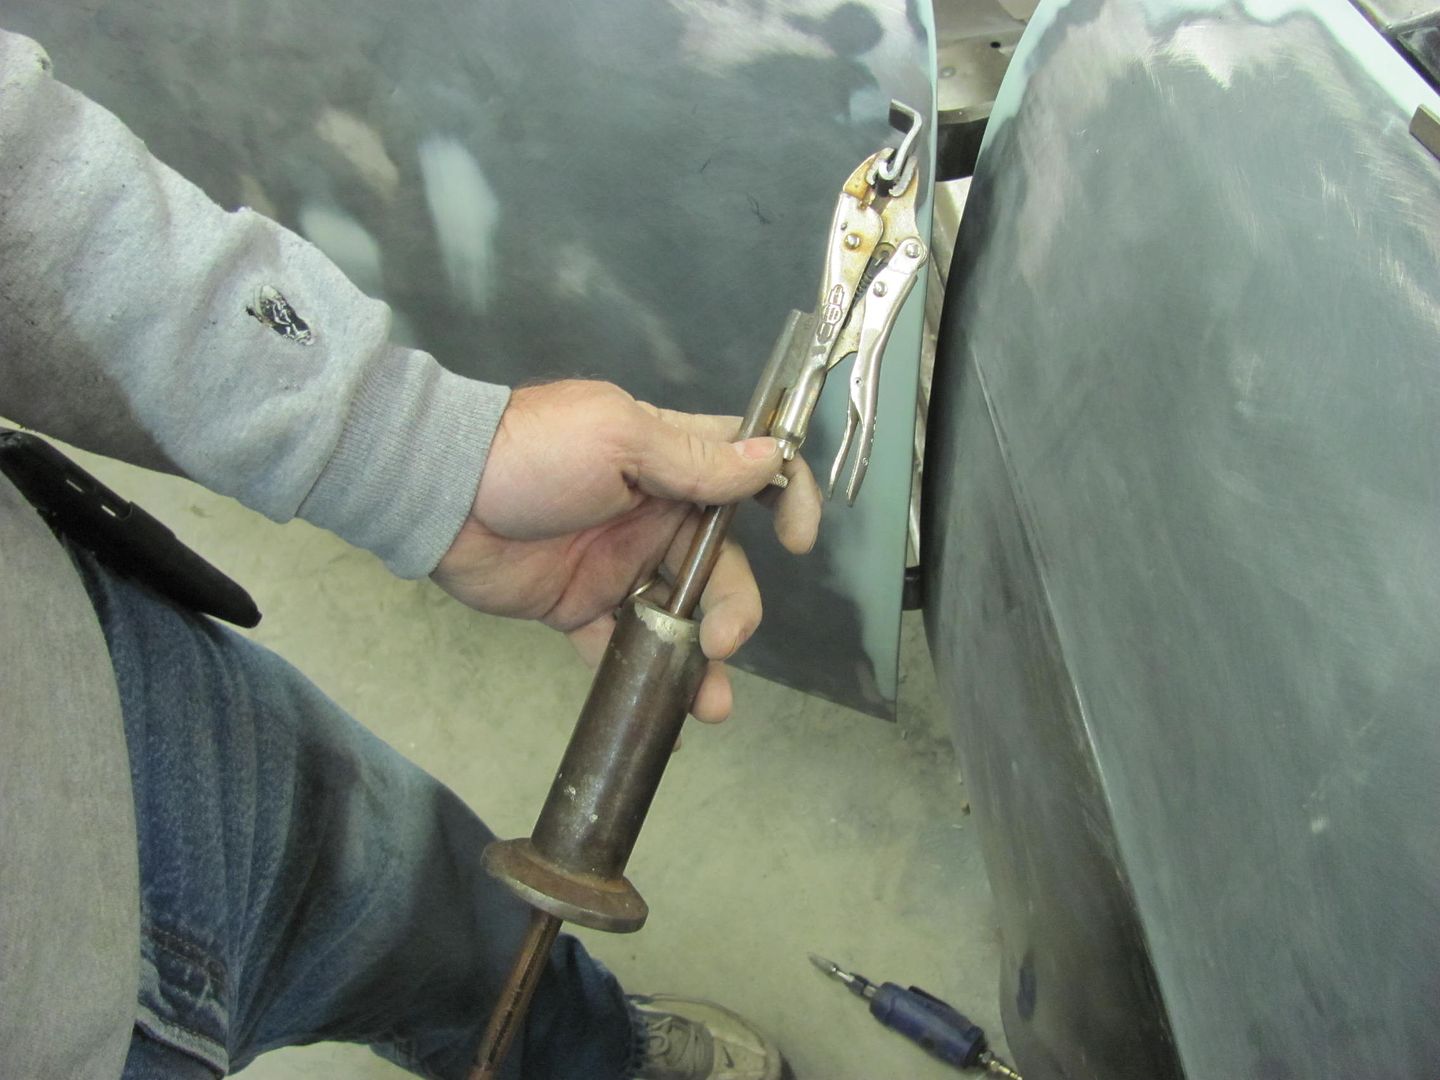
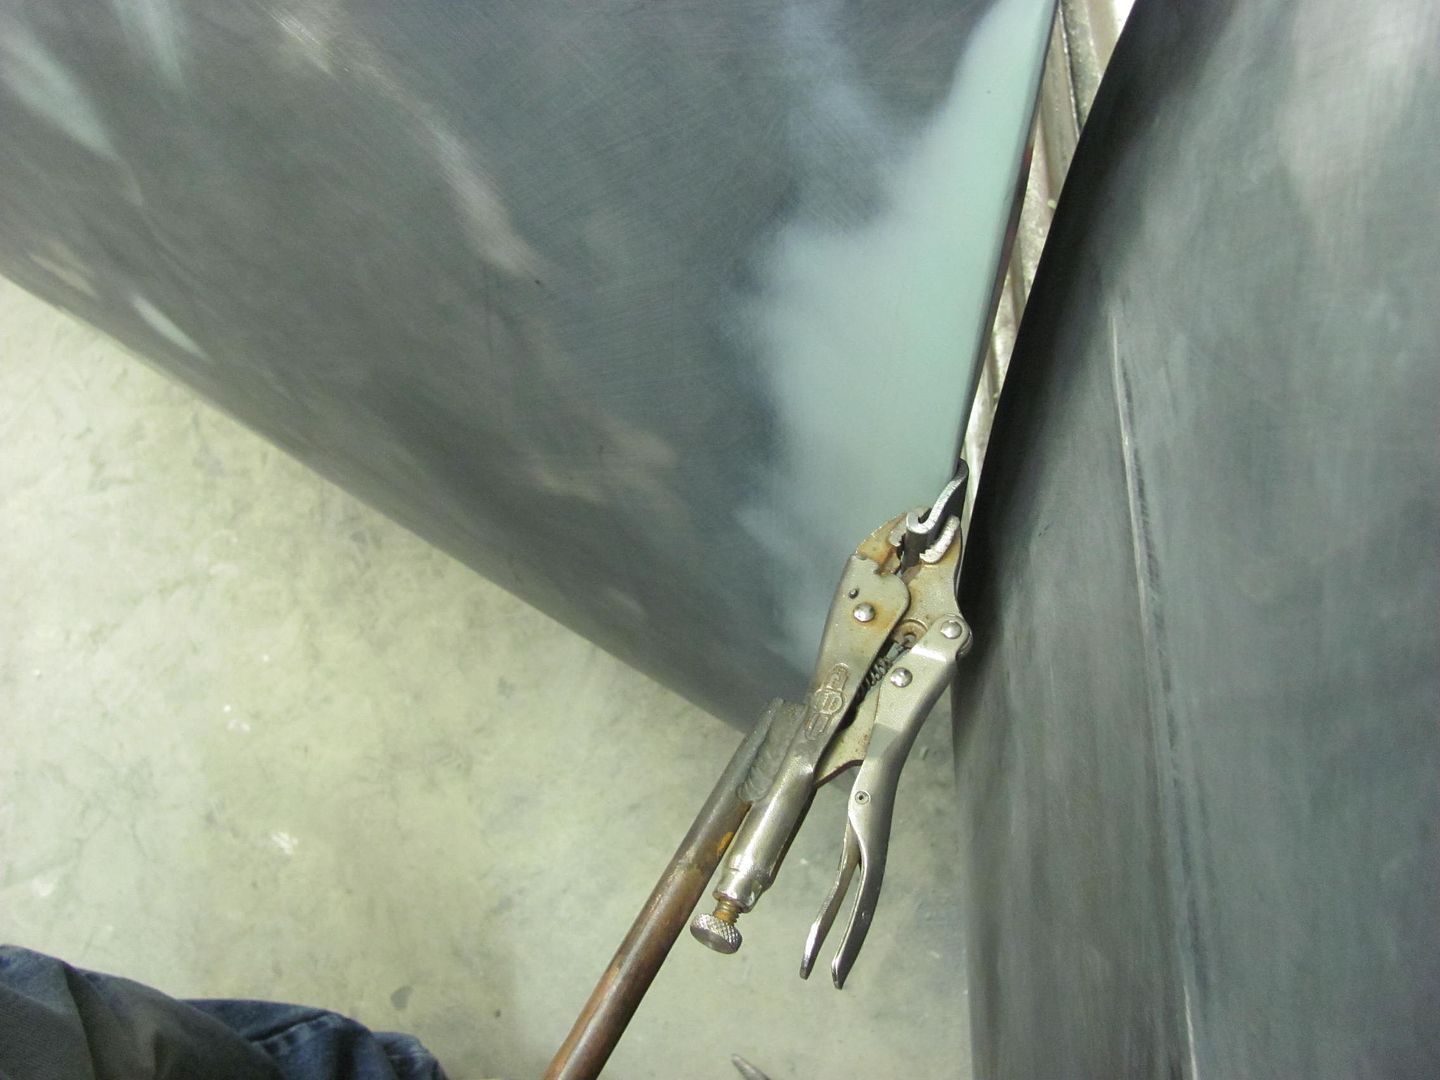
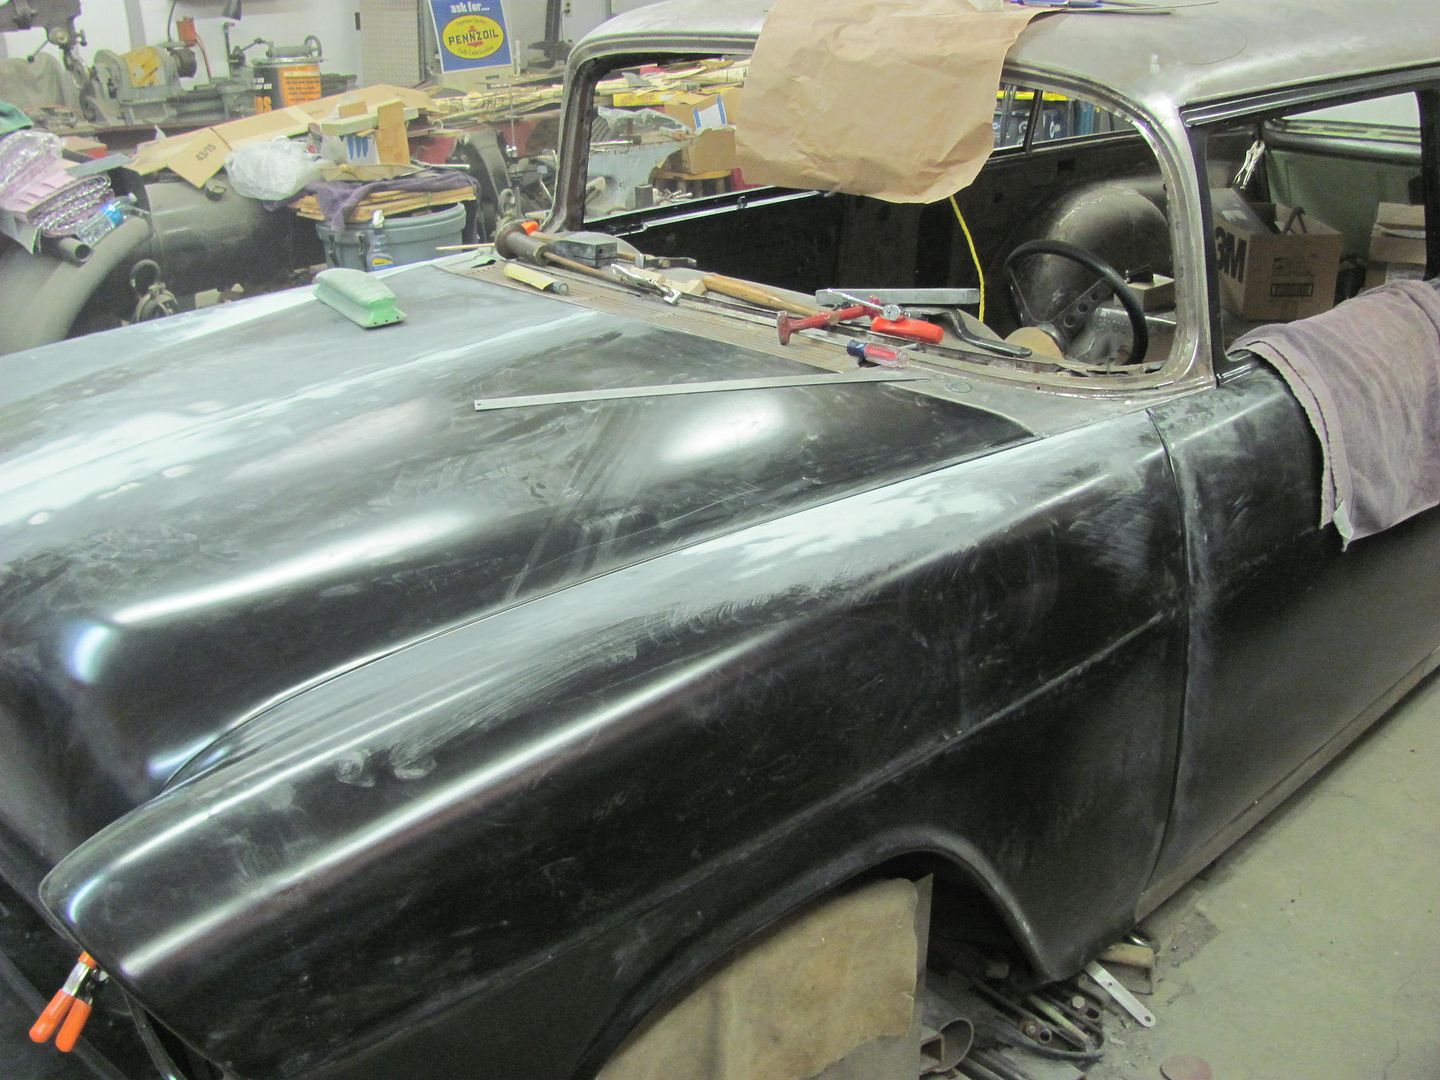
While he welded away, I turned my attention to the front end. The passenger door had a bit of a tight spot to the rear edge of the fender while opening.. Using a hack saw blade as a "feeler gauge", it was tight in one area. To help out the situation, time for another tool. I have a dent puller with a small pair of vise grips permanently attached, so we just need an adapter kit...


This was some leftover square tubing scraps...


Picture%202101.jpg


Picture%202100.jpg


In use..


Picture%202102.jpg


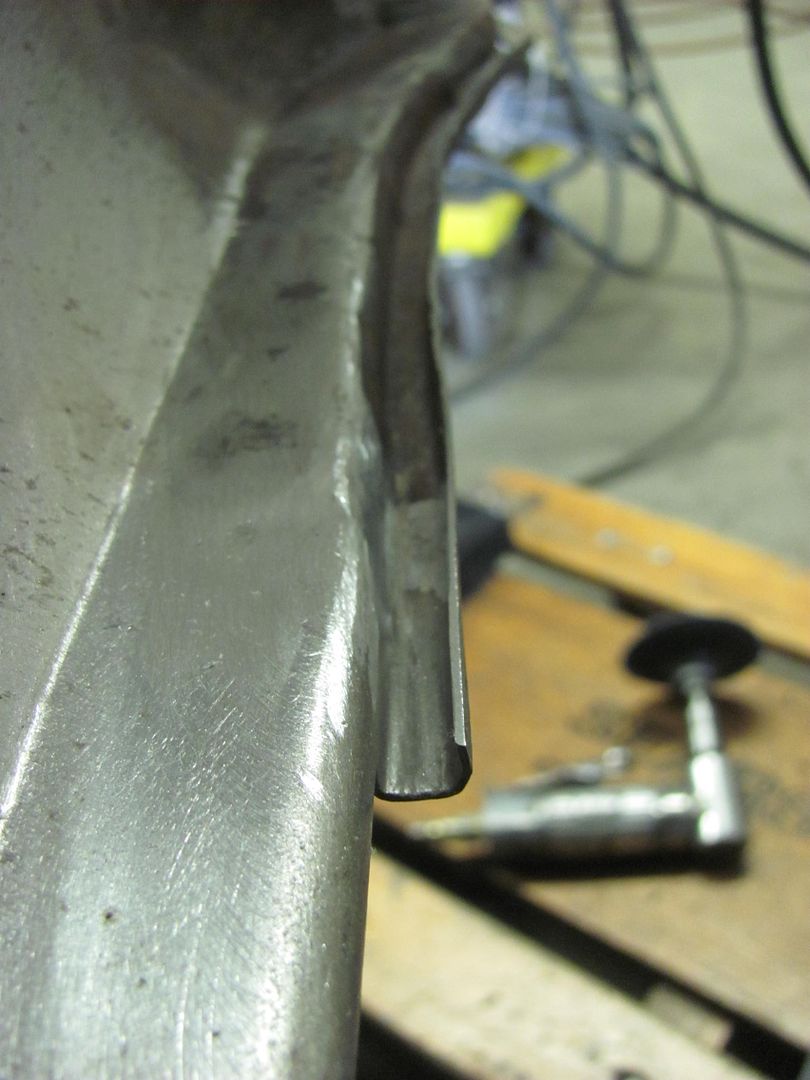
After the pulling effort, the tight gap was well over two HSB thicknesses.


Picture%202111.jpg


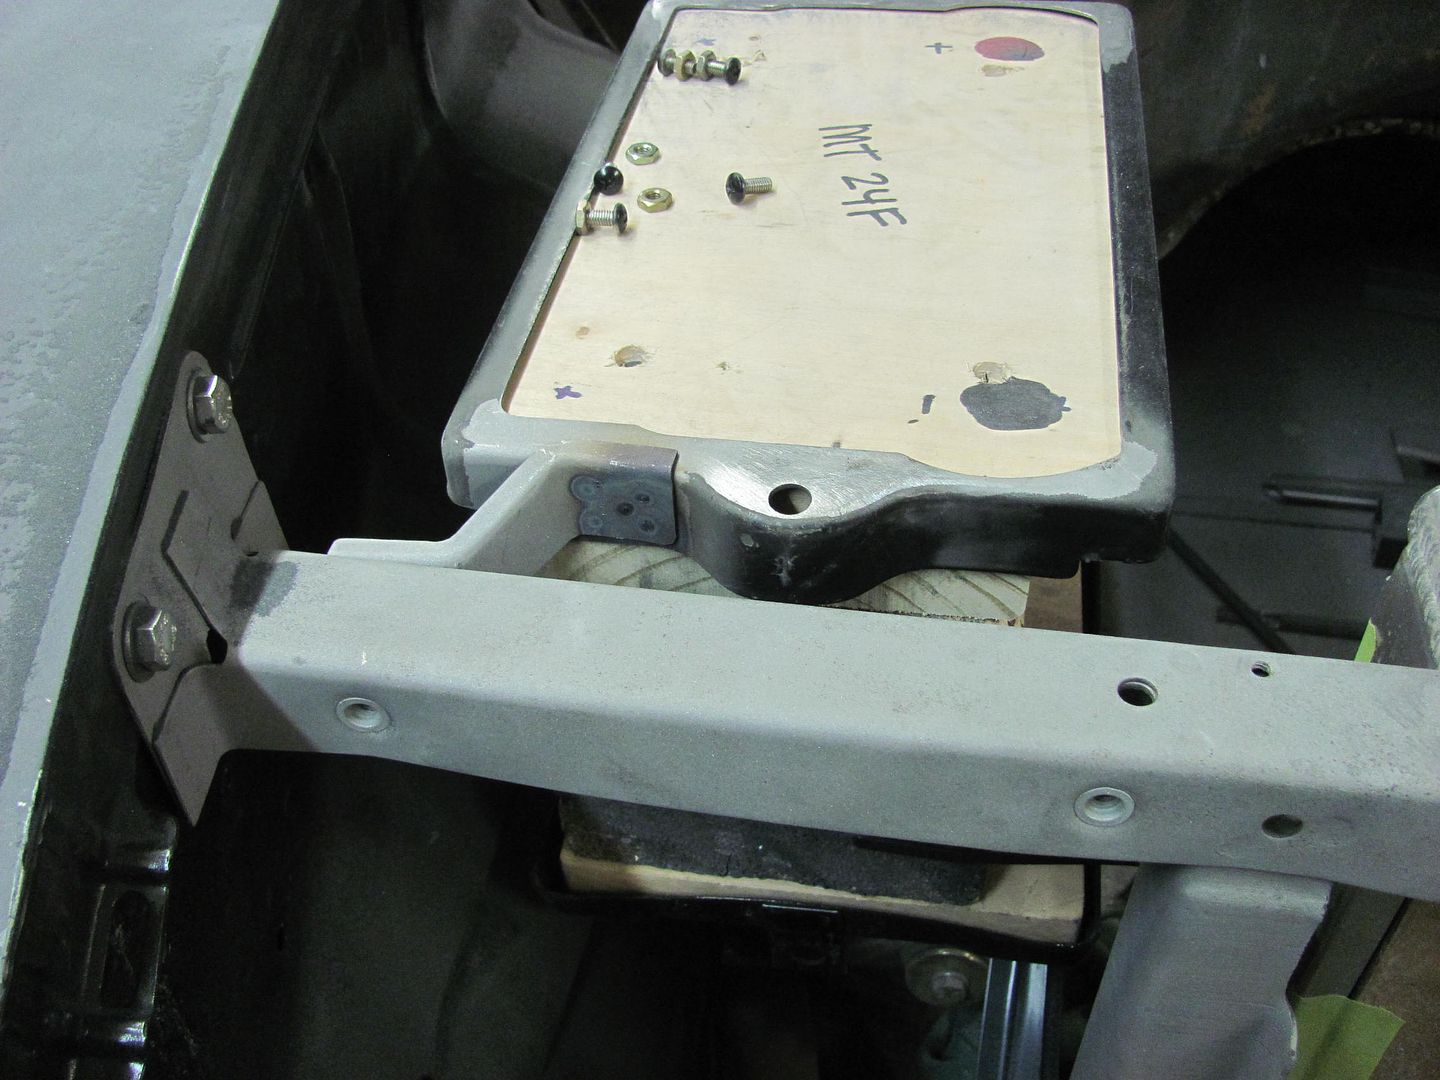
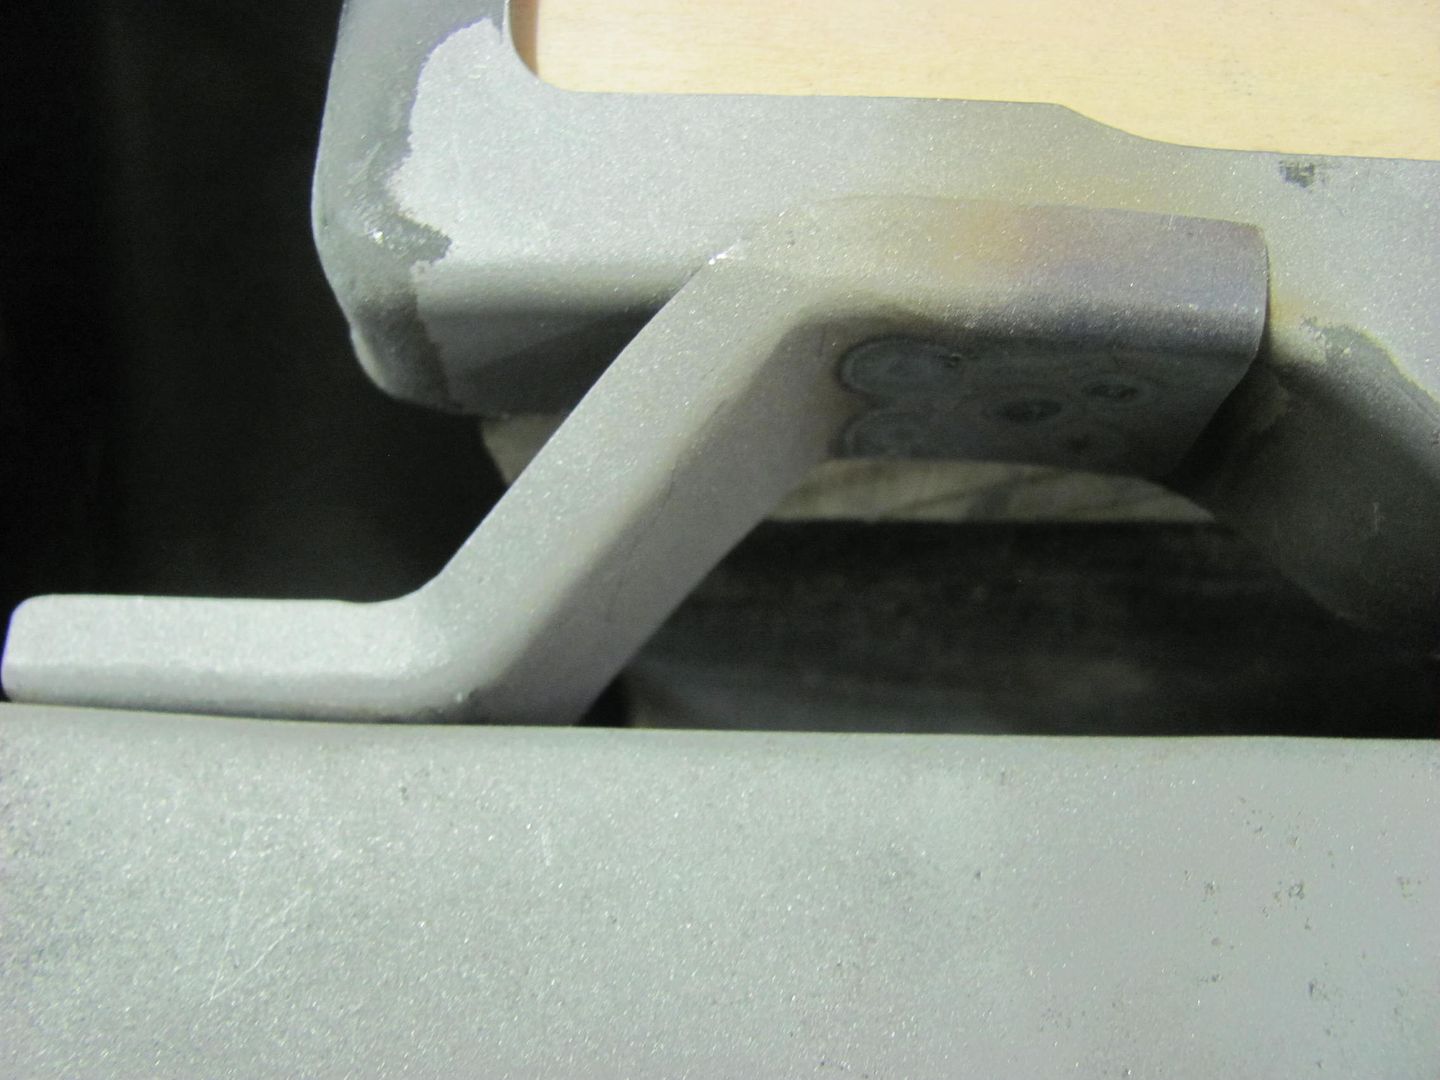
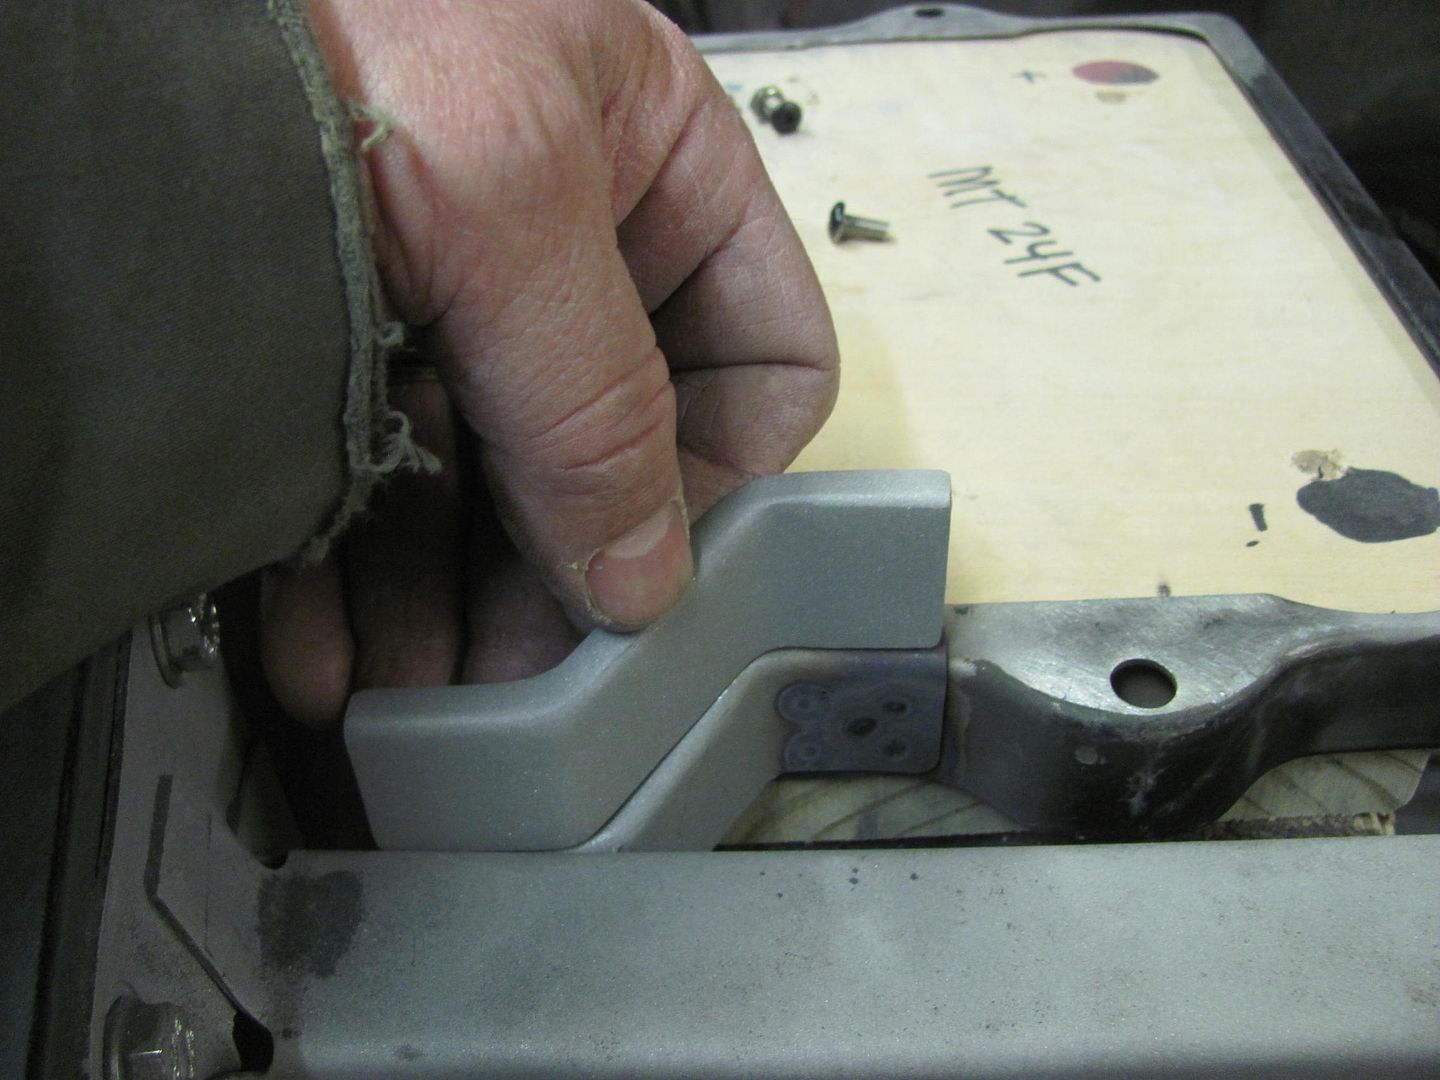
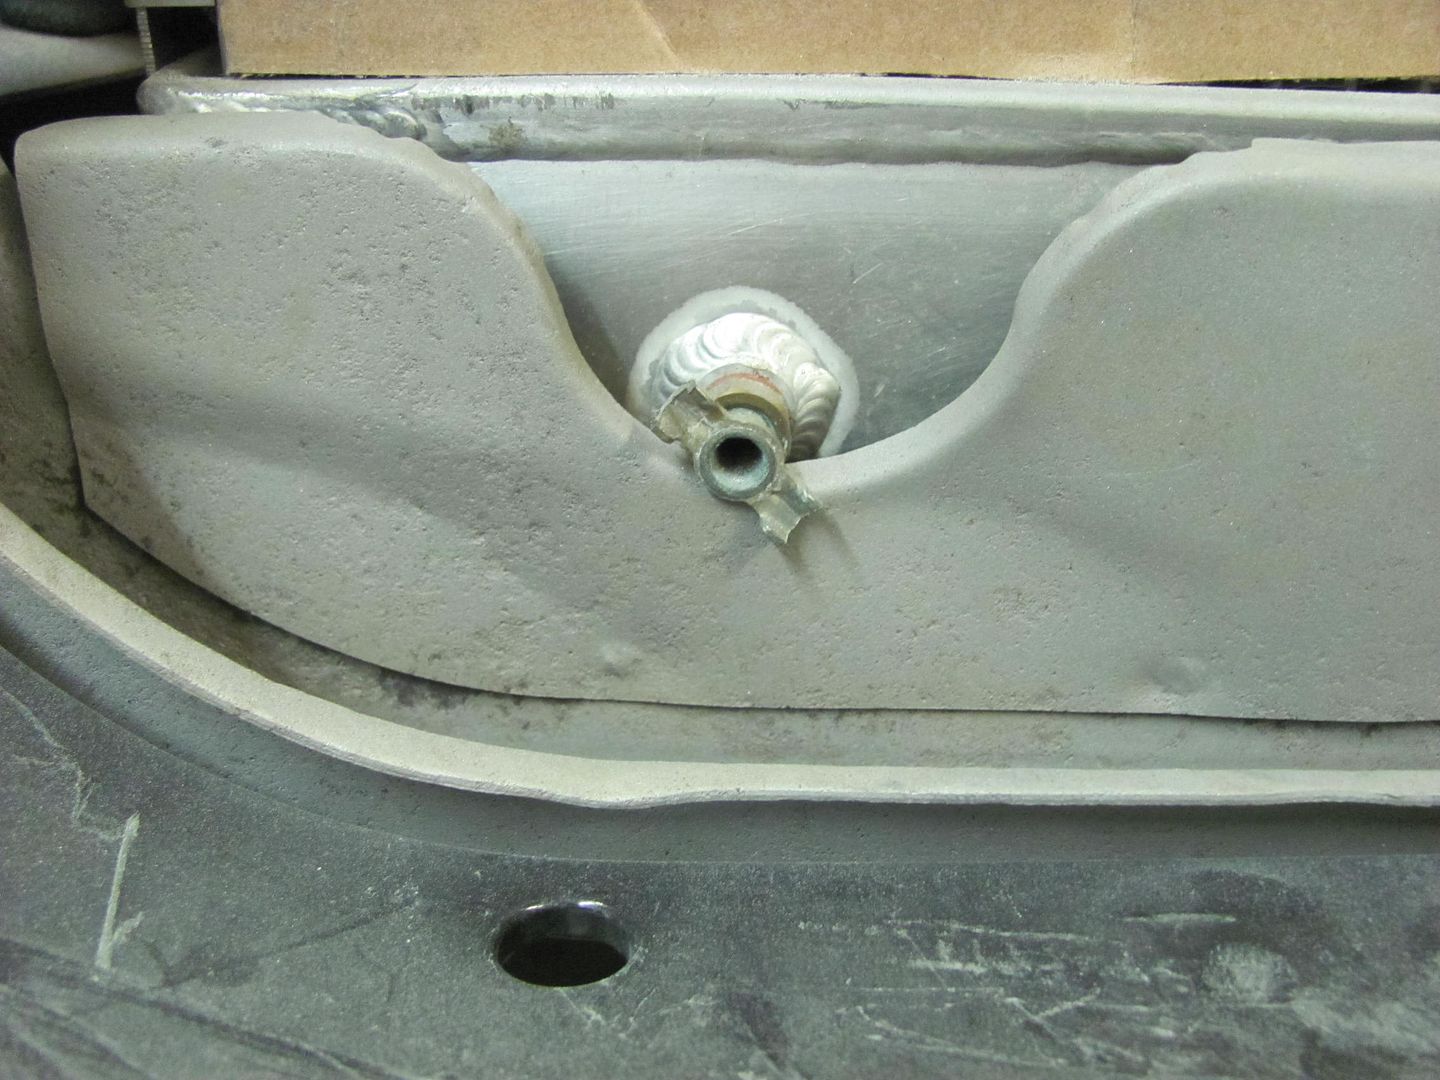
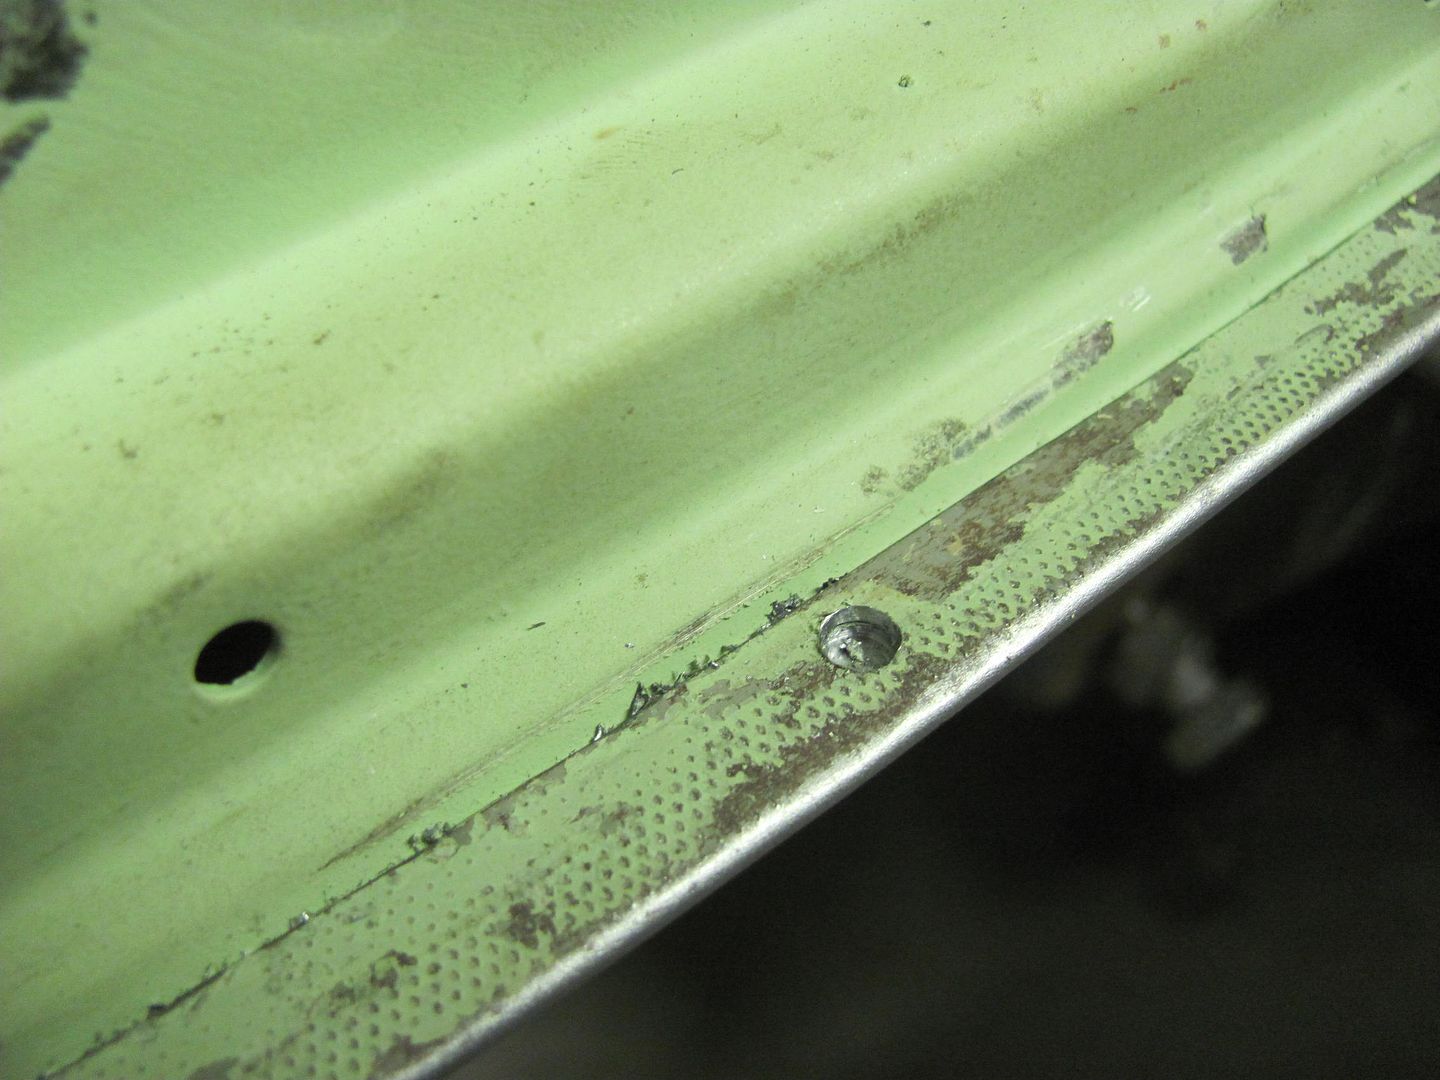
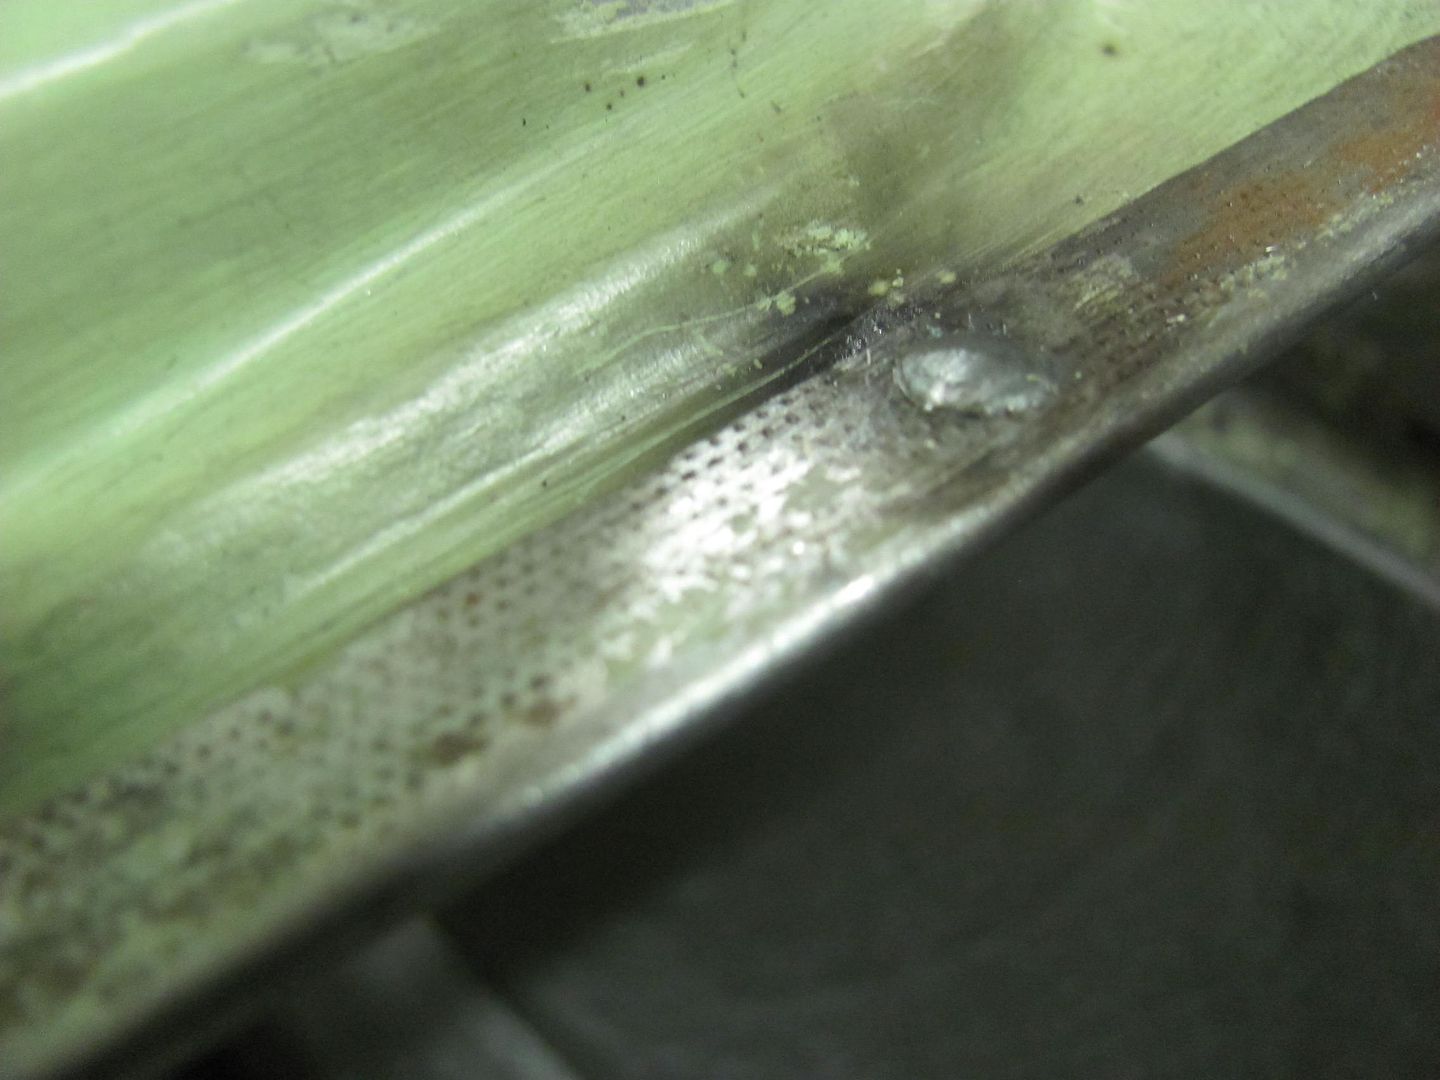
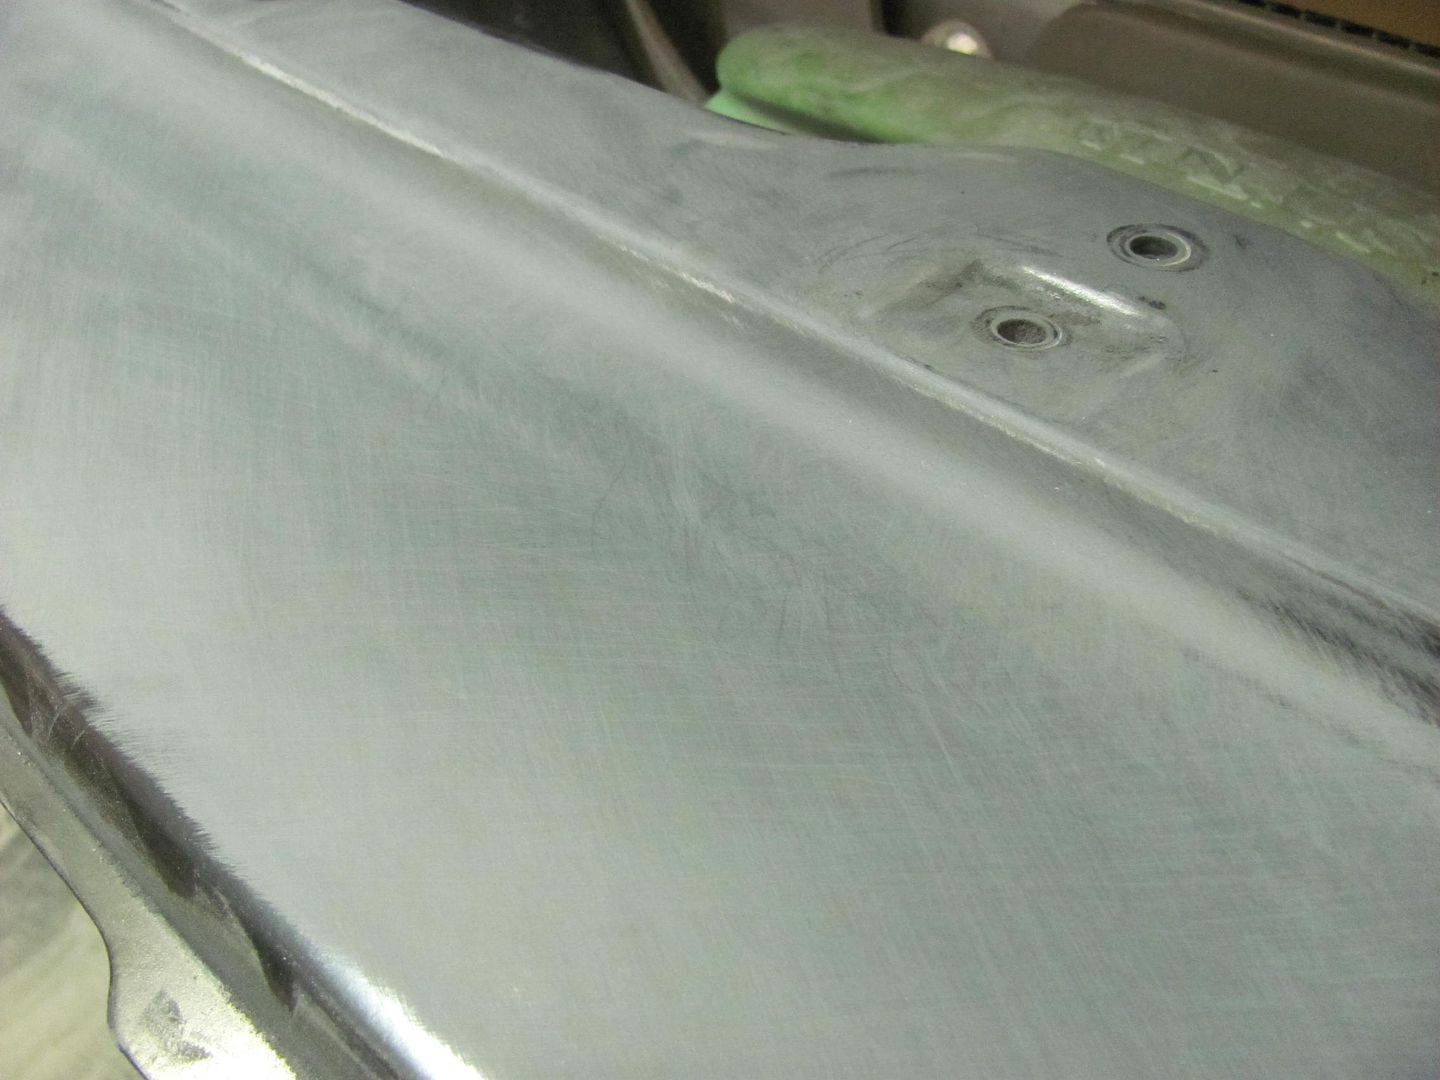
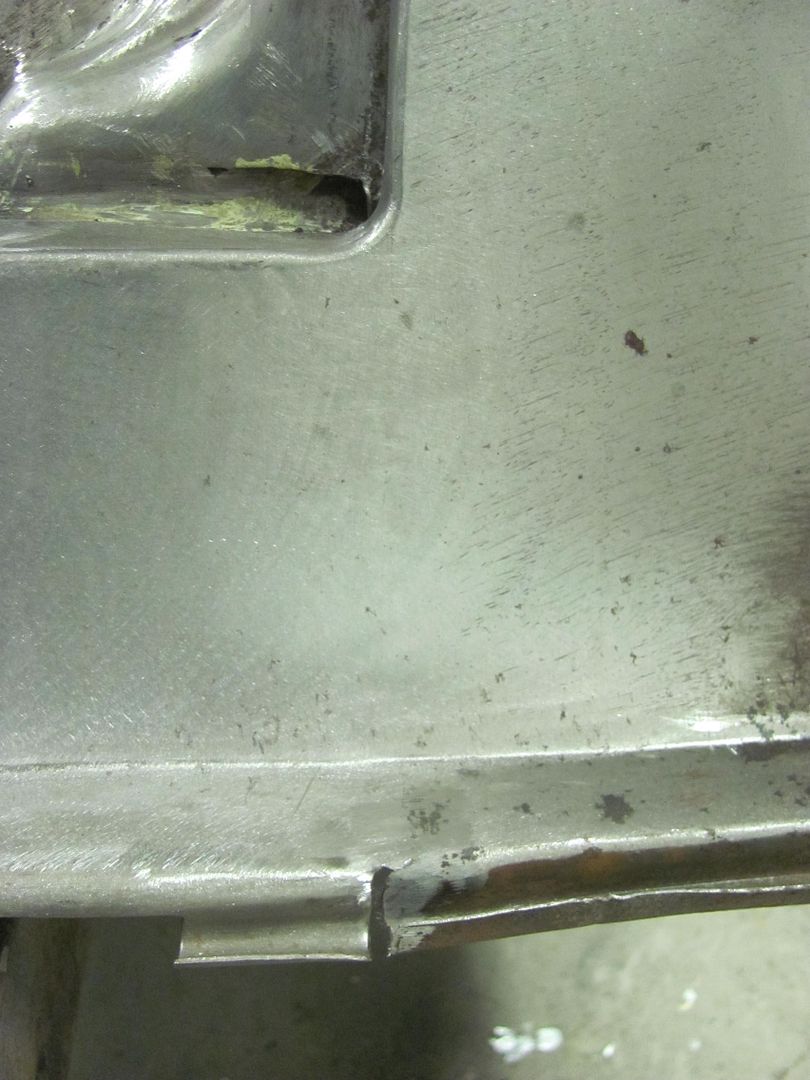
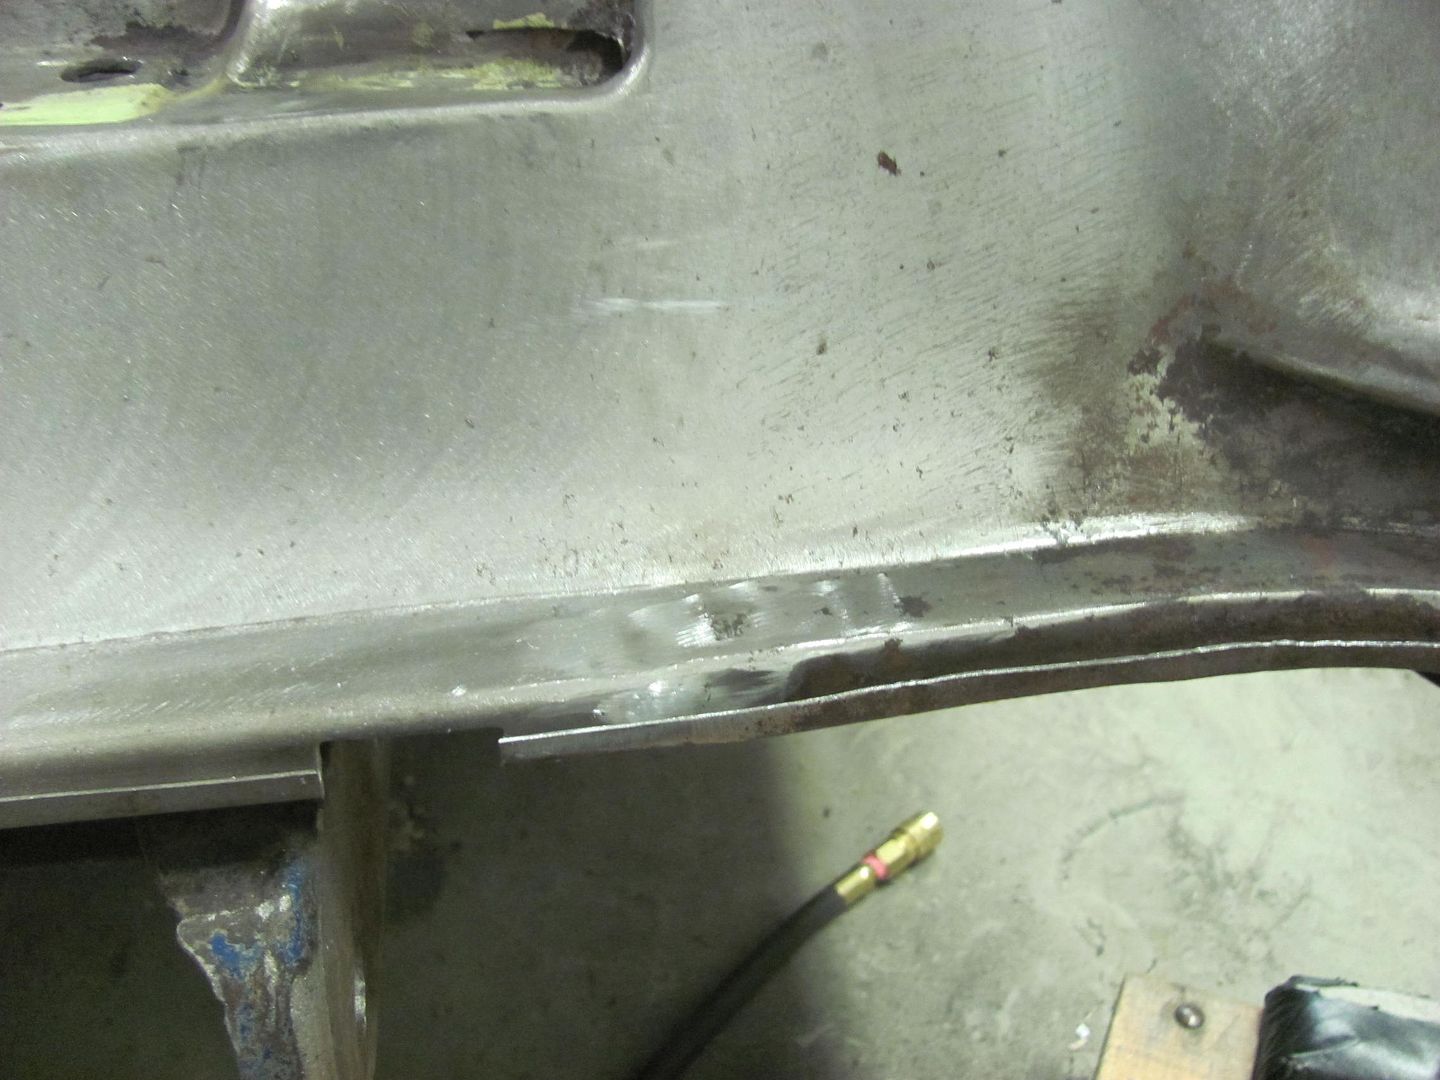
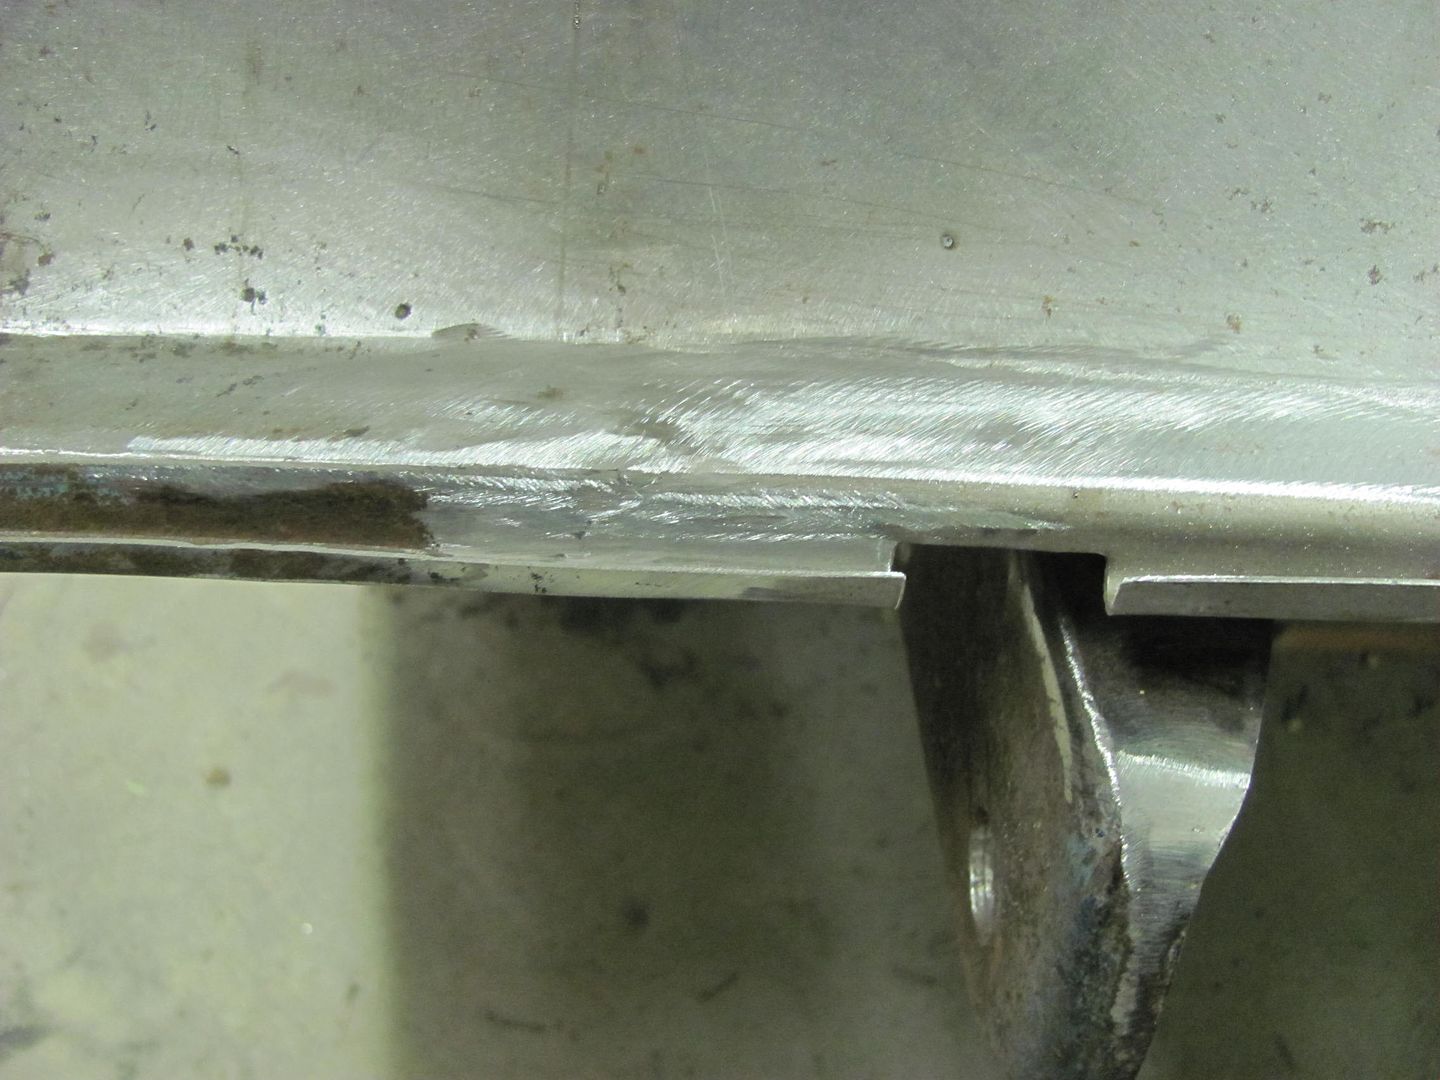
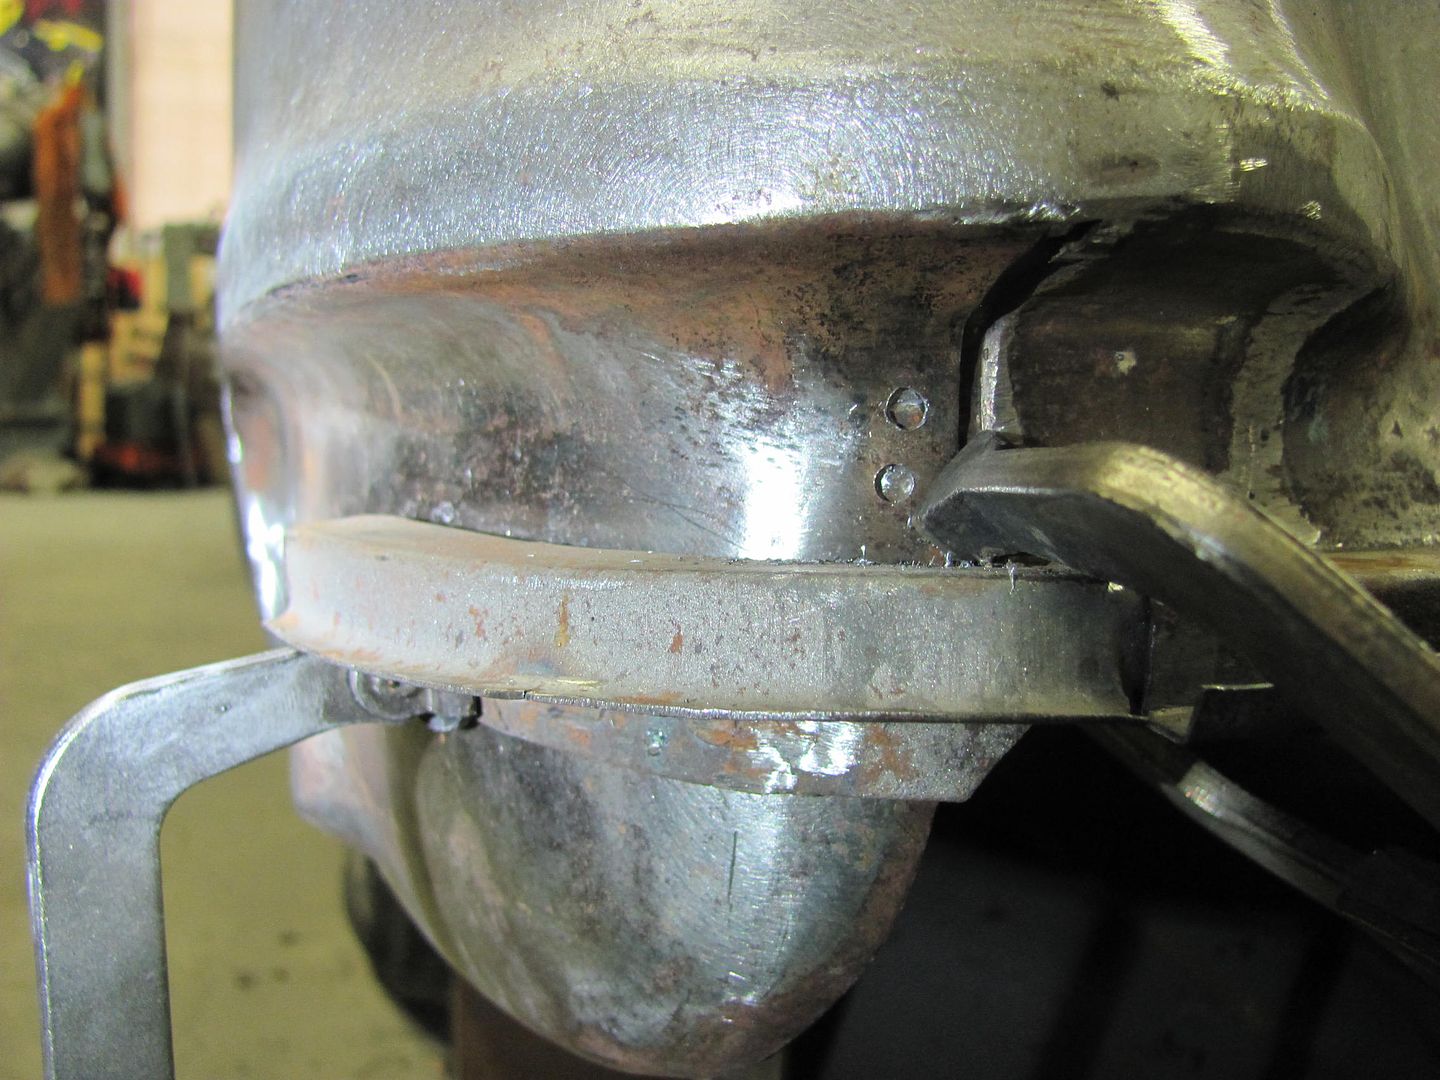
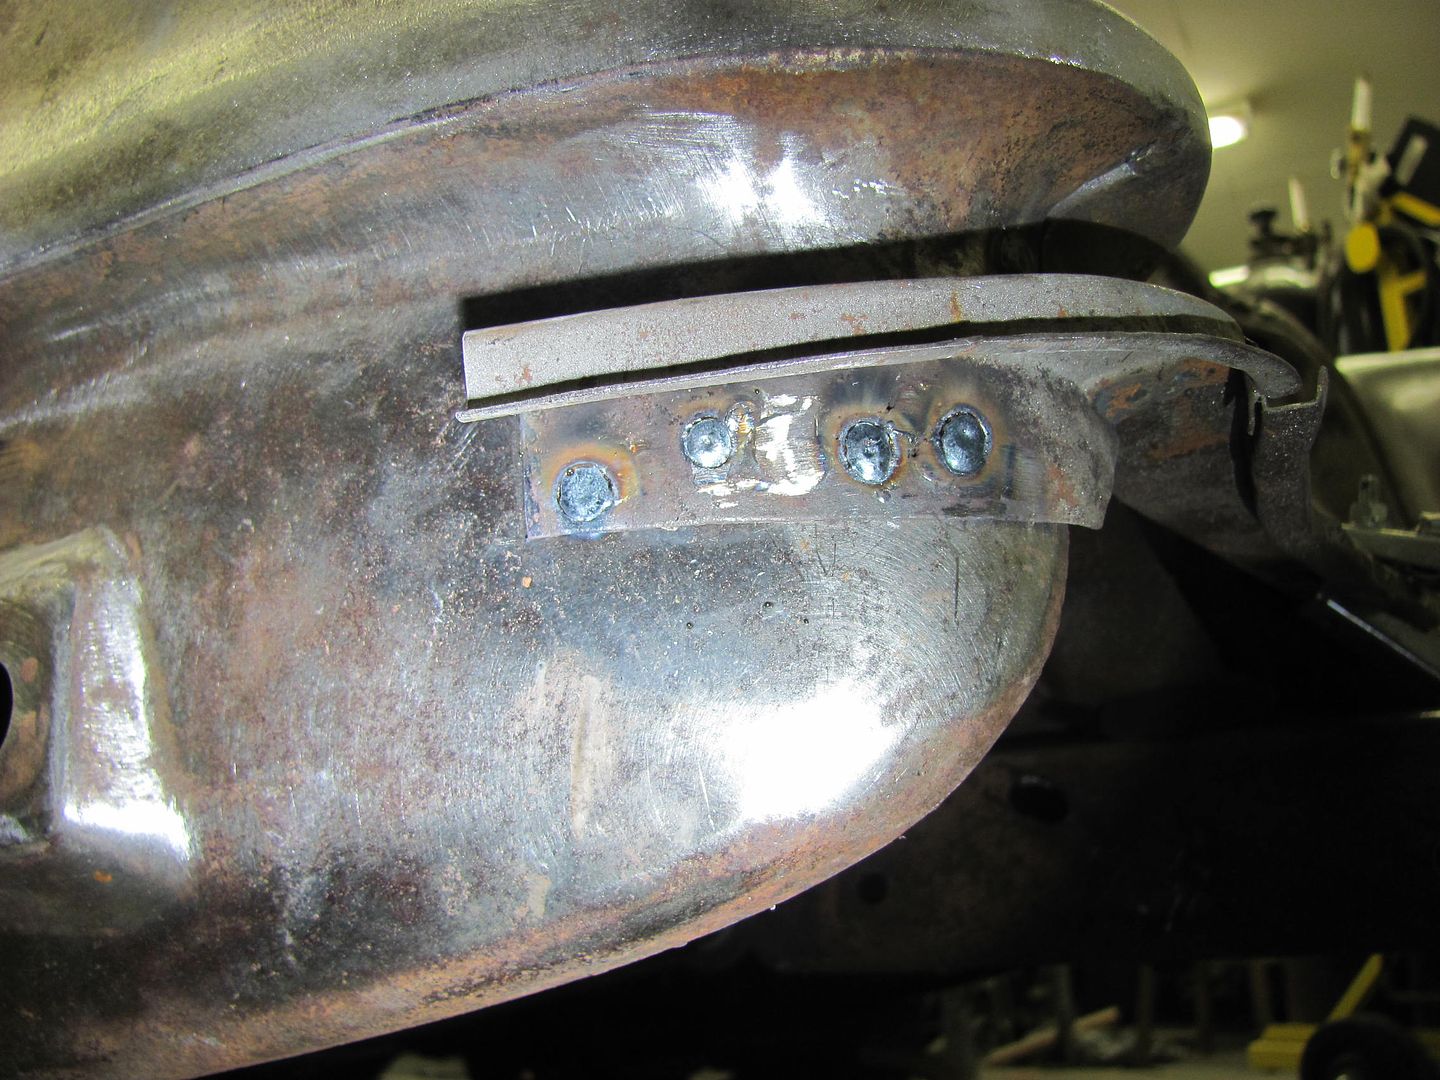
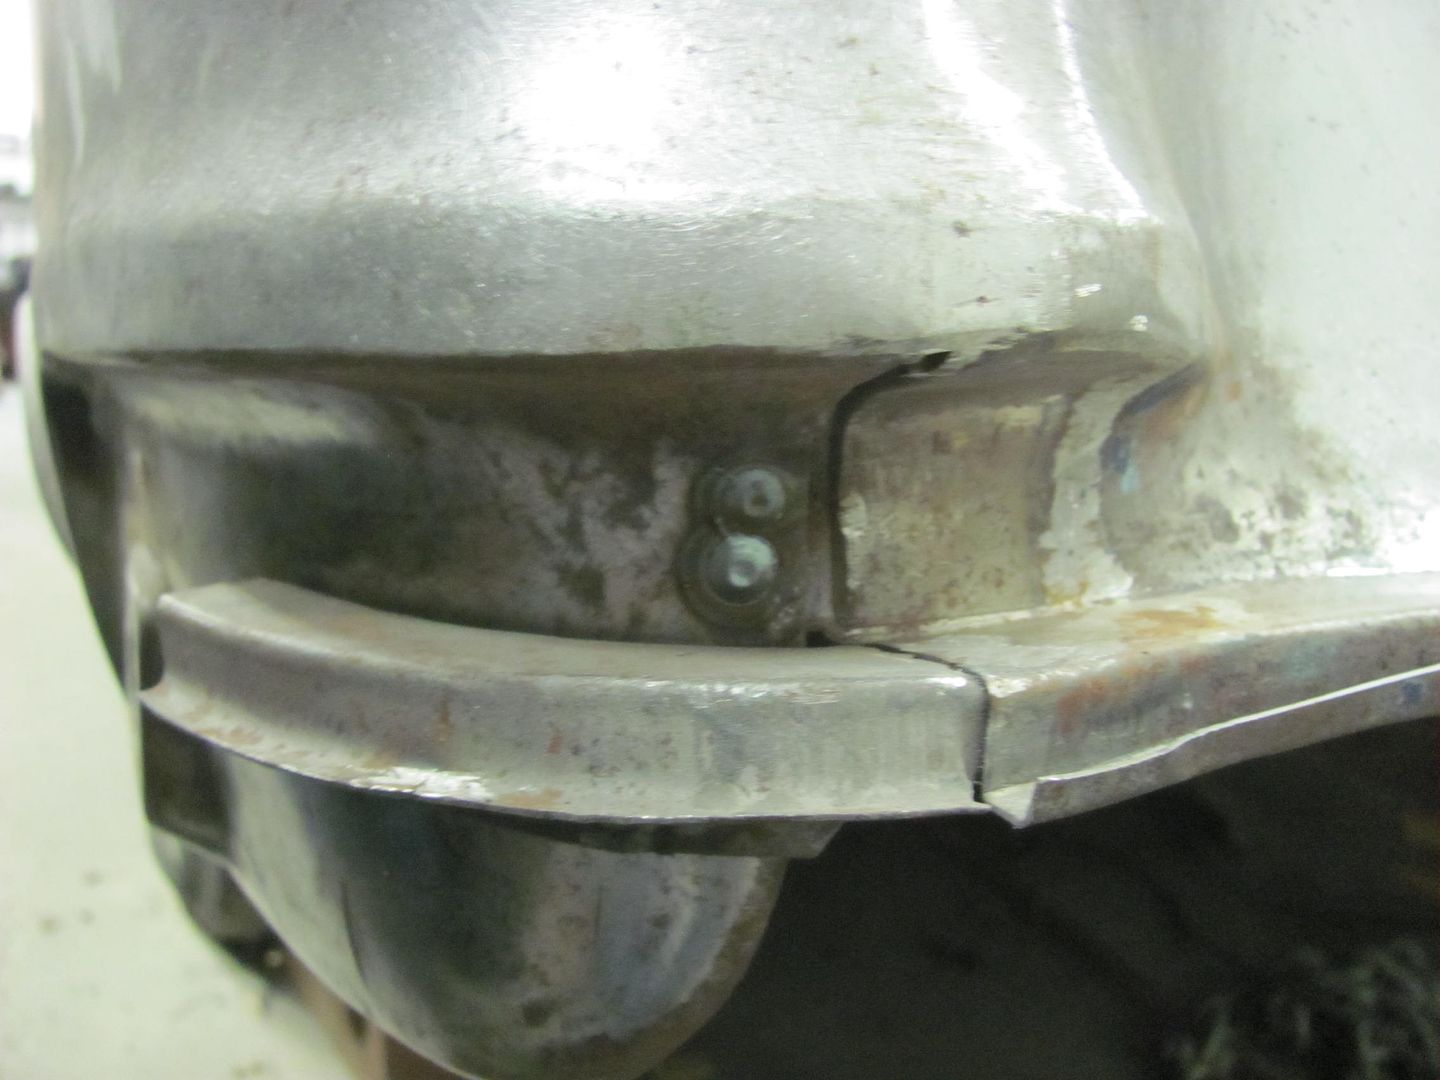
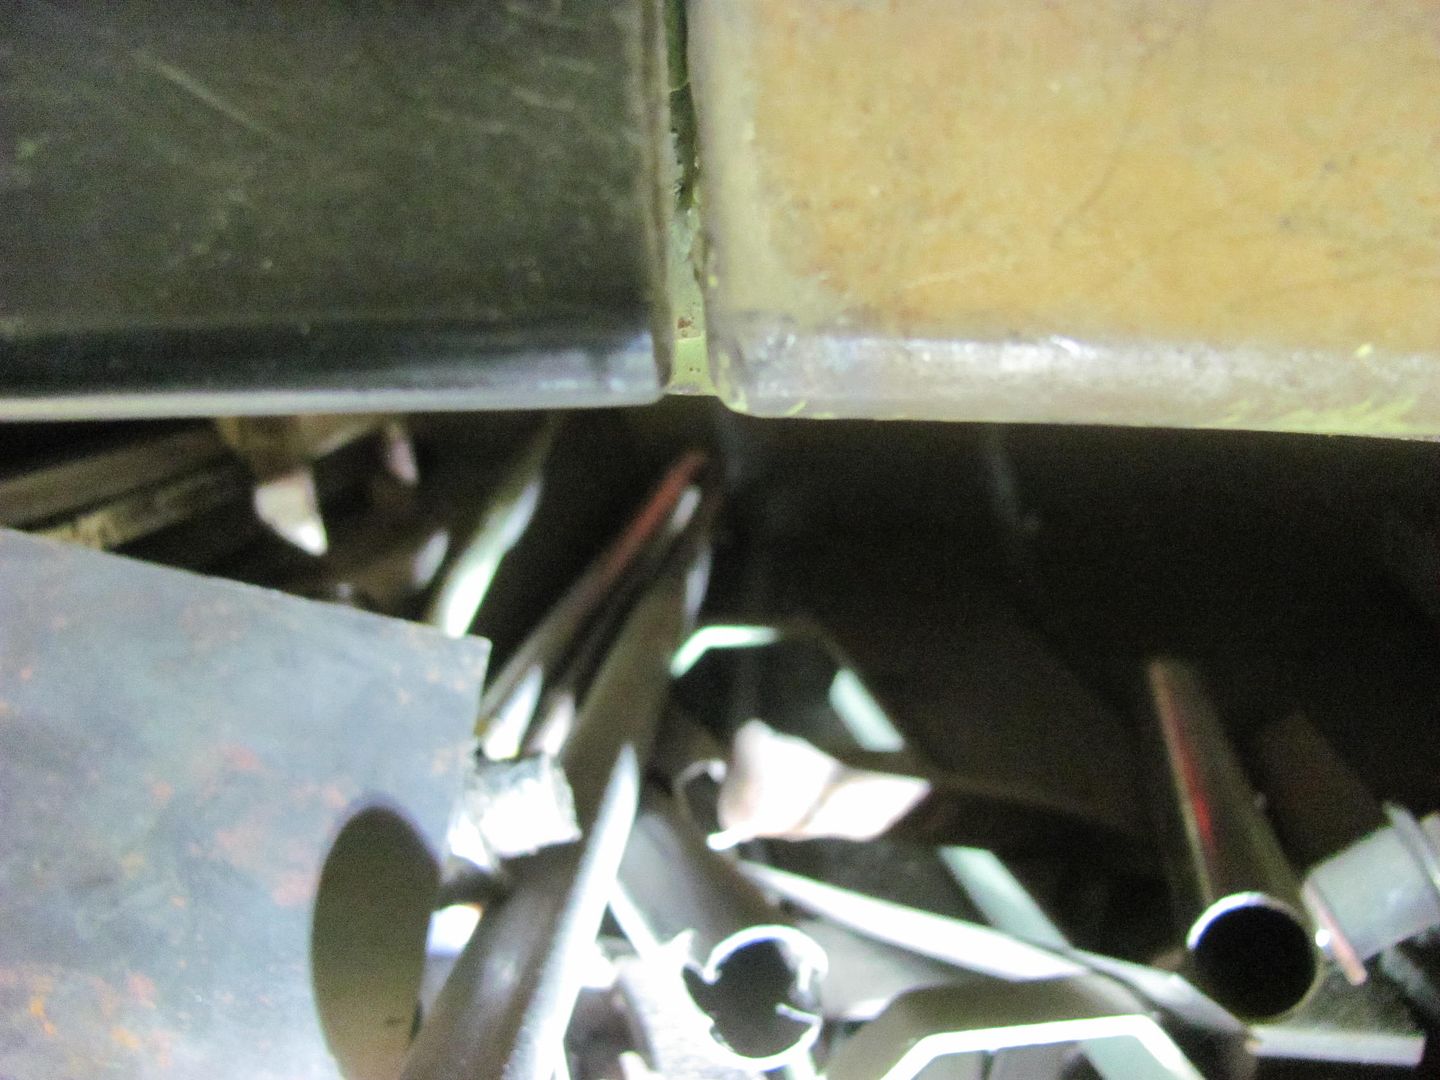
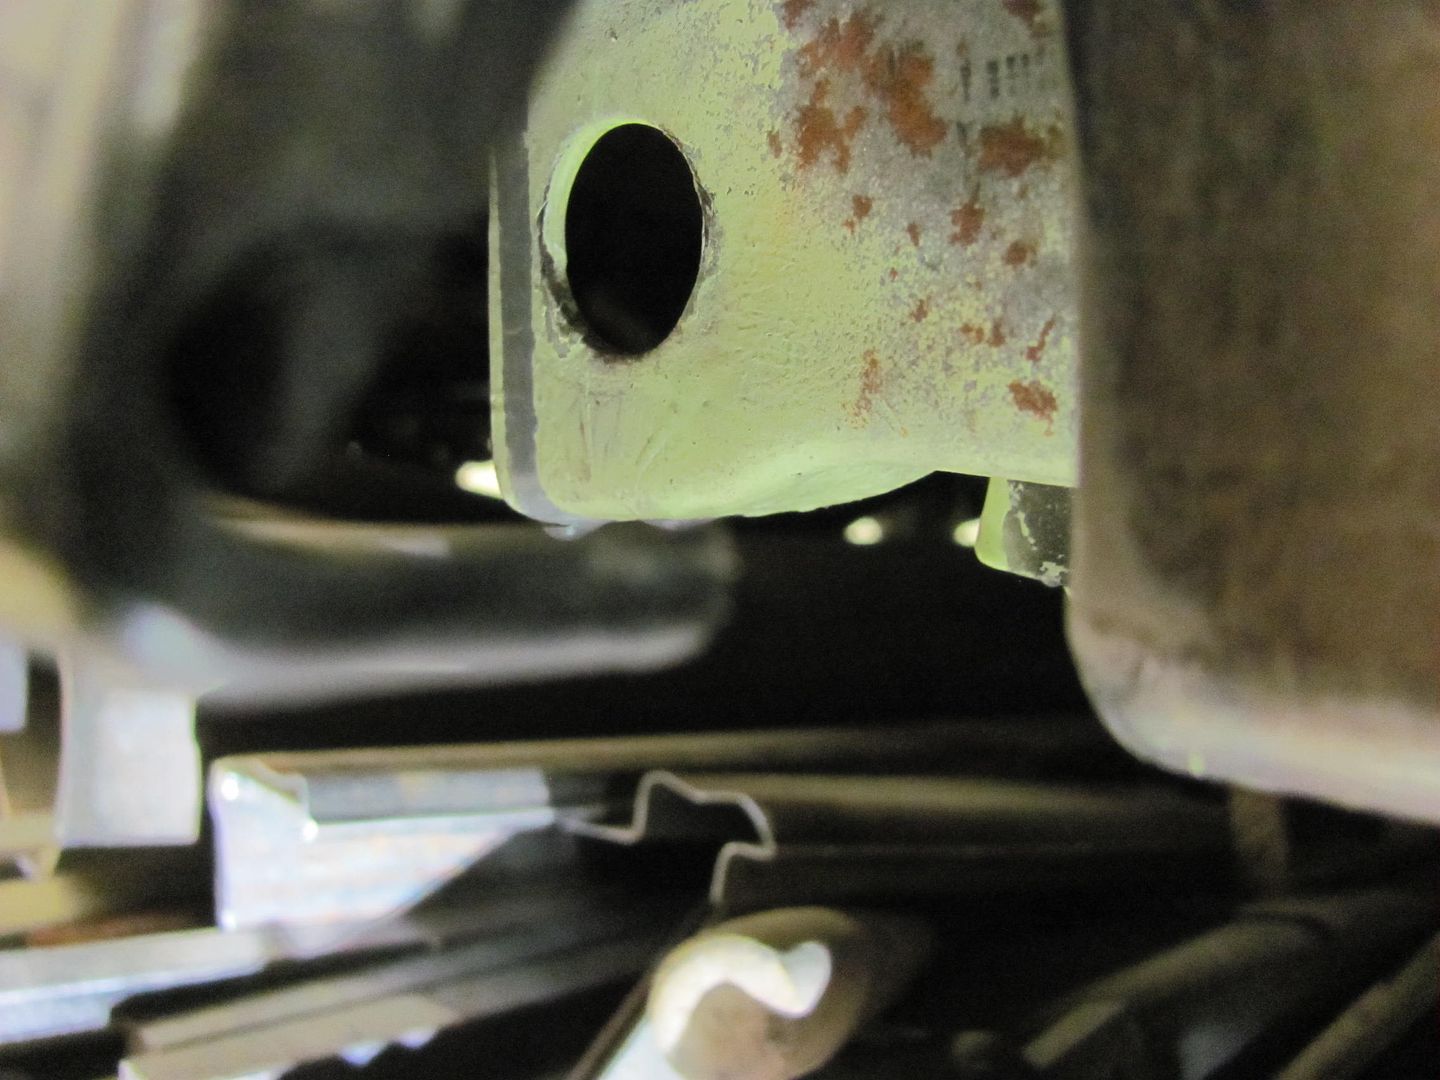
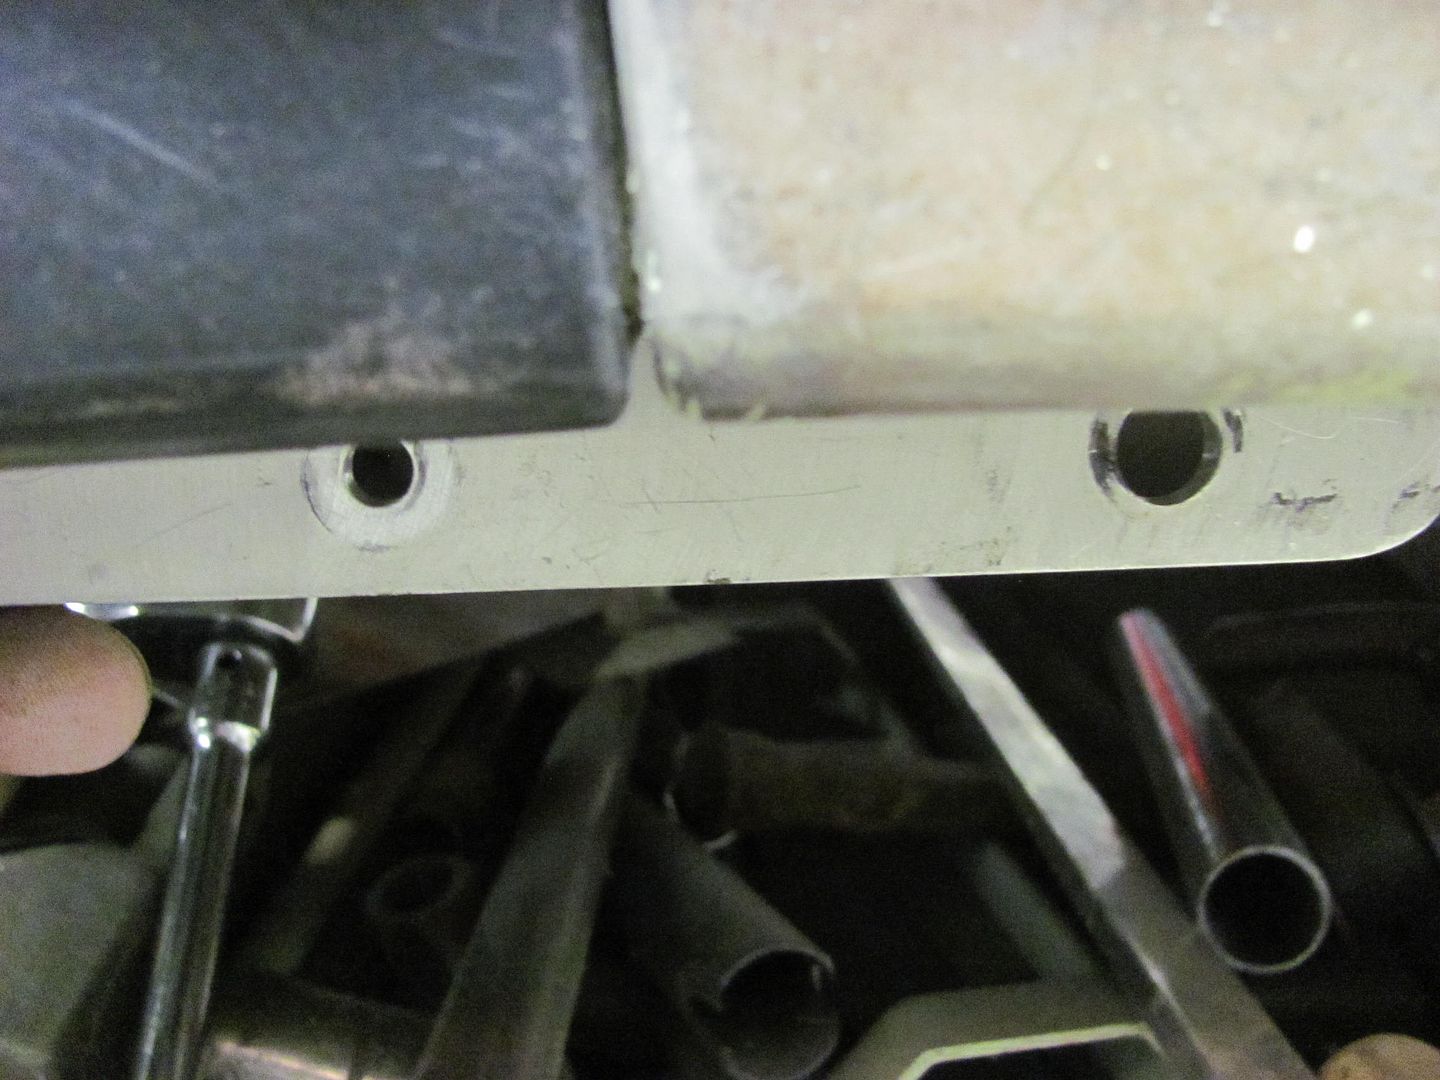
Moving on to other fender fitment, the bottom edge of the fender was higher than the adjacent rocker. Any adjustment was futile as the bolt was at the bottom of the adjustment hole. Time for some die grinder action to bring the hole downward and also flatten the bottom edge of the hole so any movement forward or backward doesn't push the bolt upward..... This was done on both fenders..


Picture%202112.jpg


Picture%202113.jpg


Picture%202114.jpg


Test fit shows much better alignment.. This may be why the 57 went to a square hole..


Picture%202115.jpg


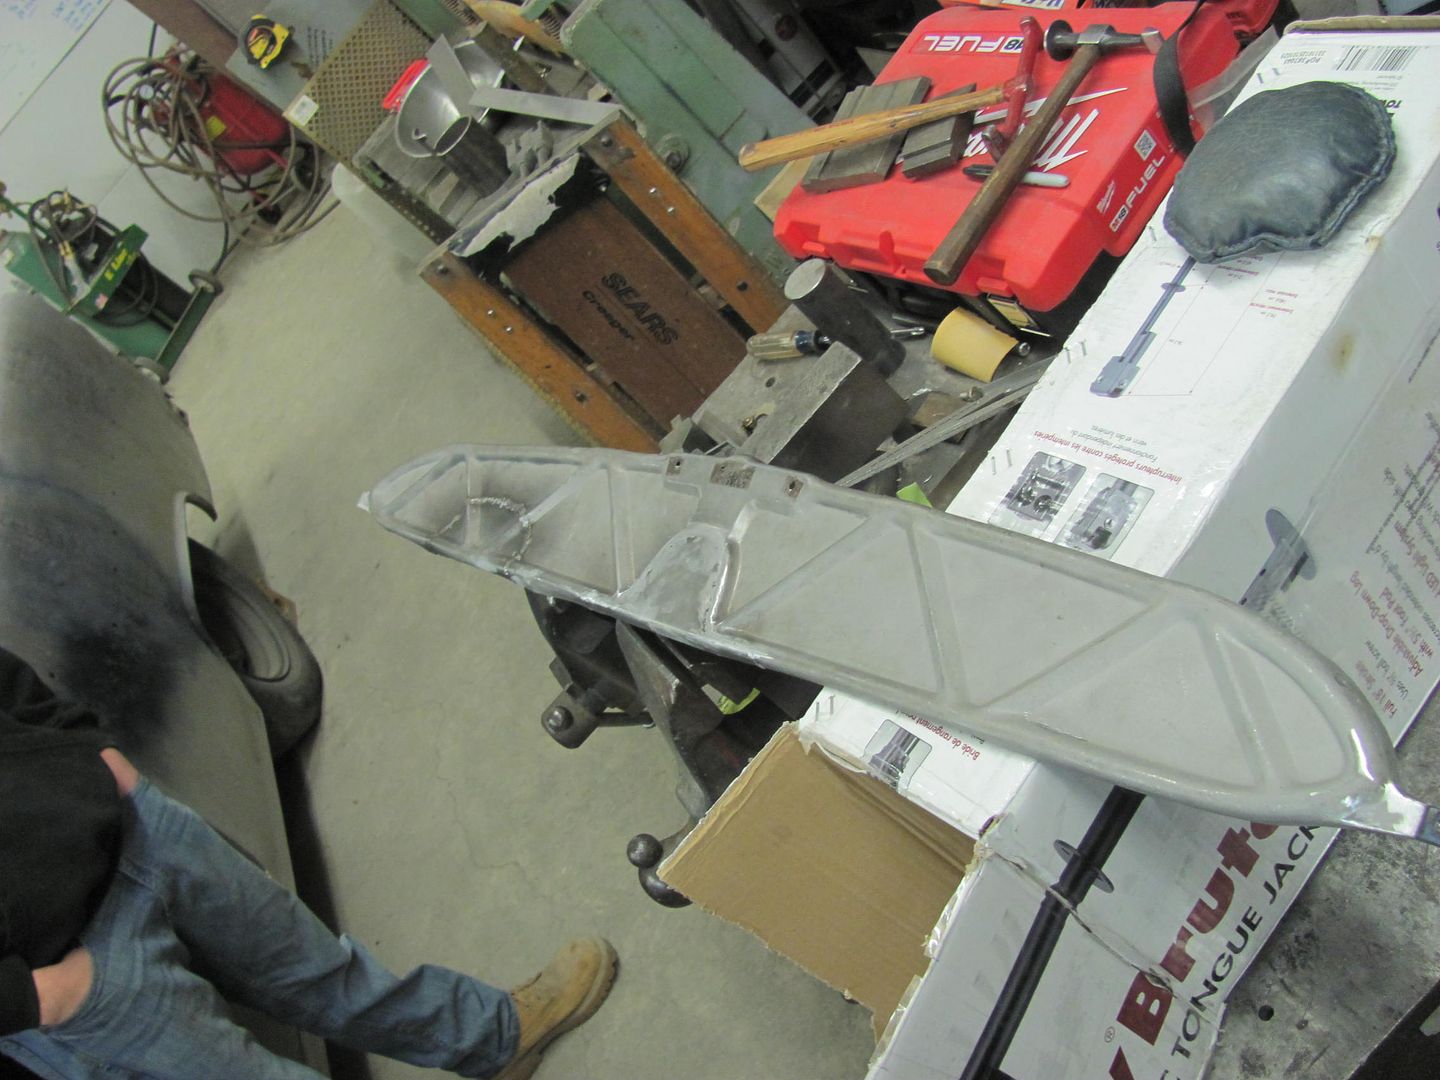
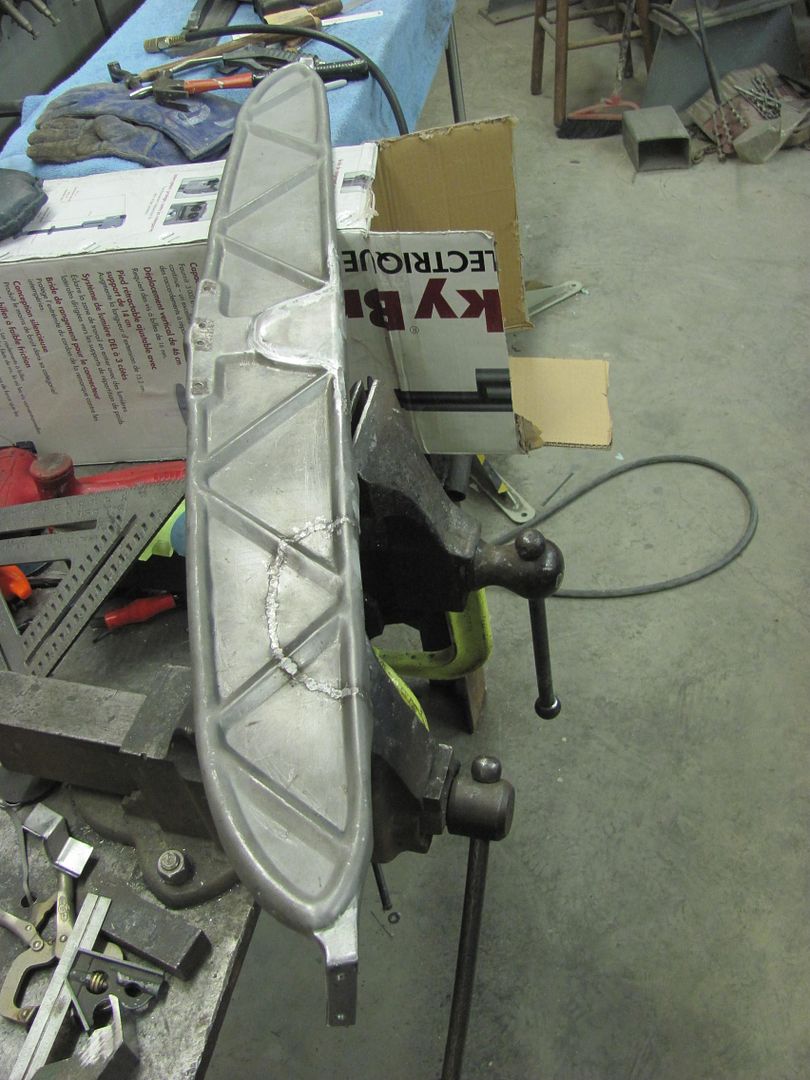
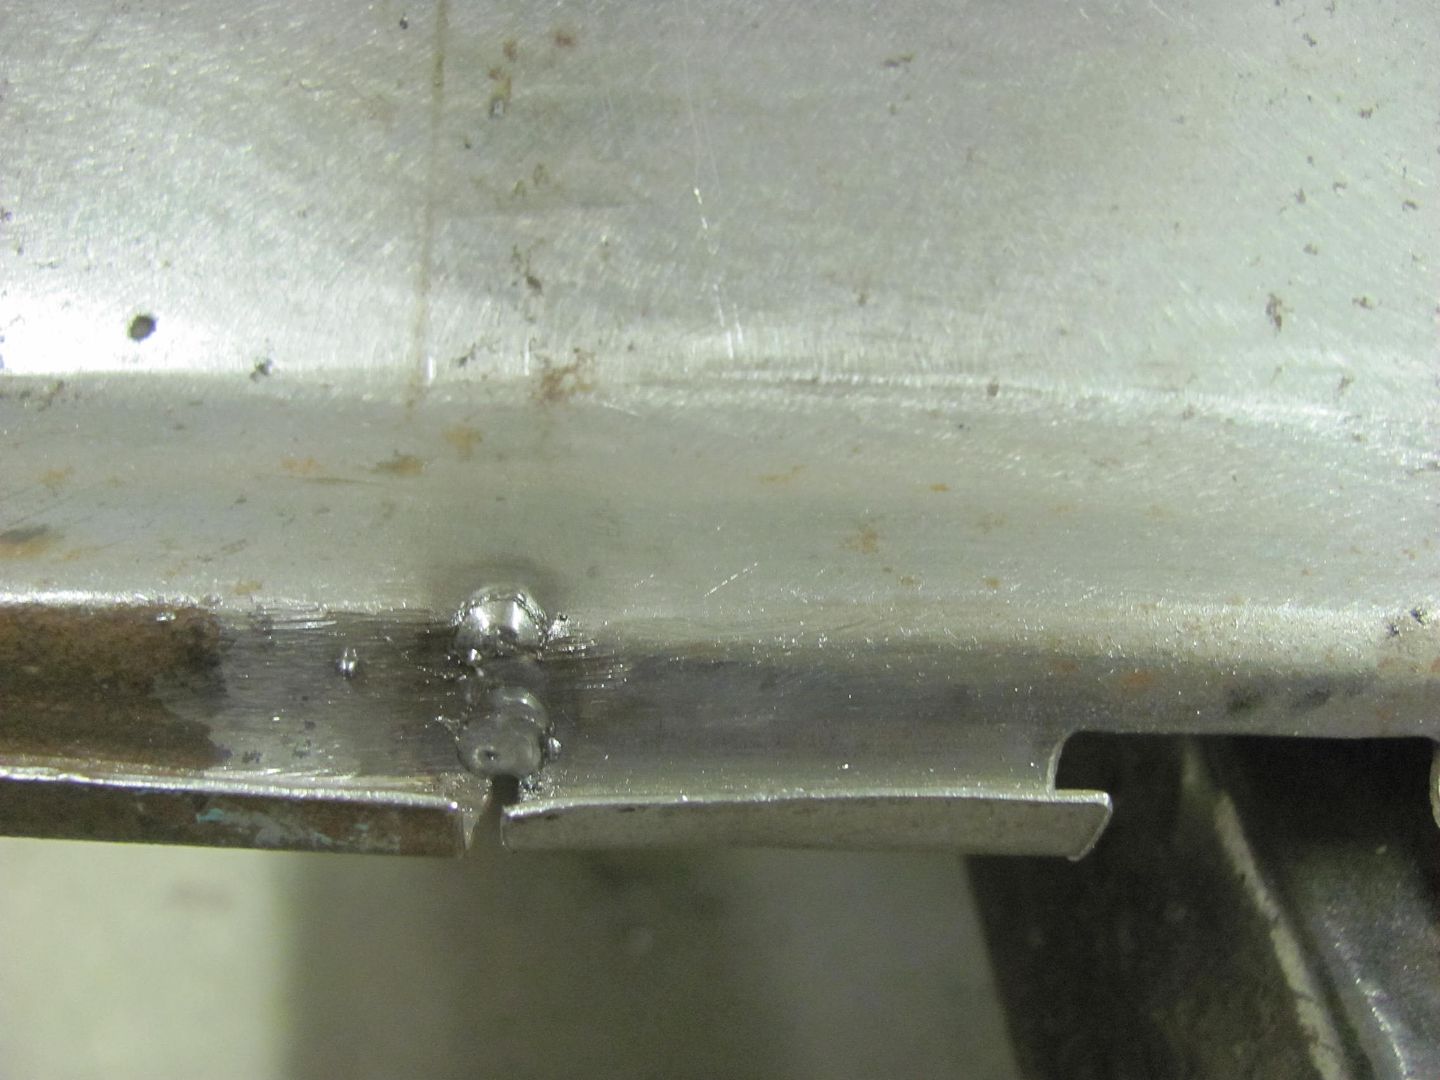
Kyle done with his welding on the center patch, just needs to be dressed with the sanding disc. We'll save that for after the other patch gets welded in place..

Front:


Picture%202116.jpg


Rear:


Picture%202117.jpg


And I was also busy making more dust... Can't wait for springtime and the leaf blower :willy_nil


Picture%202118.jpg


Picture%202119.jpg


Picture%202120.jpg


Picture%202121.jpg
 

1971gsfan

Well-known member
Joined
Dec 19, 2009
Messages
84
Location
Wilmington NC
Robert
I'm still pondering the ideas for my hood. I've seen two versions different from my plan. They both look nice, but are a little taller than I want. I'm doing my frame and will be back on the hood this summer. As always your posts are very helpful to a novice.
Tim
 
OP
M

MP&C

Well-known member
Joined
Oct 21, 2009
Messages
4,396
Location
Leonardtown, MD
Someone noticed we use some rather "vintage" ice picks as scribes for metalwork, and asked to see a closer look.. I had picked these up a few years ago at an auction as my wife looks at me with that "and why do we need those" looks... The one came shorter as shown, but to prolong the life of the picks, sharpen with a very fine file, never use a grinder ;)

The auction was in Fredericksburg VA, if anyone recognizes any of the old ice plants, be sure to chime in so we can all get a history lesson. I tried calling them but nobody answered 8 or 30.. :lol_hitti

Picture%202131.jpg


Picture%202132.jpg


Picture%202133.jpg


Picture%202134.jpg


Picture%202135.jpg


Picture%202136.jpg
 

gasgas17

Well-known member
Joined
Nov 7, 2009
Messages
443
Location
Nova Scotia, Canada
We just switched over to 10 digit dialing from 7 digit. The extra 3 digits are painful. I can only imagine what a pain it was to go to 7 digit dialing from 2 or 3. I'm just glad I'm not the first guy with the new area code. Nice ice picks. Ice houses were a big industry around here back in the day. It was shipped as far as Europe.
 
OP
M

MP&C

Well-known member
Joined
Oct 21, 2009
Messages
4,396
Location
Leonardtown, MD
Kyle finishing up on the hood brace....


Picture%202122.jpg


Picture%202123.jpg


Because he had gaps to contend with, we used some copper to insure less chance of blow outs. A piece of 1/2" copper pipe was flattened and bent in the press brake to make a fitted backing for the vee bead detail..


Picture%202124.jpg


Picture%202137.jpg


Picture%202142.jpg


Picture%202145.jpg


Picture%202146.jpg


Just a bit of work with the sander and this part should be done. Like the new look without all the gaping holes..


Meanwhile, I continued to make dust. Here's a good view of the built in "guide coat" feature of the SPI. Blocking on the top of the hood shows a low spot.....


Picture%202140.jpg


And with just a couple scuffs from the bottom, the low shows up there as well


Picture%202141.jpg


Just a few bumps with the hammer from the bottom into the small shot bag on top and the low is gone.


And the rest looks pretty much the same other than the piles of dust on the floor moving around.. :lol:


Picture%202139.jpg
 
OP
M

MP&C

Well-known member
Joined
Oct 21, 2009
Messages
4,396
Location
Leonardtown, MD
The SPI must be quite a bit heavier than the typical high build and guide coat products, as most of the dust seems to fall to the floor/less airborn. So far, no black boogers.. :thumbup:
 

impala4speed

Well-known member
Joined
Oct 11, 2009
Messages
194
Location
Youngstown, Ohio
Someone noticed we use some rather "vintage" ice picks as scribes for metalwork, and asked to see a closer look..

Beautiful work as always Robert and thank you for the detailed explanations.
If nothing else, I have at least one thing in common with you:
This was among the tools left by my late father-in-law. It is a handy thing to have.
 

Attachments

  • 002.jpg
    002.jpg
    136.4 KB · Views: 61
  • 001.jpg
    001.jpg
    114 KB · Views: 59
  • 004.jpg
    004.jpg
    126.9 KB · Views: 61
OP
M

MP&C

Well-known member
Joined
Oct 21, 2009
Messages
4,396
Location
Leonardtown, MD
A while back we had made the brackets to make up three "reproduction" battery trays based on a 1955 Chevy factory air conditioned car.


Picture782.jpg


The only part that did not come with the used original pieces we had as patterns was the factory hold down with it's attached "zee" bracket that secures the battery hold down to the rear of the core support, as seen here in the factory assembly bulletin.


Picture%201999.jpg


We recently mocked up the battery location, and made a zee bracket based on the picture and the dimensions we had in front of us.


Picture%202148.jpg


Picture%202147.jpg


Now to make the remaining two brackets for the other two battery trays.. A roll former die in the press brake was used to make the vertical bends.


Picture%202149.jpg


A bit of tipping using a press brake die as an anvil, and then using the tipping tool...


Picture%202150.jpg


Picture%202151.jpg


The finished brackets and a comparison....


Picture%202152.jpg


Picture%202153.jpg


Picture%202154.jpg


Picture%202155.jpg
 
Last edited:

mopar4don

Well-known member
Joined
Mar 9, 2013
Messages
103
Sweet, so will I see these on ebay?
With all that time you have on your hands, you could reproduce parts, and sell them on ebay! :lol:
 
OP
M

MP&C

Well-known member
Joined
Oct 21, 2009
Messages
4,396
Location
Leonardtown, MD
Too busy for ebay parts.... :willy_nil


Kyle finishing up the hood brace..


Picture%202156.jpg


Picture%202157.jpg


Picture%202158.jpg


While I continue to generate dust on the floor...


Picture%202159.jpg


Recently we installed a used core support that was quite a bit nicer than our original, but still showed some issues...


Picture%202160.jpg


Here we see some rust...


Picture%202161.jpg


And not quite enough clearance to the petcock..

Picture%202163.jpg


So this will be next on the list, cutting out a new one with a bit better fitment.
 
To avoid these ads, REGISTER NOW!
OP
M

MP&C

Well-known member
Joined
Oct 21, 2009
Messages
4,396
Location
Leonardtown, MD
Well as I still hadn't finished blocking the front end, rather than pull the core support just yet, Kyle will start on the rear of the wagon in wrapping up some details there. Before pulling the tailgate, there was one gap that was inconsistent, so I gave him a hand with the rework before he got welding..


Picture%202165.jpg


Picture%202166.jpg


First to unfold the flange a bit...


Picture%202168.jpg


Picture%202167.jpg


Next, some 14 gauge steel was cut out and a strengthening bend added to use for some friendly persuasion..


Picture%202169.jpg


Picture%202170.jpg


Refolded...


Picture%202172.jpg


For comparison, before:


Picture%202166.jpg


After:


Picture%202171.jpg


Then we tweaked the twist of the tailgate for good fitment to the opening and Kyle added three plug welds down each side to lock the skin to the inner tail gate.


Picture%202173.jpg


Picture%202174.jpg


...Then we removed the tail gate so he could finish the plug welds for the top flange of the tail pan, I had only tacked it in place when the tailpan was installed, so this should help check off another item from the list......

Meanwhile I continued blocking out the front end..


Picture%202176.jpg


Picture%202177.jpg


Picture%202178.jpg


Picture%202179.jpg
 
Last edited:

Divcod

Well-known member
Joined
Jan 9, 2015
Messages
319
Location
Pacific Northwest
Like the design of the English Wheel, my daughter would take it based on the color. Is the wheel a commercial design or a custom build? Just starting to go through your posts hoping to pick up pointers, Thks
 

zmotorsports

ALLIANCE MEMBER
Joined
Oct 20, 2009
Messages
21,312
Location
Northern Utah
It is a quite versatile machine. Pretty compact too, which is nice for cramped shop space..

Sorry if you have posted this but I went back several pages and didn't see very good pictures. Would you mind showing a few more pics of your Baileigh brake? Which model is # is it? Also I would like to hear your thoughts/opinions/impressions of it. Any input about it would be great.

Thanks.

I enjoy watching your build(s). VERY impressive skills.

Mike.
 

gordyy

Well-known member
Joined
Jan 10, 2013
Messages
180
Location
North Dakota
I love the way you make those gaps just close perfectly,
This thread is one of those I can't wait to see every day, a true craftsman doing things better than the factory ever could and did.
 
OP
M

MP&C

Well-known member
Joined
Oct 21, 2009
Messages
4,396
Location
Leonardtown, MD
Thanks for the comments guys!

Sorry if you have posted this but I went back several pages and didn't see very good pictures. Would you mind showing a few more pics of your Baileigh brake? Which model is # is it? Also I would like to hear your thoughts/opinions/impressions of it. Any input about it would be great.

Thanks.

I enjoy watching your build(s). VERY impressive skills.

Mike.

Mike, it is the BB-4816M. I'd say the primary shortcoming with this machine would be bending aluminum, as you are relying solely on the clamping bar to hold the item. I primarily use steel in the shop, so it works better in that the piece also reacts to the magnet for a bit better holding power. It is rated at 16 ga but much like your normal apron brakes, you don't get a good crisp bend when putting 48" wide piece of 16 ga in a 16 ga rated machine. To even get good crisp bends on an apron brake using 16 ga material, IMO you need a 12 ga rated machine regardless, but then that capability also comes priced accordingly. So this machine is similar, but it's not often I'm doing something that wide and for the most part the material I'm using is 18 or 19 ga.


Picture048-1.jpg


Here's a video on some of the capability, and for anyone interested in one I'd say contact Shane at Baileigh and see if he can put you in touch with someone local to you with a machine, to try one out in person. I have a local guy interested in their 6' machine, and he's supposed to come by the shop and check mine out to see how he likes the functionality.

https://www.youtube.com/watch?v=LmNjt0ua6nw
 
OP
M

MP&C

Well-known member
Joined
Oct 21, 2009
Messages
4,396
Location
Leonardtown, MD
Well Kyle skipped out on me tonight, something about a birthday and his parents taking him out to dinner.. and here he could have been welding! :lol:


So I took the opportunity to have dinner with the family, so tonight was a short night...


One of the other areas I skipped over at the rear of the wagon was when the tail pan was installed. The factory version with the pinch welded flanges has a gap in the crimp seam for the rear bumper seal:


Picture%202182.jpg


As I got rid of all the pinch weld seams at the rear of the wagon to eliminate those rust traps, the gap at the crimp seam will be filled in. To assist in filling in the wide gap, a piece of copper flat bar is used as a backer..


Picture%202184.jpg


Picture%202185.jpg


Next, as the reproduction tail pan has a rounded crimp seam and the area on the original quarters is more of a square, we'll add some hammer action here. The remaining piece of the flat bar is clamped in and used as an anvil..


Picture%202186.jpg


Picture%202187.jpg


Picture%202188.jpg


Continuing welding...


Picture%202191.jpg


Picture%202193.jpg


Picture%202195.jpg


.....and a repeat on the driver's side...


Picture%202198.jpg


Picture%202201.jpg


Picture%202202.jpg
 
Last edited:

zmotorsports

ALLIANCE MEMBER
Joined
Oct 20, 2009
Messages
21,312
Location
Northern Utah
Robert thanks for the information on the brake. I kind of thought you had the magnetic version when I say a previous pictures but it was kind of hard to tell.

I do a lot of aluminum work and have been looking at the BB-3616E mainly due to the small footprint.

Thanks again and I have to say again, amazing work.

Mike.
 
OP
M

MP&C

Well-known member
Joined
Oct 21, 2009
Messages
4,396
Location
Leonardtown, MD

zmotorsports

ALLIANCE MEMBER
Joined
Oct 20, 2009
Messages
21,312
Location
Northern Utah
Mike, If I hadn't gotten the Mag brake, my second choice was their box and pan with the foot controlled clamping..

http://metal.baileighindustrial.com/finger-brake-bb-5016f-ds


They also have it in a 12 ga rating and 40 wide. I know it's quite a bit more over what you are looking at but if your budget can swing it, IMO the 12 ga machine will give you a much nicer results than the 16 ga machine.


http://metal.baileighindustrial.com/finger-brake-bb-4012f

Thanks Robert, that BB-4012F was the other one that I was considering. Looks nice and beefy. Just a little worried about the larger footprint and taking up space in my already cramped shop.

Thanks again.

P.S. on a side note are you pretty happy with the quality of the Baileigh machine? One thing I like to ask people is given the opportunity would they purchase the same unit again.

Thanks.

Mike.
 
OP
M

MP&C

Well-known member
Joined
Oct 21, 2009
Messages
4,396
Location
Leonardtown, MD
I think I'm in a similar situation that I've got to watch the size and quantity of the machinery in my shop, so something with more versatility is a plus. Even given the same bend width as my last brake, the mag unit doesn't have all the bracing, trusses, etc that you find on an apron style brake, so it was almost a foot less in width. If I had to do it again, I'd definitely buy it again. Next on the machinery list is to put the planishing hammer together.... and then find a spot for it :lol:
 

tlmartin84

Well-known member
Joined
Apr 23, 2012
Messages
1,085
Location
West Virginia
Can't remember where I got it from, but this is the one I have, one screw is straight 1/4 shank for the cut off wheels with 1/4 holes, second screw has 3/8 shank for cut off wheels with 3/8 holes. Arbor piece has 3/8 relief cut in it for the larger shank bolt.


http://www.grainger.com/product/CLESCO-Cut-Off-Wheel-Mandrel-1F544


****edit....just went to Tractor Supply, they have the same style for 5.99


1F542_AS01


THANK YOU FOR POSTING THIS

I ordered one, put it in my ANGLE GRINDER with a 1/16" cutoff disc and it makes working down spot welds much easier!

Previously I had used the 1/16" in a straight cut off tool, so you always are at a right angle. Occasional I would leave marks that wouldn't sand out because they were too deep. This is perfect!
 

Kevin54

MEMBER EMERITUS
Joined
Jan 12, 2005
Messages
29,341
Location
Urbana, Ohio
Thanks for the comments guys!


Mike, it is the BB-4816M. I'd say the primary shortcoming with this machine would be bending aluminum, as you are relying solely on the clamping bar to hold the item. I primarily use steel in the shop, so it works better in that the piece also reacts to the magnet for a bit better holding power. It is rated at 16 ga but much like your normal apron brakes, you don't get a good crisp bend when putting 48" wide piece of 16 ga in a 16 ga rated machine. To even get good crisp bends on an apron brake using 16 ga material, IMO you need a 12 ga rated machine regardless, but then that capability also comes priced accordingly. So this machine is similar, but it's not often I'm doing something that wide and for the most part the material I'm using is 18 or 19 ga.


Picture048-1.jpg


Here's a video on some of the capability, and for anyone interested in one I'd say contact Shane at Baileigh and see if he can put you in touch with someone local to you with a machine, to try one out in person. I have a local guy interested in their 6' machine, and he's supposed to come by the shop and check mine out to see how he likes the functionality.

https://www.youtube.com/watch?v=LmNjt0ua6nw

Robert......after using the brake, does is leave the metal magnetized or does it demagnetize it on release? I know that on our surface grinders the power chucks would demag before they would release. On the standard grinders without the electric mag, they would leave the material magnetized.

I would think that if it left the material magnetized, when you did any grinding, it might leave small particles still attached to the piece you just made, and wiping the piece off still may leave small particles on there.

Just curious :dunno:
 
OP
M

MP&C

Well-known member
Joined
Oct 21, 2009
Messages
4,396
Location
Leonardtown, MD
THANK YOU FOR POSTING THIS

I ordered one, put it in my ANGLE GRINDER with a 1/16" cutoff disc and it makes working down spot welds much easier!

Glad to help out!


Robert......after using the brake, does is leave the metal magnetized or does it demagnetize it on release? ...Just curious :dunno:


Kevin, I'm sure it adds some to a small degree, but I haven't detected anything that noticeable.


Today Kyle finished up another loose end, tying in the bottom of the NOS quarter panel.. A bit of hammer bumping to get the panels aligned...


Picture%202203.jpg


Plug weld holes drilled and filled.....


Picture%202204.jpg


Picture%202205.jpg


Picture%202207.jpg


Picture%202208.jpg


Then he turned his attention to duplicating a second half for the front divider panel for the rear seat.


Picture%202209.jpg


Picture%202210.jpg


Picture%202211.jpg


Picture%202212.jpg


Using the Erco kick shrinker....


Picture%202213.jpg


Needs a bit of fine tuning still but he's getting there...


Picture%202214.jpg


And I was making progress on more blocking of the front end body parts, at least until an emergency phone call from one of our tenants indicated some water pipe issues from the recent low temps... This is what I was greeted with....


IMG_20150221_163201468.jpg


The hole to the left is where the plumber had put the pipe through, right against the outside wall. Then the brainiac insulators failed to caulk, and then put insulation over TOP of the pipes, keeping them well acclimated to any outside temps. I cut some access holes in the wall and relocated the one pipe farther away from the outer wall board where insulation could go between the pipe and the wall, as it should have been done from the get go.


IMG_20150221_195630853.jpg


IMG_20150221_195729801.jpg


IMG_20150221_195658368_HDR.jpg


And here's the culprit...


IMG_20150221_211715802.jpg


IMG_20150221_211721433.jpg


I'll let things dry out overnight, and finish tomorrow with adding a bit of caulk and insulation. Drywall/painter due in early this week to close things up..
 
Last edited:

Ohmthis

Well-known member
Joined
Jan 20, 2013
Messages
3,000
Location
Outside of Louisville KY
Robert, I feel for you on the plumbing issues! My last tenant went out of town for Christmas and decided to turn the heat off to save on her bills. About that time we had highs in the teens. When she got back I got a call that she could hear something hissing in the wall and thought it was a snake or something. I went to check it out and found the water pipe busted. I asked why it was so cold in the house and she told me her reasoning. She thought she would save a little money, but it ended up costing her more. She lost her deposit due to negligence.
Cars looking good, your attention to detail really impresses me. Some of the things you are doing (getting ALL the gaps perfect) Really will take a trained eye to see when done.
 

Joe69

Well-known member
Joined
Sep 6, 2009
Messages
2,371
Location
Muncie, Indiana
And I was making progress on more blocking of the front end body parts, at least until an emergency phone call from one of our tenants indicated some water pipe issues from the recent low temps... This is what I was greeted with....


IMG_20150221_163201468.jpg


The hole to the left is where the plumber had put the pipe through, right against the outside wall. Then the brainiac insulators failed to caulk, and then put insulation over TOP of the pipes, keeping them well acclimated to any outside temps. I cut some access holes in the wall and relocated the one pipe farther away from the outer wall board where insulation could go between the pipe and the wall, as it should have been done from the get go.


IMG_20150221_195630853.jpg


IMG_20150221_195729801.jpg


IMG_20150221_195658368_HDR.jpg


And here's the culprit...


IMG_20150221_211715802.jpg


IMG_20150221_211721433.jpg


I'll let things dry out overnight, and finish tomorrow with adding a bit of caulk and insulation. Drywall/painter due in early this week to close things up..

I dealt with a similar situation in my kitchen last winter. I feel for you.
My wife stayed home from work that day, otherwise the water would've been running for 10-12 hours!
I hate copper pipes, they are very unforgiving to freezing. Any time I replace any plumbing, it's Pex all the way.

Joe
 
Last edited:
To avoid these ads, REGISTER NOW!
Top Bottom