To avoid these ads, REGISTER NOW!

MP&C Shop Projects

22george

Well-known member
Joined
Jan 26, 2011
Messages
1,634
Location
SW Ohio
I didn't use adhesive The inner door has a bit of twist available when skin is "unsecured". So the inner and outer parts were epoxy primed separately, inner installed back on the car, then skin wrapped. Then you can twist the door to better match the opening. Some plug weld holes were drilled from the back side in the flange, and welded in place to hold the door skin in place, and lock the "twist". Plug welds then cleaned up and epoxy primed. Poured some epoxy primer around the inside perimeter to seal up the seam.

Thanks Robert.:bounce:
 
To avoid these ads, REGISTER NOW!
OP
M

MP&C

Well-known member
Joined
Oct 21, 2009
Messages
4,396
Location
Leonardtown, MD
Cody set the hood (bonnet) on the Austin Healey to get a look see on the louvers....


IMG_7154.JPG


…..and this past Tuesday he came back to the shop so we could finish up the louvers in the trunk lid (boot). I must say this was the most involved and challenging louver job we have done so far. The trunk lid has a lot of crown, and with a 6” rise in the center, we needed to use the rotation fixture ala Mini Cooper wheel hub. We added to this a hinge mechanism to allow rotation up and down. The limits of the machine's throat height and high crown also meant we'd have to punch half the louvers from back end first, then rotate the lid and tooling and approach the rest from the front end. Now given the extreme flex/twist that the .050 aluminum is prone to, we needed to make sure the cut pattern would be parallel to the last set at the point we rotated from front to back. This required some "gusset" straps clamped in place to limit the twist.


IMG_7119.JPG


Before this was added, any twist of the panel would change the outer limits of the cut +/- 1/4". Here's the wheel hub arrangement along with the hinges for up and down adjustment. We needed adjustments along 3 different axis to be able keep all the louvers running true and parallel.


IMG_7125.JPG


IMG_7124.JPG


….and we're off....


IMG_7126.JPG


At this point we were 4 hours in to measuring, clamping, test run (drag the cutter against the panel to scribe the location), rotate 180 front to back, and test the pattern again, just to get to where we could start cutting. …..and another 4 hours to go before we finished. All told, with the time Vince and I spent Saturday working out clamping methods and other details, the layout was approx 4 times that of what it took to do the actual cutting.


IMG_7149.JPG


IMG_7150.JPG


IMG_7152.JPG


….and the time lapse video of the process..


IMG_7130.JPG


IMG_7139.JPG


Yesterday Cody sent me pictures of the trunk lid installed.. These louvers really change the attitude of the car... Badass....


IMG_7157.JPG


IMG_7158.JPG


IMG_7154.JPG
 
Last edited:

GRN96WS6

Well-known member
Joined
Dec 23, 2012
Messages
2,193
Location
SOMD
Curious how does a painter ensure they paint the louvers, I feel like a certain technique would be necessary?
 
OP
M

MP&C

Well-known member
Joined
Oct 21, 2009
Messages
4,396
Location
Leonardtown, MD
Thanks for the comments guys.. I am grateful that Cody calls on me for nice challenges like this. Its nice to be backed in a corner every now and then.. :lol_hitti

For painting, this car is all aluminum and is going to stay in bare finish.. IF it were to be painted, I'm glad it's not me doing it. It would take multiple approaches from both sides to cover all the surfaces/edges...
 
OP
M

MP&C

Well-known member
Joined
Oct 21, 2009
Messages
4,396
Location
Leonardtown, MD
Front mounted engine, is using Honda S2000 drivetrain. Trunk was louvered for the look. Will have an inner "skin" to deflect any water that may intrude down and towards the back, where it can drain..
 
OP
M

MP&C

Well-known member
Joined
Oct 21, 2009
Messages
4,396
Location
Leonardtown, MD
Thanks for the info Bob! This one is a 54, I believe parts of it may have been steel but the outer body will be all aluminum when he’s done.
 

EdT

Well-known member
Joined
Sep 21, 2010
Messages
1,104
Location
North Georgia
On most of the Healeys, the central core of the body was aluminum. All the moving panels and the outer fenders were steel. At least that's how the ones I have worked on were arranged. I think there are (were) a couple of companies making aluminum panels to replace the steel ones.
 

Bowtie4life

Well-known member
Joined
Apr 17, 2020
Messages
129
Location
Washington DC
There were 55 aluminum-bodied model 100S (S for Sebring) Austin Healeys built in the mid-1950s. To further reduce weight they came with an aluminum head on the 4-cylinder engine, a small plastic windscreen, no convertible top and no bumpers. It also came with disk brakes on all four corners (first production car so equipped).
https://en.wikipedia.org/wiki/Austin-Healey_100


Thanks for the information guys. I remember now Bob about the all aluminium ones. I forget more about cars than I retain. There is a guy not to far from me that has been working on Healeys exclusively for years. This guy has never advertised and you wouldn't even know that he does if you never been in there before.
 

WoodsTruck

Well-known member
Joined
Jan 12, 2013
Messages
1,019
Love the projects.

Question though. I have a project where I want to install nutserts through the back of a cab and have access to the back before the bed gets bolted on. Any suggestions on how to seal the outside of the nutsert from the elements? This is on a Toyota pickup and the factory uses some rubber cap type things to cover the nutsets that are installed in the kick panel and inner fender.
 
OP
M

MP&C

Well-known member
Joined
Oct 21, 2009
Messages
4,396
Location
Leonardtown, MD
McMaster carries some thread-sealing closed end rivet nuts...

https://www.mcmaster.com/rivet-nuts/sealing-rivet-nuts/


The length of the bolts will be more critical so you don't bottom out, but this should protect from water intrusion. If the grip range on the rivet nut does not go low enough for your metal thickness, I've also installed them using a thick, snug fitting washer on the inside to match the grip range. Also helps to spread out the load in sheet metal.
 
OP
M

MP&C

Well-known member
Joined
Oct 21, 2009
Messages
4,396
Location
Leonardtown, MD
Time to play catch up here..


Vince got two of the milk cans media blasted and worked on the third while I sprayed some SPI epoxy primer on the first two.


IMG_7212.JPG


IMG_7213.JPG


Also got some epoxy on the hood brace...


IMG_7211.JPG


Ends are quite a bit better than before..


IMG_7210.JPG


IMG_7209.JPG


I received a state of the art drawing the other day, and was asked if we could duplicate the 1/16 offset shown...


IMG_7221.PNG


Of course this meant we needed some new tooling..


IMG_7222.JPG


IMG_7223.JPG


IMG_7237.JPG


Our first sample, with the proper 3/4 flange...


IMG_7234.JPG


IMG_7235.JPG


IMG_7238.JPG


We had another panel that would require the offset on two adjacent edges, so one more sample...


IMG_7241.JPG


IMG_7257.JPG


IMG_7258.JPG


video action:


That'll do pig, that'll do.


Some of the upholstery parts have been trickling in... so let's add some bling factor....


IMG_7245(1).JPG


IMG_7250.JPG


IMG_7253.JPG


IMG_7256.JPG


IMG_7243(2).JPG


IMG_7244(2).JPG


….and we made a hand punch for setting the trim tag rivets on the cowl...


IMG_7192.JPG


IMG_7193.JPG


video version:


And finally, we also had some 3/8 stainless fuel line to straighten out of it's coil for a big block mopar… Video parts 1, 2, and 3:


.
 
To avoid these ads, REGISTER NOW!
OP
M

MP&C

Well-known member
Joined
Oct 21, 2009
Messages
4,396
Location
Leonardtown, MD
More progress in the shop, another upholstered piece getting assembled... this one the driver's side rear kick panel. Our polished stainless seat belt escutcheons are installed, one in the front for the lap belt and up top for the shoulder belt.


IMG_7286(1).JPG


IMG_7284(1).JPG


Midrange and tweeter installed....


IMG_7287(1).JPG


Vince has the hood just about ready for epoxy...


IMG_7270.JPG


IMG_7295.JPG


And we got a new "radius" fixture for the Tommasini wheeling machine, allows you to use it to form radius on flat bar and other shapes..


IMG_7281(1).JPG


action shot....


Last edited:

shortykorte

Well-known member
Joined
Sep 1, 2014
Messages
8,034
Location
Tallahassee, Fl
The bright work on the upholstered panels really set the panels off. It’s a shame very few will realize the effort that goes into making a gem.

What’s the difference in using Powermax versus a bead roller on making offset, gauge of metal?

Also clever adapter for English wheel.


Sent from my iPhone using Garage Journal
 
OP
M

MP&C

Well-known member
Joined
Oct 21, 2009
Messages
4,396
Location
Leonardtown, MD
With the Bead profiles for a bead roller, the "shape change" is merely pulling metal from the adjacent area just outside the profile, which in many cases will warp/distort. The Pullmax/Lennox, given proper tooling, will add a bit of stretch to a bead where any distortion is minimized. For the offset shown, more than anything the Lennox was used so we could make use of the linear slide for better precision when we do the final pieces. Feeding the bead roller by hand, especially for repeat passes, can be challenging to follow the exact same path. Having it clamped to the linear slide should give us better results.
 

stokefire7

Well-known member
Joined
Oct 5, 2011
Messages
616
Question for you, bro. Would an English wheel take the texture out of this ?
 

Attachments

  • texture.jpg
    texture.jpg
    143.3 KB · Views: 115

WoodsTruck

Well-known member
Joined
Jan 12, 2013
Messages
1,019
Any suggestions on prep or materials needed to paint stainless steel mirrors and chromed door handles?

Thanks
 
OP
M

MP&C

Well-known member
Joined
Oct 21, 2009
Messages
4,396
Location
Leonardtown, MD
If it were me, and the chrome is free of pitting and not peeling, I would lightly abrade with Garnet or Black Beauty media blast (80 grit or finer) until the shiny disappears and then prep and Epoxy prime. This is similar to what we've done with the stainless replacement hardware we use on our bus repairs:


For the hardware, we media blast the heads using 80 grit garnet media and then paint the urethane directly on the bare metal using NO primer..... I've found that more build thickness makes for easier chips. This method seems to hold up well, even using drill/drivers for installation.


Picture%203855.jpg
 
OP
M

MP&C

Well-known member
Joined
Oct 21, 2009
Messages
4,396
Location
Leonardtown, MD
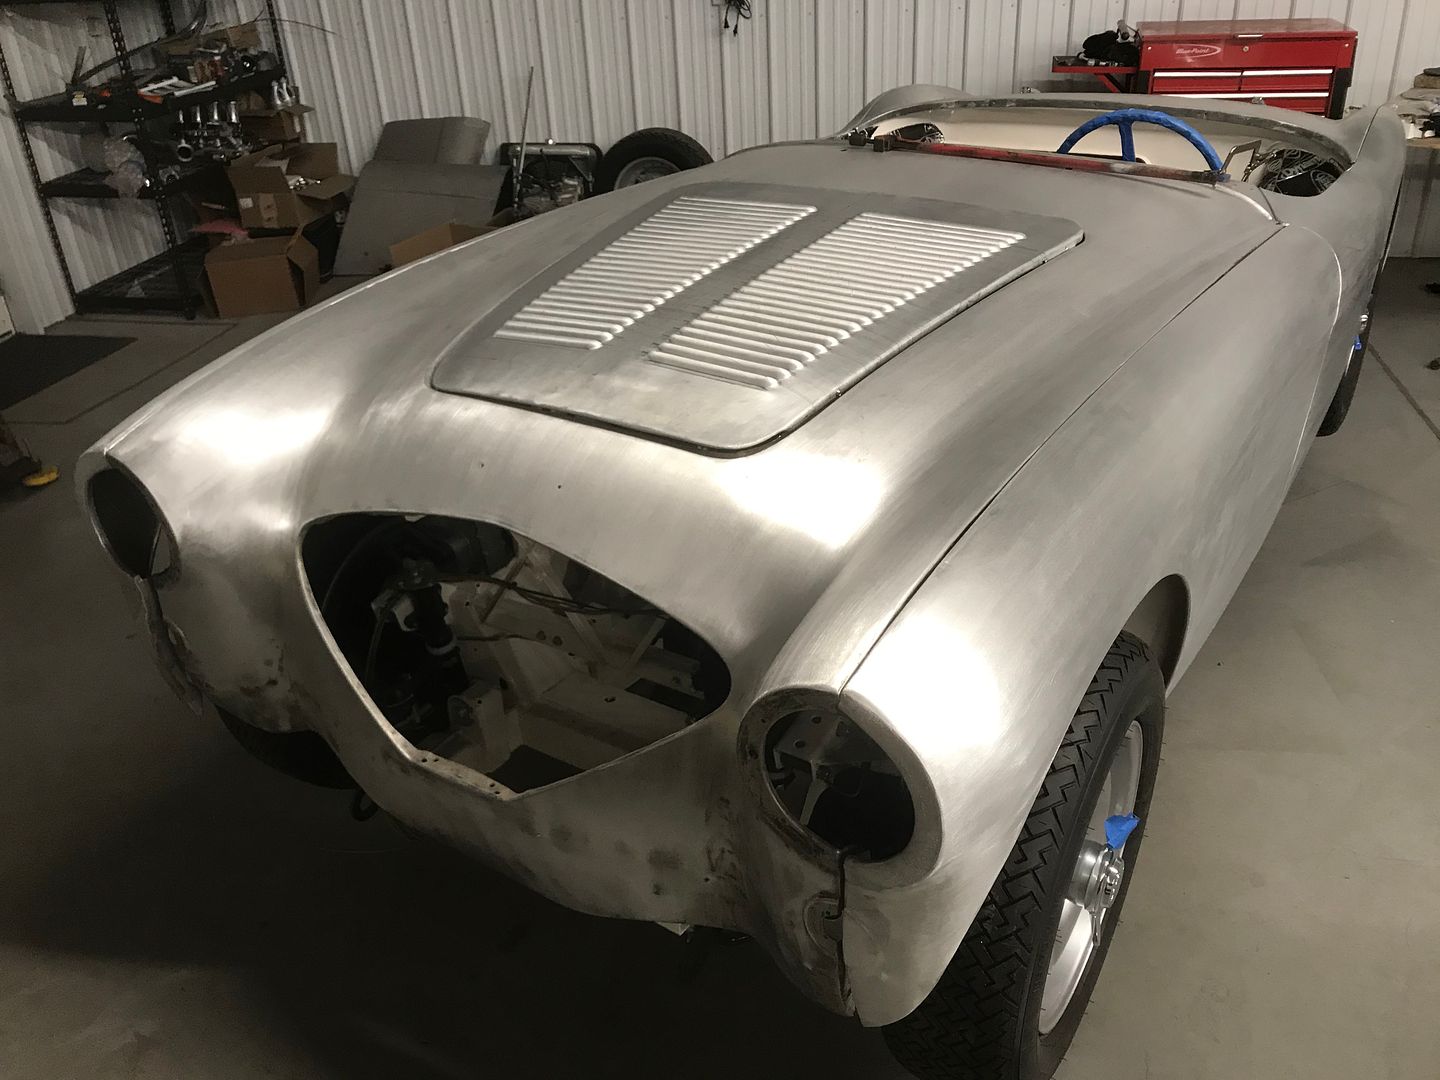
Overdue for another update...

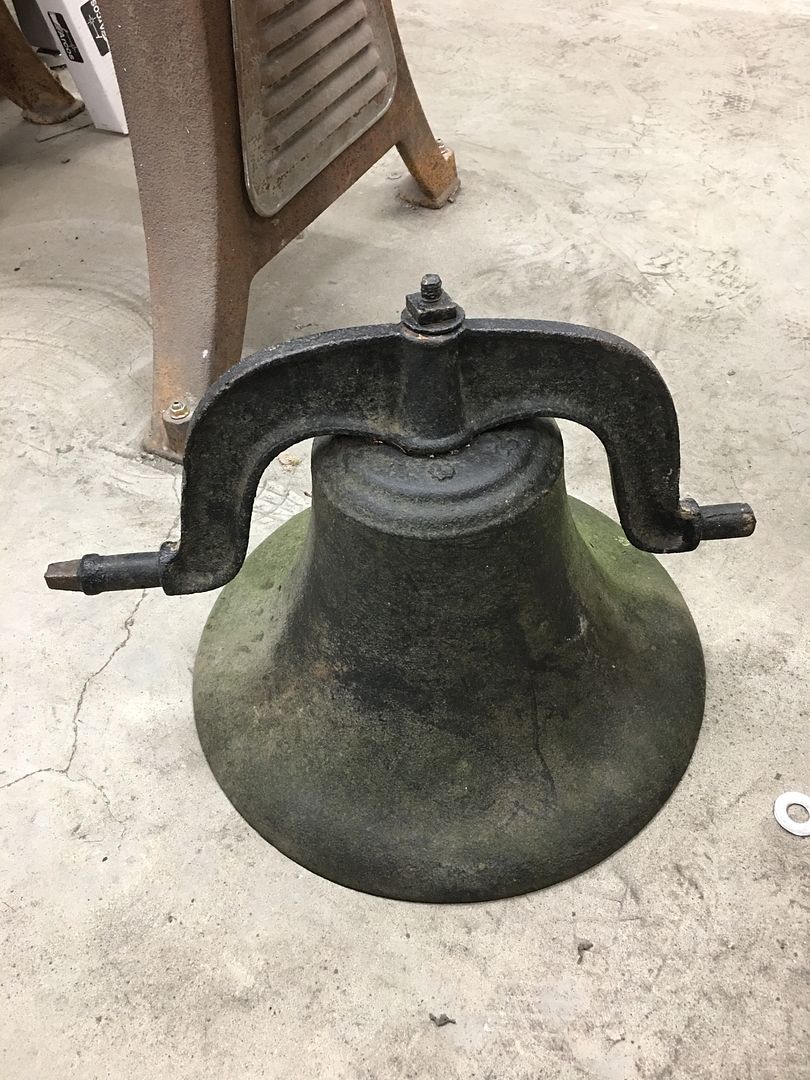
So with all three milk cans delivered, why not a dinner bell? Indeed. This one was missing the clapper, so that's the latest fabrication...


IMG_7371.JPG


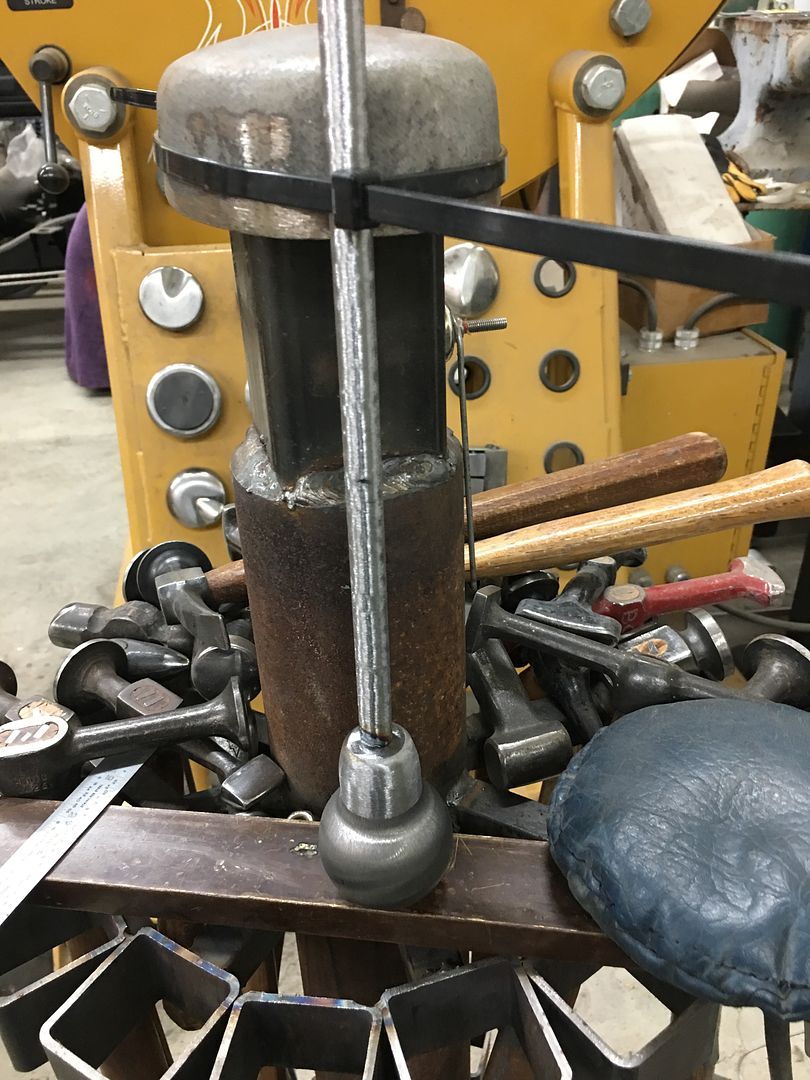
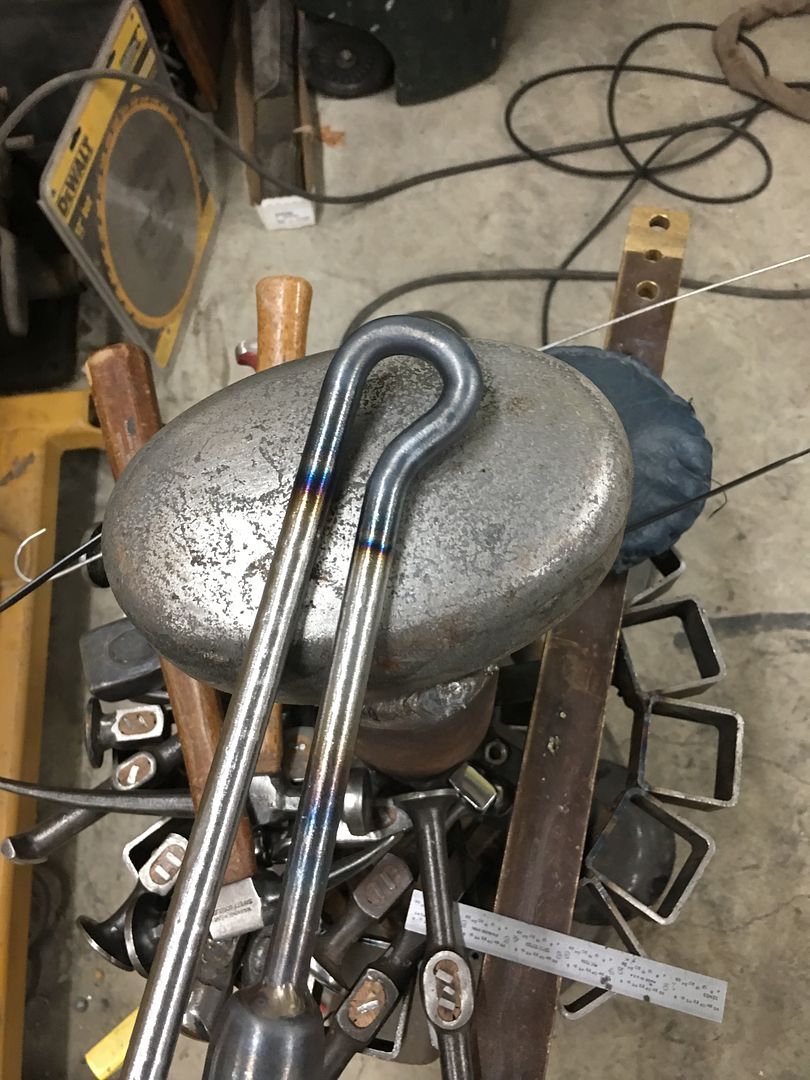
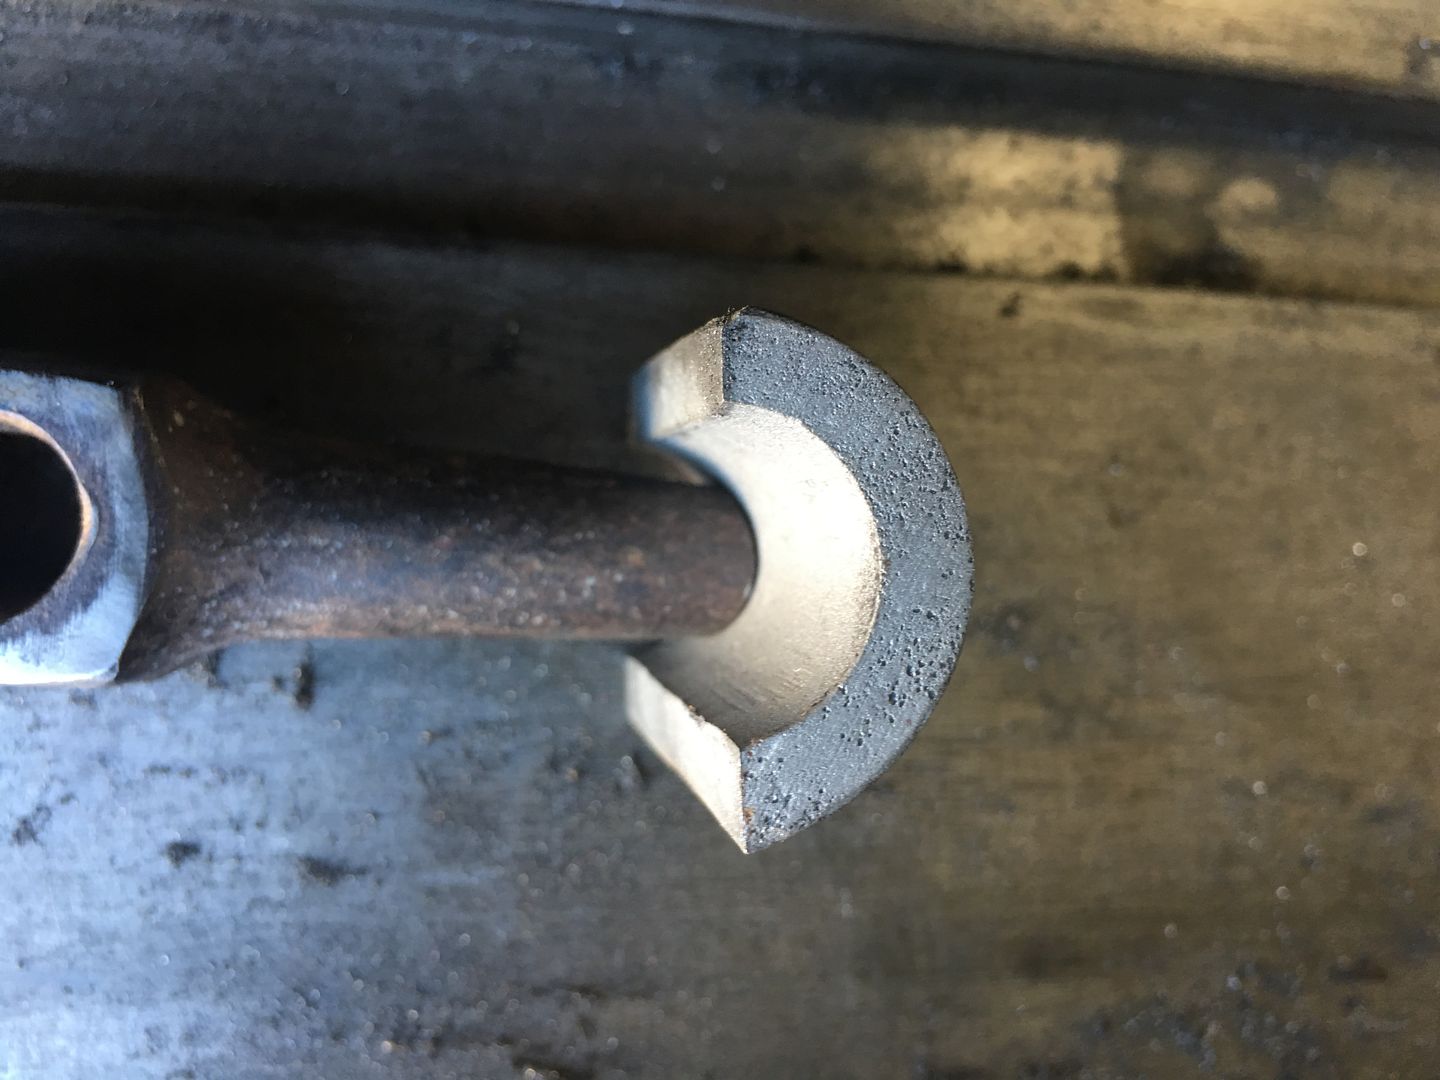
A used 2" hitch ball was reworked in the lathe, and looks like this will be a good start...


IMG_7366.JPG


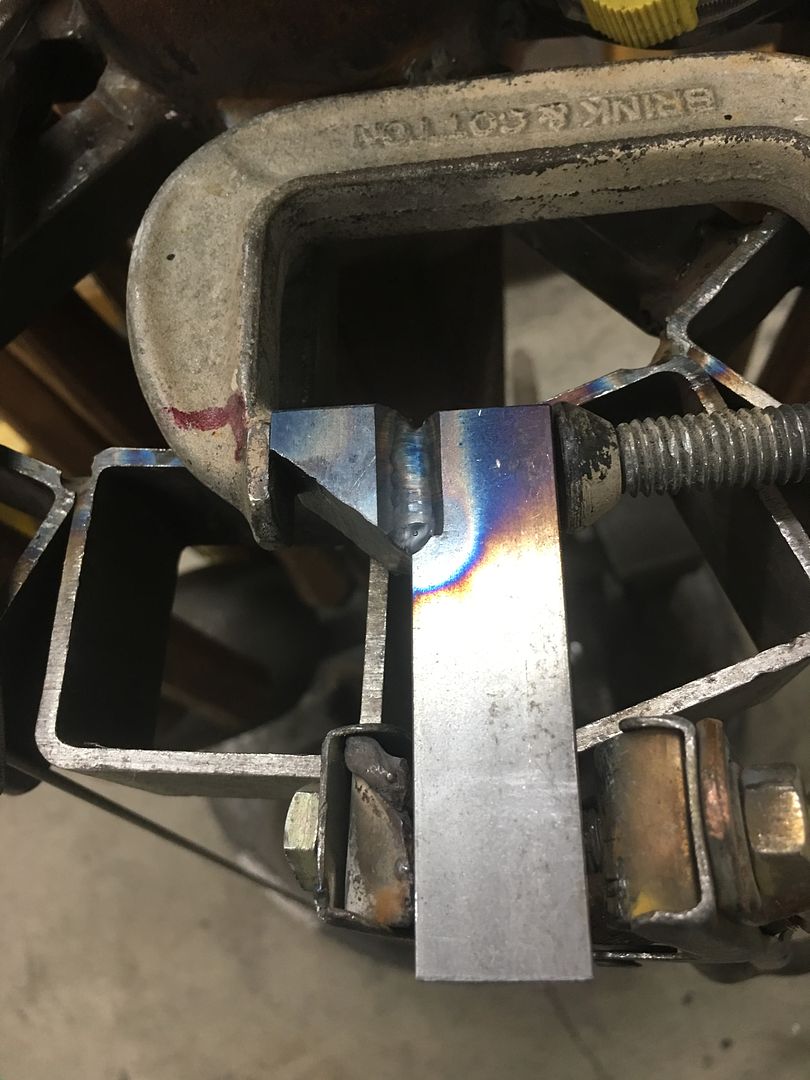
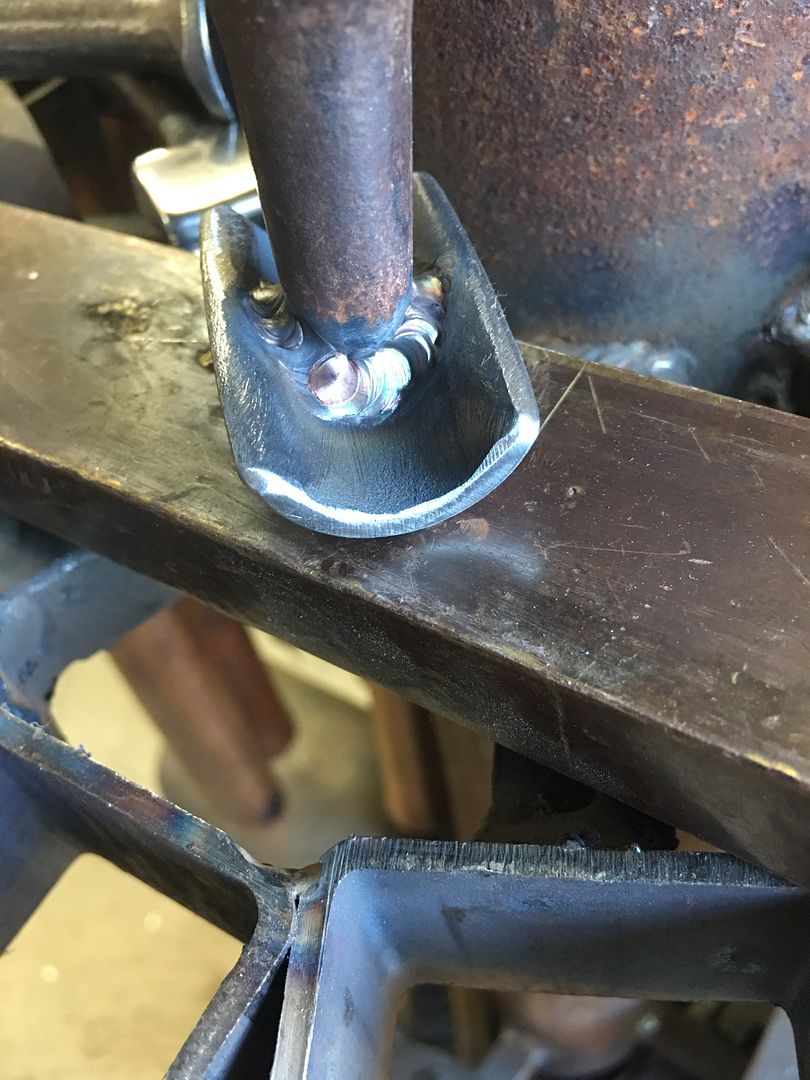
Hammer/bench head stand is used as a welding fixture.. Hey, whatever works..
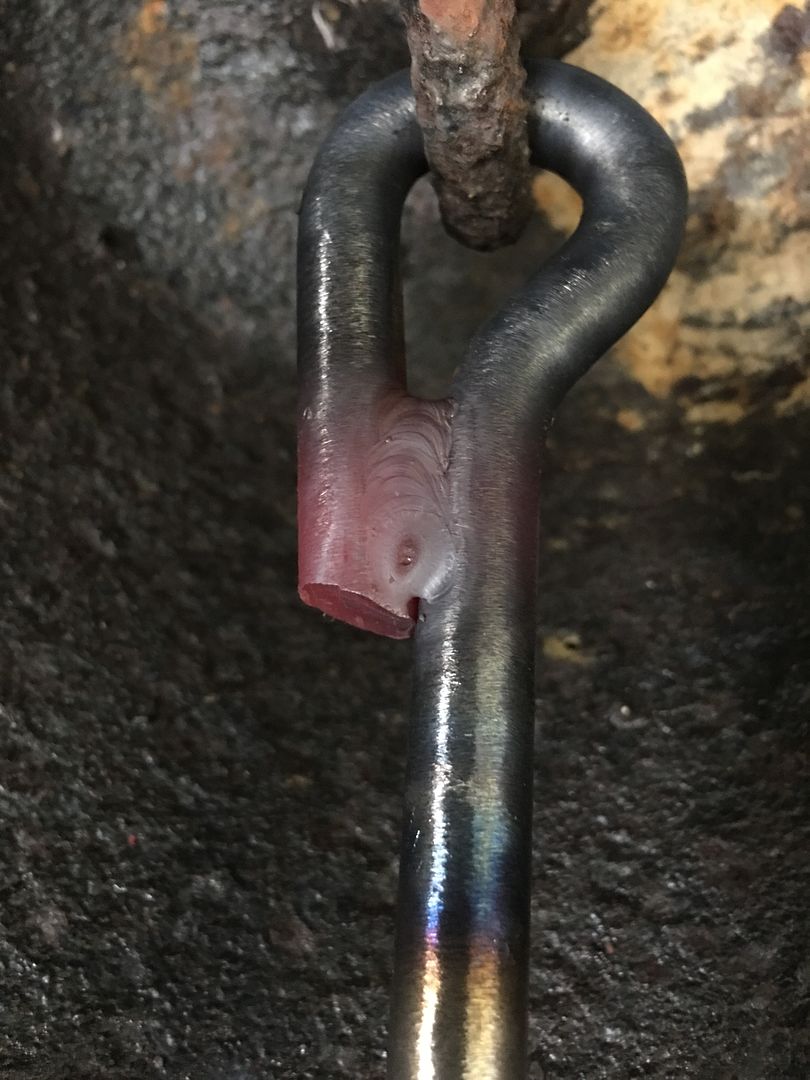

IMG_7367.JPG


root pass


IMG_7368.JPG


IMG_7369.JPG


IMG_7372.JPG


IMG_7374.JPG


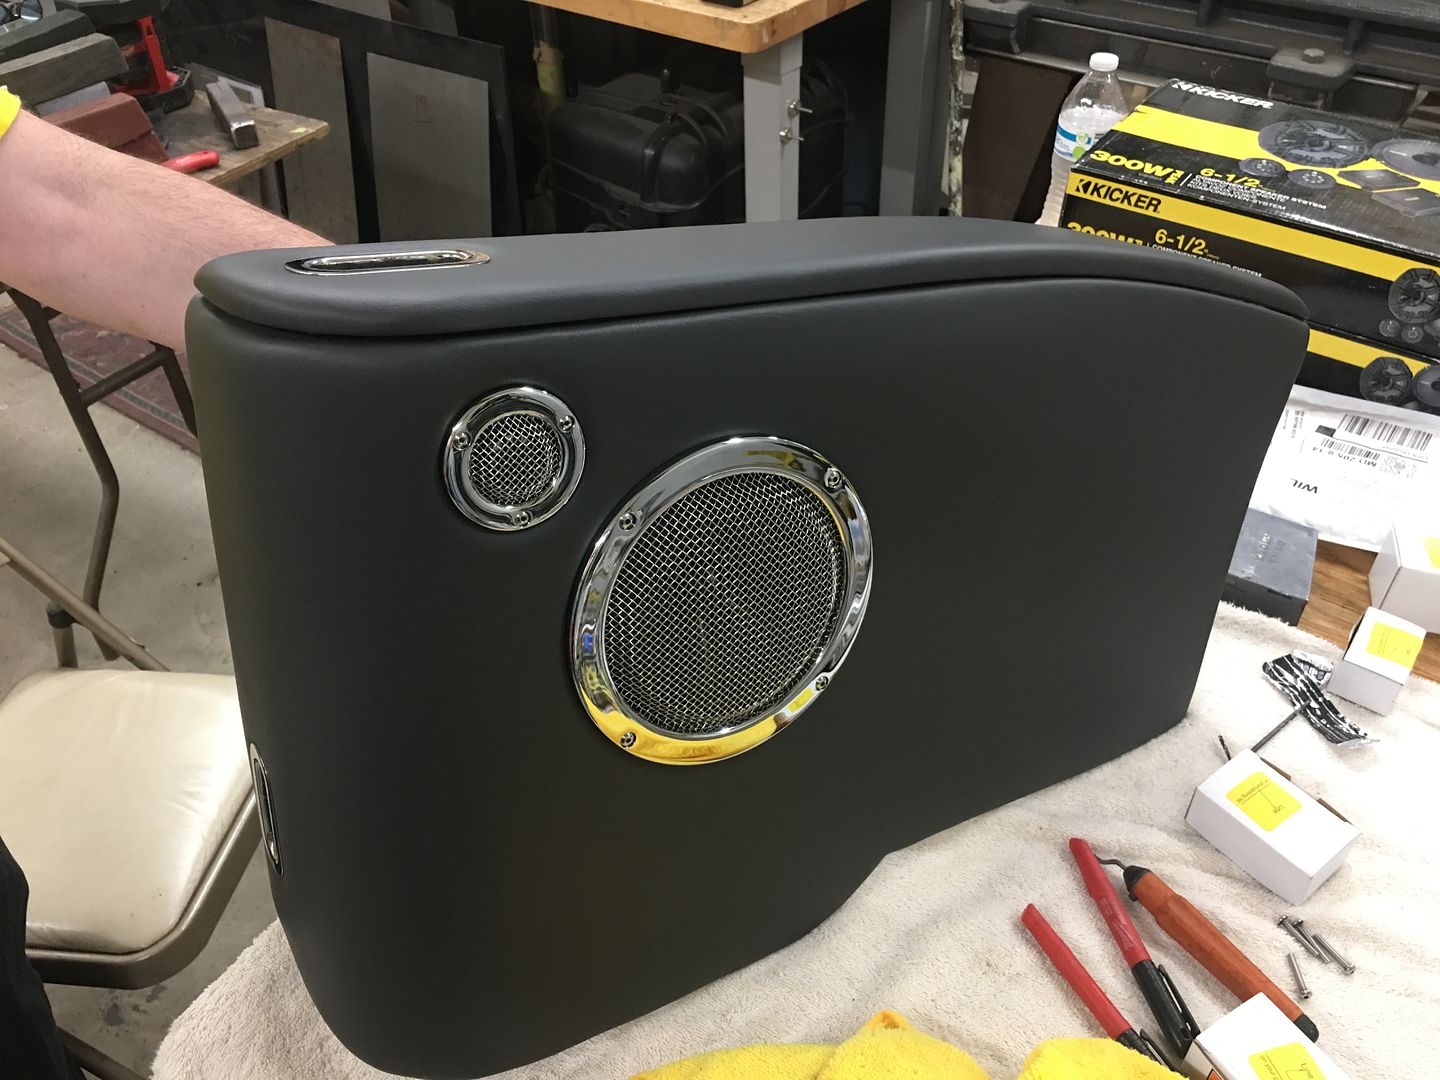
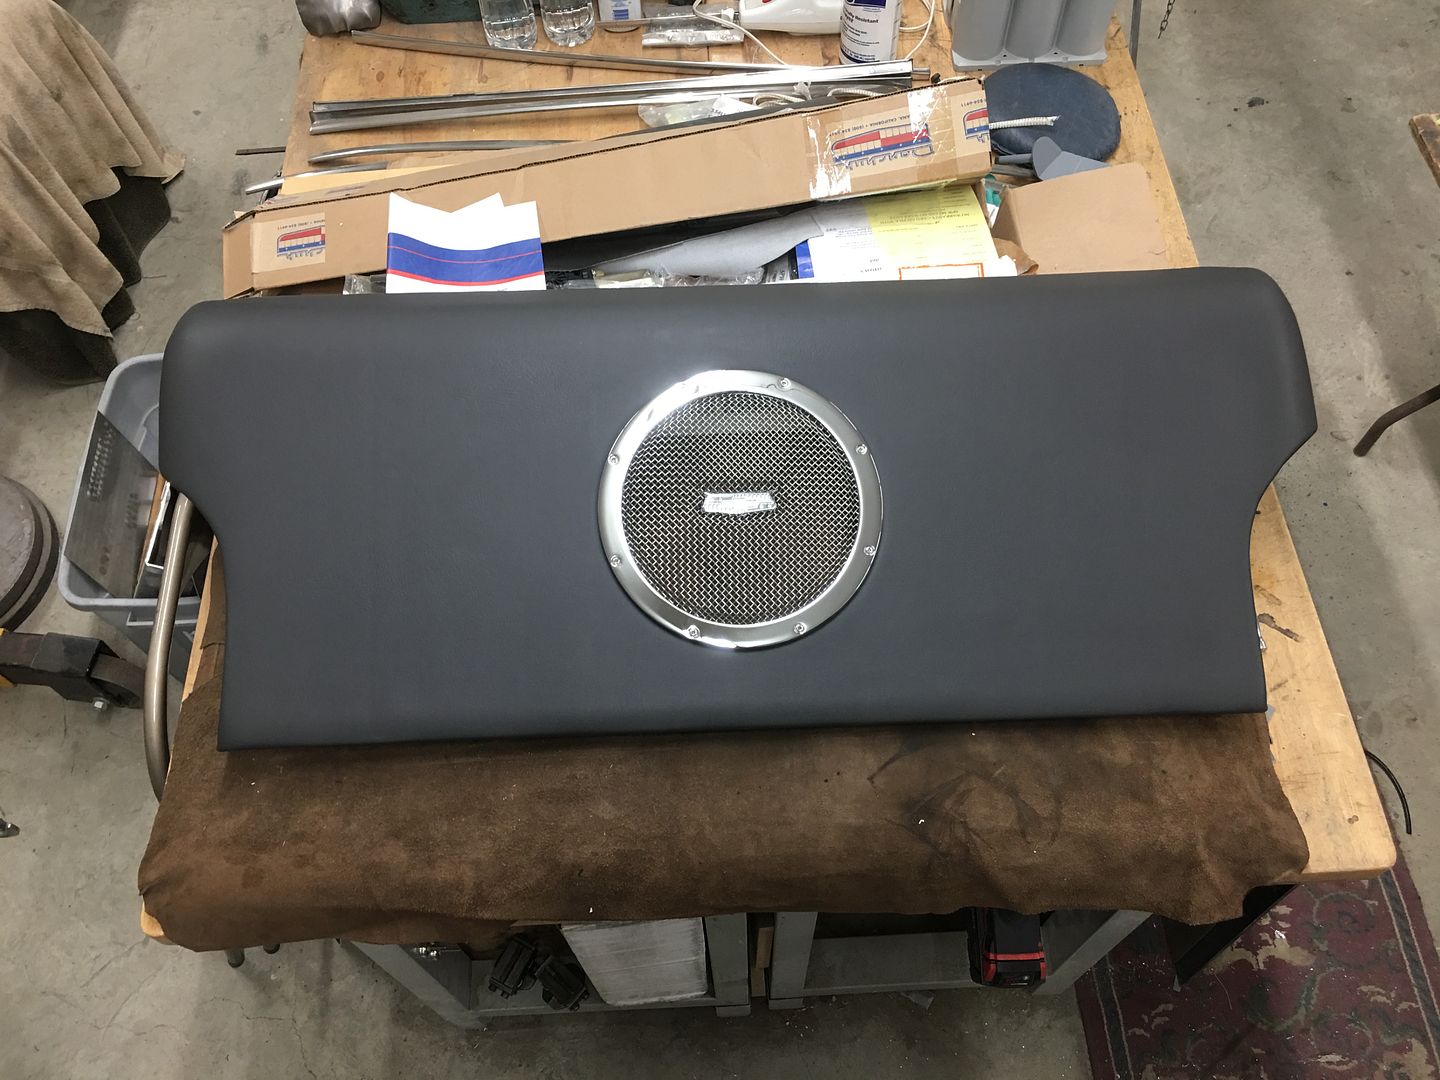
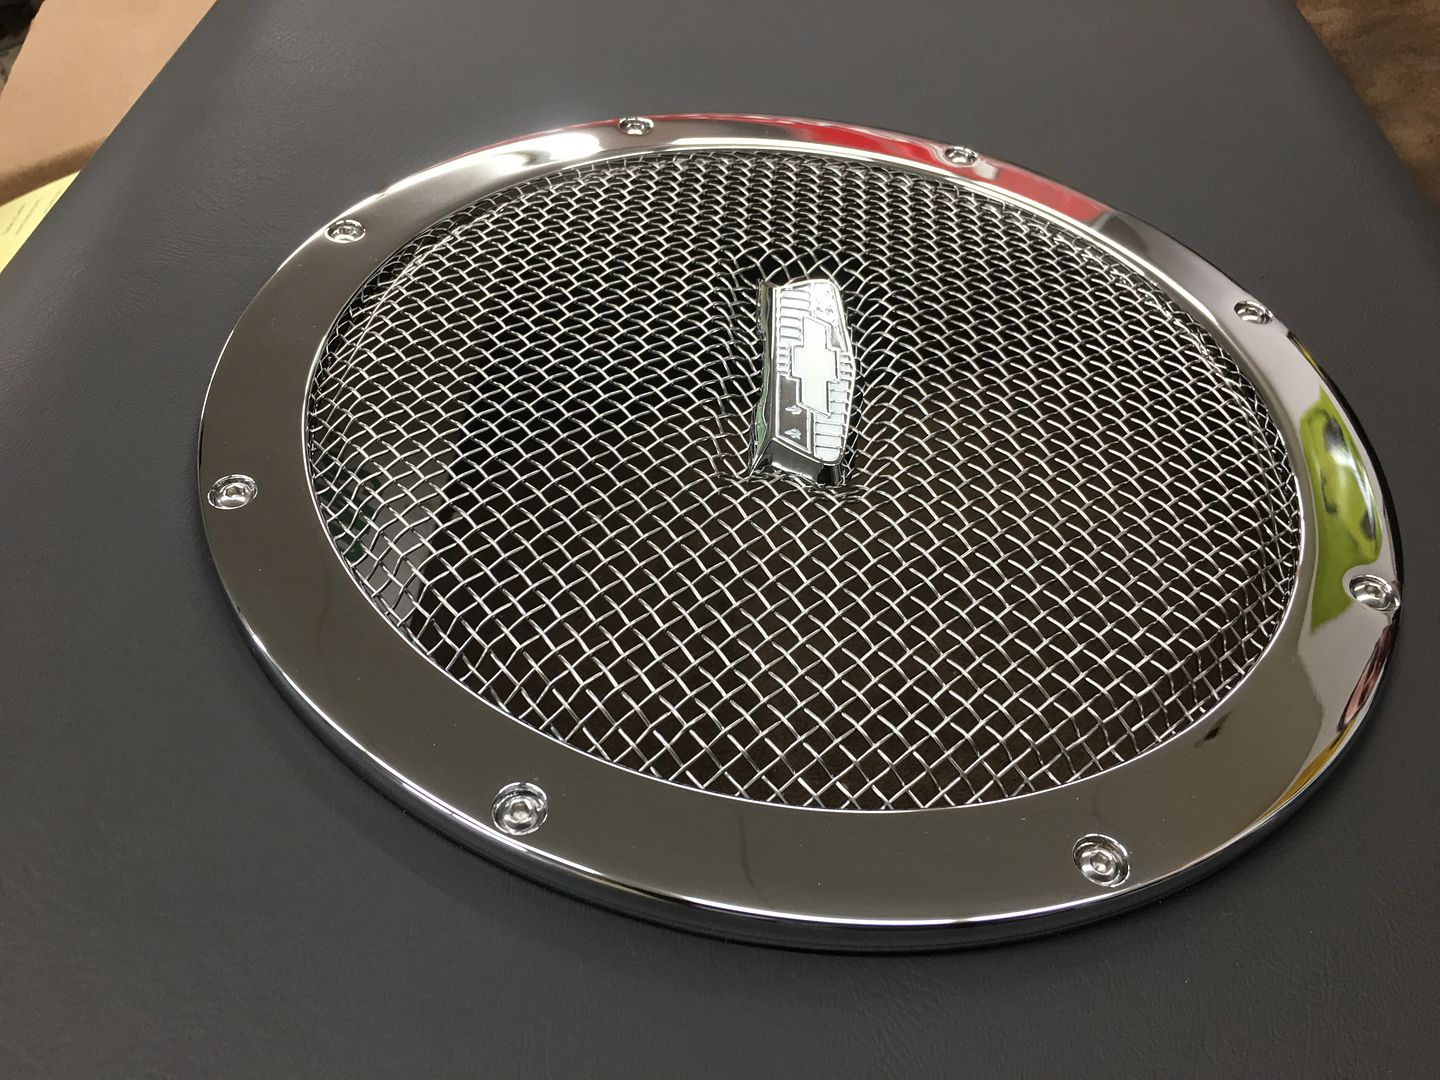
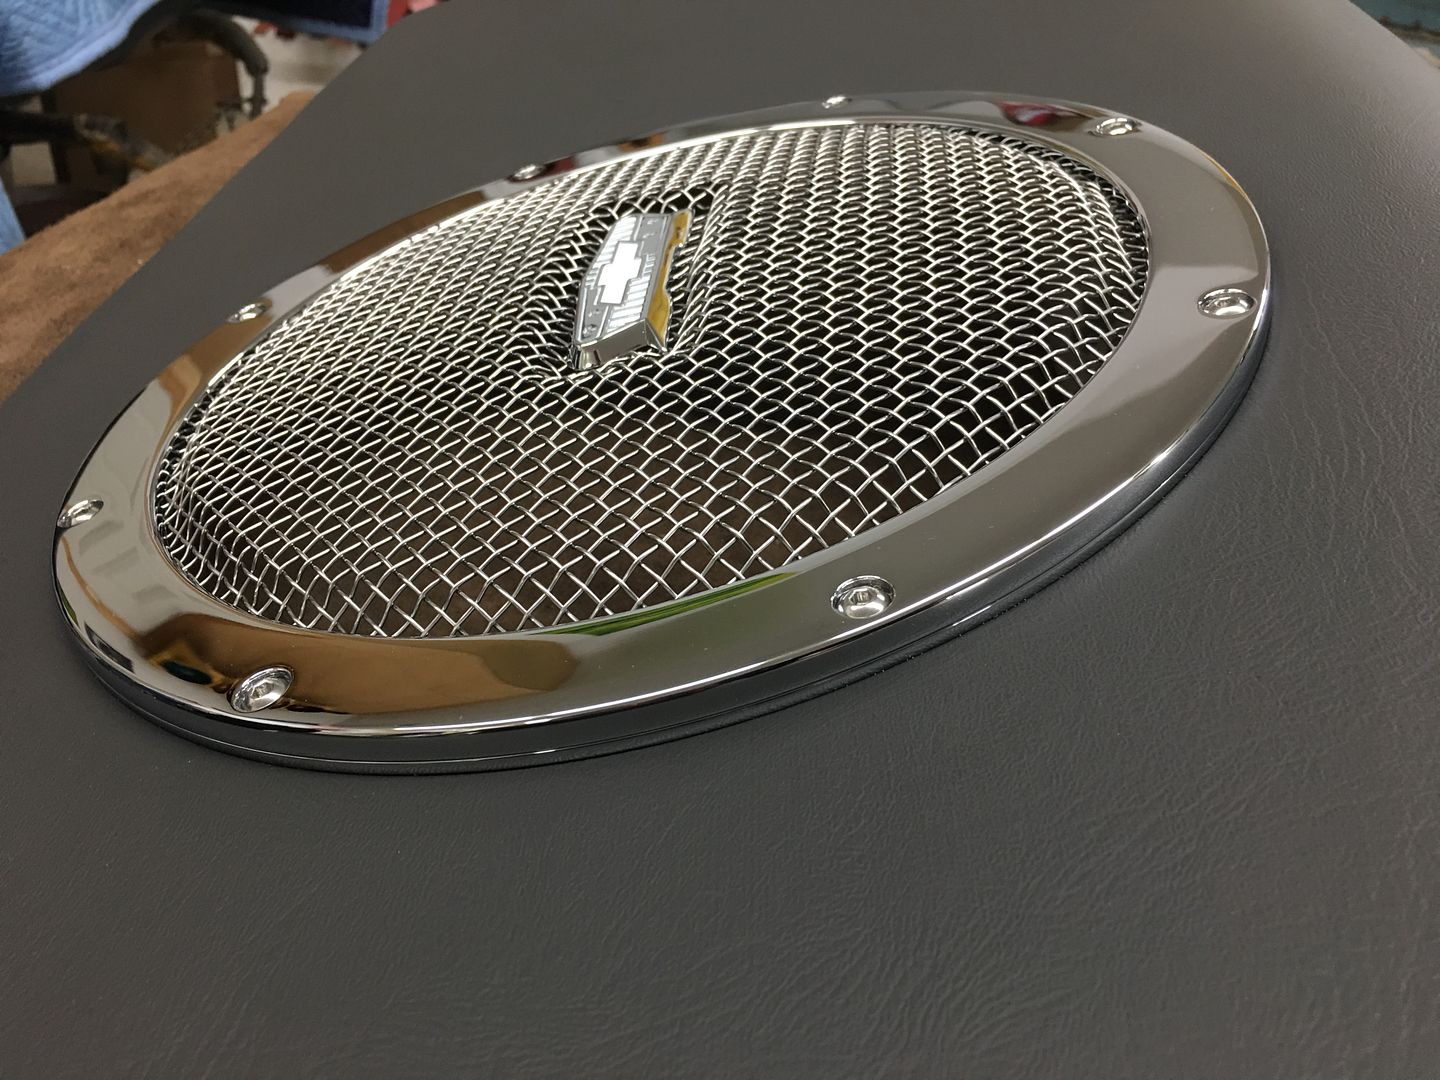
Finished product in action:


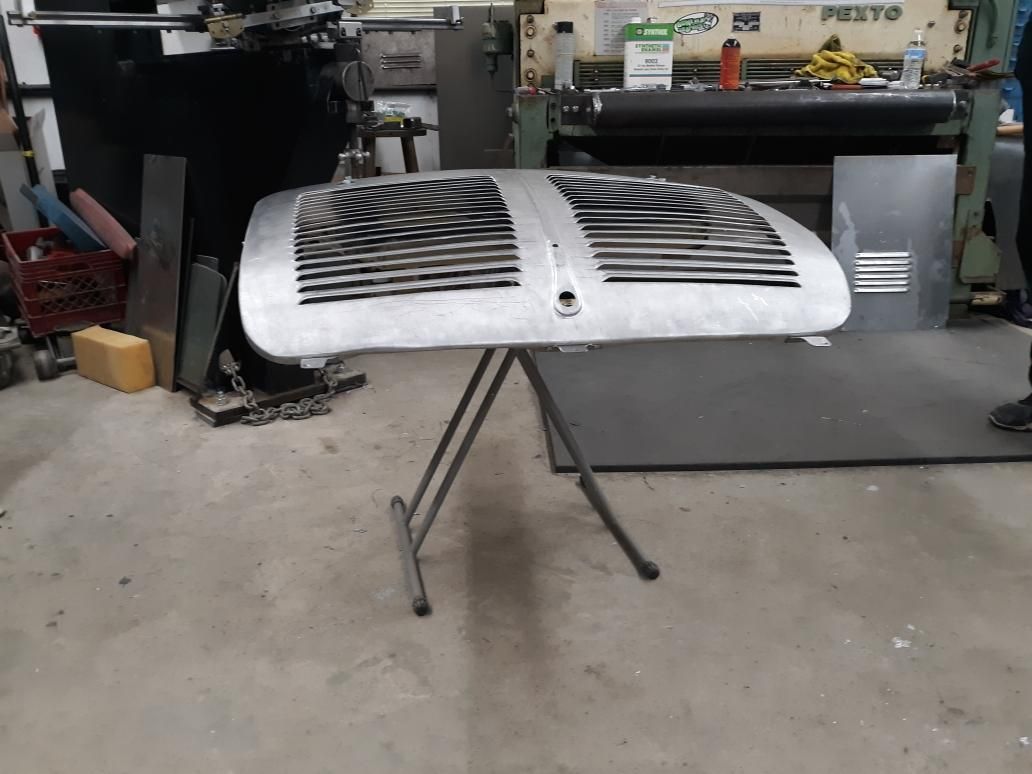
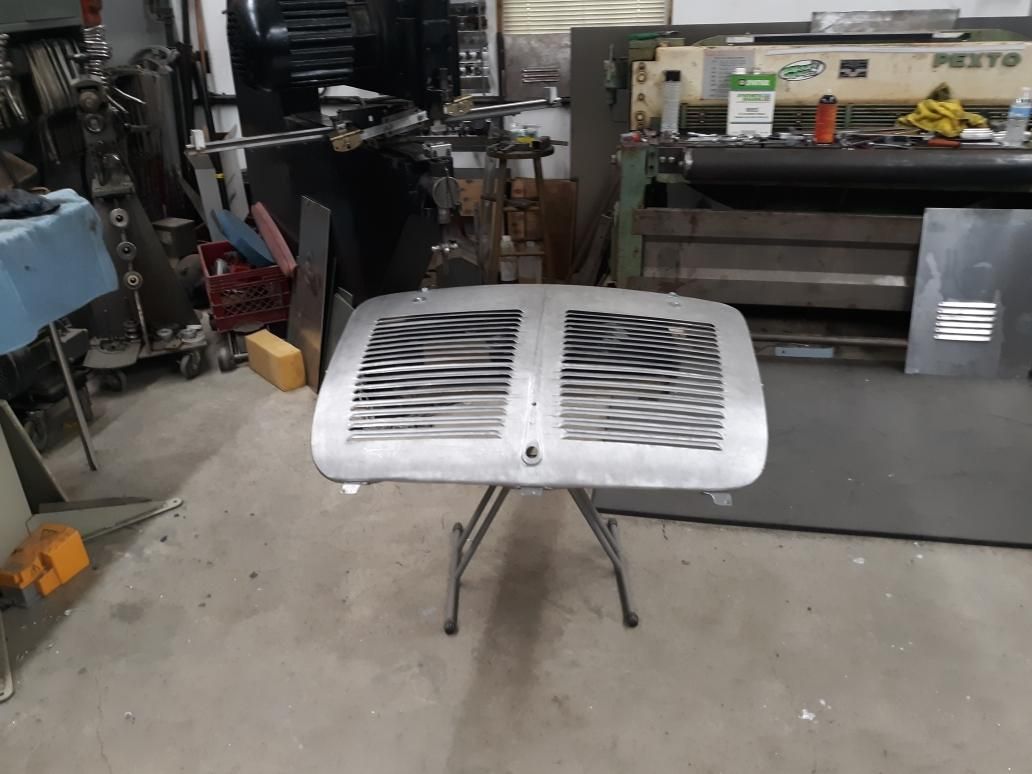
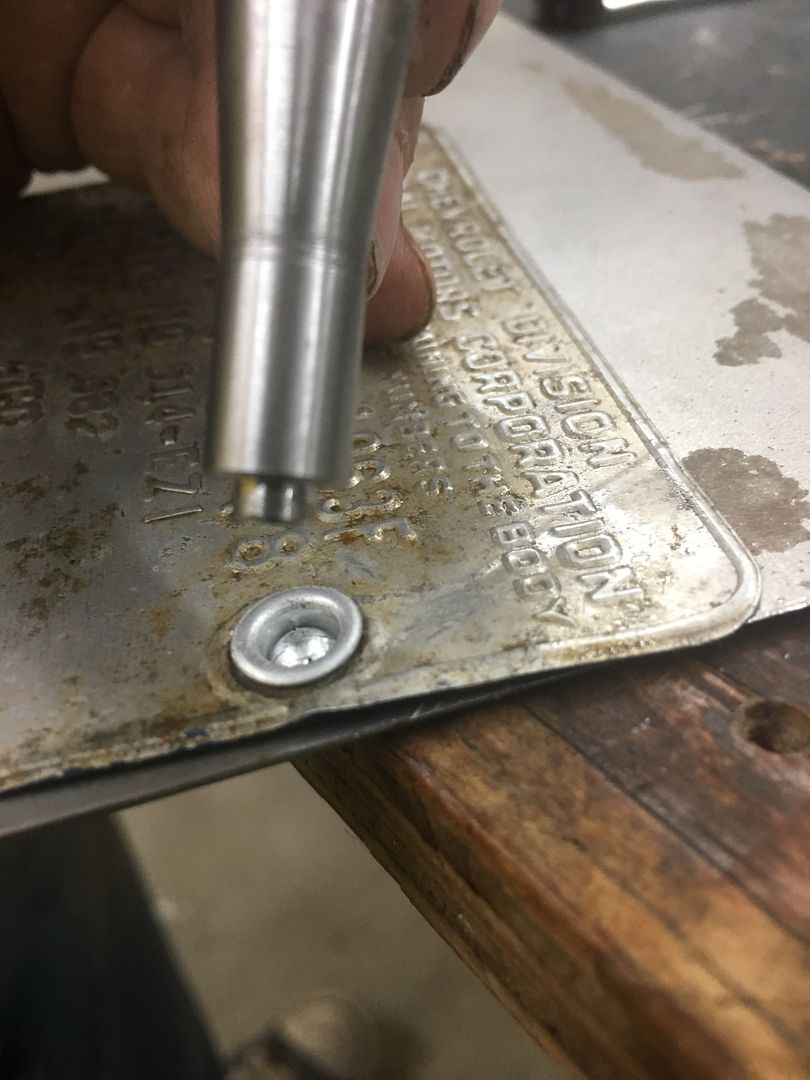
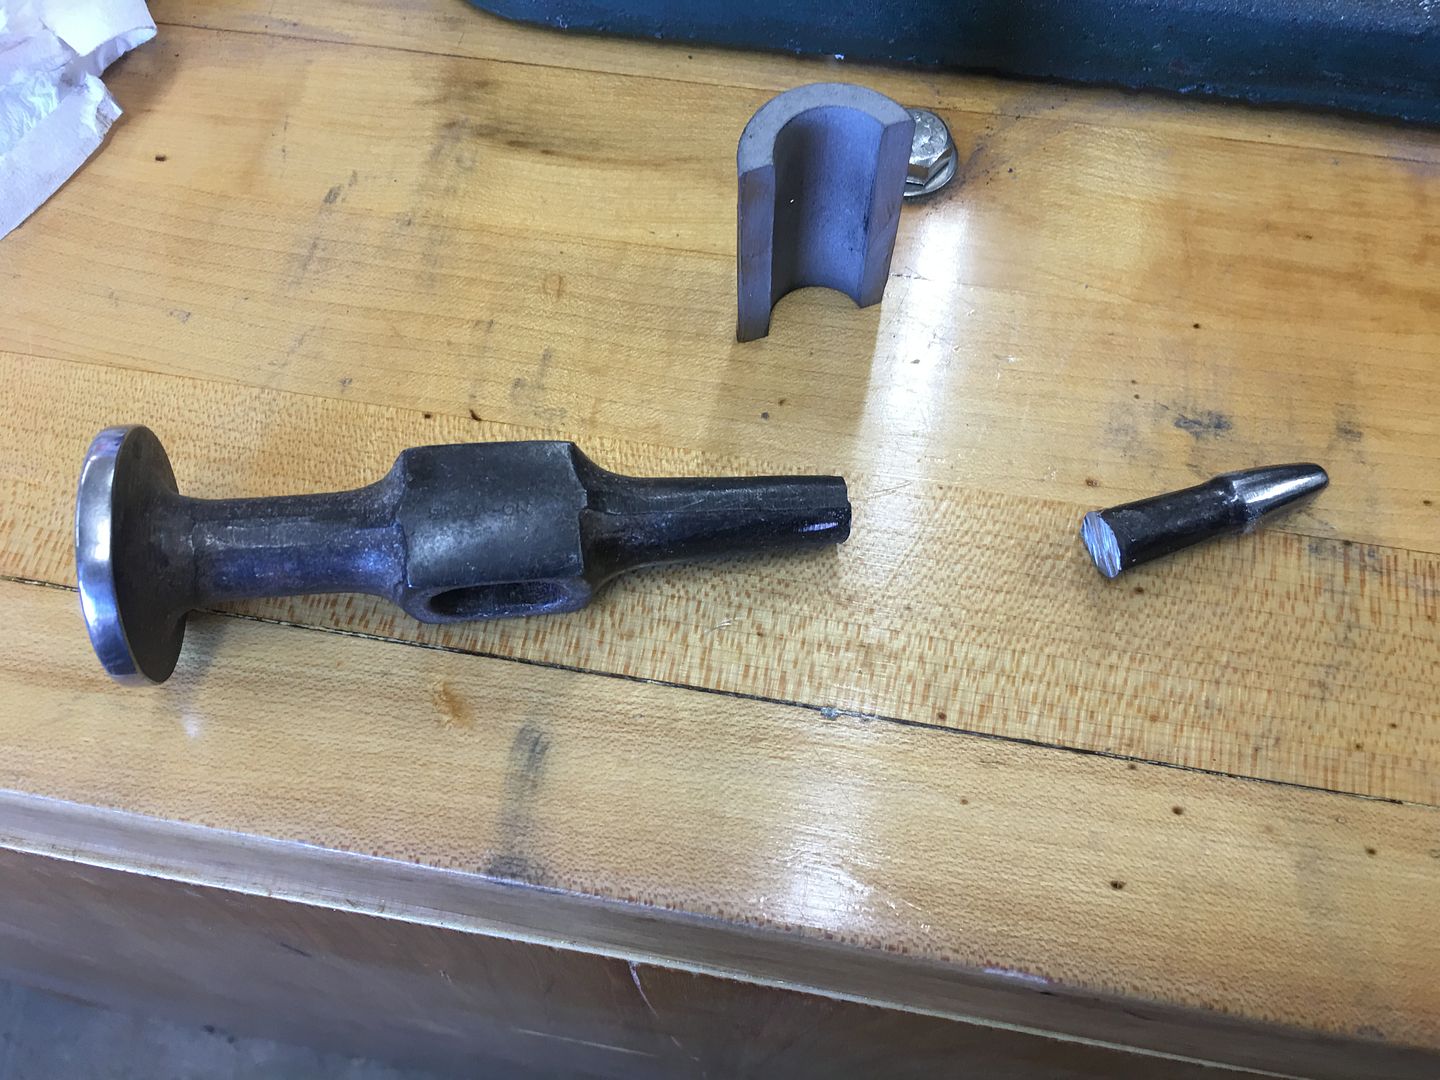
We had some dings in the F7 hood to remove that were located in the radius along the sides.. Didn't really have a hammer that fit the exact requirement, so I use a "KIT" that my buddy Will Cronkrite had given me, a piece cut out of a Model A leaf spring.


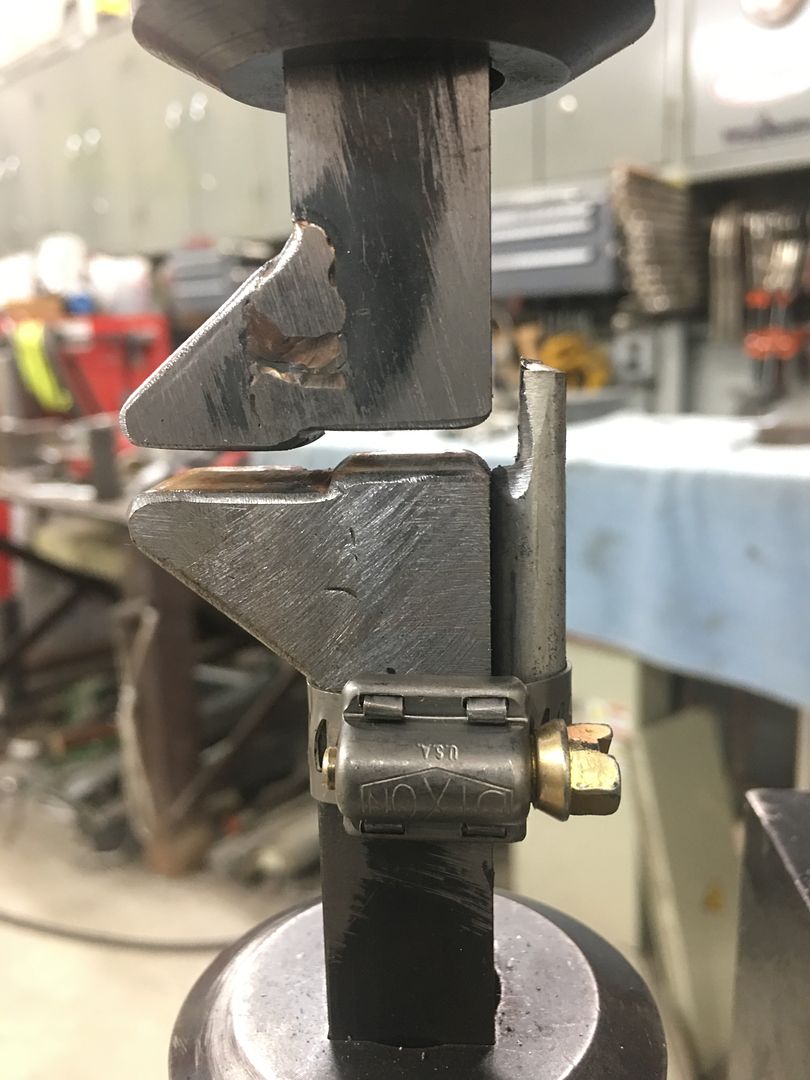
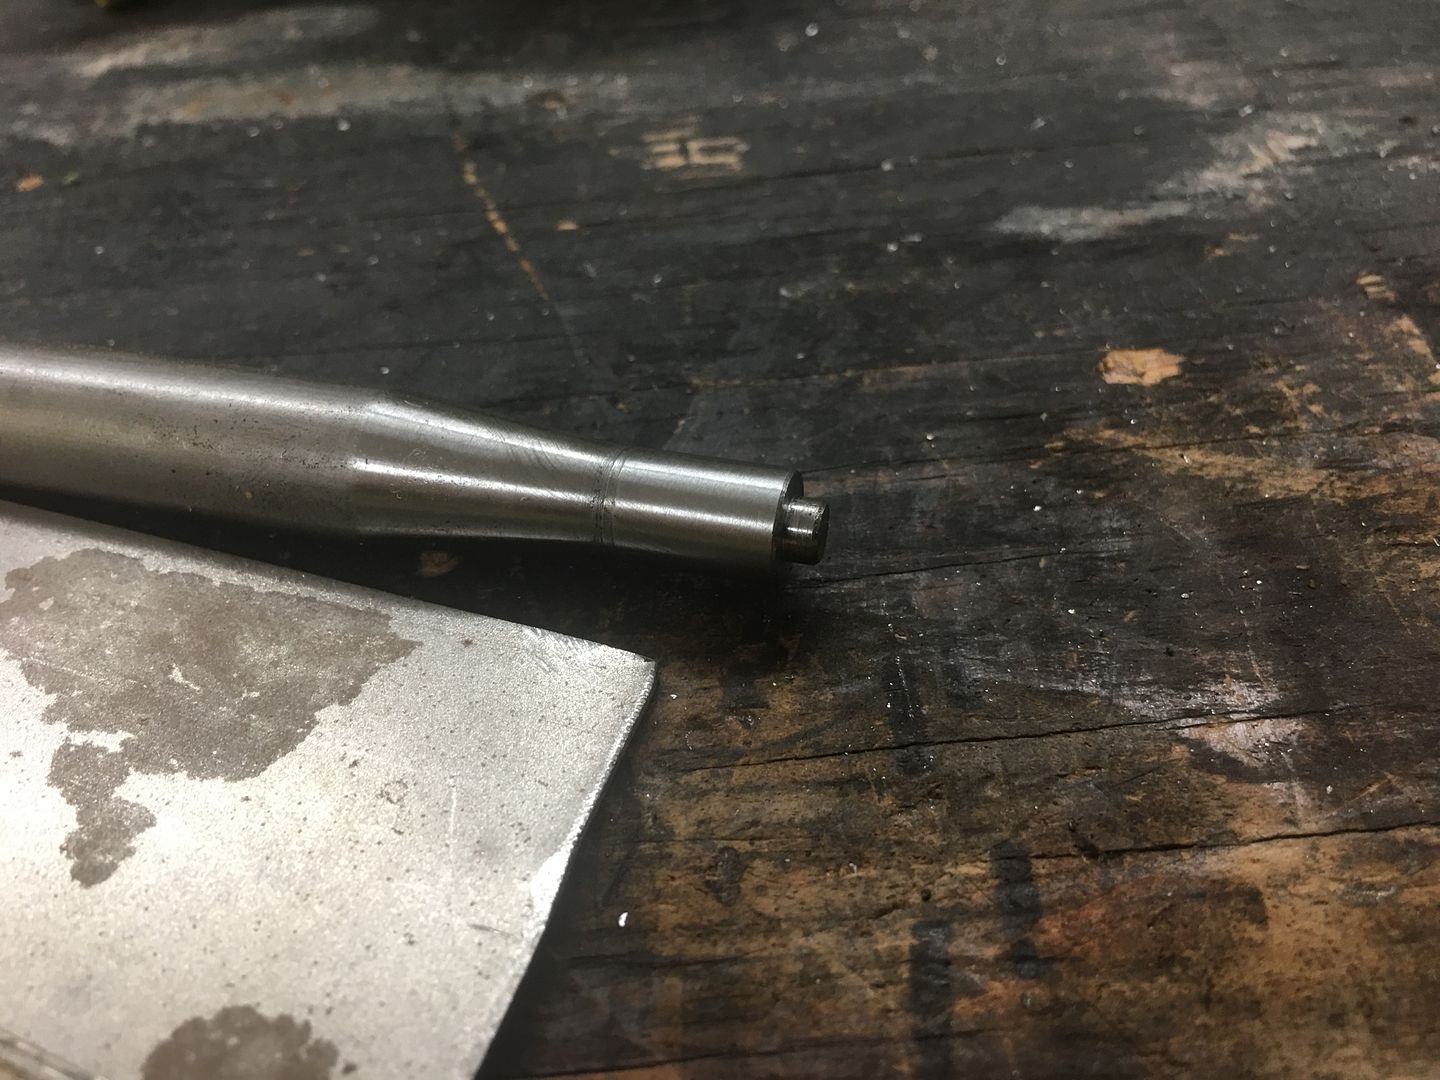
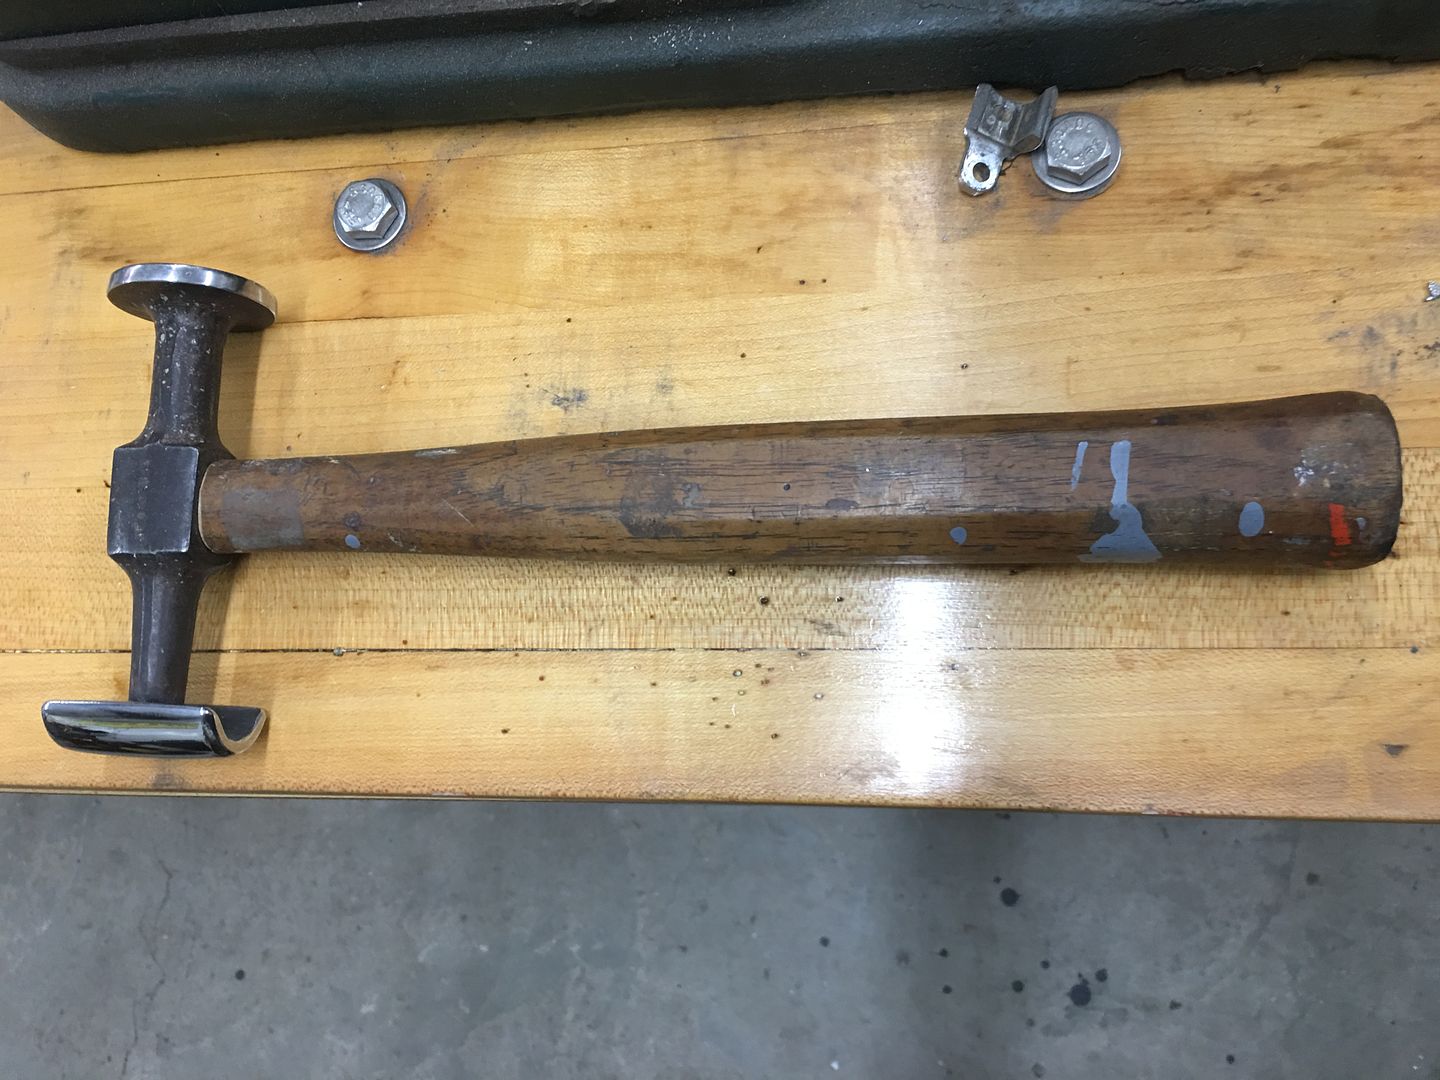
I had more than one BF603 in stock, and rarely use the pick end, so it became the likely candidate.


IMG_7334.JPG


IMG_7335.JPG


IMG_7336.JPG


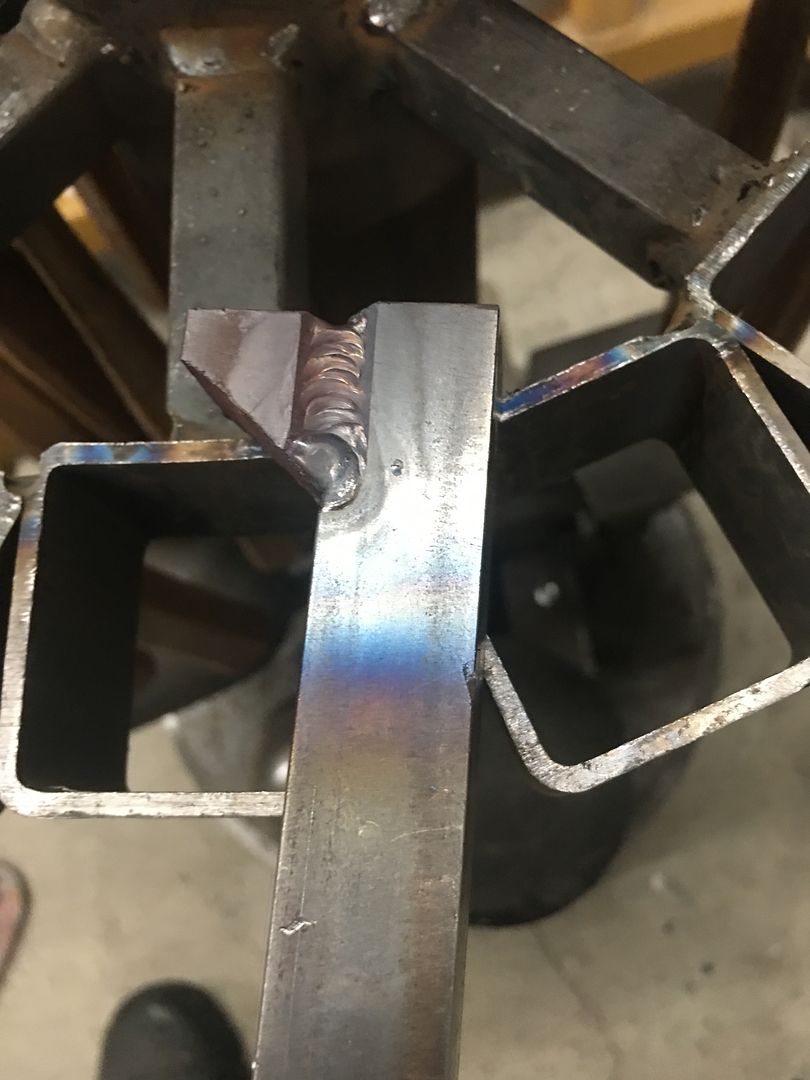
TIG welded in place using ER312 rod


IMG_7340.JPG


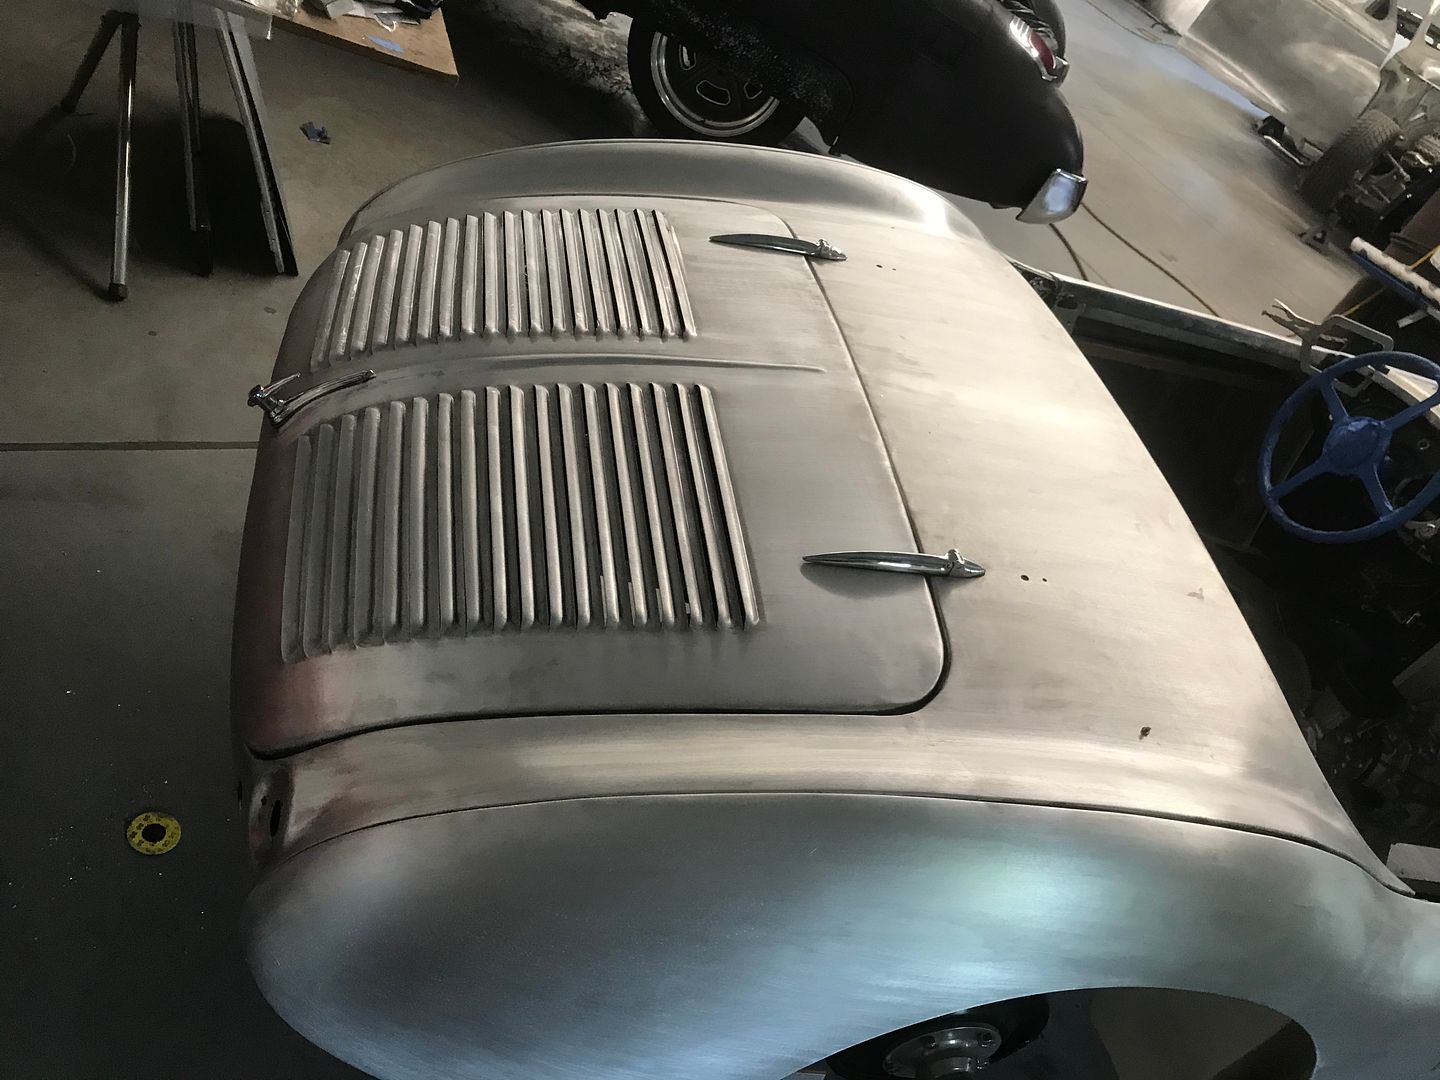
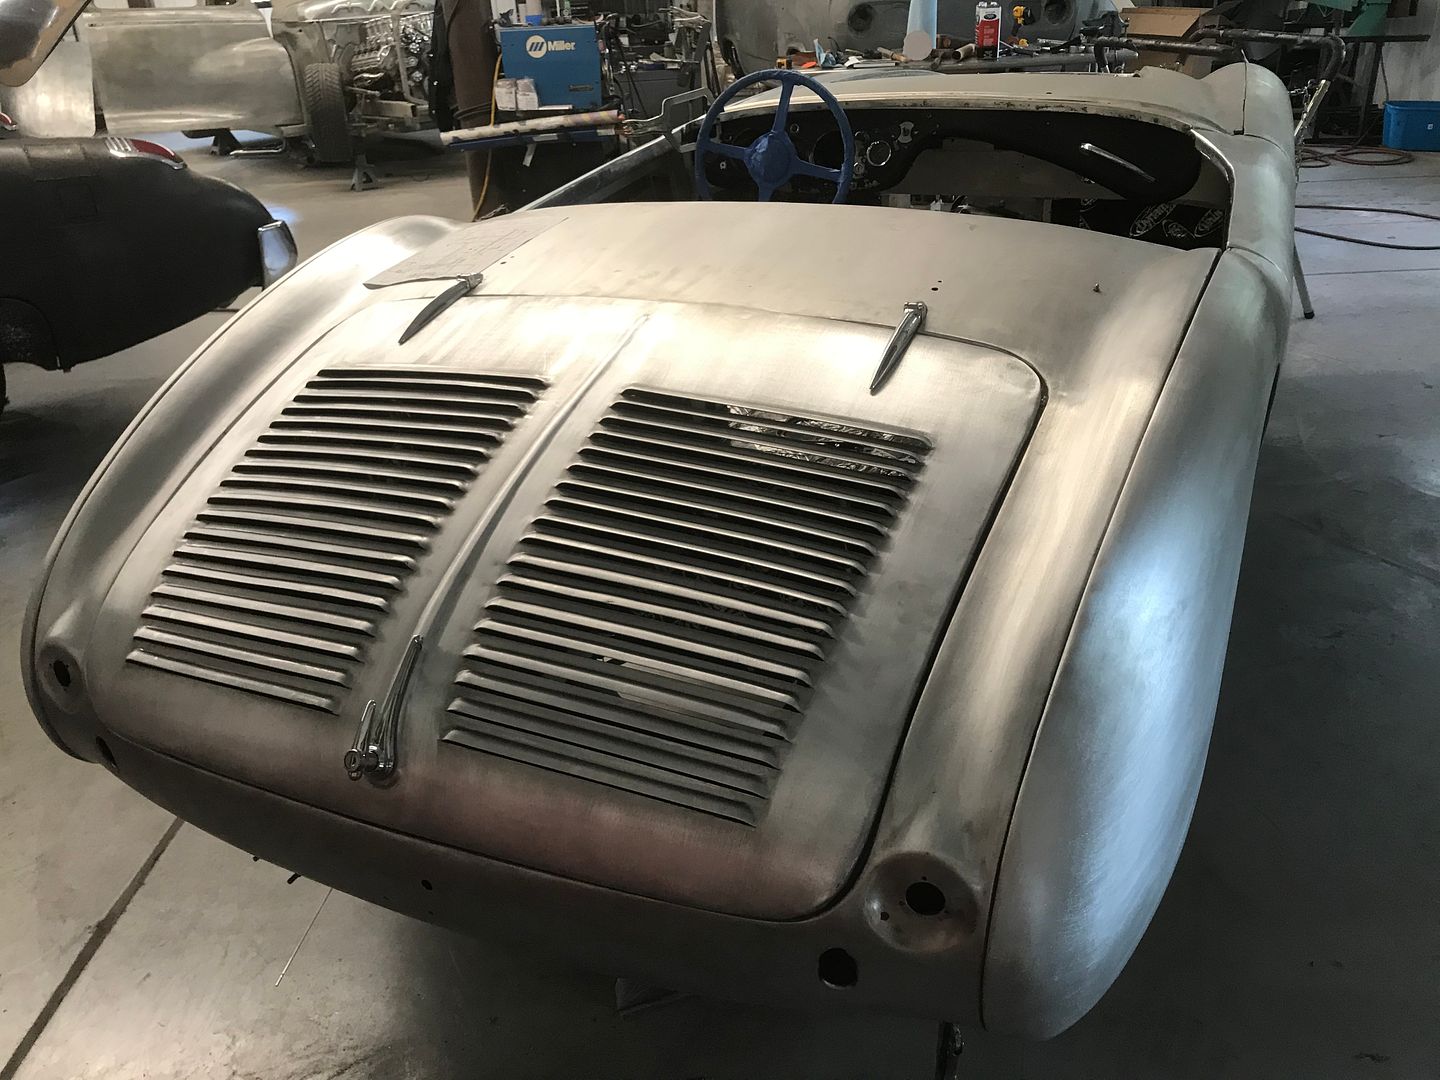
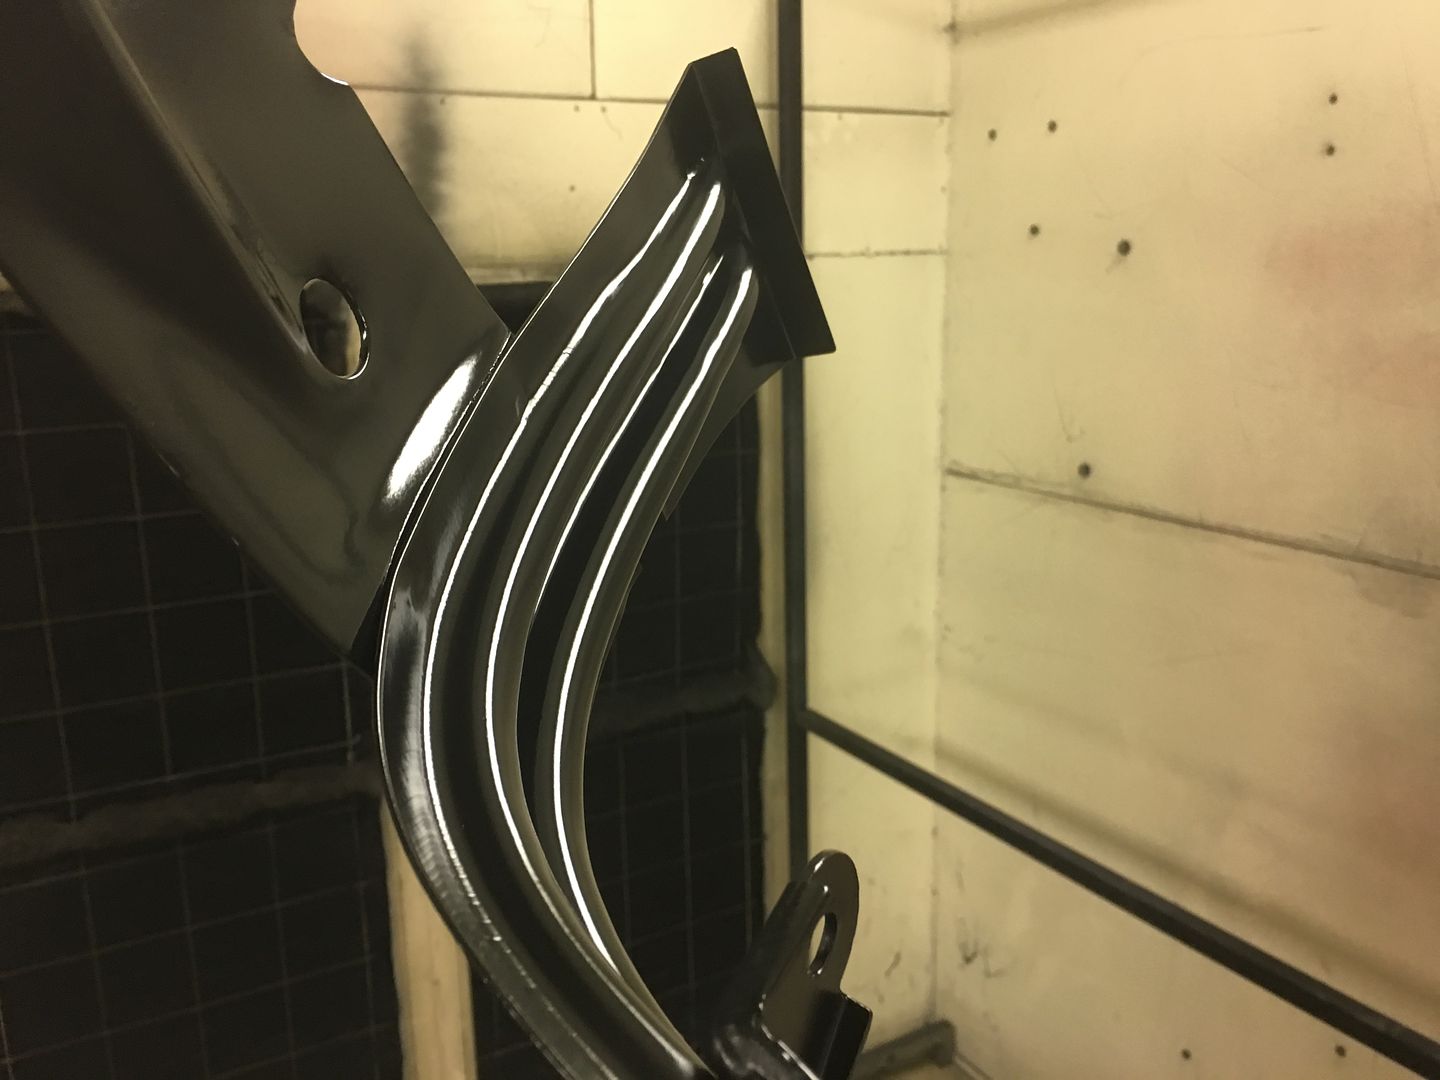
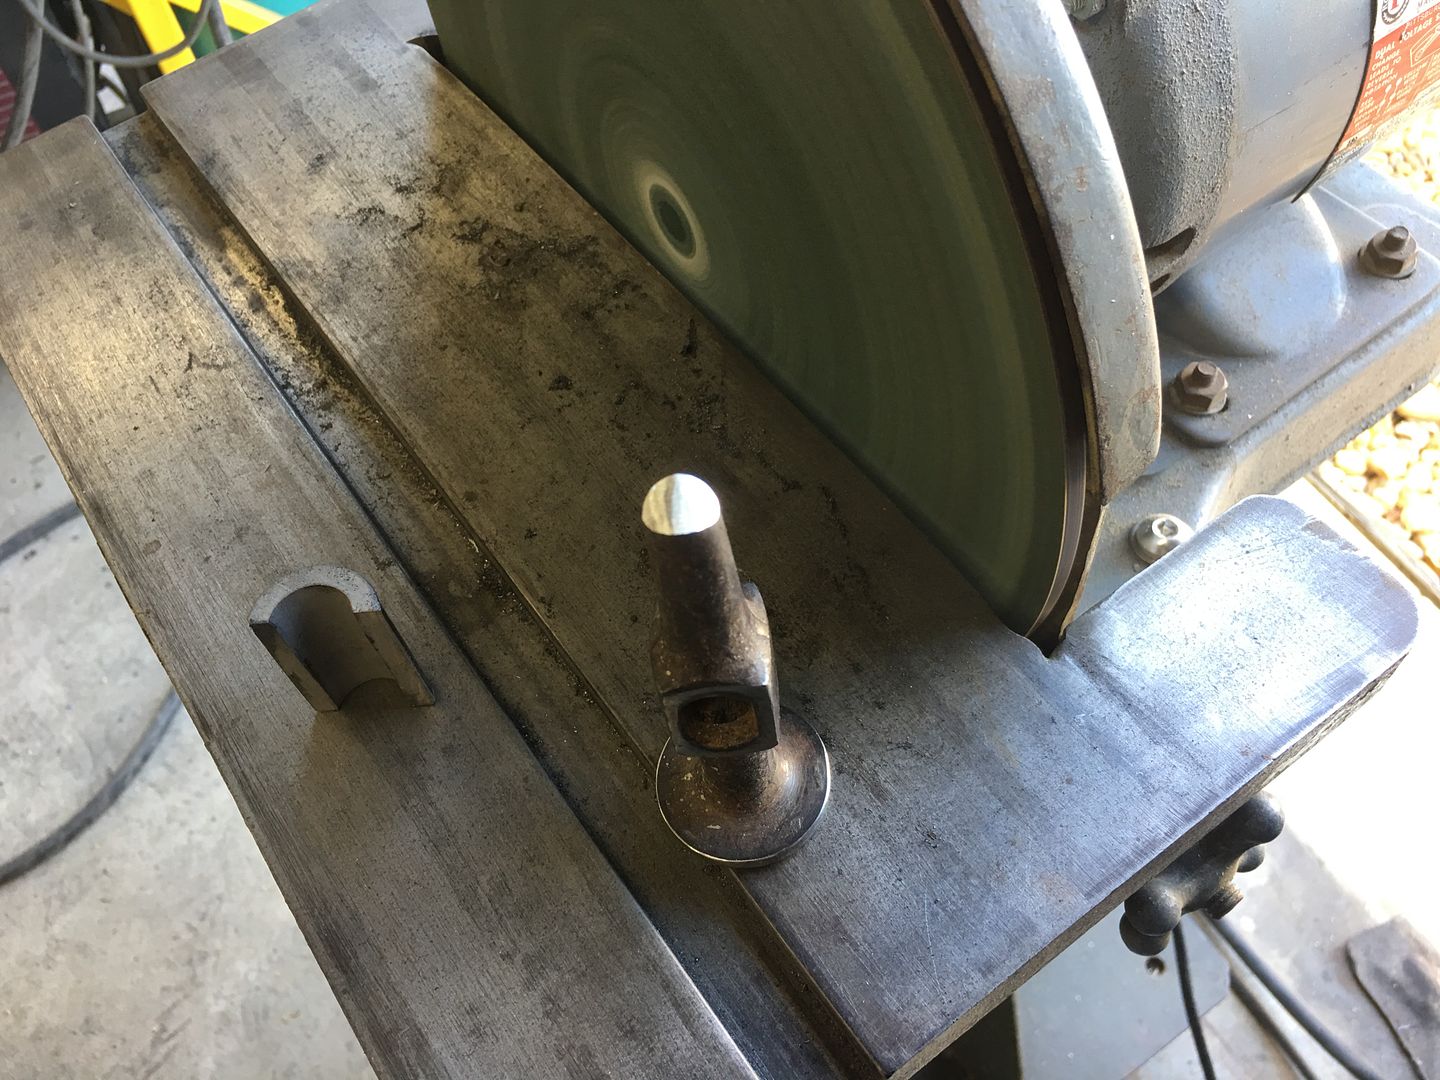
Some crown added long ways and polished up...


IMG_7345.JPG


IMG_7346.JPG


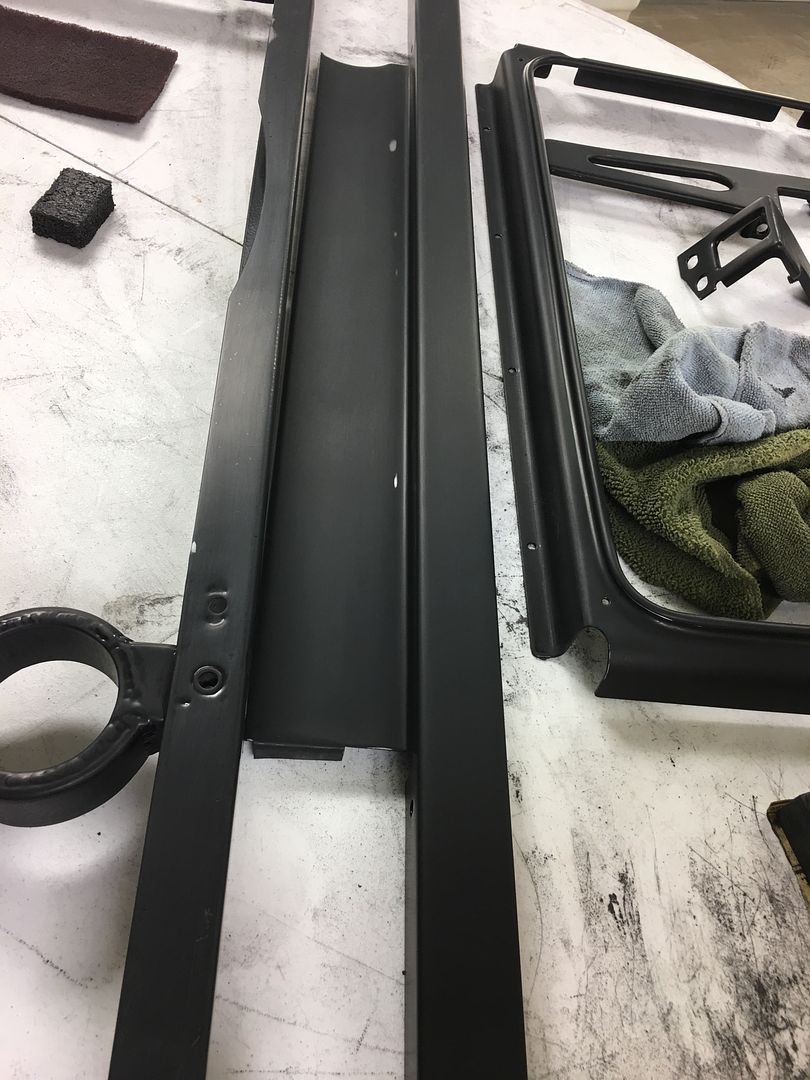
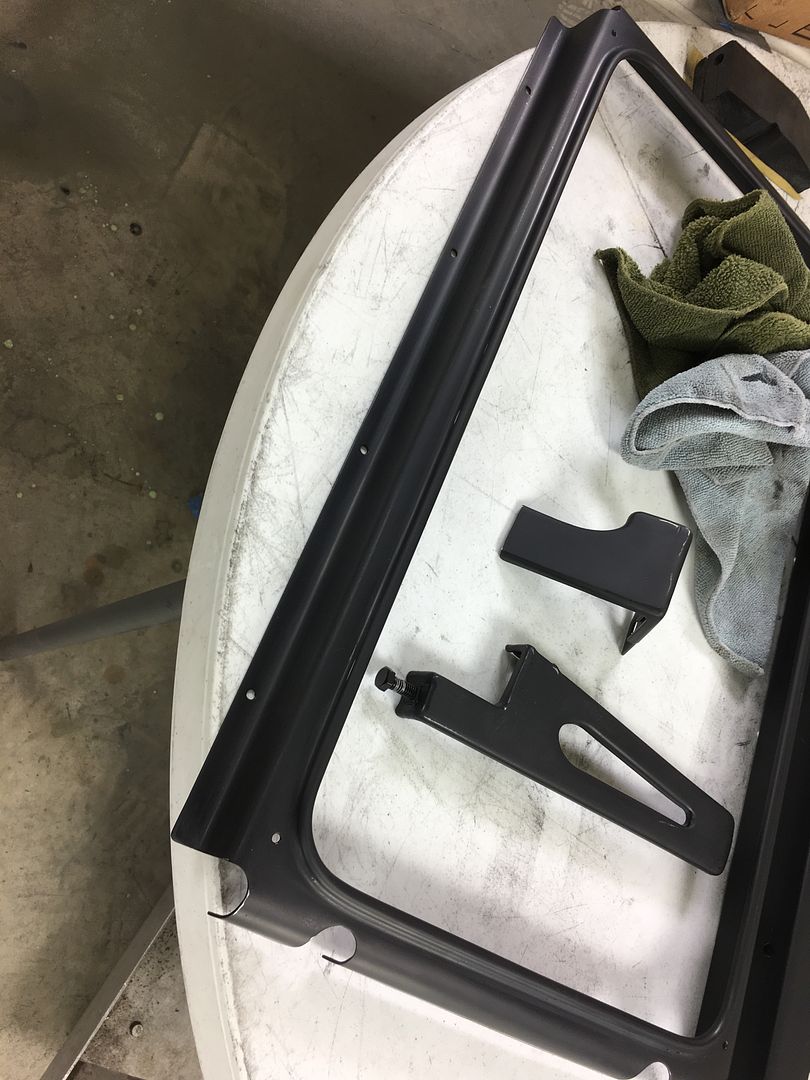
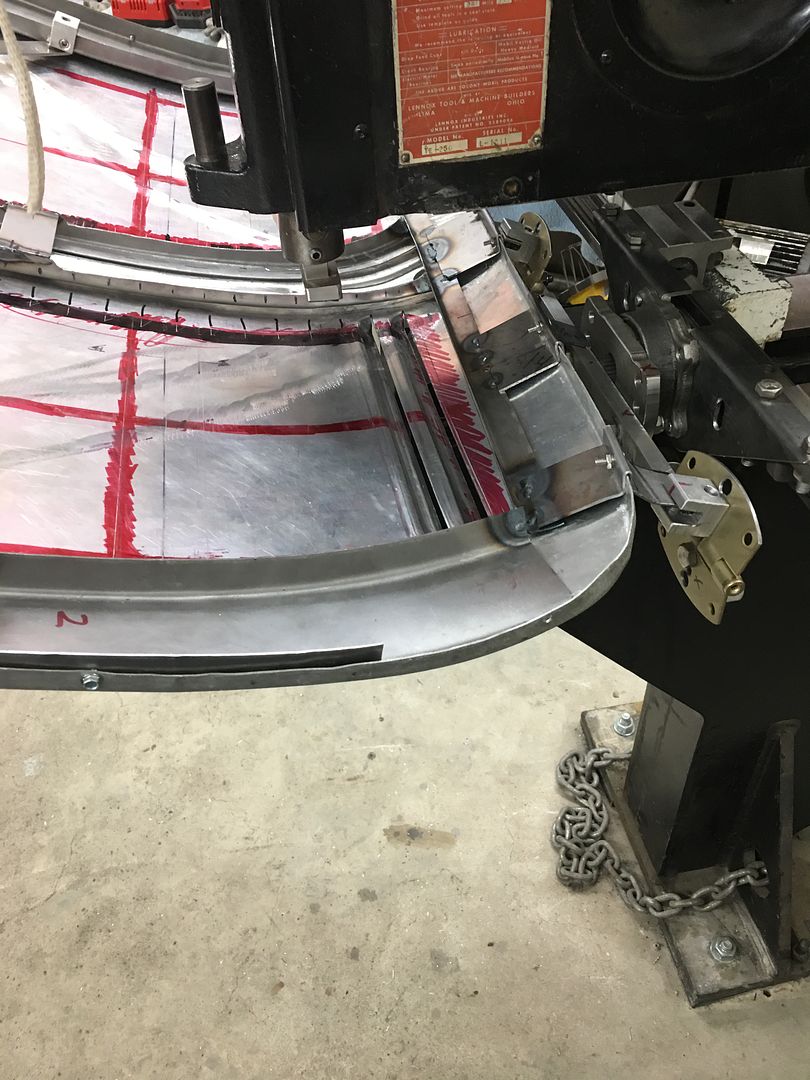
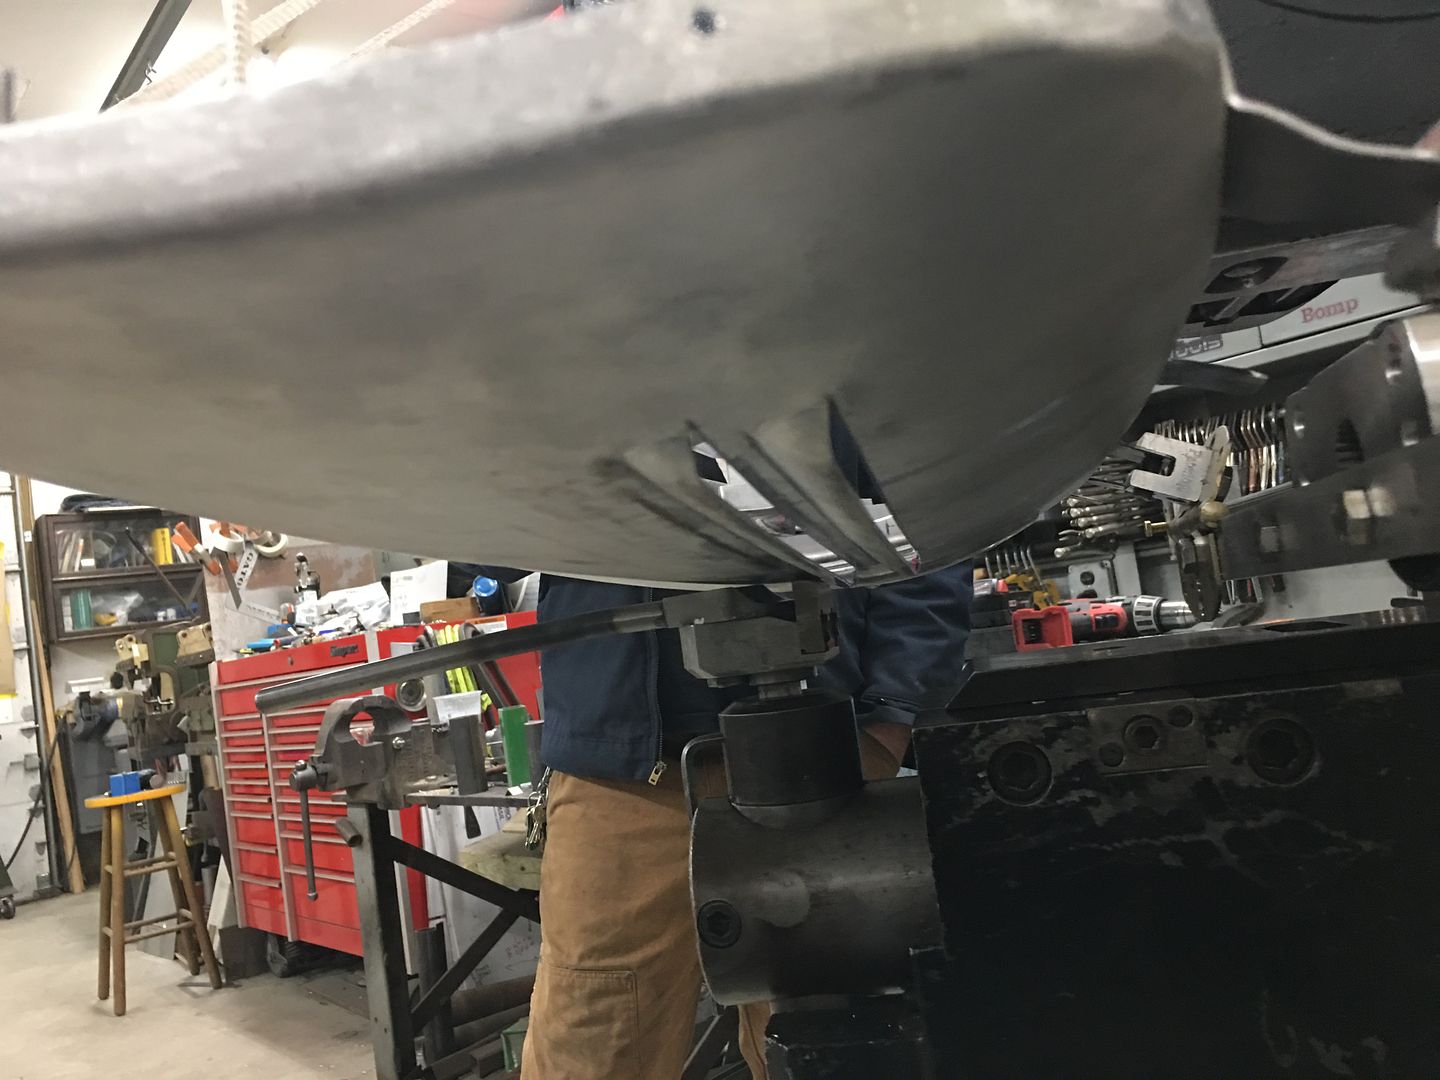
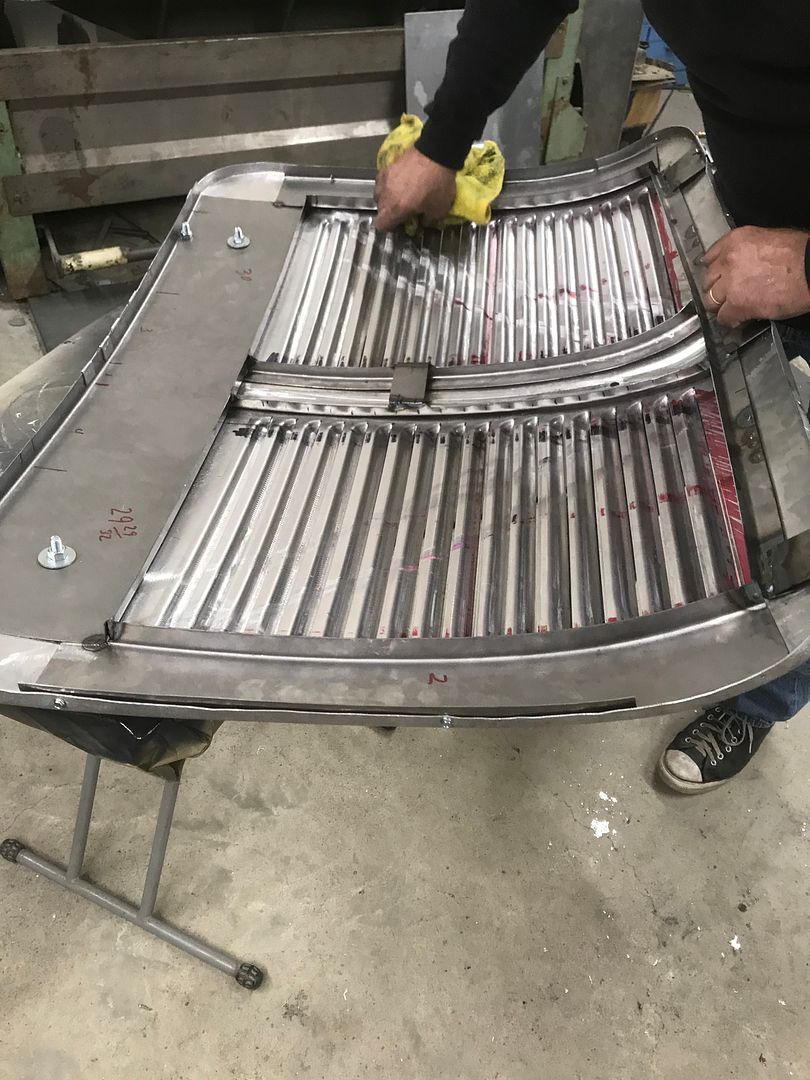
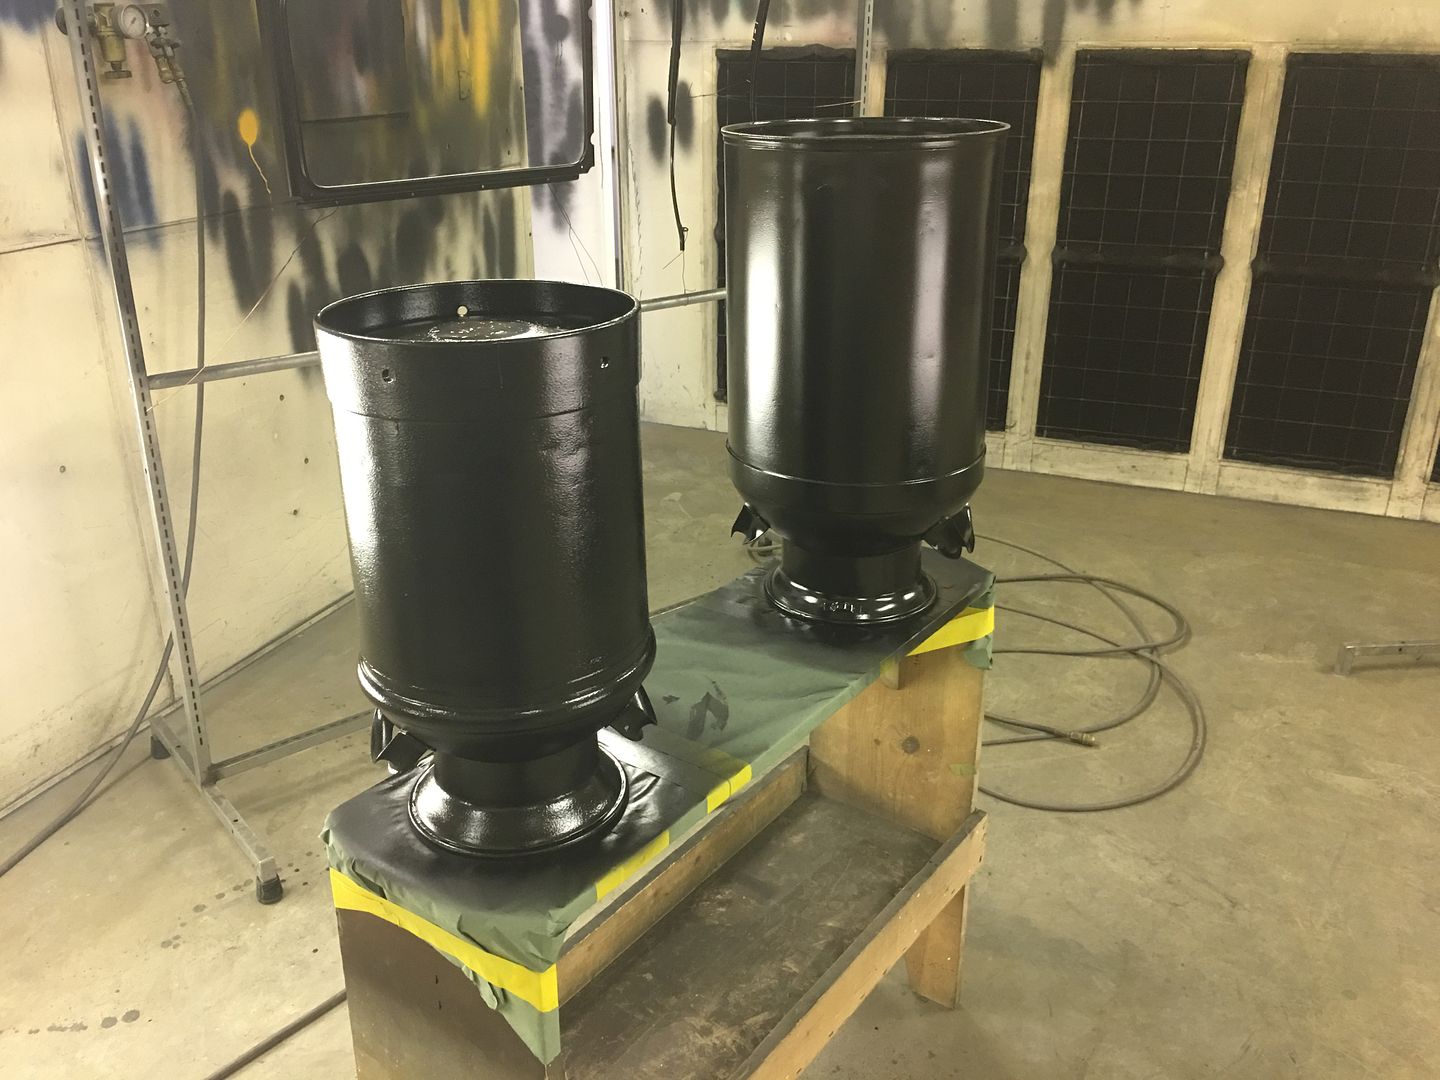
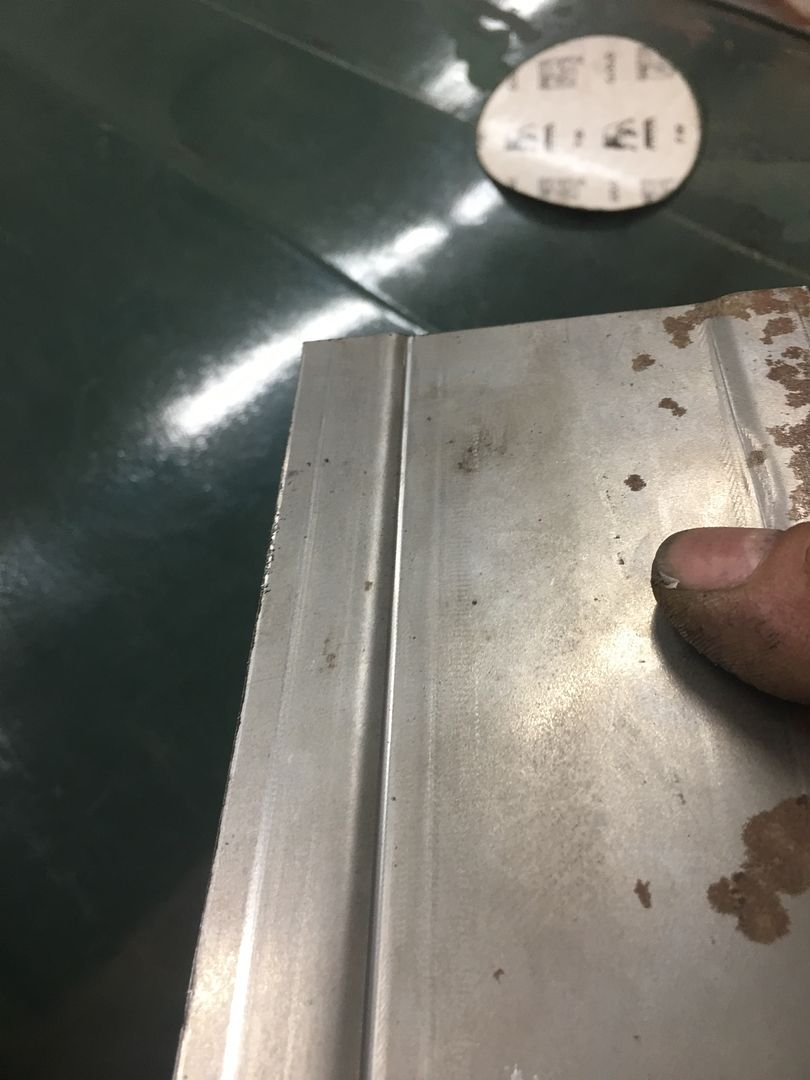
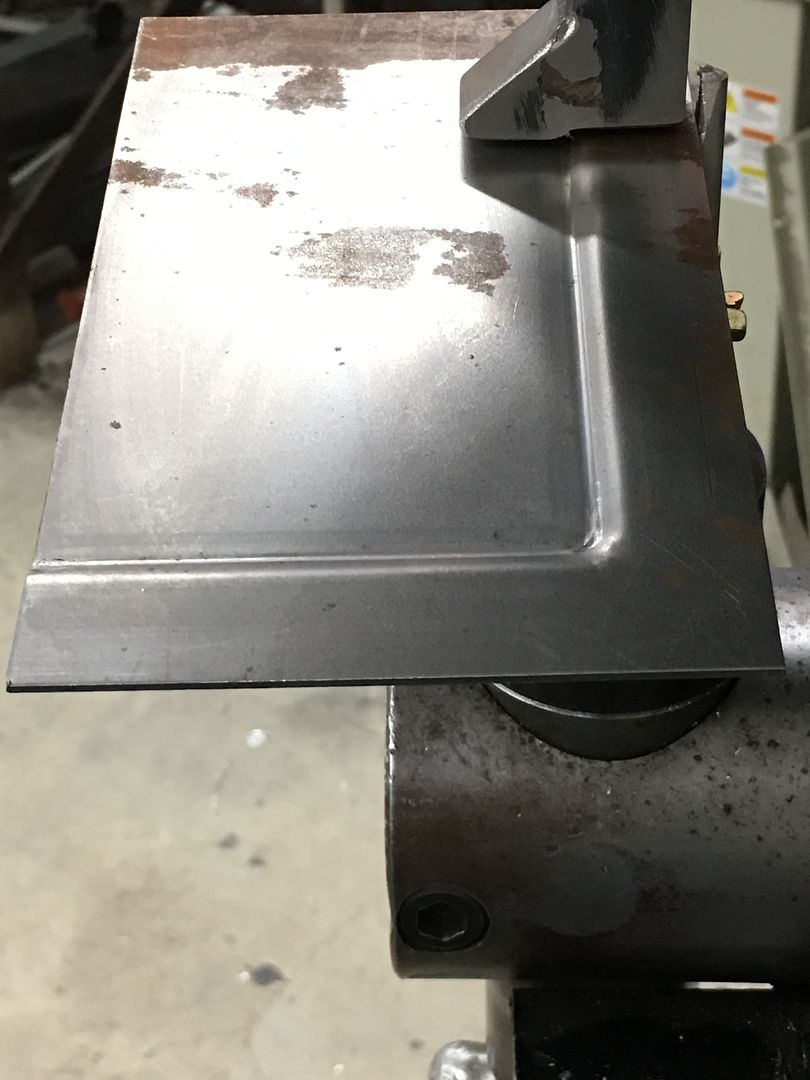
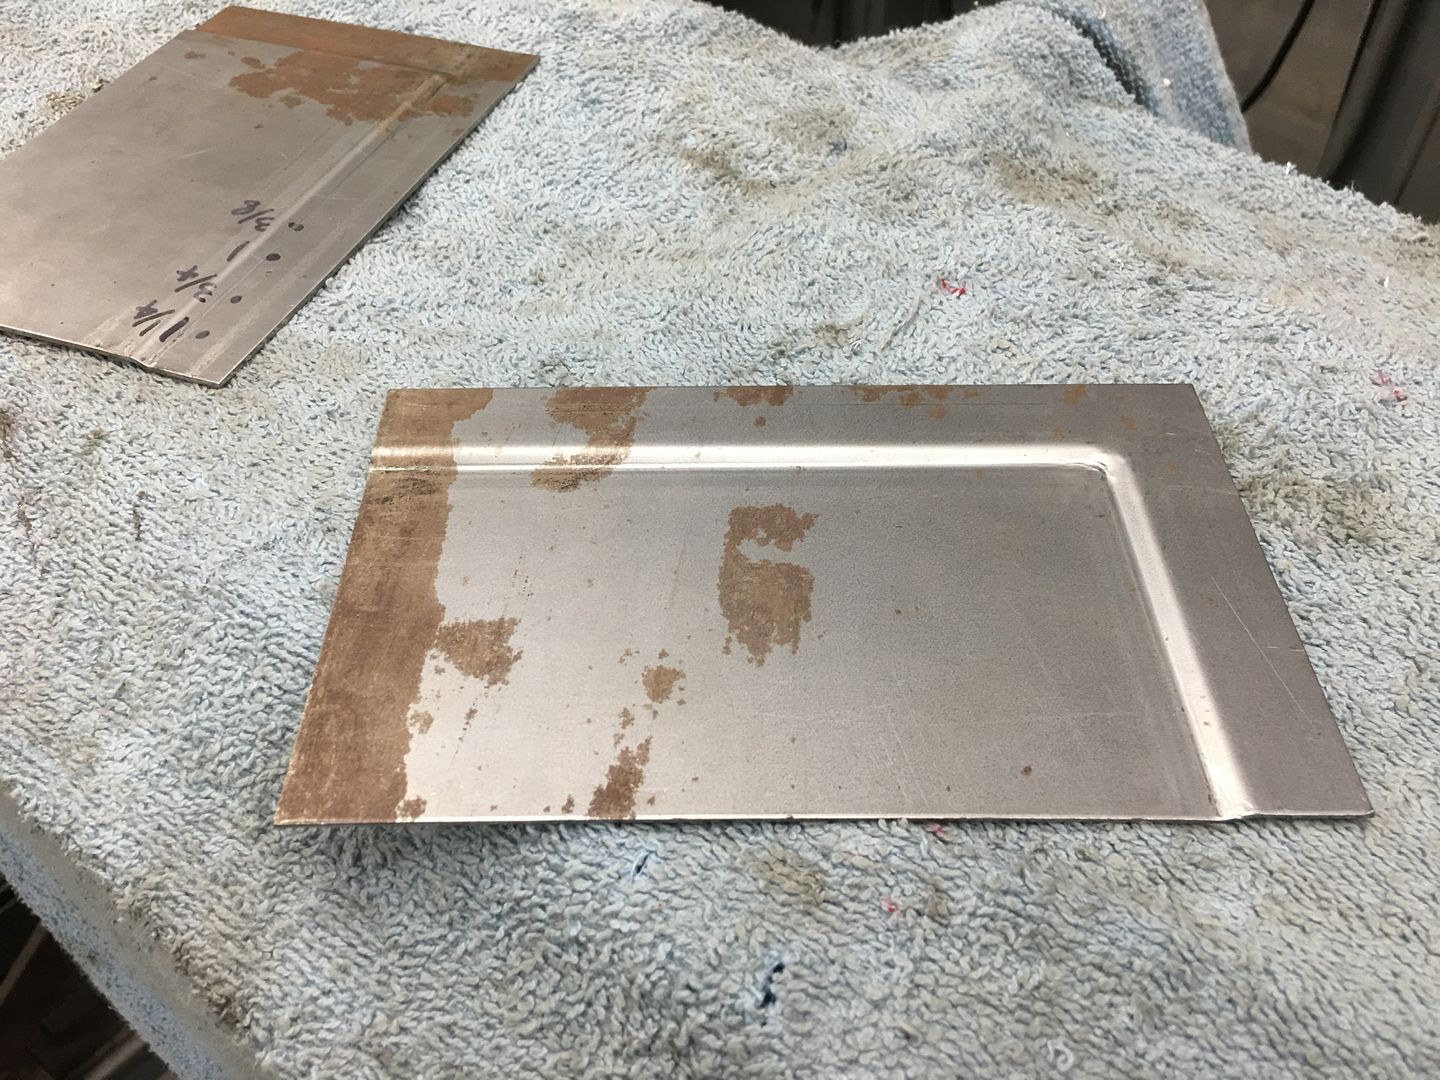
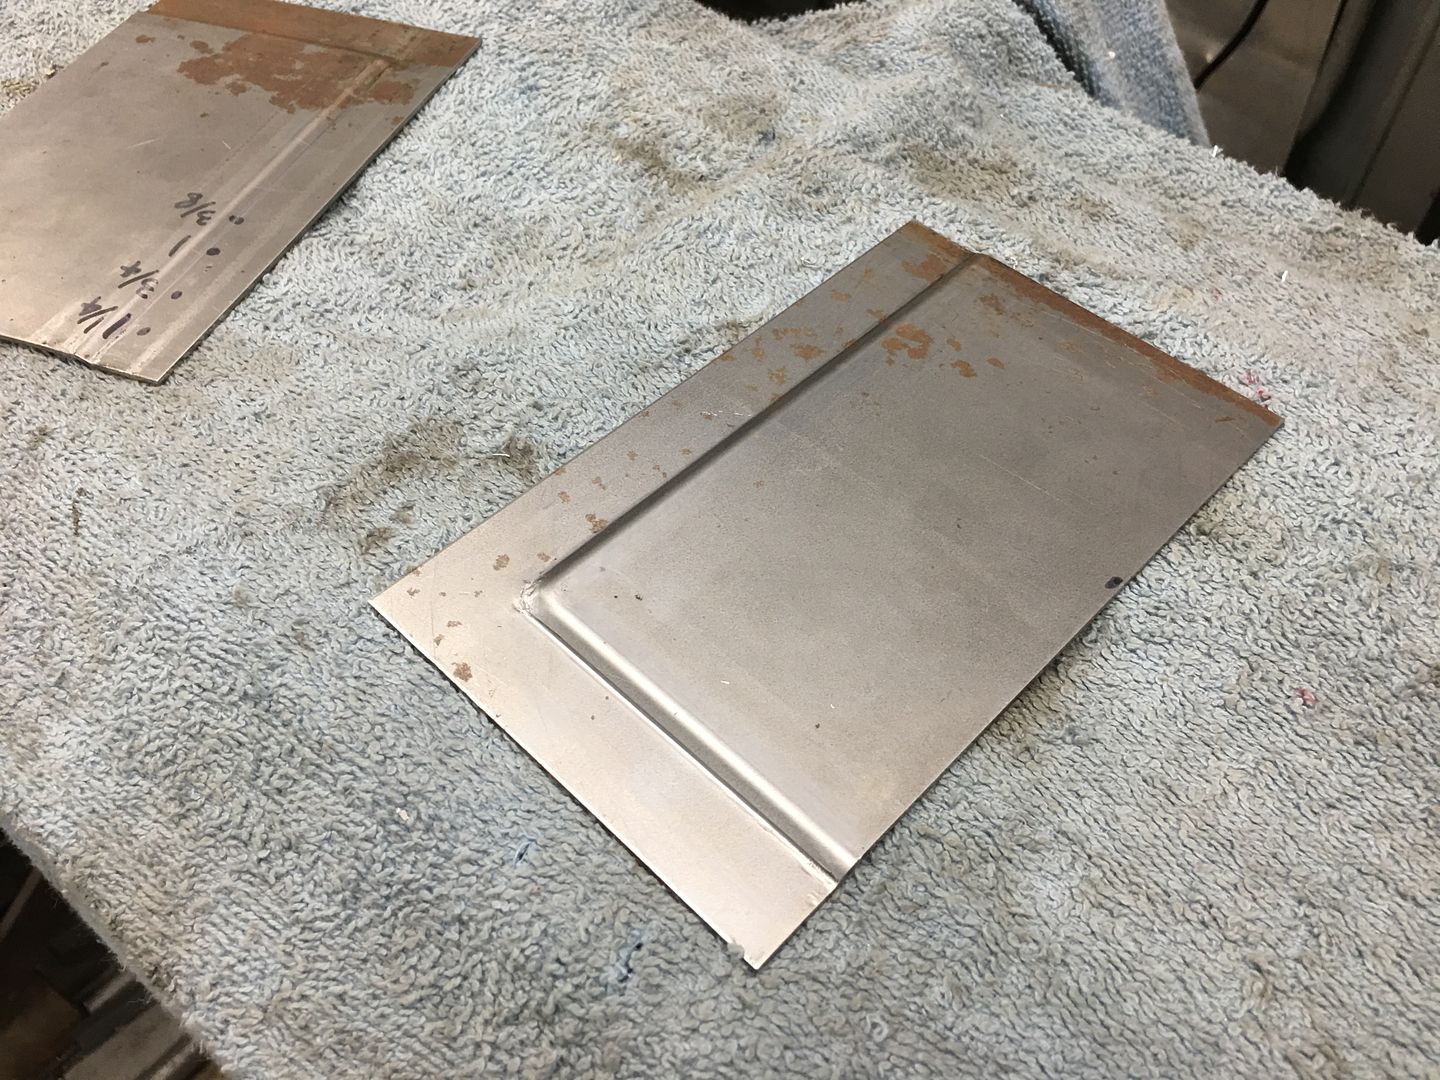
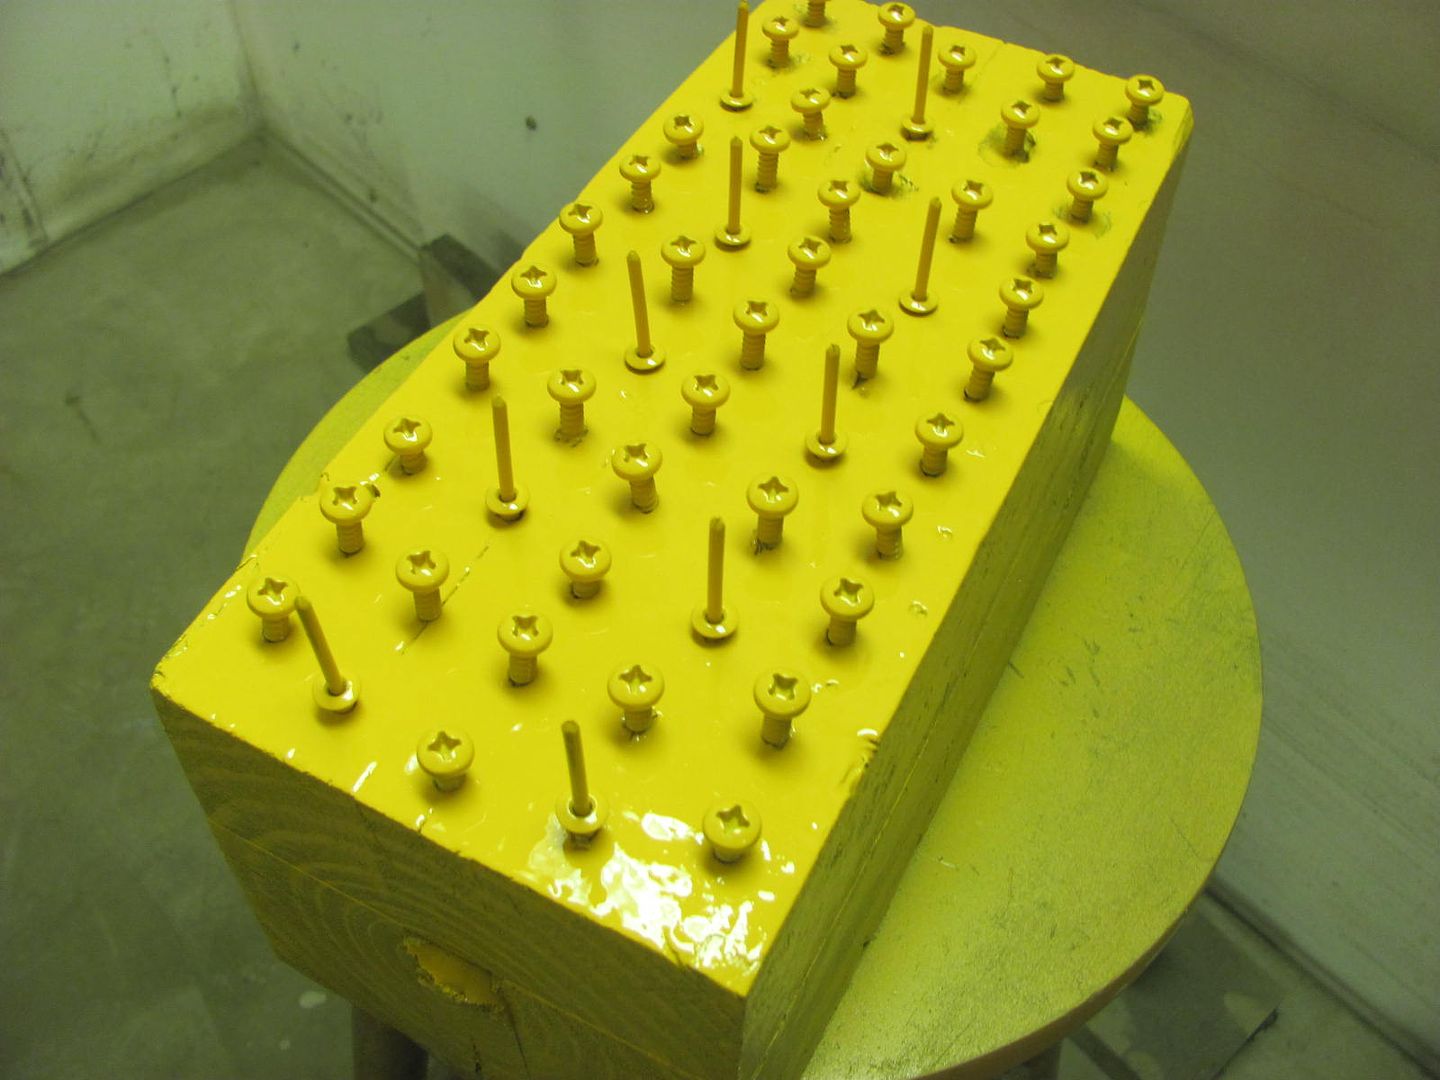
Both of the Wagon's rear kick panels are now prepped, ready to go..


IMG_7289(1).JPG


IMG_7330.JPG


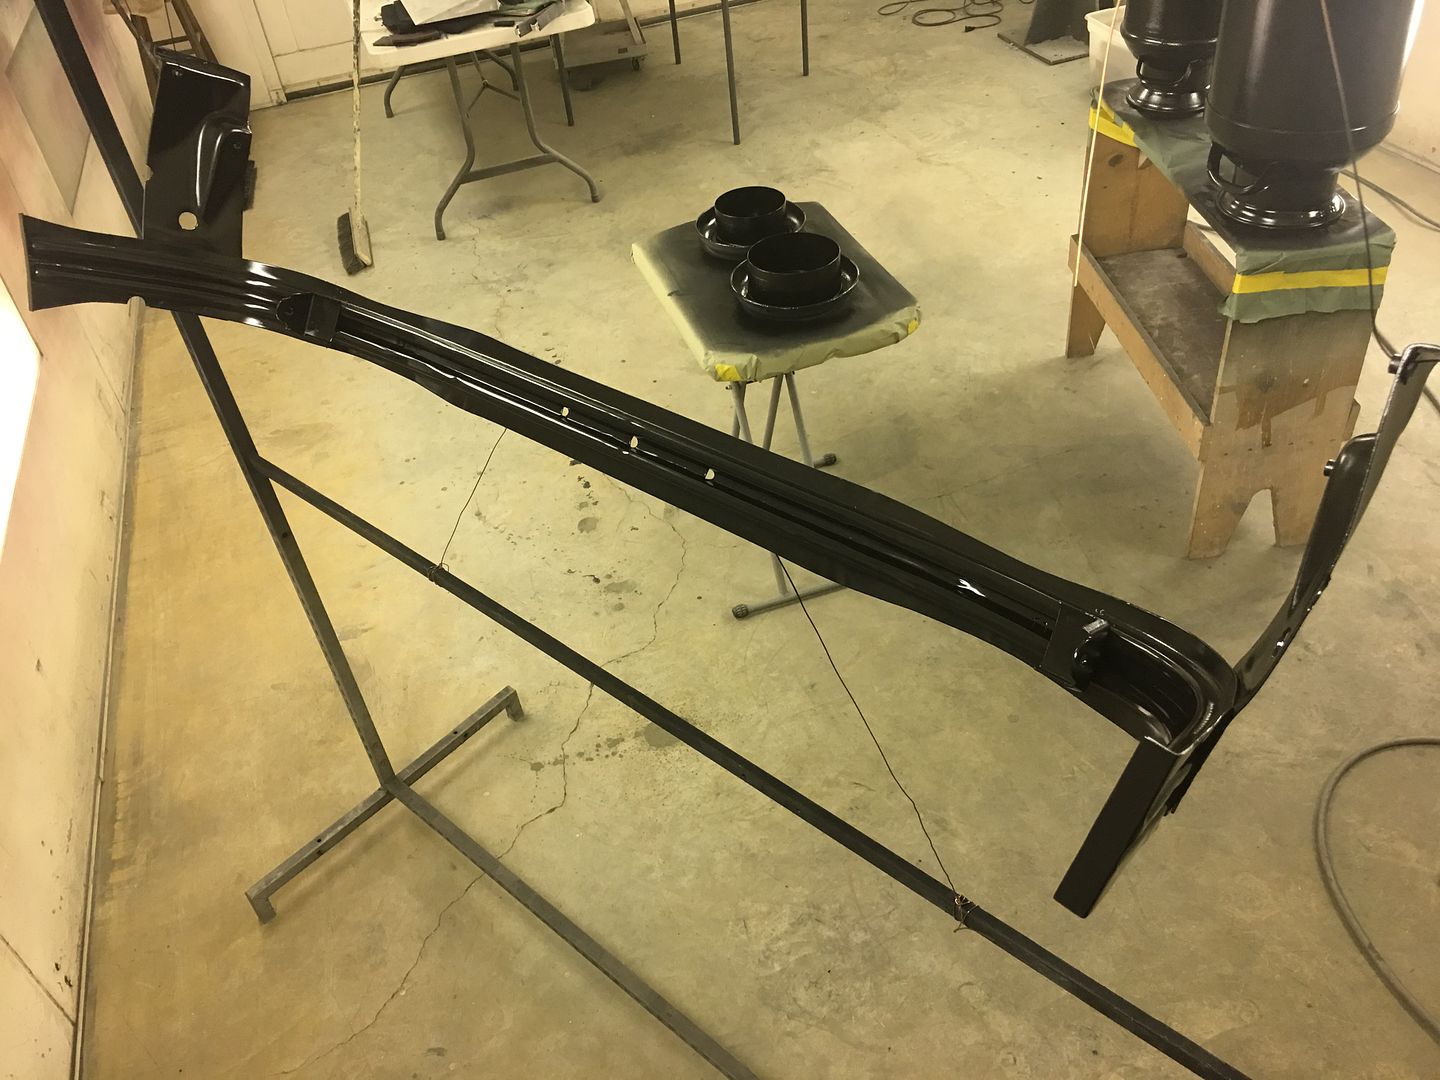
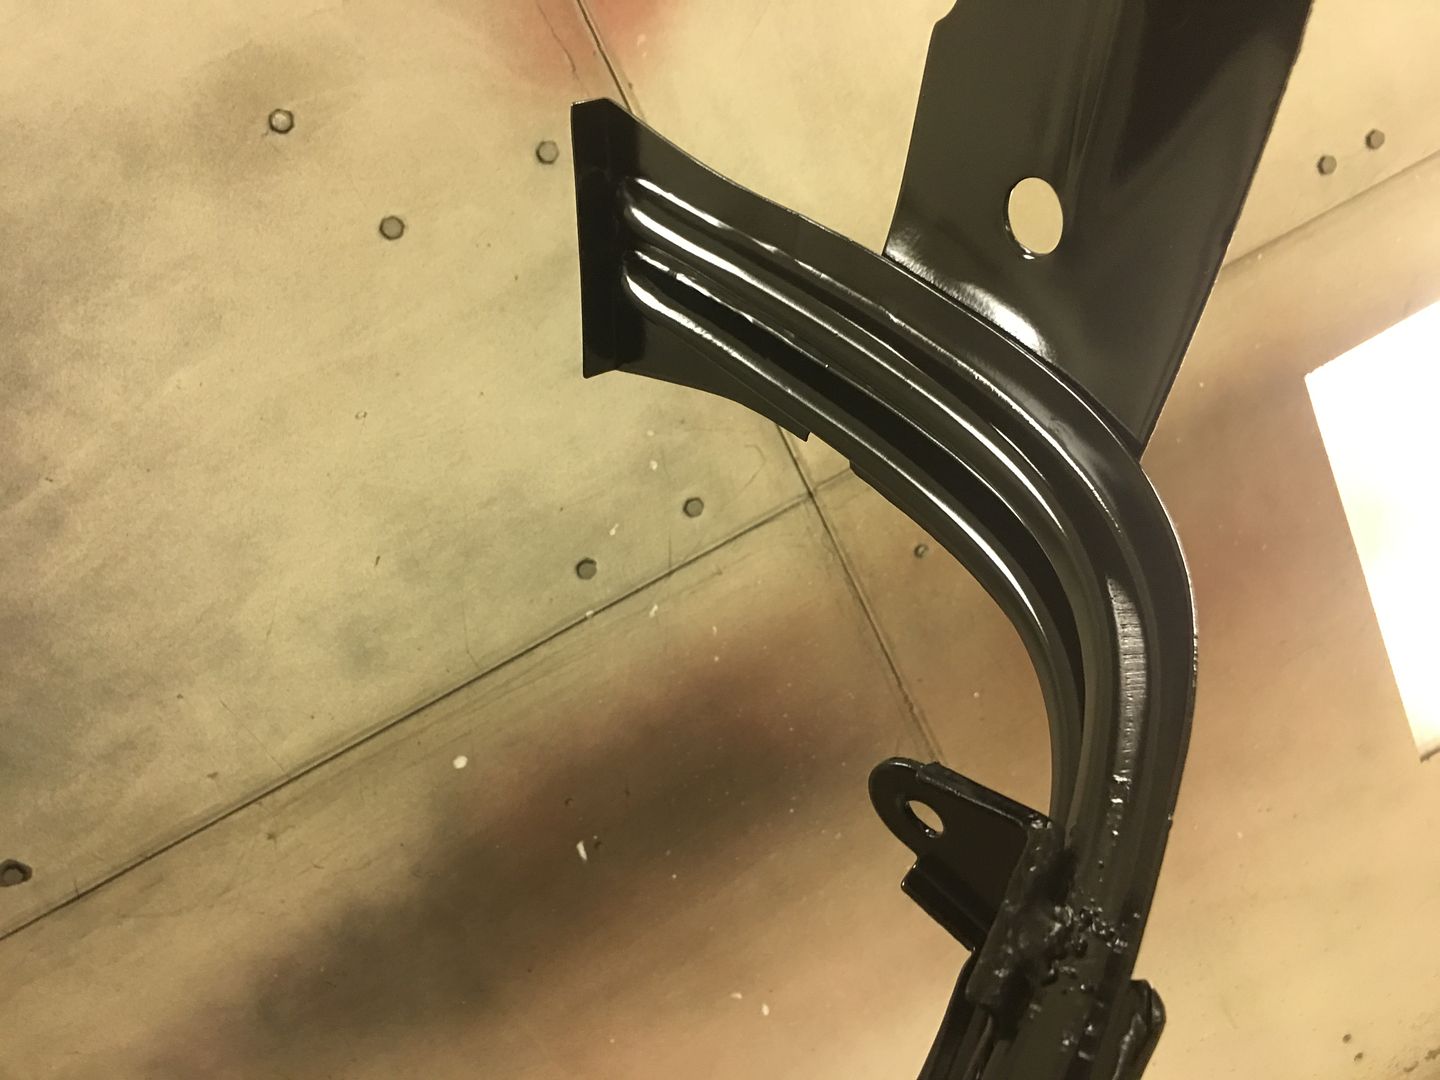
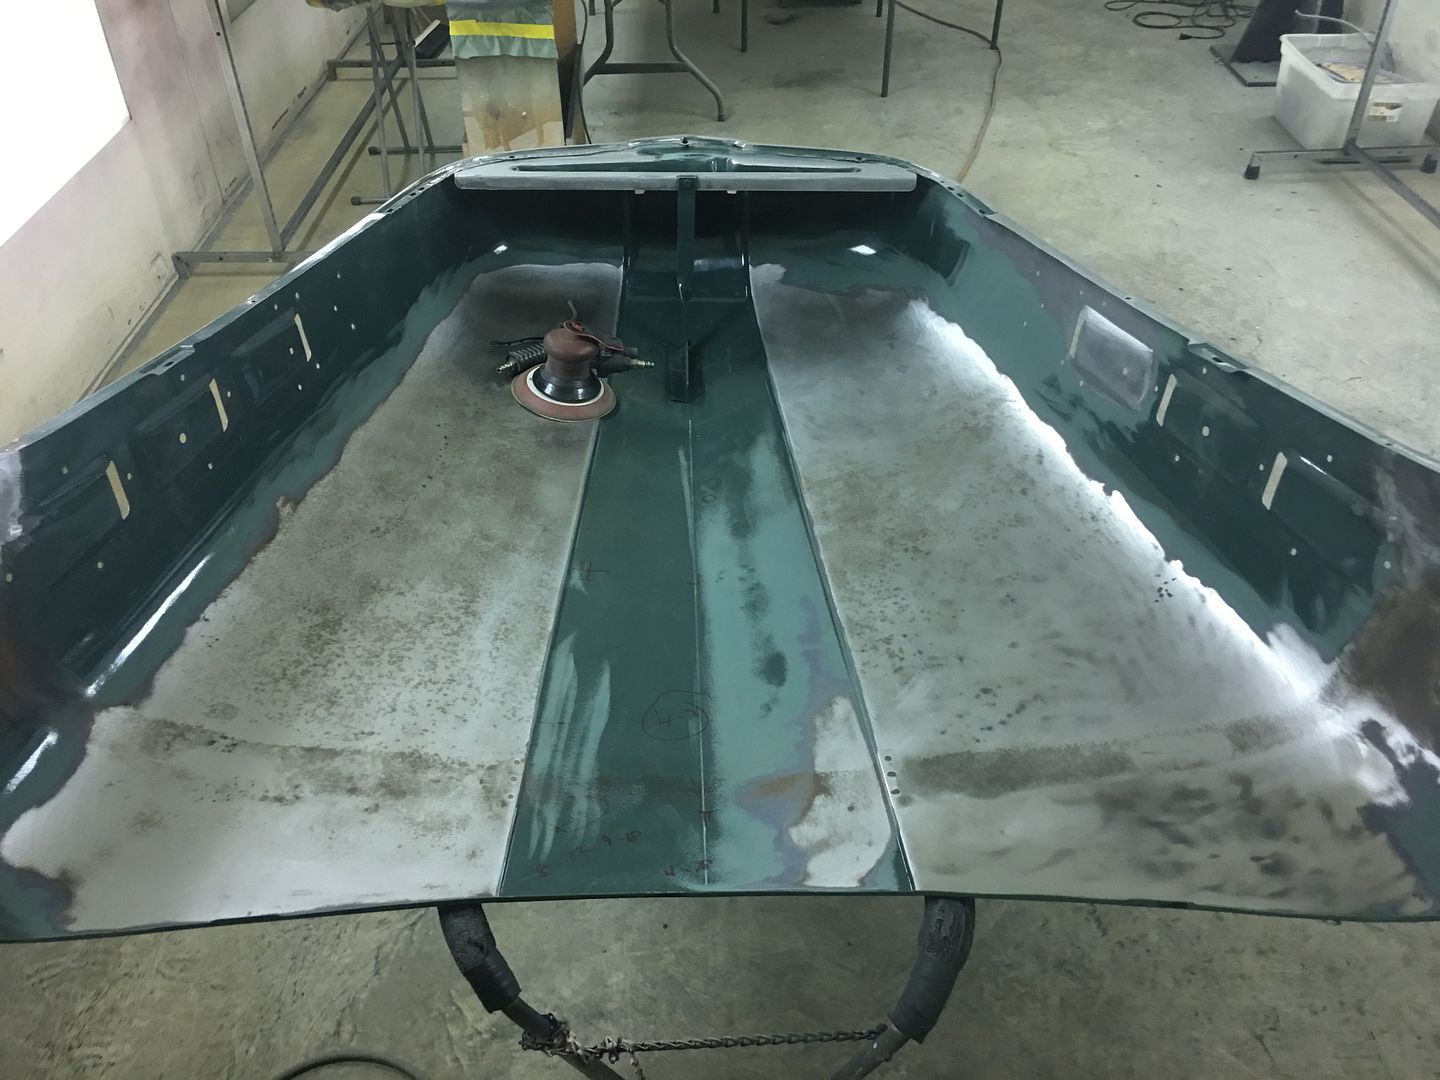
Vince has the core support and associated parts blocked and ready for some green...


IMG_7378.JPG


IMG_7379.JPG


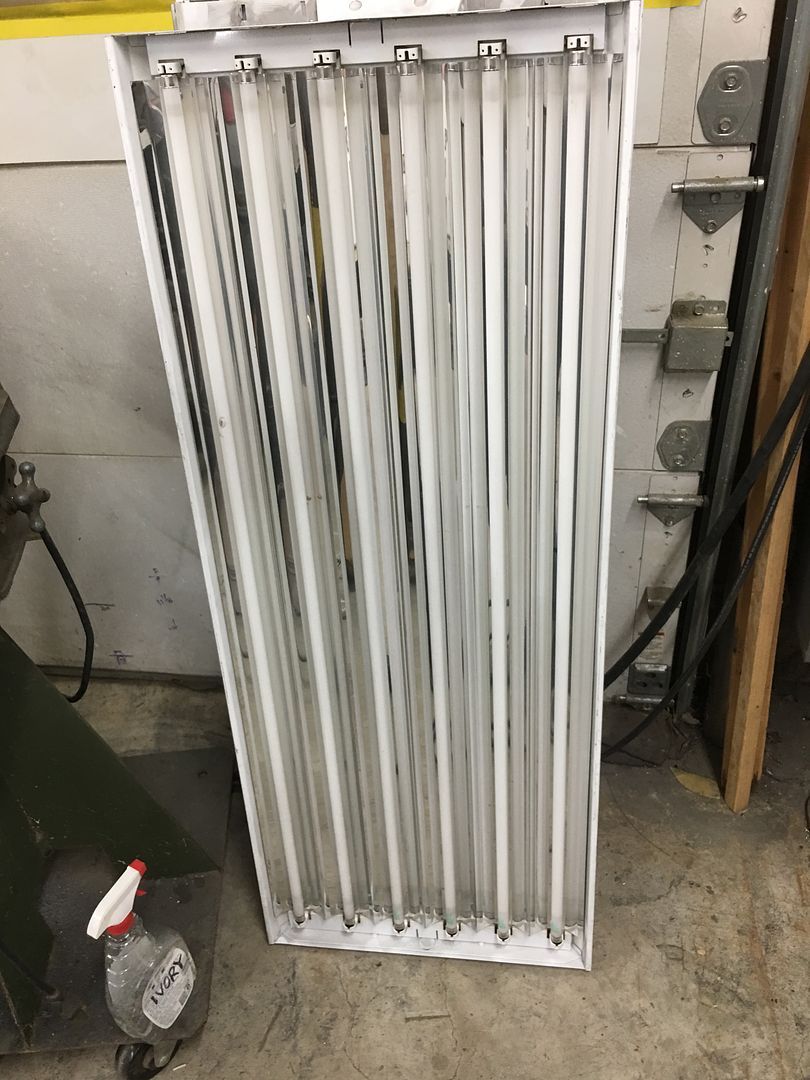
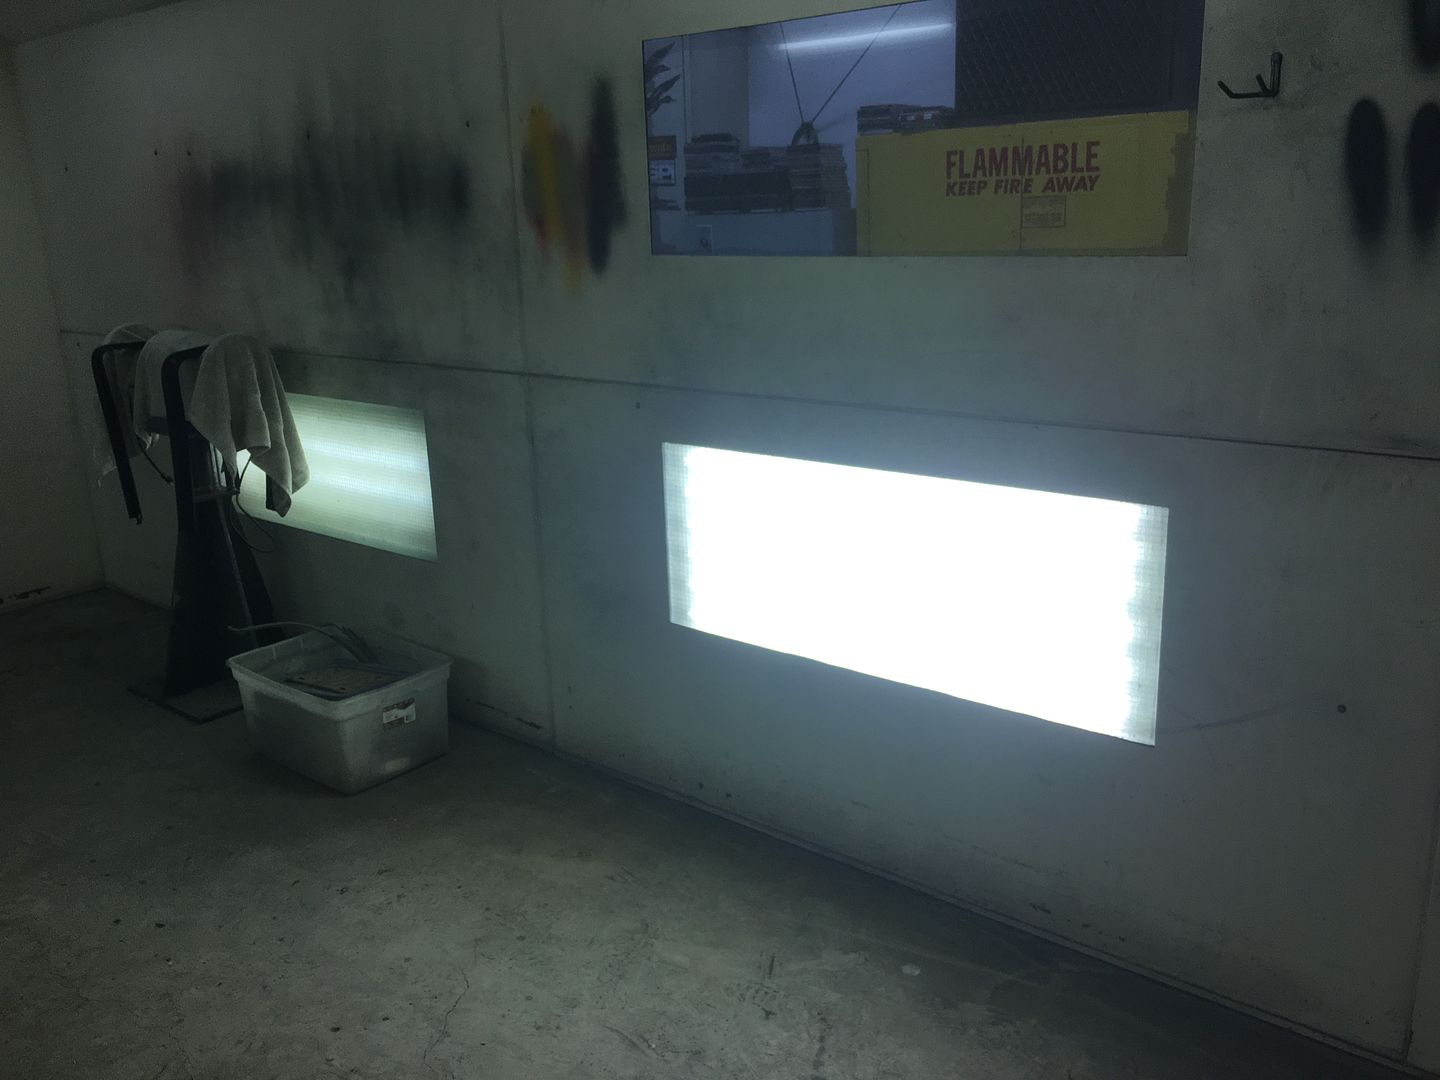
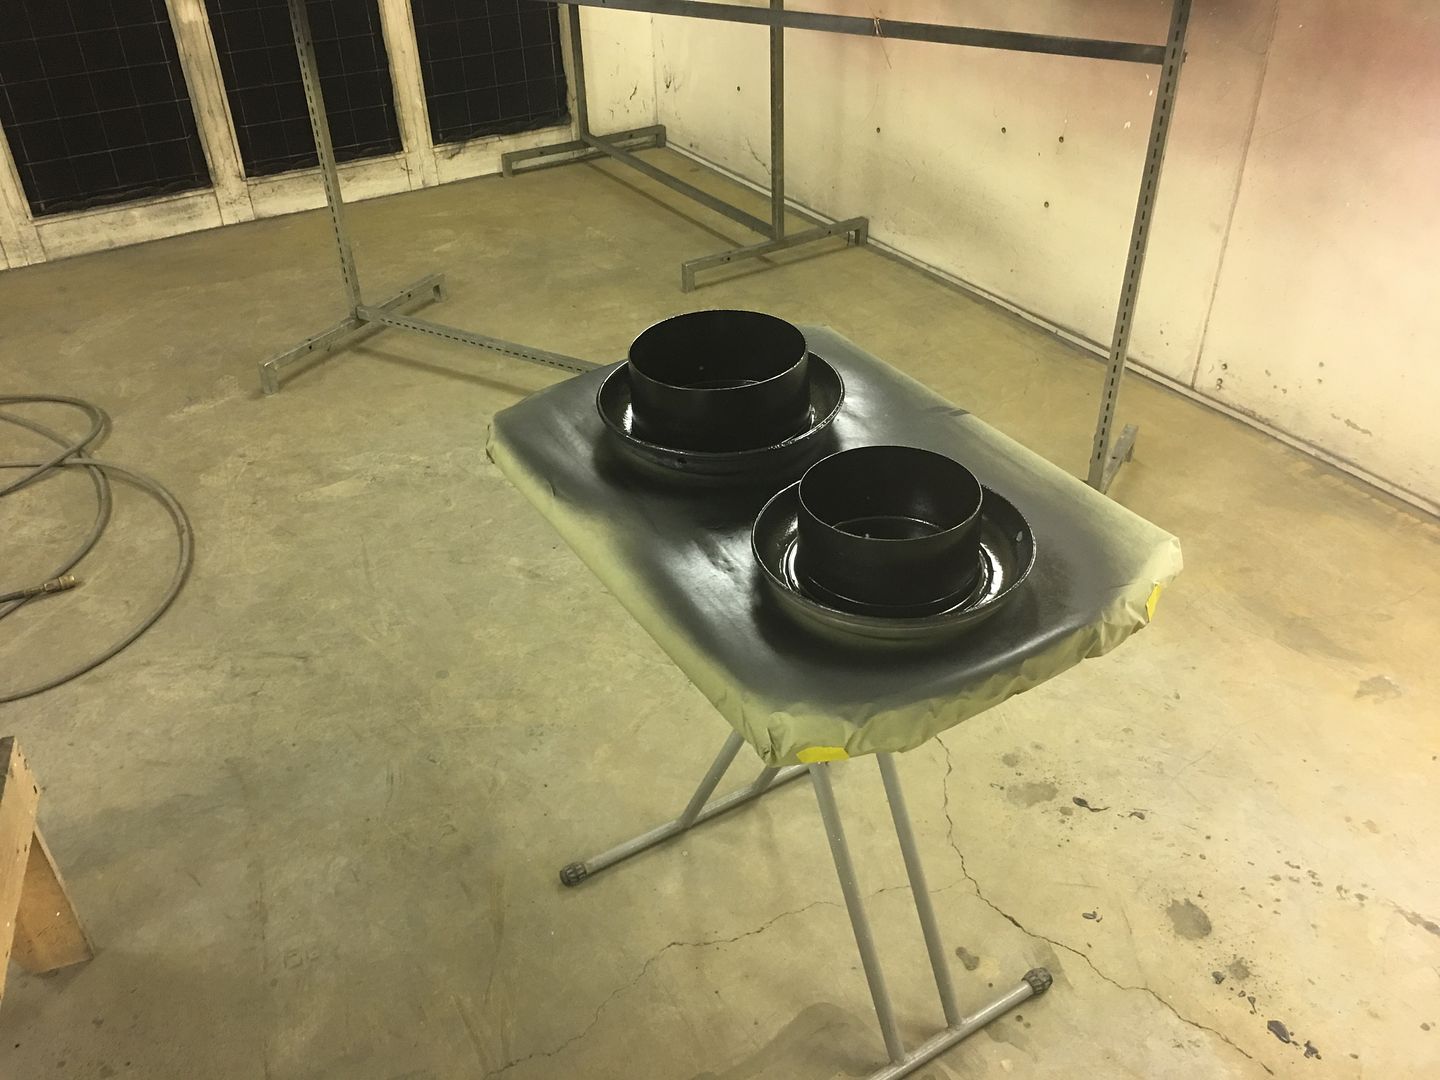
….and speaking of paint, we got some "new" used light fixtures for the paint booth so we can see a bit better...


IMG_7362.JPG


Old next to new...


IMG_7347.JPG


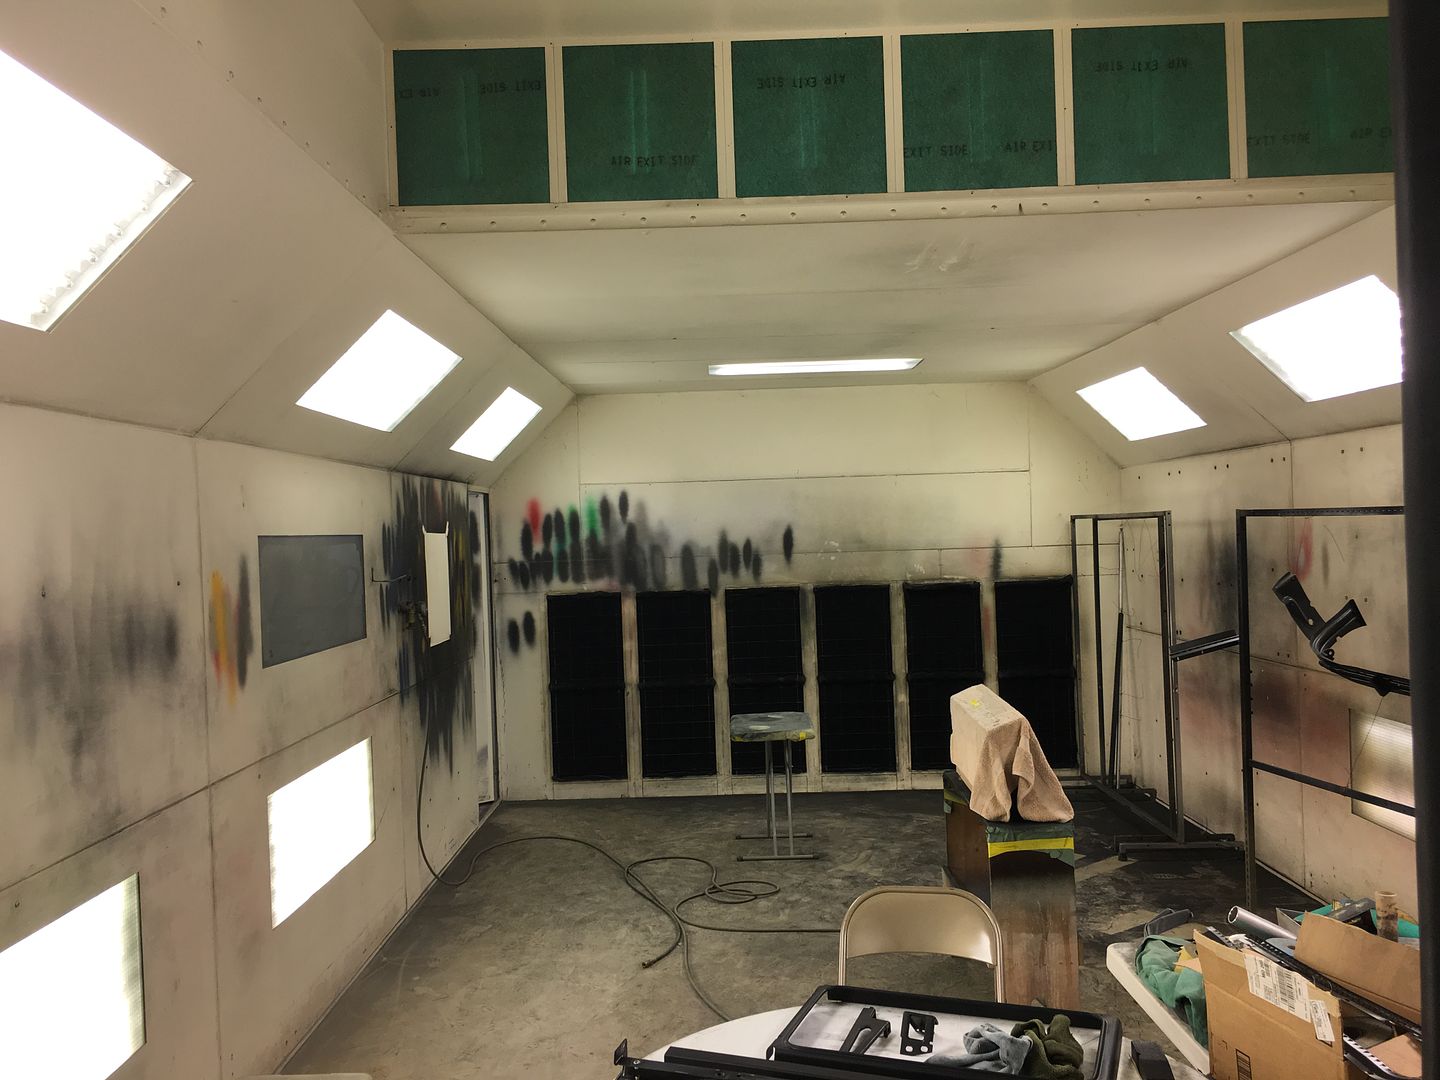
Now that we can see a bit better, it's clear that the walls need a fresh coat of white...


IMG_7380.JPG


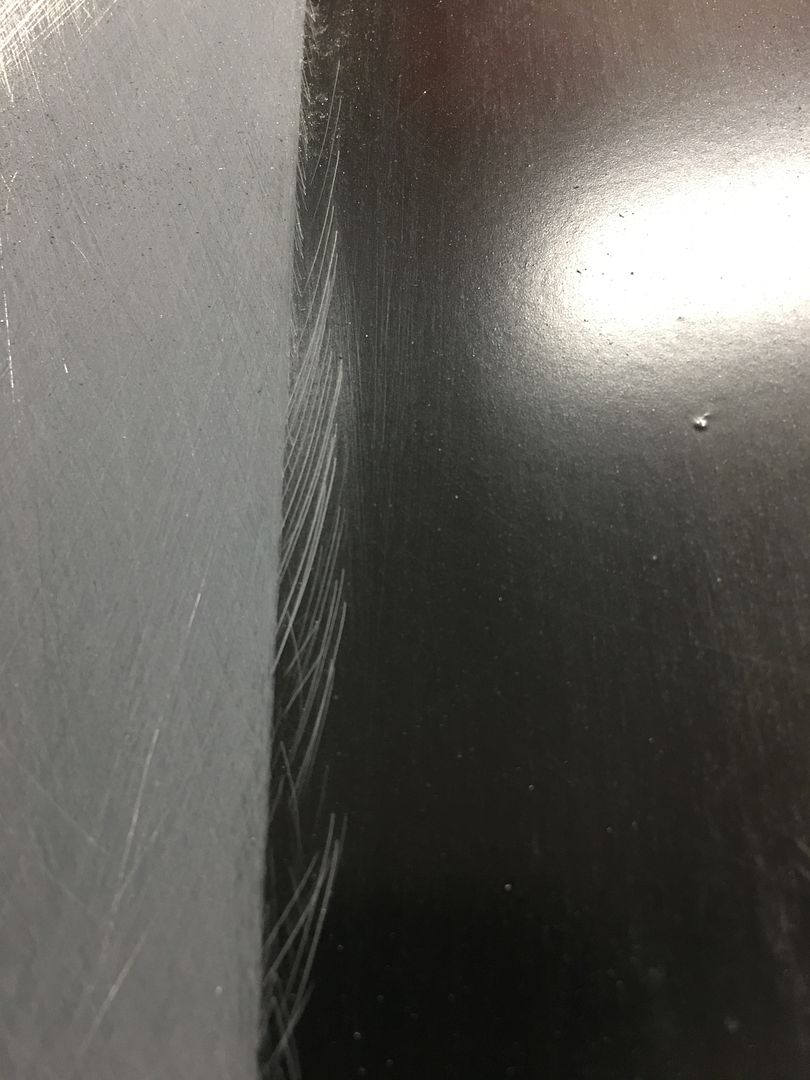
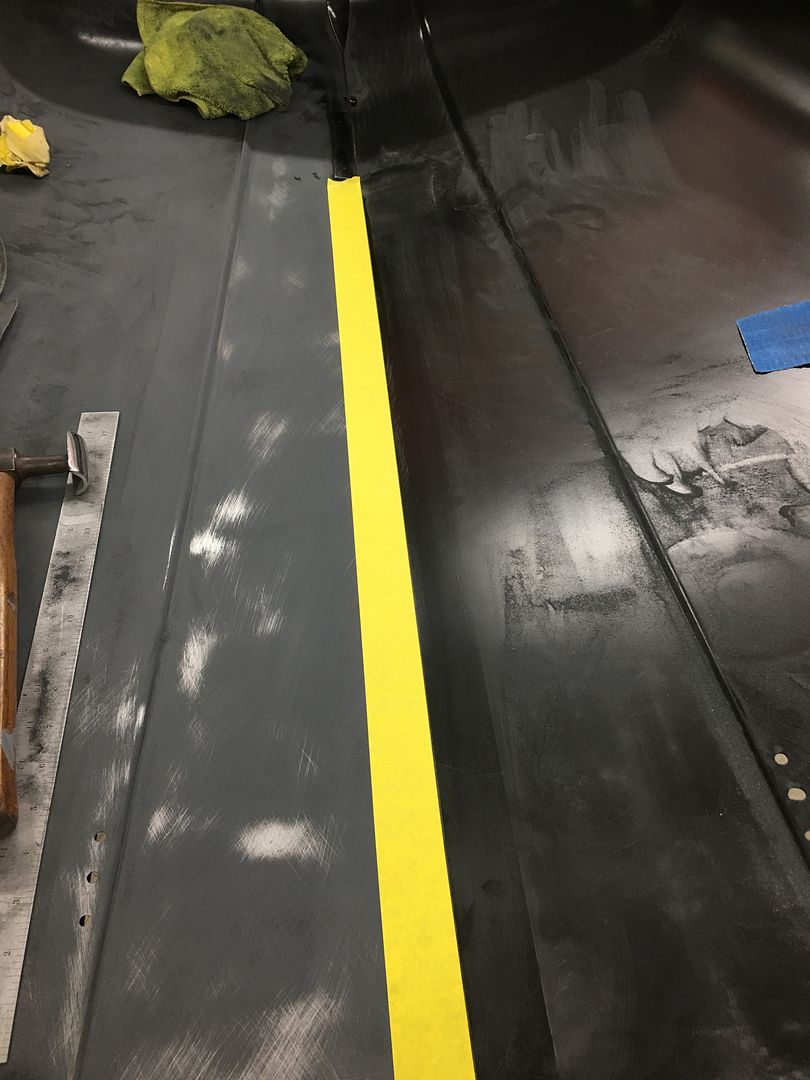
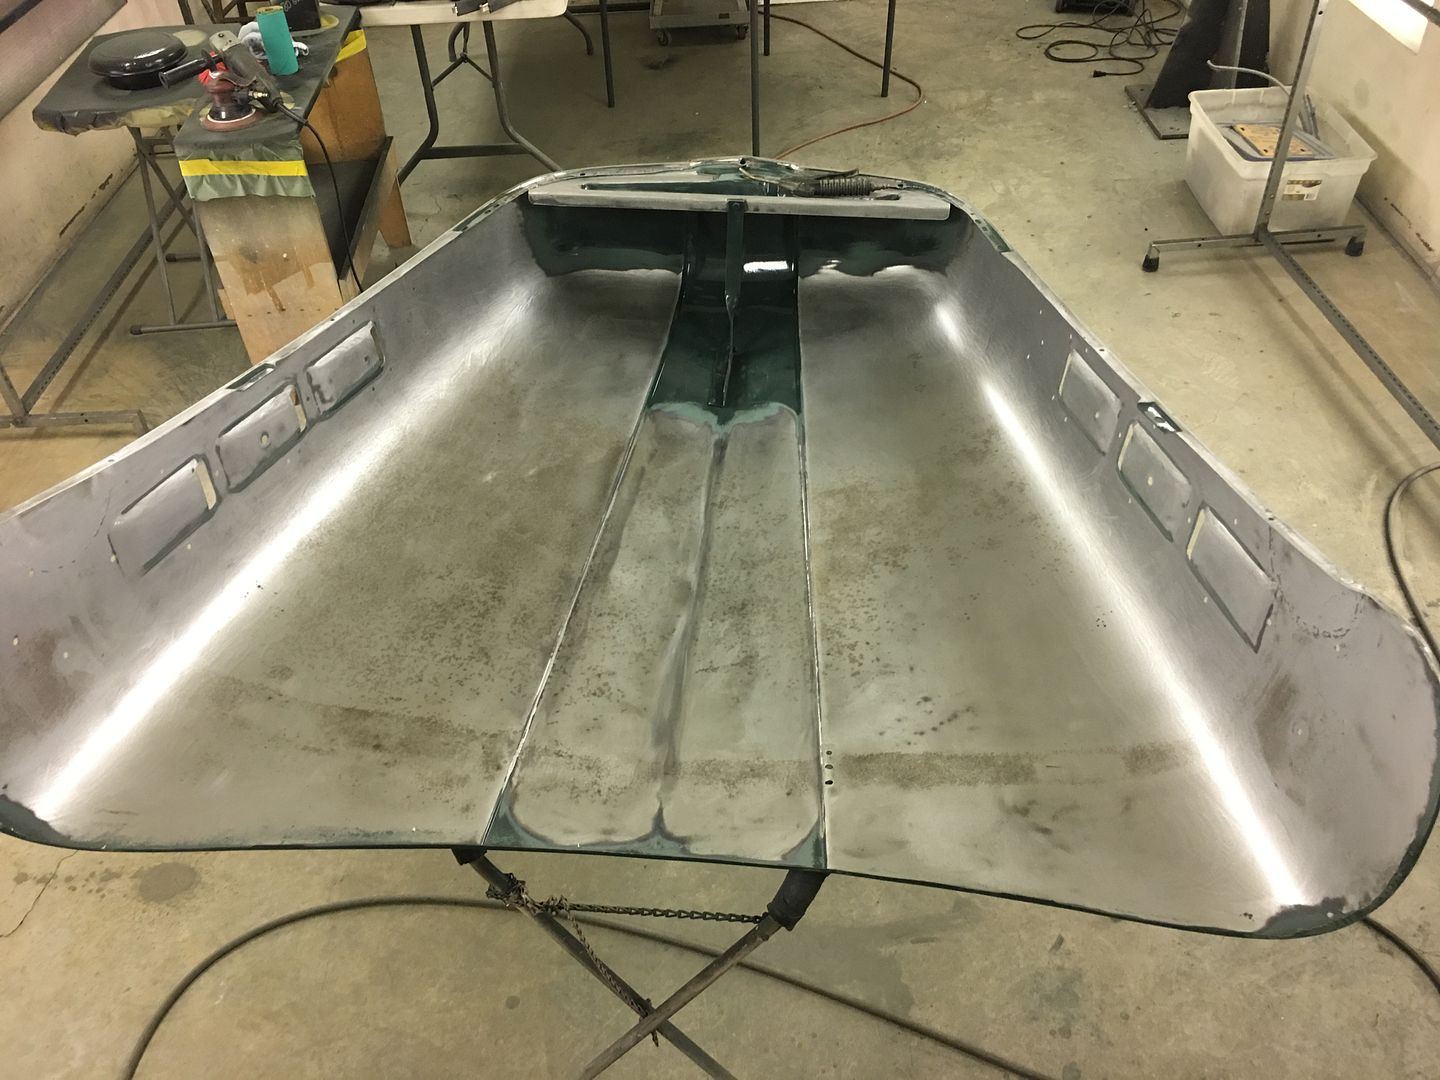
….And some blocking tips on the F7 hood. We have a nice crease on the inside of the hood from front to back. These scratches show that we would be taking material off the adjacent side if no other steps were taken to stop our sanding block at the center of the crease...


IMG_7382.JPG


By adding a strip of tape along the center, it gives us a positive stop for the sanding block..


IMG_7381.JPG


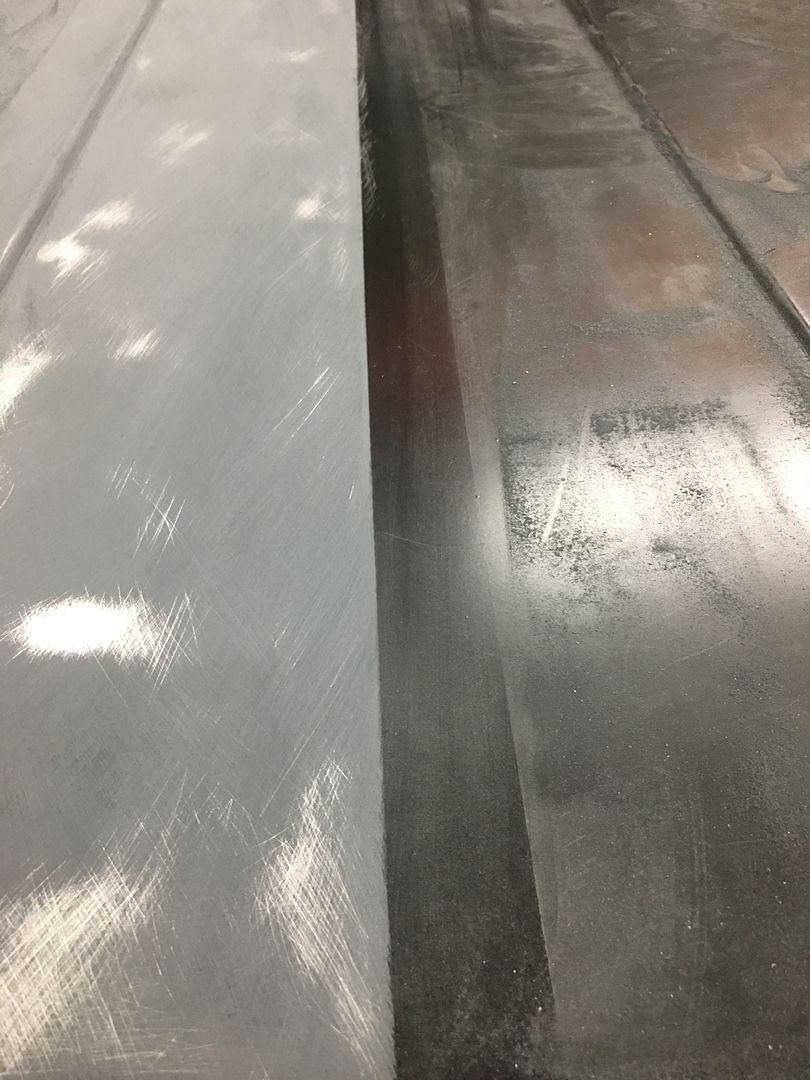
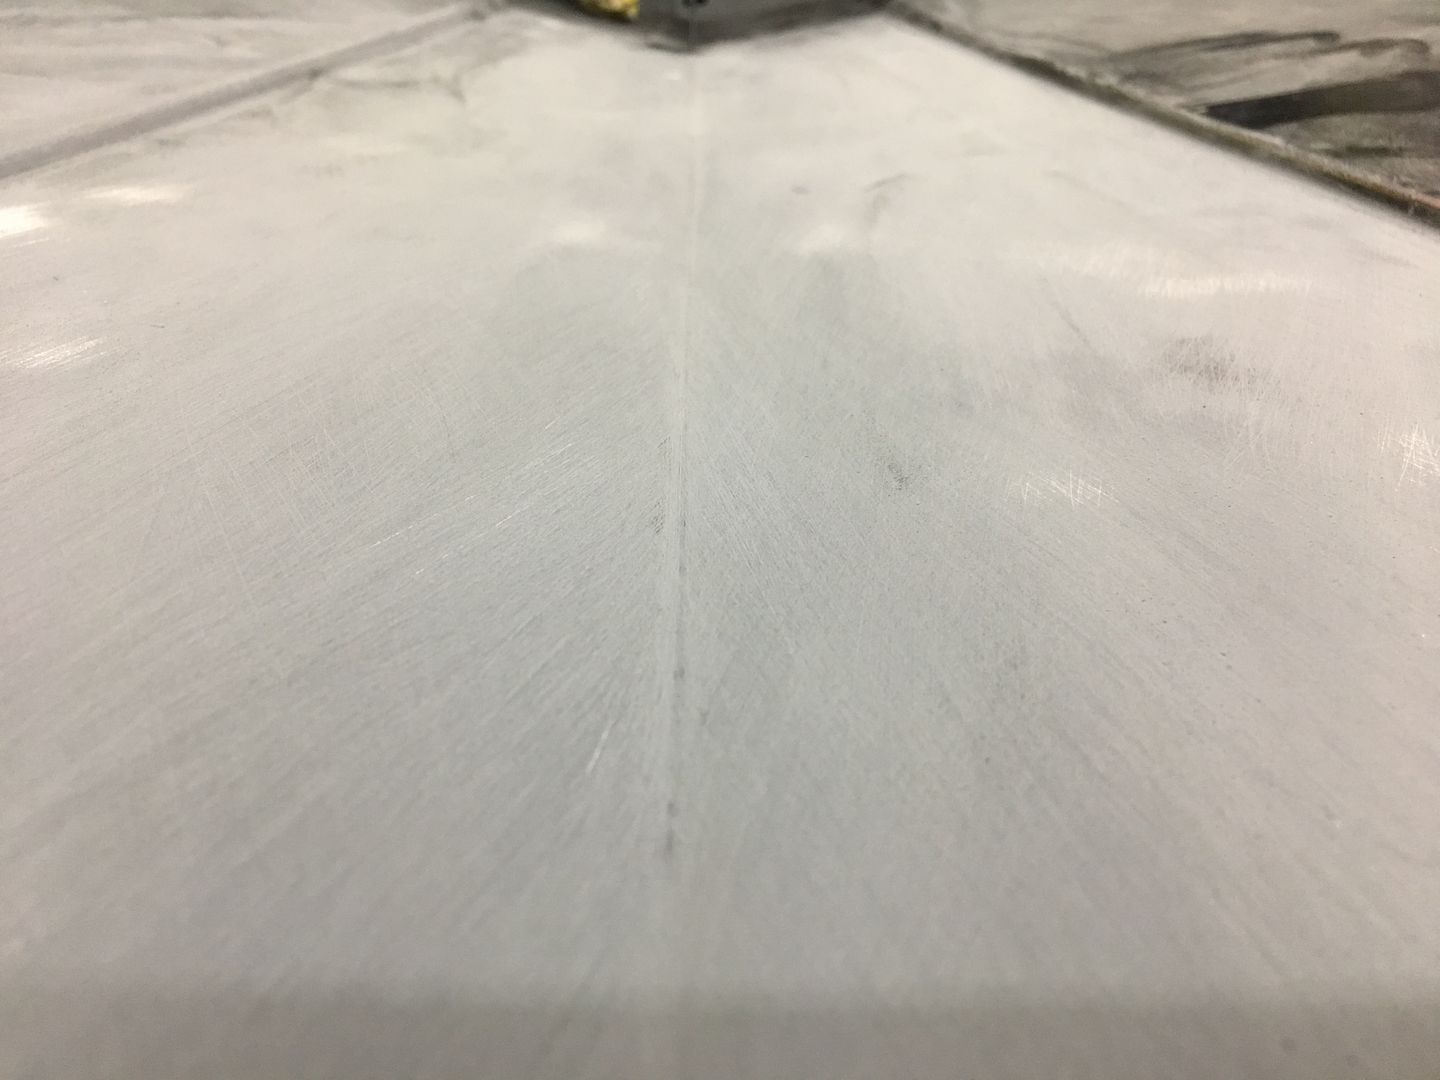
Then switching for the other side....


IMG_7383.JPG


Which leaves us a nice crease in the middle, and panels nice and flat to either side...


IMG_7385.JPG
 

zmotorsports

ALLIANCE MEMBER
Joined
Oct 20, 2009
Messages
21,312
Location
Northern Utah
Robert, how thick is that SPI Black epoxy coating with the two applications that you apply? Looks like it works real well as a guide coat for then applying either a bit of glazing putty or when you go to the 2K primer it will show where it needs it the most?

Also, with the green~ish HoK epoxy primer you were brushing it on in certain areas where you were using it as a weld thru coating. Does the SPI epoxy coating have similar consistency where it can be applied with a brush in the same manner? I used the PPG DP epoxy primer much the same way, apply with a small brush in some areas rather than spraying on the backside of a panel or between panels.

Thanks.
 
Last edited:
OP
M

MP&C

Well-known member
Joined
Oct 21, 2009
Messages
4,396
Location
Leonardtown, MD
Thanks for the comments fellas. Got some machinery changes going on at the shop in the next couple days, I’m excited for the new capability. More to come...


Robert, how thick is that SPI Black epoxy coating with the two applications that you apply? Looks like it works real well as a guide coat for then applying either a bit of glazing putty or when you go to the 2K primer it will show where it needs it the most?

Also, with the green~ish HoK epoxy primer you were brushing it on in certain areas where you were using it as a weld thru coating. Does the SPI epoxy coating have similar consistency where it can be applied with a brush in the same manner? I used the PPG DP epoxy primer much the same way, apply with a small brush in some areas rather than spraying on the backside of a panel or between panels.

Thanks.


Mike, i started using the SPI mainly because HK was getting too proud, and their epoxy, although sandable, did tend to load up the paper. SPI does have a good build where three coats will hide quite a bit. I have used both HK and SPI in a brush-on application as a protectant between panels. Not a weld-thru per se, as we use that flattened but to clean out the plug weld hole. SPI works well with spraying, brushing, rolling. Take your pick. I would only caution that the first coat should go on a bit light to medium. A heavy coat for the first one and it tends to fisheye. Light to medium on the first, and after it flashes you’re good to go for heavyset coats. If doing heavy coats for more build you may want to allow more flash. Some of the guys will do so and let it set overnight between coats. SPI does set up as a semi-gloss that fills out when sanded, so yes, it has the perfect guide coat built in. I have a can of the 3M powdered guide coat that I’ve never used because of this.
 

zmotorsports

ALLIANCE MEMBER
Joined
Oct 20, 2009
Messages
21,312
Location
Northern Utah
Thanks for the comments fellas. Got some machinery changes going on at the shop in the next couple days, I’m excited for the new capability. More to come...


Mike, i started using the SPI mainly because HK was getting too proud, and their epoxy, although sandable, did tend to load up the paper. SPI does have a good build where three coats will hide quite a bit. I have used both HK and SPI in a brush-on application as a protectant between panels. Not a weld-thru per se, as we use that flattened but to clean out the plug weld hole. SPI works well with spraying, brushing, rolling. Take your pick. I would only caution that the first coat should go on a bit light to medium. A heavy coat for the first one and it tends to fisheye. Light to medium on the first, and after it flashes you’re good to go for heavyset coats. If doing heavy coats for more build you may want to allow more flash. Some of the guys will do so and let it set overnight between coats. SPI does set up as a semi-gloss that fills out when sanded, so yes, it has the perfect guide coat built in. I have a can of the 3M powdered guide coat that I’ve never used because of this.

Thank you very much for your feedback Robert.

I've been making a list and doing some research so I can make a call to SPI later today hopefully to order a few items and try them out.

Thanks again.
 

zmotorsports

ALLIANCE MEMBER
Joined
Oct 20, 2009
Messages
21,312
Location
Northern Utah
Robert, I just hung up the phone with SPI and placed my first order. I spoke with Barry for over an hour comparing products and he was extremely helpful in helping me make the transition from PPG's products.

Thanks again for your time and feedback. I greatly appreciate it.
 

Bob Heine

ALLIANCE MEMBER
Joined
Oct 24, 2009
Messages
10,703
Location
Boca Raton, Florida
Robert, I just hung up the phone with SPI and placed my first order. I spoke with Barry for over an hour comparing products and he was extremely helpful in helping me make the transition from PPG's products.

Thanks again for your time and feedback. I greatly appreciate it.
Mike, SPI is the kind of company that has all but disappeared. As you discovered, Barry is the owner and he is the one who answers the hotline. You are now headed into a really cool rabbit hole. I've used both the water- and solvent-based wax and grease removers, black epoxy primer and universal clear so far and all have been outstanding products. Barry sells the blackest black base and single stage I've seen. Other brands look brown or blue next to it. It looks blacker than the true black lacquer from the good old days.

I have yet to throw out a shipping box from SPI. You'll know why in a couple of days.
 

zmotorsports

ALLIANCE MEMBER
Joined
Oct 20, 2009
Messages
21,312
Location
Northern Utah
Mike, SPI is the kind of company that has all but disappeared. As you discovered, Barry is the owner and he is the one who answers the hotline. You are now headed into a really cool rabbit hole. I've used both the water- and solvent-based wax and grease removers, black epoxy primer and universal clear so far and all have been outstanding products. Barry sells the blackest black base and single stage I've seen. Other brands look brown or blue next to it. It looks blacker than the true black lacquer from the good old days.

I have yet to throw out a shipping box from SPI. You'll know why in a couple of days.

Thanks Bob.

When I was speaking to Barry I was getting the feeling the products will be similar to most of the PPG products from the late 80's into mid-90's. Many of the products I was asking him about we joked about their performance way back then and how things have changed in the mainstream paint & body world currently.

Couple that with the fact that I've been away from the paint & body scene for nearly 5 years and I have some catching up to do. Let's put it this way, I have been a die-hard PPG fan for the past 30+ years and have been very pleased with their products although when they did away with the original formula of the DP epoxy primers and went to the LF (Lead Free) I was instantly disappointed in that particular product. Barry told me that his Epoxy Primer is very much like that old original DP from the PPG line. He also told me his Universal Clear is nearly identical to the old DC2020 which was a high solids clear and worked fantastic so I am pretty excited to try the SPI products out.

The reason I've started looking/searching for something else is because I went to my local Paint & Body Supply that I still have an account with when I priced out PPG products that I will need I about had a heart attack so I figured I had better do some more research and now I feel like I'm starting from scratch. When we moved 3+ years ago because I figured I'd never be painting again and it would be senseless to box things up just to move them plus I figured they wouldn't be good by now anyways so I either tossed them or gave away to friends what was still good.

Sorry to hi-jack Robert.
 
To avoid these ads, REGISTER NOW!
Top Bottom