sean Buick 76
Well-known member
Looking fantastic!!!!


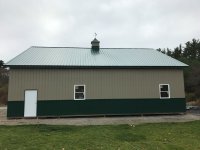
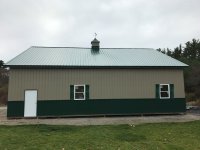
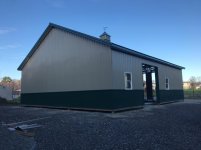
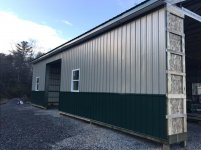
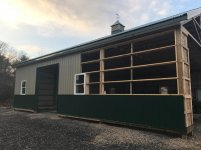
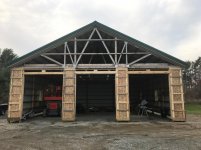
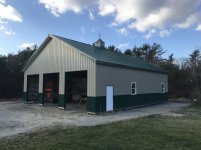
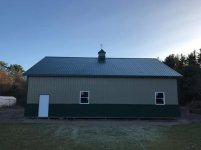
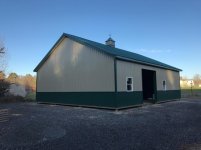
It has been a while so here are some more pictures. I am done with the roof!!! The roof was a big accomplishment for me due to my aversion to heights. I am happy with the finished roof along with the soffits and eaves. The wainscot is going well so far, hopefully I will get some wall steel up today.
It has been a while so here are some more pictures. I am done with the roof!!! The roof was a big accomplishment for me due to my aversion to heights. I am happy with the finished roof along with the soffits and eaves. The wainscot is going well so far, hopefully I will get some wall steel up today.
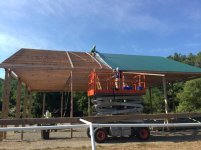
Ah, the roof panels. Lets just say that I am glad I am done with the roof! The panels are 24' 7.5" long, at that length they become VERY flexible. The way my father and I handled this was interesting to say the least. We started out by placing a 20' long board onto the scissor lift with one end tucked up under the eave and the other end near the ground. We would slide a panel onto the board with the top hanging over onto the roof. Then we raised the scissor lift up so the board angle matched the roof angle. Then I would climb a ladder that I had affixed to the roof slope and pull the panel up to the peak and started to fasten it down. It may not have been the most efficient way but working with only myself and my father, it was virtually the only way for us to do it. Its done, and I am happy with the results
Sean
If you roll the panel into a "U" or "O" shape it's a lot easier to handle the long pieces without fear of kinking them. I used regular motorcycle straps and carried them up a ladder.
You are taking on quite the accomplishment taking this on nearly by yourself! Well done sir!
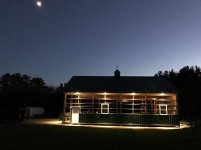
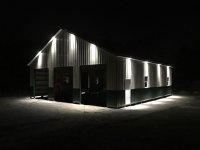
I was curious as to the lighting in this post.
It appears you've install eve lighting?
I'm a huge fan of nearly hidden, very functional, yet solid accent lighting and want to know more details?
Do you have lighting installed at this point? And of so, what light fixture is it?
If not, what other kind of sorcery is producing this effect?
Keep up the good work? You'lol be enjoying the fruits of your labor soon enough!
Wow, great job doing it all yourself! May I ask specifically which of the three towns you're in? I live in Rochester and so do my parents. My father is going to put up a 32x30 pole barn in the spring and we are trying to decide on who to go with. I was looking at Hansen pole buildings as well as DIY. I have seen a DIY brand building and it looked nice. We don't plan on erecting the building ourselves though, wish we had the time...
Keep up the good work.
-Bill
OK,
You can't leave us hanging. You MUST give us details on the deck and porch!
Bill
I like that lighting idea, very nice touch. Also big kudos for all the work you have done so far. Keep up the good work!
I have a 42x48 with doors just like your plans except mine are 12x12 doors.
Me sidewall height is 14 ft.
2016 sq. ft. gives decent shop room plus storage for a few cars or toys.
Good luck with it and keep us posted.
.....it has basically faded to a purple/maroon color and has swelled more on one edge due to uneven extrusion. I may replace it eventually with Azek product. I really enjoy the porch and spend as much time out there as I can.
Sean
I live in Rochester, great town to raise kids with a good school system. I wish I had the money to have the building built for me, but if I wanted it this size I was going to have to build it myself. I shopped several brands and this kit was the best for my needs.
Sean
Nice work! I hope I never build a shop again, but if I do, I'd love to build it myself like you are doing.
It looks like you already hung 2*6s between the trusses to hang your ceiling on. Can you tell me more about that? Why not 2*4s? What spacing did you use? How did you attach it to the trusses?
Thanks!
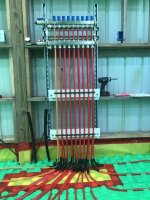
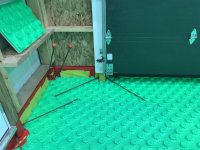
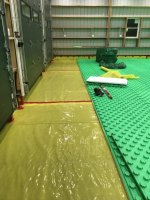
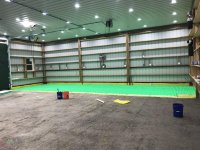
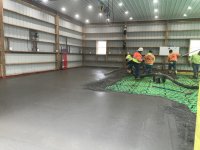
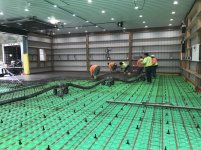
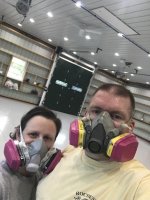
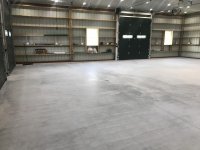
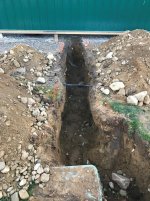
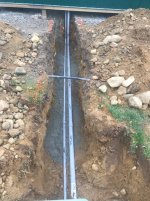
I passed my electrical rough inspection! I'm continuing to move forward with the electrical and garage doors. The overhead doors (Garaga) should be hung this coming Monday and Tuesday along with liftmaster 8500 jack shaft openers. Soon I will begin to install the foam board insulation along the interior perimeter of the grade board to begin prepping for the radiant floor slab. Coincidently putting the foam board in place will also help to close up the garage from weather and further bird intrusion. Here are some updated pictures and links to the electrical and lighting.
Sean
http://www.garagejournal.com/forum/showthread.php?t=348336 electrical
http://www.garagejournal.com/forum/showthread.php?t=355882 lights