
You are using an out of date browser. It may not display this or other websites correctly.
You should upgrade or use an alternative browser.
You should upgrade or use an alternative browser.
my Florida dream garage project
- Thread starter LutzTD
- Start date
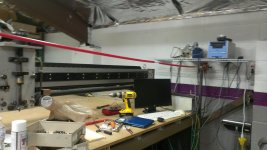
success  I found a setup page that had the second port turned off. Once I got it reset to on the z axis works. I put belts on the X and Y and its alive. Still need to get the limit switch issue sorted and add the e-stop. Since this thing is so big Im going to use a conveyer cable e-stop type system. also added a shelf for the controls to get them off the table. I turned on the router motor I got with the machine. its a 2hp porter cable. sounds a little rough. I blew it out and ran it for a bit. I think it will do until I figure out something better
I found a setup page that had the second port turned off. Once I got it reset to on the z axis works. I put belts on the X and Y and its alive. Still need to get the limit switch issue sorted and add the e-stop. Since this thing is so big Im going to use a conveyer cable e-stop type system. also added a shelf for the controls to get them off the table. I turned on the router motor I got with the machine. its a 2hp porter cable. sounds a little rough. I blew it out and ran it for a bit. I think it will do until I figure out something betterworked today to get the estop working on the router. I got 2 conveyer estops off of ebay for $30 delivered. Then some 1/8 coated cable, ends red pex tubing and eyebolts from HD. I set it up about 20" above the work surface. A good yank on any part of the cable and it trips the switch. The blue button resets it. I don't think I will connect the light.
Attachments


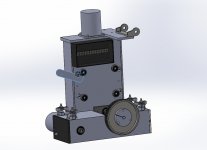

made the wrench and tightened up the y axis bearings. Still need to figure out the limit switch wiring. I bought an additional breakout PCBA so I can wire the switches directly to the control board and bypass the Anahein control. I think this is going to be safer as it uses 5v normally closed instead of ground normally open setup. The ground NO setup could have a wire shorted or cut and would disable the function of the switch making an unsafe failure for that drive. If the 5V NC system get shorted it will pop a fuse and if it disconnects or gets cut it will disable that drive movement which is a safe failure. This will also allow the e-stop circuit and an additional circuit to detect tool height.
Too complicated for me
its an old CNC router I got off Craigslist. It was still hooked to an old 386 computer with dos software. Im fixing the things that are current, and updating those that are not, basically the software and computers.
I am going to go ahead and make a box for the smoothstepper board. Looks like the way I want to do the limit switches will work with a break out board so I am now ready to make an enclosure. I did a quick design in SW and have all of the hardware ordered. I will try to get out in the shop and make the box. Its pretty simple.
Attachments

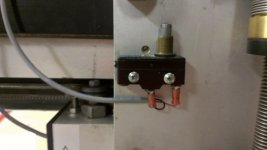
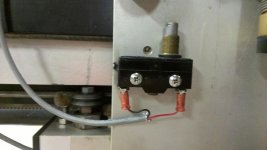
well my power supply for the computer for the router, a 2002 Shuttle, gave up the ghost, so I couldnt work on the boards and enclosure without hooking it all up to make sure the design was OK. So I bought a used laptop on the bay and am awaiting delivery on that. In the mean time Im swapping the leads on all the switches and wiring up the e-stop. The middle position is NO and the outer is NO so all get swapped to the outer terminal. Once I did that I ohmed them all and found the down z limit switch wiring has a fault somewhere. I think this machine originally was taken out of service from a down crash on the z so it makes sense. Ill have to trace the wire to find the fault before I finish it all up.
Attachments
 present to myself. The wife would never have thought of it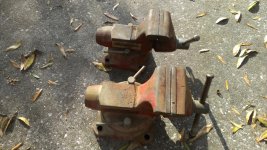
rixtrix1
Well-known member
Good deal. Bet you paid a lot less that off the truck for those vises.
Good deal. Bet you paid a lot less that off the truck for those vises.
yeah, I thought it was a good price. they werent $25 or anything like that. Ever since I got the first 3" Wilton Ive been on the look out for another. These are the new version Wiltons but they are a world of difference quality wise from the stuff in the box stores. I will get good use out of them.
got the new(to me) laptop and worked to get it configured to run the router. I installed Mach3 demo and I have the old DOS version of BobCad. I have found it to be a really a nice little program for generating 2.5D NC code quickly. I spent a couple days fiddling with it and going through the manual I got with the mill. I imported the flat file DXF for the bottom half of the smooth stepper box I want to make and finally have the g-codes generated to make the part. I got those loaded into Mach3 and with another couple days of fiddling I got the Mach3 to run the g-codes generated by DOS BobCad in simulation mode. Next step is to connect the Smoothstepper PCBA with a breakout board to the Anaheim Automation motor driver. Will be this weekend I hope. I downloaded a demo version of BobCad v27 which is the modern up to date BobCad, seems to be still pretty efficient and easy to use. I was not able to generate g-code with it as it is a demo copy, but they are offering a seat of BobCad v27 Pro right now for under $1000. Im on the fence to spend the grand, but if I had the grand to spend Id be all over it.
Attachments
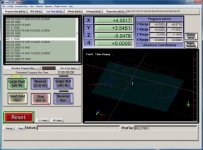
Last edited:
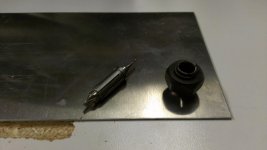
did my first cut today. went as fast as I could (didnt know how to set some things up) and basically it all worked except the cut itself. The geometry was correct, but the bit did not cut, it basically melted through. After doing some investigation the welded material on the cut means I was too slow, which is counter intuitive for me, but thats what the feed/speed calcs tell me. I got a straight 2 flute which was all I could find. It should have been going 27000RPM with a 28IPM feed speed! I was at 22000 (max for the router) and 18 IPM. SO I have some single flute spiral cutters ordered. That will cut down the IPM requirement and help clear chips, but the RPMs are still slow. I may try to get a variac. I believe those will over clock by 20% which would get me to 26400RPM. Im close.... I may just center drill the holes and change to a 3/16 cutter. This will slow the speed down to 22000rpm and 30IPM for the aluminum sheet
I also am going to pipe some air through the harness and direct a couple of high pressure air streams onto the cutter
I also am going to pipe some air through the harness and direct a couple of high pressure air streams onto the cutter
Attachments
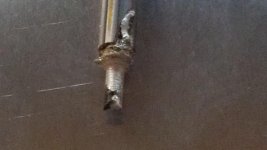

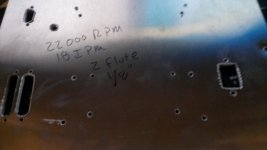
Last edited:
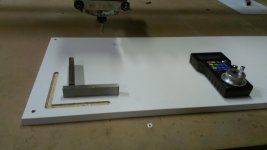
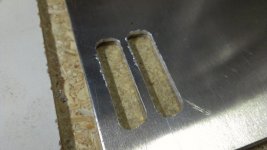
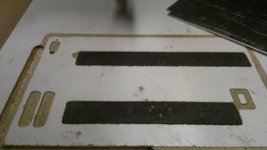
worked on the router this weekend. I put a sacrificial piece of melamine down on the table, then cut a x-y stop in with a 1/2 endmill. I am able to use some different sizes of endmills now as I was able to get some new collets for the porter cable router. anyway, once the slots were cut I add 2 1/2 thick O-1 parallels for stops and locate the plate blank on the table at 0,0. I tried again with a smaller endmill using a feed rate of 60in/min and still its loading up and melting the material. I am hitting this with an air gun all the while to try to get the chips clear. Second attempt today, I reprogrammed for a 1/4 endmill. Same rpm but 30 ipm feed. Cuts much better. I got a decent part to use so Im ecstatic. The second program split out the small holes with a center drill. That worked OK too. So I will try to get the top programmed and run and fold these up as my next step. I may recut the bottom and top to do the perimeter so it is more accurate than I can do with the stomp shear. The double side tape worked OK, but in the long term im going to learn to program to move around clamps and hold it down physically.
Attachments





Kevin54
MEMBER EMERITUS
did my first cut today. went as fast as I could (didnt know how to set some things up) and basically it all worked except the cut itself. The geometry was correct, but the bit did not cut, it basically melted through. After doing some investigation the welded material on the cut means I was too slow, which is counter intuitive for me, but thats what the feed/speed calcs tell me. I got a straight 2 flute which was all I could find. It should have been going 27000RPM with a 28IPM feed speed! I was at 22000 (max for the router) and 18 IPM. SO I have some single flute spiral cutters ordered. That will cut down the IPM requirement and help clear chips, but the RPMs are still slow. I may try to get a variac. I believe those will over clock by 20% which would get me to 26400RPM. Im close.... I may just center drill the holes and change to a 3/16 cutter. This will slow the speed down to 22000rpm and 30IPM for the aluminum sheet
I also am going to pipe some air through the harness and direct a couple of high pressure air streams onto the cutter
Two things you have to watch out for is the speed, and the type of material. he softer the aluminum, the easier it will gum up your cutter. Plus the faster the router runs the better chance of gumming up the cutter because it will heat the aluminum to the point of getting to get to the semi-liquid state.
The best thing to do it get a variable speed control, and use a light lube like some WD or even a few drops of oil. Try to stay away from any 6061-0 as it is dead soft. try to stay with something like 6061-T4 or T6. Some 5052-H32 is 1/4hard and 5052-H34 is 1/2 hard and will cut well, as 2024-T3 will cut well also.
If you run into some 1100 or 3003, it will not cut good with a router as it is real soft.
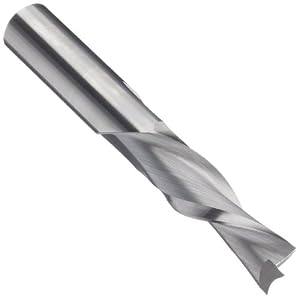
Also if you look for router bits they make an end mill that is used for plastic or sheet metal that has reversed flutes and it will "downcut". By that I mean that it turns in the correct dimension, but the reverse flutes push the material down instead of trying t lift the material. It will prevent fraying, chip out, and lifting. Here is a couple of sites showing what I am talking about http://www.2linc.com/endmills_aluminum_1fl_std.htm
http://www.bing.com/images/search?q...AB140CC7C2442DB710DB5B43C7D6&selectedIndex=21
Two things you have to watch out for is the speed, and the type of material. he softer the aluminum, the easier it will gum up your cutter. Plus the faster the router runs the better chance of gumming up the cutter because it will heat the aluminum to the point of getting to get to the semi-liquid state.
The best thing to do it get a variable speed control, and use a light lube like some WD or even a few drops of oil. Try to stay away from any 6061-0 as it is dead soft. try to stay with something like 6061-T4 or T6. Some 5052-H32 is 1/4hard and 5052-H34 is 1/2 hard and will cut well, as 2024-T3 will cut well also.
If you run into some 1100 or 3003, it will not cut good with a router as it is real soft.
Also if you look for router bits they make an end mill that is used for plastic or sheet metal that has reversed flutes and it will "downcut". By that I mean that it turns in the correct dimension, but the reverse flutes push the material down instead of trying t lift the material. It will prevent fraying, chip out, and lifting. Here is a couple of sites showing what I am talking about http://www.2linc.com/endmills_aluminum_1fl_std.htm
http://www.bing.com/images/search?q...AB140CC7C2442DB710DB5B43C7D6&selectedIndex=21
awesome thanx. I was a toolmaker long, long ago but I only had experience with tool steels so this thin aluminum is killing me. I also tend to try to hurry things so my first efforts were ill conceived
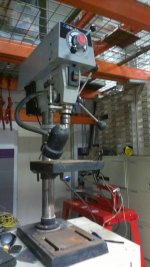
 . I will mostly be doing 5052 no more than half hard so thats cool. Im also going to eventually get a new variable speed router. I also am going to cut off the top of my HF drill press and make an outrigger that I can run at drill speeds for the drilling ops. I had asked the Woodcraft guys about the reverse flute but he said they tend to be hard on cutters in the aluminum, have you tried those specifically with 5052 sheet, how should I set the work, Im double side taping it to melamine right now.
next passes with this tool should be better, Im going to add a finish pass with an .010" cut to try to get cleaner edges. Now that the programming is getting easier it wont be as much trouble to add. Im using cambam, its pretty good so far and easy to pick up. Its the best cost vs features app I have found so far.
Last edited:
wasfast
Well-known member
I've had great success with using isopropyl alcohol on aluminum. Works very well, low cost and leaves no residue to have to clean late. Evaporates quickly.
I've had great success with using isopropyl alcohol on aluminum. Works very well, low cost and leaves no residue to have to clean late. Evaporates quickly.
wow, never would have thought of that thanx. thats awesome, I couldnt figure out how to get rid of a liquid coolant or oil. Im going to run an air line through the wire race and put 4 small blowers to keep the cutter clean and try to cool it a little, maybe I can mist the alcohol through that system to carry away some heat as well.
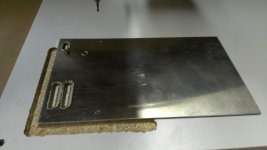
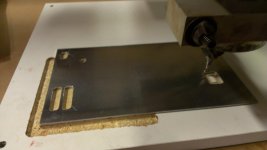
I redid the CAM to include a seperate .010" finish cut, and also to do the profile of the base and top plates so I dont have to rely on the shear for the outside accuracy and so I can get the cormer radii. Took longer to cut but not too bad. I kept a constant supply of compressed air and also put some alchohol in a spray bottle and misted it on the cutter thanx WASFAST, that is the tip of the year! So with the .25" 2 flute high speed steel cutter at 22000RPM and at 30IPM with .05 cut per pass, this is working pretty nice. Next time I will increase the finish cut to .015" to clean all of the burrs, .010" was enough except for a few spots, not sure why. Next steps I want to automate the air and maybe even get some infusion pumps from work to automate the alchohol. So I will have an alchohol injected router, sounds pretty cool.....
Once I get this box done I can rewire the router to use the switches for home and limit and the estop. Right now its running with no limit switches and only the pendant estop. I still need to drill the holes to size and fold it up.
Once I get this box done I can rewire the router to use the switches for home and limit and the estop. Right now its running with no limit switches and only the pendant estop. I still need to drill the holes to size and fold it up.
Attachments


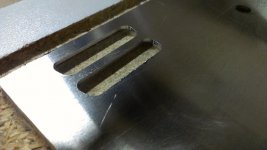
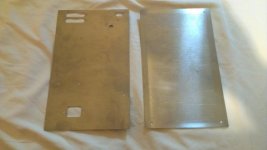
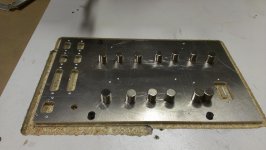
got the smoothstepper box folded. Im not happy with it for fit so I want to make it over with a little bigger box. The bend allowance was slightly off, so I have that adjusted for the next ione, unfortunately I used all of my aluminum sheet getting the cutting sorted out. I can wire it up in this box then once I get another sheet of aluminum I can recut it.
Attachments
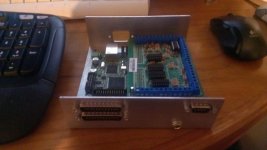
got the wires soldered on the DB9 and the DB25 connectors and run in the smoothstepper box. I plan to reconnect it to the router today and make sure its all working. I would like to cut a new bottom part, I found a piece of scrap that is big enough so I will try my magnet hold downs as well.
Attachments
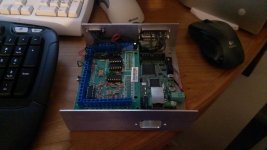
revised the smoothstepper box to add another DB9 and also a network cable pass through. I was going to make a special cable for the limit switches but it makes more sense just to add another connector and have all of the signal pairs discrete rather than sharing one leg.
Attachments

Last edited:

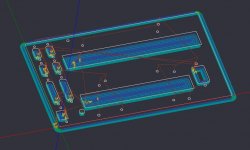
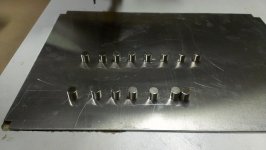
I revised the layout yet again. The DB25 connectors were too big to fit next to each other. Anyway, here the cam program to cut them again. I am going to cut 2 rectangular pockets in the nest and screw down some steel strips, then put some rare earth magnets on top of the aluminum to clamp it down. These are 1/2" diameter x 1/2" tall and have 25lbs pull force each. Im going to put 6-8 of them on there so it should be held fast in theory. I have some rubberizing spray coating Im going to add to the steel strips if it moves to help hold them from sliding.
Attachments
Last edited:
today I routed the holes for the steel strips and pressed in the strips. I tried to clamp with only magnets but it wasnt enough. It has good hold down force but it wanted to scoot sideways under what I thought was too little pressure. It is somewhat of a success as it holds the middle good and with a few screws not all the way in it holds firm. Its good not to have to drive the screws all the way as it bends the peice. I could also use washers but the magnets do keep it all from vibrating. I have some more magnets coming with through countersunk holes to see if a magnet below and above is enough by itself
Attachments

madoc1
Well-known member
looking good! 
jim
jim
well I was finally able to get back out in the shop. I folded up the lower portion of the box and ran all the wires for the DB9's. This gives me limit switch and e-stop functionality. After some cursing and retrying finally got it all working. Turns out when you hit a limit you have to reset a different software button then reset the estop. I wasnt doing the first reset and couldnt get the e-stop to disingage in the software. Then I lost my z axis again. Since I had this issue once before I decided it must be something in the breakout board looking at port two outputs incorrectly. With the breakout I can wire anything to anything so I was able to move the z axis outputs to the port one pins connected to port two pins on the output cable and its all working now.
Attachments
shortykorte
Well-known member
Hello from Florida. I have a poo question about your air line. You use regular galvanized pipe correct? I guess you are using filters at each outlet to catch any possible rust?
Hello from Florida. I have a poo question about your air line. You use regular galvanized pipe correct? I guess you are using filters at each outlet to catch any possible rust?
I have a filter/seperator at the 1" entrance line for the shop. Havent seen any rust so far. I suspect with the light amount of oil from the compressor the entire line is likely coated by now. I dont see the oil anywhere, but I can smell it in the air. I ve been blowing chips and cooling my router cutter with air for a while and I dont see anything at all in the air. I dont do painting or anything so no worries for me. If I did decide to paint Id use something more modern like HVLP or nitrogen which wouldnt use my air system anyway.
Last edited:
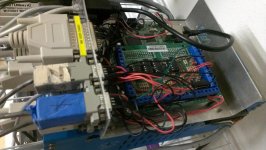
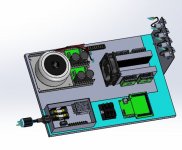
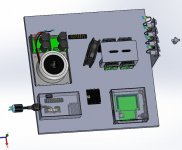
Im finally going to get back to my bridgeport cnc control box. I learned a lot messing around with the router so I think Im better prepared. Rather than rush into a 5 week project making an enclosure Im going to lay it out on a piece of wood first, get it running and wired, then design the enclosure. I have a good enclosure design to start with, but some of the elements of the control are different than I first thought, so I will use that design as a reference to make an enclosure for the final "on wood" setup. Heres a picture of my first on wood design.
Attachments
rixtrix1
Well-known member
Hello from Florida. I have a poo question about your air line. You use regular galvanized pipe correct? I guess you are using filters at each outlet to catch any possible rust?
What's the worry about rust when using galvanized pipe? With only the very small area of cut threads and pipe ends being exposed in a fairly new system, I wouldn't expect there to be a rust problem for some time. My first shop was built in 1938 using black pipe for the air system and as far as I know, it had never been replaced or had a rust problem. It did have a system oiler installed at the compressor that was serviced regularly while I worked there ( 1978-1985).
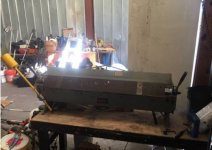
nice find this weekend. I sold a scroll saw I no longer needed and with that cash I found a 4ft finger brake. This will be good for interupted folds I cant do on the brake die with my limited die selection. Anyway, I will need to be creative to fit it in the shop. I think Im going to make a shelf above the shear and have it placed about 12inches above the shear surface. This way it doesnt have a footprint in the shop
Attachments
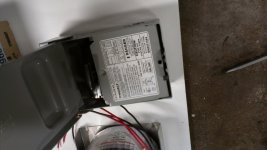
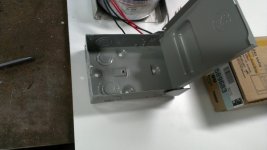
also got a chance to work on the mill control on a board. I mounted the transformer and the AC box. I found the cheapest AC enclosure was a 30amp disconnect, I just removed the guts. This makes a very nice big junction box for $7. I want to put the 5vdc transformer in there too because they are so noisy electrically. Now that I have the physical layout and an inventory of spare parts Im going to get my McMaster and Digikey orders together. I also decided that by adding 2 DB25s in the gecko assembly I can now use my router smoothstepper box plug and play on this assembly. Thats saves me a couple hundred dollars upfront cost.
Attachments

vr4joe
Well-known member
Wow this is a great thread! Keep up all the great work Lutz
shortykorte
Well-known member
What's the worry about rust when using galvanized pipe? With only the very small area of cut threads and pipe ends being exposed in a fairly new system, I wouldn't expect there to be a rust problem for some time. My first shop was built in 1938 using black pipe for the air system and as far as I know, it had never been replaced or had a rust problem. It did have a system oiler installed at the compressor that was serviced regularly while I worked there ( 1978-1985).
Florida is very humid where Lutz and I both live plus I'm here to learn. It didn't dawn on me that this is some oil in the pipes hence the need for oil separator.
TedInFlorida
Active member
Welcome to GJ, Neighbor! Glad to know there are other members nearby if/when I need a hand, or that can lend a hand when needed... I'm near TPC.
Subscribed!
Ditto. Crystal River here.
Your project is making me reconsider mine.
taumac
Well-known member
Ditto. Crystal River here.
Your project is making me reconsider mine.
Hell your right down road from me I'm in weeki wachee
nice find this weekend. I sold a scroll saw I no longer needed and with that cash I found a 4ft finger brake. This will be good for interupted folds I cant do on the brake die with my limited die selection. Anyway, I will need to be creative to fit it in the shop. I think Im going to make a shelf above the shear and have it placed about 12inches above the shear surface. This way it doesnt have a footprint in the shop
started the shelf over the shear today for the finger brake. I need to get this done as I have been hauling the brake around in the back of my excursion now for a couple weeks. Its too heavy to move by myself so I want to finish the shelf before I phone a friend to help me unload it.