To avoid these ads, REGISTER NOW!

Between 265 & 485 SQ/FT Nick's Two-Car Detached Vdub Garage

Workspaces sized between 265 and 485 squarefeet.
OP
N

nicholam77

Well-known member
Joined
Dec 18, 2016
Messages
2,669
Location
Minneapolis, MN
Memorial Day weekend update:

My awesome parents watched the kiddo for most of Monday so I got a decent amount of shop time! A rarity these days! I mostly spent it doing "shop" projects and tinkering, but hey sometimes that's more fun than the real stuff.

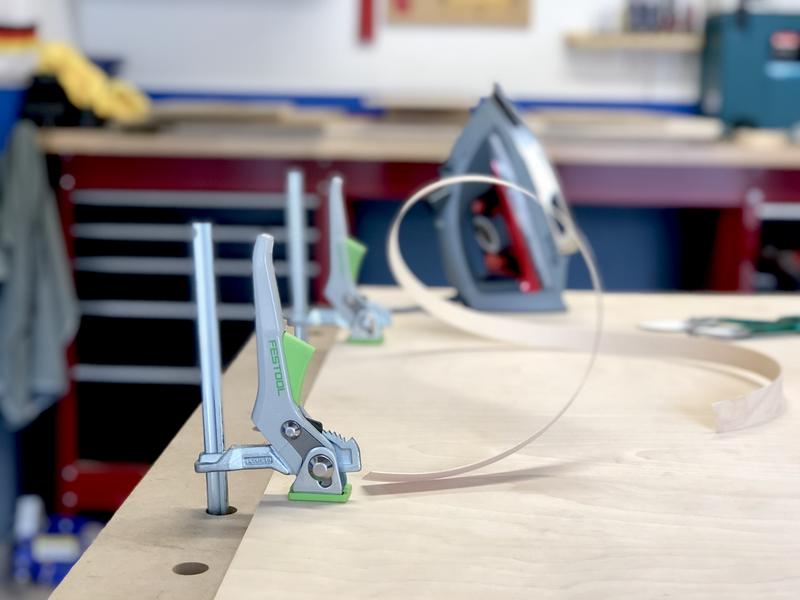
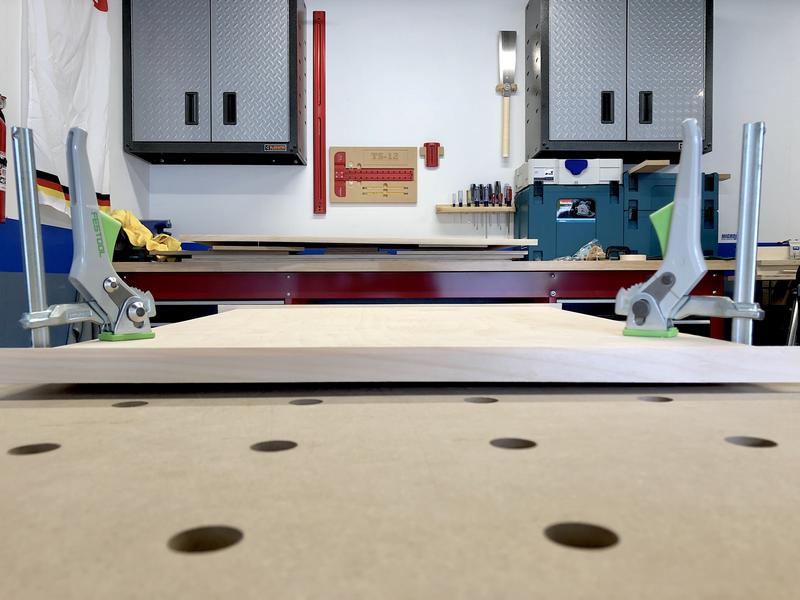
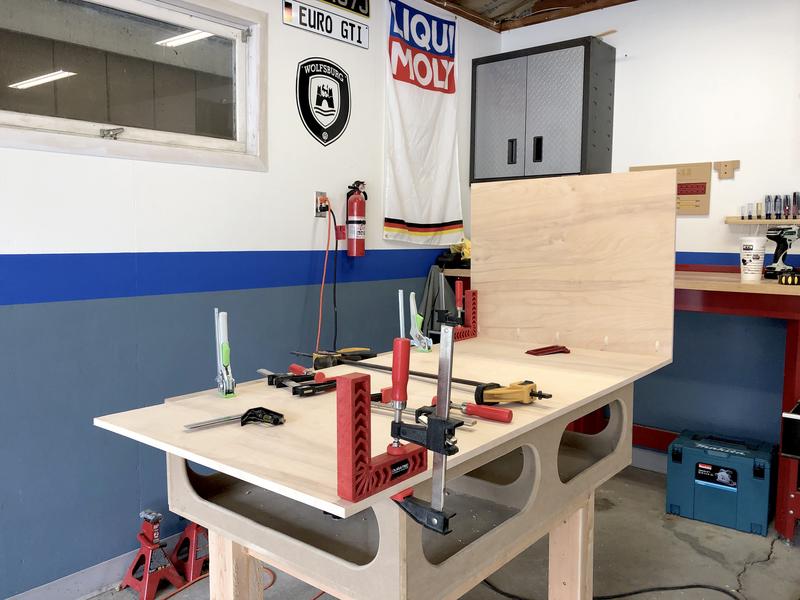
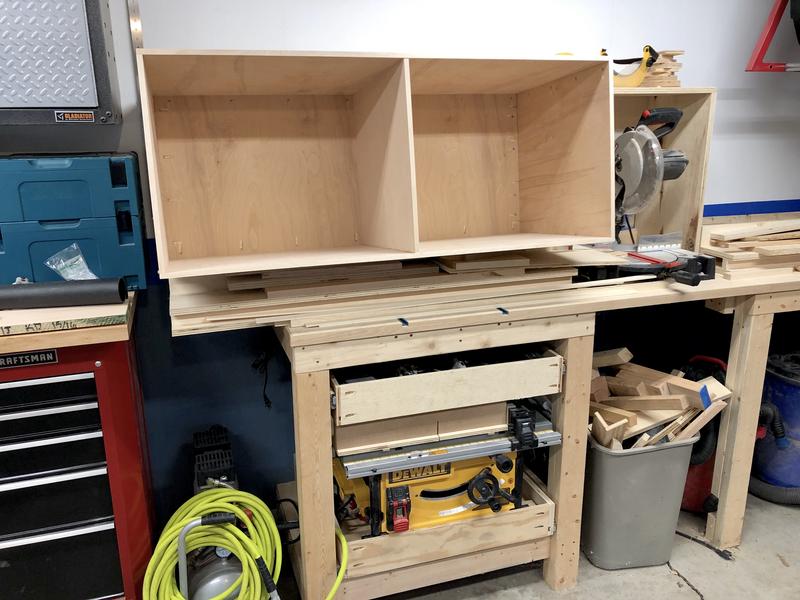
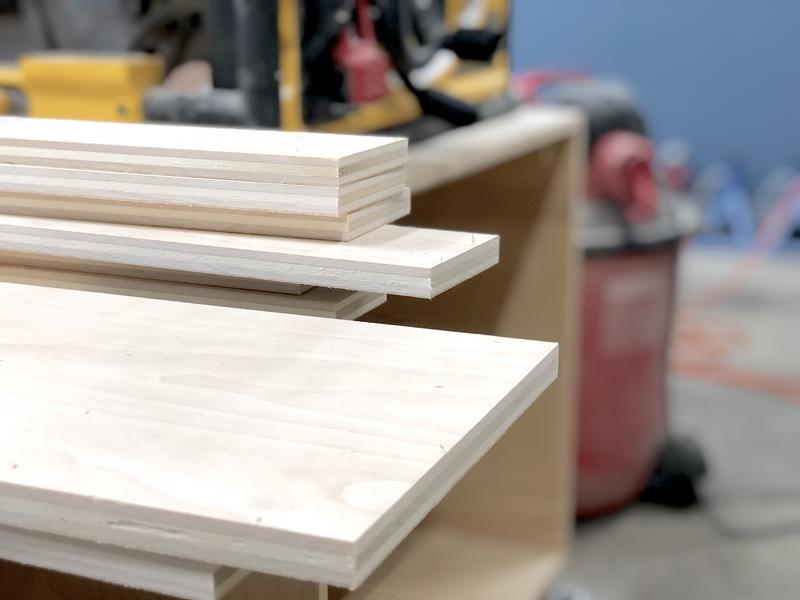
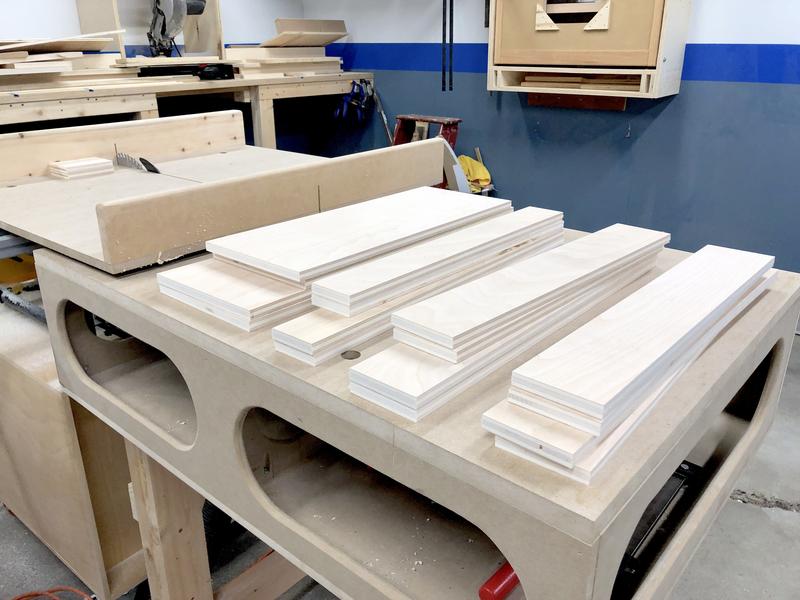
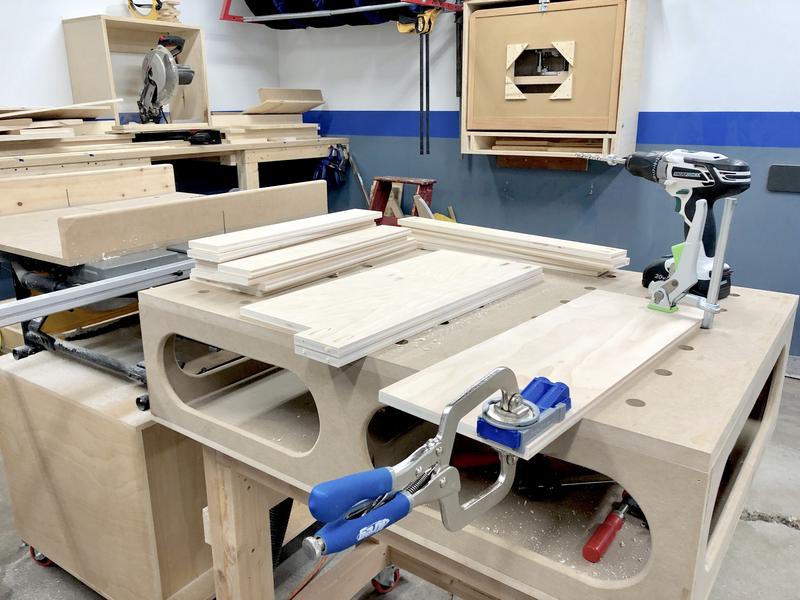
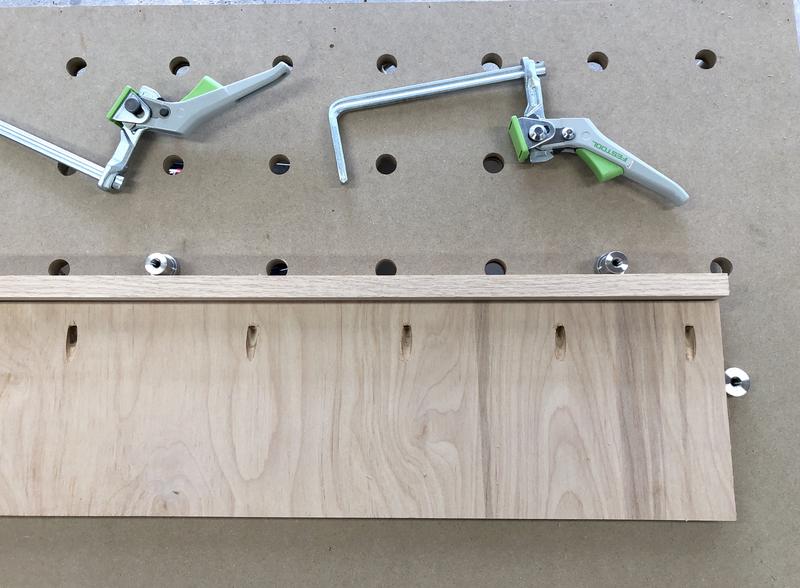
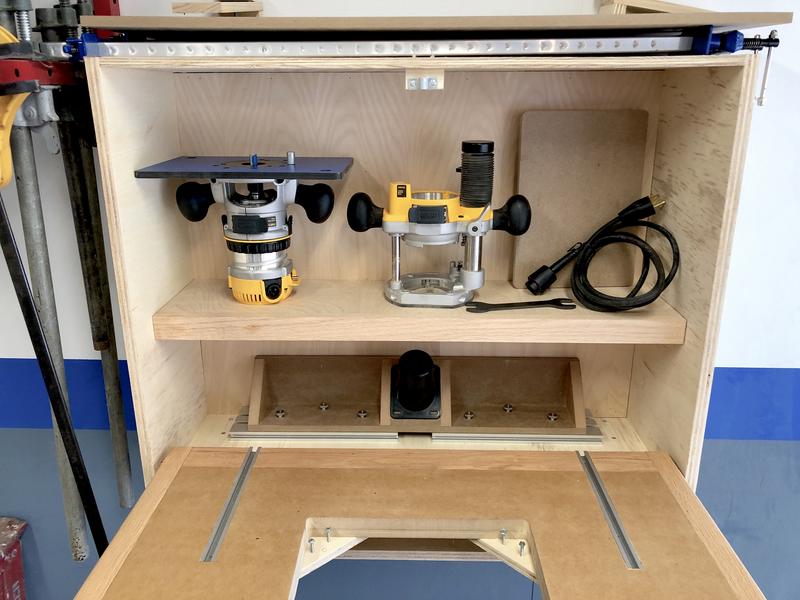
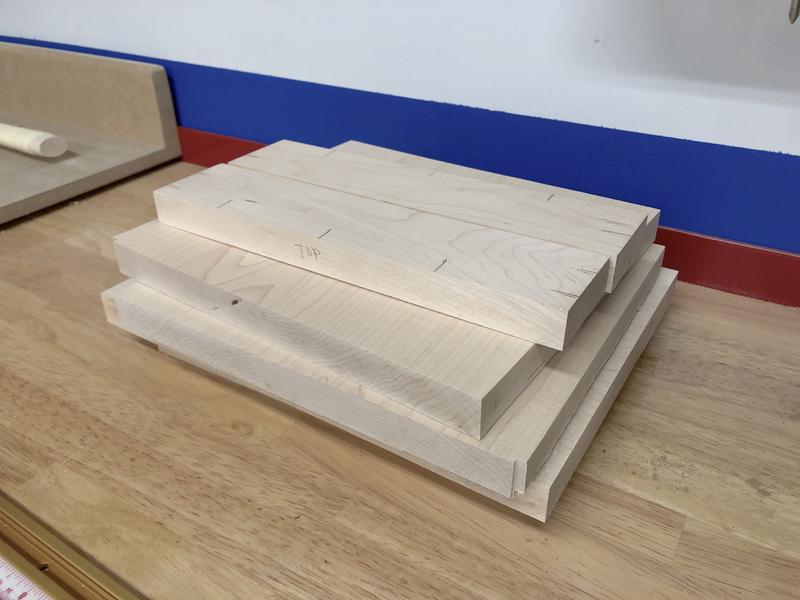
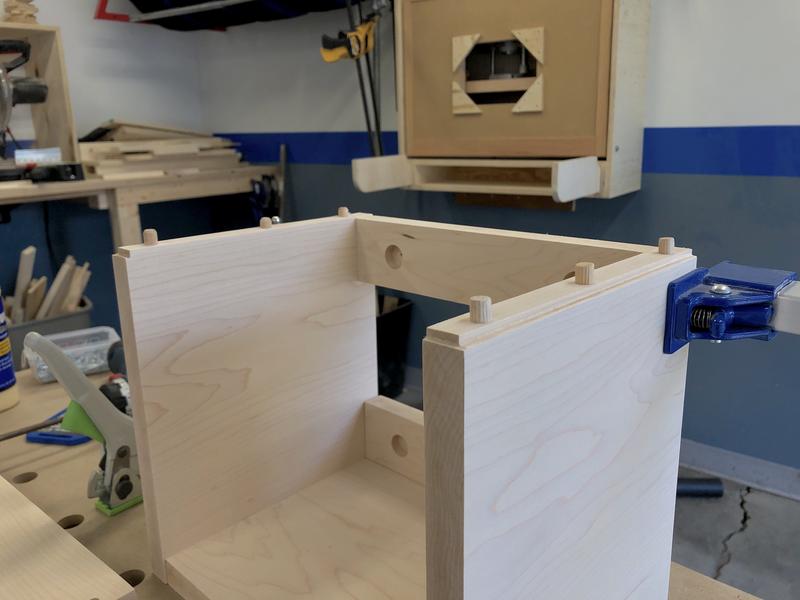
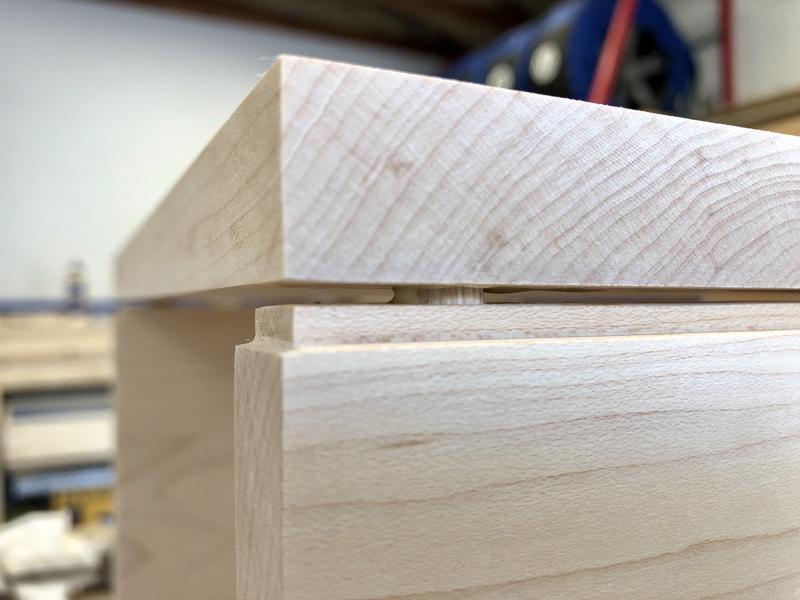
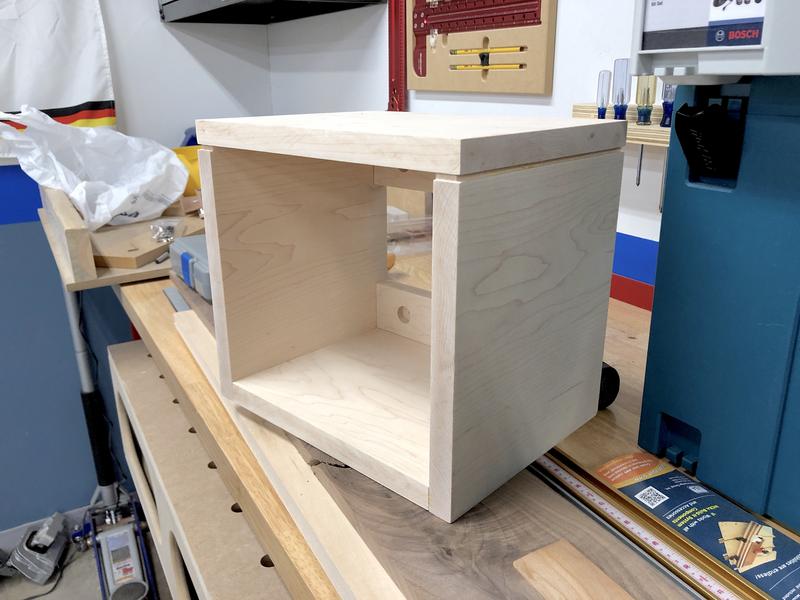
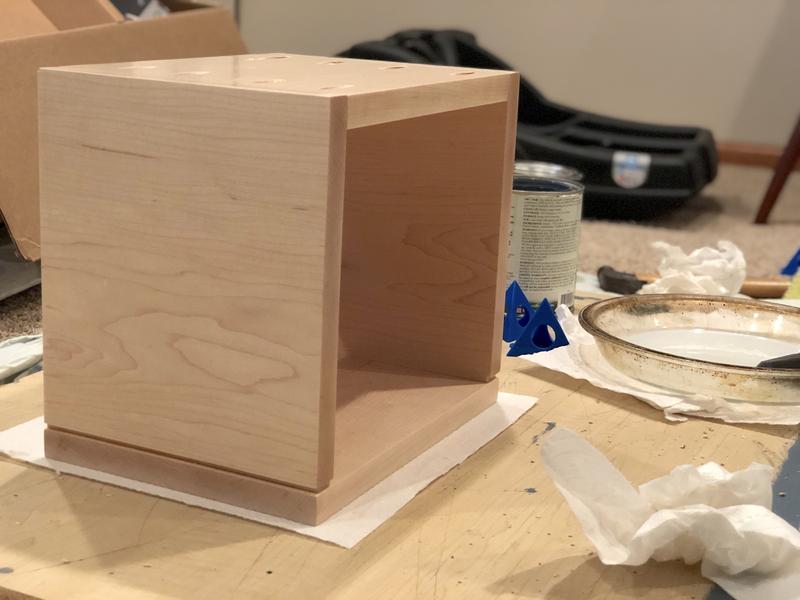
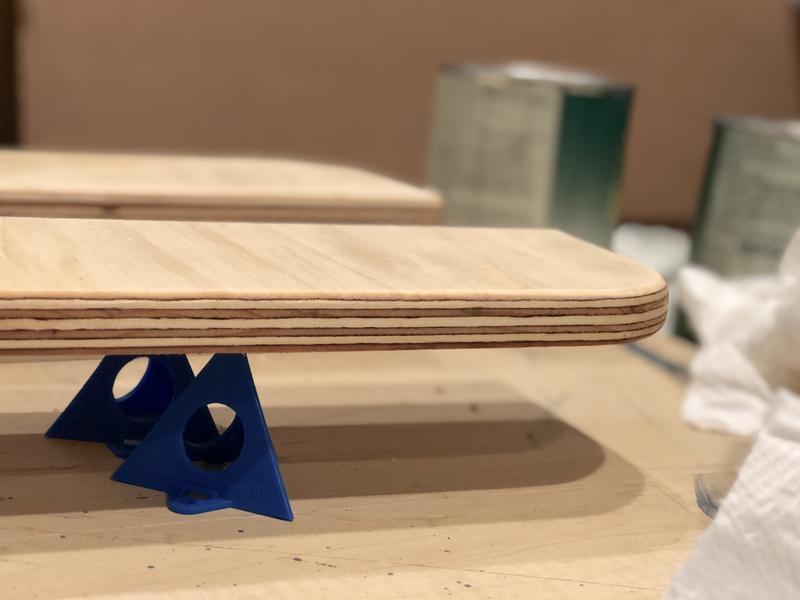
First up I added oak edge banding to router cabinet shelf:

IMG-6052.jpg


IMG-6055.jpg


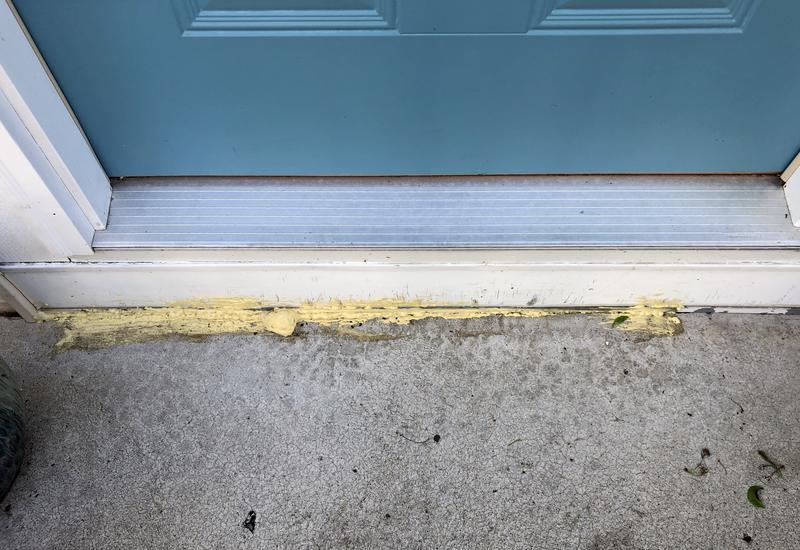
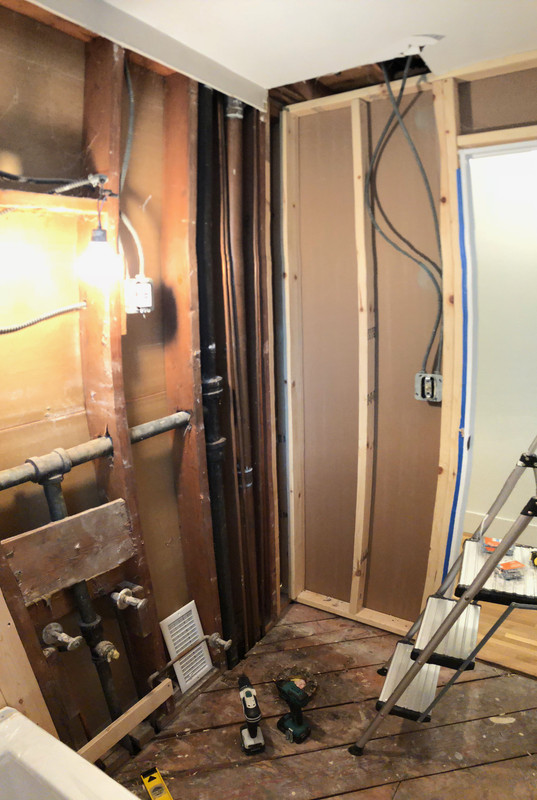
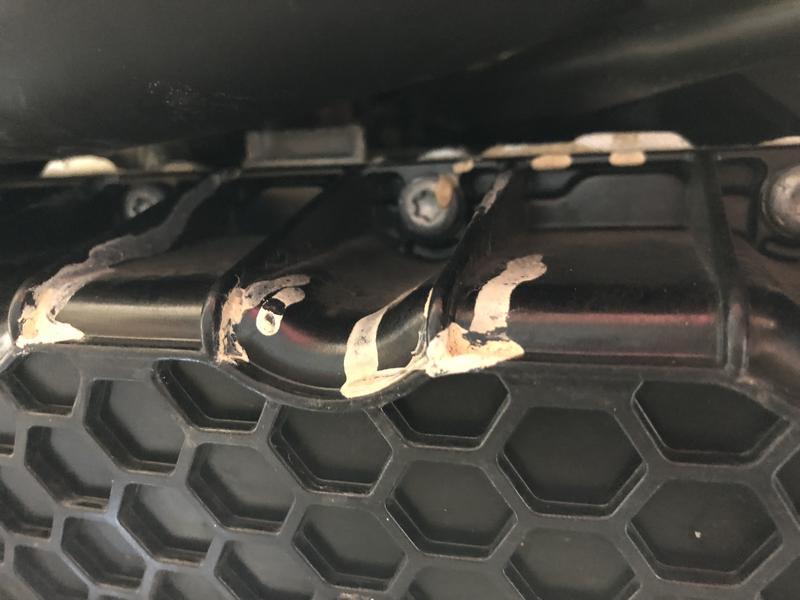
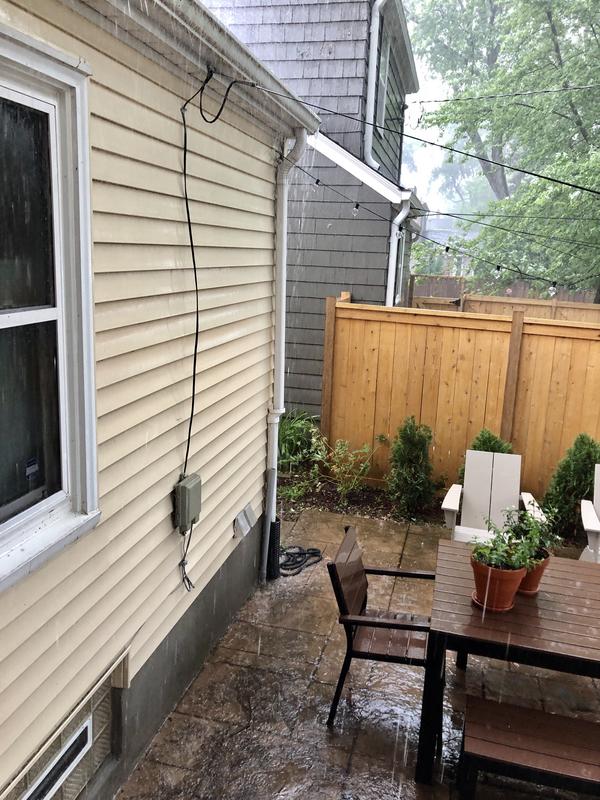
Filled gap in front stoop with expanding foam, as well as inside threshold:

IMG-6107.jpg


IMG-6109.jpg


IMG-6111.jpg


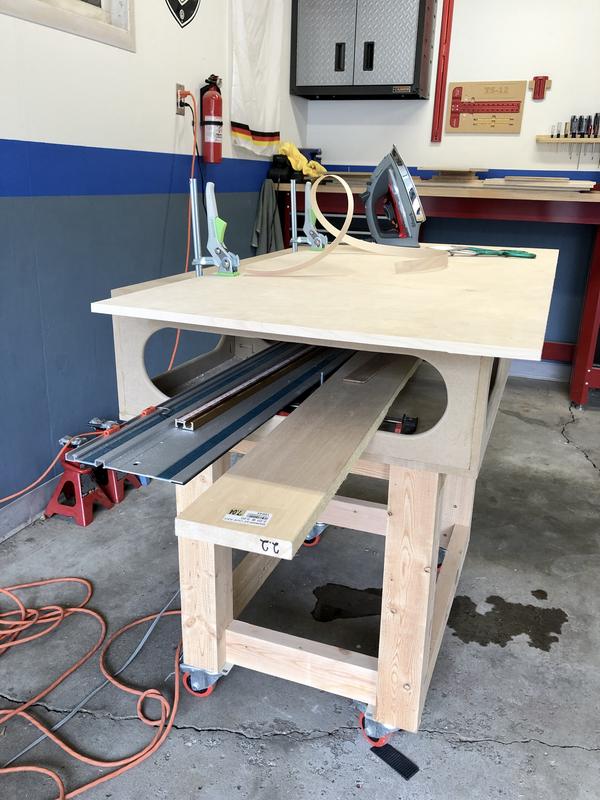
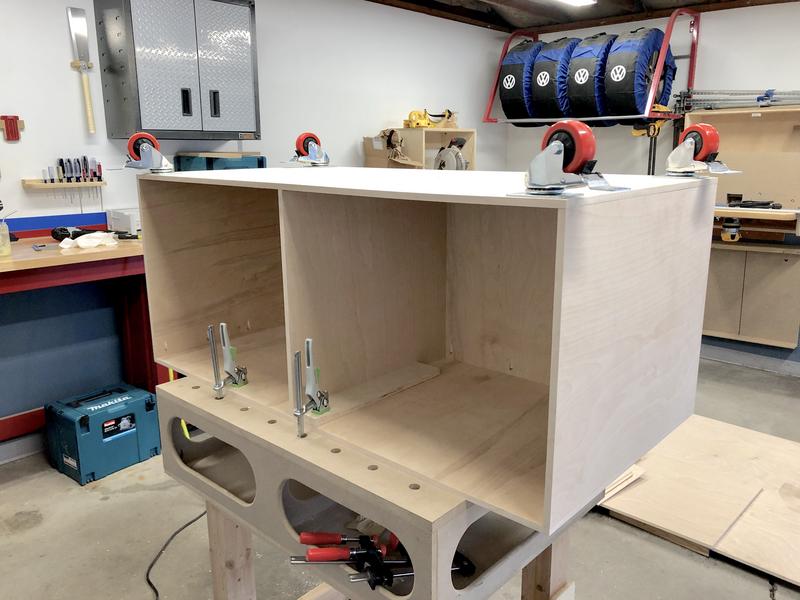
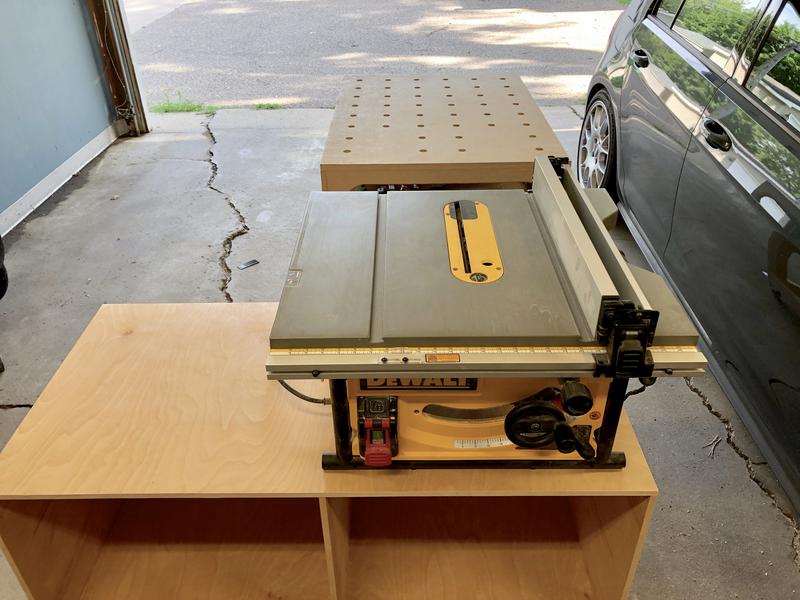
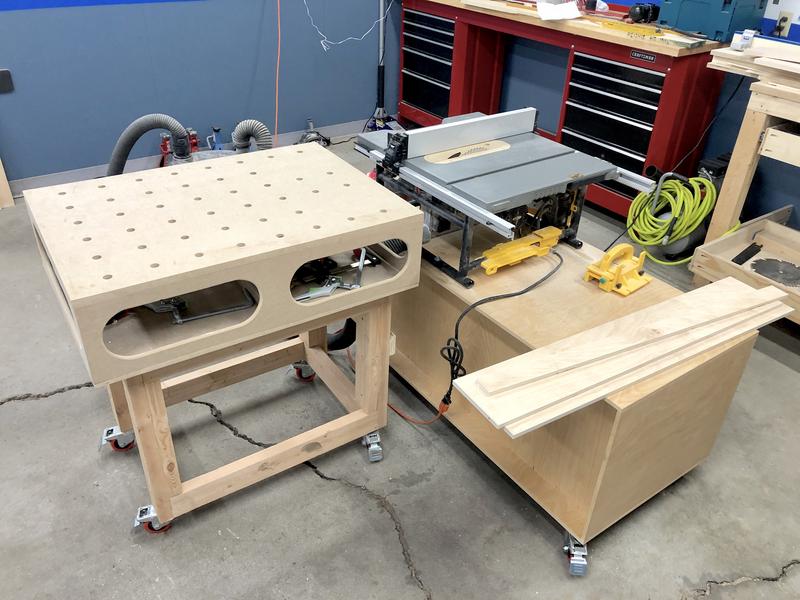
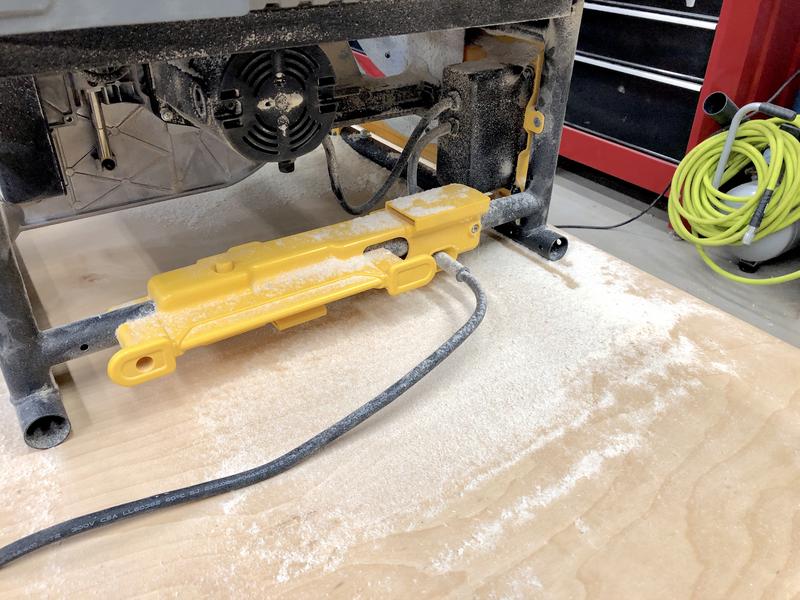
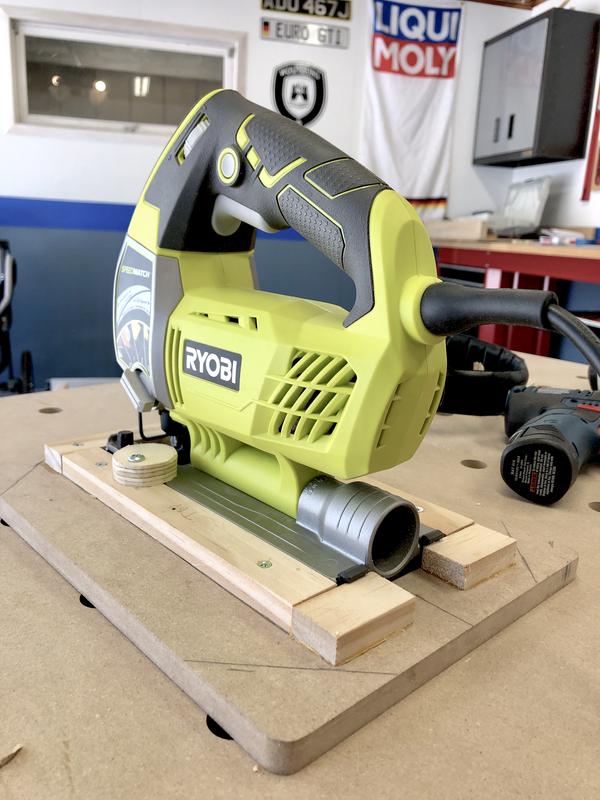
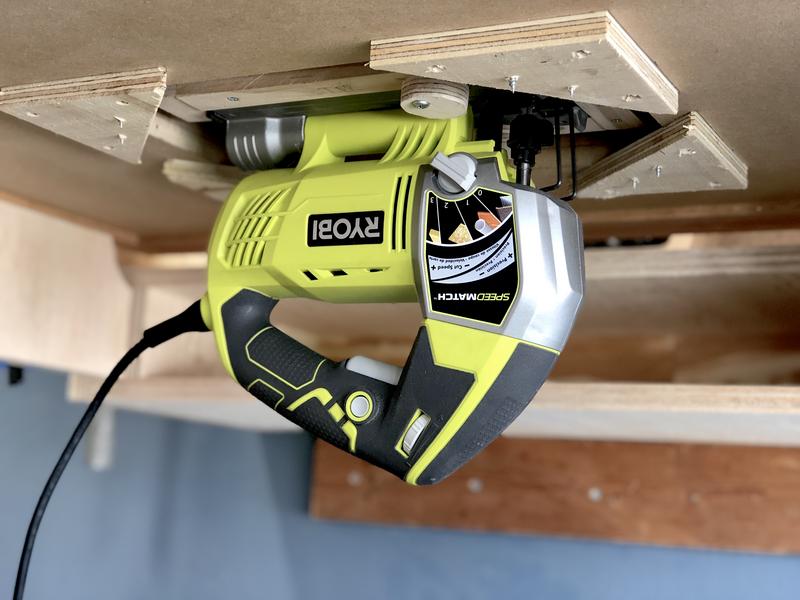
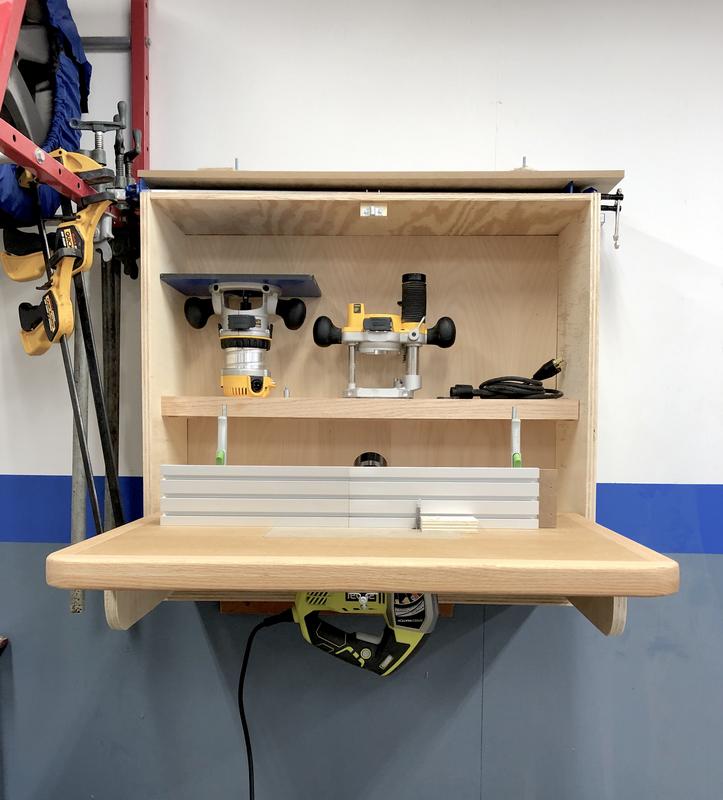
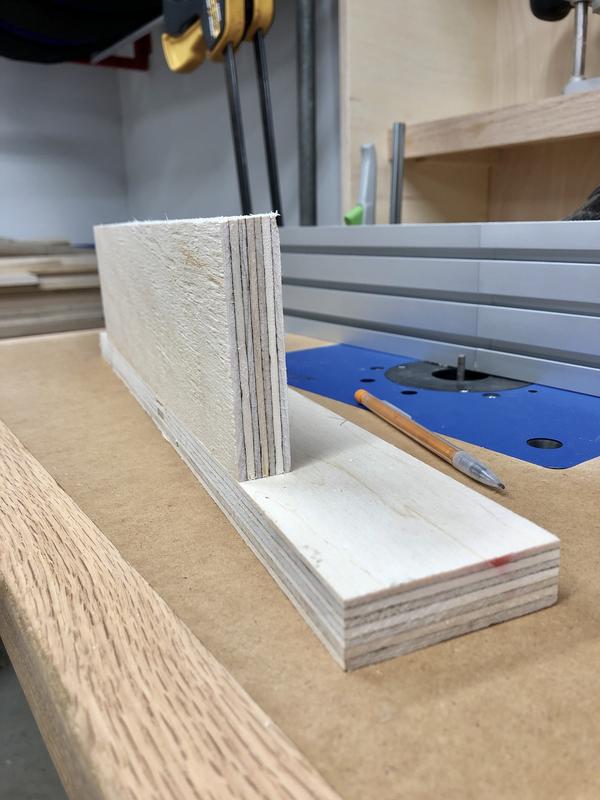
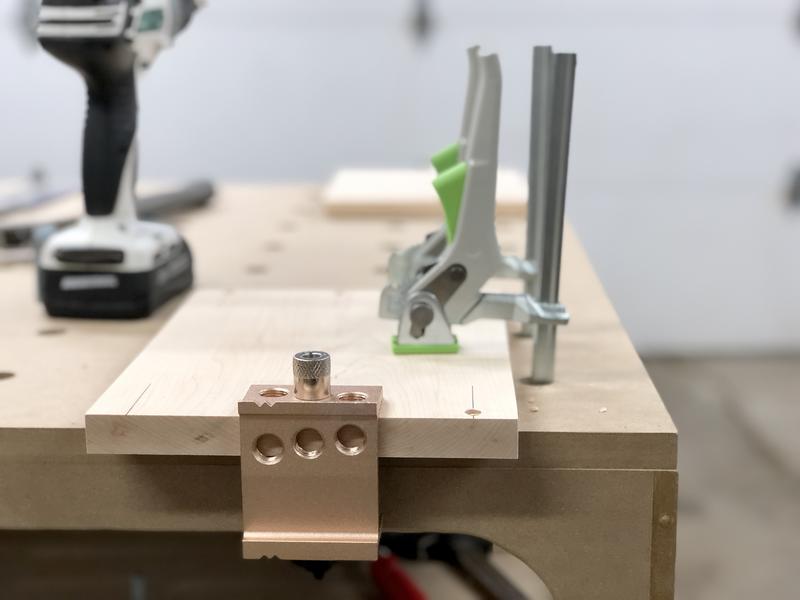
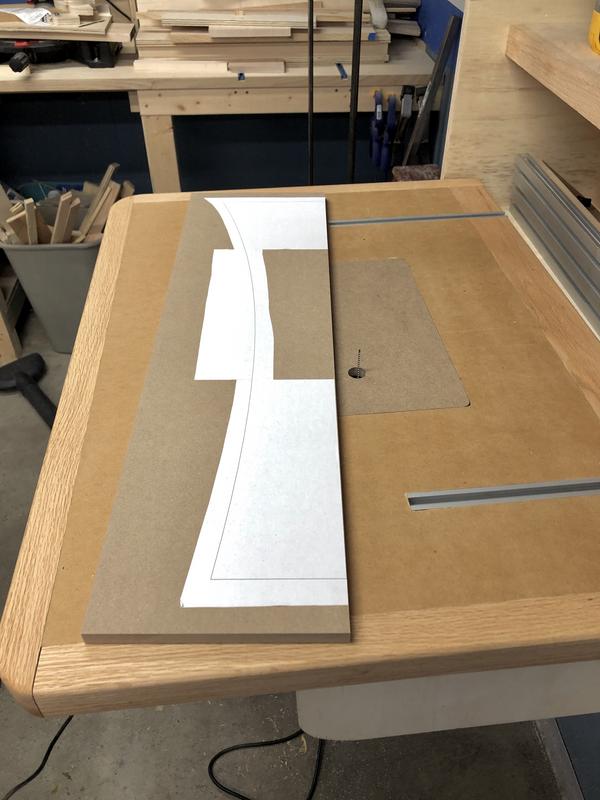
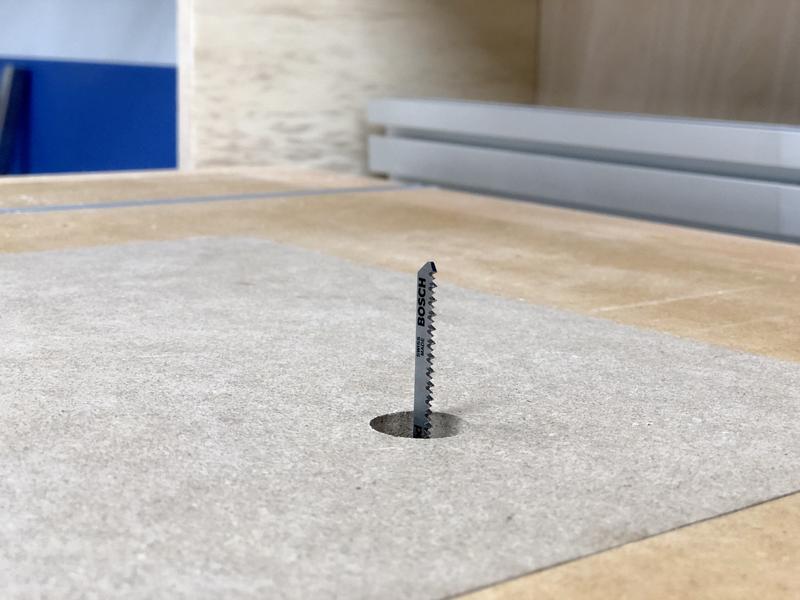
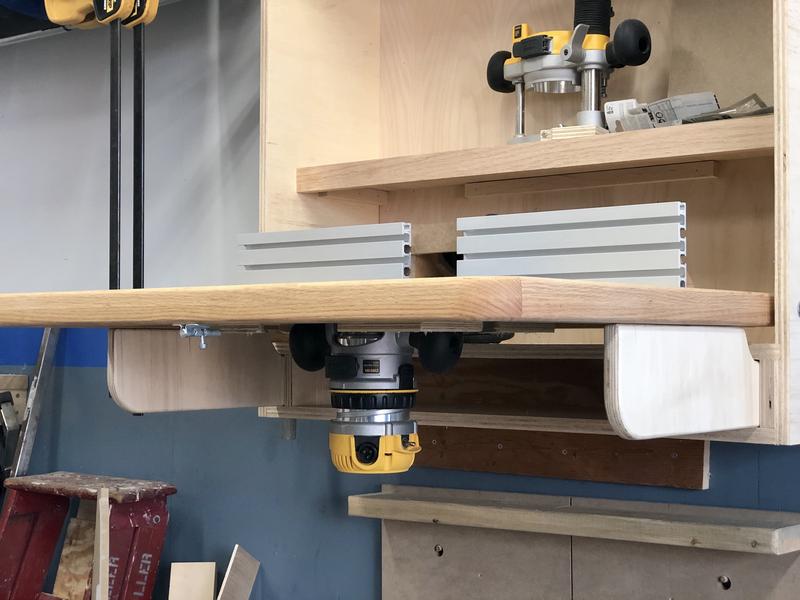
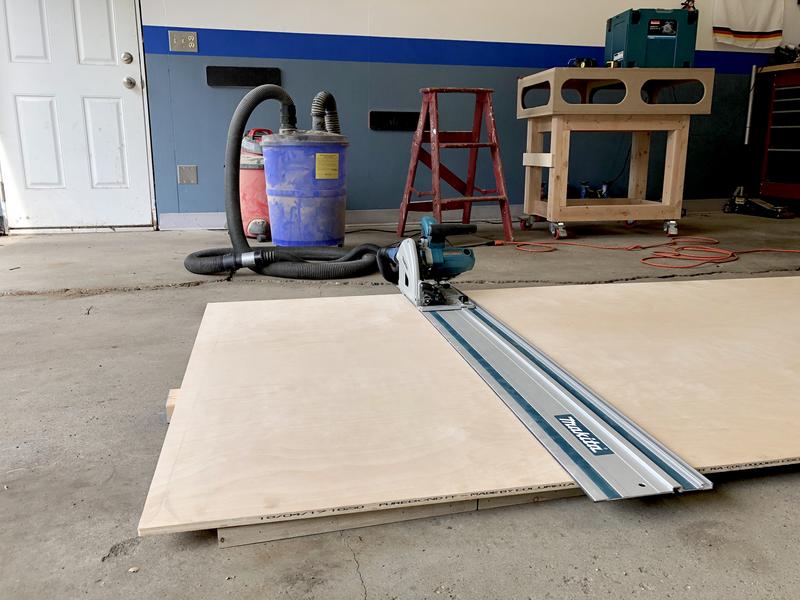
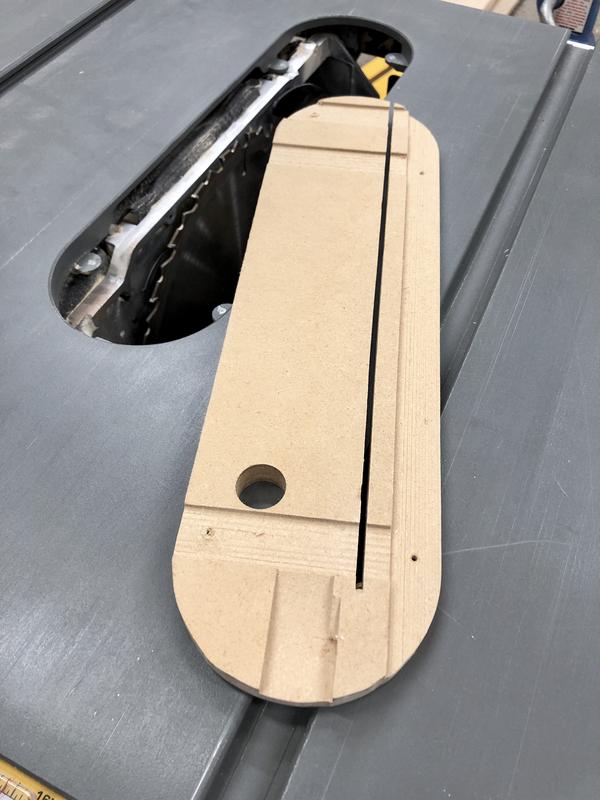
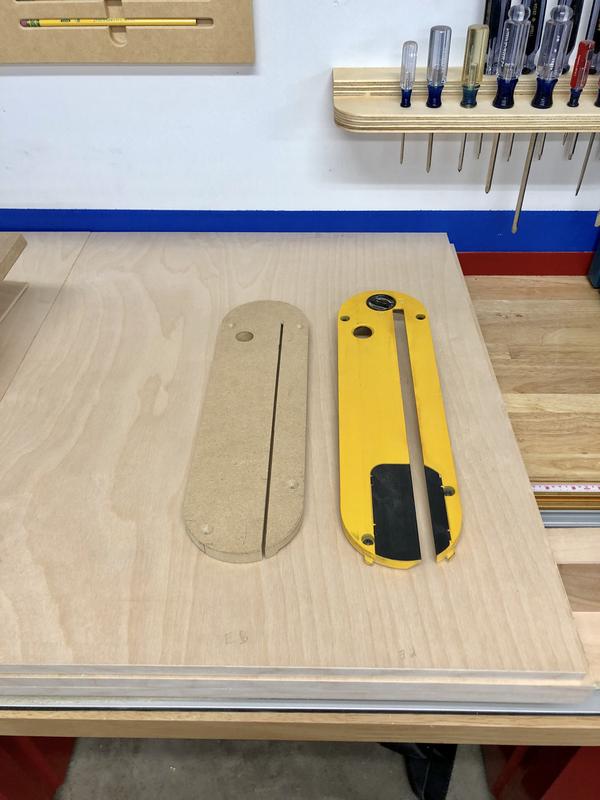
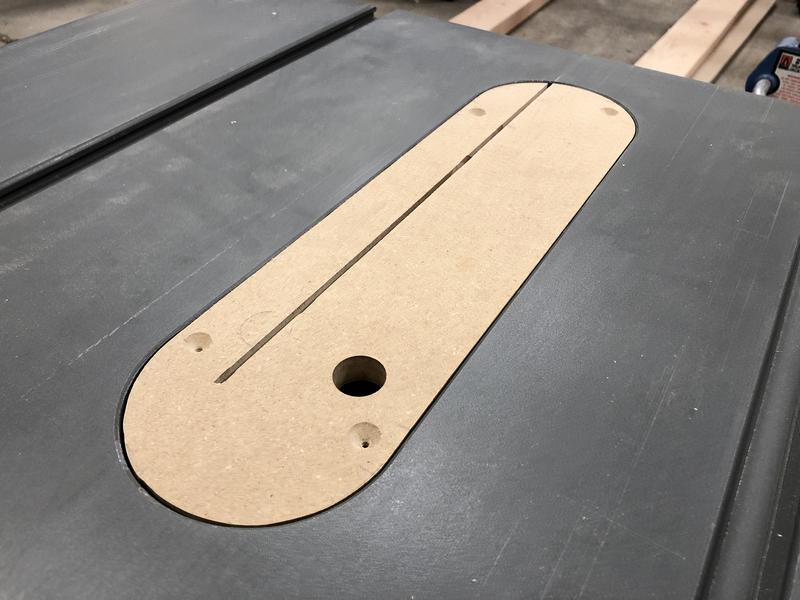
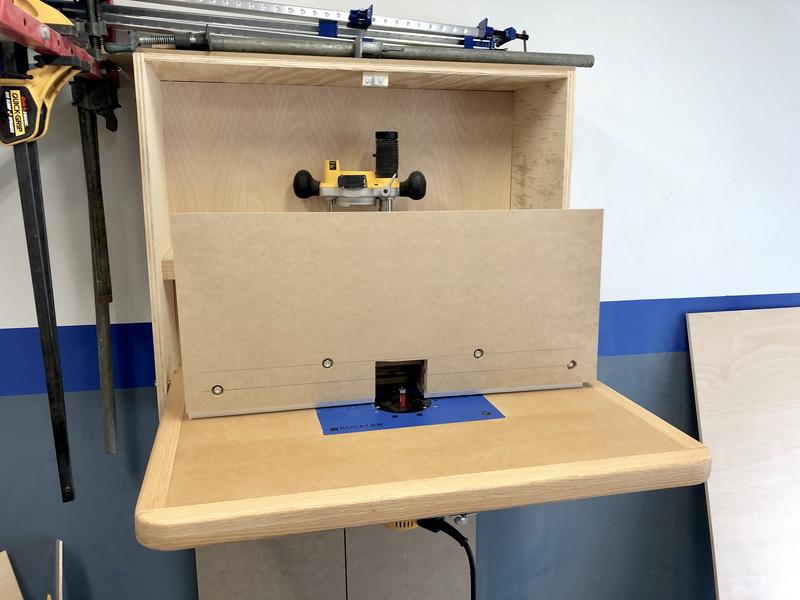
Finished jig saw base:

(made circular cam clamps to hold it in place)

IMG-6117.jpg


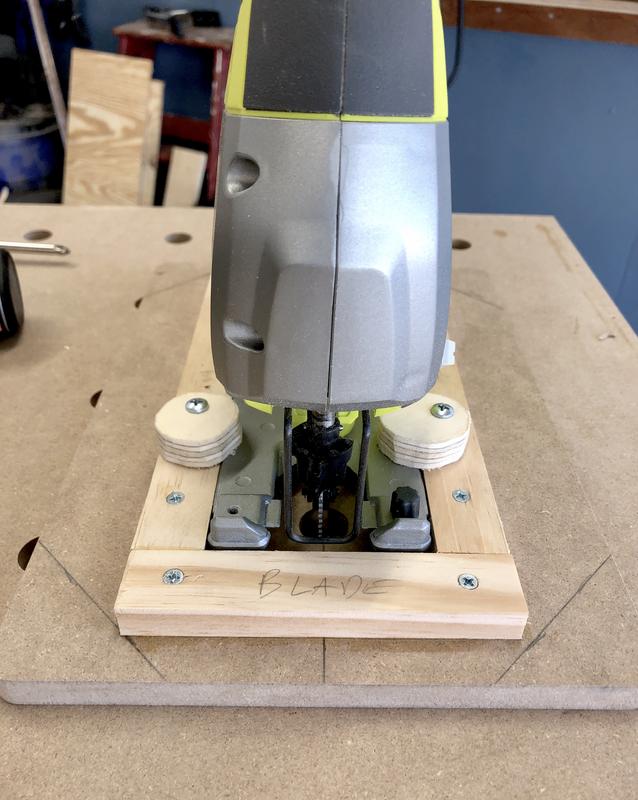
Left back open for dust extraction. A little rough around the edges, but it works.

IMG-6119.jpg


IMG-6114.jpg


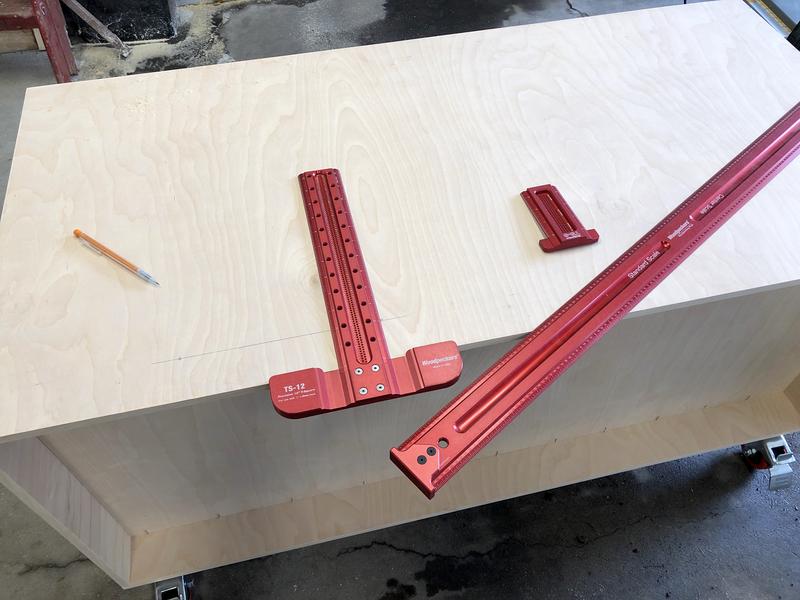
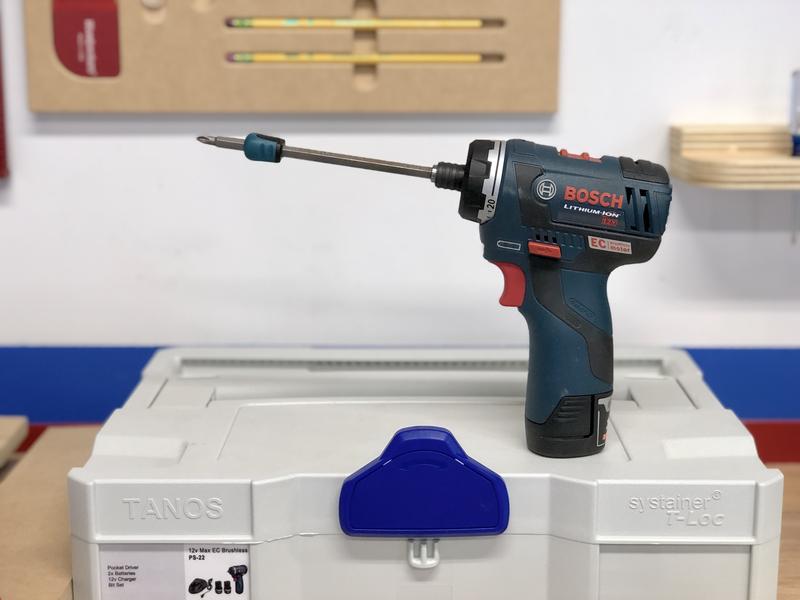
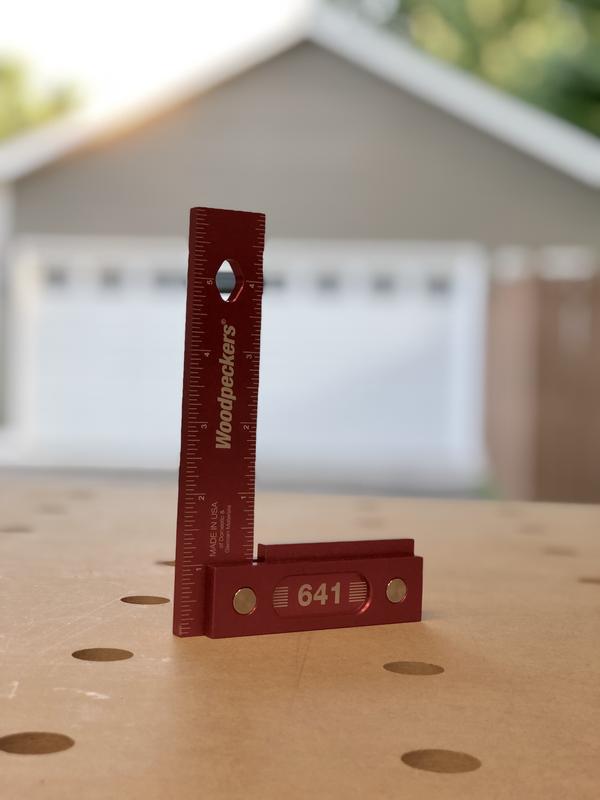
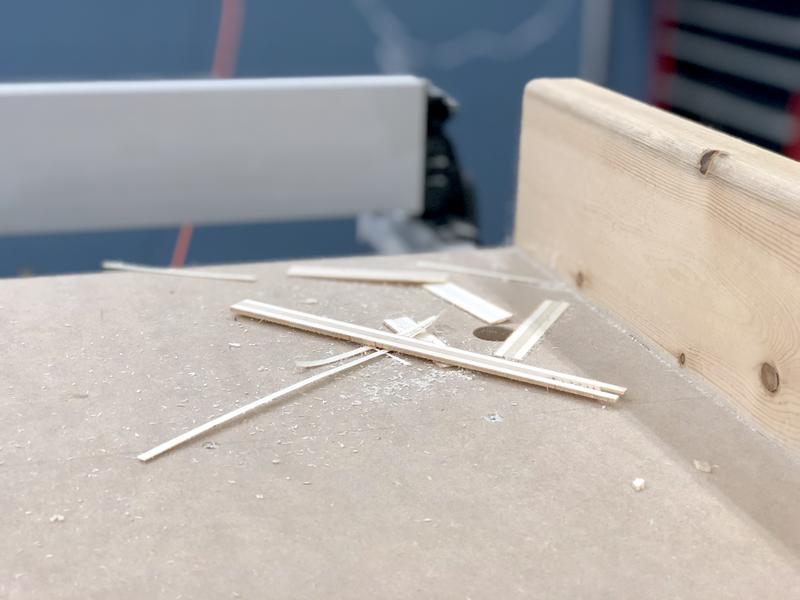
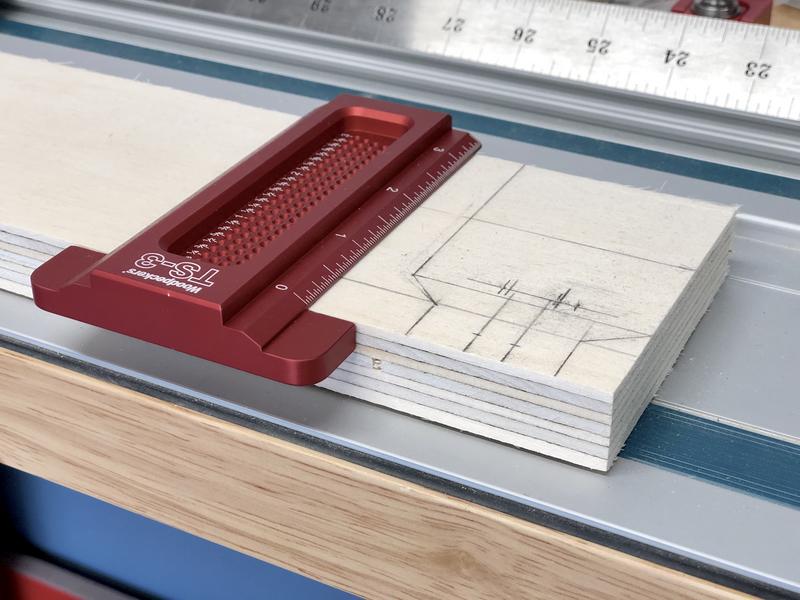
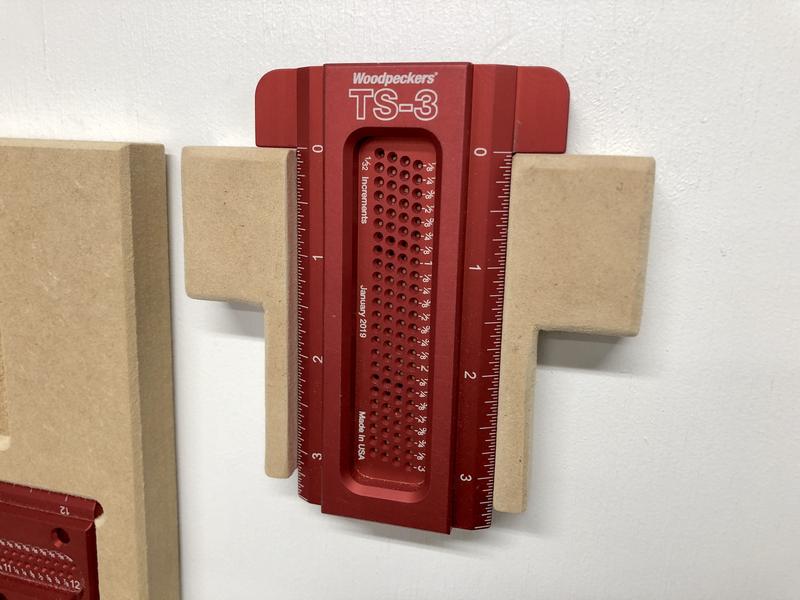
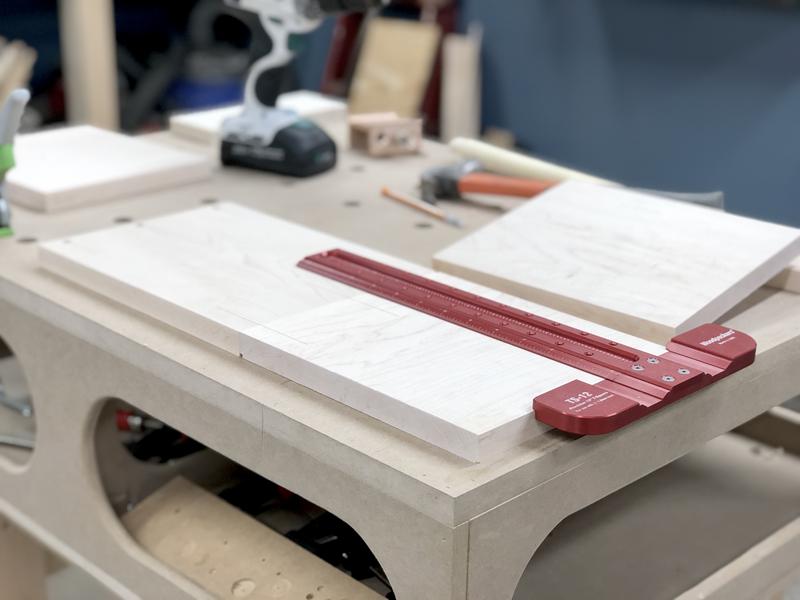
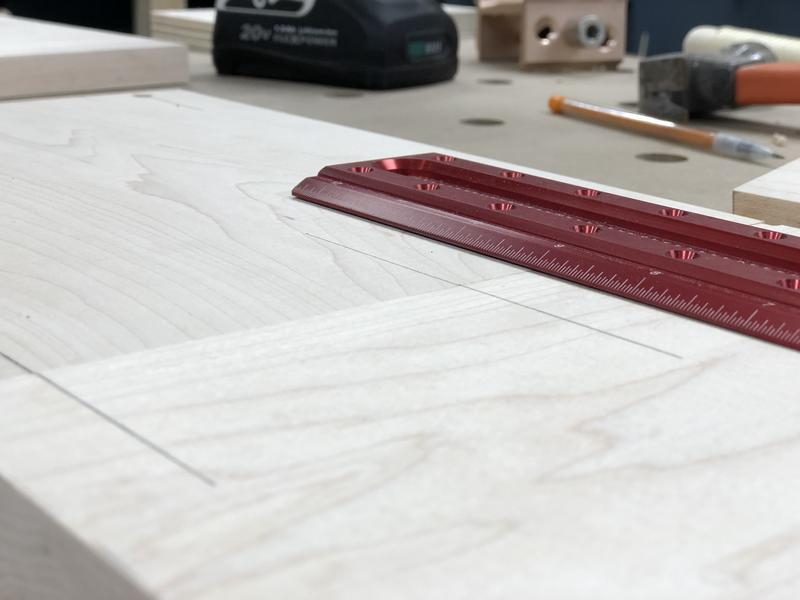
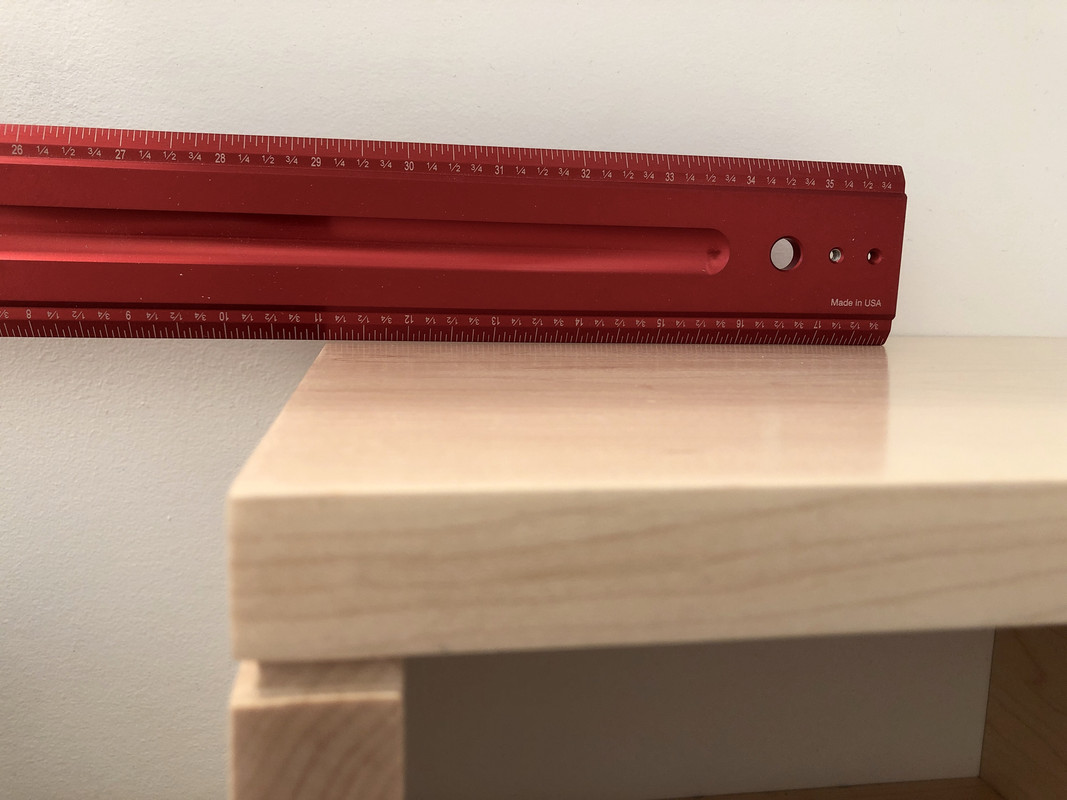
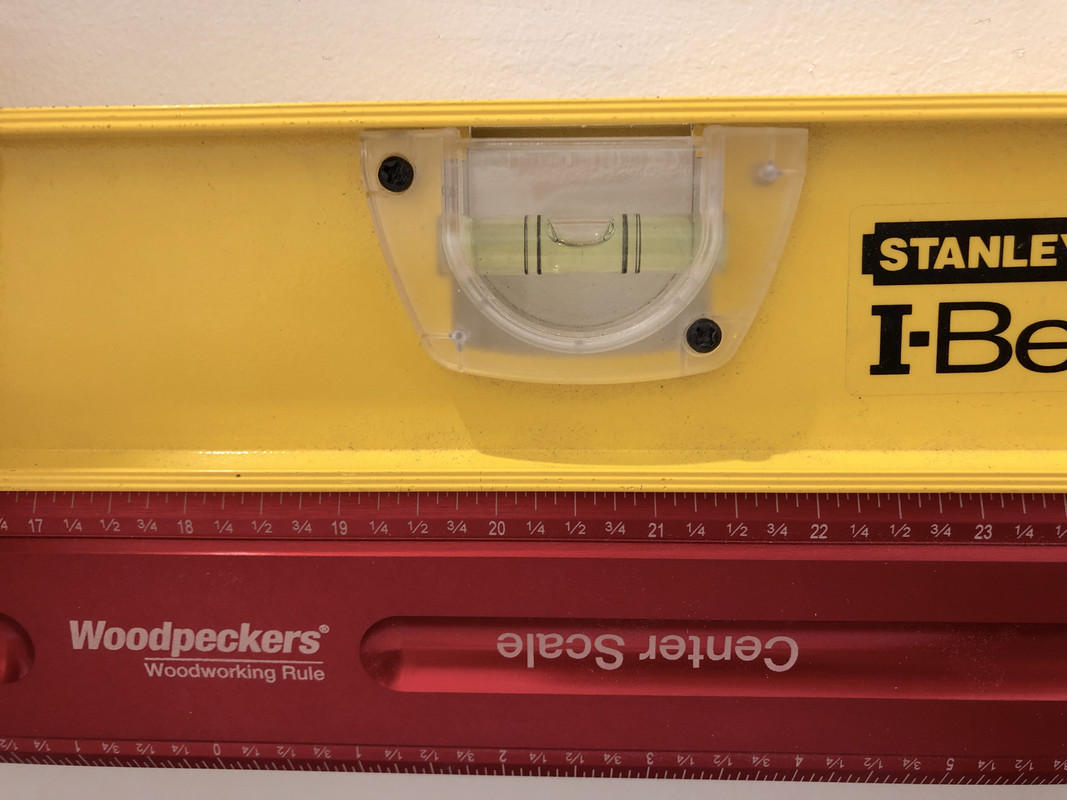
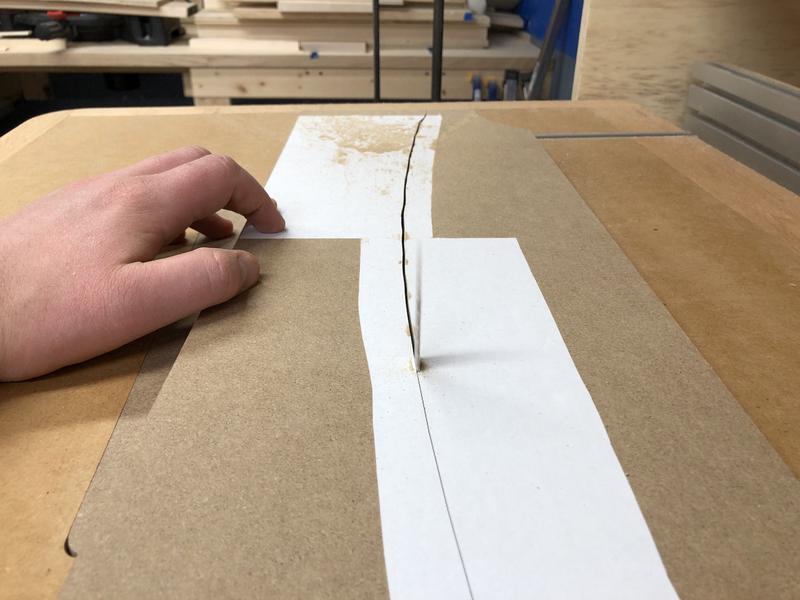
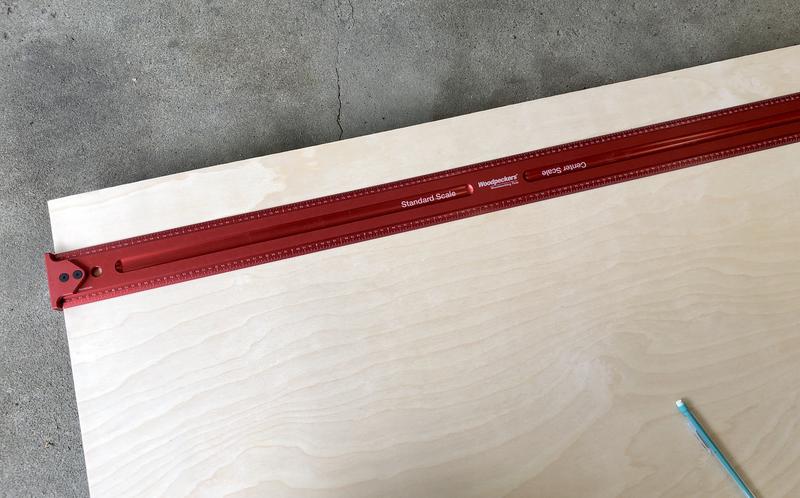
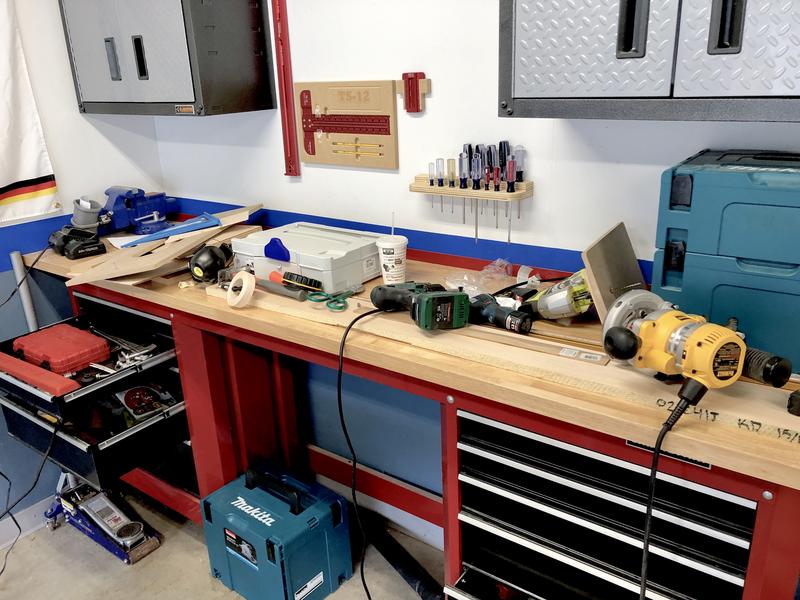
Tested it by cutting the blade guide block. Did some (messy) layout with a new tool that finally showed up this weekend (Woodpecker TS-3 T-Square One Time Tool). I had ordered this back in January. Surprises in the mail are always nice!

IMG-6120.jpg


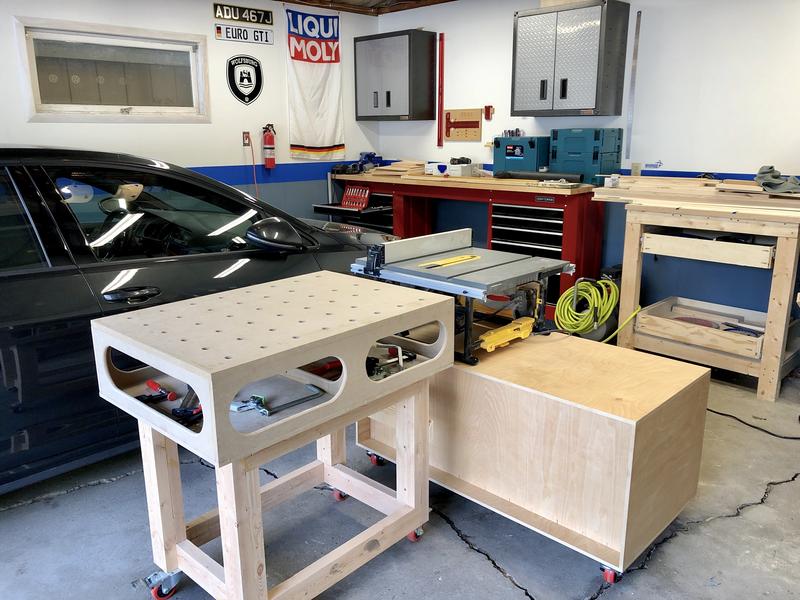
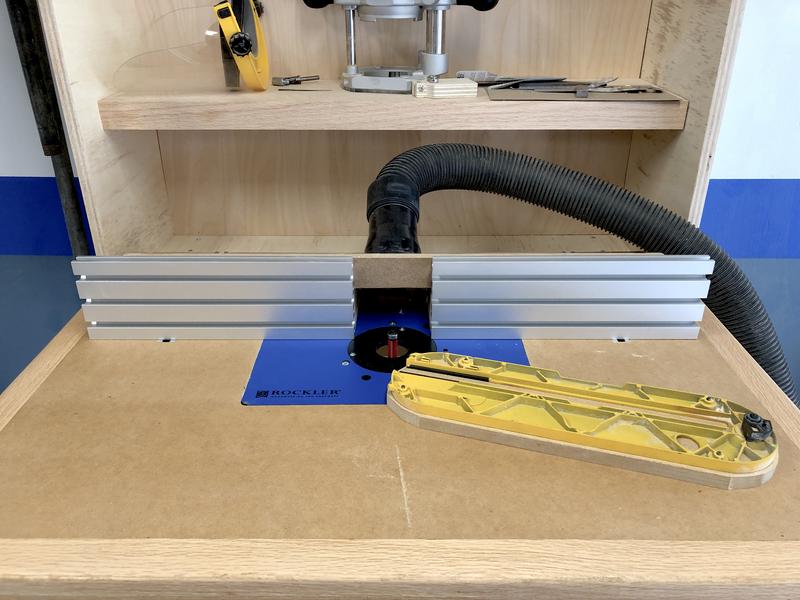
Closing the router subfences and it can be used as a rip fence / straight edge guide.

IMG-6125.jpg


IMG-6127.jpg


IMG-6130.jpg


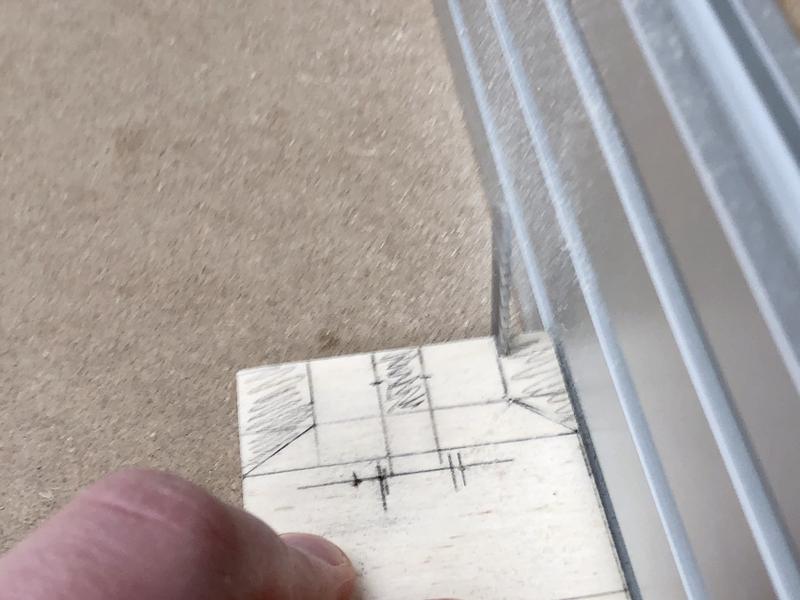
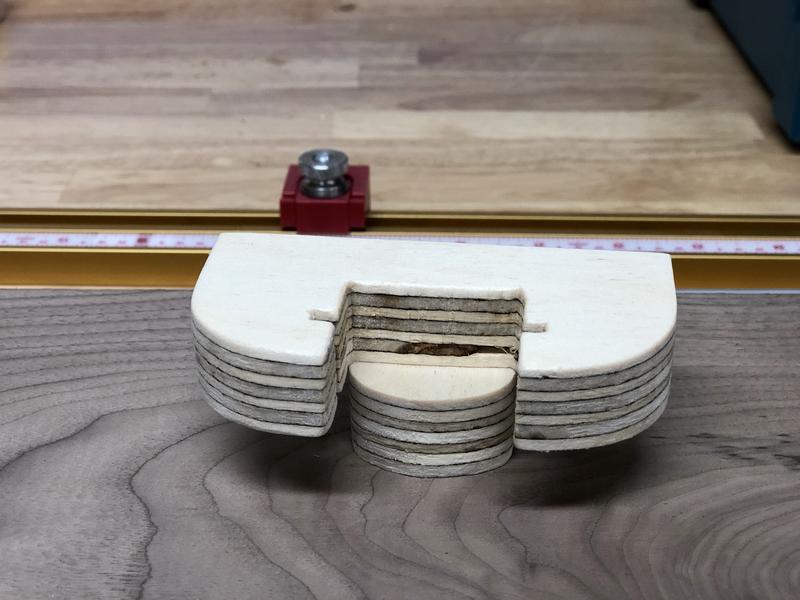
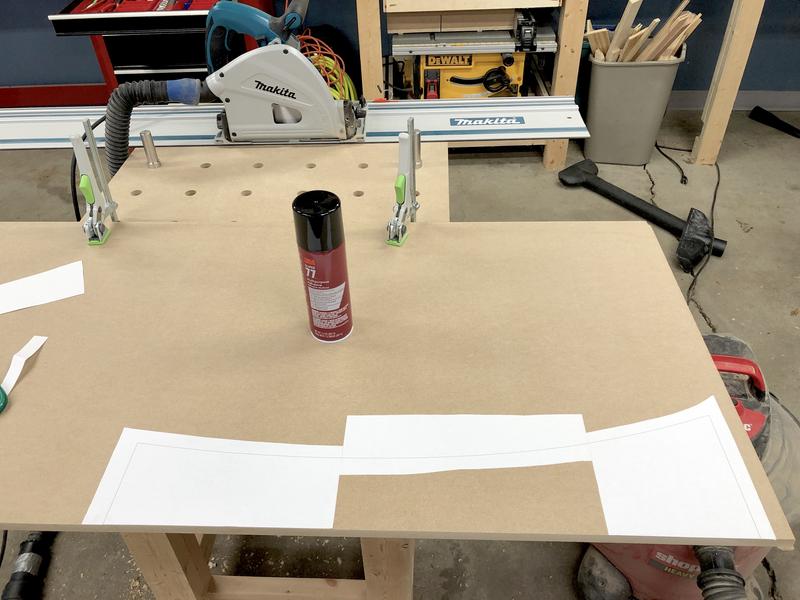
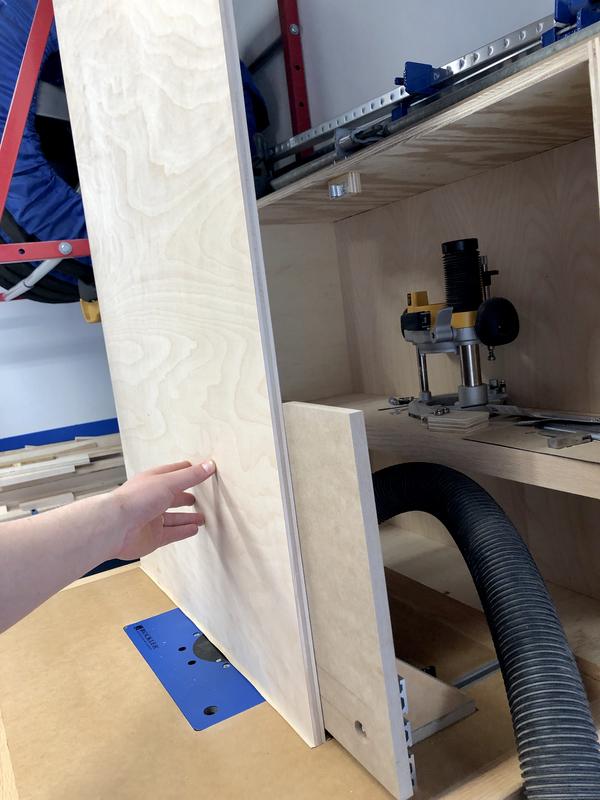
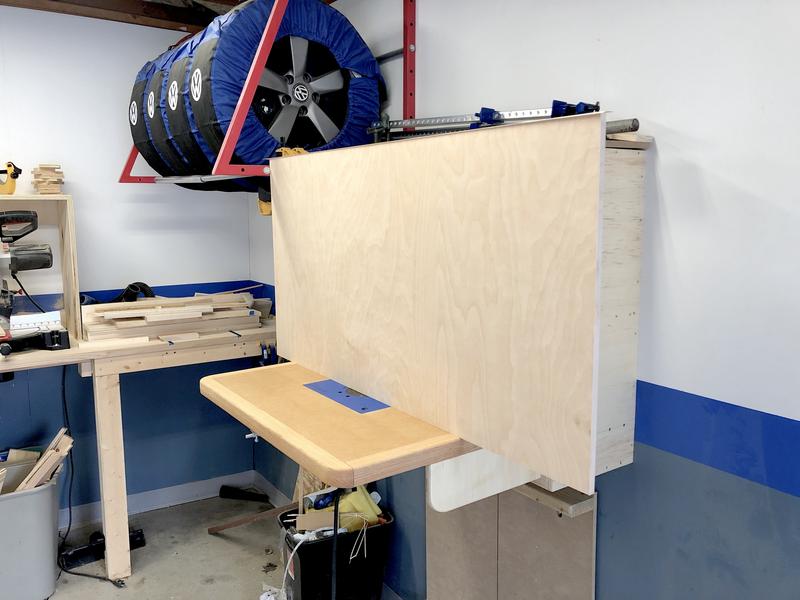
Something like this would be difficult to cut without this inverted setup (assuming not using band saw, scroll saw, or hand saws, none of which I own).
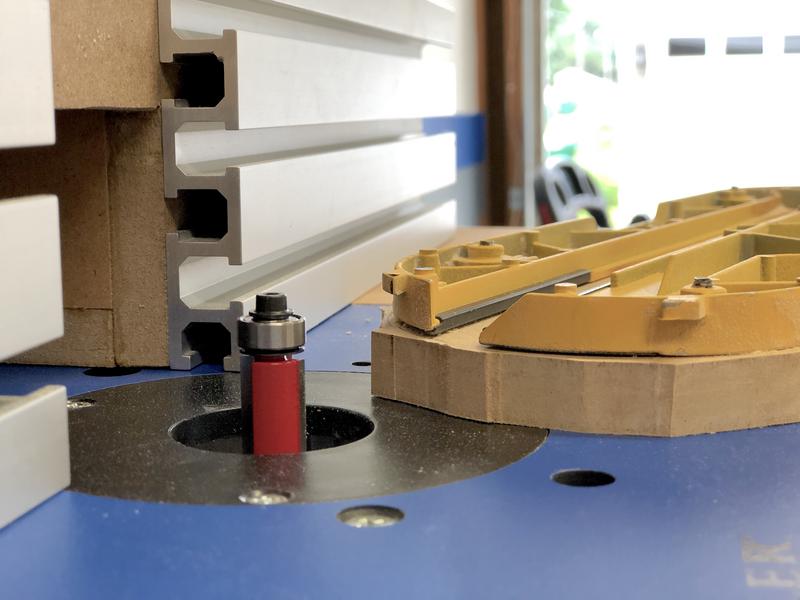
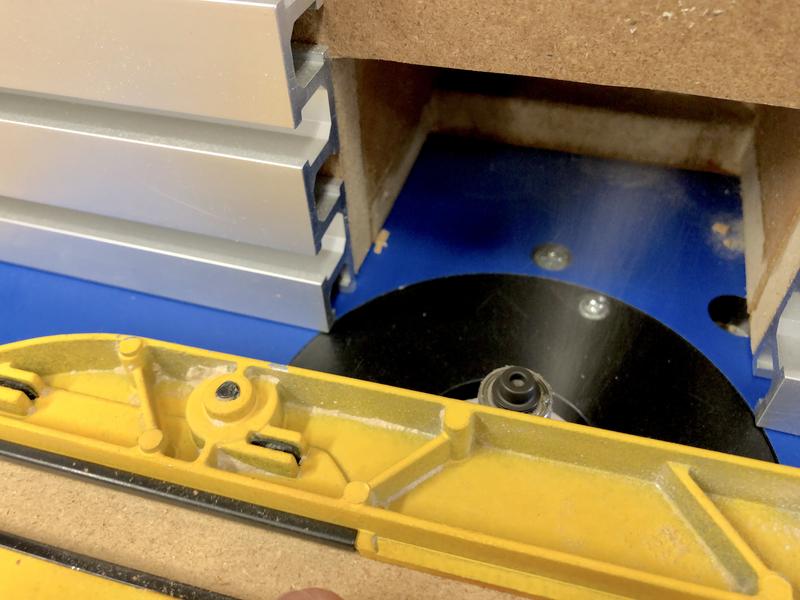
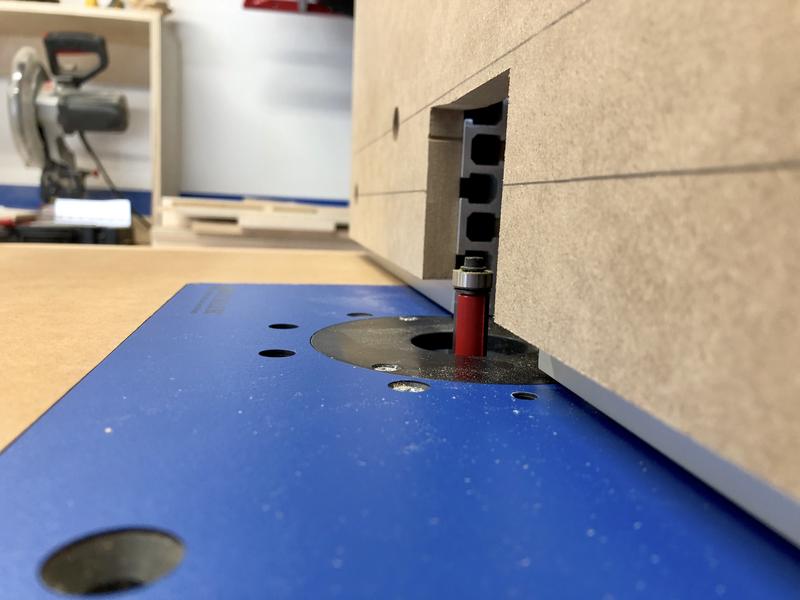
Added the bearings:

IMG-6131.jpg


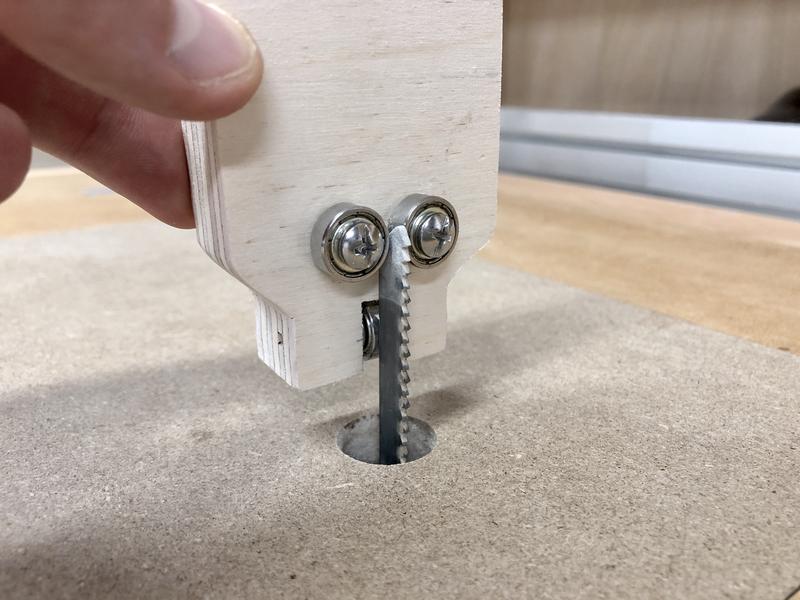
So... I need a longer blade. And a better blade.

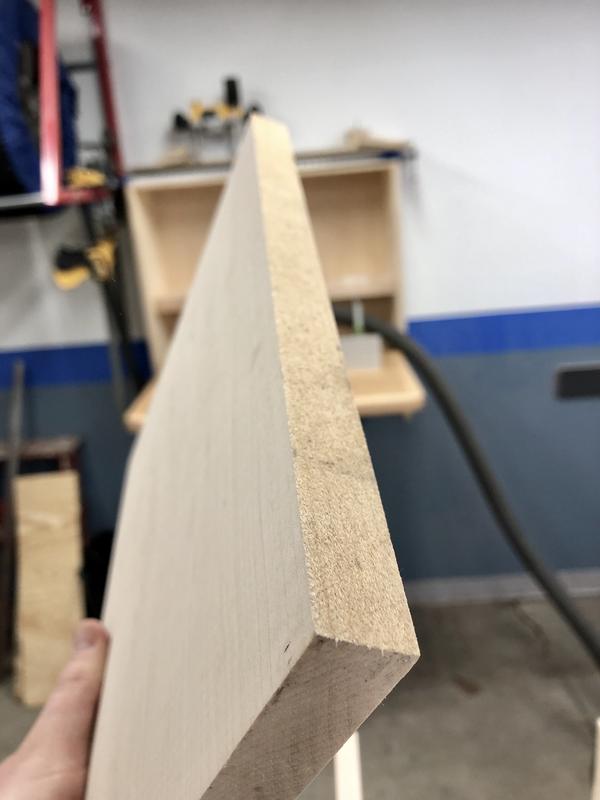
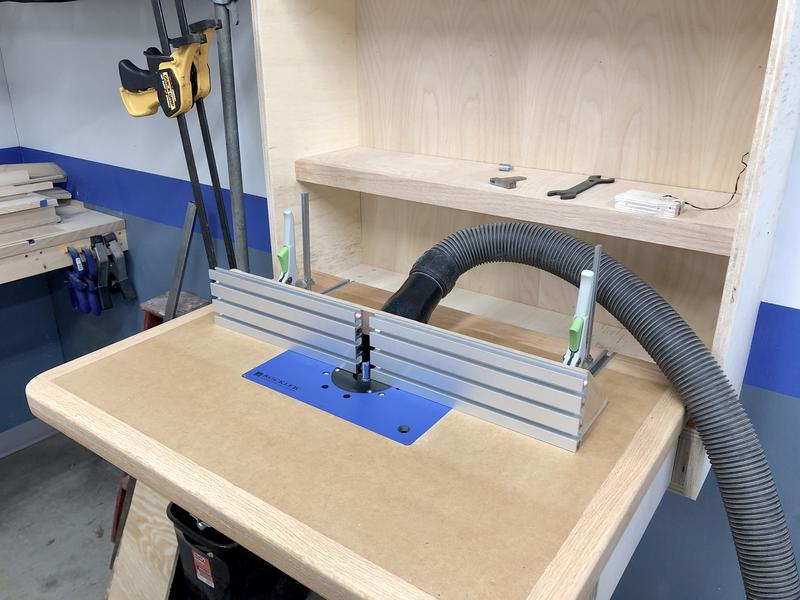
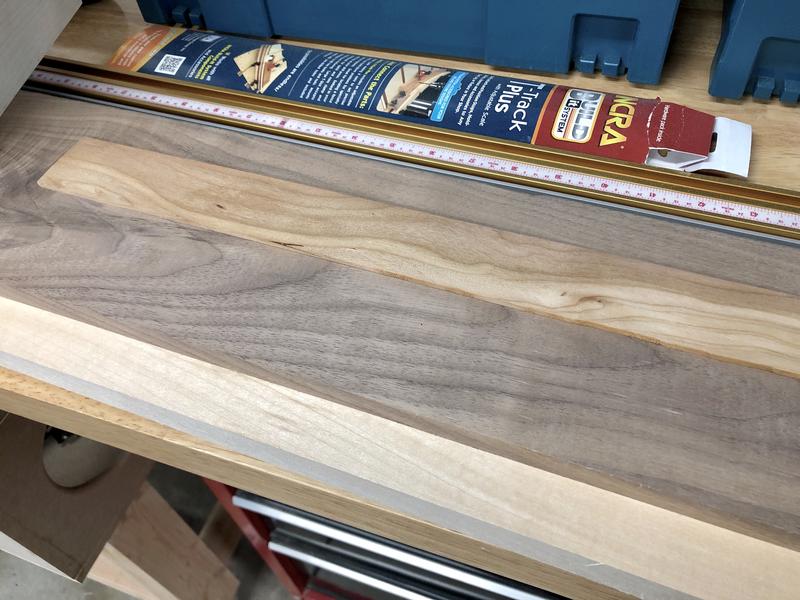
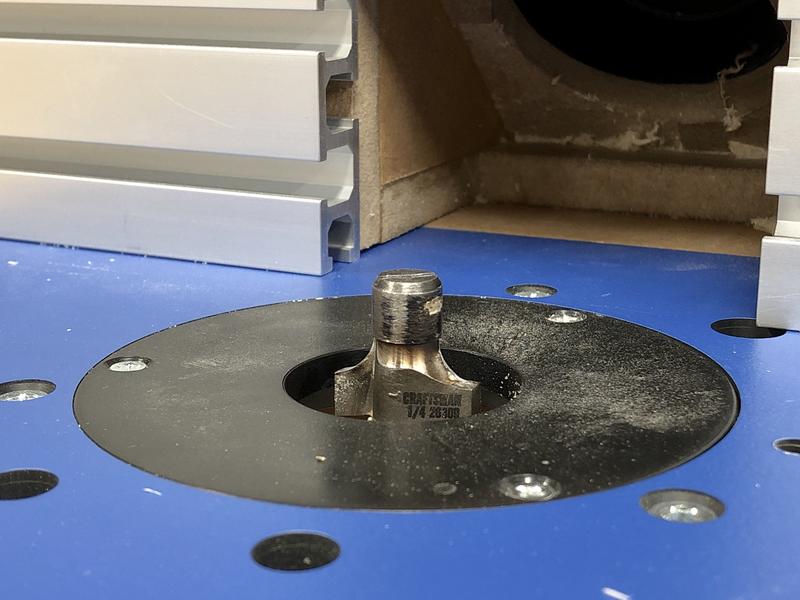
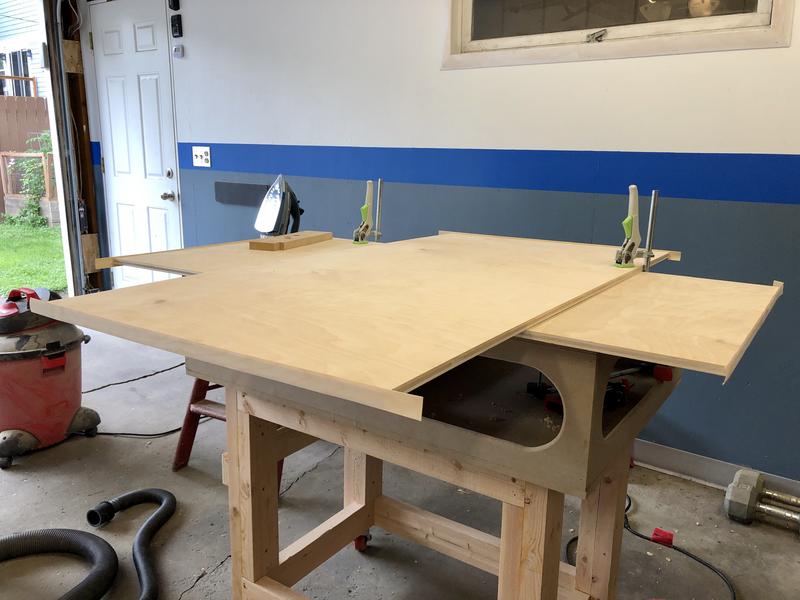
Next I continued to play around with the router table. Tested edge jointing a piece of maple with a rough edge:

IMG-6144.jpg


Connected the shop vac for the first time:
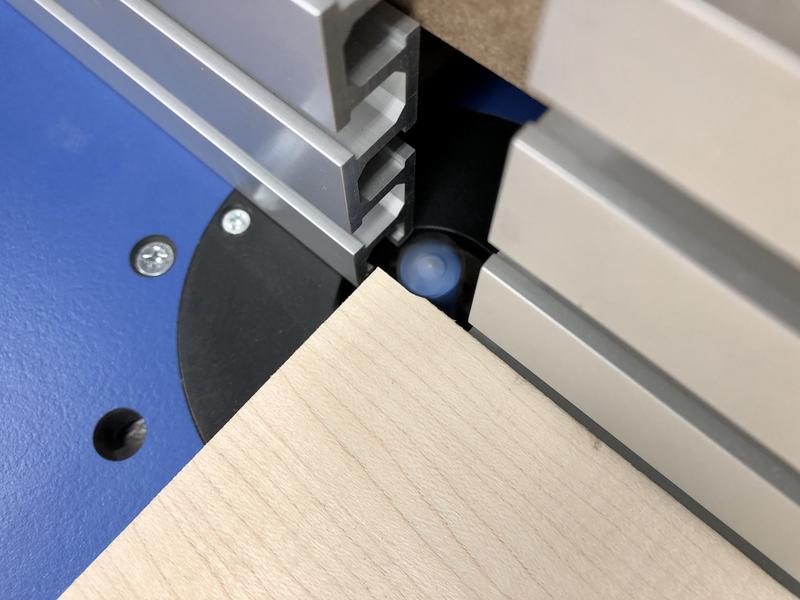
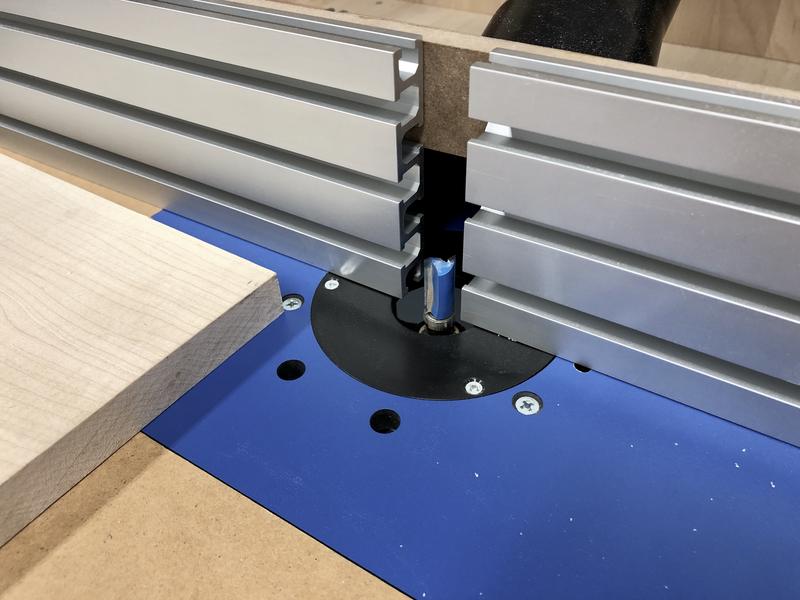
IMG-6143.jpg


Jointing in action:

IMG-6146.jpg


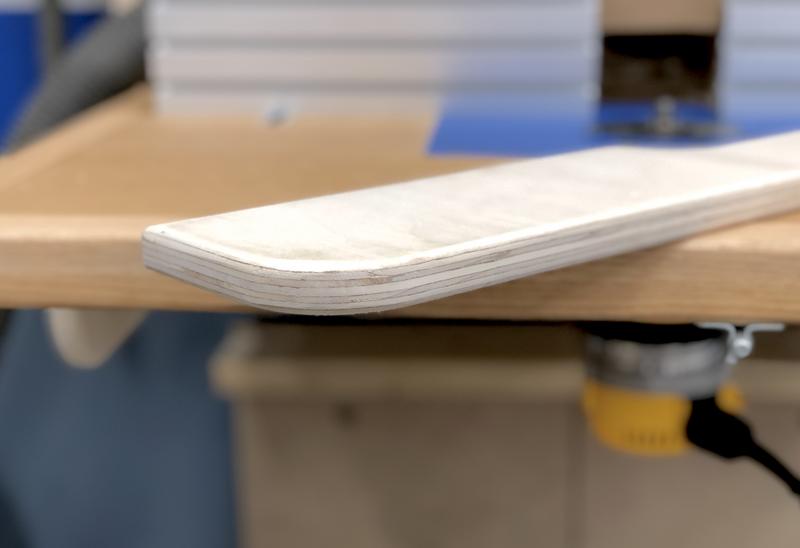
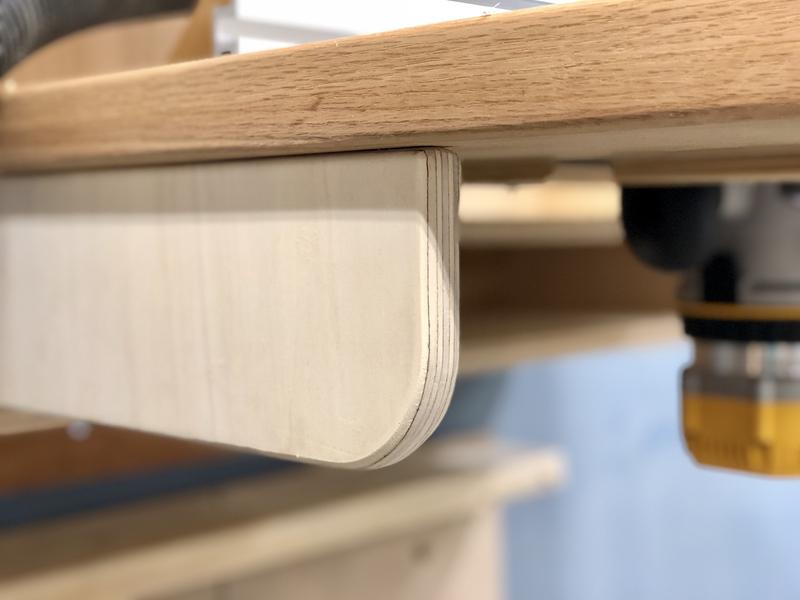
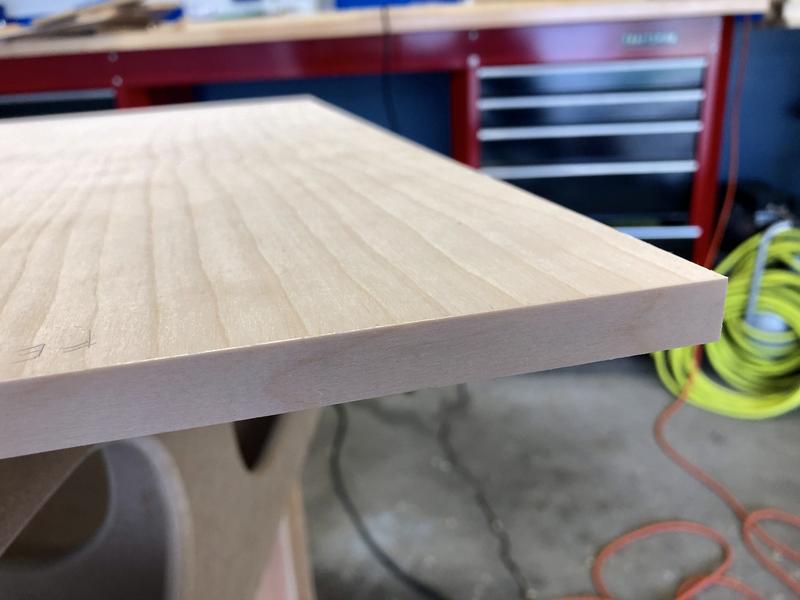
Dust extraction works great. This is the surface after two passes, almost completely clean:

IMG-6147.jpg


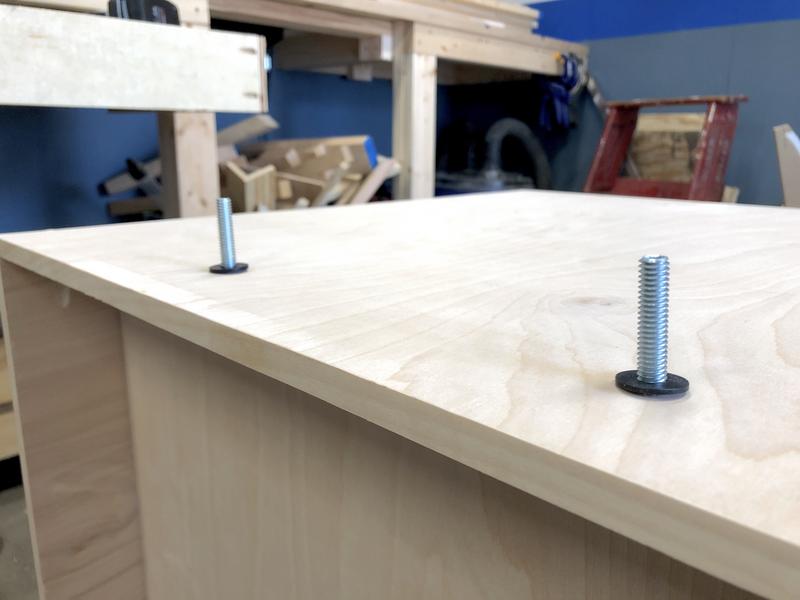
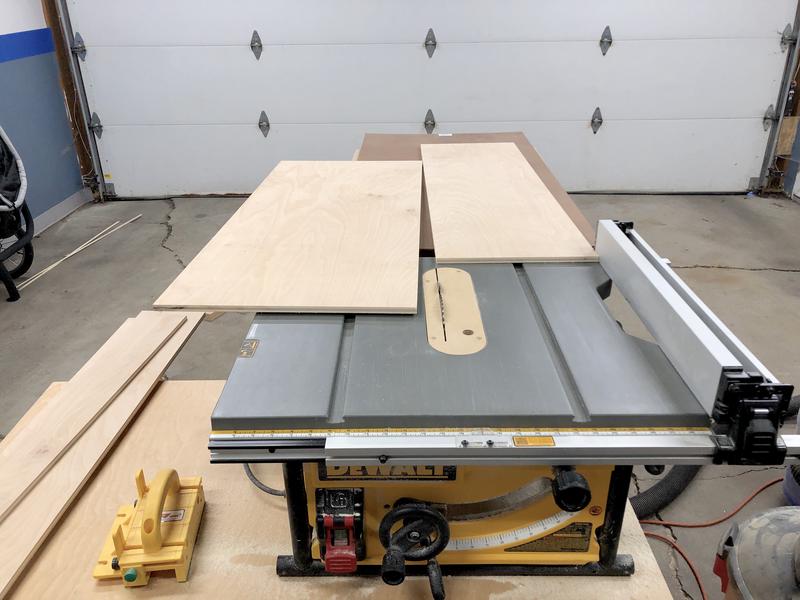
Next with the router table I tried making some mortises in plywood, and connected them with a floating tenon I cut on the table saw:

IMG-6155.jpg


IMG-6156.jpg


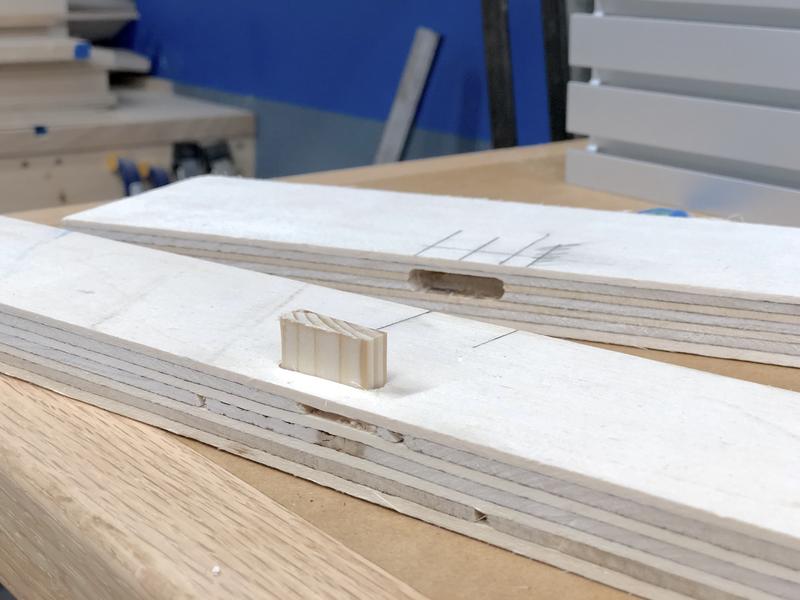
Nice alignment. No purpose to this other than experimentation.

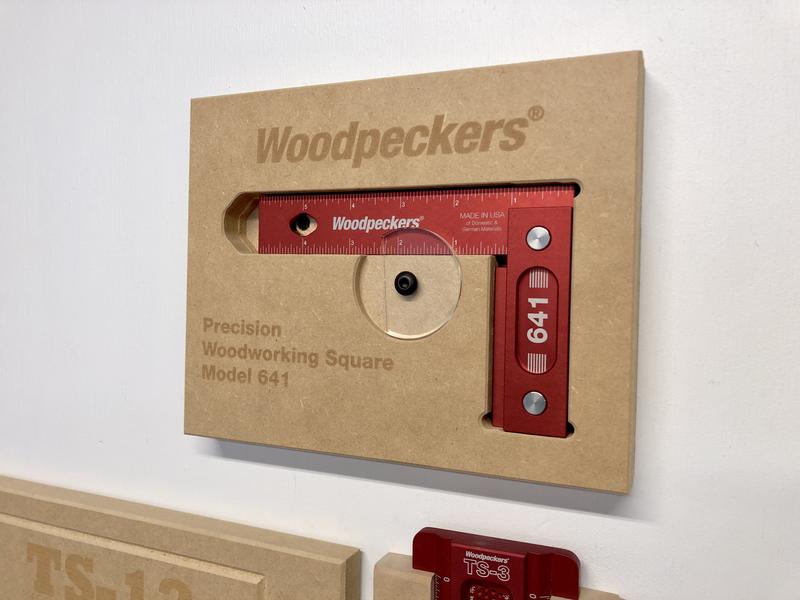
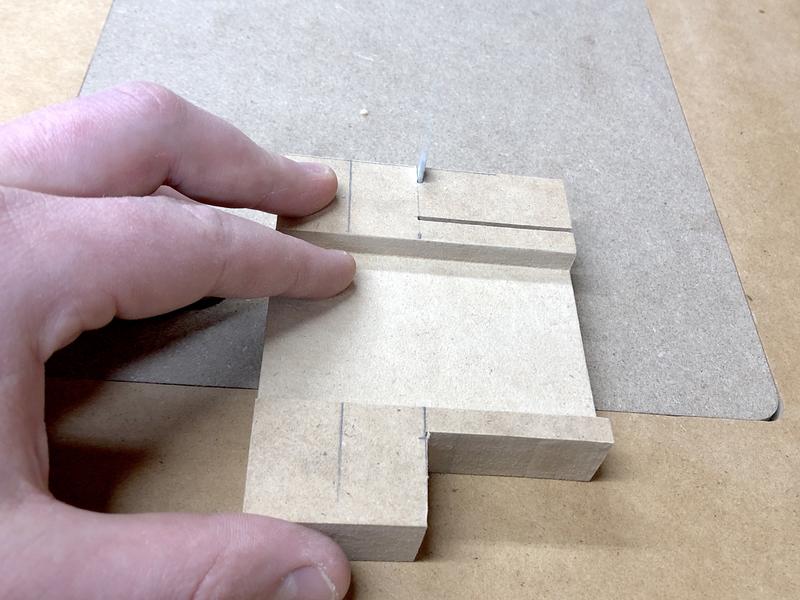
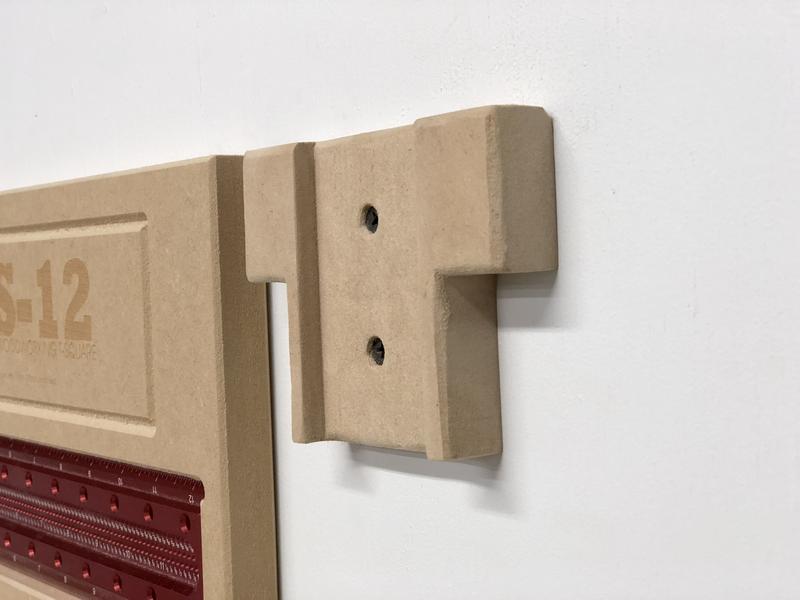
Back to the jig saw setup I used it to cut a small MDF "case" for my new T-Square, similar to the one it's big brother came with:

IMG-6157.jpg


IMG-6159.jpg


IMG-6163.jpg


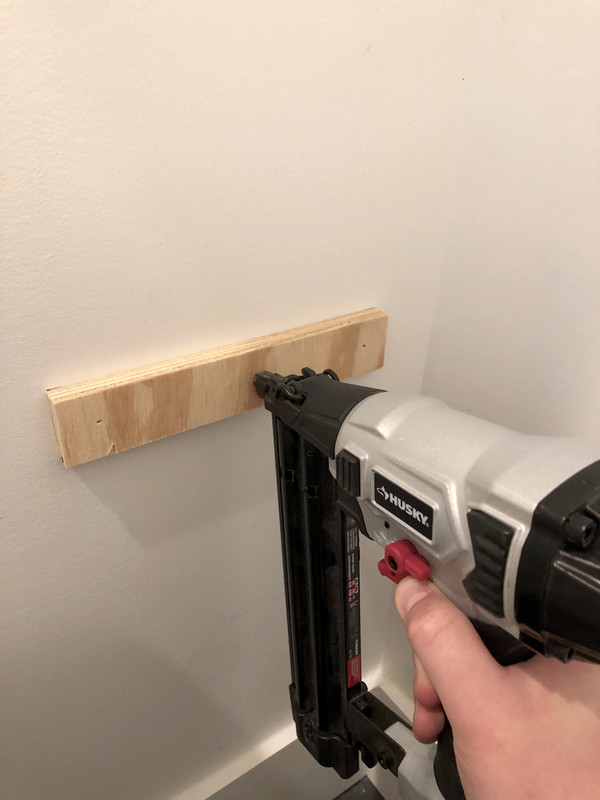
And a plywood holder for my Japanese pull-saw:

IMG-6186.jpg


IMG_6195.jpg


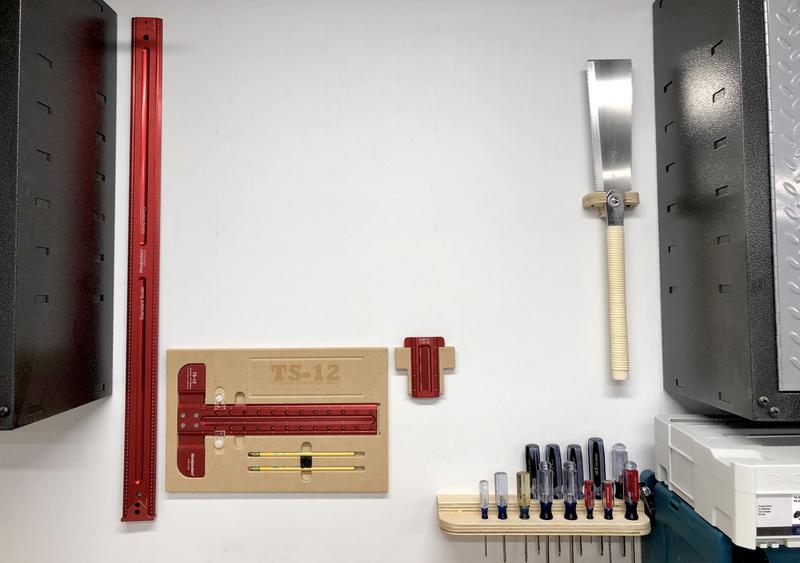
Yay! That's two more things off my workbench and onto the wall! :thumbup:

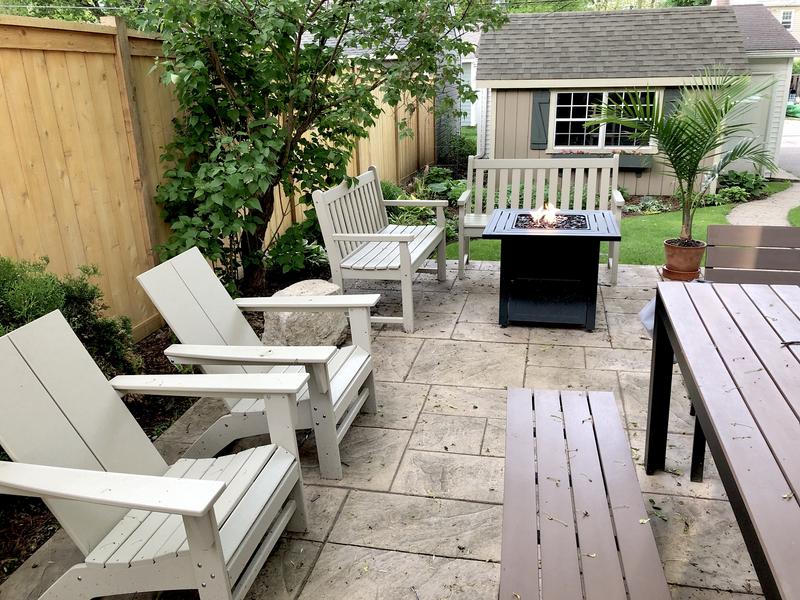
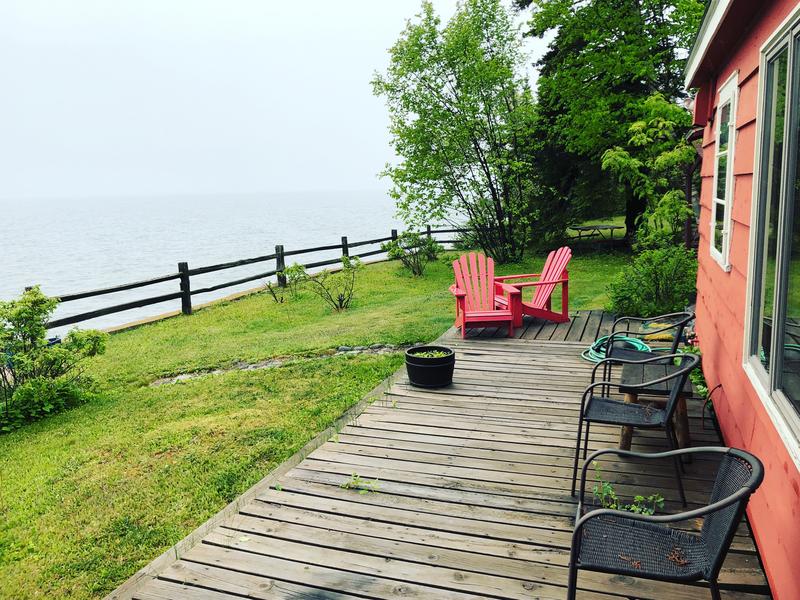
Time to wind down the night on the patio:

IMG_6198.jpg


IMG_6200.jpg


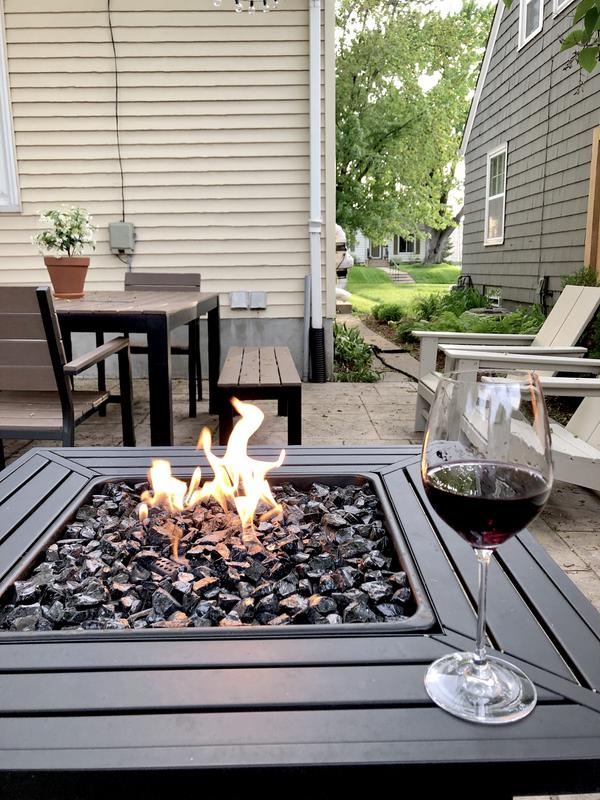
Hope everyone had a great weekend.

:beer:
 
To avoid these ads, REGISTER NOW!

Mikkeli

Well-known member
Joined
Apr 12, 2018
Messages
192
Location
Central Finland
Nice update! Great attention to small details, I like that. Patio looks very comfortable, maybe I should stop by when I visit Minneapolis.
 

Grumblebum

Well-known member
Joined
Aug 10, 2015
Messages
1,940
Location
Wollongong Australia
Great updates Nick, I was a bit behind on recent happenings, but have been following along otherwise for a long time.

Love the router table, thanks for the detailed photos as you have clarified some things I was wondering as I'm planning a router table setup into a cart build hopefully soon.

Are you happy with the dewalt router ? I was thinking of that one as well.

Cheers GB :beer:
 
OP
N

nicholam77

Well-known member
Joined
Dec 18, 2016
Messages
2,669
Location
Minneapolis, MN
Looks like you are ready to do some more serious woodworking! Best of luck

Thanks man. It's a slow process, but yeah I'd like to make some sort of furniture eventually with real joints and no screws. Having trouble finding the time lately for a project like that but I figure the more I can get the shop and tools and workflow and organization in order, the easier it will to try a bigger project when the time comes.

Great updates Nick, I was a bit behind on recent happenings, but have been following along otherwise for a long time.

Love the router table, thanks for the detailed photos as you have clarified some things I was wondering as I'm planning a router table setup into a cart build hopefully soon.

Are you happy with the dewalt router ? I was thinking of that one as well.

Cheers GB :beer:

Thanks, Grumblebum!

It's funny, I don't think building the router table really saved me any money over buying something like this:

Screen-Shot-2019-05-31-at-1-14-52-PM.png


But I certainly had fun making it and I think it will suit my needs well. I still have some accessories to add like miter track, feather boards, flip stop, etc. But I figure I can add those as I have a need for them.

I am happy with the DeWalt router. I'm not sure that it has any standout features that make it better than an equivalent Bosch, Makita, or Porter Cable, but it works well. Soft start motor, adjustable speeds, accepts 1/2" collets, multiple bases and line of accessories. The depth-adjustment works ok on the fixed base, although I'd probably always measure the bit with a rule anyways to be sure. I haven't used it for any intricate applications (I'm kind of a router novice) but in the stuff I have done like route dados for t-track inlays, plunge the holes in the MFT, round over edges, flush trim edges, it's worked very well.

:beer:
 

bj383ss

Well-known member
Joined
Sep 29, 2011
Messages
3,166
Location
TX
Nick even though it may have cost more I think your shopmade router table beats that store bought one by a long shot. And you got the experience of building it.

I can't wait to see you make a raised panel door with your router. You talk about impressing people. The router is Black Magic to most non DIYers.

Bret
 

Unruh

Well-known member
Joined
Aug 12, 2017
Messages
1,431
Location
Silverdale, Washington
Wow. That dust collection on that router table is top notch. I’ll take a picture after a couple passes on mine and show you the difference...:headscrat.

I have also been checking out your Woodpecker Tools. I was like, “Damn, those are nice!”. Than I searched them and was like, “Damn, those are too nice!”. I just got my early Father’s Day gift, so I’m on my own for those. Which one should I start my collection with?
 
OP
N

nicholam77

Well-known member
Joined
Dec 18, 2016
Messages
2,669
Location
Minneapolis, MN
Wow. That dust collection on that router table is top notch. I’ll take a picture after a couple passes on mine and show you the difference...:headscrat.

I have also been checking out your Woodpecker Tools. I was like, “Damn, those are nice!”. Than I searched them and was like, “Damn, those are too nice!”. I just got my early Father’s Day gift, so I’m on my own for those. Which one should I start my collection with?

Thanks! I'll have to figure out dust collection for the jigsaw now because that was definitely an issue with no vac hooked up...

So I got the Woodpeckers 36" rule from my parents for the holidays, and the TS-12 T-Square from my in-laws for the holidays. Awesome gifts, but I didn't spend my own money on them.

That being said, I've kind of fallen in love with their stuff. Shortly after those gifts I ordered the small TS-3 T-Square as a One-Time-Tool, meaning they do a limited production run and then expire it, because I liked the 12" version so much. Does any hobbyist need Woodpeckers quality stuff? I don't think so. There are lots of less expensive options out there that would work perfectly fine. Personally, I don't feel my building skills are up to snuff for their quality/accuracy/prices. However, for me it's not as much about necessity, as much as I just have an appreciation quality things, including tools. Part of the reason I like woodworking is the tools. Even though I could produce a similar result with more economical measuring tools, there's something really satisfying about a precision tool, a quality tool, an efficient tool that makes the job easier, or a tool that just looks cool. I think Woodpeckers is all of the above.

As far as which one to start a collection with, I have no idea. They have so many different tools it's hard to say what your needs might be. Even though the idea isn't novel (Inrcra for one has much cheaper options) the T-Squares with the scribing pencil holes are really cool and useful I think. Here's an example:

I used a doweling jig recently that required marking a line 2 inches in from the edge of the workpiece. The T-square was perfect for this because not only did it align the mark across both pieces, but it referenced a perpendicular edge making sure they were at 90 degrees.

IMG-6178.jpg


IMG_6179.jpg


IMG_6185.jpg


Also, some of their rules and smaller triangles and squares are not as outrageously priced and might be a nice starting point.

Myself, I'm looking at getting some more rules in the future of smaller sizes (and because they are laser-etched on the same equipment they will all be consistent to one another). As well as one of their squares, but I'm not sure which size yet.

So in summation, they are nice, and they are expensive. But I like them a lot and would recommend them :thumbup:
 
OP
N

nicholam77

Well-known member
Joined
Dec 18, 2016
Messages
2,669
Location
Minneapolis, MN
Nick even though it may have cost more I think your shopmade router table beats that store bought one by a long shot. And you got the experience of building it.

I can't wait to see you make a raised panel door with your router. You talk about impressing people. The router is Black Magic to most non DIYers.

Bret

Yes Bret, I believe you are right, and I feel the same way. I'm happy with the way mine looks but also mostly for the experience of building it like you said. Each time I make something I learn a bunch of things and realize how I would do it differently the next time :lol_hitti

That in itself is very valuable.

:beer:
 
OP
N

nicholam77

Well-known member
Joined
Dec 18, 2016
Messages
2,669
Location
Minneapolis, MN
Finally back to working on finishing the bathroom vanity. I feel like I'm always jumping around in this thread, but sometimes that's how it goes.

If anyone recalls, the original vanity idea was to have two cabinets, one large, one small, bridged by a glass shelf:

Screen-Shot-2019-06-05-at-2-52-54-PM.png


Well I obviously built the big one, ran out of time to finish the rest, had the kiddo, and here we are. With a few exceptions here and there (which I've mostly spent on the router table) I haven't been able to get in the garage for very long or very often to build stuff. I've accepted my fate on this, and even though it was an abrupt change of pace from pre-kid project days, I wouldn't trade it for anything. :bounce:

But... I haven't forgotten my original design and would still like to see it through. So I've been piecemealing it as I can. Which often means after work, after chores, after the baby has been put down for the night, after dark, or during a quick 30min nap on the weekends if I can convince my wife my garage projects are somehow more important than the 1000x other things we have going on to upkeep the house. :lol_hitti

The other problem is on the cabinet I did finish, the front drawer face suffered some heavy warping over the winter. I originally had some warping issues when building it (and it was very hot and humid then), and I am not surprised that it did this:

IMG-6174.jpg


:mad:

The top has also "shrunk" away from the wall about 1/8" so now there is a gap. As another forum member pointed out back when I made it, I should have glued all the joints!!! I think that bit me in the *** a bit.

I don't really want to take the whole thing off the wall, dismantle the plumbing, and replace the top, so I think I'm going to just leave that and replace the front drawer face only.

My plan is to get some quality maple veneer hardwood plywood and edge band it.

And on to my progress... I cut the pieces for, and assembled the smaller cabinet:

IMG_6167.jpg


I used the same method of concealed pocket screws to attach the bottom, sides, and stretchers (but with the addition of wood glue this time!).

For the top however I couldn't conceal the screws, so I used dowels instead:

IMG-6189.jpg


IMG-6190.jpg


IMG_6193.jpg


And honestly I liked that better anyways.

I also made a mistake this time around - I hit the edges with an orbital sander to clean up some saw blade marks and burning, but of course I wasn't able to hold it perpendicular and it messed up some of the edges. I didn't notices this until the glue up of course. It's minor, but still something to remember for next time.

I also decided to leave this small box open, with no drawer/door.

And as far as the glass shelf, I got this piece of walnut that I am going to use underneath it:

IMG_6194.jpg


So basically the 1/2" walnut will get some sort of curvy profile like in the Sketchup 3D render, and then the glass will be 1/4" with the same curve, except extend past the front of the walnut support by an inch or so. This way the glass is supported, but will (hopefully) still sort of look light and like it's floating, and the walnut will add some contrast to the maple. I think it should look pretty cool.

:beer:
 
OP
N

nicholam77

Well-known member
Joined
Dec 18, 2016
Messages
2,669
Location
Minneapolis, MN
Weekend Progress

Each night before bed I've been applying a coat of finish to the small cabinet. Using the same Generial Finishes High Performance water-based polyurethane.

IMG-6268.jpg


IMG-6266.jpg


3 coats on everything, an extra 2 on the top and exposed side.

Applying finish can be a delicate pain in the ***, like with this poly it's so easy to leave drips or excess and ruin the coat. But like sanding (also not much fun and easy to make mistakes), it's awesome to see the depth and grain of the wood come to life. So in that sense it's also an enjoyable part of the project.

Once it had sufficiently dried I could install it. Since I was installing alone, I put a cleat in the wall to help balance it level, in place. Annoying to lug the compressor and hose inside just to shoot 2 brads, but in the end it made the install easy. But I can really see the benefit of those battery powered nailers for certain tasks.

IMG_6317.jpg


I used a combination of cleat thickness and brad nail length that would match the thickness of the drywall only and not puncture past it. Referencing the old demo photos there is a cluster of pipes in that area and I didn't want to accidentally shoot into a pipe:

IMG_2414.jpg


Which leads into the next thing -- screwing the cabinet itself to the wall. I rested it on the cleat and drilled through with a small bit to mark the mounting holes on the drywall:

IMG_6319.jpg


I was basically praying that there wouldn't be pipes where the screws needed to go. I lucked out and hit a stud on one side, and nothing on the other, so I used drywall anchors on that side.

IMG_6324.jpg


IMG_6332.jpg


And of course before driving the screws home I checked that everything was still level. Don't have a level more than 24" so I piggybacked it on my 36" rule:

IMG_6325.jpg


IMG_6326.jpg


IMG_6328.jpg


So yeah, there it is, about 9 months after the first cabinet:

IMG_6330.jpg


IMG_6331.jpg


IMG_6329.jpg


I'm excited to start on the shelf now and finish it off.

:beer:
 
OP
N

nicholam77

Well-known member
Joined
Dec 18, 2016
Messages
2,669
Location
Minneapolis, MN
Hope all the dads out there had a great Father's Day weekend.

I spent most of it with family, but also hung this flower box at the request of the wife:

IMG-6399.jpg


IMG-6400.jpg


It's PVC vinyl. Was going to build one but I think she decided I would not get around to it soon enough and summer is fleeting, so we just bought one.

Had to peel back the siding and find some studs. Sort of a pain but not too bad.

And then Saturday night I was able to spend 45min working on the bathroom vanity shelf.

I had presented these two designs:

Screen-Shot-2019-06-12-at-2-37-21-PM.png


Screen-Shot-2019-06-12-at-2-37-04-PM.png


I like the 1st one and the wife likes the 2nd one. I wanted it a little curvier since a lot of the other bathroom components including the cabinets and shelfs are very squared off.

I've also considered giving the bottom edge a 1/4" chamfer:

Screen-Shot-2019-06-12-at-2-07-01-PM.png


So with limited time I made an MDF template of the design the wife preferred :lol_hitti

I printed a 2D version of the sketchup file 1:1 scale and spray glued it to the MDF.

IMG-6386.jpg


IMG-6389.jpg


Then used the jigsaw to cut it out.

IMG-6388.jpg


IMG-6393.jpg


I had got that thin scroll blade to do the job, but ended up switching halfway through the cut to a bigger blade because I couldn't keep on the line well enough.

Also, without dust collection for the jigsaw the dust from the MDF was horrendous. I like MDF for it's flatness and relative cheapness, but I really need some better dust collection.

IMG-6397.jpg


I left the ends long but it will be flush between the two cabinets.

I think I'm still going to make a template of the other design and see which is best in person. :)

Eventually I'll use the MDF to template route the walnut board. And now I need to find a place that can cut the glass for me.
 
OP
N

nicholam77

Well-known member
Joined
Dec 18, 2016
Messages
2,669
Location
Minneapolis, MN
No updates on the garage or house to share, I was up on Minnesota's "north shore" this weekend. About a 5 hour drive from my house. First long road trip with the kiddo. She did great.

1-F36949-F-F5-B3-457-A-980-C-F79151-FF04-E9.jpg


Stayed in this old cabin/cottage that's in my family, my grandparents used to live there in their retirement. It's right on Lake Superior and very calming, also somewhat of a time capsule.

CE6-B5169-24-C6-495-E-8808-875-C997-F79-CA.jpg


9-DBAA7-A0-AD6-C-4-EFB-B8-C6-EE482-F45-DFE3.jpg


221-C5-A84-0-D82-4-D4-D-9-CD0-570-CEFD1-B0-FA.jpg


MN north shore scenery:

8-B05-D2-BD-59-AA-44-E7-A118-A7-FDD08-FE50-D.jpg


Spotted this '72 Jensen Interceptor while on the trip. Never seen one before but I am always interested in unique cars.

79-BD588-C-B68-F-4542-B9-E2-60-C2-F70-EC0-C3.jpg


Not sure when I'll be able to get back to the vanity, I have a few upkeep projects to take care of like oil changes for both cars and one of the gutters on the house has a clog. Fun stuff. In any case, it was nice to be away from the city for a few days with no real agenda...

:beer:
 

turbotalon1g

Member
Joined
Aug 15, 2010
Messages
9
I'd love to come check this out sometime. Even better, you should come and look at my small 2 car and give me some ideas
 
OP
N

nicholam77

Well-known member
Joined
Dec 18, 2016
Messages
2,669
Location
Minneapolis, MN
What a beautiful cottage and location!

Thanks!

Love the view. I have always wanted a place on Superior! Thanks for sharing :beer:

It's my parents', but yeah it's a very calming place. Unfortunately usually only get up there once a year.

------------------------------------------------------------------------

This past weekend was fairly productive. I oil-changed both our vehicles:

IMG_6611.jpg


Mazda recently got all new tires after a nail through the sidewall. Bye bye $$$$. :spit:

IMG_6628.jpg


Felt good to get that out of the way.

While my car was up on stands I took the chance to remove an ECU "piggyback" unit by Dinan. It gives a slight boost of 20 HP and 30 TQ on 93 gas.

IMG_6634.jpg


IMG_6631.jpg


I've felt for a while like something is off with my car, I get a lurching when getting on the gas, letting off the gas, or braking and gear changes. Excessive bucking in 1st and 2nd, clutch feels like it wants to drop out on 1st gear take offs, and sometimes the lurching is accompanied by a clunk noise. I want to take it into a shop or potentially the dealer and see if something is up. I'm no mechanic but I've upgraded all the mounts and that shouldn't be the weak point. I kind of suspect the clutch or the dual-mass flywheel. Wanted to remove the unit for dealership reasons and to go back to basics.

It also threw a check engine light a few times this week:

IMG_6625.jpg


The resulting codes were:

P060600 - ECM/PCM Processor

P023600 - Turbocharger Boost Sensor (A) Circ. Range/Performance

I don't know what this means but another thing I want to get checked out. After removing the Dinan unit I cleared the codes and they haven't returned.

I also noticed some sweating around the oil cap and some weird residue on the front of the oil pan.

IMG_6630.jpg


IMG-6637.jpg


All of this is frustrating because it's kind of ruining the driving experience (mostly the lurching) and I don't feel like I have the time or money to take it in and figure it out.

:wtf:

During a Saturday morning baby nap in an effort to claim some shop time I quickly rounded over the router table support arms and put some finish on them. Totally unnecessary, but what the heck.

IMG_6587.jpg


IMG_6585.jpg


My dad gave me this roundover bit and it's quite dull. I think I need to pick up a new one.

IMG_6588.jpg


IMG_6591.jpg


IMG_6593.jpg


I love how plywood plys come to life when finish is applied.

IMG_6598.jpg


I think the router table is my favorite thing I've made. It's quite enjoyable to use.

Sunday I didn't get much done as we had a big rain storm.

IMG_6640.jpg


Hoping I can get a few things knocked out over July 4th.

:beer:
 
To avoid these ads, REGISTER NOW!

cash68

Keeper Of Rotor Hill
Joined
Feb 2, 2011
Messages
979
Location
Milwaukee, WI
Don't buy chinese router bits on amazon. I had one break in the first 5 minutes of use, and part of it was sucked INTO my router and destroyed the fan/armature.
 

Kriesel

Well-known member
Joined
Mar 25, 2014
Messages
138
Location
Afton, Minnesota
Love the view. I have always wanted a place on Superior! Thanks for sharing :beer:

Hey, I know you! haha

I too love Superior. Some friends and I were talking the other day though, and I've never been on a boat on Superior. But I love sitting and watching it.

I've felt for a while like something is off with my car, I get a lurching when getting on the gas, letting off the gas, or braking and gear changes. Excessive bucking in 1st and 2nd, clutch feels like it wants to drop out on 1st gear take offs, and sometimes the lurching is accompanied by a clunk noise. I want to take it into a shop or potentially the dealer and see if something is up. I'm no mechanic but I've upgraded all the mounts and that shouldn't be the weak point. I kind of suspect the clutch or the dual-mass flywheel. Wanted to remove the unit for dealership reasons and to go back to basics.

I also noticed some sweating around the oil cap and some weird residue on the front of the oil pan.

IMG_6630.jpg


IMG-6637.jpg

I've had to swap out my dual mass flywheel, and went with a single mass flywheel and a stage 2 clutch. Sounds like you have a little clutch slip and some noise from the dual mass flywheel failing.

I think the white stuff on the oil pan might be threadlocker seaping down from something. That's my guess... Not sure where it would come from but that's what it looks like. I've never seen anything like that on my vw.
 

kulka89

Member
Joined
Dec 7, 2018
Messages
15
Location
Streamwood, IL
Hey man! Dope Garage and car! I have a mk7 gti myself and a mqb tiguan. Also used to have mk6 gti few years back.
 

Attachments

  • IMG_2775-small.jpg
    IMG_2775-small.jpg
    159.1 KB · Views: 98
  • 20190630_130438.jpg
    20190630_130438.jpg
    146.8 KB · Views: 94
  • 15229818979_4d14b12cca_o.jpg
    15229818979_4d14b12cca_o.jpg
    160.8 KB · Views: 76

Deezler

Well-known member
Joined
Nov 1, 2011
Messages
240
Location
Southeast MI
While my car was up on stands I took the chance to remove an ECU "piggyback" unit by Dinan. It gives a slight boost of 20 HP and 30 TQ on 93 gas.


I've felt for a while like something is off with my car, I get a lurching when getting on the gas, letting off the gas, or braking and gear changes. Excessive bucking in 1st and 2nd, clutch feels like it wants to drop out on 1st gear take offs, and sometimes the lurching is accompanied by a clunk noise. I want to take it into a shop or potentially the dealer and see if something is up. I'm no mechanic but I've upgraded all the mounts and that shouldn't be the weak point. I kind of suspect the clutch or the dual-mass flywheel. Wanted to remove the unit for dealership reasons and to go back to basics.

It also threw a check engine light a few times this week:

IMG_6625.jpg


The resulting codes were:

P060600 - ECM/PCM Processor

P023600 - Turbocharger Boost Sensor (A) Circ. Range/Performance

Those ECU codes are almost certainly from the Dinan piggyback, I would think. The way it works is to intercept the boost pressure signal and fool the ECU. But your ECU is, apparently, too smart or sensitive for that. I have the equivalent Dinan unit on my Mk5 GTI with no codes. But also not very much HP gain, lol.

But let me ask you, is the bucking/lurching any better now without the Dinan unit present? I've seen a lot of drive-ability problems where the clutch gets blamed but it was really just ECU tuning and/or ignition issues causing some stumbling. I kind of blame my Dinan tuner for chunky part-load acceleration smoothness when my engine is cold.

How many miles are you at now? Have you ever changed/replaced the PCV unit (oil cap seepage).
 
OP
N

nicholam77

Well-known member
Joined
Dec 18, 2016
Messages
2,669
Location
Minneapolis, MN
Don't buy chinese router bits on amazon. I had one break in the first 5 minutes of use, and part of it was sucked INTO my router and destroyed the fan/armature.

Good call. I probably don't need a bunch of different sizes anyways. I'll just get name brand, one or two sizes I think.

I've had to swap out my dual mass flywheel, and went with a single mass flywheel and a stage 2 clutch. Sounds like you have a little clutch slip and some noise from the dual mass flywheel failing.

I think the white stuff on the oil pan might be threadlocker seaping down from something. That's my guess... Not sure where it would come from but that's what it looks like. I've never seen anything like that on my vw.

Thanks for the input. I don't notice any slip once in gear, even under hard acceleration. It's just 1st gear starts that are janky. One thing I'm wondering is my wife has driven my car just handful of times, and once when I was with her she was slipping the clutch pretty bad, smelled clutch and everything. Made me wonder if that had happened the few times she drove it on her own, too. She used to have a manual transmission car a long time ago but wasn't used to mine. I wonder if it could have made hot spots on the flywheel or something. My 1st gear starts have been shudder-y for at least a year, but weren't always, so it's not just my driving style. I try to slip the clutch as little as possible on take offs and gear changes, always matching revs.

If it is my flywheel I'd definitely consider an upgraded clutch, although idk if I'm bold enough to go SMFW. Never driven one but I always hear about the chatter and I feel like that would bother me. Although I would love it if revs fell quicker. What brand clutch did you get and was the single mass noisy for you?

This video reminded me of the clunk I would get:


It doesn't happen very often anymore, but last winter it was very often.

Hey man! Dope Garage and car! I have a mk7 gti myself and a mqb tiguan. Also used to have mk6 gti few years back.

Thank you

Wow, those GTI's are clean! Nice work! :bowdown: 
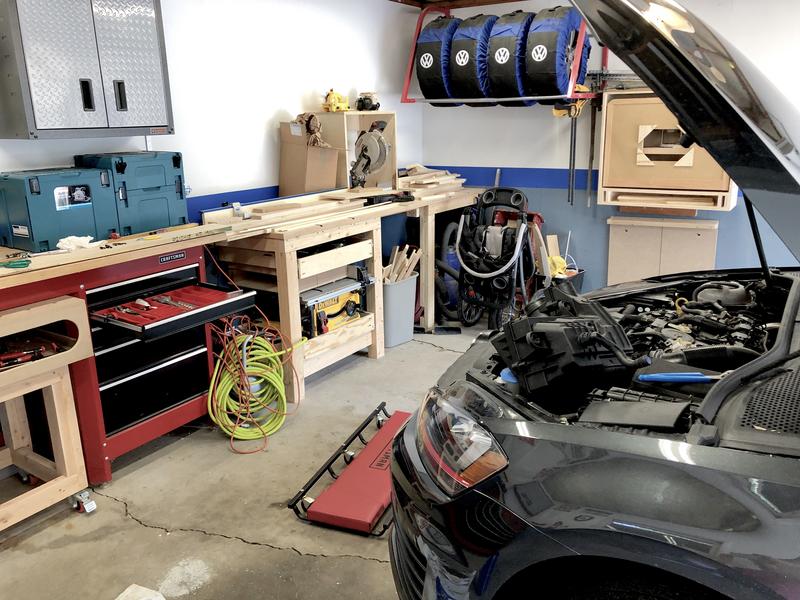
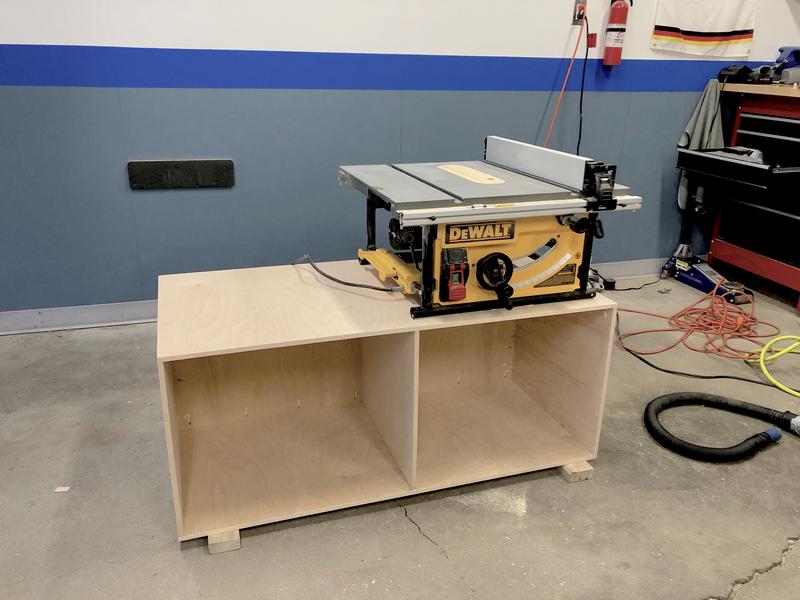
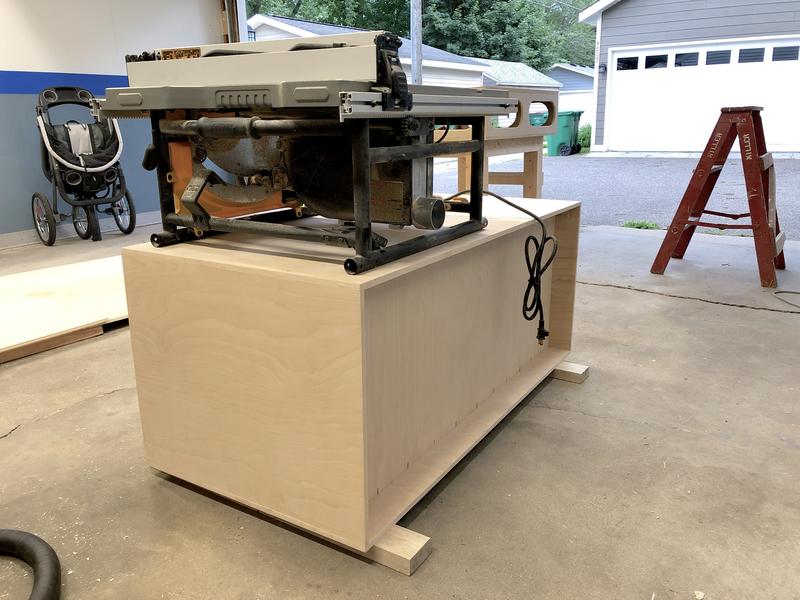
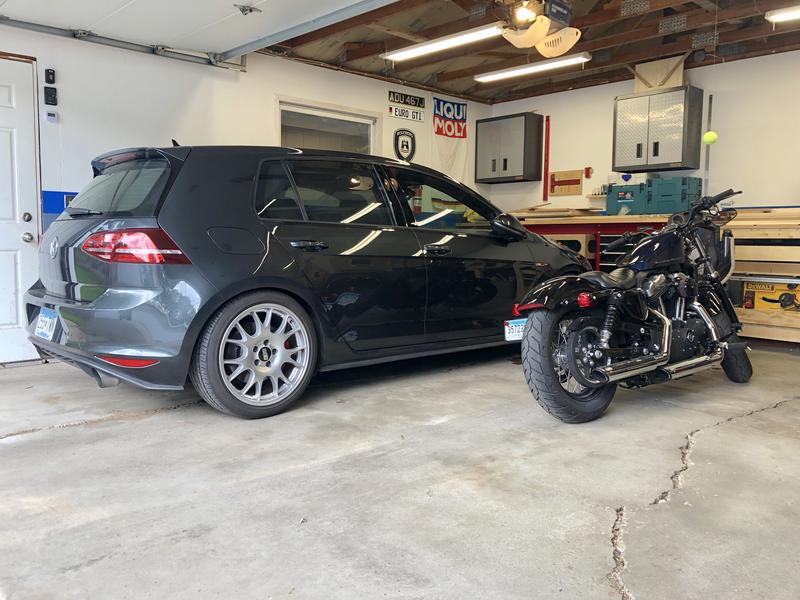
At first I was trying to figure out why the front end looked so good and then I realized... no plate :bounce:

Those ECU codes are almost certainly from the Dinan piggyback, I would think. The way it works is to intercept the boost pressure signal and fool the ECU. But your ECU is, apparently, too smart or sensitive for that. I have the equivalent Dinan unit on my Mk5 GTI with no codes. But also not very much HP gain, lol.

But let me ask you, is the bucking/lurching any better now without the Dinan unit present? I've seen a lot of drive-ability problems where the clutch gets blamed but it was really just ECU tuning and/or ignition issues causing some stumbling. I kind of blame my Dinan tuner for chunky part-load acceleration smoothness when my engine is cold.

How many miles are you at now? Have you ever changed/replaced the PCV unit (oil cap seepage).

I was assuming the piggyback had something to do with the codes. First time it ever threw a CEL, though. One of the reasons I took it off. I enjoyed the boost in power but it wasn't drastic and can live without it for now. I just want to get it back to "normal".

The bucking/lurching is the same with or without the Dinan unit. I agree that the Dinan didn't always have the smoothest power delivery, but I don't think it was my issue. Not to say it couldn't be something besides the clutch/flywheel, but the reason I thought the flywheel is the springs in it and it feels like excessive engine/transmission movement. I literally just put BFI stage 1 mounts and dogbone insert so it shouldn't have this much play in it. (And yes the problem was there before upgrading the mounts, too). It's been about a year. The reason I upgraded the mounts was to try and solve it. I just have a strong aversion to taking the car into the dealer I guess :)

The excess movement or lurch happens letting off the gas, too, so I'm not sure if that could be ignition related but it seems like probably not. It's not necessarily tied to acceleration, just any abrupt momentum change.

I just hit 25,000 miles. So, not many. I have a short commute. And no, I've never done anything with the PCV.
 

sawduststeve

Well-known member
Joined
Oct 7, 2016
Messages
2,139
Location
Havering-Atte-Bower,London/Essex boarders, England
Evening Nick

I thought we were mates and only now, after we've booked our holidays do you
tell me about the lake cabin, :lol::lol::lol: it looks pretty Superior to me. :thumbup: what a beautiful place. We've got a place that backs onto the Norfolk Broads, it's almost the same :lol:, only two hours away though.
Great work with getting on with the bathroom cabinets.

Steve:beer:
 
Last edited:

Kriesel

Well-known member
Joined
Mar 25, 2014
Messages
138
Location
Afton, Minnesota
Thanks for the input. I don't notice any slip once in gear, even under hard acceleration. It's just 1st gear starts that are janky. One thing I'm wondering is my wife has driven my car just handful of times, and once when I was with her she was slipping the clutch pretty bad, smelled clutch and everything. Made me wonder if that had happened the few times she drove it on her own, too. She used to have a manual transmission car a long time ago but wasn't used to mine. I wonder if it could have made hot spots on the flywheel or something. My 1st gear starts have been shudder-y for at least a year, but weren't always, so it's not just my driving style. I try to slip the clutch as little as possible on take offs and gear changes, always matching revs.

If it is my flywheel I'd definitely consider an upgraded clutch, although idk if I'm bold enough to go SMFW. Never driven one but I always hear about the chatter and I feel like that would bother me. Although I would love it if revs fell quicker. What brand clutch did you get and was the single mass noisy for you?
I have a south bend stage 2 daily clutch, and the kit came with a single mass flywheel. Every once in a while I hear chatter, and have to remind myself it's just the clutch/flywheel. I don't notice much at all, just randomly sometimes... The "daily" version is supposedly less chattery, and they advertise it as such.

Before swapping a new clutch/flywheel, mine was also clunky starting to move in 1st. I think I swapped around 175k miles, maybe 150k miles. I'm at 240k now.
 
OP
N

nicholam77

Well-known member
Joined
Dec 18, 2016
Messages
2,669
Location
Minneapolis, MN
July 4th weekend update:

**please don't quote the whole post, it's going to be long :)**

The weekend's not over quite yet, but I've probably fit in all the projects I'm going to get to.

On Thursday I got off work early and picked up some plywood from Home Depot, even rented one of their trucks to get it home:

IMG_6663.jpg


3/4" maple to fix the main bathroom vanity cabinet drawer, and 1/2" birch for a top secret project. I wanted 3/4" birch but they didn't have it and I didn't want to leave empty handed so I'm hoping 1/2" will work out ok.

Friday I had a glorious woodworking day to myself, as I had the day off work and my parents' volunteered to do daycare, anyways, from 8-4pm.

The mystery project is a table saw cart. I was never happy with my other MFT cart solution, and it was poorly engineered. The Shop Vac couldn't connect and it was wobbly. When I fastened the MFT paulk worksurface to the base, the table saw no longer fit on the ledge at all, so I had been using it on the floor.

:lol_hitti

I really want to increase efficiency in setup and clean up times in the garage, and thus want the table saw permanently mounted to a cart on casters I can roll out instead of store in a drawer. This is what I came up with:

Screen_Shot_2019-07-05_at_7.47.01_PM.png


Screen_Shot_2019-07-05_at_7.46.49_PM.png


Screen_Shot_2019-07-05_at_7.45.51_PM.png


The left side "box" will be storable underneath, and while I didn't take the time to model it the right side compartment will have 3-4 drawers to store blades, wrenches, zero clearance inserts, and other accessories.

To be able to store this on the back wall however, I will have to re-make the miter station. This time I want to go for more of a "floating" station that the TS cart can dock underneath:

Screen_Shot_2019-07-05_at_7.42.09_PM.png


I also want to build a larger MFT cart with Systainer storage, crosscutting setup for the tracksaw, and double as an outfeed table.

The new table saw cart surface, the new MFT, and the old MFT will all be at the same relative height so they can be used in a modular fashion.

I'm thinking the miter station surface will be melamine tops, and underneath some shallow drawers.

The models aren't complete, but you probably get the idea.

So first I started breaking down the 4x8 birch plywood. Track saw was super useful, but at the same time it's a bit of a conundrum on how to get square and parallel cuts without special accessories. I ended up just measuring and marking and lining the track up by hand.

IMG_6693.jpg


IMG_6696.jpg


Surprisingly, it seemed to be pretty accurate. At least accurate enough for shop furniture.

Then I ripped the broken down pieces to width on the table saw, but I was getting a lot of chip out on the underside. The track saw quality of cut was soooo much better than the table saw, but I wanted to use the fence for a parallel cut. I thought a zero clearance insert might help, so I tried to make one out of MDF (Side-Track Project #1):

IMG_6698.jpg


Double-sided tape and cut rough shape with inverted jigsaw. Inhaled a mouthful of MDF dust.

IMG_6700.jpg


Flush trim/pattern bit to flush it up. Dust collection on the router is A++

IMG_6734.jpg


Became a more complicated task as I had to make a bunch of relief cuts on the underside:

IMG-6756-2.jpg


All done:

IMG-6757-2.jpg


IMG_6754.jpg


IMG_6755.jpg


And after all that effort I still got chip out :spit: I think it's my blade.

Ok, so plywood was cut. Then I tried to add some iron-on edge banding to make it look purdy.

oh-you-fancy-huh.jpg


IMG_6739.jpg


First time doing this but it was actually pretty easy.

(Side-Track Project #2)

I thought it would be a GREAT idea to use the router table to trim the excess edge banding instead of buy one of those trimmer tools.

I followed this idea from Guy's Woodshop Youtube Channel:


IMG_6742.jpg


IMG_6744.jpg


IMG_6745.jpg


Essentially an auxilliary fence that is raised to allow the edgebanding to trim with a flush bit.

IMG_6746.jpg


IMG_6750.jpg


But I didn't account for the tire rack, so I couldn't run the long panels all the way through.

:mad:

Other than that it worked great. To finish the parts I couldn't get I just popped the motor in the plunge base and did by hand. Not as accurate but worked okay.

IMG_6753.jpg


Still needs sanding but I'm happy with the results.

IMG_6752.jpg


So where am i at on this thing? I thought I was gonna get it all done in one day, but I ran out of edge-banding and only have most of the pieces cut. Also forgot to buy the casters.

Time to clean everything up. Whenever I work on something I feel like the the whole place turns into a clusterfudge of tools and power cords and materials.

IMG_6747.jpg


IMG_6748.jpg


I mean I was just trying to make a simple plywood box!
 
OP
N

nicholam77

Well-known member
Joined
Dec 18, 2016
Messages
2,669
Location
Minneapolis, MN
Almost forgot, today I cleaned up the GTI as best I could around 7am for Cars and Coffee w/my dad and younger bro.

IMG-6759.jpg


It hasn't been properly washed in longer that I feel comfortable admitting but I quickly gave it a pressure washer rinse and wiped down with quik detailer.

My brother rode my dad's harley sportster 48 over to my house afterwards (they are both into bikes) and thought it looked cool in the garage so I snapped a few pics.

IMG-6774.jpg


IMG-6780.jpg


Ok that's it. Hope everyone had a great 4th!

:beer:
 

bj383ss

Well-known member
Joined
Sep 29, 2011
Messages
3,166
Location
TX
Nick great update. Your garage is turning more woodshop everyday. Pretty soon that poor car will be sitting outside permanently if things keep progressing up the scale. :bounce:

Did I read correctly the mileage on your car is only 25,000 miles with all those issues or you have had it for 25,000 miles? That seems like it shouldn't even be broken in yet.

Anyways I wish you luck chasing the issues. The Camaro gave me some headaches last year but at 137,000 miles its about time.

Bret
 
OP
N

nicholam77

Well-known member
Joined
Dec 18, 2016
Messages
2,669
Location
Minneapolis, MN
Evening Nick

I thought we were mates and only now, after we've booked our holidays do you
tell me about the lake cabin, :lol::lol::lol: it looks pretty Superior to me. :thumbup: what a beautiful place. We've got a place that backs onto the Norfolk Broads, it's almost the same :lol:, only two hours away though.
Great work with getting on with the bathroom cabinets.

Steve:beer:

HA! Too funny, Steve! I had to Google Image search Norfolk Broads - looks nice to me! Two hours is way more convenient.

Nick great update. Your garage is turning more woodshop everyday. Pretty soon that poor car will be sitting outside permanently if things keep progressing up the scale. :bounce:

Did I read correctly the mileage on your car is only 25,000 miles with all those issues or you have had it for 25,000 miles? That seems like it shouldn't even be broken in yet.

Anyways I wish you luck chasing the issues. The Camaro gave me some headaches last year but at 137,000 miles its about time.

Bret

Thanks, Bret. I hope you are wrong about the car getting pushed out but you never know :bounce:

Sometimes I do dream of what it would be like to have a more permanent woodworking setup in even half the garage. Would eliminate some of the set up time.

Yes you read correctly, only 25,000 miles on the GTI. I got it new, it's 3 years old, and no, I don't drive very much relatively speaking :(

It's a good and bad thing about living close to my work.

I could be totally wrong about the flywheel, as I've never experienced one go bad before. The symptoms just seem like what I'm noticing. I'm not getting any clutch slip that I can tell, and I baby it most of the time. No launches, no tune, no sloppy shifts and I always rev match. There's no way there should be a failure with the dual-mass flywheel springs at such low miles but I suppose anything is possible. Or maybe it's something else entirely. Hopefully I can take it in soon and get a diagnosis and see if I am crazy or not.

The other part of it is it's hard for me to tell if any of it is from stuff I've done to the car such as the motor, trans, and dogbone mounts, stainless clutch line, deleting some of the hydraulic dampeners on either side of the line, etc. And I wonder if there is something wrong if the dealer will just blame it on that.

We shall see. :beer:
 
OP
N

nicholam77

Well-known member
Joined
Dec 18, 2016
Messages
2,669
Location
Minneapolis, MN
Weekend Update:

It was HOTT it Minneapolis :shocking: Like 90 F and super humid. Not the best for woodworking but oh well. I had an opportunity to get some stuff done anyways.

Saturday, I finished up the edge banding for the table saw cart.

IMG-6834.jpg


I'm pretty sure Ron Paulk may have had this in mind when designing the table but I "discovered" that not only are the cubbies great for putting drills and clamps, but I can slide my tracksaw rail and longer items all the way through.

IMG-6835.jpg


If the router table is my favorite shop item I've made, the MFT cart is definitely the most useful and most used.

IMG-6839.jpg


Sunday I finished cutting some last few bits and then pocket hole'd everything and put it together.

Originally wanted to use dowels for a cleaner look but my jig didn't line up well with the 1/2" ply.

This is where I made a few mistakes. I was going to glue and brad nail the bottom in so you wouldn't see pocket holes looking down, but I accidentally drilled for them anyways. I still glued and shot the bottom in with brads, but along the back panel I mis-measured and fired them all in at the edge of the joining board and not in the middle, so the the brads are poking out and visible. Still have to figure out how to fix this. Annoyed with myself, but was moving fast and the baby only naps for so long :bounce:

MFT bench works great for assembly, but still planning to make a larger one:

IMG-6843.jpg


Didn't have hardware for the casters but set them in place to see how it would look:

IMG-6847.jpg


And here's where it ended up for the weekend:

IMG-6850.jpg


IMG-6851.jpg


And since I have nowhere to put it:

:lol_hitti

IMG-6855.jpg


Where it will ultimately go:

full-garage.jpg


And then I have to figure out where the vacuum and dust bin will go. :wtf:


Left to do on the TS cart:

  • 4-5 drawers for under the table saw
  • Smaller nesting cube for table saw surface extension
  • wipe-on poly
  • mount saw and casters
 
OP
N

nicholam77

Well-known member
Joined
Dec 18, 2016
Messages
2,669
Location
Minneapolis, MN
Today I put a finish on the table saw cart (Minwax poly)

6417AFCE-7C37-4BD3-B4C6-93613C0C24D2.jpg


I started with an aerosol can, but didn't like how it applied, so went back to the wipe on stuff. I thought it would save me time but it appeared kind of streaky and not that great coverage (could definitely have been my technique).

4B4E3158-8EF8-44EB-9566-A9D60D22E015.jpg


Brought out the big guns to lay out the mounting holes for the table saw.

07A1263E-8CDB-4843-A766-BEA57AECE876.jpg


The saw will be bolted down with 5/16 bolts, washers and nuts. I added a neoprene washer just under the saw frame to act as a bushing of sorts and absorb some vibration when it's running. Haven't fired it up yet but seems to work well, keeping the whole saw slightly suspended off the wood, but still tightly secured.

F281618B-D094-45FF-9381-BF43F402DC76.jpg


Here's how it looks with the saw attached and bolted down:

B860EE9D-E580-49CB-ABA9-C92A5657668D.jpg


The MFT cart is about 3/4 inch lower than the table saw surface, and should make for a good outfeed table.

460C68D0-E0C0-4AEF-97F9-D854EECCDB7E.jpg


3B12323B-D31E-4F65-9812-2657B3C1A12F.jpg


FINALLY I have the table saw mounted in a cart, on casters! Only took a few years.

I think this is going to make it infinitely easier to set up and put away, not to mention a more solid and stable setup with onboard storage when I can get to building that out.

For now, unfortunately, I had to roll it into the shed because it doesn't fit under the miter station.

:lol_hitti

This whole workshop efficiency thing is like a big row of dominos. One thing always leads to another. I look forward to the day when everything is situated and organized and I can just pop out and get something done without hassle. But then again... it is also fun doing "shop" projects.
 
OP
N

nicholam77

Well-known member
Joined
Dec 18, 2016
Messages
2,669
Location
Minneapolis, MN
I have a dilemma on my hands. Do I tear down the miter saw station???

I meant to rebuild it eventually but now that the table saw cart is an inch too tall to fit under I can't keep it in the garage which is not convenient.

The framing of the miter saw station doesn't really allow me to easily disassemble part of it -- I think it's all or nothing.

I don't use it very much now that I'm not doing baseboard and casing on the regular, but it's a catch all surface for cutoffs and scraps and junk that doesn't have a home.

Of course I will replace it with a new and improved one, already designed in Sketchup, but I fear it will be quite some time before I can get to it and thus quite some time that my miter saw will be without a home and losing that extra storage.

But perhaps it has to be done.

---------------------------------------------------------

Switching gears, a brief Home Automation update:

Our bedroom is on the upper level and during hot, humid summer nights it gets way too hot up there. Even though our Nest Thermostat is "smart", it's almost too smart for it's own good. It auto-learns your schedule, and thus doesn't activate much at night unless it goes below a temperature extreme. I wanted a way to "trigger" the AC a few times over the night, but only on hot nights, and something simple that my wife can use.

Here's what I came up with. The whole action is initiated by a Siri Shortcut in iOS:

IMG_6896.png


When run, it calls a "WebCoRE piston" via a URL. WebCoRE is the scripting platform I use for SmartThings automations, and the scripts can be executed when their external URLs are opened. This is the Siri Shortcut workflow for anyone interested (I've pixelated out the URL!!):

IMG_6933.png


And here is the WebCORE piston (script) that is run when the Siri Shortcut is pressed:

Screen-Shot-2019-07-23-at-3-25-34-PM.png


It sets a "variable" called hotNight to True.

When True, the following secondary piston/script runs at defined times:

Screen-Shot-2019-07-23-at-3-26-02-PM.png


Essentially at 12:00 AM, 2:00 AM, and 4:00 AM, it checks to see if my Nest Thermostat is idle. If it is, it forces the mode to AC Cooling, and sets the temperature to 2 degrees less than what it's currently at via an expression, thus forcing the AC to kick in no matter the current temperature.

Then at 5:00 AM, the hotNight variable returns to False so this sequence won't be activated again until some uses the Siri Shortcut again.

I'm not really expecting anyone to follow along with this closely :), but just wanted to hopefully show some of the power of Home Automation outside of simply yelling at Alexa to turn your lights on and off. With some third party tools the sky is really the limit in what you can think up.

Hopefully it's mildly interesting.

:beer:
 

Finallygotit

ALLIANCE MEMBER
Joined
Jul 6, 2013
Messages
4,088
Location
Tucson, AZ
Two things...

IMHO it's time to tear out the miter station now that you're not using it. Build up what you need to do to get the new table saw station parked away. If you need the miter saw, you can always pull it out and set it on the multipurpose table or the floor.

Second, is the Nest upstairs or in the main living area downstairs? If it's downstairs, does Nest sell a remote (for the lack of a better word) dumb thermostat that can act as a zone for the upstairs? My thinking being that you now won't have to be up in the middle of the night tapping your cell phones. :wtf:

Just a thought...........


:beer:
 

bj383ss

Well-known member
Joined
Sep 29, 2011
Messages
3,166
Location
TX
I agree with Dan on getting rid of the MS station. I had a big huge one with fence and storage. I replaced it with a more modular one with less storage on purpose so that I can keep less cutoffs and scraps. I also made mine to were the fliptop planer cart fits underneath it.

Bret
 
OP
N

nicholam77

Well-known member
Joined
Dec 18, 2016
Messages
2,669
Location
Minneapolis, MN
Thanks for chiming in guys, I think you are right. The MS is too big and takes up too much space. I think I'd still like to have one as it's nice for breaking down long boards like 2x4's or door casing, and I do have more work like that to do on the house someday, plus it gives the saw a home. Bret, I have seen your new one and it looks really nice. The planer cart, too. My plan was to use the storage similarly where I can slide the TS cart or another MFT underneath. And I love the concept of modularity in my small space.

I don't want to hoard scraps, either, but I do want some defined storage for them like you have. Right now I just throw them on the top of the bench when the waste bins are full and it makes the whole thing very unusable if I have to clean it off first.


Finallygotit
, the Nest is in the main floor hallway. I've tried balancing out vents and still have a situation where the basement is cold, the main floor is good, and the upstairs is hot. At least in the summer. I'm sure I probably have poor or no insulation in the joist spaces. Nest does sell a wireless remote sensor now. You can have as many as you want in different rooms, and then choose one to prioritize for a bit.

I'm not 100% sure how it works, but knowing Nest and the app, I'm guessing there isn't a lot of flexibility in how long it targets a certain room. I could be wrong.

My thinking with the WebCoRE piston is that if we knew it was going to be extra hot and humid, we could run the Siri Shortcut that evening, and then the WebCoRE piston would take care of triggering Nest overnight on it's own, so we wouldn't have to be tapping our phones in the middle of the night. Which is what we were doing previously.

The Nest room sensors are $40 each, so not super cheap, but I may try it eventually, because Google has announced the "Works With Nest" API will be shutting down on Aug 31, 2019 and likely break 3rd party integration with SmartThings. This is pretty frustrating to me.

:beer:
 
OP
N

nicholam77

Well-known member
Joined
Dec 18, 2016
Messages
2,669
Location
Minneapolis, MN
Last night after putting the baby down I went out to the garage. I've rarely done this, because I'm usually burnt out after the work day at that point, and doing feel like doing projects. But tonight I gave it a shot and was pleasantly surprised in how much I accomplished.

But first I played with two new tools I got in the mail. One is a small magnetic-hex-bit-slip-on piece from Makita. It slips on any hex drive bit and provides 17x the magnetic pull of a regular magnetized bit according to the packaging. You can see it on the tip of my driver here:

IMG-6939.jpg


I saw it on Mike Farrington's YouTube channel (which is really good btw). I can confirm it works well, and I like that I can move it from bit to bit or take it off if I don't want the magnetization.

Amazon link if anyone is interested.

The other thing that showed up is the Woodpeckers 641 square.

IMG-6944.jpg


Last time they had a sale I wasn't ready to pull the trigger, and waited a whole year until they had a sale again. $10 off + free shipping. When you factor in that shipping is ~$10, $20 off is a good amount on an already pricey tool that has sales tax added as well.

Previously I had no reliable square, and have come to love Woodpecker products so I figured now is a good a time as any to pick one up. It doesn't disappoint. I added it to "the wall".

IMG-6942.jpg


IMG-6941.jpg


I will say while the case looks nice, it's not as easy to remove as the other tools.

Ok so here's what I accomplished. Starting with a full 4x8 sheet of 1/2" plywood I started to break it down for the Table Saw Cart drawers with the track saw.

Once in rip-able pieces I ripped them to width on the table saw.

IMG-6950.jpg


IMG-6949.jpg


I'm loving the new setup for this and how I can put stock to the left of the saw for easy grabbing.

With clean parallel edges established I trimmed one end square with a cross cut sled.

IMG-6952.jpg


IMG-6953.jpg


Then I flipped the boards around and cut them to length, also on the cross cut sled. My sled doesn't have a stop, and the lengths I needed were 18" and 21" and were larger than my sled fence anyways, so here was my method.

I carefully marked one board with a rule, lined it up with the blade tooth, and then stacked a second board, flushing up the ends by feel with my index finger. This way I cut two at once, and even if not every drawer side in the batch was exactly the same, at least the pairs for each drawer would be, keeping each drawer square.

IMG-6954.jpg


With the pieces cut I pocket hole'd the fronts and backs with the K3 jig (they'll be getting false fronts).

IMG-6955.jpg


While my setup totally works, I can see extra efficiency either in using a Kreg Automaxx clamp instead of the Festool Quick Clamp, or investing in the K4 or K5 jig. I feel like I will do enough pocket holes in my life to make it worth it, but currently there are other tools higher on the list. There is something to be said for accomplishing a repetitive task as quickly as possible, though.

All done:

IMG-6956.jpg


That's where I stopped for the night. But I was feeling pretty good about getting that done, plus setup and cleanup, in about 2 hours start to finish. Starting with 4x8 sheet and ending up with clean, square, basically identical drawer parts for 4 drawers.

One downside I noticed with the table saw cart is because the saw is open sitting on top, sawdust still gets everywhere even with the shop vac hooked up.

IMG-6957.jpg


IMG-6958.jpg
 
To avoid these ads, REGISTER NOW!
Top Bottom