Trapps
ALLIANCE MEMBER
genius. To be filed under “today I learned.”
What he said!
Nice work, Nick!

genius. To be filed under “today I learned.”
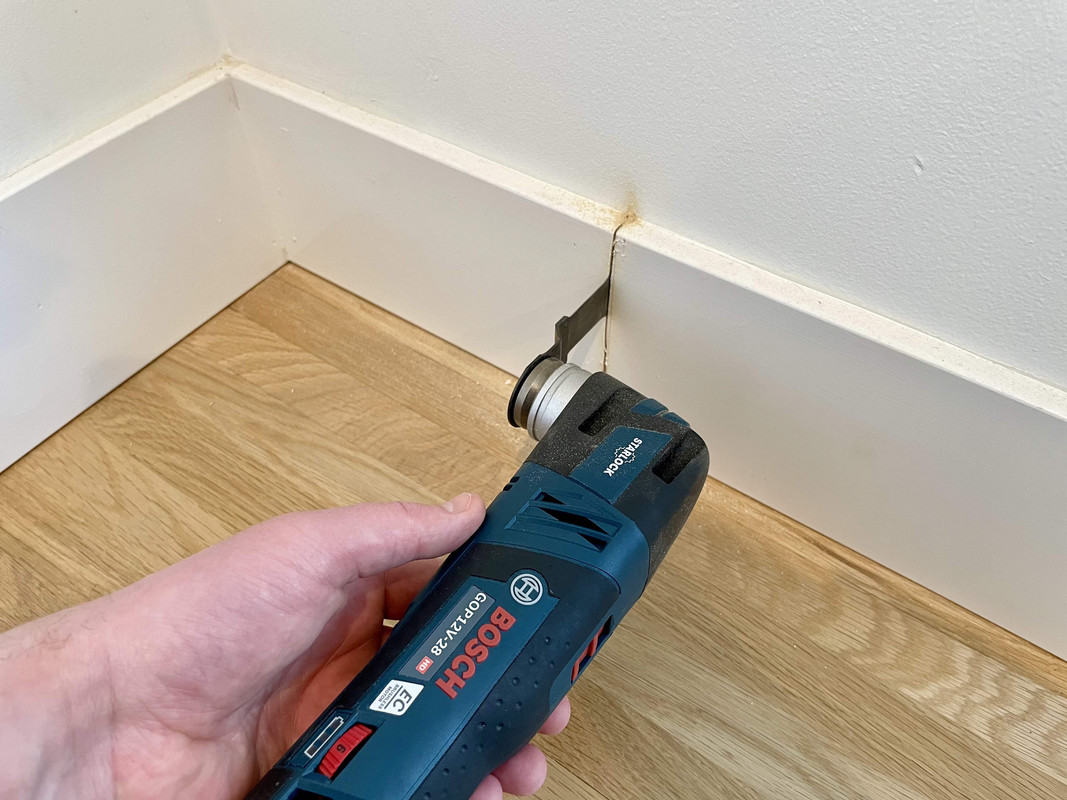
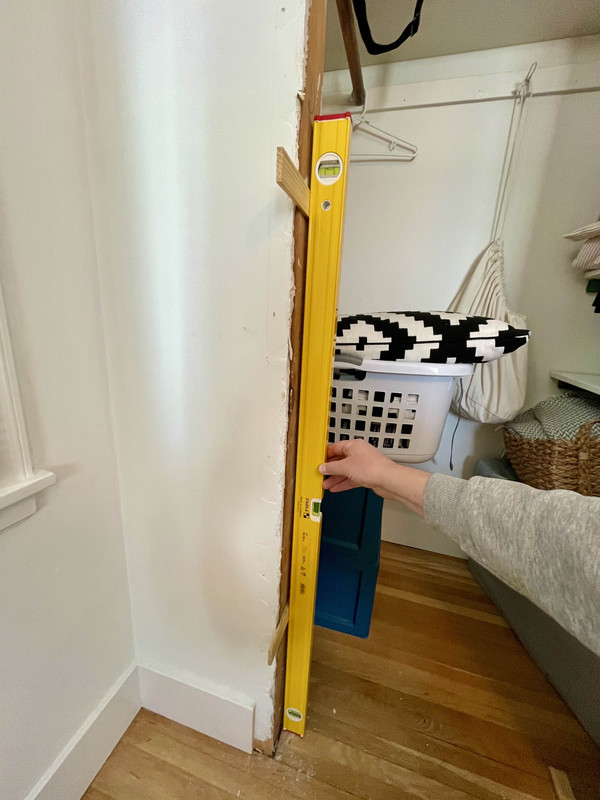
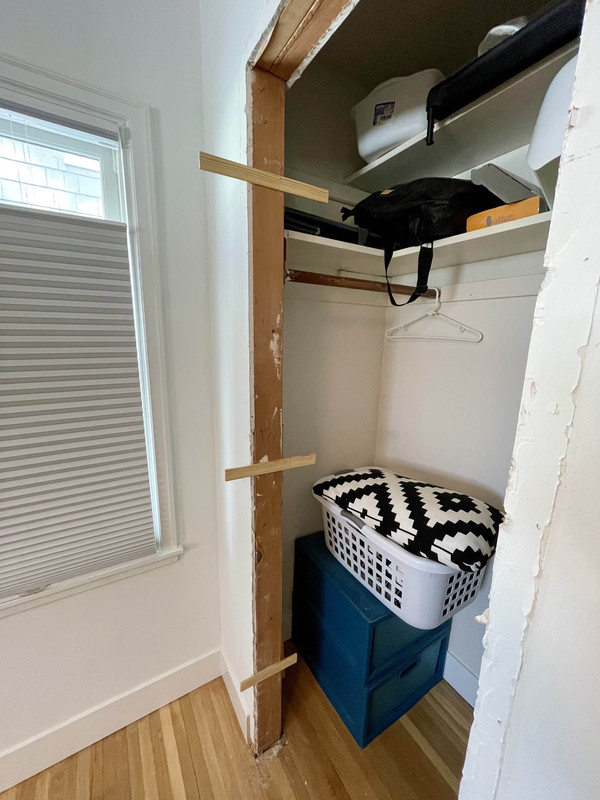
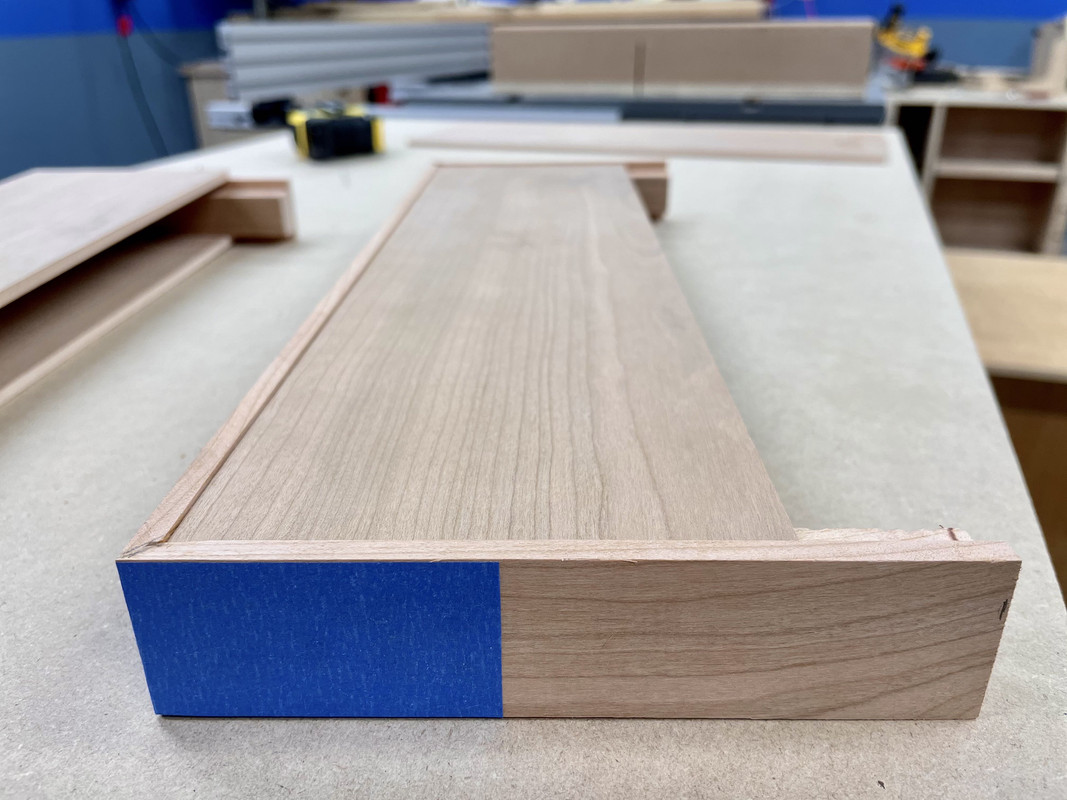
I'd say that's a pretty nice job there scribing that! Guess it means you should add a 12" to 14" bandsaw to the 2021 XMas list so you can cut closer to the line than you can with the jigsaw!

Regarding the quad outlet, they also sell a standard duplex with 2 USB ports on it.
I put these in by my nightstands to add some convenience.
https://store.leviton.com/collectio...x-receptacle-15-amp-t5632?variant=18216836099
Nice update. At first, I was thinking just cheat with a backsplash type trim. However, seeing it in place, it looks clean without it and I think it was worth the effort.
So a tip for the next scribe. Cut about 1/16 to maybe 1/32 or so short of the line, but cut it on a bevel. Then use you block plane, RO, palm belt sander or angle grinder with a sanding disc to sneak up to the line. The back bevel on the primary cut means you only have a small amount to sand off but you maintain clearance under the line.
Only catching up on this thread just now. Great work.
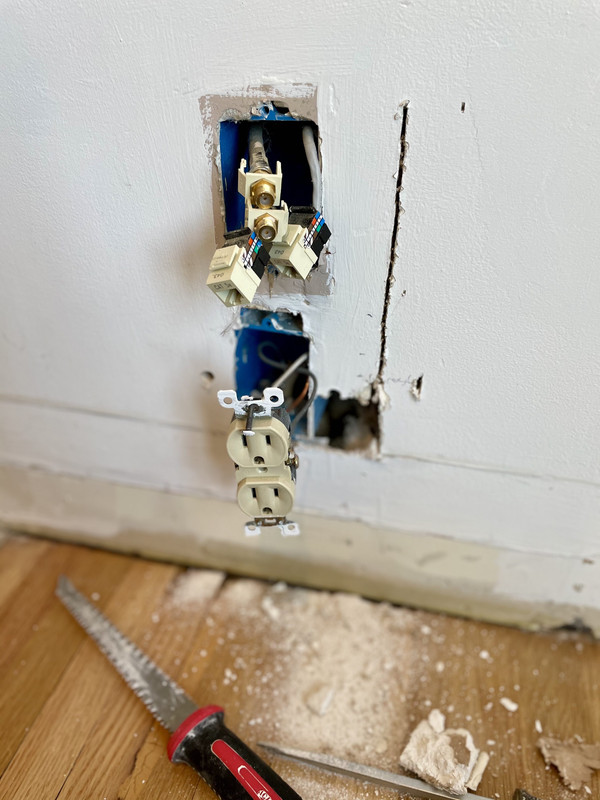
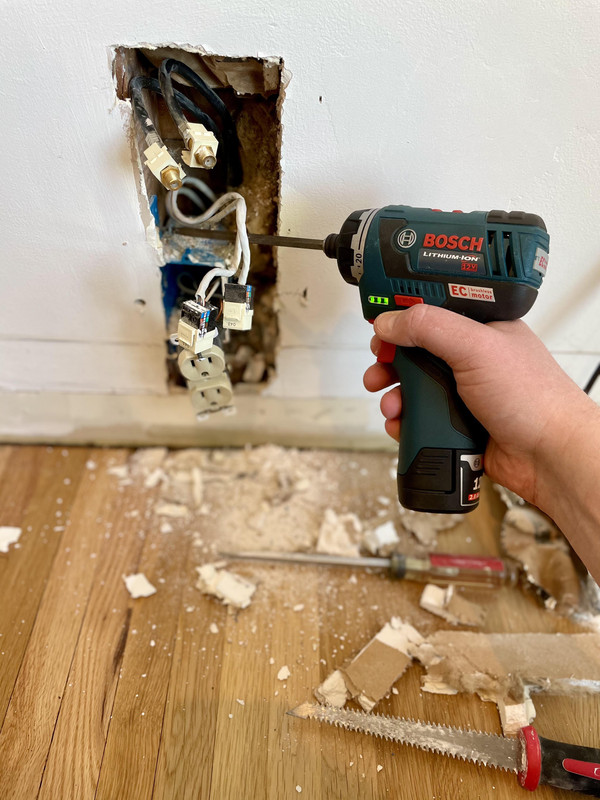
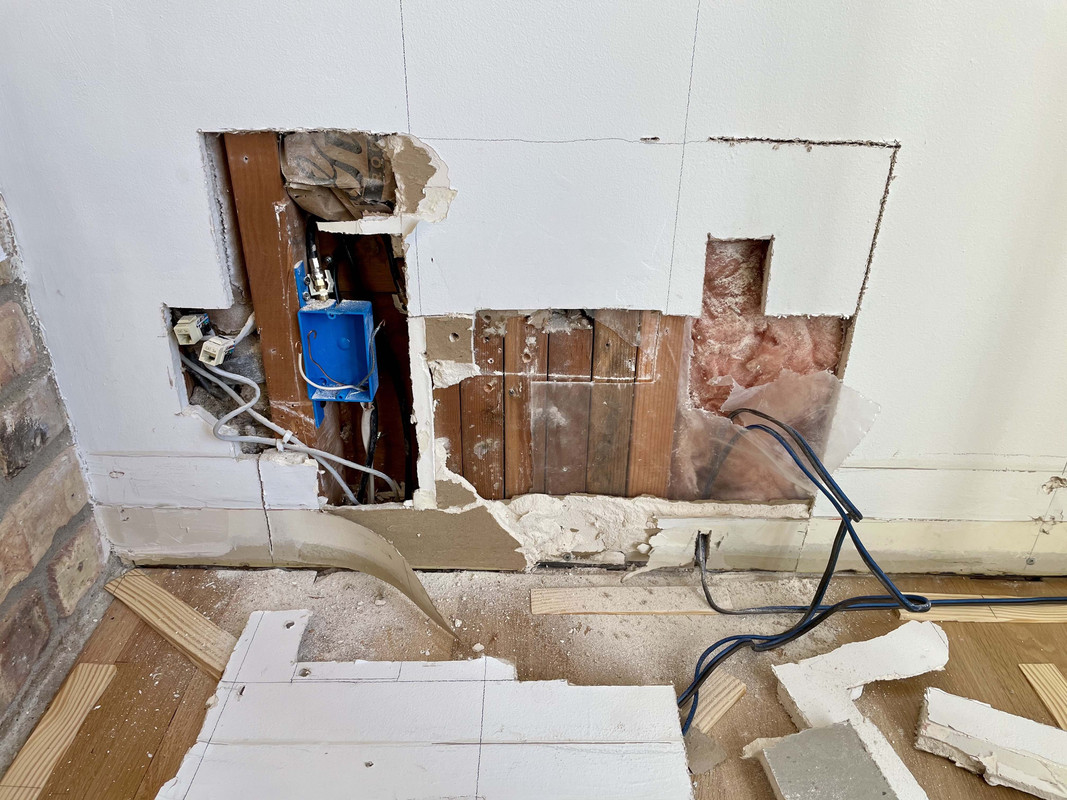
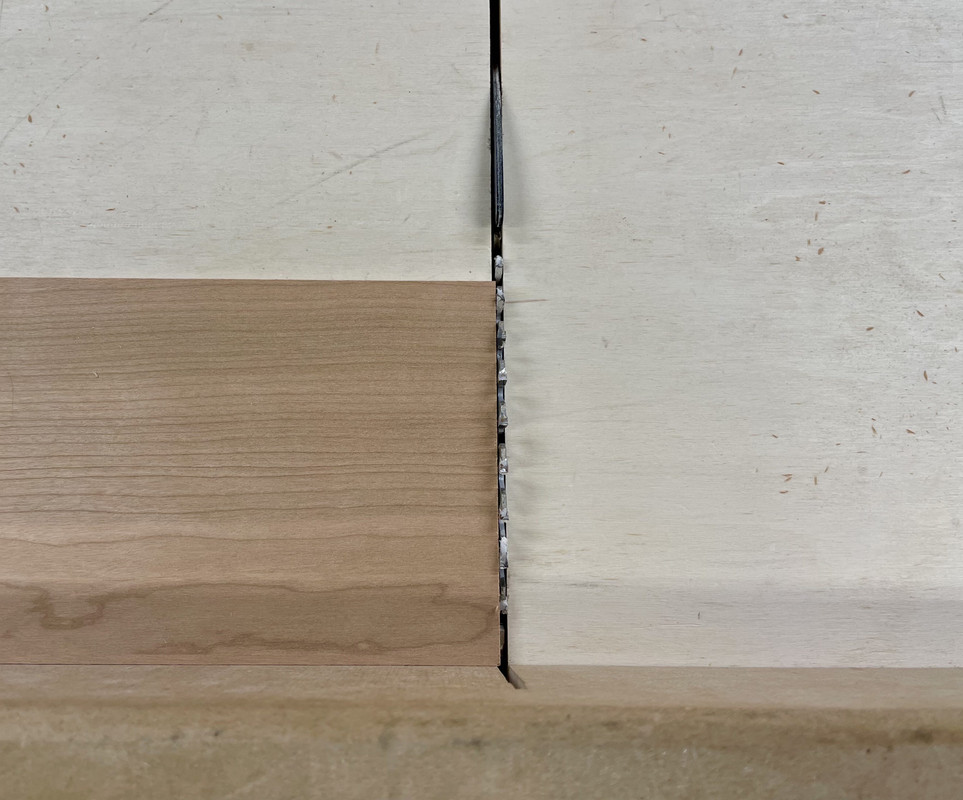
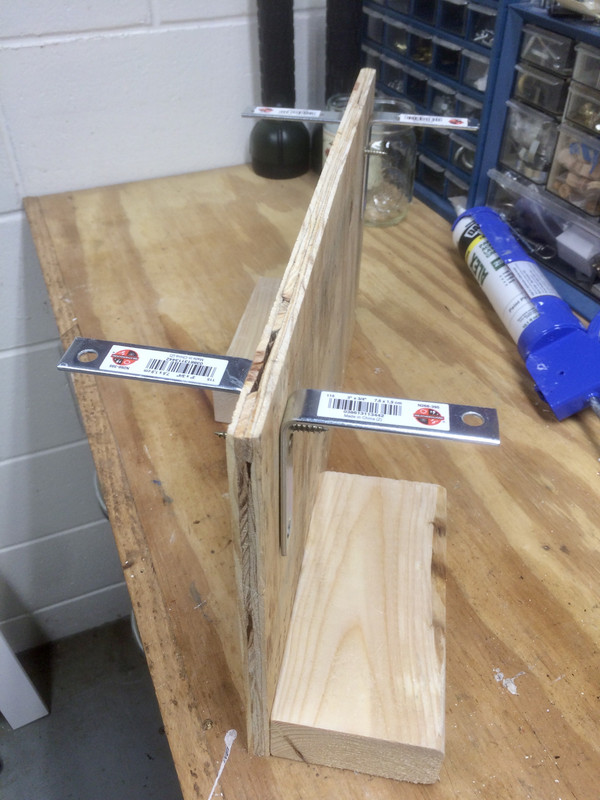
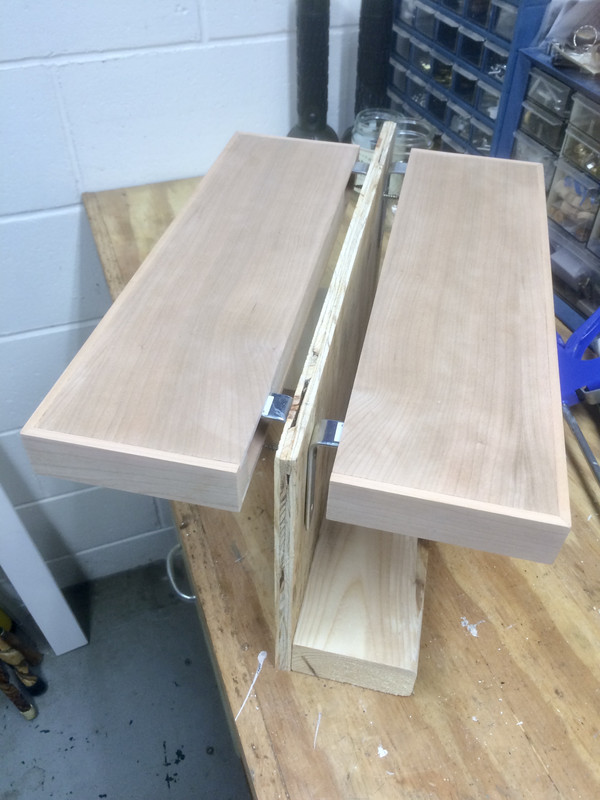
As the two routing errors were into the margin between the two slots, I would have been inclined to use the router to remove the top 2 plys in that centre section and do the reverse on a scrap piece of ply, then glue it into the gap and re-route the slots. I suppose it would have been advisable to create the patch first, to whatever thickness, before reducing the centre out of the workpiece. Too late now but just an idea.
What he said!
Nice work, Nick!

Awesome, this is helpful. Do you cut the bevel with the jigsaw? I'll try this on the next one and maybe use the random orbit sander to clean it up as I don't have the other tools. My only fear is messing it up on the actual piece but maybe I'll do a practice on a scrap board. Thanks for the tips.
On some things I'll pre bevel with the tablesaw leaving a 1/8 or so flat above the bevel.
If I'm doing it "on site" I'll use the jigsaw.
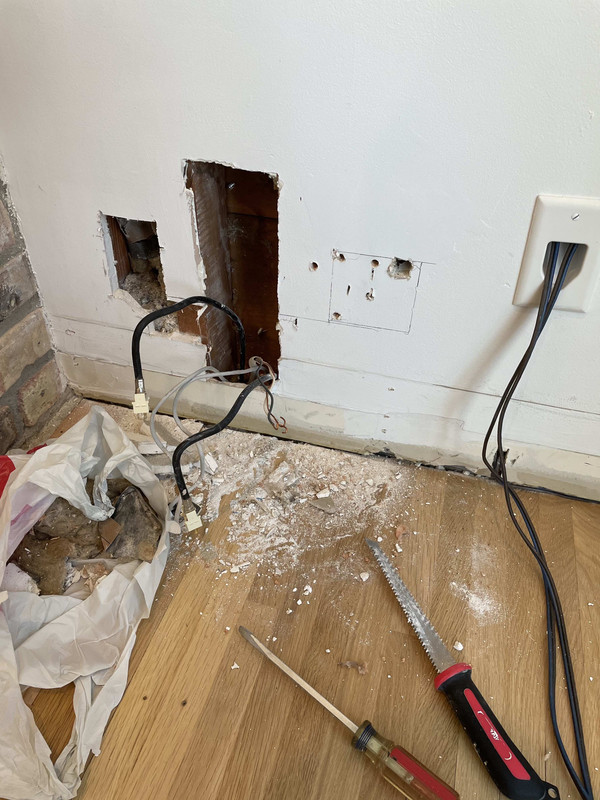
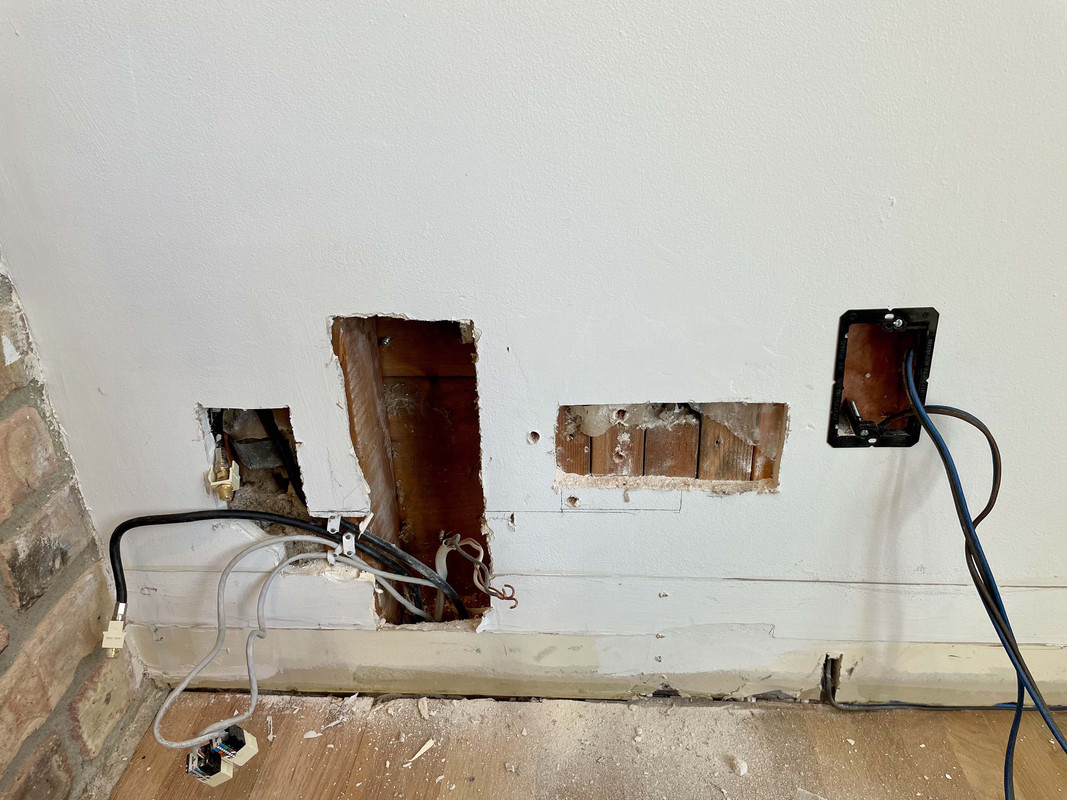
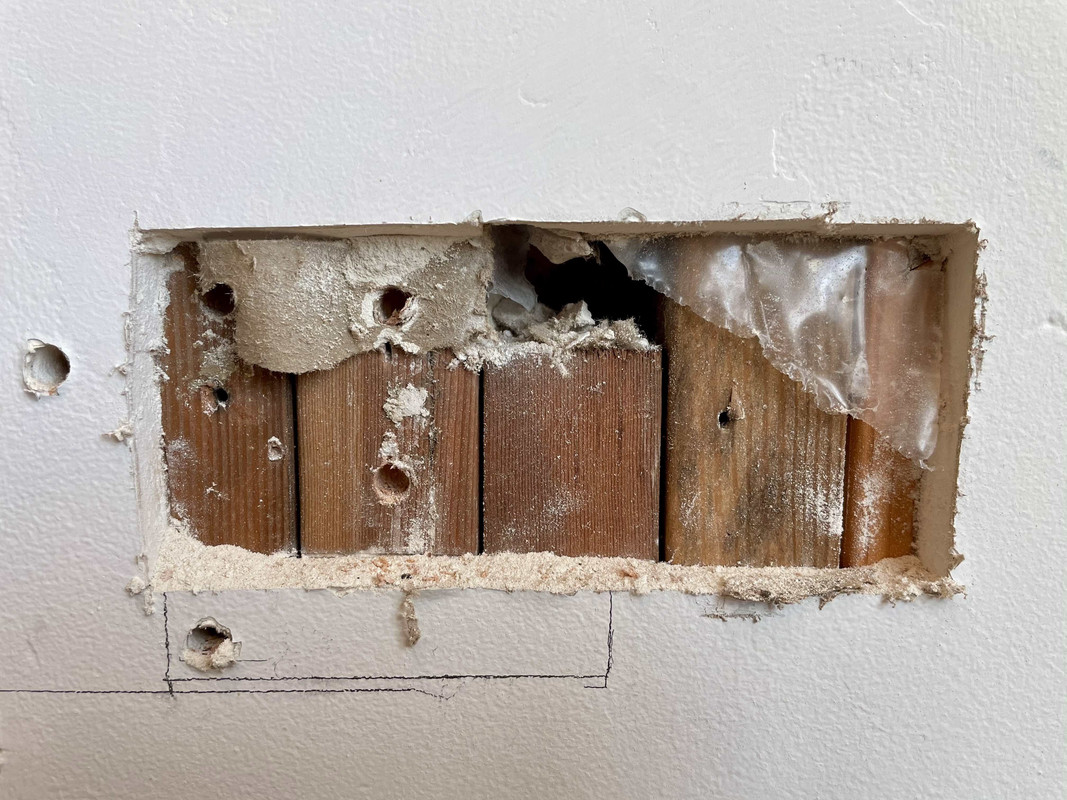
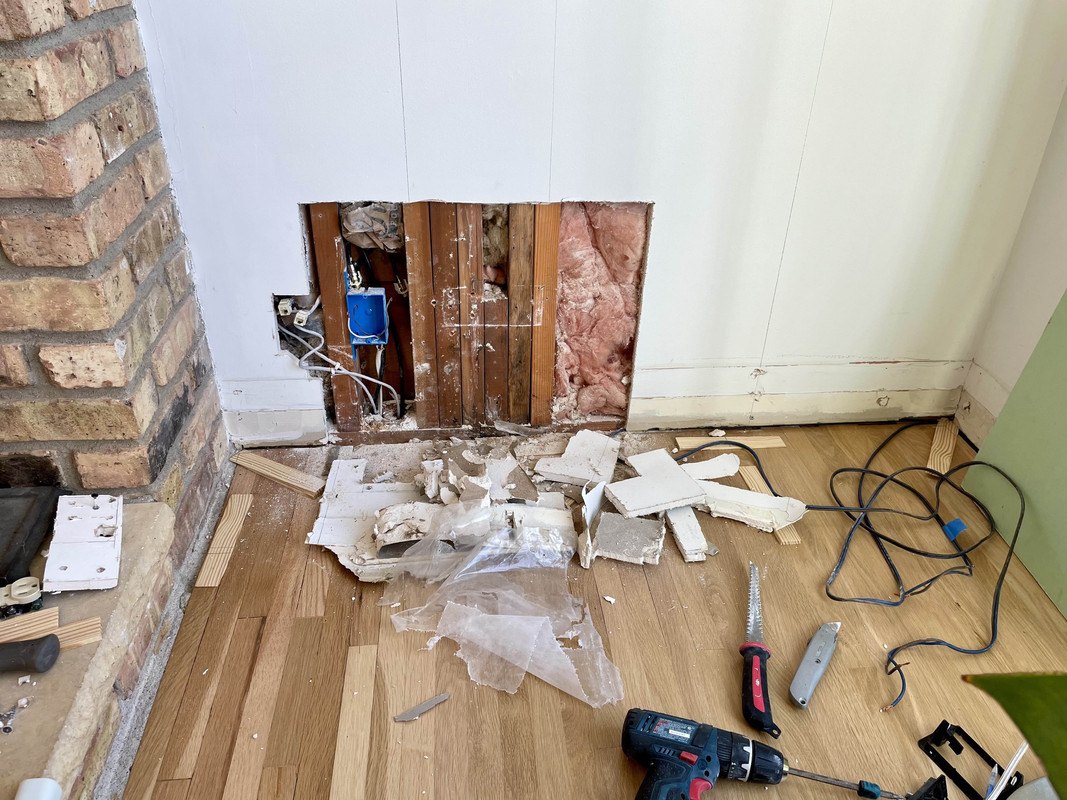
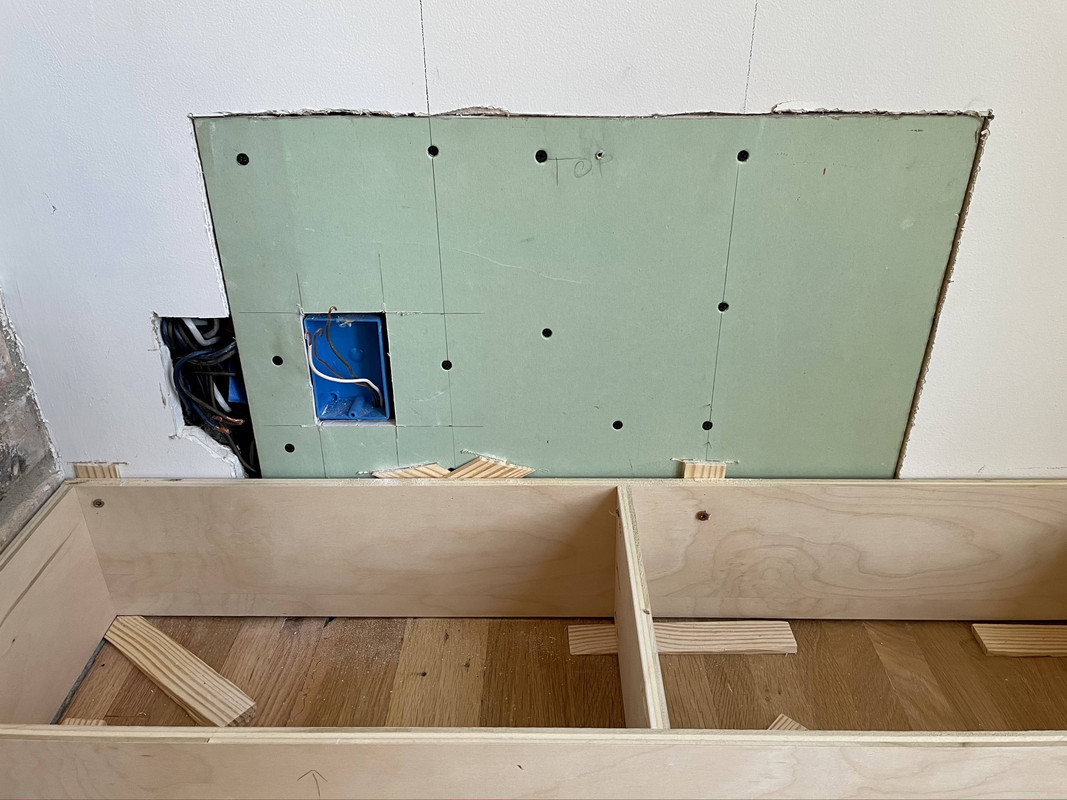
This sort of show the process, but it wasn't a critical scribe so it's straight off the saw without sanding to the line.


Sweet work!
Sent from my iPhone using Tapatalk
Impressive work!
Hey Nick, just dropping in to say thanks again for your recommended threads to checkout! I started off with the Tiny Tokyo Shop, which led me down the rabbit hole of the Mid-Century Moto Mecca Makeover and I'm currently completely and utterly addicted to that thread! I've been reading it every free second and am currently on page 55...I'm reading stuff from 7 years in the past now and so pumped to keep reading and catch up to present day. Thanks to Gregor, I'm now also in need of a Stabila level...along with a Japanese mechanical pencil, Franklin Sensors stud finder and probably a motorcycle! (luckily I already have a bunch of Festool, but more of that too! haha)
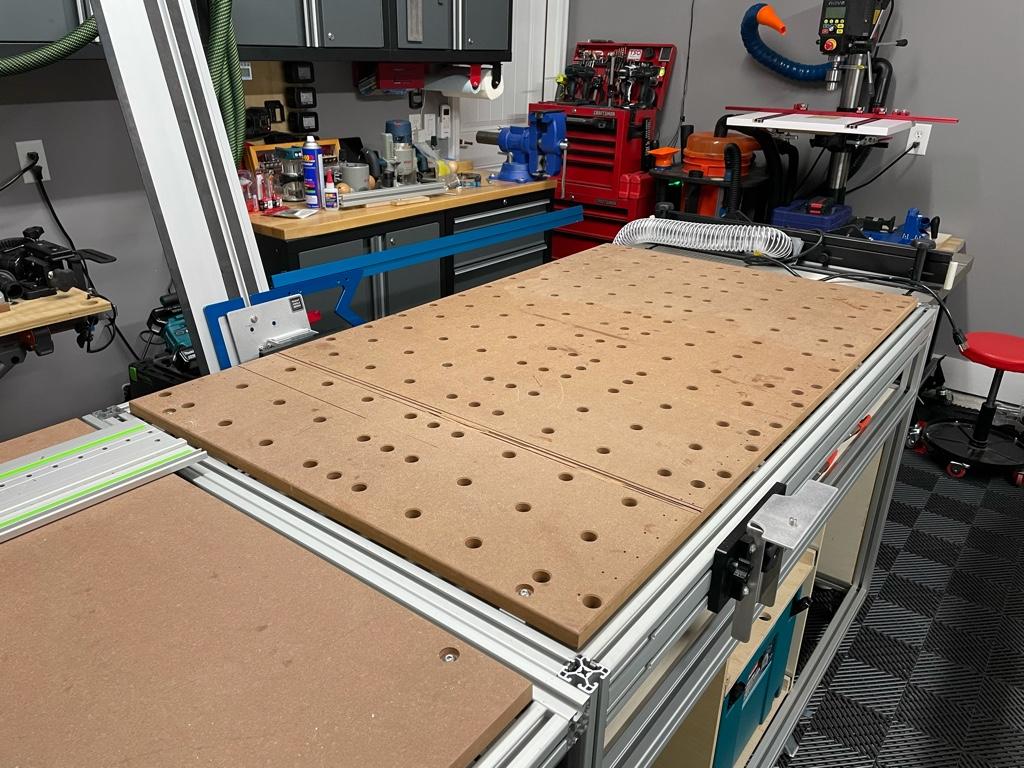
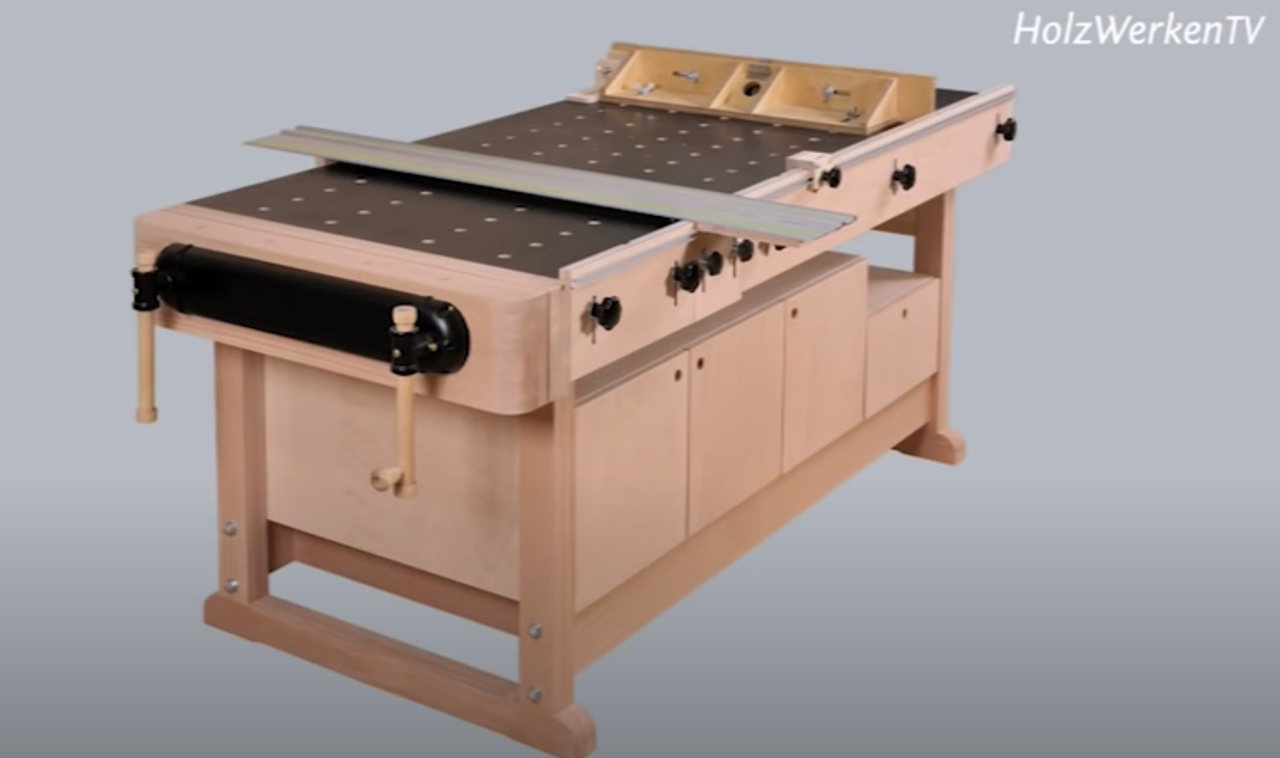
I'm still working on my custom MFT workbench. It has now evolved into my take on a hybrid of Hooked on Wood's and the Holzwerken Werbank. I'm still debating on how I want the tracksaw rail bracket set up. I've already got an actual MFT and I absolutely despise the slop in the front and rear rail brackets...I've spent countless hours dickin around with it, added a slop stop, bought a giant square, etc...a few years ago I actually removed the whole setup and just use a TSO rail square/dogs on it. I reinstalled it for the 1st time last week and quickly remembered the frustration it creates, but also how convenient it is being able to just lift the rail to adjust for the next cut and having a fence. This has me now debating on getting the Dashboard Rail Bracket and using it on both my MFT and my new workbench or building one like the Holzwerken and just having it on my new workbench. Don't want to distract from your thread, but I'll attach a photo of the current state of the workbench top and in Gregor like fashion, a metric tape I highly recommend. Anyways, I'm rambling...maybe I need to start my own thread soon as a place to document my garage too!
Cheers,
Matt

Yes! There is a lot of drool worthy stuff in that space and it's obvious a lot if thought has gone into it...please share more!Mcgeedesign all I am going to say is you need your own build thread! Awesome setup.
Bret
Mcgeedesign all I am going to say is you need your own build thread! Awesome setup.
Bret
Yes! There is a lot of drool worthy stuff in that space and it's obvious a lot if thought has gone into it...please share more!
Sent from The Garage Journal mobile app
Hey Nick, thanks for getting back to me!
Yeah, I already have a MFT and I actually built my 1st MFT cart based on a video on the Garage Journal YouTube. I unfortunately had no clue that the name of the channel referenced this forum…wish I would’ve stumbled onto it back then!
[...] that then led me further down the rabbit hole to the Holzwerken bench (I ended up getting some of the magazines even though they’re all in German and there’s a lot of good unique builds in there…I find a lot of the ways Euros think about builds really interesting) And then I got to thinking it would be cool to have a foldable extension table that hooks to MFTs to break down plywood/added workspace and that led me to your thread. Pretty crazy!
If I end up going with the Dashboard rail bracket (he’s right down the road from me and I love supporting local biz) I’m considering selling everything on my og MFT besides for the table itself, but not sure how big a market there’d be for it?…mind telling what you paid for yours? I’m still not certain on the best way to mount the Dashboard if I go that route…I’ve emailed Rob and he suggested t-track from Orange Aluminum. Do you like the actual rails you used on your build? I've watched the BFT garage journal build video and gotten some ideas there too.

I actually just got the TSO rail connector in the mail from Lee Valley, but am yet to use it.
Have you seen any slick workbench bases on wheels you really like? I’m basically looking for an elegant way to add wheels to a modified version of the Holzwerken trestle feet...maybe just rounding over the sides so they look a bit better than just a post down there? I'm going to be looking at this workbench just about everyday for a long time so I'm trying to make it as visually appealing as it is functional.
Thanks again for the links to all these great threads, it's nice to have someone to chat with about this MFT build too. If you've got any ideas for the workbench feet or my shop layout, I'd love to hear them!
And in the tools department for that matter too... I'm still waiting for my "score of the century"


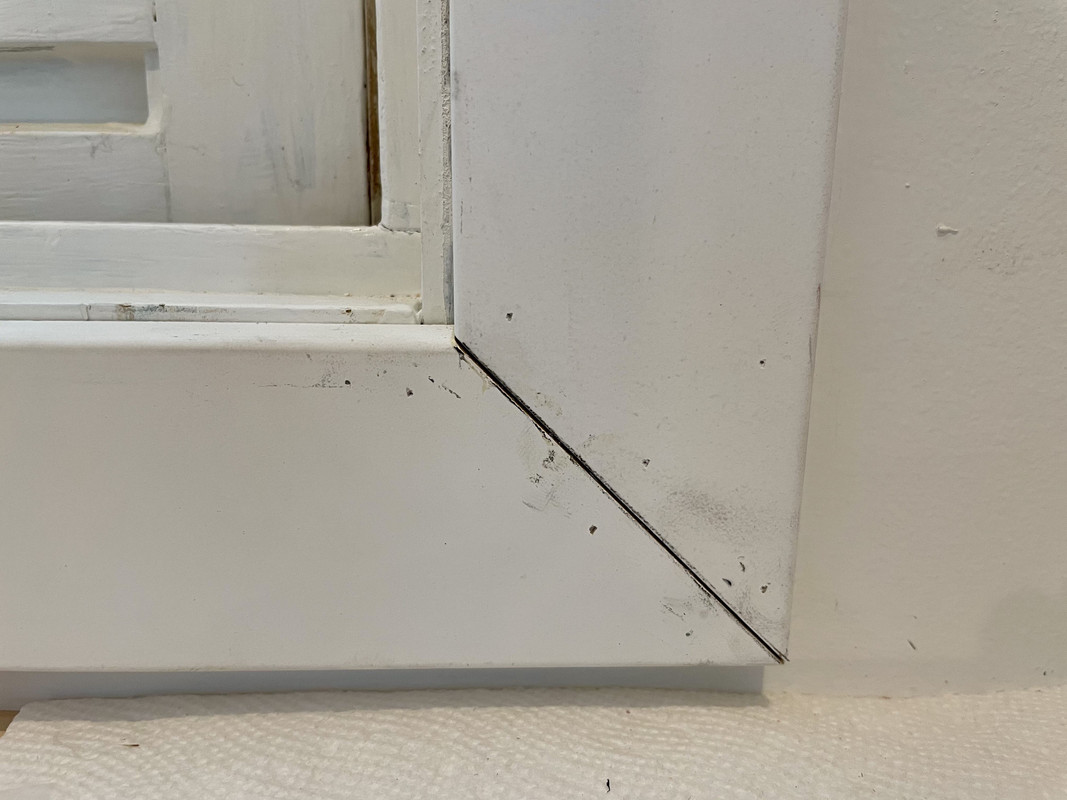
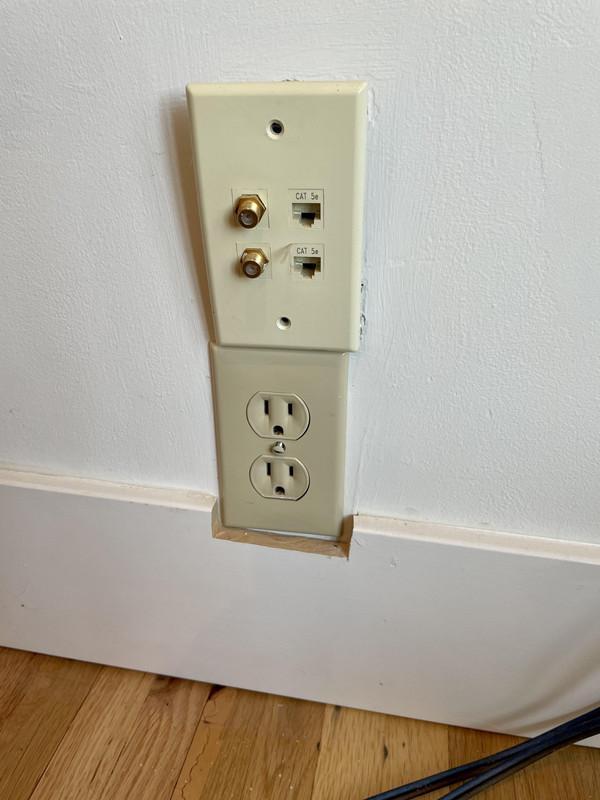
** WARNING: if you're reading this jar944, please avert your eyes! In addition to the graphic images of embarrassingly gappy joints, there is a complete and utter lack of moulding detail on these casings **
Putty and paint make it what it ain’t.
Lol. I got a good laugh out of the warning. Moulding is all about personal preference and the look you want. If you like a certain style wether that be plain to ornate that's all that matters.
I've never tried to cut moulding with a track saw. I would think its considerably more difficult than a miter saw. Picture framed window casing is already more difficult since all 8 cuts needs to be dead nuts to come out perfect vs an apron/stool casing where you can tweak the casing legs if you are a bit off of 90 degrees.
If you plan on doing a lot of window and door casing consider pre-assembly of the moulding. It allows you to glue it all up square and tight. using biscuits will strengthen the corner joints and will keep the miters from opening up with seasonal wood movement. The other benefit is you can bend the assembled casing to fit wonky walls.
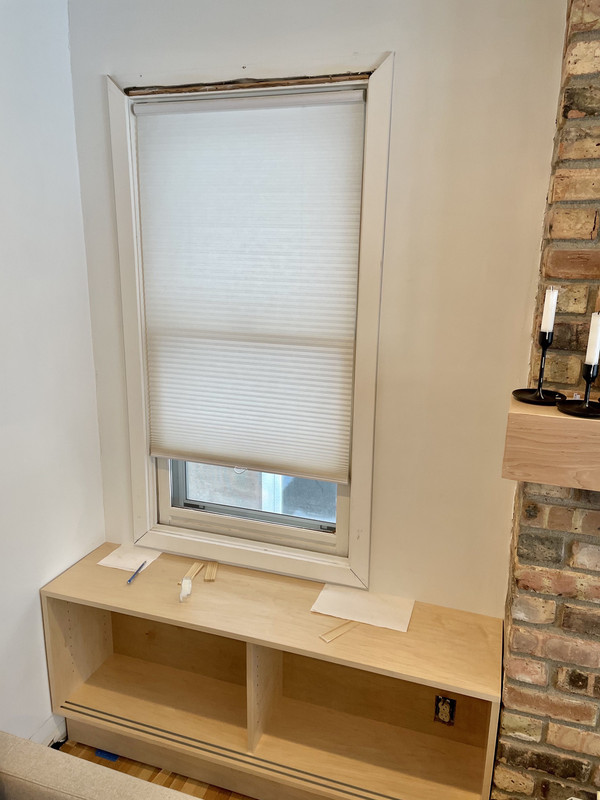
I've become really interested in Modernism. It's a bit frustrating because my house is practically the opposite...!
I was trying to think of that saying!
I've become really interested in Modernism. It's a bit frustrating because my house is practically the opposite, but it was a new development for me after buying the place. I do think some of the ideas can still apply, so yes, I am trying to strip back and simplify visually. It's not a big house and the rooms are compartmentalized, so I feel like there isn't "space" for that traditional ornamentation. And like you said, some of it is personal preference. However, I do have a strong appreciation for the craftsmanship that goes into more traditional work, and seeing what you do in your thread has been a big inspiration.
In any case I agree that architecture and a home (and any detail within) is extremely personal. In my humble remodels I've tried to keep that top of mind, strictly doing what I want vs. any sort of resale value type upgrades.
I'm planning on building kitchen cabinets soon, so it's been cool seeing how he's used the LR32 system...that's one pricey system. I saw one come up on craigslist at a decent price last month, but hadn't seen Gregor's thread yet or I probably would've tried to get it. It's been cool seeing how you and the Tokyo shop guy have made custom versions of it!

I like it too. I wanna make a Jetson style chair. My wife likes craftsman style, so I make craftsman style...lol.
It's funny how ones preffered architecture aesthetic can change over time. At one point I was fascinated with the arts and crafts design, but have gone the exact opposite diving into more and more complex and ornate structures. Im about as far away from Modernism as you can get, without going full gilded age victorian "over the top" ornamentation.
I did strictly resale based upgrades in our last house, and while it worked well for the resale I didn't want to do that again. I can see the viability in that plan though for a lot of people. It makes sense especially if you are only planning on being in a place for a few years.
). I was just excited to have my own place. In the process of working on it I've become WAY more interested in architecture and developed preferences.
I don't have much of an update...
 I am super jealous! I’m excited to hear your review of it!
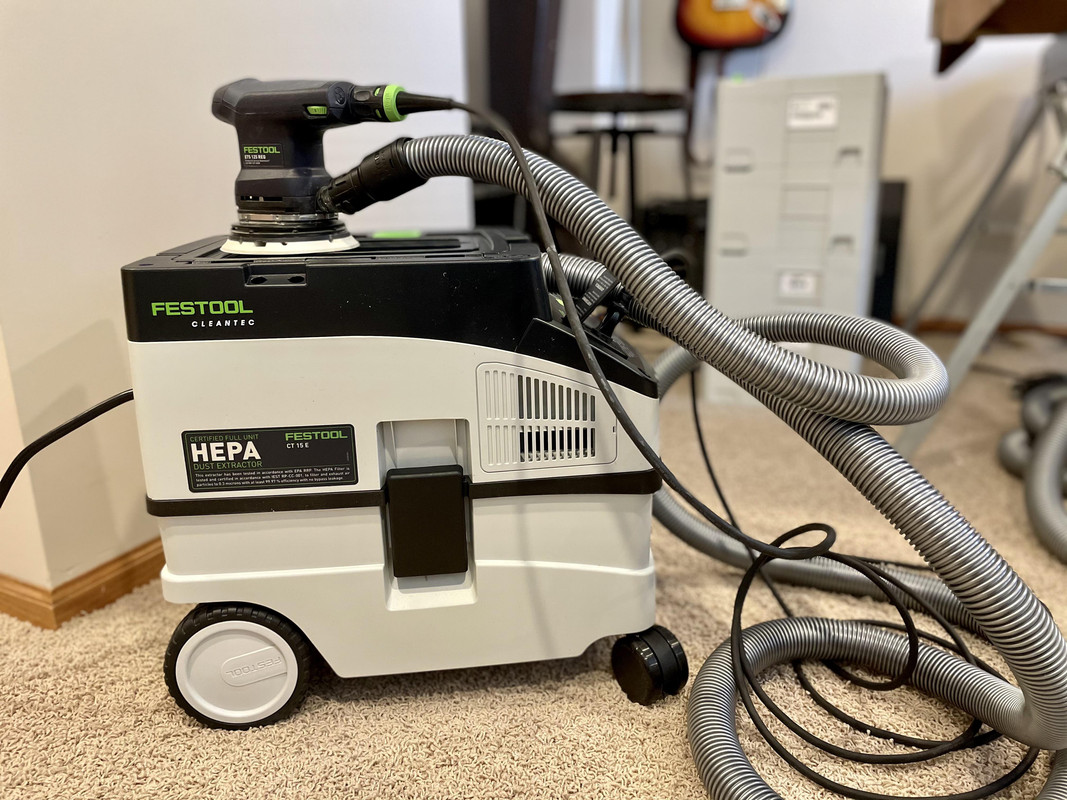
It's funny to think about being excited about a glorified vacuum... but here we are...X2 on the jealously. Now that I'm on the Makita platform, I've been looking into their corded/cordless dust extractor. That purchase will still be a ways out but I have found that the sooner I can figure out what I am looking for, the more likely I will know prices and be able to find a good deal.
Nick - I think you’ll find the CT15 will check most of your boxes on being able to work indoors. I use my CT MIDI I with my TS55 in my sons toy room (walk out basement French doors and finished living space that is immediately before my shop) and I have minimal cleanup. I won’t claim it’s perfect because I do run a vac over the floor when I’m finished but it’s miles ahead other options like running 4X8 sheets over my TS by myself. The most annoying thing you’ll find with the CT15 is the ribbed hose (gets caught on stuff), lack of hose garage (having to use the bungie on top) and lack of a manual clean function for the Hepa filter. The extractors are miles ahead of a shop vac and you will notice the biggest benefit with sanding and being able to turn the suction down. Now to pick up the DF500 - the only tool I would say that is dust free every time I use it in or outside my shop. Actually going back to your finish carpentry experience, I use a Domino for the finish case work in my house. All the doors and window miters get the same treatment with wood glue prior to install.
hahaGreat addition with the VAC! I've been watching craiglist and FB Marketplace for a Festool or similar style VAC with on/off by the tool and adjustable suction...I find myself using my at least 12+ year old Shop Vac less then I should when working because I don't like it and then I have to use it more to clean up the mess by not using it....I should be smarter....but I'm not yet
A Domino and a Festool Vac are (2) of the things many folks I've talked to said would be there only Festool tool if they could only have 1....maybe I should finally break down and get the Vac....


Great work Nick! Very cool projects and new tools
Just catching up, you've been busy!
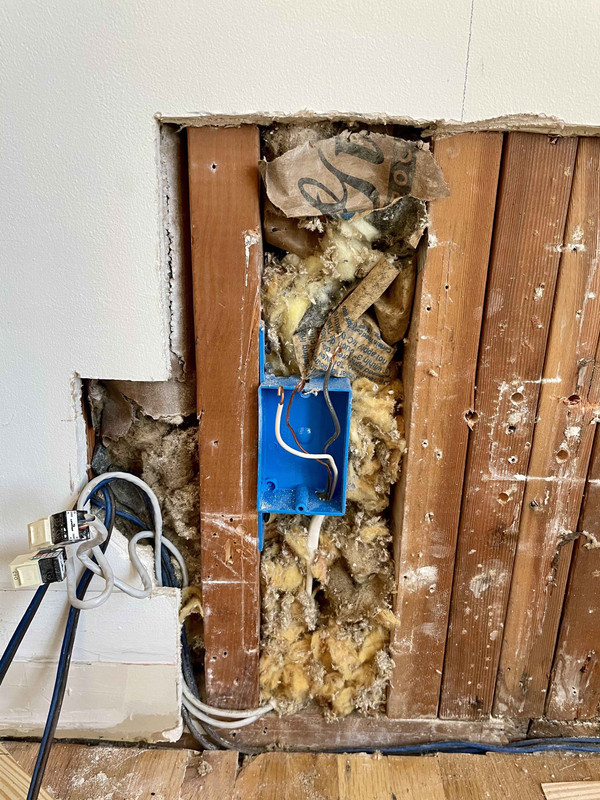
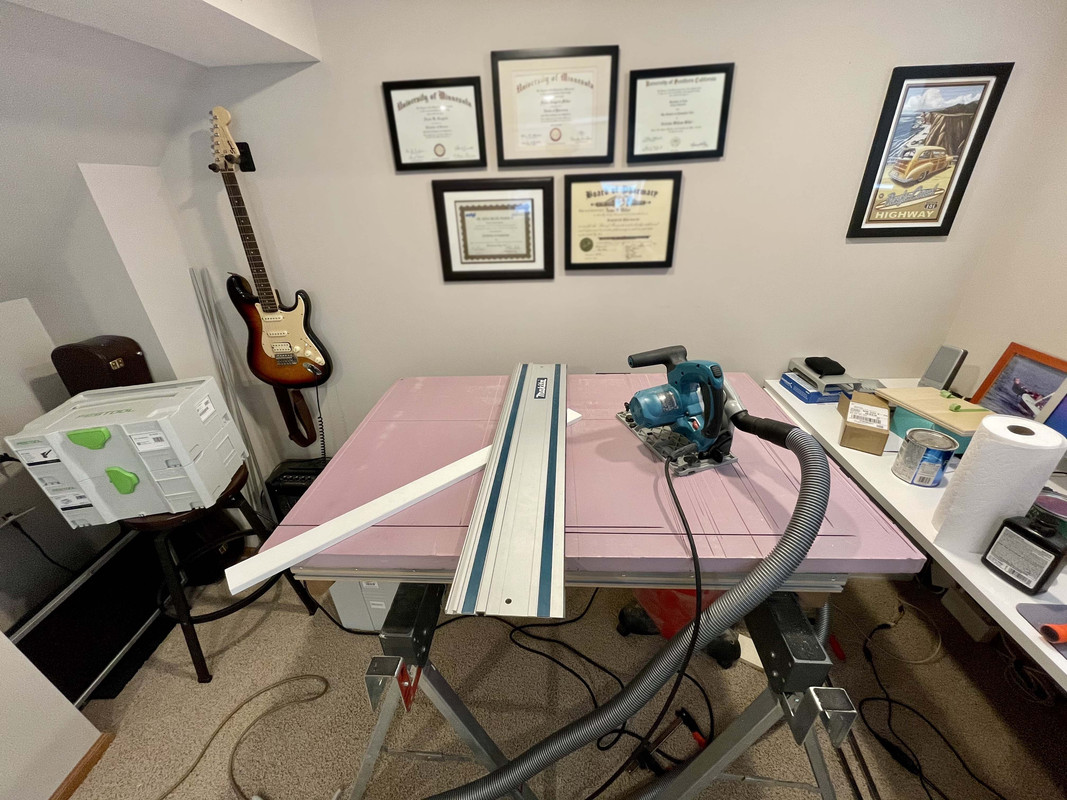
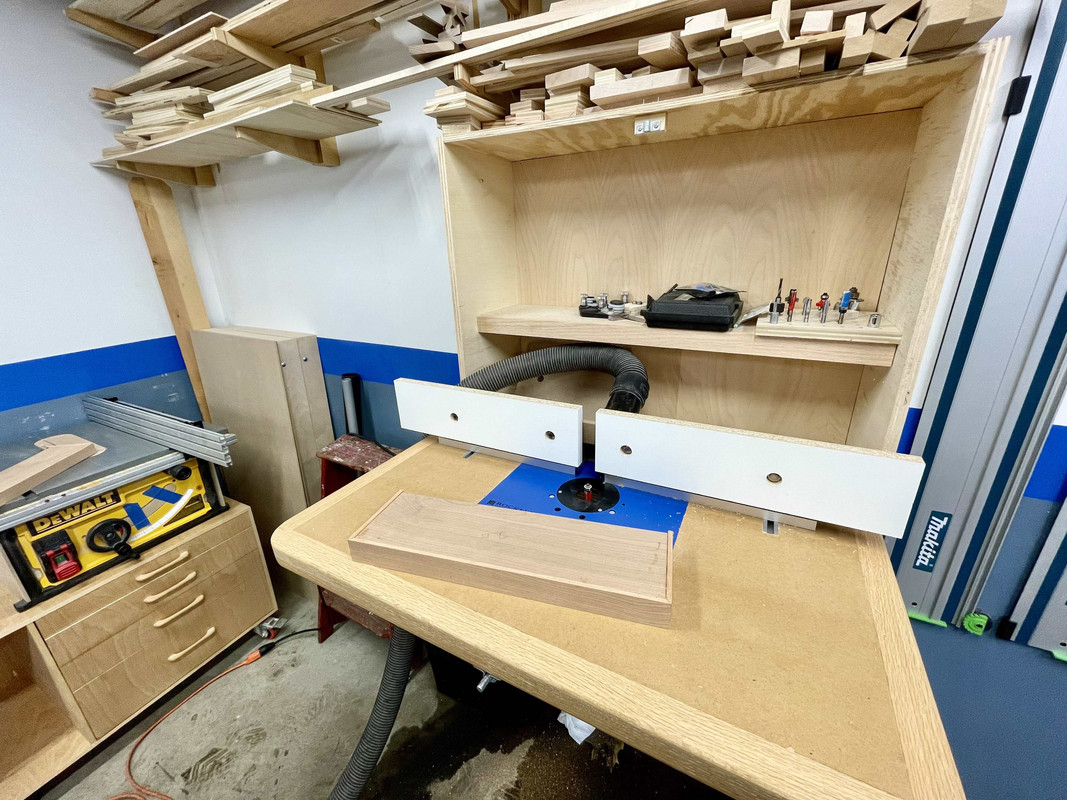
Seeing you route those long dados with just an edge guide made me break out in a cold sweat. If there is one thing I believe it is that, "The best substitute for skill is constraint." The Makita router guides for their rails are inexpensive, likely easy to get working with that decidedly un-green router you are using, and make it so that you will never drift off a straight path. Routers are wandering creatures by nature, with a ferocious bite and should always be locked down as much as possible. They are the one tool I regularly use that can just instantly destroy hours of work and threaten life and limb while doing so.
Also, a small Japanese style flush cutting saw would have been handy trimming back that beautiful patch job you did. The teeth have no outside set to them, so they can cut flush with little to no marking on the surface. The blades are extremely thin and flexible, cut on the back stroke, and they should be fairly cheap. Put one on your shopping list, it will come in handy.
Lastly, the TSO rail connectors look quality, but my experience with making tooling for these rails tells me the concept seems better in theory than practice. Concentrating all that load on the corner radius of the weakest parts of the rail seems less than ideal. The Makita ones are cheap, but use a split design that prevents them from making dimples in the rail from the set screws, something the Festool design (unsuccessfully) tries to workaround by crippling their fasteners with flathead screws. The Makita uses tiny hex head set screws though, and I can't help but believe that there is a better solution to be found. Another thing to put on my list...

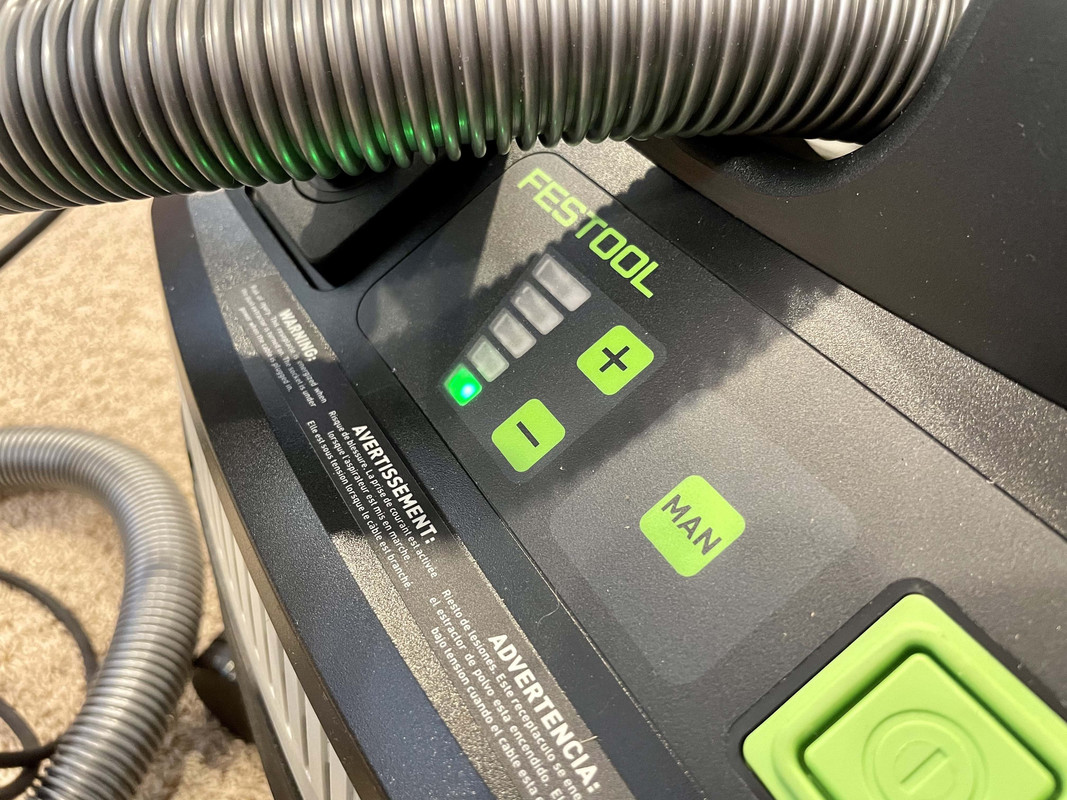
How do you like the CT15?
I haven’t seen one in person yet, but the price is appealing. If the hose fits in a pack out and some pack out feet could screw on the vacuum itself to roll around some more tools, it would be REALLY appealing.
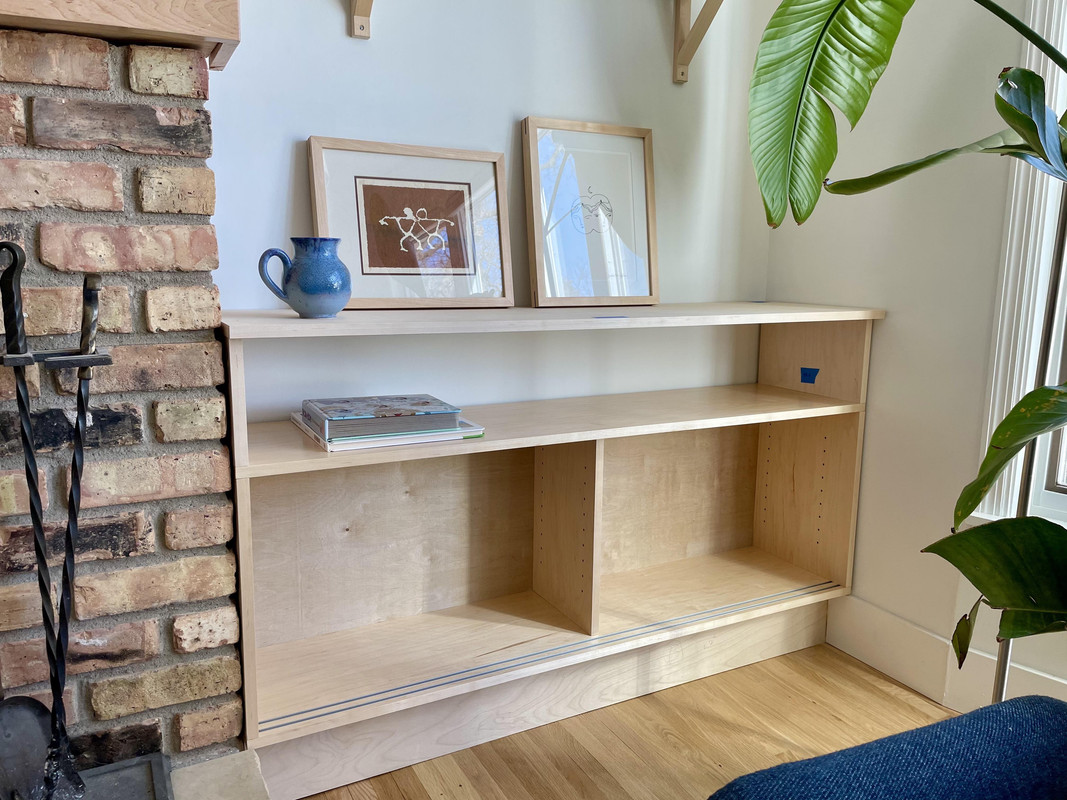
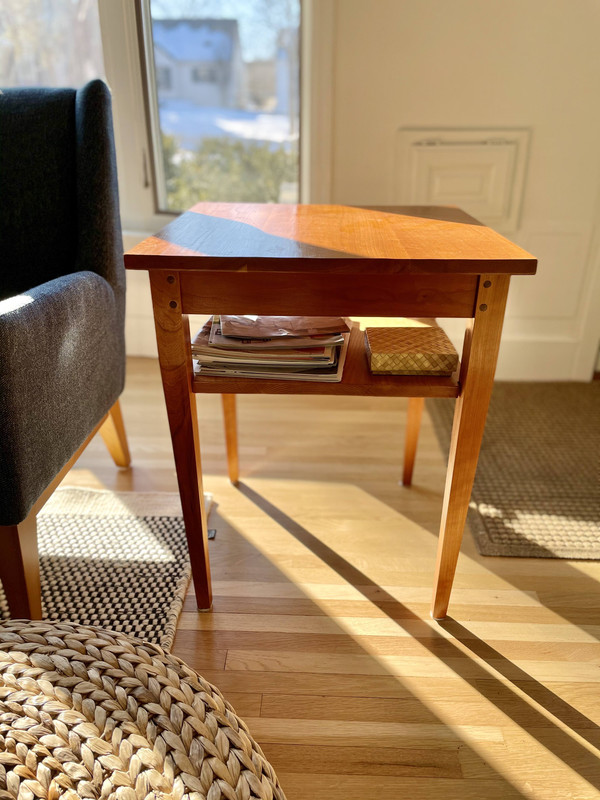
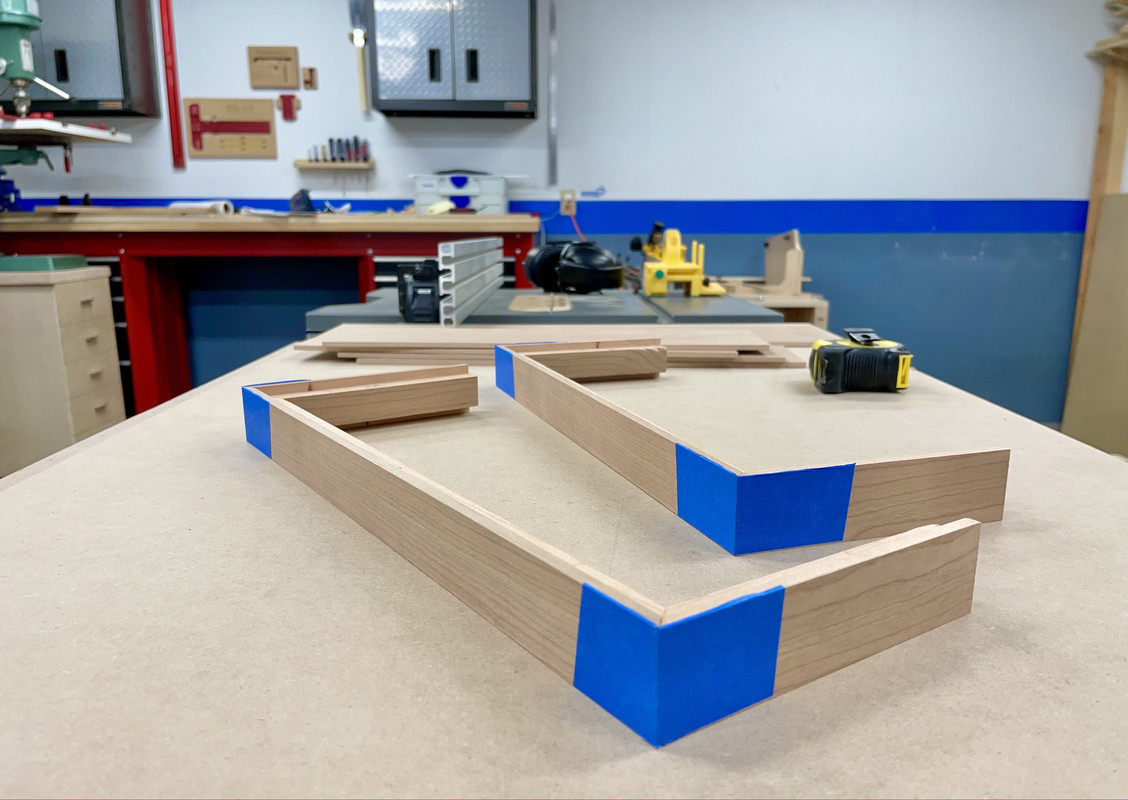
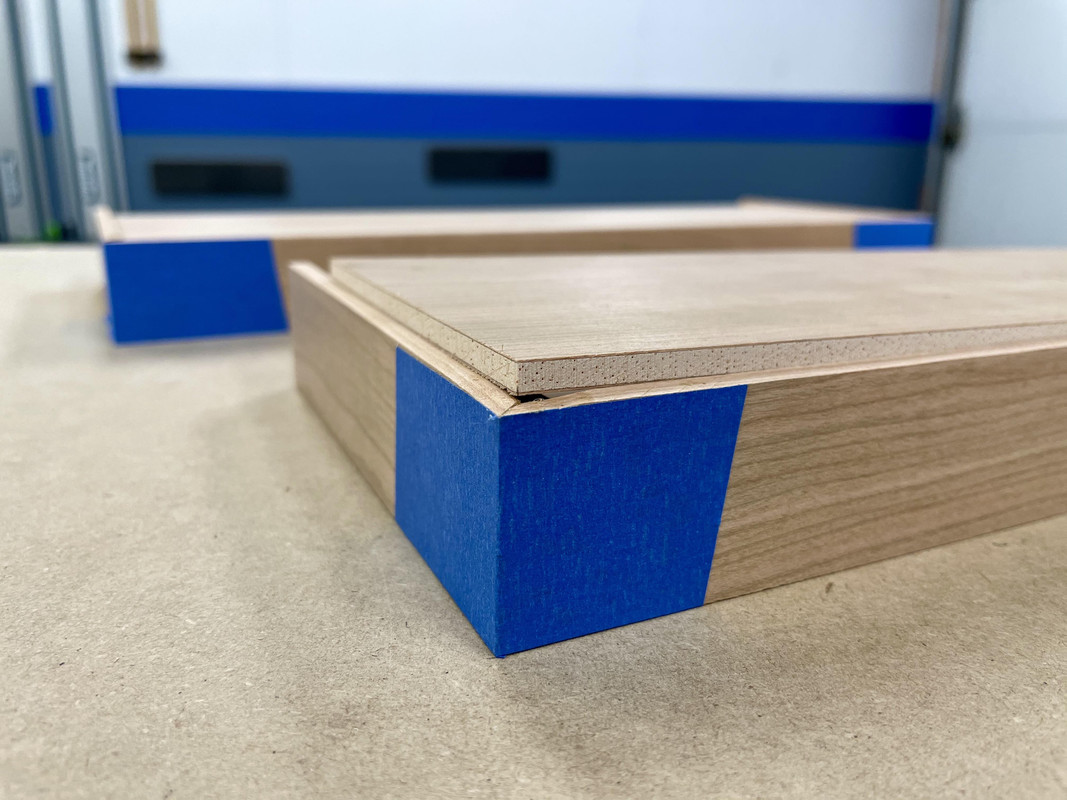
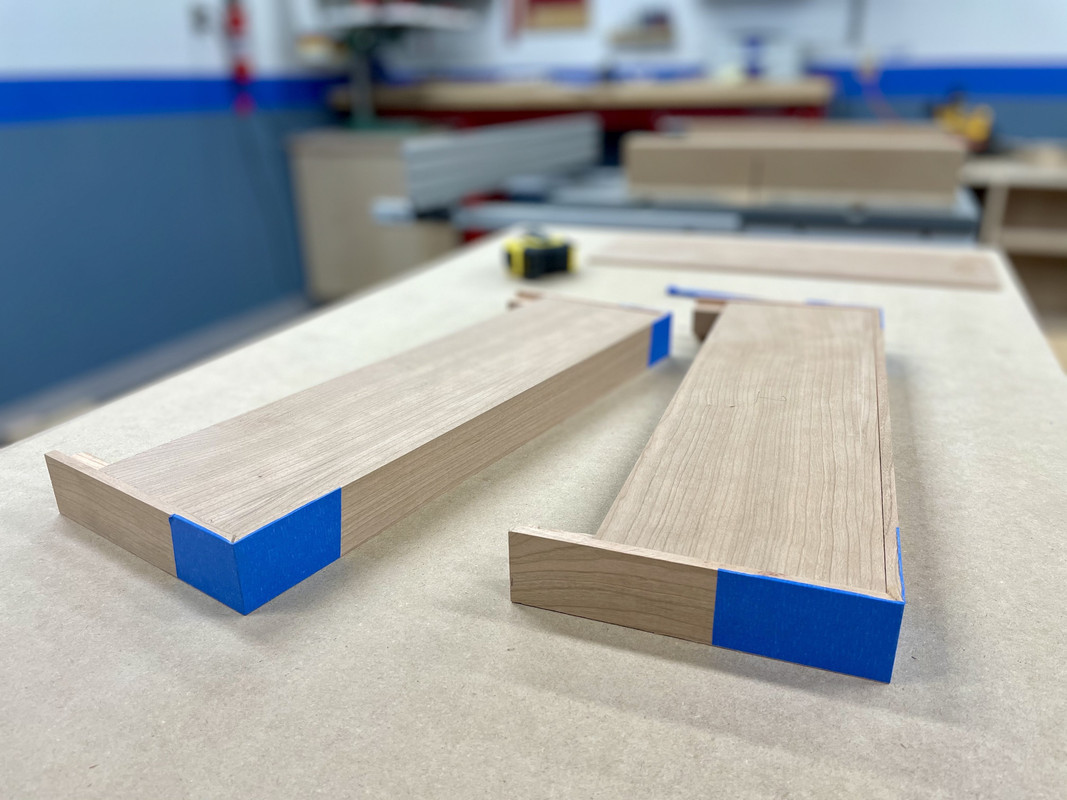
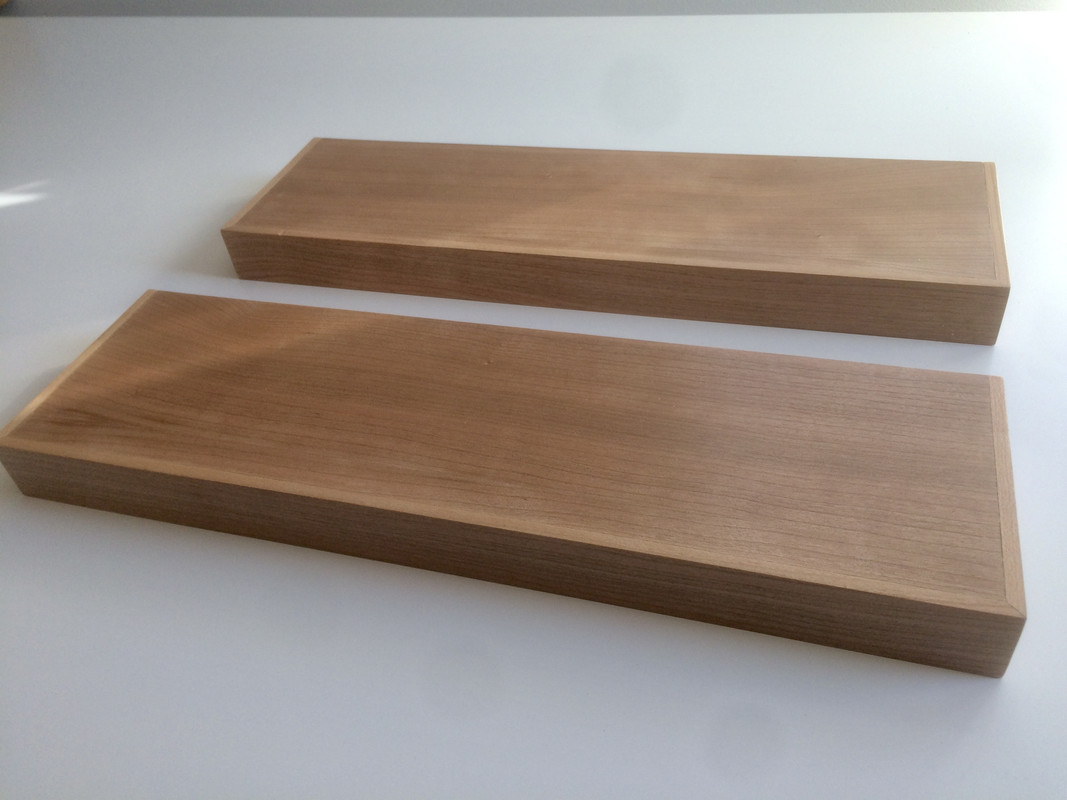
The shelves turned out very nice! A lot of tips can be found reading your thread, thanks!