To avoid these ads, REGISTER NOW!

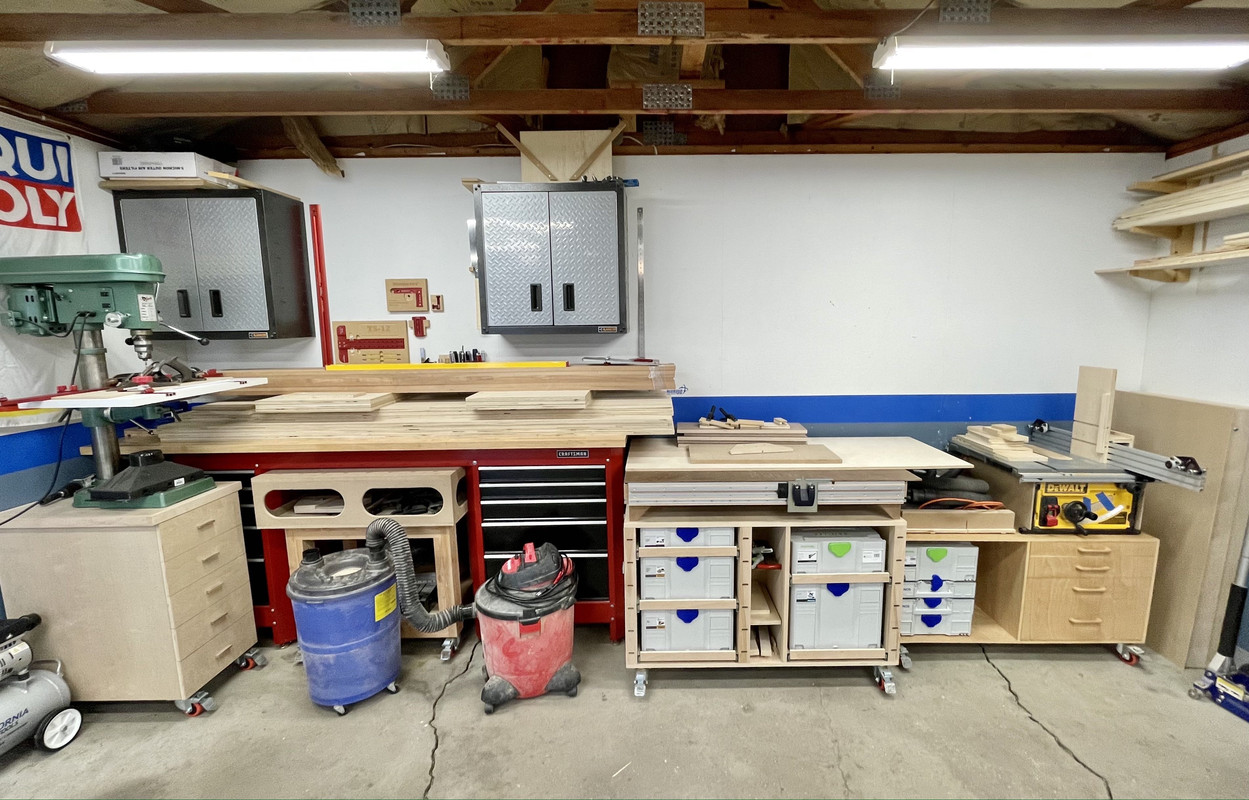
Between 265 & 485 SQ/FT Nick's Two-Car Detached Vdub Garage

Workspaces sized between 265 and 485 squarefeet.

topcok88

Well-known member
Joined
Jun 3, 2013
Messages
660
Thanks, that's a good tip. Too late for this project I think and I only bought the Satin as I tend to prefer more natural/matte looking finishes. I still think it's going to come out great. Next time...

One downside is the 24 hr dry time between coats (in ideal conditions). Which in my 50° F garage probably isn't. I'm used to being able to reapply in 2-4 hours haha. Do you wait that long when using it?


My conditions are climate controlled in my basement at 68 degrees with proper ventilation. As far as application process this is what I do.
Prep sand surface to 220-320 depending on base material.
ARS Gloss applied using a dauber or a sponge brush.
Wait 24 hours. Light sand using my ETS150/3 with 220. Vacuum surface with brush attachment to agitate the surface and use a tack cloth or damp mineral spirits rag for final wipe down. Apply coat second coat of ARS Gloss.
Wait 24 hours. Light sand using my ETS150/3 with 220. Vacuum surface with brush attachment to agitate the surface and use a tack cloth or damp mineral spirits rag for final wipe down. Apply coat of final coat of ARS Satin. During application stir the ARS Satin frequently to ensure the de-glossing agents stay in suspension. If you don’t keep the de-glossing agent in suspension the finish can come out splotchy or inconsistent across large surfaces. Obviously the application technique (thickness applied) can heavily influence the rate at which the material cures or dries depending on what material you are applying. Hope this helps.


Sent from my iPhone using Tapatalk
 
To avoid these ads, REGISTER NOW!

Unruh

Well-known member
Joined
Aug 12, 2017
Messages
1,431
Location
Silverdale, Washington
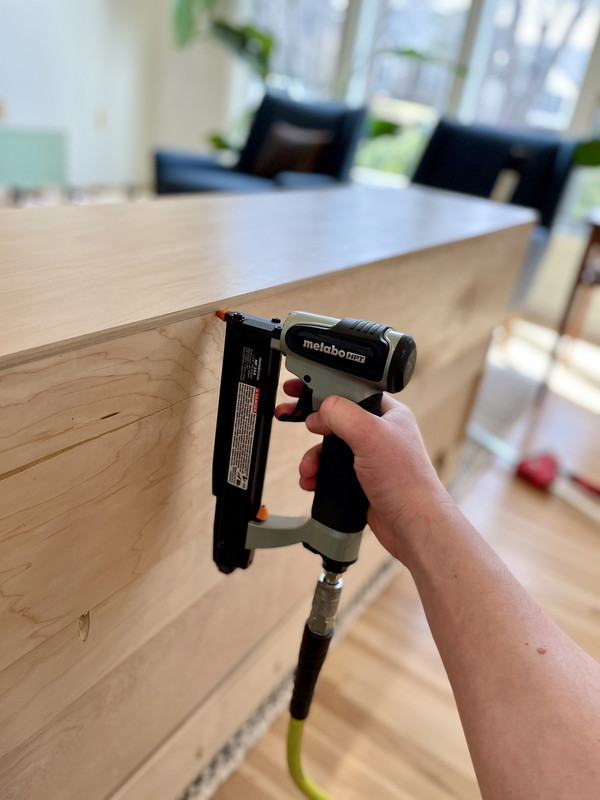
IMG-1940.jpg

How is that finish/pin nailer. I’ve been looking for one lately. I really wanted to go cordless. I’m currently using Makita 18V system and am really happy with it. However, the finish/pin nailer has terrible reviews.
 
OP
N

nicholam77

Well-known member
Joined
Dec 18, 2016
Messages
2,671
Location
Minneapolis, MN
My conditions are climate controlled in my basement at 68 degrees with proper ventilation. As far as application process this is what I do.
Prep sand surface to 220-320 depending on base material.
ARS Gloss applied using a dauber or a sponge brush.
Wait 24 hours. Light sand using my ETS150/3 with 220. Vacuum surface with brush attachment to agitate the surface and use a tack cloth or damp mineral spirits rag for final wipe down. Apply coat second coat of ARS Gloss.
Wait 24 hours. Light sand using my ETS150/3 with 220. Vacuum surface with brush attachment to agitate the surface and use a tack cloth or damp mineral spirits rag for final wipe down. Apply coat of final coat of ARS Satin. During application stir the ARS Satin frequently to ensure the de-glossing agents stay in suspension. If you don’t keep the de-glossing agent in suspension the finish can come out splotchy or inconsistent across large surfaces. Obviously the application technique (thickness applied) can heavily influence the rate at which the material cures or dries depending on what material you are applying. Hope this helps.

Yes, that is helpful. On my last coat I tried to be a better stirrer. I know it's a thing, but I can't wrap my head around power sanding a finish. I assume it's on lowest speed? I've only ever hand sanded w/320 between coats, on any finish. First coat I did heavier to let it absorb more, 2nd and 3rd coats I've kept pretty light. I will definitely try the gloss then satin approach on the next one, I do agree it looks a bit flat. But still nice. Thanks for your advice.

How is that finish/pin nailer. I’ve been looking for one lately. I really wanted to go cordless. I’m currently using Makita 18V system and am really happy with it. However, the finish/pin nailer has terrible reviews.

I like it! I'm usually anti-battery when it comes to tools (aside from drill/drivers). I like having the freedom of picking the best tool and not being locked into a battery platform, or worse, having multiple platforms and chargers. I also don't like the need to buy new batteries once they no longer hold a charge, the limited work time, the need to remember to charge, and the storage requirements. And corded tools are often cheaper, especially if you're not on the battery platform.

However, one thing I'd really love is a battery nailer! While the Metabo HPT works great, it is a PITA to drag the compressor and hose in the house just for a few pops.

The Metabo HPT is reliable though. Consistent drives, shoots fairly long pins (up to 2" I believe?), and best part is it was affordable. I want to say I paid around $70 for it. Not bad when some pin nailers are in the $200 range. So if you don't mind the air compressor situation, I can definitely recommend it.

If you haven't had one before, I've found a pinner to be a game changer. So much tinier hole, much quieter, light weight and easy to handle. I love it.

Milwaukee has a new 12V pin nailer that looks pretty awesome, but $$$.
 

Bakafish

Well-known member
Joined
Feb 7, 2017
Messages
477
Location
Tokyo
I have a Makita PT351DZK pin nailer, not sure if it is offered stateside. I think it is older tech than the current line. It does what it is supposed to do for the most part, although I occasionally need to use a nail set on the longest nails. It may be my fault, with proper pressure it always seems to hit flush. Downsides are the bulk and weight compared to air tools, but unless you always have air available the idea of dragging out a compressor and hose is a lot of friction. I've found that even stupid things like having to take a tool out of a box has a disproportionate effect on my willingness to use it, so that should be factored in if you suffer from similar apathy. I lust after a set of air tools, but the memories of noise and being tethered to stiff hoses, along with lubrication and air-moisture worries all put it low on my list.

As far as "batteries" being an issue, I'm still regularly using 10 year old 3AH 18V Makita batteries along with a few newer vintage 5-6AH units. I seriously doubt they have anywhere near the capacity they started with, but they work all day for my light use tools, and it saves having to swap batteries. I really worried about going cordless when I first bought into the system, having had a long and poor experience with the preceding rechargeable technologies (I was into videography) starting with Lead Acid, to Nickel Cadmium and Metal Hydride. Modern Lithium Ion high quality batteries work great, I've come to embrace them without reservation. It's really hard to use batteries quicker than you can charge them, and just buying more if that becomes an issue is a really easy solution.
 

bepjrfan

Well-known member
Joined
Aug 14, 2015
Messages
170
Location
North Dakota
I have a Makita PT351DZK pin nailer, not sure if it is offered stateside. I think it is older tech than the current line. It does what it is supposed to do for the most part, although I occasionally need to use a nail set on the longest nails. It may be my fault, with proper pressure it always seems to hit flush. Downsides are the bulk and weight compared to air tools, but unless you always have air available the idea of dragging out a compressor and hose is a lot of friction. I've found that even stupid things like having to take a tool out of a box has a disproportionate effect on my willingness to use it, so that should be factored in if you suffer from similar apathy. I lust after a set of air tools, but the memories of noise and being tethered to stiff hoses, along with lubrication and air-moisture worries all put it low on my list.

As far as "batteries" being an issue, I'm still regularly using 10 year old 3AH 18V Makita batteries along with a few newer vintage 5-6AH units. I seriously doubt they have anywhere near the capacity they started with, but they work all day for my light use tools, and it saves having to swap batteries. I really worried about going cordless when I first bought into the system, having had a long and poor experience with the preceding rechargeable technologies (I was into videography) starting with Lead Acid, to Nickel Cadmium and Metal Hydride. Modern Lithium Ion high quality batteries work great, I've come to embrace them without reservation. It's really hard to use batteries quicker than you can charge them, and just buying more if that becomes an issue is a really easy solution.

I am in the same mindset as you on this. Used air for the longest time because of the battery worry. However, got a milwaukee 18 gauge nailer here about 4 months ago and it has been a gamechanger as far as productivity. Don't have lug around a compressor or wait for it to fill anymore. Have about 1000 nails through it and it has been flawless. These nailers are super efficient on batteries as well. A 2.0 battery lasts a week with consistent use.

Technology has exponentially improved in the last 10 years on battery operated tools. I wouldn't be concerned with the battery issues any longer.
 

tab2

Well-known member
Joined
Apr 9, 2009
Messages
381
Location
Boston
If you like Hiatachi/Metabo nailers check out Big Sky Tool. They have refurbished tools on their website that are like new. That's where I have bought all of my Hitachi guns, including that pin nailer that I really like as well. I haven't seen a difference between the Grade A & C tools; they all look brand new.

They have a compressor so small (Hiatchi EC28M) that it fits in a Sys-3 with some slight modification. It is super quiet and a coil hose fits in there too so it doesn't bother me "having to drag out a compressor."

I can't justify the price yet for cordless nailers when there is nothing wrong with my pneumatic ones. Bummer.
 
OP
N

nicholam77

Well-known member
Joined
Dec 18, 2016
Messages
2,671
Location
Minneapolis, MN
Modern Lithium Ion high quality batteries work great, I've come to embrace them without reservation. It's really hard to use batteries quicker than you can charge them, and just buying more if that becomes an issue is a really easy solution.

I am always pleasantly surprised by how long my little 12v drills last on a charge. So I totally take your point on lithium ion. I still think battery tools are generally more expensive, and I don't love the idea of multiple charging platforms or being locked into a single tool brand. Lithium Ion may be dang good but I still feel weird about storing them in 0° F conditions which my garage gets in the winter. I find myself taking batteries inside. Might just be paranoia but I think I just need to train myself to embrace them!

However, got a milwaukee 18 gauge nailer here about 4 months ago and it has been a gamechanger as far as productivity. Don't have lug around a compressor or wait for it to fill anymore. Have about 1000 nails through it and it has been flawless. These nailers are super efficient on batteries as well. A 2.0 battery lasts a week with consistent use.

Sounds amazing. The compressor is a nuisance. I wish they weren't so pricey!

If you like Hiatachi/Metabo nailers check out Big Sky Tool. They have refurbished tools on their website that are like new. That's where I have bought all of my Hitachi guns, including that pin nailer that I really like as well. I haven't seen a difference between the Grade A & C tools; they all look brand new.

Cool! My 18-gauge brad gun blew a seal and I took it apart and lost some of the parts so I actually am in the market for a replacement.

They have a compressor so small (Hiatchi EC28M) that it fits in a Sys-3 with some slight modification. It is super quiet and a coil hose fits in there too so it doesn't bother me "having to drag out a compressor."

Don't tempt me!! I do love a good Systainer!
 
OP
N

nicholam77

Well-known member
Joined
Dec 18, 2016
Messages
2,671
Location
Minneapolis, MN
Living Room Built Ins - part 15 - All Done!

Well, not 100% (is a project really ever done??), but I'm calling it for photo / journal purposes.

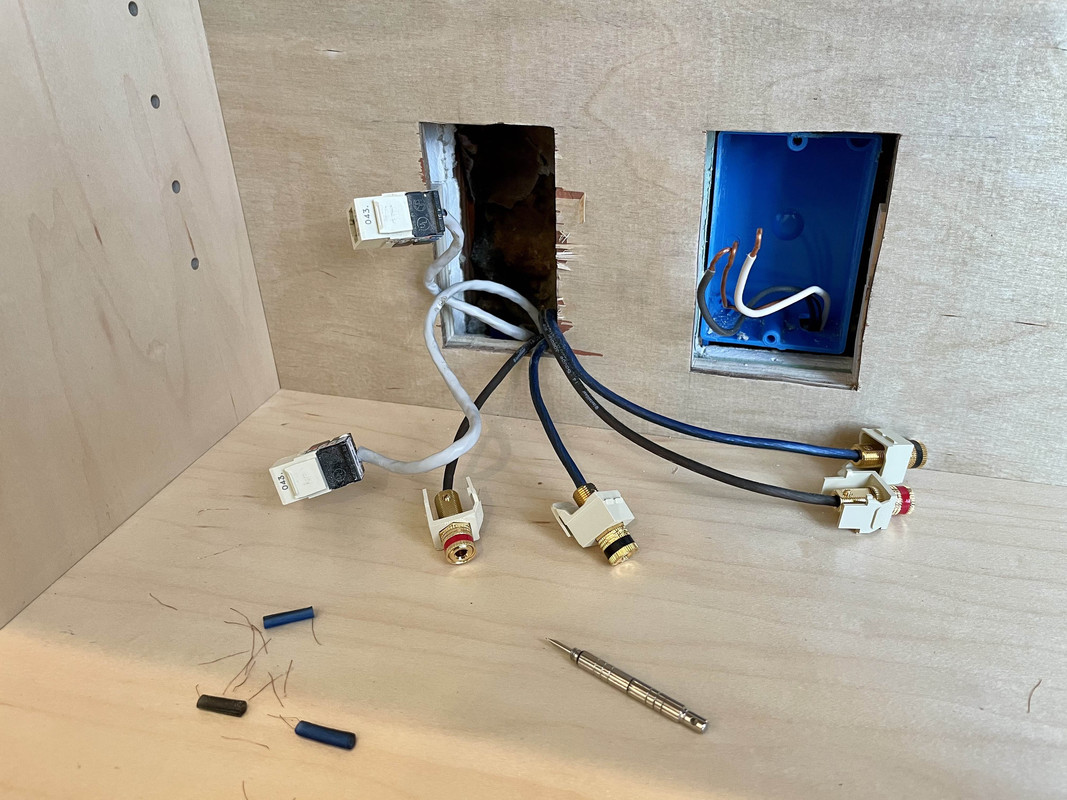
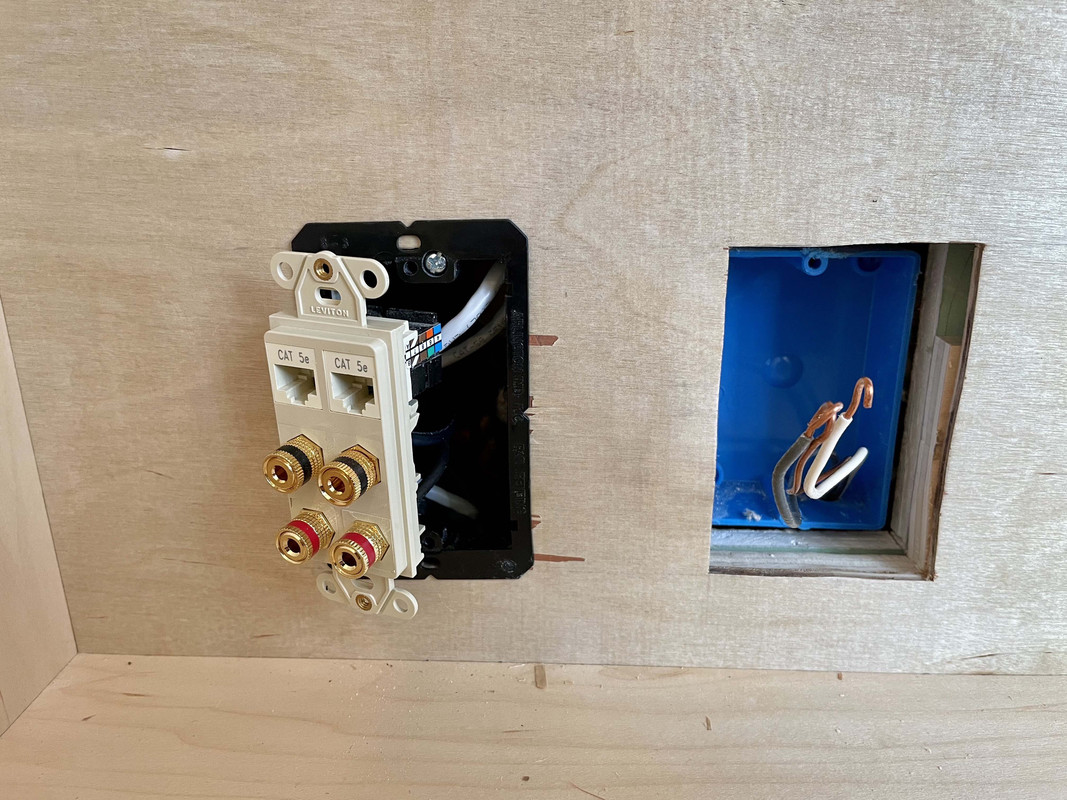
I finished some wiring stuff.

IMG-1952.jpg


IMG-1955.jpg


The Cat5e and speaker terminals are for a mini-amp and Sonos Connect that go to the living room in-wall speakers. Now they will be out of sight and my daughter won't be able to press all the receiver buttons!

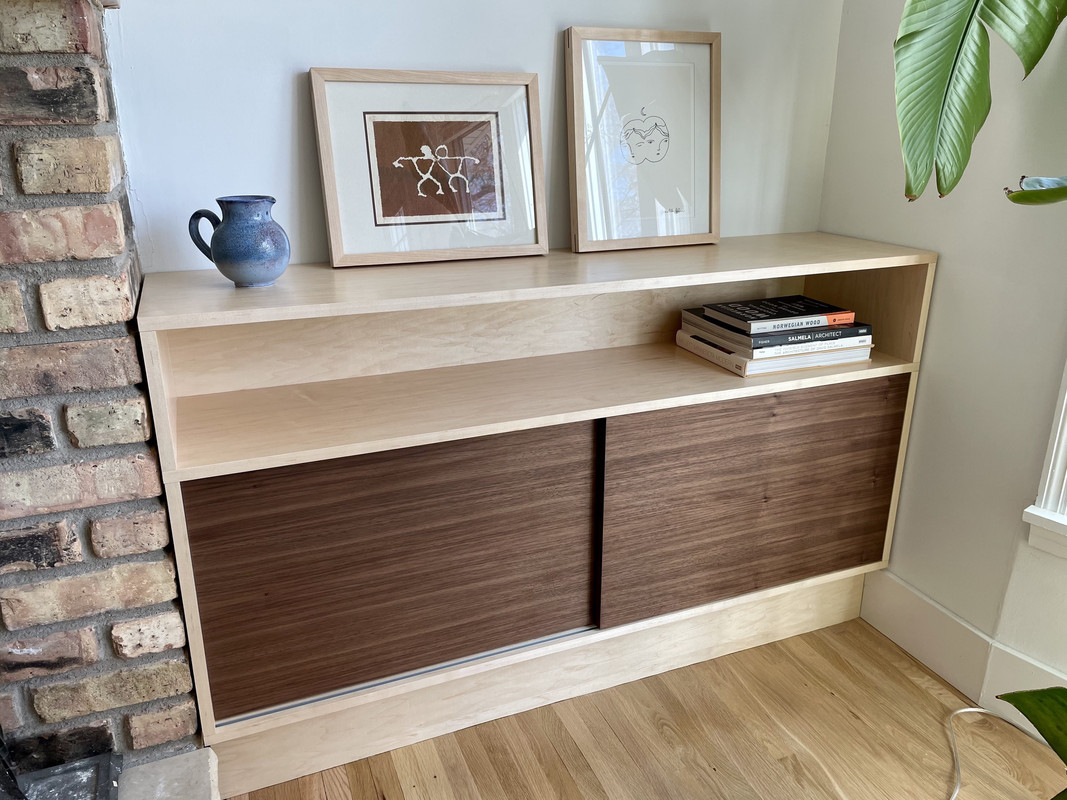
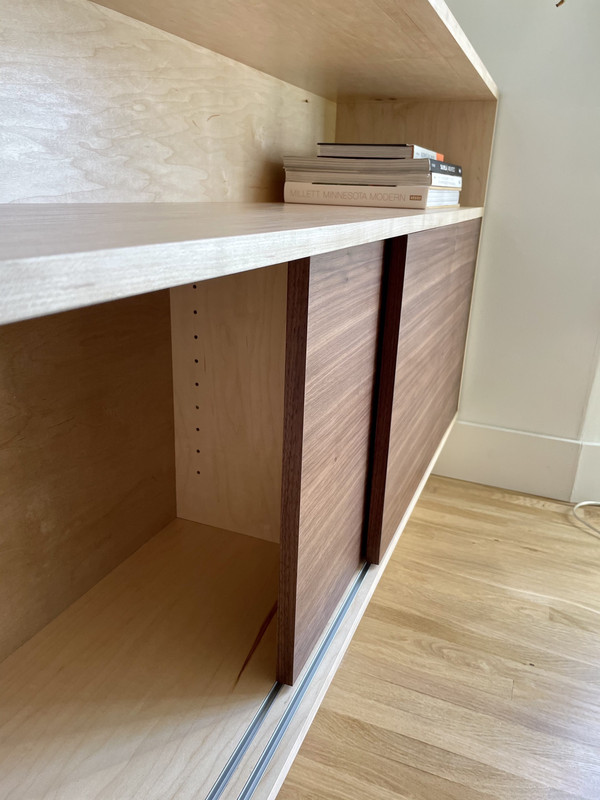
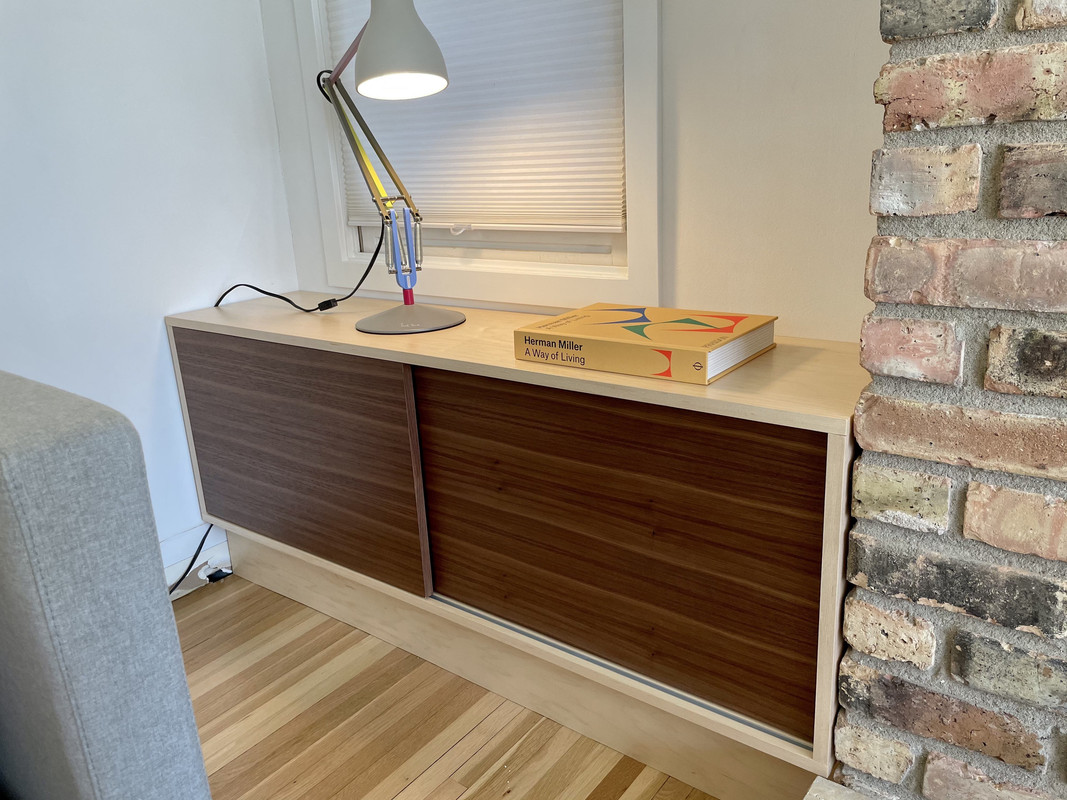
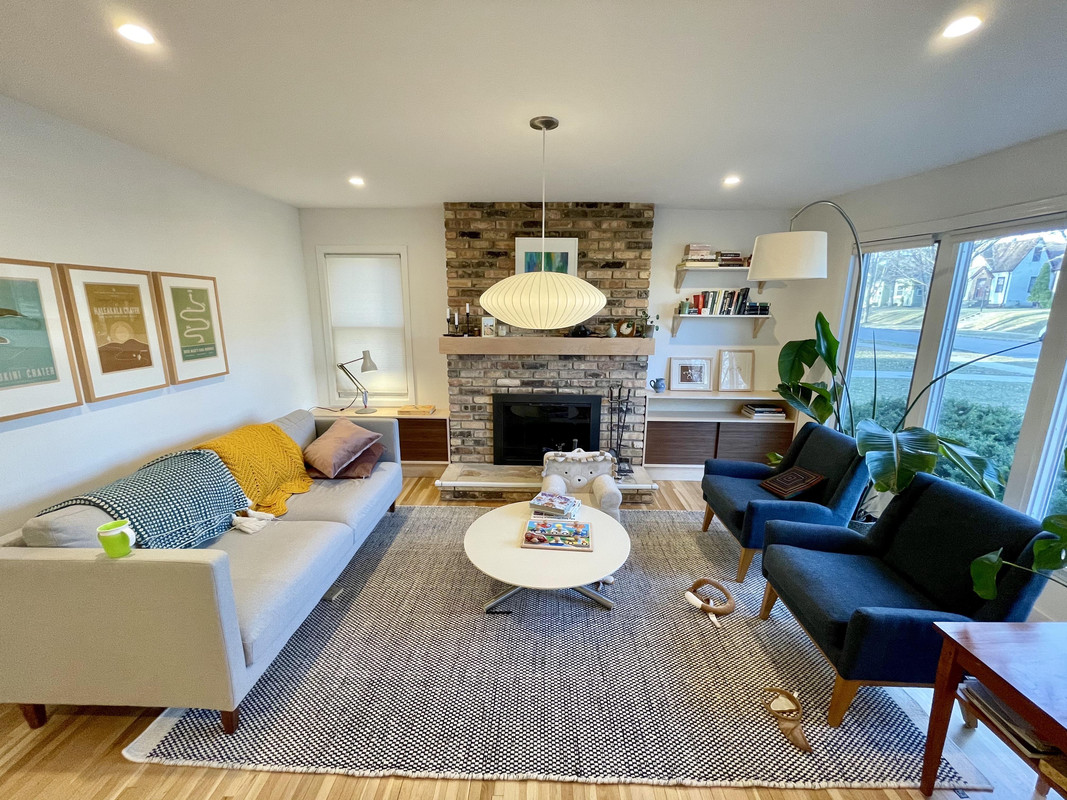
Here's some final installed pics:

IMG-1956.jpg


IMG-1958.jpg


IMG-1960.jpg


IMG-1963.jpg


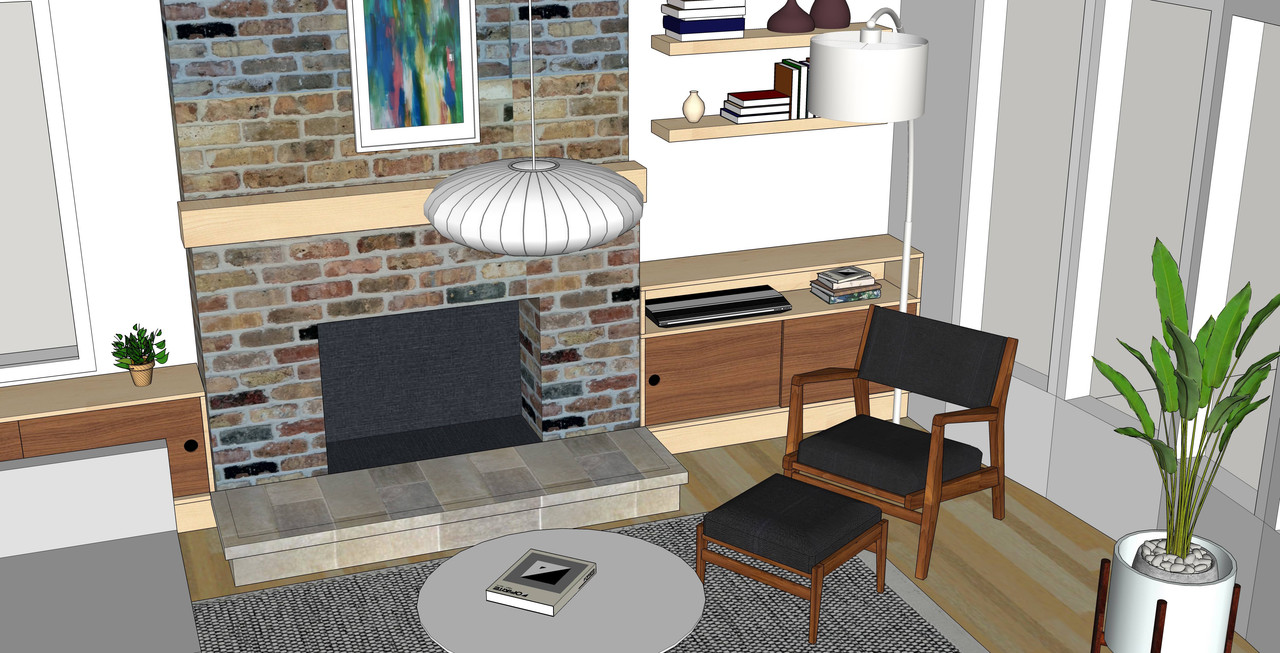
Not a surprise, but they bear striking resemblance to the original Sketchups:

built-in.jpg


Some random thoughts and things I learned on this project:

  • built ins are hard
  • installation challenges (leveling, scribing, fitting parts) took a LOT of time
  • I hugely underestimated the amount of time these would take overall
  • I LOVE the walnut
  • the door tracks and UHMW tabs work very well, and I'm super happy with how that came out

Thanks to everyone who gave advice and suggestions along the way, as well as just commenting and checking in. It really does help keep me motivated!

:beer:
 
OP
N

nicholam77

Well-known member
Joined
Dec 18, 2016
Messages
2,671
Location
Minneapolis, MN
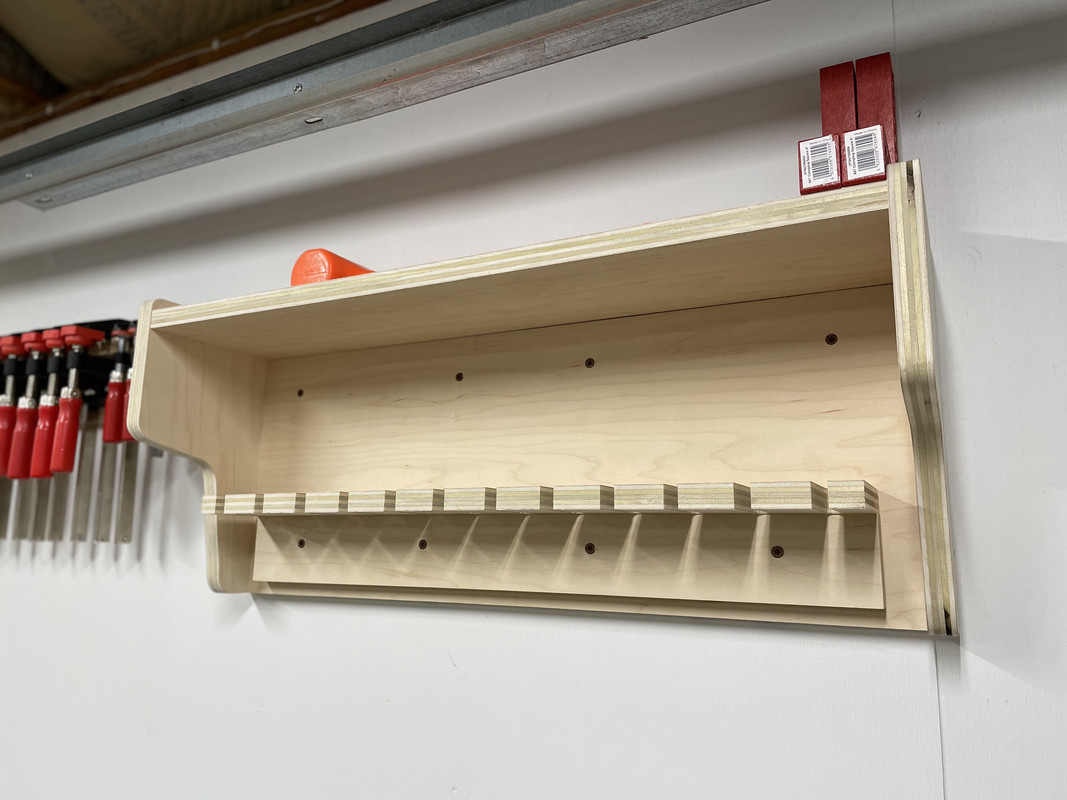
Parallel Clamp Rack

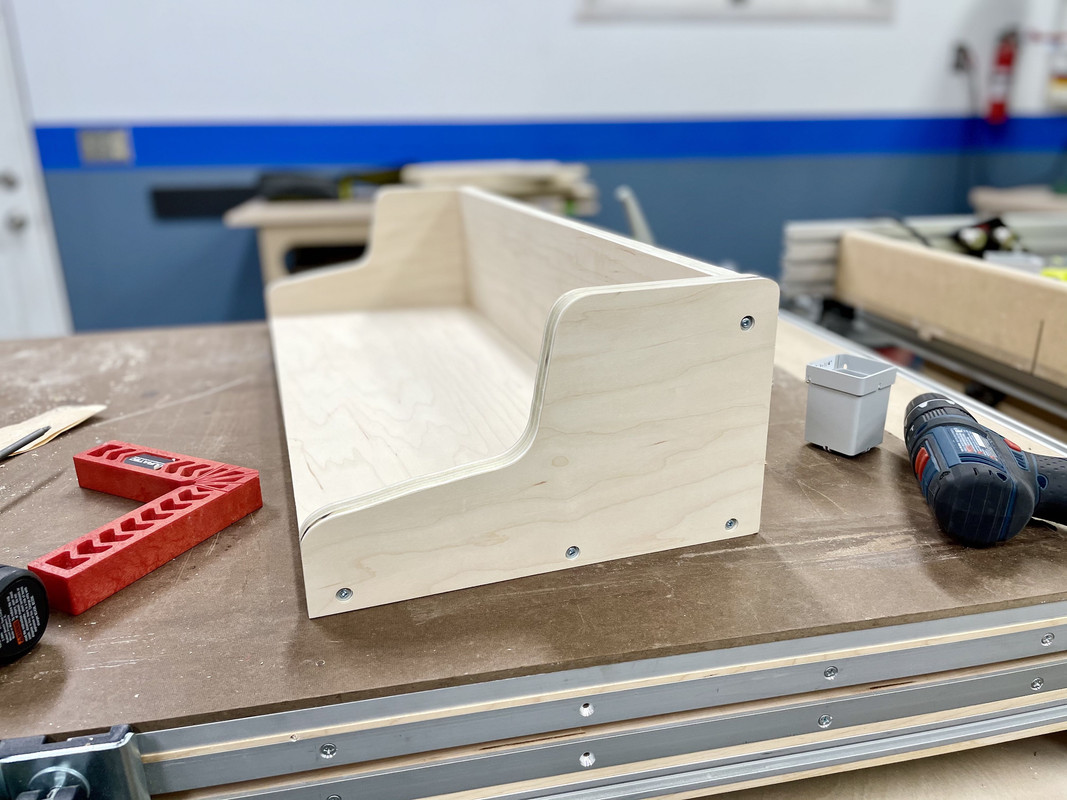
This evening I decided to bang out a quick shop project.

I was at Home Depot last weekend and had a moment of weakness and left with two 24" parallel clamps. They've been on "the list" for awhile, and after making many cabinet carcasses and drawers, especially with pocket holes, I've often found the longer F-clamps lacking. Feeling a little guilty but the deed is done.

So yeah... needed a place to put them. I came very close to getting this steel parallel clamp rack from Rockler for $20. I have a desire to make my own stuff... but am short on time and sometimes I feel like there are fairly good, inexpensive commercial solutions where it doesn't make sense to DIY. But then again, I get a lot of satisfaction from these "shop projects". So to hell with the easy road!

I did save some time by adapting this design from the Wood Whisperer. It was quite helpful because he had dimensions ready to go I could work off of instead of figuring it out as I went along.

Check out Marc's link if you're interested in the details, but I did snap a few pics as I went along:

IMG-2009.jpg


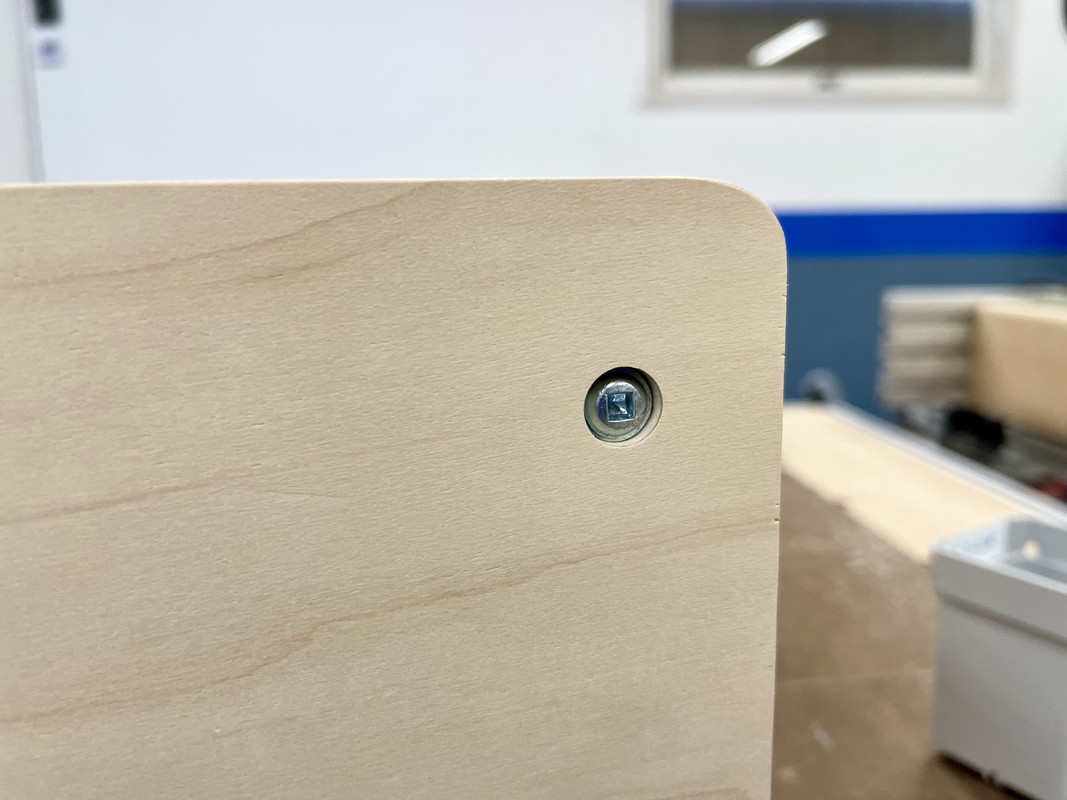
A detail I've found I like as an alternative to countersinking is using the pan head Kreg screws in a 3/8" Forstner recess:

IMG-2010.jpg


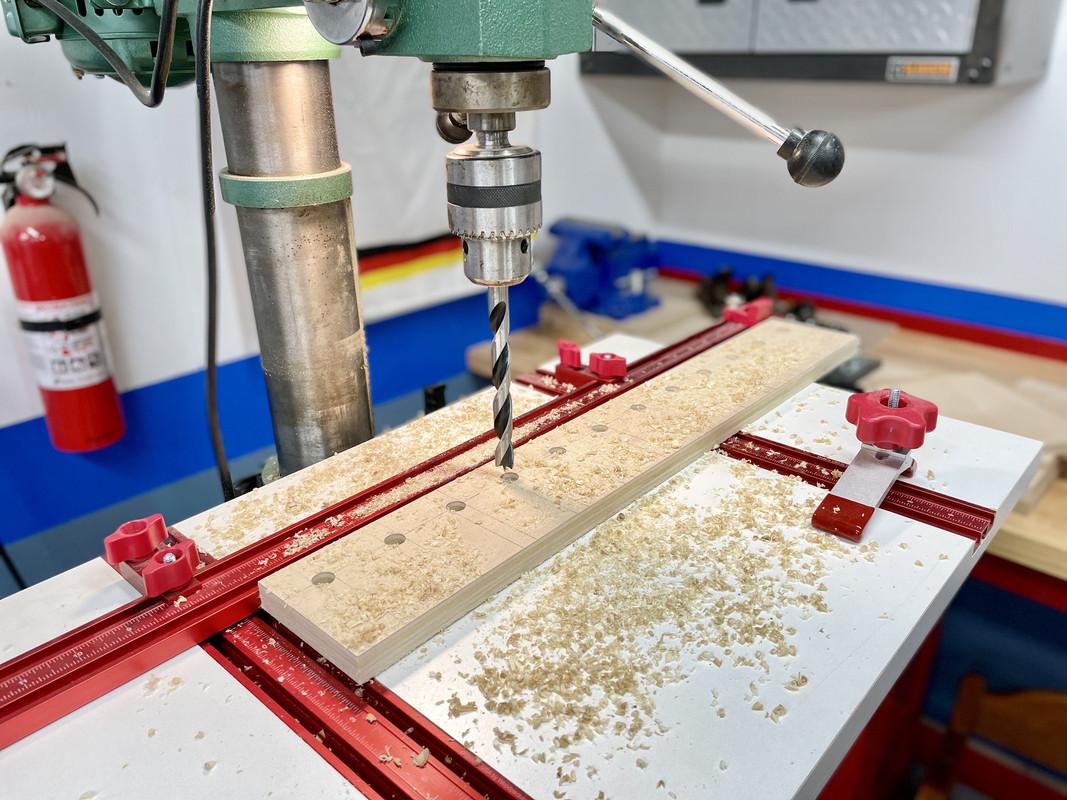
Slots were drill press + jigsaw combo.

IMG-2011.jpg


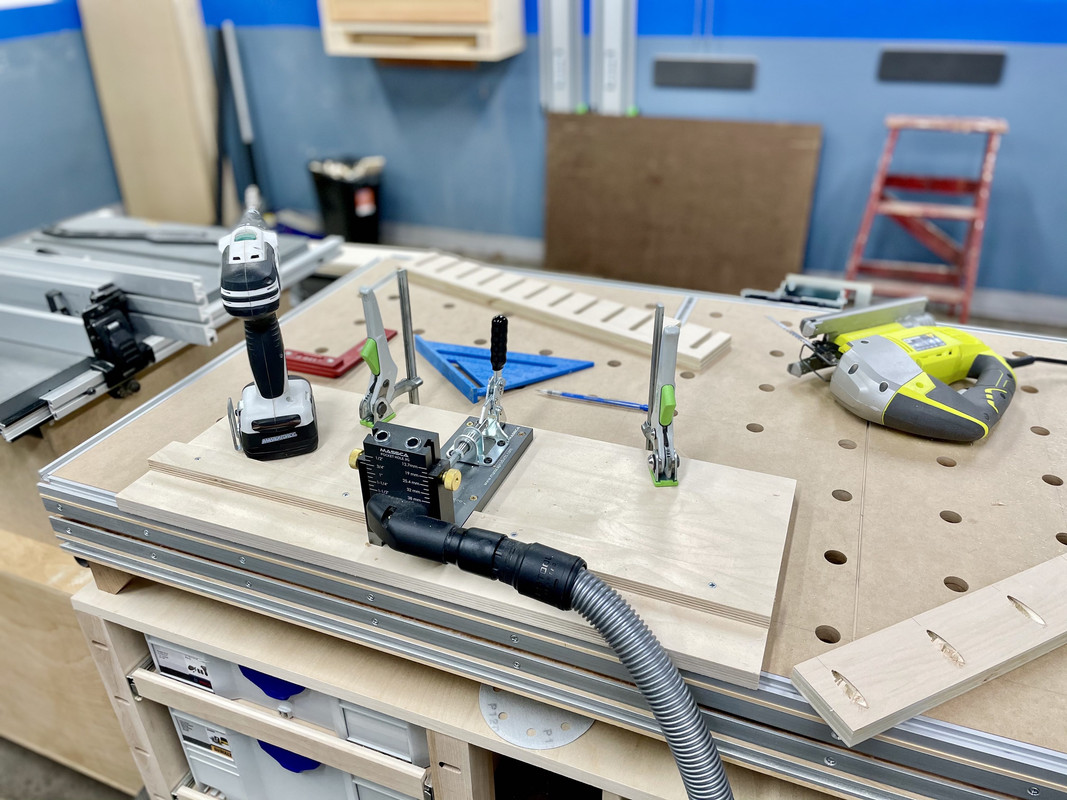
Time will tell the strength but I did use pocket screws and **** joint for the part that actually bears the weight of the clamps. And glue.

IMG-2013.jpg


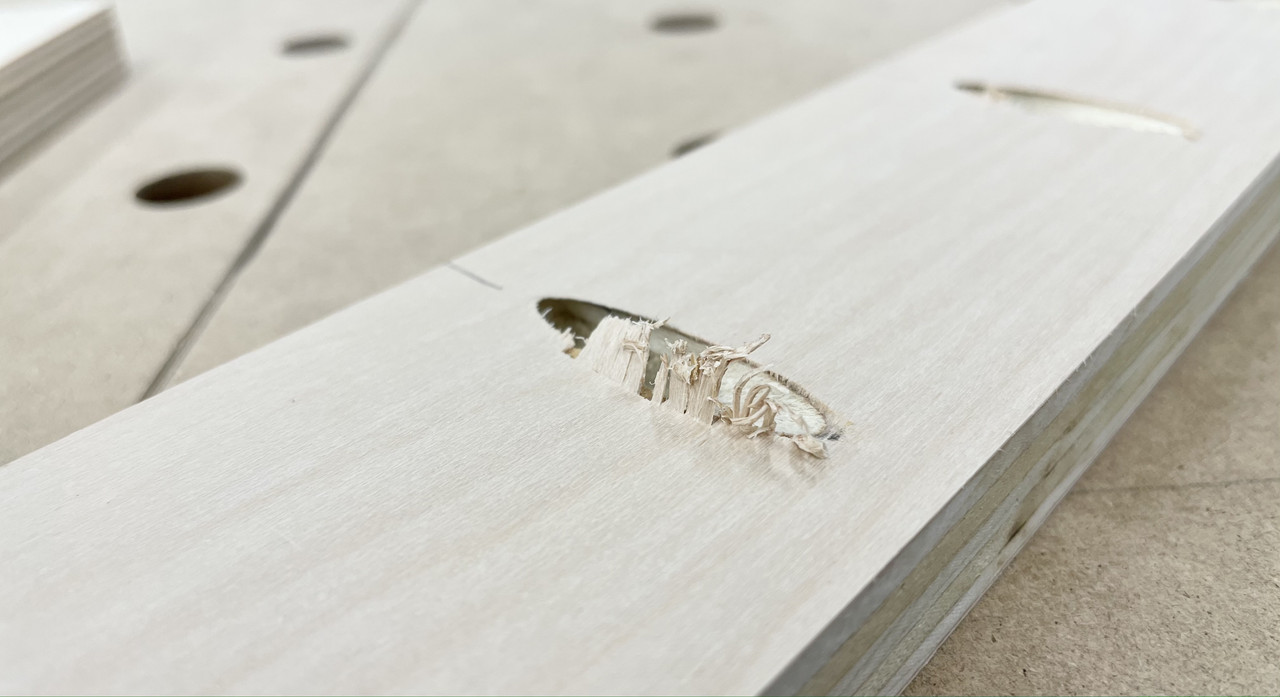
The Massca jig is super efficient but one thing that still bugs me is the "fringe" around the holes:

IMG-2012.jpg


They break off easily, and no biggie for concealed, but if they ever needed to be plugged it wouldn't be the cleanest.

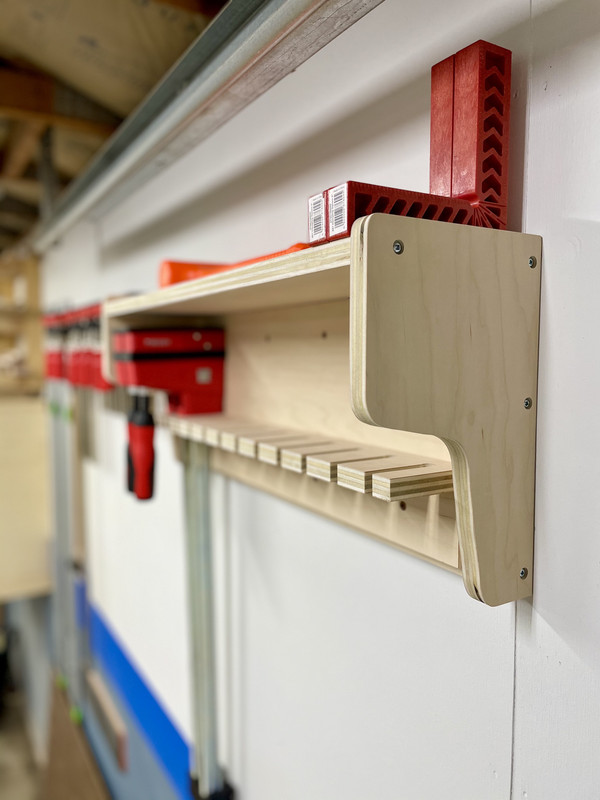
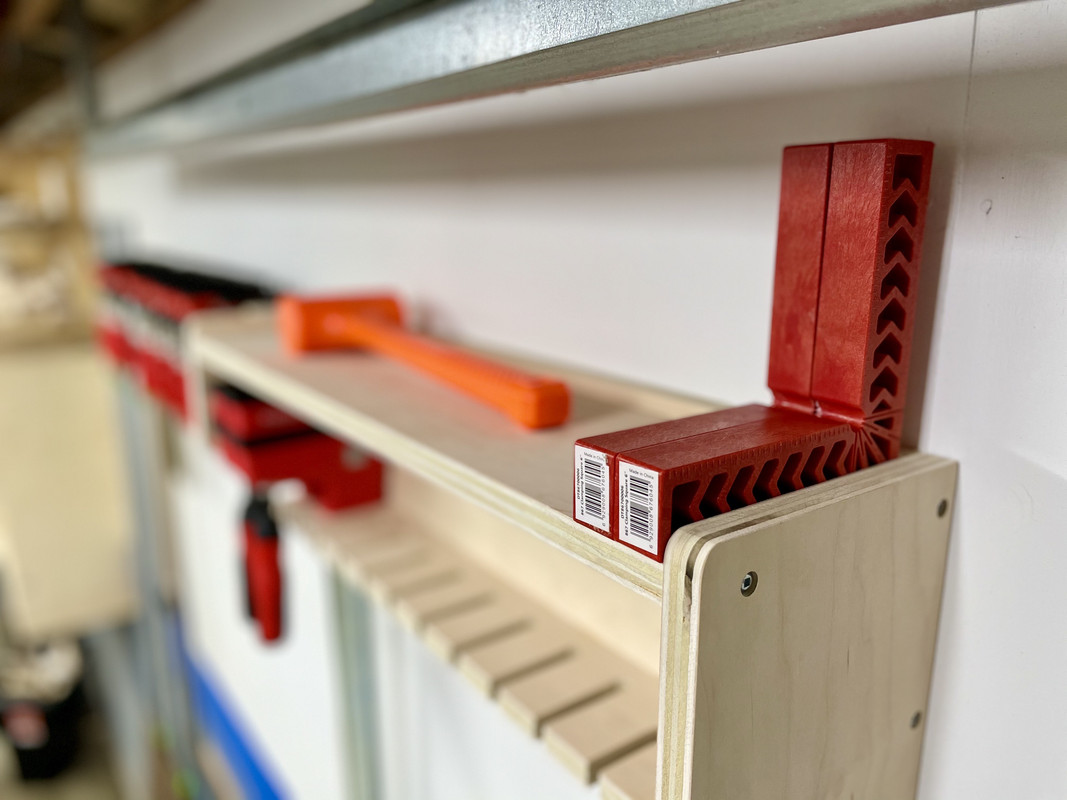
Mounted on the wall:

IMG-2014.jpg


IMG-2015.jpg


Top has a nice little shelf I'm planning to store some commonly used assembly goodies like 90° positioning squares, glue, dead-blow mallet, etc.

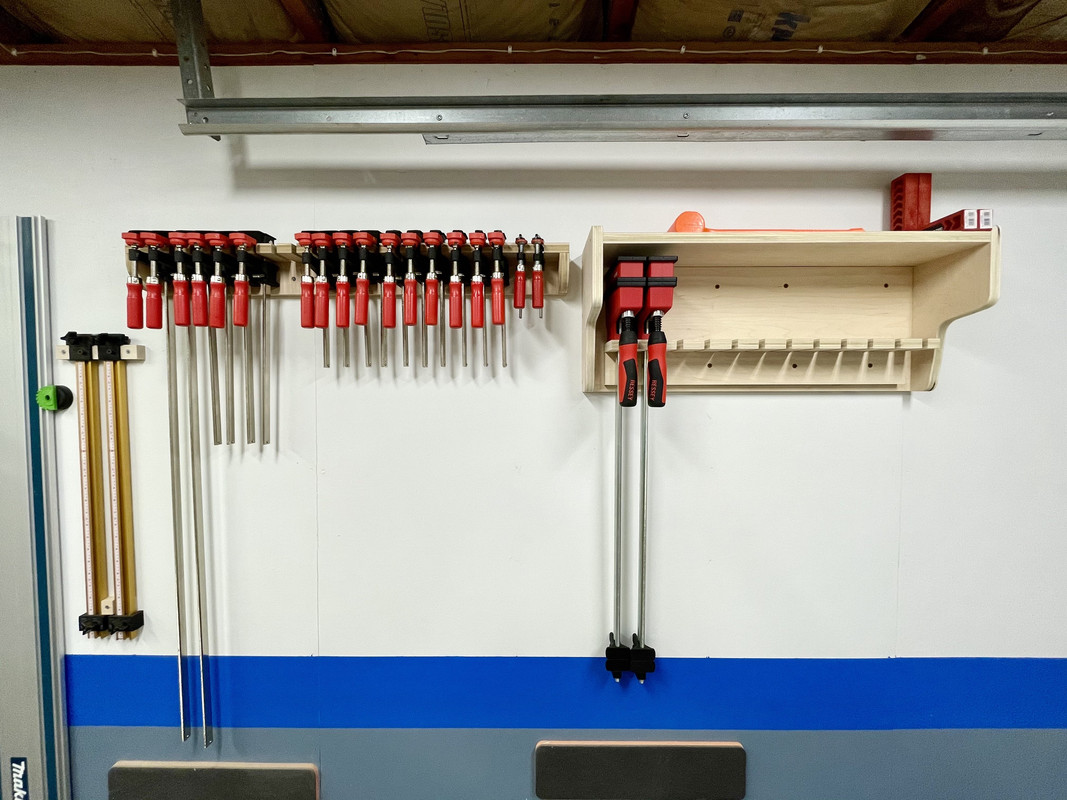
IMG-2016.jpg


IMG-2017.jpg


I only made 12 slots, but lets be honest 12 clamps is enough to break the bank. I'm hoping I can maybe find some used ones along the way to fill it out in time. First I need to see if I end up using them like I think I will.

:beer:
 

bj383ss

Well-known member
Joined
Sep 29, 2011
Messages
3,166
Location
TX
Nick the built ins came out fantastic. I love the Walnut too. It seems everything DIY takes longer than we think.

The living room looks very put together and planned. Looking forward to your next project.

I have never pulled the trigger on those cabinet clamps as I feel I would never use them that much. But then again I don't own any to use so who knows.

Bret
 

Unruh

Well-known member
Joined
Aug 12, 2017
Messages
1,431
Location
Silverdale, Washington
The built ins look amazing. Walnut my be my favorite wood to wood with and as a bonus it smells great while working with it.

Your clamp rack looks almost too good for a garage! I always make extra slots or storage on things like that. Then my OCD kicks in and I have to fill them up!! Great Work!
 
OP
N

nicholam77

Well-known member
Joined
Dec 18, 2016
Messages
2,671
Location
Minneapolis, MN
Nick the built ins came out fantastic. I love the Walnut too. It seems everything DIY takes longer than we think.

The living room looks very put together and planned. Looking forward to your next project.

I have never pulled the trigger on those cabinet clamps as I feel I would never use them that much. But then again I don't own any to use so who knows.

Bret

Thank you Bret, that means a lot coming from you. :thumbup:

I think one big way I will use the parallel clamps is holding parts together while driving pocket screws, particularly with drawers and cabinet casework.. I know Kreg also makes specific clamps for this, which are also expensive, but they only do that one thing.

I'm also supposed to do a huge cabinet job for my parents soon, and am anticipating trying them out on that.

The built ins look amazing. Walnut my be my favorite wood to wood with and as a bonus it smells great while working with it.

Your clamp rack looks almost too good for a garage! I always make extra slots or storage on things like that. Then my OCD kicks in and I have to fill them up!! Great Work!

Thanks man! I agree on extra storage... it takes time to make stuff and I would be kicking myself if I ran out of space. Sadly with the parallel clamps it's probably going to sit empty, taunting me.

Nick, the finish product looks terrific! A job well done, very worth all of the effort.

I think one of these cool reproduction speakers on top of the built in will fit right in with your decor

https://www.amazon.com/dp/B07FHDCJ55/?tag=atomicindus08-20

Thank you!! I *think* it was worth the effort, too. Of course I'm just coming off finishing it so I think I will appreciate them even more after the post-project-exhaustion has worn off.

I agree that speaker/radio would fit nicely, although I have some existing in-wall speakers installed that I just received a new mini-amp for.
 
OP
N

nicholam77

Well-known member
Joined
Dec 18, 2016
Messages
2,671
Location
Minneapolis, MN
Kid Bed - wrapping it up

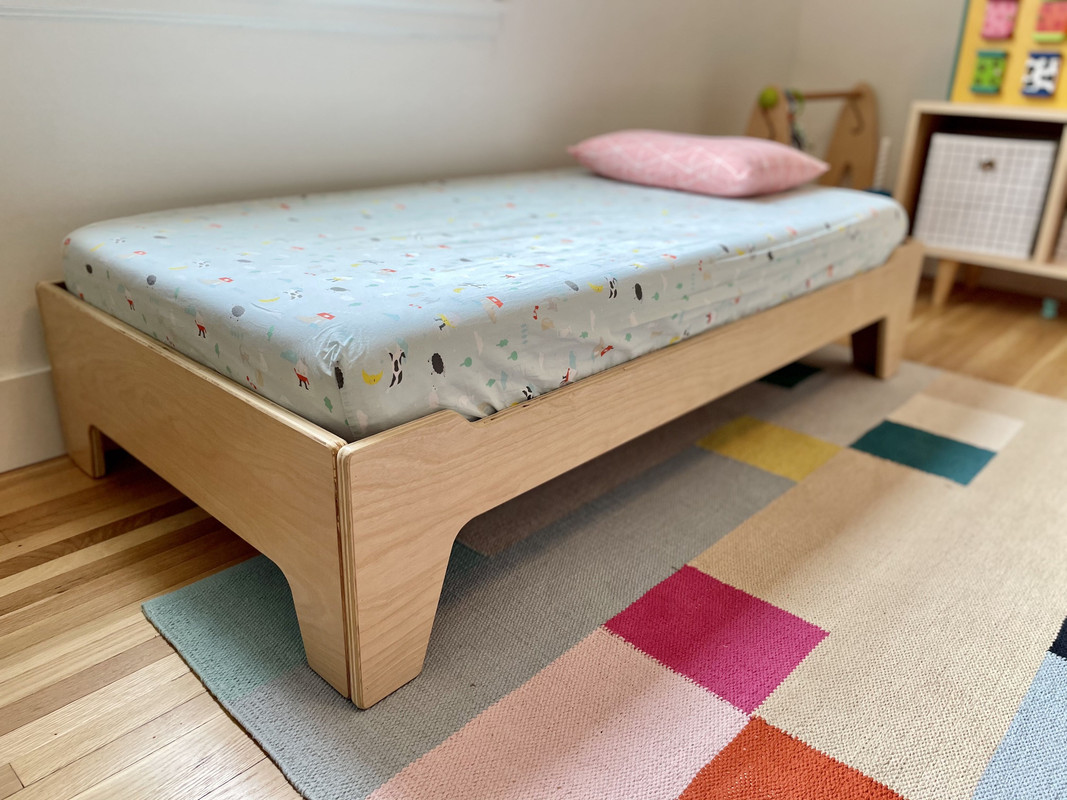
Some of you may not remember but I started building a bed, or built most of it rather, for my daughter last summer. And then bailed because we decided we wanted to keep her in the crib as long as possible. If you're interesting in the beginning, check out posts 829, 849, 853, and 880.

Well... baby #2 is due July, so she'll be moving rooms, and I want to get her used to the bed first, instead of two big changes at once. So time to finish up.

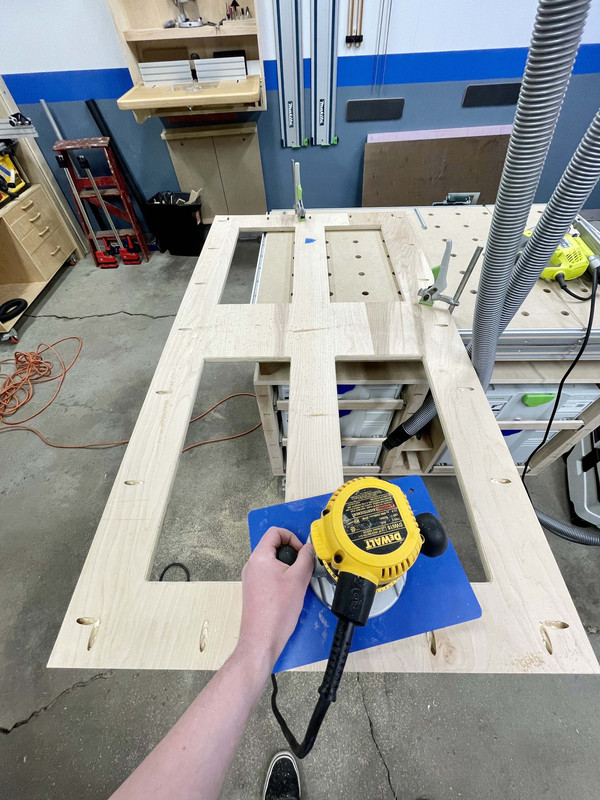
I had everything cut to size, but decided to cut out some holes in the mattress platform to reduce weight. I tried to remove as much material without completely compromising strength.

Track saw + jig saw for this. Easy peasy. And even though it will be hidden I gave it a round over because why not.

IMG-1992.jpg


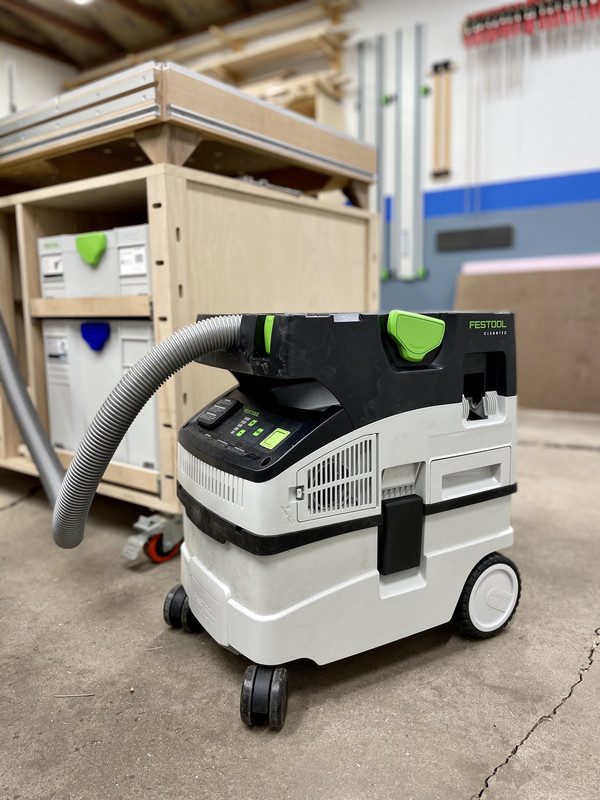
Btw in case anyone is interested in this vacuum, I did pick up the Systainer hose garage for the CT15. It's meant for the MINI/MIDI but it fits. Only oddity is the place for the manual filter clean is empty. Part 204717.

IMG-1994.jpg


Then I assembled it. Without glue. I'm going to see how it works out, and wasn't sure if I'd be wanting to take it apart.

IMG-2019.jpg


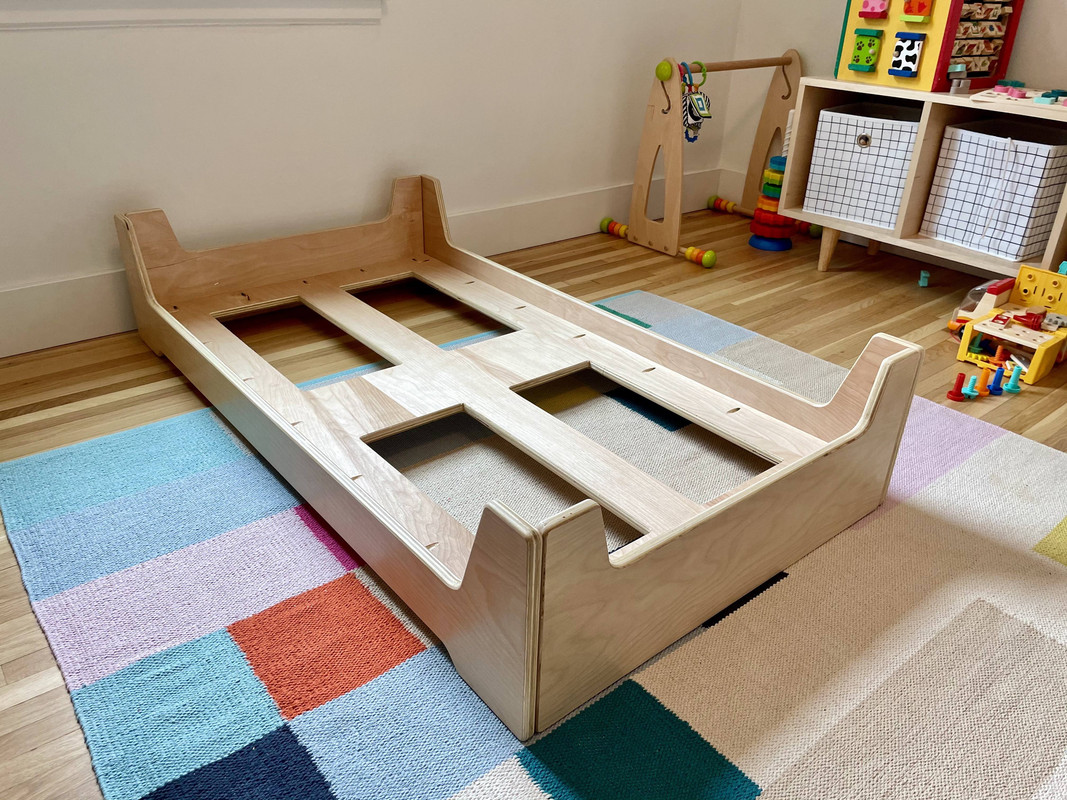
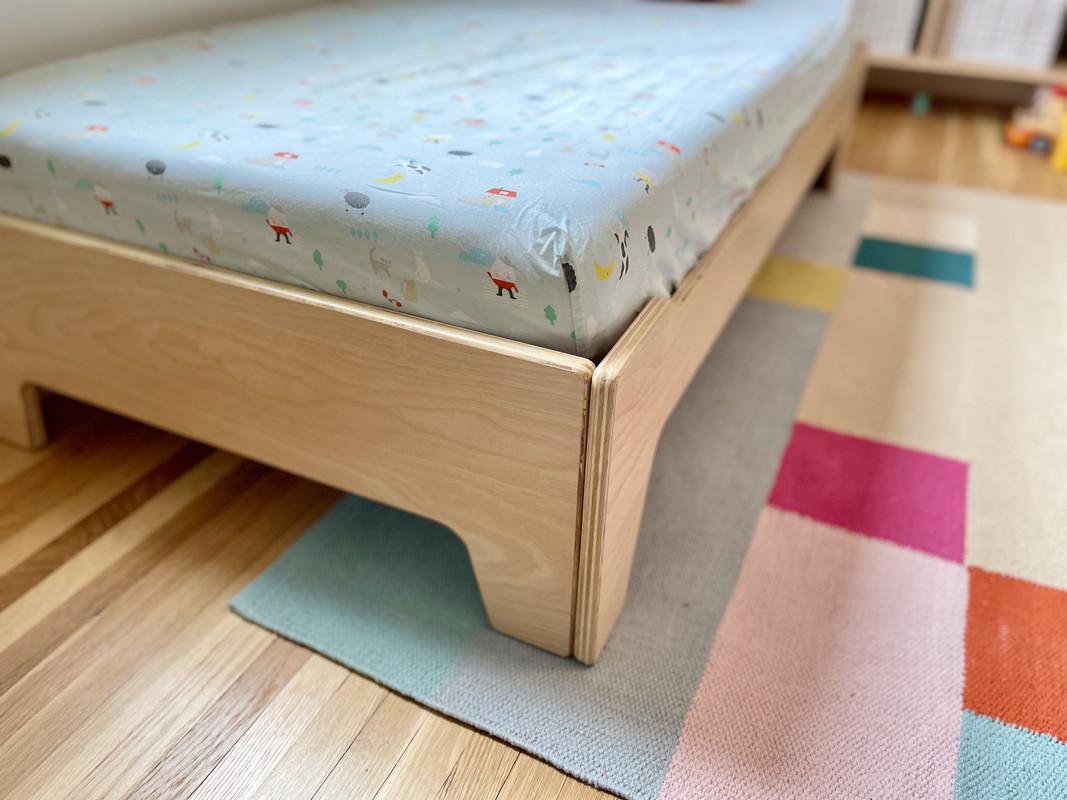
The four sides are dry joined with dowels, and the whole mattress platform is pocket screwed all the way around. It seems pretty solid.

The bed is reversible by flipping it over. This is "low mode":

IMG-2020.jpg


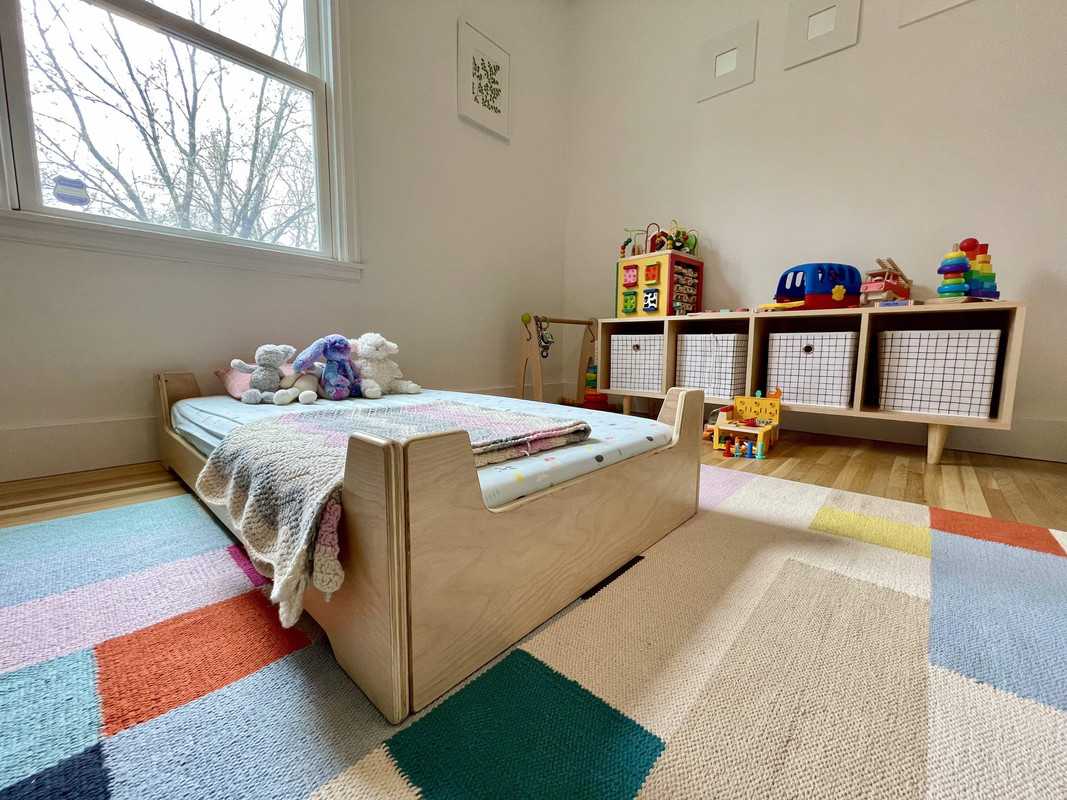
And this is "high mode":

IMG-2025.jpg


Honestly the mattress sticks above the rails either way, so it's not like you can't roll out of it. We might just skip to the taller mode. We'll see how it goes...

My one regret on this project is not using nicer baltic birch plywood. I still don't have a supplier and am using Home Depot stuff. Upside is the bed only cost $50 + my time, but it would have been even more professional or felt like it could have been purchased at a store, if it were baltic birch I feel.

IMG-2026.jpg


We're not transitioning quite yet, but I left it up so she could see, and my daughter was THRILLED. That alone made it worth it.

:thumbup:
 
OP
N

nicholam77

Well-known member
Joined
Dec 18, 2016
Messages
2,671
Location
Minneapolis, MN
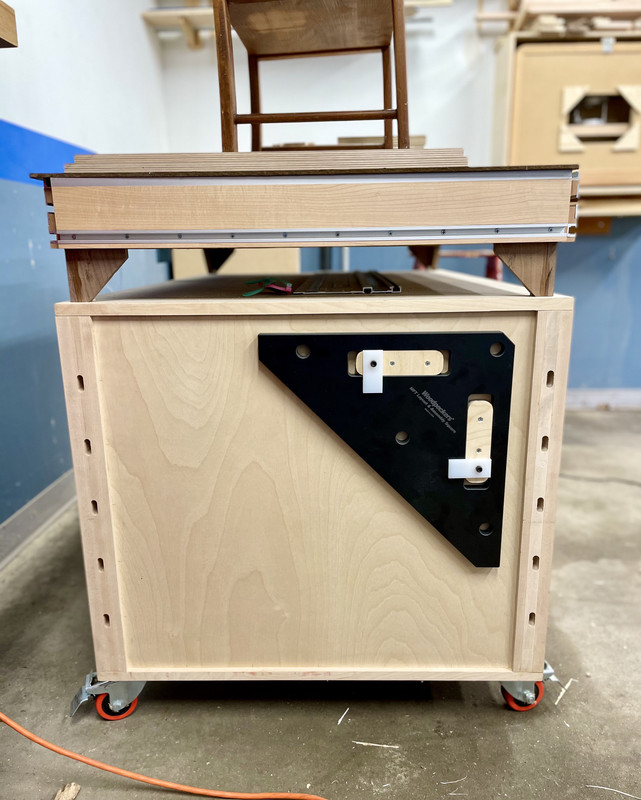
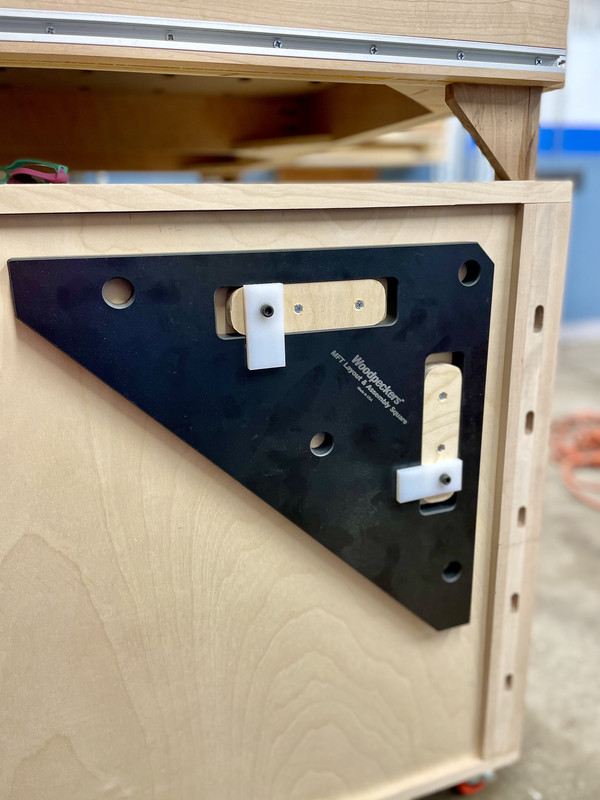
MFT Square Storage

This is a quick one. I had a few hours today and wanted to do something fast. The MFT square I got for my fence and rail setup I've been storing on my stationary workbench, or the table saw cart, or wherever. It's kind of large. Having to move it to get to stuff. No place to call home.

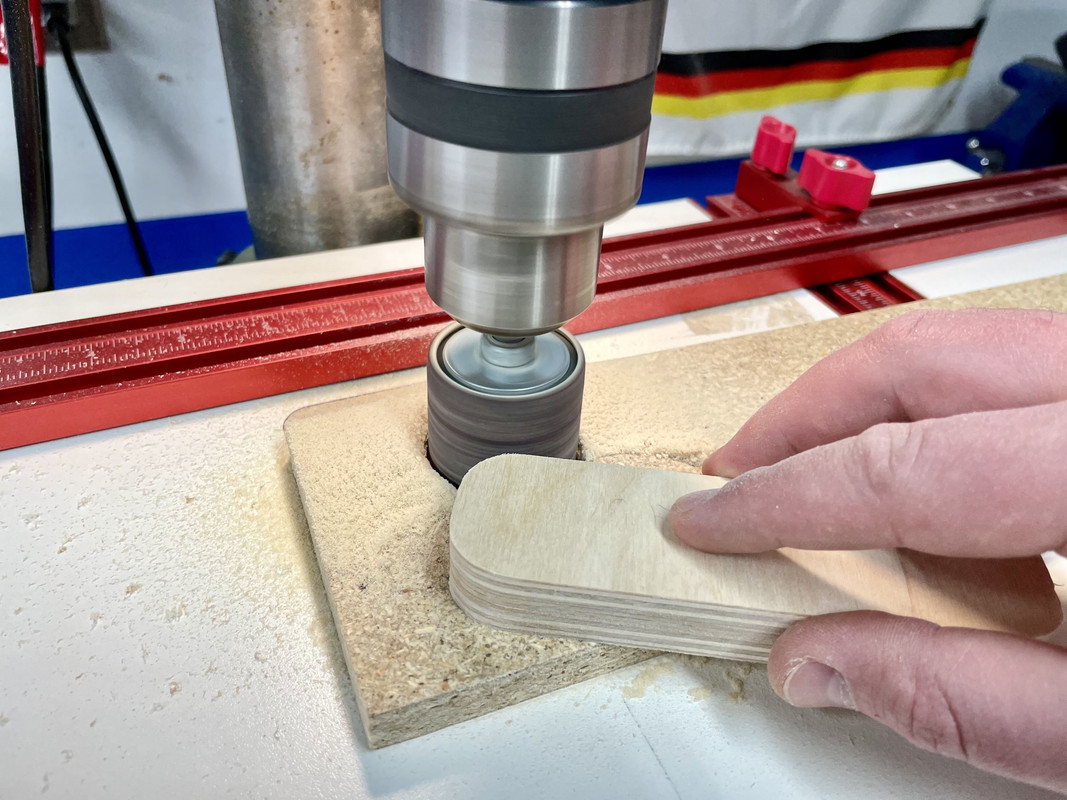
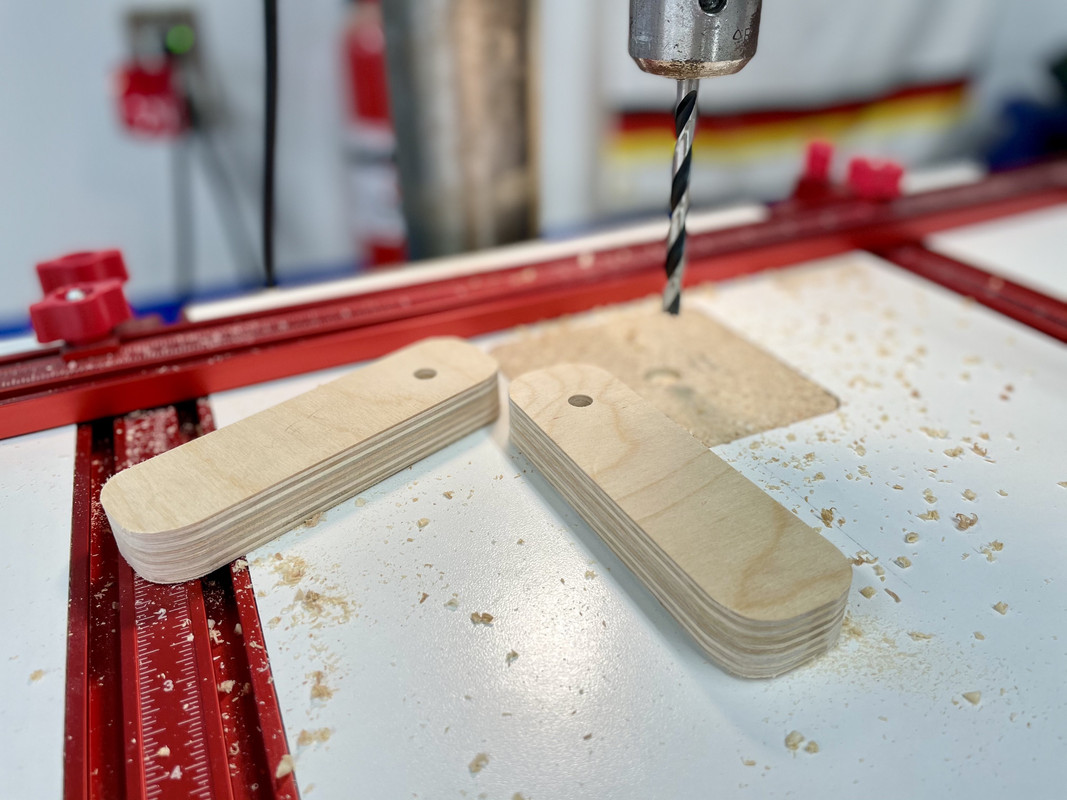
So I fashioned some plywood cleats and made 'em purdy with some rounded corners:

IMG-2030.jpg


An oscillating spindle sander, or disc sander, is on the list, but I think those I'd probably be looking at Craigslist for used. The right deal hasn't come up.

IMG-2032.jpg


Speaking of Craigslist, I used the drill press heavily on this little project. I never could have imagined how often I use it.

And then I used some leftover UHMW plastic for some retaining tabs. Skipping to the result:

IMG-2034.jpg


IMG-2036.jpg


Now it's with the MFT, at the ready, on a vertical surface not taking up space.

It's the little things... :lol:
 

joey1320

Well-known member
Joined
Jun 14, 2015
Messages
1,813
Location
NE Ohio
Living Room Built Ins - part 15 - All Done!


IMG-1963.jpg


Not a surprise, but they bear striking resemblance to the original Sketchups:


Thanks to everyone who gave advice and suggestions along the way, as well as just commenting and checking in. It really does help keep me motivated!

:beer:


Stunning room. It automatically says "Conversations" to me as I see myself with family/friends conversing and enjoying the time.
 

The J

Well-known member
Joined
Mar 4, 2010
Messages
152
Awesome work! The walnut looks perfect.

Vision to concept to finished product - very well thought out and thanks for bringing us along for the ride. The Sketchup planning went a long way. I’m sure the wife is relieved it’s done!!


The clamp rack looks great. Too empty though!! The pan screws make a small but noticeable difference and works since those screws are more visible on that location.


Who makes those red 90* guides?
I’m a sucker for small layout tools.
 

Trapps

ALLIANCE MEMBER
Joined
Feb 10, 2017
Messages
2,003
Location
The Detroit Zoo
Everything looks great, as usual Nick!

The DP is one of those tools that I knew I'd use. But now that I have one, I find myself almost looking for ways to use it...

:beer:
 
OP
N

nicholam77

Well-known member
Joined
Dec 18, 2016
Messages
2,671
Location
Minneapolis, MN
Stunning room. It automatically says "Conversations" to me as I see myself with family/friends conversing and enjoying the time.

Thanks!! The purpose of the room to me is pretty much as you've described. Many of the smaller houses on my block (like mine) are set up similar where the "living room" is the first thing you enter through the front door. Also many have big flat screen TVs you can see through the windows in the evenings. I decided early on this would be a "sitting" room, with no TV. It's not huge but a nice place to receive guests or family, or just sit with a book or magazine. I'm hoping to get a modern lounge chair in there someday, but taking my time with that.

Awesome work! The walnut looks perfect.

Vision to concept to finished product - very well thought out and thanks for bringing us along for the ride. The Sketchup planning went a long way. I’m sure the wife is relieved it’s done!!


The clamp rack looks great. Too empty though!! The pan screws make a small but noticeable difference and works since those screws are more visible on that location.


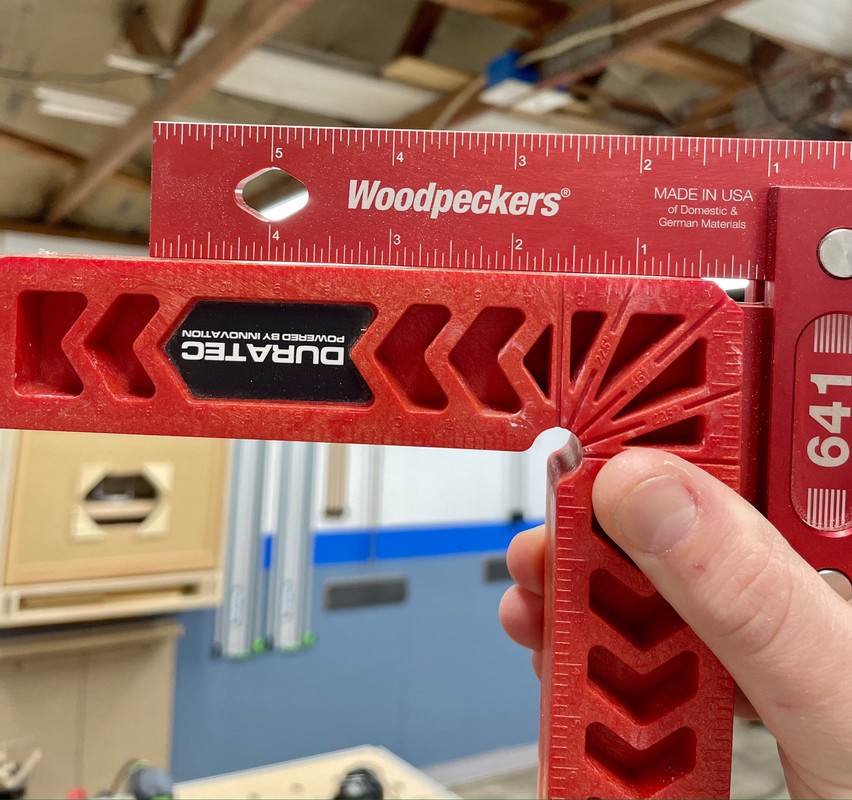
Who makes those red 90* guides?
I’m a sucker for small layout tools.

Thanks J! My wife is pretty understanding of projects, especially when they benefit us both. But I'm sure she is glad she no longer has to listen to me complaining about how much work I have left to do...

The red 90° squares are just some cheap-O's I got on Amazon I think. The brand is "Duratec" although I am sure there are similar out there.

IMG-2056.jpg


They are not *perfectly* square, but just fine for assembling cabinets. I often get obsessed with accuracy and squareness, but I've never felt the need to upgrade these and they work fine with the F-clamps.

It's been awhile since I checked in - you've been busy! Nice job across the board!

Thanks man!

Everything looks great, as usual Nick!

The DP is one of those tools that I knew I'd use. But now that I have one, I find myself almost looking for ways to use it...

:beer:

Thanks Mark! I've found I've used the DP a lot for shop-related projects, jigs and such.

:beer:
 
To avoid these ads, REGISTER NOW!

quadrcr87

Well-known member
Joined
Jul 5, 2013
Messages
1,036
Location
Travelers Rest, SC
MFT Square Storage

An oscillating spindle sander, or disc sander, is on the list, but I think those I'd probably be looking at Craigslist for used. The right deal hasn't come up.

I like that drum sander in the drill press trick. I will probably do the same once I get a drill press. For now its carefully holding a small piece in one hand and my orbital sander upside down in the other.
 
OP
N

nicholam77

Well-known member
Joined
Dec 18, 2016
Messages
2,671
Location
Minneapolis, MN
I like that drum sander in the drill press trick. I will probably do the same once I get a drill press. For now its carefully holding a small piece in one hand and my orbital sander upside down in the other.

Yeah, I've done the orbital sander thing too haha. :D It works much better on the drill press, the only thing is I try to apply very little pressure so as not to put undue force on the quill. But totally gets me by in a pinch until I can get a proper sander.
There are even some drill presses out there that have an oscillating feature meant to use with sanding spindles.

Wow! Just spend the morning and 2 cups of coffee reading through the whole thread. Nice space and even better projects!

Thanks for the compliments and checking it out!
 
OP
N

nicholam77

Well-known member
Joined
Dec 18, 2016
Messages
2,671
Location
Minneapolis, MN
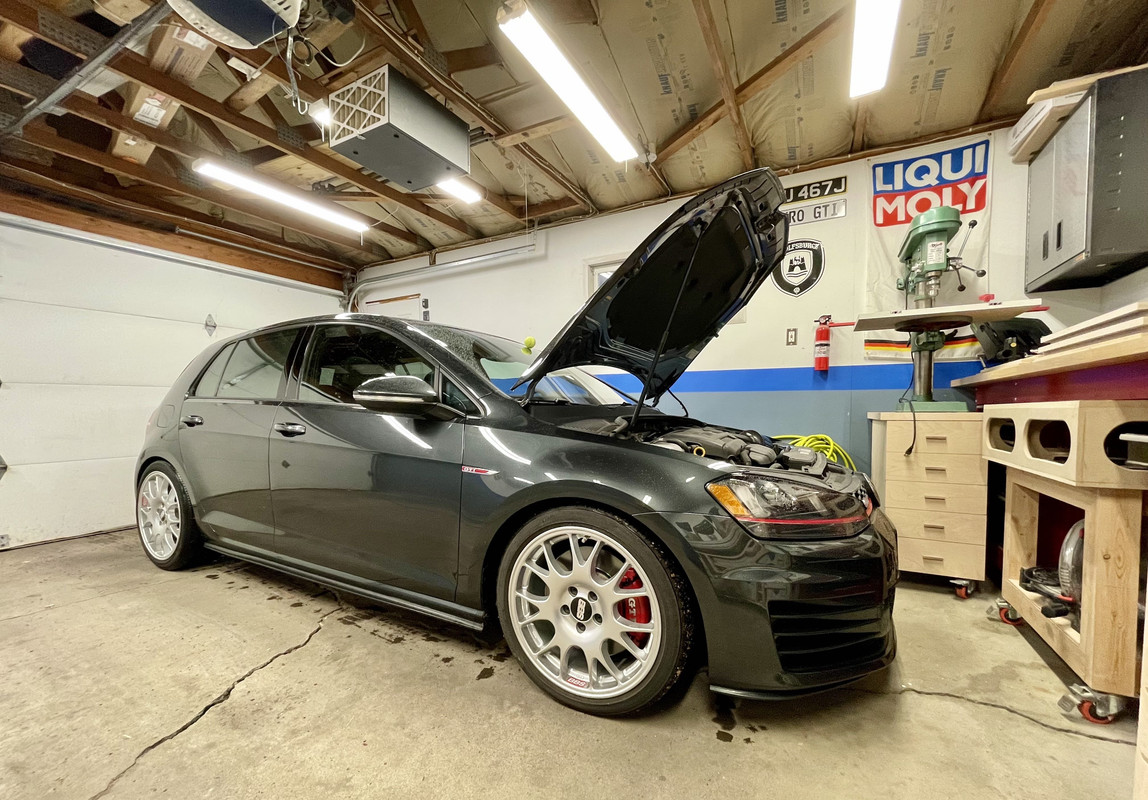
Revisiting the namesake of the thread after quite some time, the VW got a little love over the weekend.

Back to summer wheels and got a wash in.

IMG-2085.jpg


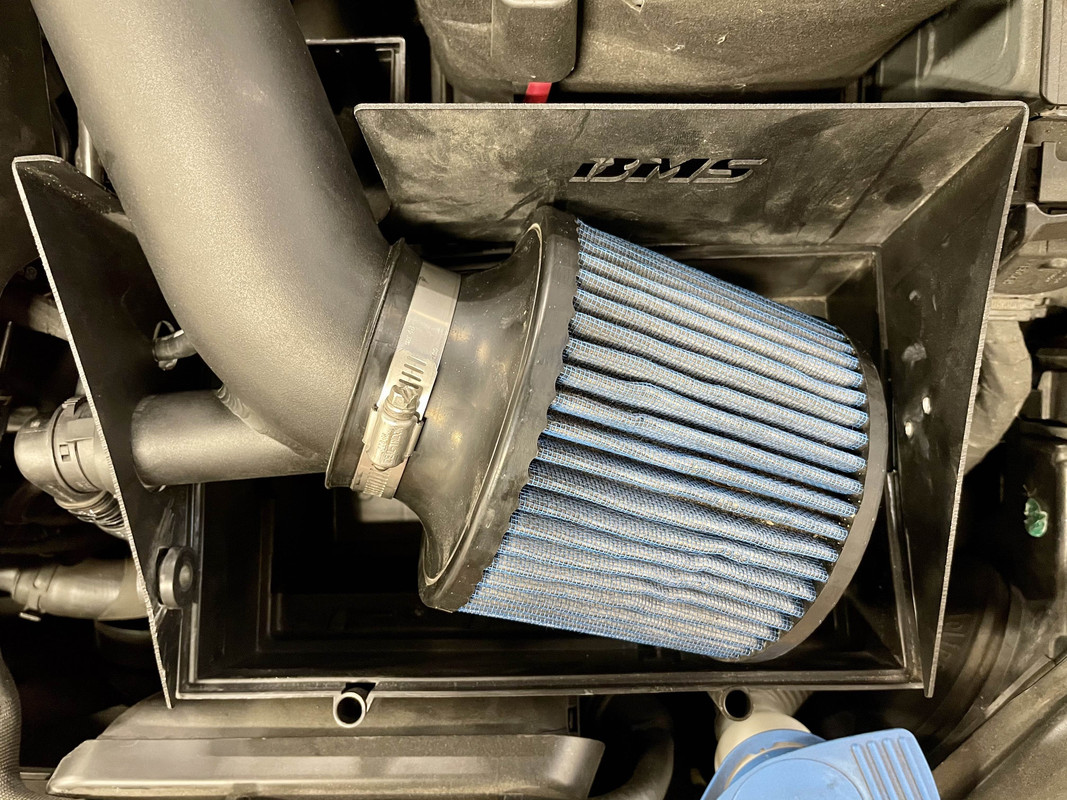
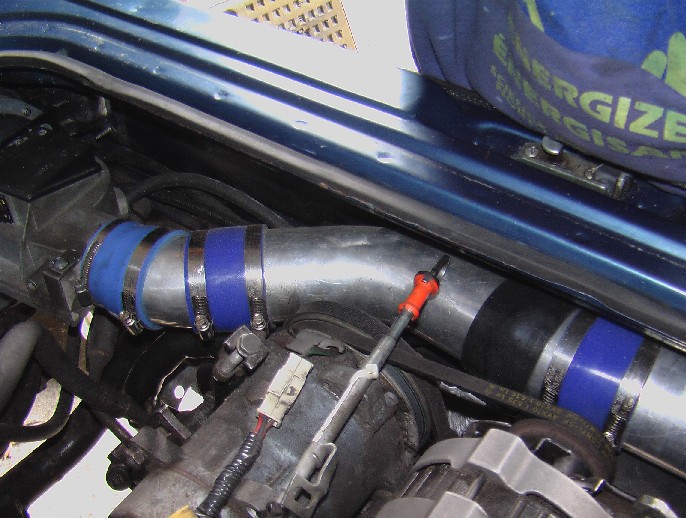
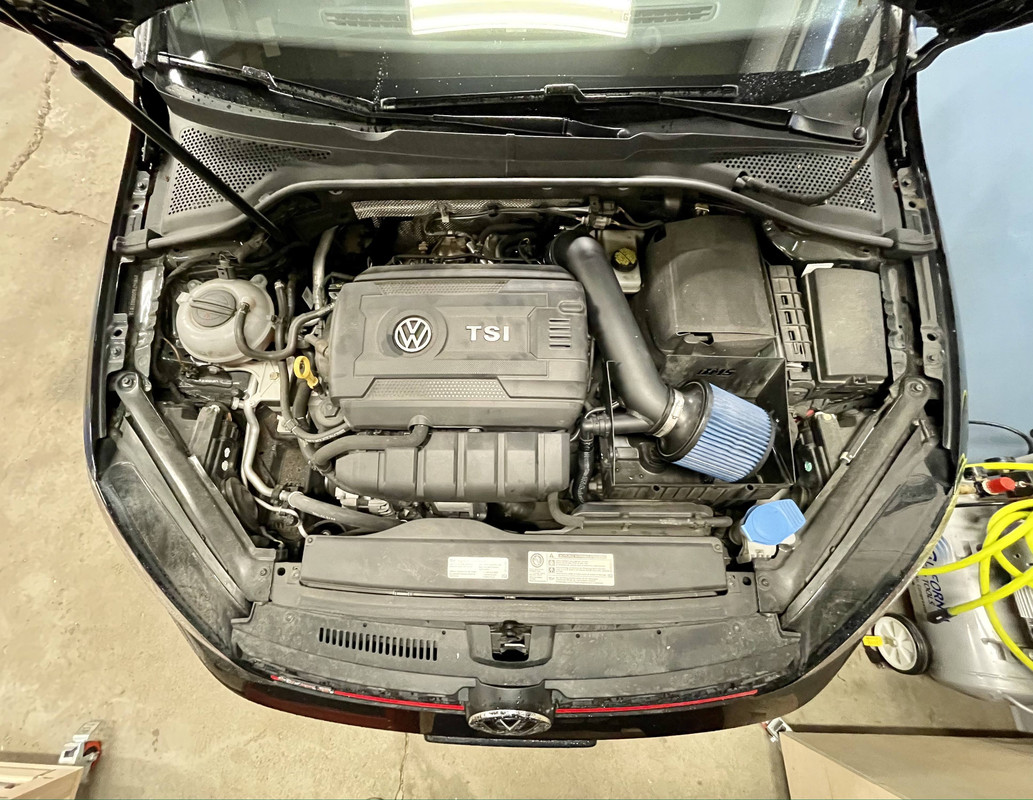
And installed a Burger Motorspots cold air intake / filter on a stick. **** dyno says I've gained 400 WHP.

Jk it was kind of a trial to see if I like it. I've had a few Turbo Beetle cabriolets as car rentals before and I was jealous that you could actually hear the turbo and DV. The GTI is so well-damped in the cabin you get basically nothing.

I found one of these used for $60. This particular one is $229 new but has been out of stock for about a year so idk if they are ever coming back. For reference, intakes on this platform are usually in the $350 - $450 range, which in my opinion is ridiculous. I figured, for $60... I can try it and flip it if it stinks.

IMG-2086.jpg


As usual as it goes for me installing car parts, it was frustrating. Fitment was not good, it was a major struggle to get everything aligned.

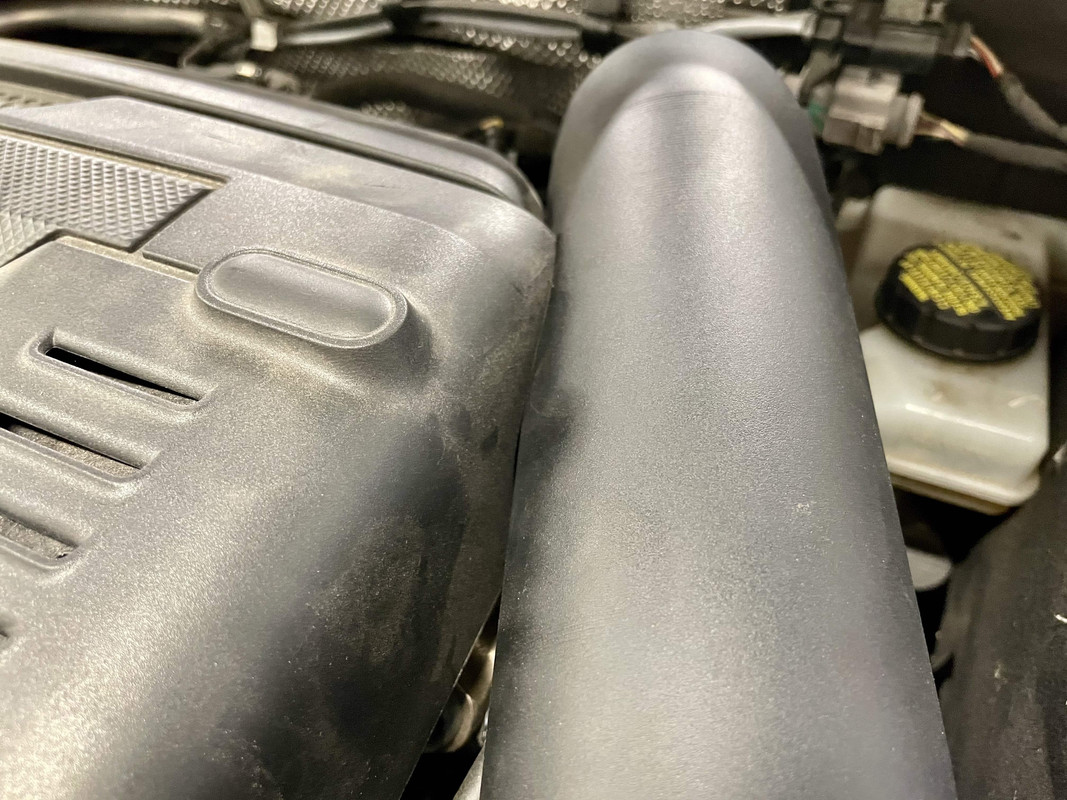
The intake tubing is basically rubbing against the motor:

IMG-2083.jpg


And the cone filter itself is pressing against the back wall of the support box:

IMG-2084.jpg


Not a fan of this but hopefully it will be ok.

The reason I got it cheap was the filter was crushed a bit and the previous owner had drilled some holes in the support box for water and meth lines.

IMG-2079.jpg


Since it's under the hood none of this is really a problem to me.

Here's the disappointing part... no way near as much turbo noise as I expected!! In first gear I hear nothing from the DV. 2nd and 3rd there is some decent noise from the DV release when you let off the gas, but it's only very audible with the windows down. Windows up still pretty dang quiet. AND I really have to run it out and drive like a race car driver to get enough boost. I'm not tuned or anything so maybe these are more effective running some additional boost, but a little disappointed. Aside from the "DV effect" there is really no additional intake noise. The rental Beetle I drove you could hear the turbo spooling much better. I'm gonna leave it on for now, when summer finally gets here it might be kinda fun with the windows and sunroof open, but initial impressions are I'm certainly glad I picked up a cheap-O and nothing expensive.

:beer:
 
Last edited:

Denwood

Well-known member
Joined
Sep 22, 2014
Messages
4,192
Location
Thunder Bay, Ontario, Canada
Nick, I build my last custom intake from some mandrel bent 3" aluminium tubing, and silicon coupling gaskets. You just buy generic bends and straight bits and join them with the couplers. just an idea if you want to sort the contact. This was for my Audi engine into 1990 Westfalia conversion...

intake.jpg


I have this strange desire to start looking for an R every time I see your GTI :)
 
Last edited:

bj383ss

Well-known member
Joined
Sep 29, 2011
Messages
3,166
Location
TX
Nick that is strange. Can you even hear it sucking air when you goose the throttle? Most open elements you can at least here the air sucking in louder than stock. Most stock air boxes are setup to be quiet for the majority of the public that don't want to hear or feel their engine working.

I have a K&N on the Camaro in a whisper lid and you can hear every bit of air running in when I am on it. Same on the Caprice. It has your old standard round open element air cleaner with a 6" tall air cleaner. Neither one of them have hood insulation though.

Bret
 
OP
N

nicholam77

Well-known member
Joined
Dec 18, 2016
Messages
2,671
Location
Minneapolis, MN
Nick, I build my last custom intake from some mandrel bent 3" aluminium tubing, and silicon coupling gaskets. You just buy generic bends and straight bits and join them with the couplers. just an idea if you want to sort the contact. This was for my Audi engine into 1990 Westfalia conversion...

{pic}

I have this strange desire to start looking for an R every time I see your GTI :)

Ha, that's cool Dennis. I've driven it a few times now and it seems ok I think, but I will keep that in mind if it becomes an issue.

Regarding the GTI... I also want an R lol. Or wish I could have went that route. I'm a fan of the MQB platform and particularly the Golf overall, but several things have bugged me about the GTI from the start:

1) the gear ratios **** (tall, big spreads, especially down low)
2) the clutch ***** (super vague, weak pressure plate, can't hold up to a tune without upgrade)

I'm a ride or die manual transmission guy (I didn't even test drive the DSG) but I actually kind of wish I had. The DSG actually has better ratios and I think the car would feel MUCH quicker. It's a capable motor and chassis, and I think the manual transmission kills that a bit.

The R on the other hand... is up on power from the factory, and has a different gearbox with a more close-ratio transmission! In the 6 speed. Never driven one but I'm sure it's a sweet spot for manual transmission folks.

People have argued to me that the reason they did dumb ratios in the GTI is it doesn't have AWD, but... I call bull-poop. It's disappointing because it just doesn't feel as sporty to drive as it should.


Nick that is strange. Can you even hear it sucking air when you goose the throttle? Most open elements you can at least here the air sucking in louder than stock. Most stock air boxes are setup to be quiet for the majority of the public that don't want to hear or feel their engine working.

I have a K&N on the Camaro in a whisper lid and you can hear every bit of air running in when I am on it. Same on the Caprice. It has your old standard round open element air cleaner with a 6" tall air cleaner. Neither one of them have hood insulation though.

Bret

I only hear it in 2nd, 3rd gear or above, at medium RPMs. 1st is pretty much non-existent (and it's a long 1st gear!). Basically confirms my long-held suspicion that 1st gear is neutered by boost-limiting, probably because high torque and FWD blah blah blah. But 2nd doesn't really dig into good boost until your 30-40 mph+, so it's challenging to get the turbo noises on residential streets without driving like a bit of a clown.

My car does have under hood insulation, so that is surely killing it some. I removed the weatherstrip where the firewall / windshield intersect this morning, and that did help a bit. But overall, still a bit underwhelming.

It's hard for me to tell if it's just quiet in the cabin, or quiet overall. There's a chance it's just quiet in the car and I'm still ******* off the neighborhood :lol:

It's a blessing and a curse, VW engineered the car to be very well damped inside. It's quiet, comfortable, dare I even say a hint of Audi-esque luxury. But, that also makes it less sporty and kind of tame. I mean it's supposed to be an enthusiast's car... not that fun if you can't hear the motor, exhaust, or turbo. I've done a few things (like stiffer motor mounts) that help bring it out, but completely stock, the car is on the tame side for what I think should have a *little* more attitude.

I can only imagine what your cars sound like, Bret, I'm sure they are totally awesome!!!
 
OP
N

nicholam77

Well-known member
Joined
Dec 18, 2016
Messages
2,671
Location
Minneapolis, MN
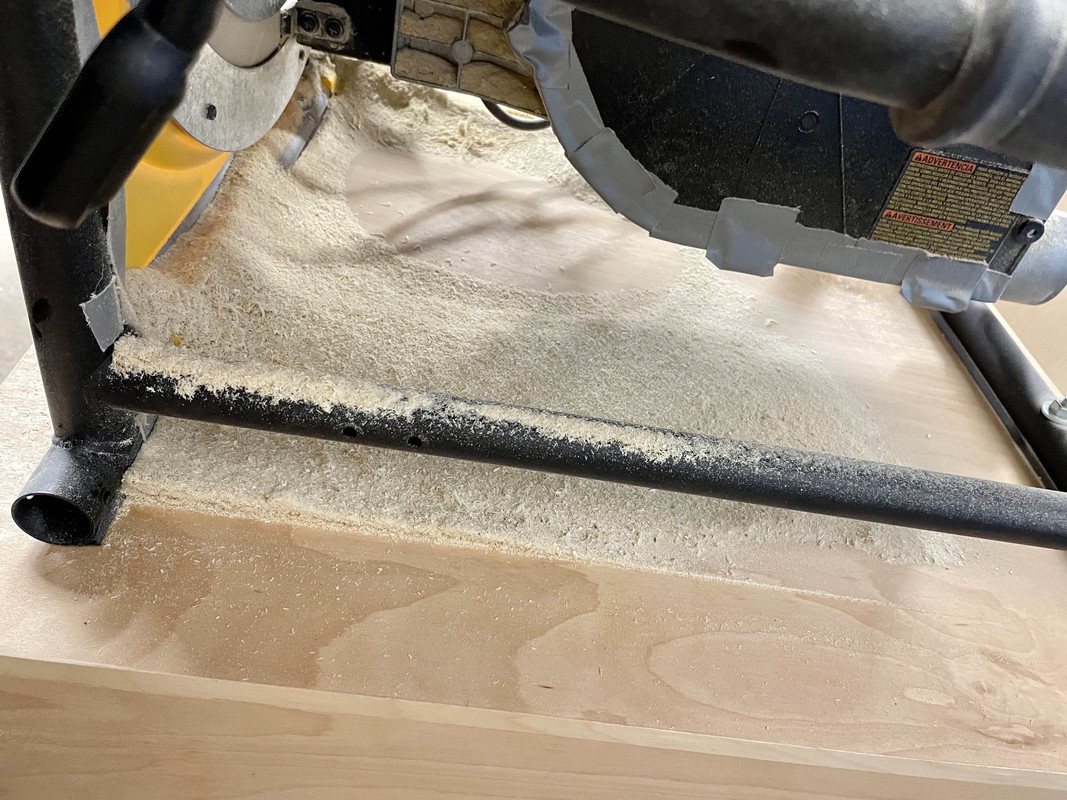
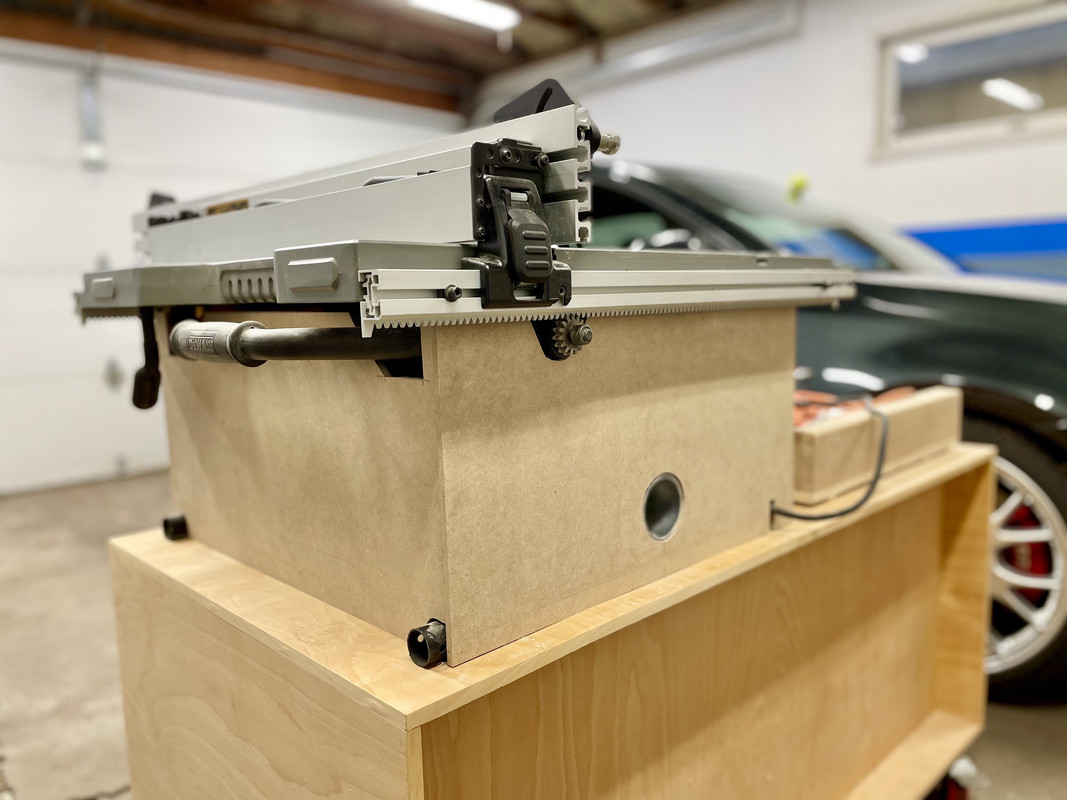
Teeny tiny shop project the other day. Awhile ago I made some dust covers for my table saw. They have worked well, and do trap a lot of dust inside.

IMG-2058.jpg


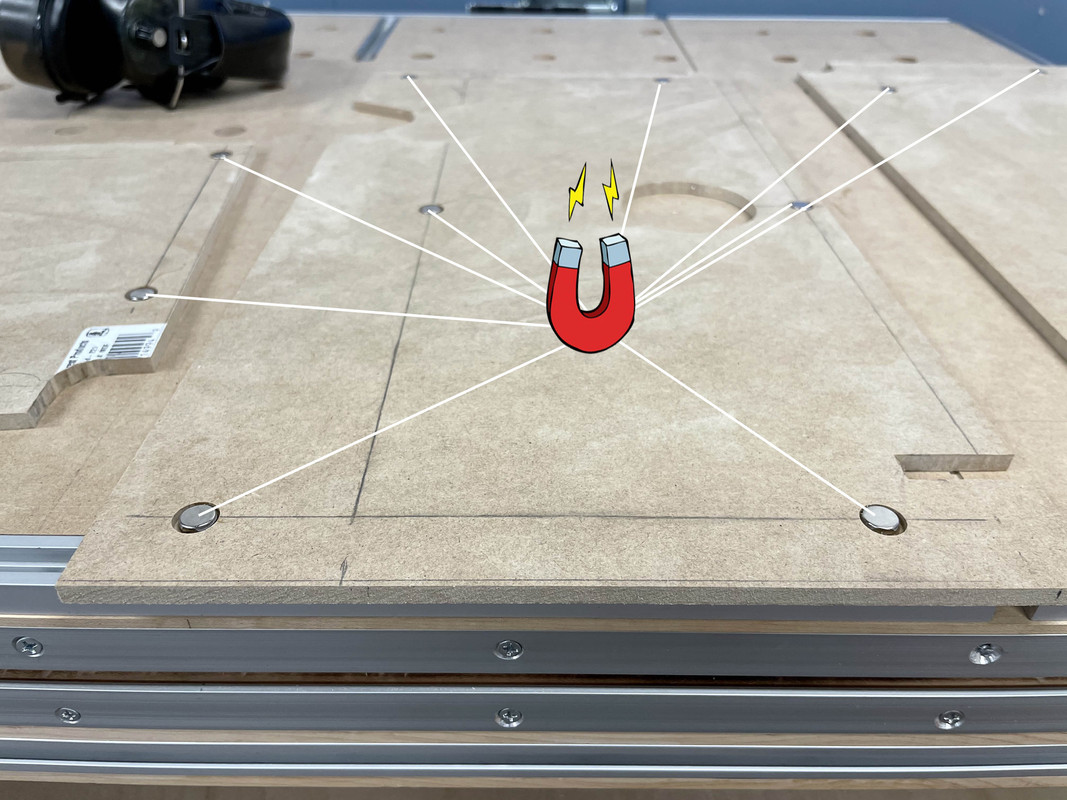
Although they fit well, sometimes one would fall over. I decided to add some magnets to hold them secure by recessing with the drill press and some super glue.

IMG-2059.jpg


IMG-2087.jpg
 
Last edited:
OP
N

nicholam77

Well-known member
Joined
Dec 18, 2016
Messages
2,671
Location
Minneapolis, MN
Craiglist Find - Rail Square

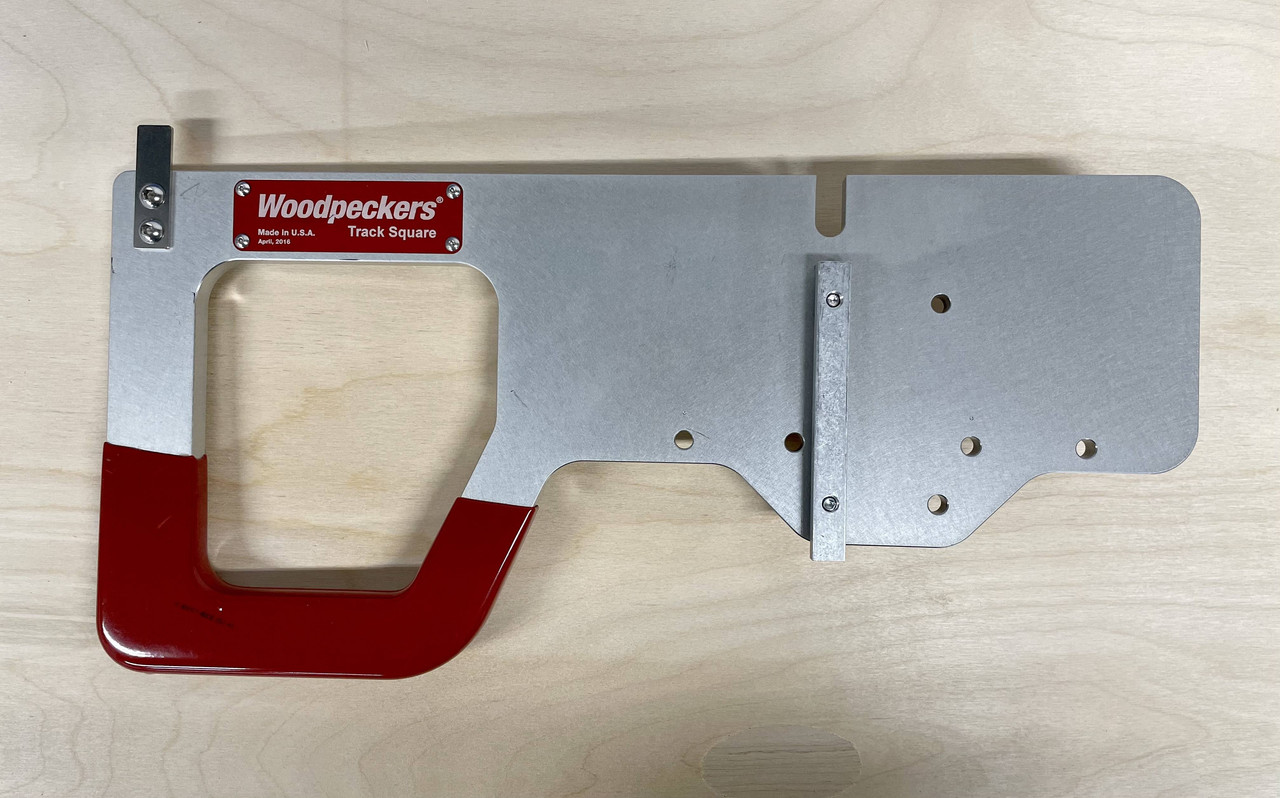
Just sharing because I'm excited! I made an impulse purchase on this used Woodpecker One Time Tool "Track Square":

IMG-2096.jpg


I rarely find good deals, but I do often keep an eye on the used markets around me, Facebook, Craigslist, Nextdoor, etc.

This bad boy has some signs of use, but it was less than a third of what TSO's cheapest rail square costs. Getting one square corner on a full sheet of plywood is an important part of breaking down sheet goods with a track saw, and I've never had a great method. Sometimes you can do all the rip cuts, and then all the cross cuts on the MFT, but sometimes not. Depends how the cut list is laid out to use the sheet most efficiently.

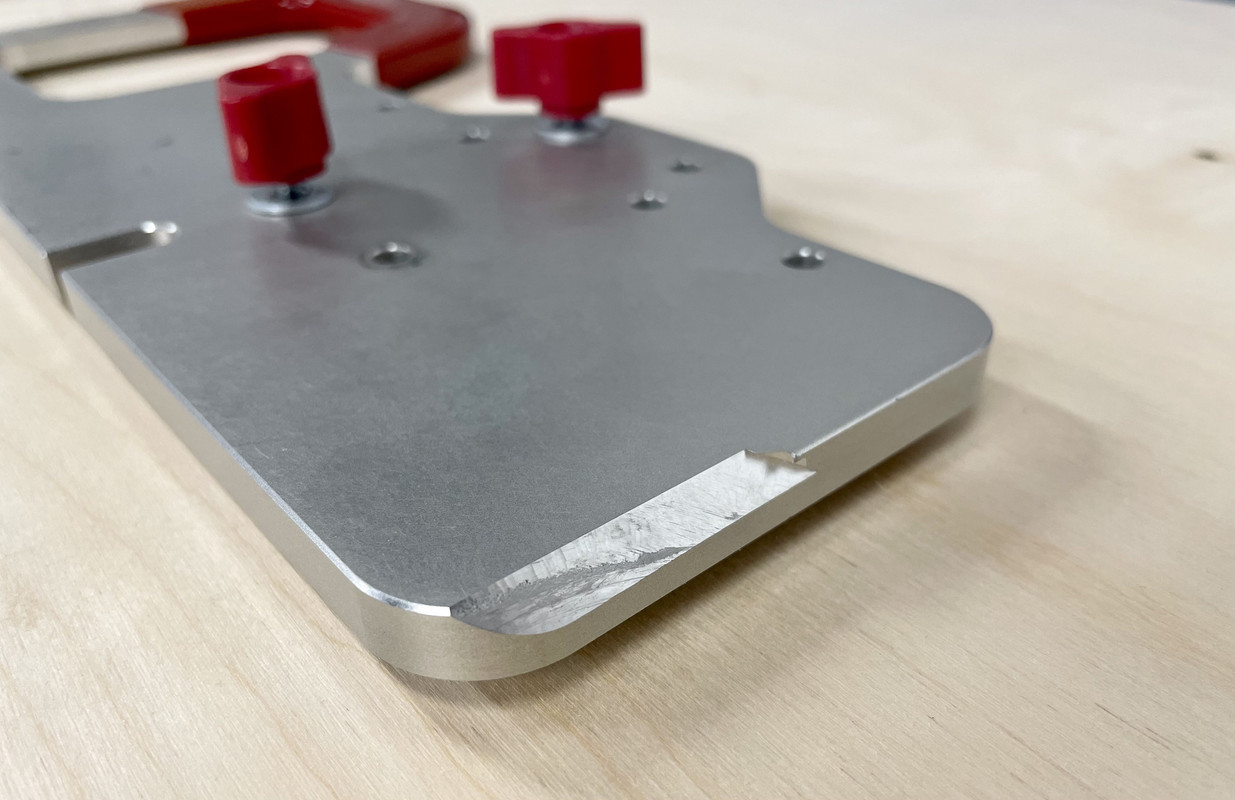
Anyways one reason it was a deal is the previous owner accidentally cut into the bottom on a miter cut:

IMG-2097.jpg


This isn't a huge deal to me since it's on the bottom.

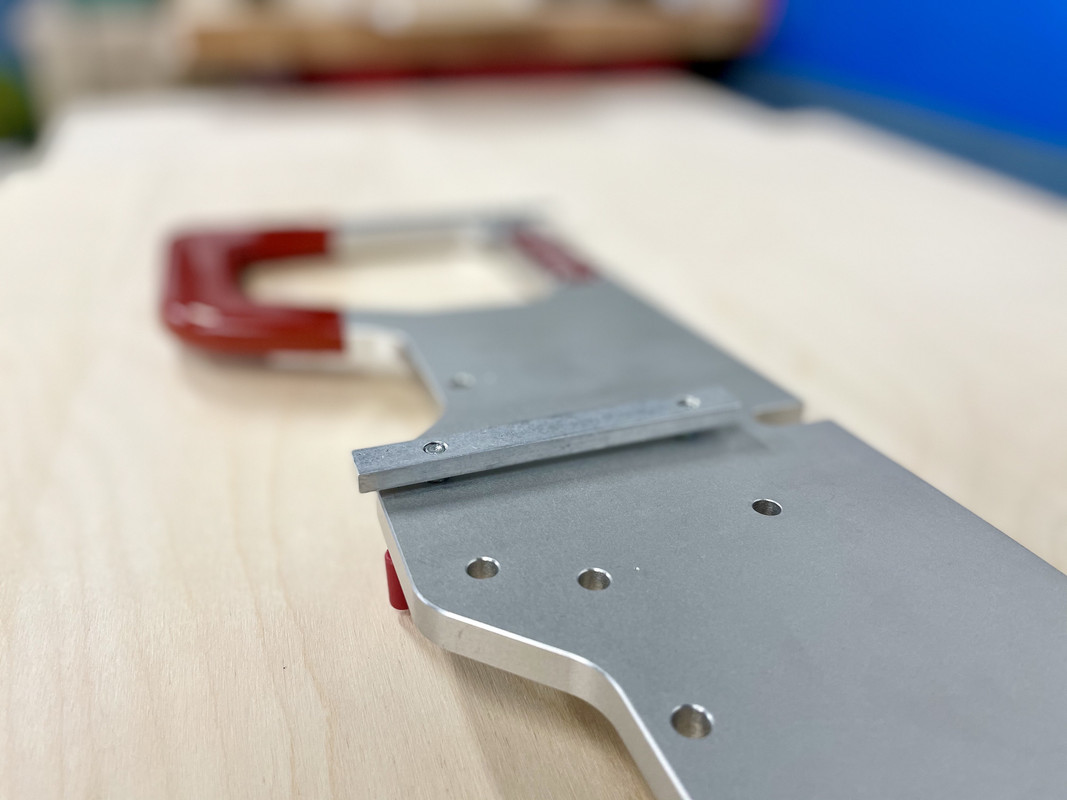
One bummer I didn't realize (like I said this was a bit of an impulse purchase), is the rail square has no reference for square. What I mean by that is the little bar that the rail slides onto has some play in it:

IMG-2098.jpg


According to Woodpecker's own instructions, you need an "accurate reference square" to "calibrate" it to the rail. Most rail squares (including Woodpecker's latest one) have an additional fixed bar that is perfect 90° and a spring clip that hugs the rail to it.

Fortunately I think I can use my phenolic MFT setup square as a large reference.

In retrospect it's not perfect, but super cheap compared to new ones and I still think it will be useful. And I should get to try it soon -- my dad has been bugging me to start his enormous pantry project, since I am finished with the built ins.

:scared:
 

The J

Well-known member
Joined
Mar 4, 2010
Messages
152
Updates to the dust covers look great. Nice idea with the magnets.


I see you’re itching to mod the GTI. They’re supposed to be sporty but comfortable and practical. Having had a few, there’s a certain refinement they have at their price point versus the Japanese competitors. They excel at mixing practicality with sport, and are fine cruising comfortably on the highway with the family while still being to row gears quickly when you’re solo. But yes, some of that is boring versus the rumble of a flat four WRX or the Lego-like ease of tuning Civic Si’s.

I’d put the stock airbox back in and put that money towards a stage 1 APR tune. The intake isn’t doing anything for performance anyway. Wakes the car up and I feel their tunes have always been a nice mix of performance and reliability versus other tuners that focus on higher dyno numbers. But there are many options as I’m sure you know.

Anyways, remember to Save the Manuals!

Also, save up for a used Mk7 R!
 

bemuum5

Member
Joined
Mar 18, 2020
Messages
5
Location
Scottsdale
As a former Minnesotan of 20 years spending the majority of my time in the Minneapolis and Edina (50th and France) area, I read through the thread and couldn't help but shutter at the winter time photos remembering having to take the trash out, and my buddies pouring water bottles over car door handles in the dead of winter as pranks. Man it was cold.

I also own a Mk7.5 Golf R that is fully Stage 2 - so same motor, just different tweaks here and there.

I started with APR - the performance is there, the drivability was not for me. Mine is a daily driver first, track car second. Laggy throttle input, uneven surges in torque across a couple hundred RPM range confirmed with a dyno session that I couldn't figure out after the torque curve came out like a squiggly line, and APR wasn't really all that interested in helping.

I moved on to EQT using the Cobb Accessport and Nick doing the tuning and couldn't be happier, and also have better fuel trims, limited to no knock, and endless modularity which is fun for a tinkerer like me.

Beautiful work on your garage! Detached 2 cars in MPLS and the metro area always seemed like cruel jokes when its the dead of winter and you have to trek through inches/ft of snow to get to anything inside the garage.

Throw a stage 1 tune on the Golf, get stickier tires, and enjoy the heck out of it!
 
OP
N

nicholam77

Well-known member
Joined
Dec 18, 2016
Messages
2,671
Location
Minneapolis, MN
Updates to the dust covers look great. Nice idea with the magnets.


I see you’re itching to mod the GTI. They’re supposed to be sporty but comfortable and practical. Having had a few, there’s a certain refinement they have at their price point versus the Japanese competitors. They excel at mixing practicality with sport, and are fine cruising comfortably on the highway with the family while still being to row gears quickly when you’re solo. But yes, some of that is boring versus the rumble of a flat four WRX or the Lego-like ease of tuning Civic Si’s.

I’d put the stock airbox back in and put that money towards a stage 1 APR tune. The intake isn’t doing anything for performance anyway. Wakes the car up and I feel their tunes have always been a nice mix of performance and reliability versus other tuners that focus on higher dyno numbers. But there are many options as I’m sure you know.

Anyways, remember to Save the Manuals!

Also, save up for a used Mk7 R!

Probably like most people a lot of that is why I got the car, so I 100% agree with you. It's pretty good at everything, but not truly great at anything. I like to call it "the compromise car" because you give up a little in each segment. Keyword a little. Is it as fast as a true sports car? No. Is it as roomy as an SUV? No. Is it as luxury as a BMW / Audi / Mercedes? No. But it is sporty, quick, can haul kids and groceries, has lots of nice features and looks. Most cars don't do everything well so I give it a lot of credit for that. I had a Jetta before this (Mk4) so not new to VW but it is my first GTI.

My plan was always to throw a tune on it. But then kid + house + woodworking hobby put it on the back burner.

If I ever do tune it, I'm not looking to push it to the max. I want reliability and it's just a daily driver. I need to be able to cart my daughter around and not worry about a blown turbo :lol:

The amount of tuners on the VW scene is a bit overwhelming to me. I know APR is big and popular. One concern I have financially is the clutch. VW put a weak pressure plate in the Mk7 GTI and almost inevitably tuned cars need an upgrade. So when you figure tune + sticky tires + clutch parts and labor it gets pretty expensive. And if I did the tune only and then all of a sudden clutch starts slipping crazy I doubt my wife would be entertained by a surprise clutch job.

I've also considered something like the Burger JB4, which lets you customize boost by gear and RPM. That way I could maybe turn it up down low and turn it down up top and prolong the clutch. The low gears (especially 1st) is where it feels hindered to me.

I had another mild piggyback on it awhile back (Dinan), and the power bump was nice but it wasn't that reliable or smooth. So idk if JB4 is better. I also don't think I want to be tinkering with it all the time, don't have time for that!

I'll give it some more thought. Although after a few years of thinking every time I crunch the "worst case scenario" numbers I chicken out.

:lol_hitti

A used R is probably out of the question with the depreciation on my car and what I've put into it. No tune as you know but there have been a fair amount of subtle "mods".

As a former Minnesotan of 20 years spending the majority of my time in the Minneapolis and Edina (50th and France) area, I read through the thread and couldn't help but shutter at the winter time photos remembering having to take the trash out, and my buddies pouring water bottles over car door handles in the dead of winter as pranks. Man it was cold.

I also own a Mk7.5 Golf R that is fully Stage 2 - so same motor, just different tweaks here and there.

I started with APR - the performance is there, the drivability was not for me. Mine is a daily driver first, track car second. Laggy throttle input, uneven surges in torque across a couple hundred RPM range confirmed with a dyno session that I couldn't figure out after the torque curve came out like a squiggly line, and APR wasn't really all that interested in helping.

I moved on to EQT using the Cobb Accessport and Nick doing the tuning and couldn't be happier, and also have better fuel trims, limited to no knock, and endless modularity which is fun for a tinkerer like me.

Beautiful work on your garage! Detached 2 cars in MPLS and the metro area always seemed like cruel jokes when its the dead of winter and you have to trek through inches/ft of snow to get to anything inside the garage.

Throw a stage 1 tune on the Golf, get stickier tires, and enjoy the heck out of it!

Sorry to activate your weather PTSD! Yeah, winter *****. And so do detached garages. Like a lot of places the housing market went a little nuts here so... it is what it is I am lucky to have a 2 car garage in the first place. As you well know, despite the snow and cold, detached is pretty common in the first ring 'burbs.

What lovely place do you live in now?

That is awesome about the 7.5 R, sounds like a blast. Idk your feelings on the forthcoming Mk8 but I feel like we got in on a great generation!

I will look into Cobb. It's been a few years since I've read up on all the options. I don't know if I can pull the trigger at the moment but can't hurt to do some research!

Did you have to upgrade your clutch? I think the R's have stronger factory pressure plate already.

Tune or not, sticky tires are gonna happen eventually, maybe next year.

P.S. got some Thai takeout at 50th and France tonight haha

:beer:
 
OP
N

nicholam77

Well-known member
Joined
Dec 18, 2016
Messages
2,671
Location
Minneapolis, MN
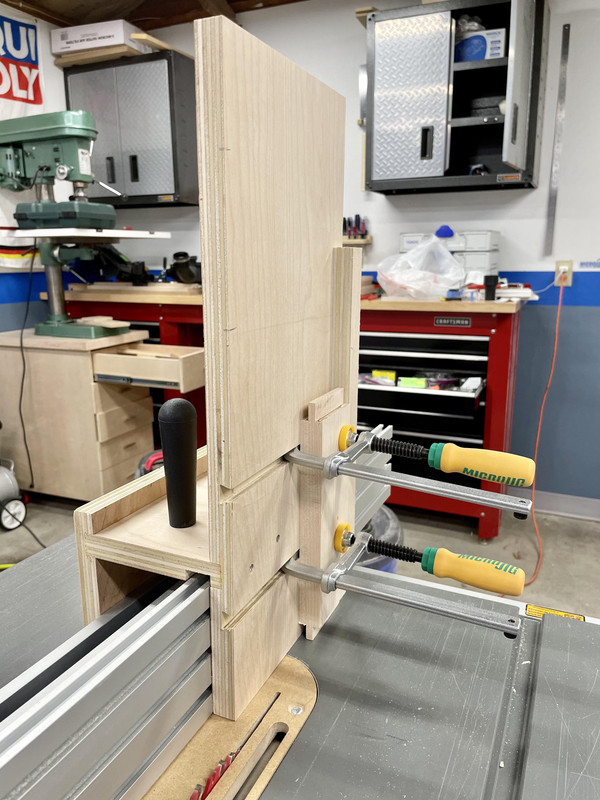
Spent way too much time on this simple tenoning jig the other night:

IMG-2103.jpg


I've been thinking about how to make my dad's cabinet project easier. You'll hear more about it soon I think but one challenge for me is doing rail and stile doors since I've never done them before. The tenoning jig was supposed to help with that, since I don't own cope + stick router bits, a coping sled, or have a miter channel in my homemade router table.

I figured table saw might be easier, and I broke down and got the basic Microjig matchfit dovetail bit and clamp pack from Rockler to make this jig. I figured I can use the clamps in the MFT and will likely use this system for a number of future jigs so I don't have to pay for expensive T-Track. I already have a couple of cool ideas in mind.

Anyways, back to the tenoning jig, man I got frustrated. I tried to assemble it with dados, which was a huge waste of time. It took me a long time to get the exact fitment set up on the router table, I really need a better system or jig for that. It's one reason I rarely use dados, but I think I will be for a mid-divider in my dad's project, so I have to get something reliable figured out.

2nd problem is my table saw. I've noticed the taller aluminum extrusion I have on the fence is not perfectly 90° to the table, which means the stock fence isn't either, although probably not as noticeable with the shorter height. I also had trouble getting the jig glued up squarely. So the side that supports the tenon is actually not perfectly square.

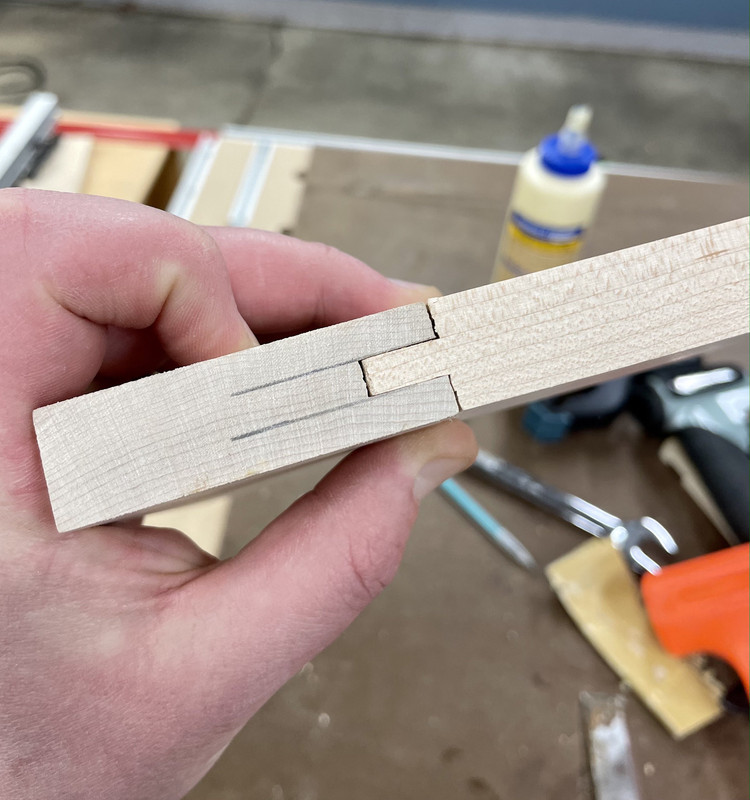
Not wanting to rebuild it I tried a test joint with some scrap maple:

IMG-2104.jpg


It worked... ok...

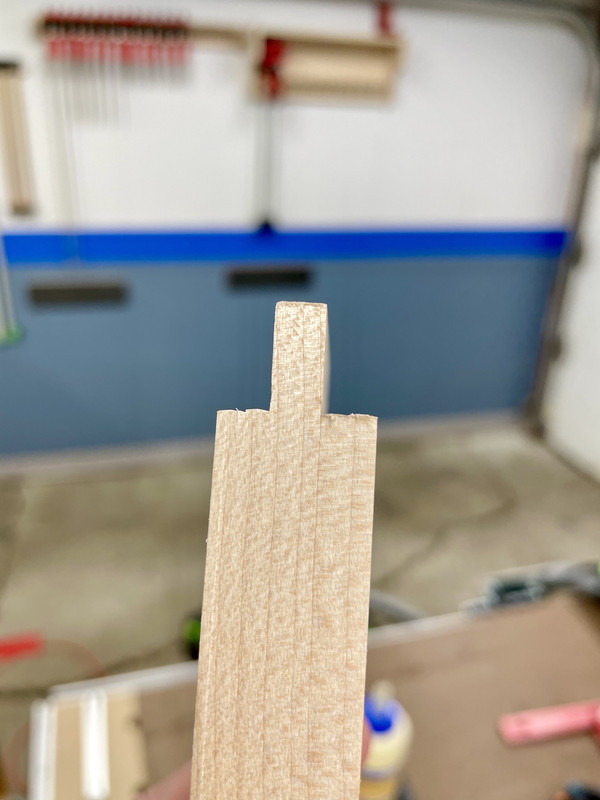
I don't have FTG tooth blade yet, so my combo blade didn't leave a totally flat surface on the tenon shoulders. Hoping this is partly the reason for not a perfect fit:

IMG-2105.jpg


But additionally I am worried about the fence perpendicularity, and my zero clearance insert is not perfectly leveled with the table surface. And if I want to get really nitpicky, the whole table on this job site saw is not perfectly flat.

All of those table saw defects (plus miter channels are not equal width throughout!) have been making me wish I could upgrade to a full size saw that's more accurate.

I'll need to practice some more with the tenons, and if I can't get good joints, come up with something else.

In other news the shop is a bit of a mess and I have a lot of leftover materials from the built ins that I want to save, but don't have a spot for. I really need to clean house before I start the next one.
 

bemuum5

Member
Joined
Mar 18, 2020
Messages
5
Location
Scottsdale
Sorry to activate your weather PTSD! Yeah, winter *****. And so do detached garages. Like a lot of places the housing market went a little nuts here so... it is what it is I am lucky to have a 2 car garage in the first place. As you well know, despite the snow and cold, detached is pretty common in the first ring 'burbs.

What lovely place do you live in now?

That is awesome about the 7.5 R, sounds like a blast. Idk your feelings on the forthcoming Mk8 but I feel like we got in on a great generation!

I will look into Cobb. It's been a few years since I've read up on all the options. I don't know if I can pull the trigger at the moment but can't hurt to do some research!

Did you have to upgrade your clutch? I think the R's have stronger factory pressure plate already.

Tune or not, sticky tires are gonna happen eventually, maybe next year.

P.S. got some Thai takeout at 50th and France tonight haha

:beer:

I'm in the Pacific Northwest now - south of Seattle, nestled in-between the Olympics, North Cascades, and Mount Rainier!

I don't have strong feelings one way or the other for the Mk8 - which means it's not the car for me as I am typically a fairly polarized individual. The performance numbers seem insane - I think VAG has stepped on their own toes a little bit with the Golf R being significantly faster than the Audi S3's new generation - similar to what Ford did with the 3.5L Ecoboost Mustangs being a $500 tune away from blowing the doors off the 5.0 versions.

I have a DSG trans so no need to upgrade anything for me, other than a $400 tune that really brings the transmission alive.

Just as an FYI - Cobb Off the Shelf (OTS) tunes are trash on Golfs. They will get you by as you wait for a basemap or other tune, but they really aren't great. They won't damage anything, they're just bad drivability. You get the Cobb Accessport for the protune capability. EQT, Sneekytunes, etc etc they all use Cobb's software to upload and datalog.

I don't know if its still there, but I used to bike to D'amico and Sons to get dinner for the family when I was growing up. My orthodontist was right above Breadsmith so after they were done cranking down my braces, I'd walk down with a wounded mouth and get myself a warm slice of whatever the daily bread was to soothe the pain. Growing up in Country Club was a fantastic place. I was on Casco Ave (this is now 15 years ago at this point) which was the only non-through street to 50th unlike Arden and Bruce. Enough of my memory lane...

On topic with your thread - I just built myself two 8ft x 2ft x 4ft work benches and am potentially going to put one of them on Casters. Your mobile saw/work cart got me thinking though...wheeling an 8ft wooden bench around in an 18x26ft garage probably isn't the best idea.
 

jar944

Well-known member
Joined
Jul 26, 2010
Messages
5,938
Location
Northern VA
Spent way too much time on this simple tenoning jig the other night:

IMG-2103.jpg


I've been thinking about how to make my dad's cabinet project easier. You'll hear more about it soon I think but one challenge for me is doing rail and stile doors since I've never done them before. The tenoning jig was supposed to help with that, since I don't own cope + stick router bits, a coping sled, or have a miter channel in my homemade router table.

I figured table saw might be easier, and I broke down and got the basic Microjig matchfit dovetail bit and clamp pack from Rockler to make this jig. I figured I can use the clamps in the MFT and will likely use this system for a number of future jigs so I don't have to pay for expensive T-Track. I already have a couple of cool ideas in mind.

Anyways, back to the tenoning jig, man I got frustrated. I tried to assemble it with dados, which was a huge waste of time. It took me a long time to get the exact fitment set up on the router table, I really need a better system or jig for that. It's one reason I rarely use dados, but I think I will be for a mid-divider in my dad's project, so I have to get something reliable figured out.

2nd problem is my table saw. I've noticed the taller aluminum extrusion I have on the fence is not perfectly 90° to the table, which means the stock fence isn't either, although probably not as noticeable with the shorter height. I also had trouble getting the jig glued up squarely. So the side that supports the tenon is actually not perfectly square.

Not wanting to rebuild it I tried a test joint with some scrap maple:

IMG-2104.jpg


It worked... ok...

I don't have FTG tooth blade yet, so my combo blade didn't leave a totally flat surface on the tenon shoulders. Hoping this is partly the reason for not a perfect fit:

IMG-2105.jpg


But additionally I am worried about the fence perpendicularity, and my zero clearance insert is not perfectly leveled with the table surface. And if I want to get really nitpicky, the whole table on this job site saw is not perfectly flat.

All of those table saw defects (plus miter channels are not equal width throughout!) have been making me wish I could upgrade to a full size saw that's more accurate.

I'll need to practice some more with the tenons, and if I can't get good joints, come up with something else.

In other news the shop is a bit of a mess and I have a lot of leftover materials from the built ins that I want to save, but don't have a spot for. I really need to clean house before I start the next one.

Before I had a shop full of machines to make tenons, I used a miter gauge on the table saw to make them.

Set the length to the shoulder with the rip fence and nibble away, then flip. It will take some tweaking but eventually you will get a good fit.

I'm 99% positive that is thr method we were shown in high school shop class.
 

Denwood

Well-known member
Joined
Sep 22, 2014
Messages
4,192
Location
Thunder Bay, Ontario, Canada
Nick, I hear you on the manual and gear ratio thing. My autocross (meaning heavily modified) 84 Scirocco was a blast to drive. I put in the closest ratio 5 spd box VW ever made for that platform, a built up 2.0 litre etc., along with the Quaife Torsen diff. In contrast my A3 Audi was a lot more civilised (like the R/GTI)and the DSG/paddle shifting is awesome..but I'd still take my 84 any day.

On the wood side, I've got an old radial arm saw that is only used with a dado blade for rabbets, tenons, etc. Once set up for a run, it works great and results in clean/precise cuts. My router setup is pretty much useless without a well designed table to go with it :-(
 

bj383ss

Well-known member
Joined
Sep 29, 2011
Messages
3,166
Location
TX
Nick you don't need a flat bottom blade for to make those tight. Just cut the tenon a little short and then cut the shoulder to size horizontally with the miter gauge. You will have to do two setups.

Bret
 
OP
N

nicholam77

Well-known member
Joined
Dec 18, 2016
Messages
2,671
Location
Minneapolis, MN
Before I had a shop full of machines to make tenons, I used a miter gauge on the table saw to make them.

Set the length to the shoulder with the rip fence and nibble away, then flip. It will take some tweaking but eventually you will get a good fit.

I'm 99% positive that is thr method we were shown in high school shop class.

Thanks Jar, this will be my backup method if the tenoning jig doesn't work well enough.

Nick, I hear you on the manual and gear ratio thing. My autocross (meaning heavily modified) 84 Scirocco was a blast to drive. I put in the closest ratio 5 spd box VW ever made for that platform, a built up 2.0 litre etc., along with the Quaife Torsen diff. In contrast my A3 Audi was a lot more civilised (like the R/GTI)and the DSG/paddle shifting is awesome..but I'd still take my 84 any day.

On the wood side, I've got an old radial arm saw that is only used with a dado blade for rabbets, tenons, etc. Once set up for a run, it works great and results in clean/precise cuts. My router setup is pretty much useless without a well designed table to go with it :-(

Not the first time I've heard you mention the Scirocco, seems like you really have a soft spot for that car. Pretty sweet :thumbup:

Ha I hadn't heard of using a dado blade in a radial arm saw before. Neat.

Nick you don't need a flat bottom blade for to make those tight. Just cut the tenon a little short and then cut the shoulder to size horizontally with the miter gauge. You will have to do two setups.

Bret

Smart, Bret. I've been meaning to add one to the blade collection eventually for miter splines etc, but I'll give that a test and a think over. Thanks!
 
OP
N

nicholam77

Well-known member
Joined
Dec 18, 2016
Messages
2,671
Location
Minneapolis, MN
Pantry Project - part 1

Ope!

IMG-2137.jpg


(That's my dad in the pic)

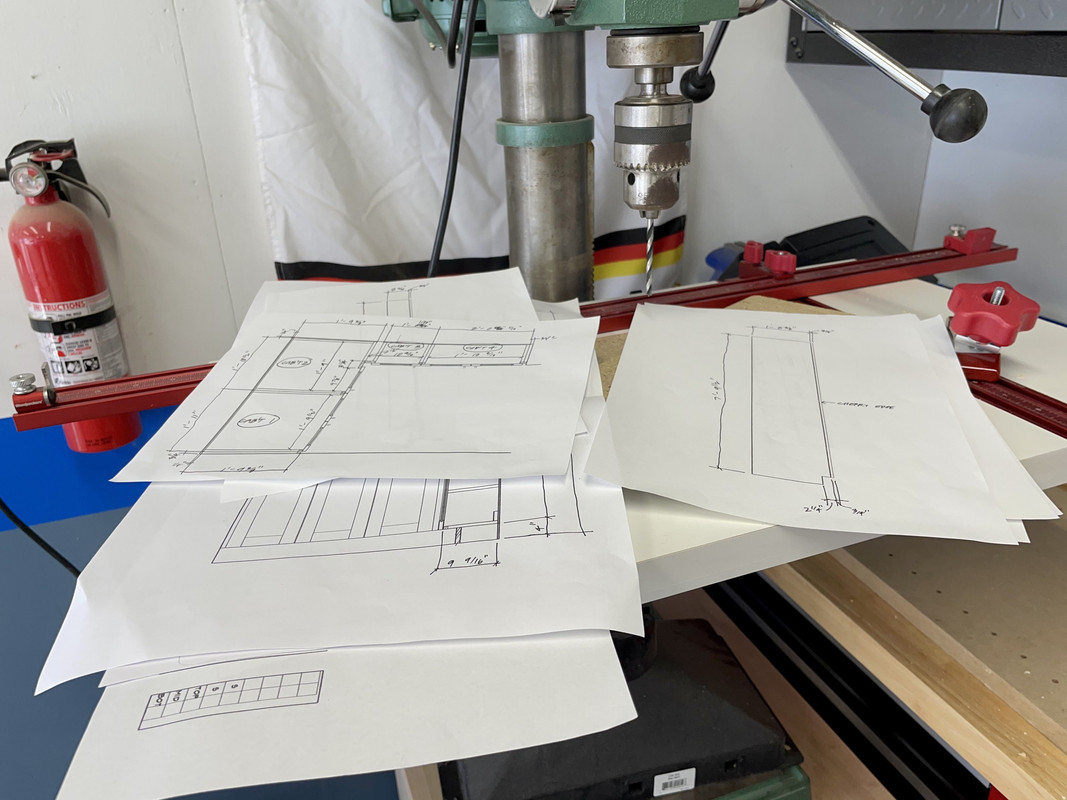
Plans he drew in Autocad:

IMG-2138.jpg


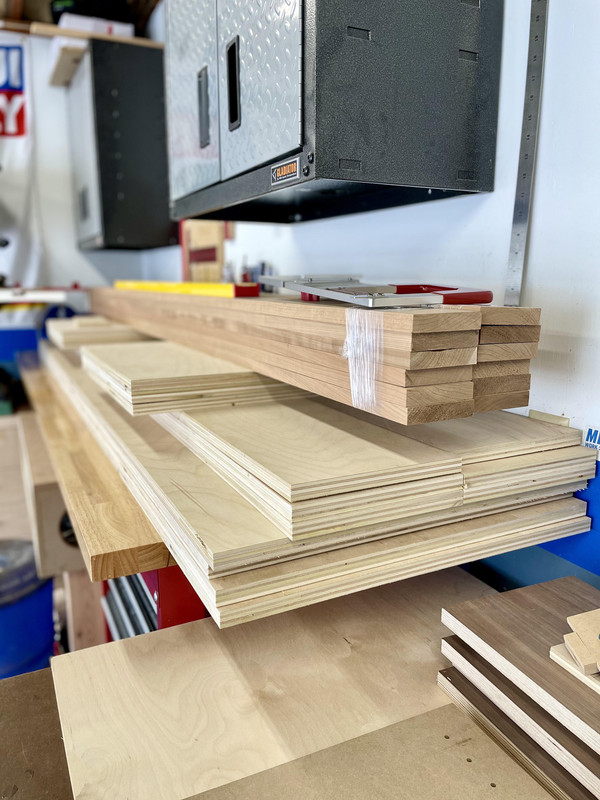
I present to you, lots of broken down plywood (6 sheets!):

IMG-2141.jpg


Getting a little crowded:

IMG-2142.jpg


I guess this means I've started the next project. :lol:
 
Last edited:
To avoid these ads, REGISTER NOW!
Top Bottom