To avoid these ads, REGISTER NOW!

Nobody’s project corner.

Nobody-named-Olli

Well-known member
Joined
Jan 9, 2025
Messages
1,635
Location
North Rhine-Westphalia; Germany
Welcome everyone to my little project corner. I will try and regularly document projects that I have taken on. DIY, wood, metal, (…).


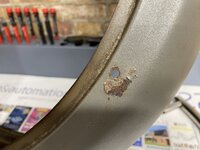
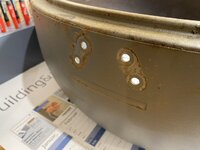
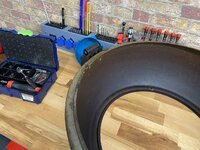
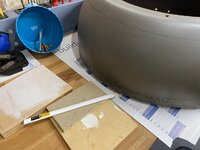
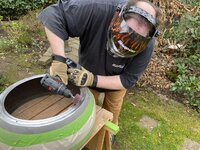
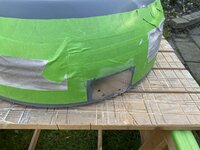
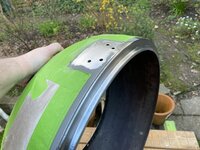
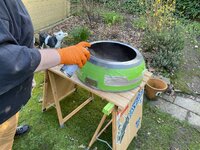
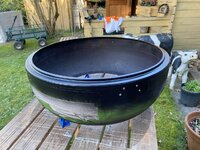
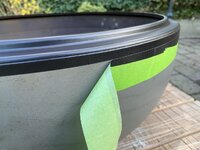
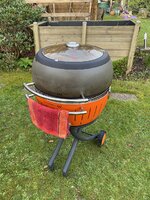
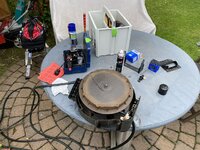
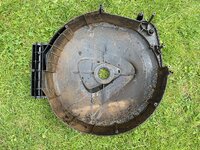
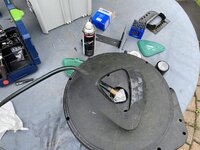
#1 The rusted Lotus BBQ XXL Hood - prep, rust removal, spray painting with heat resistant paint.

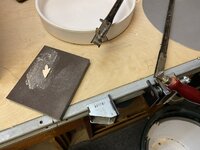
I loved this charcoal BBQ ever since I first saw it, purchased one and had many great meals prepped with it. Sadly the hood is not stainless and started to rust after some years. It probably didn’t help that the supplied cover I kept it under on the sheds patio was a great trap for moisture.

Situation:

IMG_1340.jpeg

IMG_1343.jpeg

IMG_1342.jpeg

IMG_1341.jpeg

Prep:

IMG_1338.jpeg

IMG_1370.jpeg

IMG_1378.jpeg

IMG_1385.jpeg

Kind regards,
Olli
 
To avoid these ads, REGISTER NOW!
OP
N

Nobody-named-Olli

Well-known member
Joined
Jan 9, 2025
Messages
1,635
Location
North Rhine-Westphalia; Germany
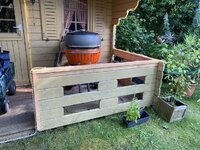
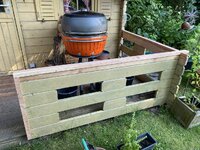
#2 Replacement of garden shed‘s handrail and the first board under it.

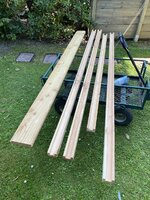
After a little over 20 years in service, a couple of parts needed replacing. Since I do not have a spindle moulder and/or planer getting these profiled boards in the exact thickness I needed was a bit tricky, but I found a great dealer that was able to get what I needed.

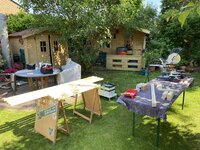
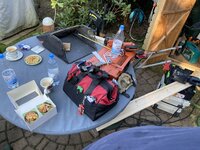
Setting up “shop” in the garden.

IMG_2703.jpeg

Cutting corners. ;)

IMG_2704.jpeg

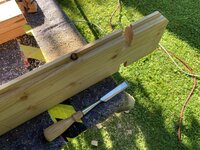
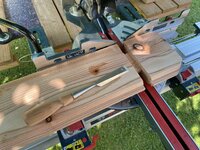
Preparing joints. Cut with jig saw and then cleaned/finished with a chisel.

IMG_2710.jpeg

IMG_2725.jpeg

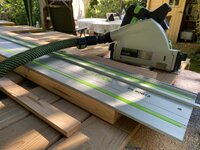
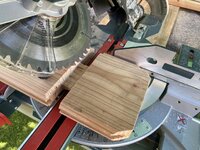
Cutting the later handrail to size.

IMG_2737.jpeg

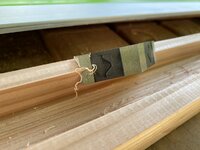
Cutting and cleaning the U-profile.

IMG_2738.jpeg

IMG_2748.jpeg

IMG_2742.jpeg

Test fit.

IMG_2753.jpeg

Using a fun little chamfering tool to take the edges off.

IMG_2756.jpeg
 
OP
N

Nobody-named-Olli

Well-known member
Joined
Jan 9, 2025
Messages
1,635
Location
North Rhine-Westphalia; Germany
Finalizing the joints.

IMG_2761.jpeg

IMG_2766.jpeg

Dry fit.

IMG_2763.jpeg

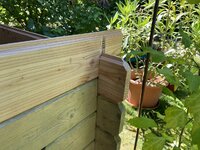
Test fit on the shed.

IMG_2772.jpeg

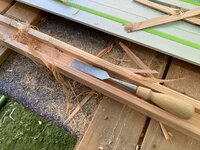
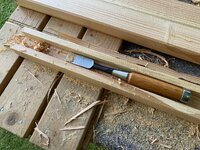
Starting “production”. Perfect timing to compare a basic Japanese chisel vs. my trusty Lie-Nielsen. My take is, while the Japanese one definitely holds the edge quite a bit longer, the Lie-Nielsen is miles ahead in terms of comfort.

IMG_2782.jpeg

IMG_2790.jpeg

”Production”

IMG_2788.jpeg

IMG_2793.jpeg

Boards cut, ready to fit handrail.

IMG_2795.jpeg
 
OP
N

Nobody-named-Olli

Well-known member
Joined
Jan 9, 2025
Messages
1,635
Location
North Rhine-Westphalia; Germany
#3 Small drying rack for homegrown garlic.

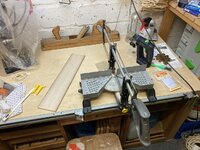
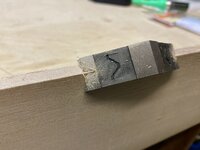
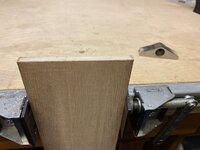
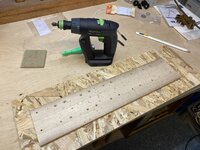
Cutting a paulownia board to size & chamfering the edges.

IMG_1738.jpeg

IMG_1742.jpeg

IMG_1745.jpeg

IMG_1746.jpeg

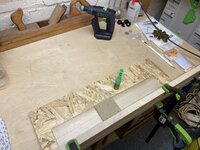
Made a template for positioning and spacing of the hole pattern.

IMG_1749.jpeg

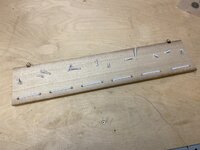
Drilling & countersink holes.

IMG_1751.jpeg

IMG_1752.jpeg

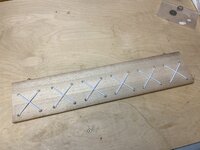
Adding elastic cord made from natural rubber (caoutchouc) and cotton to prevent mold in the long run.

IMG_1753.jpeg

Adding copper hangers.

IMG_1754.jpeg

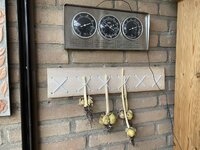
Finished.

IMG_1757.jpeg

Kind regards,
Olli
 
Last edited:
OP
N

Nobody-named-Olli

Well-known member
Joined
Jan 9, 2025
Messages
1,635
Location
North Rhine-Westphalia; Germany
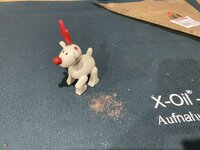
#4 Little help for Rudolph II. New antler. (I want to get this posted while Christmas isn‘t that long ago … ;) )

Christmas is a special time of year, but this year I felt Incredibly melancholic. Searching for something that kinda isn‘t there anymore - at least for me. Next Christmas will be very different for us. While going through our decorations in early December I found “Rudolph II” in one of the boxes, missing an antler. We have three, they are older than me and one was from my home, one from my grandparents on my father’s side of the family, one from my grandparents on my mother’s side of the family. Call it what you want, I felt the urge to repair it. So I put on some Christmas tunes and started the repair.

Drilled out the remainder of the broken antler.

IMG_3391.jpeg

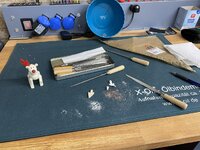
Although I was never really a fan of using a coping saw, it’s probably the best tool to cut something like this. Mirroring the existing antler on to paper & hint of double sided tape works wonders.

IMG_3392.jpeg

IMG_3395.jpeg

IMG_3394.jpeg

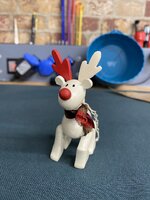
Fitting ”Rudolph II” it’s new antler.

IMG_3396.jpeg

The others have a scarf, I don’t know why “his” is missing. Quick trip to my significant other‘s sewing kit fixed that, she had just the right piece that I could borrow a bit off.

IMG_3403.jpeg

I felt a bit better afterwards.

Kind regards,
Olli
 
OP
N

Nobody-named-Olli

Well-known member
Joined
Jan 9, 2025
Messages
1,635
Location
North Rhine-Westphalia; Germany
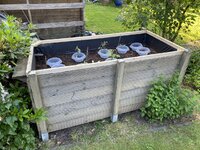
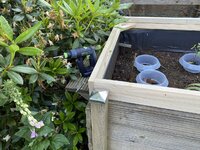
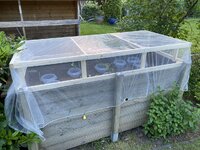
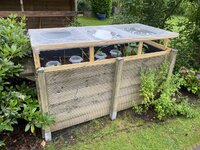
#5 Frame-lid for the raised bed. ‘24 could as well have been the year of the snail for all we experienced. I don’t think we ever had such a enormous infestation before, and my significant other asked me if I could build a frame so the net she purchased to protect the raised bed was easier to handle and the plants would have more room.

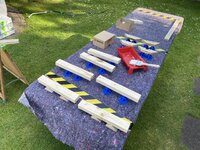
Setting up shop in the garden. You can see the prior-situation with the net in the upper right corner of this pic.

IMG_1708.jpeg

Cutting the parts.

IMG_1710.jpeg

Coating with a protective clear coat.

IMG_1718.jpeg

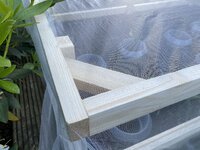
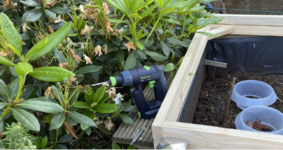
Decided to make the frames a bit more rigid. Added a stabilizer.

IMG_1722.jpeg

Frame one.

IMG_1723.jpeg

Frame two.

IMG_1726.jpeg

IMG_1727.jpeg

With risers installed and net on.

IMG_1736.jpeg

IMG_1737.jpeg

A bit later in the year, with a heavy rain warning - this paid off, as I was able to transform it into a rain cover in minutes with a bit of heavy gauge foil and an electric stapler. After seeing this a couple of days later, I added some relief cuts.

IMG_2197.jpeg

Kind regards,
Olli
 

Old tool guy

Well-known member
Joined
Apr 13, 2023
Messages
3,339
Nice work, and interesting to see how it’s done in other countries. Couple of comments and questions.

Is that a stabila carpenters pencil in one of the first pictures?
Did you use high temperature paint for the bbq grill?
The base of the grill looks rathe4 small, is it stable? Looks like it would tip over easily.
I love the miniature cow.
Cutting the large & long U in the boards would have been a good router project.
Nice job on the reindeer. He’s cute.
Last picture, you said you added relief cuts ... for what? To drain the water?
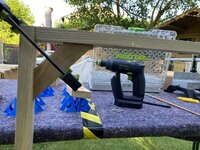
In the picture where you are drilling the holes for the garlix hanger, what is that green thing that looks like a marker?
 
OP
N

Nobody-named-Olli

Well-known member
Joined
Jan 9, 2025
Messages
1,635
Location
North Rhine-Westphalia; Germany
Thank you very much, everyone!

Nice work, and interesting to see how it’s done in other countries. Couple of comments and questions.

Is that a stabila carpenters pencil in one of the first pictures?
Did you use high temperature paint for the bbq grill?
The base of the grill looks rathe4 small, is it stable? Looks like it would tip over easily.
I love the miniature cow.
Cutting the large & long U in the boards would have been a good router project.
Nice job on the reindeer. He’s cute.
Last picture, you said you added relief cuts ... for what? To drain the water?
In the picture where you are drilling the holes for the garlix hanger, what is that green thing that looks like a marker?

Thank you very much!

Yes, Stabila carpenters pencil.

Yes, high temperature paint. (Heat resistant up to 650 degree celsius/ 1202 degree Fahrenheit) This is the paint I used: https://eshop.wuerth.de/Heat-resist...-HEATRES-650C-400ML/0893359005.sku/en/US/EUR/

The BBQ doesn‘t tip over easily, very stable. Front legs are adjustable. I’d say it’s almost as stable as if it was a “three-point support”.

Yes, relief cuts in the foil for the water to drain.

That is a pressurized hole marker. It “shoots” a bit of green chalk when pressed down. https://charlesbentley.com/diy-and-building/painting-and-decorating/marxman.html The standard will suffice for fittings up to 50mm/ about 2” - the newer “deep” one, black cap, will work from 50mm up to 100mm/ about 4”.

Kind regards,
Olli
 
OP
N

Nobody-named-Olli

Well-known member
Joined
Jan 9, 2025
Messages
1,635
Location
North Rhine-Westphalia; Germany
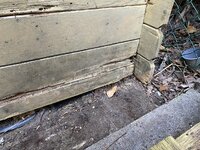
#6 Floor & side wall band-aid/ patch for the small shed. When I got the small tool shed ready for winter, I noticed that one corner had rotted away. That was my own mistake, as I had conveniently stored a couple of stones against that corner on the outside, the sun doesn‘t really reach there, so I basically created a “year round wet spot”. My mistake. Lesson learned.

IMG_3092.jpeg

IMG_3088.jpeg

IMG_3098.jpeg

Cut out affected area.

IMG_3103.jpeg

IMG_3105.jpeg

Add to substructure, patch flooring.

IMG_3130.jpeg

IMG_3117.jpeg

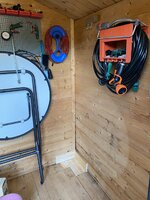
Finished. Inside.

IMG_3137.jpeg

IMG_3139.jpeg

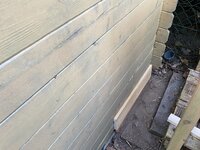
Outside.

IMG_3136.jpeg

This will give the small (garden) tool shed a couple of years additional lifespan, before it will go once the big shed has reached it’s end of life - and both sheds will be replaced by an L-shaped shed build that covers the space now occupied by the two sheds.

Kind regards,
Olli
 

gahrajmahal

Well-known member
Joined
Dec 12, 2008
Messages
2,538
Location
Cincinnati, Ohio
Olli, it is fun to read your project thread and see images reminding me of my heritage (I’m 1st generation German American). Last year in the spring the Mrs and I did Germanys “greatest hits” or all the places we had visited previously but wished to see again. We started in Berlin (never had been there) and made our way all the way down to the Swiss border. We rented a convertible Mini Cooper and had fun with the top down on many journeys. Stopping at my relatives house where they have a very similar shed in their backyard. They also do many home repair projects in their garden. Concerning your “Rudolph”, I also have many broken Erzgebirge wooden figurines from my childhood. My family has ties from there and we stopped during our trip there. I asked in the shops about repair parts, trees, angels and pyramid fan blades etc. and they sell them there. Since it was off season (no snow) we stayed in the Fichtelberg lodge overnight. What a treat! Keep adding to your project thread, I love reading it!
 

Old tool guy

Well-known member
Joined
Apr 13, 2023
Messages
3,339
It’s not nice to include pictures of food.

What kind of wood is the shed? Looks like pine.

I think you should use a countersink bit to drill a pilot hole, it will keep the boards from splitting and you can get the screw heads flush.
 
OP
N

Nobody-named-Olli

Well-known member
Joined
Jan 9, 2025
Messages
1,635
Location
North Rhine-Westphalia; Germany
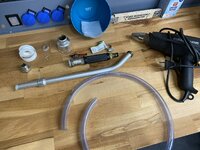
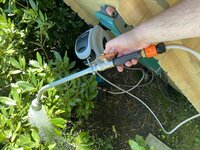
#7 Watering wand repair.

Corroded flare/ flaring.

IMG_2532.jpeg

Getting ready.

IMG_2568.jpeg

Cutting off corroded end.

IMG_2570.jpeg

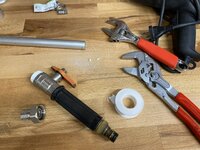
Clean.

IMG_2572.jpeg

PTFE tape.

IMG_2573.jpeg

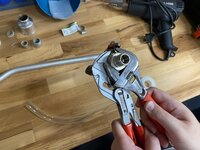
Tightening up the 3/4” to 1/2”reduction. The reduction is a leftover piece of HVAC hardware from another project.

IMG_2584.jpeg

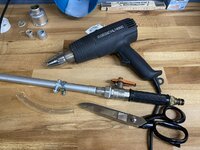
Using a bit of heat to make that piece of hose more flexible and join the parts.

IMG_2585.jpeg

Tightening hose clamps.

IMG_2586.jpeg

Adding a seal/filter to the shower head. Prior to the repair such a seal/filter sat between flare & handle.

IMG_2588.jpeg

Works.

IMG_2589.jpeg

Kind regards,
Olli
 

Ohmthis

Well-known member
Joined
Jan 20, 2013
Messages
3,018
Location
Outside of Louisville KY
Great job or your projects. It’s cool to see the tools you use VS what most would have here in the US. I can totally see where the Lie-Nielsen handle would be so much more comfortable. Maybe you can replace the handle on the Japanese chisel?
 
OP
N

Nobody-named-Olli

Well-known member
Joined
Jan 9, 2025
Messages
1,635
Location
North Rhine-Westphalia; Germany
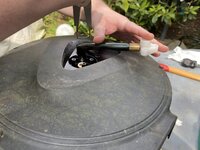
#8 Failed automatic/retractable (water) hose reel repair & installation of a new one.

8.1

A couple of years ago we bought a retractable hose reel for the garden from one of my suppliers. It broke during the summer of ‘24. An inquiry with the supplier revealed that there would be no warranty, no available spare parts and they will not attempt to repair it/ get it into the workshop on my dime.

With that being clear, I decided I would strip it down and see if I could fix it. My intentions were honest and real, hence all the tools and methodic dismantling.

For easy reference, we‘re going to call this the ‘Gen1’.

The first cover was easily removed. Seeing all the screws had rusted and dried ‘muck’ all around I already had the feeling this was probably shot beyond repair, but I continued.

IMG_2401.jpeg

This was the one half of the reel’s housing I took off first. As you can see, the only two openings are were the hose comes out - and a hole that I drilled when I installed it, because it didn’t come with a drain opening.

IMG_2407.jpeg

The drain hole I drilled.

IMG_2408.jpeg

And from the inside.

IMG_2409.jpeg

As you can see, over time so much muck build up that my drain hole was basically useless. And at times, water rose to significant levels inside.

Getting off the other half of the housing.

IMG_2403.jpeg

IMG_2415.jpeg

IMG_2416.jpeg

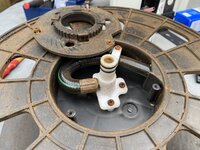
This is when I stopped taking pictures that were originally meant to be a reference for when I was putting it back together. I realized this was not repairable. And opening the spring/tensioner compartment ultimately confirmed that. The spring was completely rusted and had broken.

I had given this unit a bit of maintenance every year since installing it. I drained the housing, sprayed food grade oil on all the moving parts I could reach. The biggest issue I think was that the drain hole was too small, and there was no access beyond the opening for the hose.
 
To avoid these ads, REGISTER NOW!
OP
N

Nobody-named-Olli

Well-known member
Joined
Jan 9, 2025
Messages
1,635
Location
North Rhine-Westphalia; Germany
#8 Failed automatic/retractable (water) hose reel repair & installation of a new one.

8.2

I talked to my suppliers and it was pretty clear that an industrial quality, stainless, retractable hose reel would be out of question for this application. I don’t mind spending money for quality, but not here - the reasons I will keep to myself for now - it is what it is.

But instead of buying another ’branded’ retractable hose reel from one of the suppliers, I went to shop at Vevor. While that is still ‘branded’, it is marked up far less. We are going to call this the ‘Gen2’ for easy reference.

‘Gen2’ delivered, ‘Gen1’ in the trash bin behind.

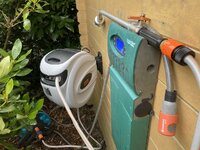
IMG_2421.jpeg

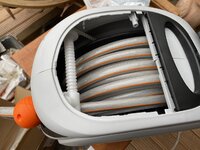
While on the ‘Gen1’ the ‘handle’ was just a ‘blind’, on the ’Gen2’ - when removed - is an easy and large access/maintenance opening.

IMG_2427.jpeg

It also comes with a large drain hole already drilled.

IMG_2428.jpeg

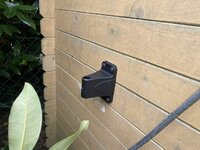
I installed the mount.

IMG_2450.jpeg


IMG_2452.jpeg

Hose reel placed on the mount.

IMG_2454.jpeg

The hose reel is easily removed from the mount. Just pull the pivot pin (which is secured with a cotter pin).

What I really like about this ‘Gen2’ is the fact that it clearly shows improvement/ evolving over ‘Gen1’.

It works and that is what matters. If we get a couple of years use out of it - and I have no doubts about that due to the better access for maintenance - it will have earned its money and we can asses anew what it will be replaced with if necessary.

Kind regards,
Olli
 
OP
N

Nobody-named-Olli

Well-known member
Joined
Jan 9, 2025
Messages
1,635
Location
North Rhine-Westphalia; Germany
We retracted the garden hose, after watering the garden, without really ‘cleaning’ the hose on it’s way back in. So over time, dirt, grass, (…) accumulated. That’s my guess at least.

With the new one and the large opening, I plan to fully extend the hose, take the handle off and wash it out through the drain hole. Then lube/preserve. Maybe every 6 months, or at the end of each ‘garden season’ and once in between.

Let’s see how that goes. :)

Kind regards,
Olli
 
Last edited:

drivesitfar

Well-known member
Joined
Oct 23, 2013
Messages
36,047
Location
Pacific Northwest
I'm curious to see how you like using these and how long they continue to work like they were designed to. I've used a few of the roller kinds in the past that didn't last more than a few years, but I was thinking of attaching an old aluminum wheel to my house and rolling my hoses up on those?

keep up the great posts and work
 
OP
N

Nobody-named-Olli

Well-known member
Joined
Jan 9, 2025
Messages
1,635
Location
North Rhine-Westphalia; Germany
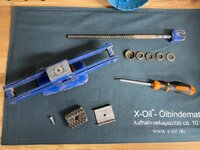
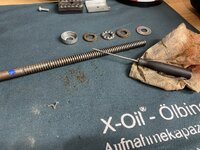
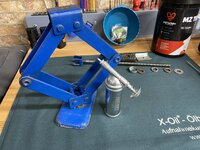
#9 Cleaning and maintenance - ‘Kinzo Tools’ scissor car jack.

I took some time to primarily clean and then re-lube/maintain my Dad’s old scissor car jack. I have no actual intention of using this in the ‘real world’ - but it bothered me that it sat on a shelf, dirty and running rough. Now I can neatly box it up and keep in the ‘project workshop’ until I have time to set up a display cabinet for a couple of these ‘heirloom’ pieces.

IMG_4306.jpeg

IMG_4308.jpeg

IMG_4309.jpeg

IMG_4310.jpeg

IMG_4311.jpeg


IMG_4312.jpeg

IMG_4313.jpeg

IMG_4314.jpeg

IMG_4315.jpeg

IMG_4316.jpeg


Kind regards,
Olli
 
OP
N

Nobody-named-Olli

Well-known member
Joined
Jan 9, 2025
Messages
1,635
Location
North Rhine-Westphalia; Germany
I don’t think it came from a car’s ‘on board’ tool set. My Dad drove a ’NSU’ (https://en.wikipedia.org/wiki/NSU_Motorenwerke) that he actually did work on himself - and I only know the stories how he would have to fix it every trip and Mom killed time by knitting. (I would have to ask which model, that was way before I was born) then an Audi 80 and then, already having married my Mom, a VW Golf 2 - that’s the first car that I can actually remember.

And that was purchased brand new, so no more roadside repair adventures with that one. I only remember him working on that VW once, to exchange the passenger side door. And that was a few years before that car ended up at the junkyard. We already had a second car by then and that was a Toyota Model F GLX. I think ultimately the coolest car we ever had.

And with it’s ‘on board’ tool set - and a similar car jack - we (Dad & me) did perform a tire change on the Autobahn at night in heavy rainfall. It was that very tool set that came with a pair of slip joint pliers, something I had never seen before - since my Dad had Knipex combination pliers and pincers - but no slip joint pliers. I also remember it was a grey faux leather Toyota tool roll. And I remember that the spare tire on the Toyota sat in a ‘steel cage’ under the car/trunk. You would loosen a bolt that sat inside the frame of the tailgate, then the cage would drop down, being caught by a chain as secondary safety and then you would proceed to lift it back up a bit and remove the chain.

Pulling out the spare tire was OK, maneuvering the flat/broken tire back into it was ‘hell’ in that very situation with darkness and rain. … I also remember my Dad held one of my hands, with the other I held onto the roof railing, and then jumped on that wrench to loosen that tire’s nuts/studs. They were never off, and they had been zapped on at the dealership with an impact. … Crazy night.

Again, I don’t think that the Kinzo came from one of the cars. The one for the Toyota was actually brown and had a very different handle assembly.

I have no recollection of what was inside that VW Gold 2 in terms of tools/car jack.


Under those 3 blue covers is one electrical outlet/socket each.

Kind regards,
Olli
 
Last edited:
OP
N

Nobody-named-Olli

Well-known member
Joined
Jan 9, 2025
Messages
1,635
Location
North Rhine-Westphalia; Germany
#10 Proof of concept for a new lawn in the garden gone awry.

#10.1

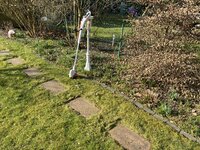
Beautiful weather, very mild temperatures - ideal for me to get some stuff done.

First this morning at around ten o’clock was some maintenance to the existing lawn, walkway and flower bed edges/borders. This went really well, I absolutely love the lightweight 12V Stihl equipment, that FSA 30 trimmer is amazing.

IMG_4783.jpeg

IMG_4784.jpeg

IMG_4786.jpeg

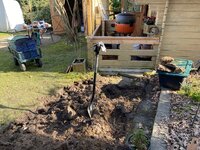
So far, so good. Next came the proof of concept. At the very end of the lawn, I wanted to remove the moss - then dig one spade deep into the soil to loosen it, screen it, compact and bring it up to level using our fantastic compost. Then reseed and keep track of growth. If we like it, reseed the whole lawn - obviously using an excavator for all the prep work.

Getting the moss up and out is really no problem.

IMG_4787.jpeg

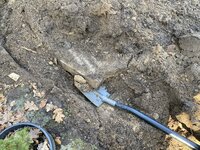
In many spots I wasn’t really able to get the one spade depth, I was hitting stone. Man-made stone.

IMG_4790.jpeg

When I found these wires, I immediately new that the rumors were true. When this settlement was developed and build in the late sixties, they tracked all their waste along with the building progress, and then buried it, only covering it superficially, on the last two or three properties. We are the second last property.

IMG_4791.jpeg

Now a couple of stones and a bit of concrete won’t give me headaches, but what I found next did.

I will add another posting, so I can start over fresh with 10 attachments available to me for that one.
 
Last edited:
OP
N

Nobody-named-Olli

Well-known member
Joined
Jan 9, 2025
Messages
1,635
Location
North Rhine-Westphalia; Germany
#10 Proof of concept for a new lawn in the garden gone awry.

#10.2

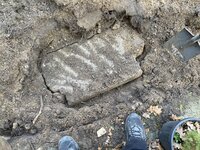
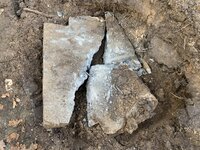
I hit stone everywhere, so I started to free them and take them up & out. Then I found this.

IMG_4792.jpeg

IMG_4795.jpeg

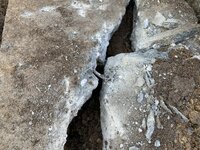
At this point, I hoped it was miss cure or something. So I grabbed my 2kg class battery powered rotary & demolition hammer and a SDS-plus chisel. This thing just laughed. I knew then, this was no miss cure and as we all know, there is no such thing as old concrete, there is only harder concrete. Still being in a fairly good mood, I got the sledge hammer. (You can see the little dents that SDS-plus chisel made, lol.)

IMG_4797.jpeg

Broke it up with the sledge. Of course it was reinforced concrete.

IMG_4799.jpeg

IMG_4800.jpeg

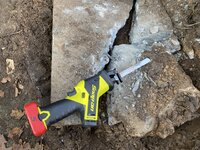
Out came my Snap-On saw-z-all with some old blade. Made quick work of the two cuts ultimately needed.

IMG_4802.jpeg

IMG_4804.jpeg

IMG_4806.jpeg

IMG_4807.jpeg

The culprit in a waste bin. And yes that is to heavy to move - but I was happy to have it in one place for the time being.

IMG_4808.jpeg
 
OP
N

Nobody-named-Olli

Well-known member
Joined
Jan 9, 2025
Messages
1,635
Location
North Rhine-Westphalia; Germany
#10 Proof of concept for a new lawn in the garden gone awry.

#10.3

Out came many more stones.

IMG_4812.jpeg

Manual screening.

IMG_4813.jpeg

The aftermath. All waste distributed over a couple of bins that can be handled by two adults, additional single pieces that are two heavy for bins.

IMG_4815.jpeg

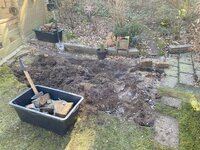
That area is now cleared of all building materials/ debris. Soil screened. This will have to be compacted, then leveled and seeded. I will have to transport all the debris to a local quarry, this will be easily shy of a hundred bucks to dispose. Not to mention getting that stuff moved to the car. (Can’t reach the property/ garden by car, everything that comes in or goes out needs to be wheelbarrowed, either manually or motorized.) This is the end-result for today. I had it done, to this stage, by 2 o’clock. By three I had showered and now it‘s almost 5 o’clock.

IMG_4816.jpeg

Proof that I did this. Lot of superficial peeling/blistering on my right hand. lol.

IMG_4817.jpeg


This is honestly the last nail in the coffin for the lawn makeover. I’m. Not going to rent an excavator to dig up more builder’s waste & debris that I will then have to commit an immense amount of time to getting it properly disposed. Not to mention the costs for skips and actual fee per ton for this kind of waste. And if I’m really winning the lottery, the waste management company wanting testing and proof for ‘no asbestos’.

I will level and reseed that patch in the coming days - and that’s it.

Kind regards,
Olli
 

drivesitfar

Well-known member
Joined
Oct 23, 2013
Messages
36,047
Location
Pacific Northwest
Talk about manual labor and good exercise and I’ve always said landscaping is better than any gym.

Here’s a couple ideas next time if you run across done unwanted concrete. Try and remove dirt under it do give it somewhere to break, drill a few holes in it with your hammer drill with maybe a half inch bit and then hit with your sledgehammer or big sds bit. Interesting about the wiring but I bet there are lot of buried bits in Germany.

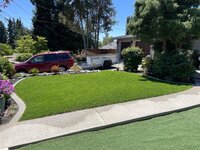
A couple tips about lawn whether it’s sod or seed that I’ve discovered after more than a few tries. The best results I have had is using garden mix instead of sandy top soil but drainage needs to be decent. I use a fertilizer I buy at the sod farm and about every 4-6 weeks on my little lawn. 15/15/15 for first 6 months or so then change to a Multy purpose one that I think is 25 5 and 5 but I’ll get exact if you ask. I also use grub killer spring (today in fact just before rainy days), and fall (September) because raccoons, crows and maybe a few other critters will tear up your lawn if grubs are in it. Plenty of pictures in my thread if you need evidence of that damage.

Good luck and I bet it will improve not only the look but the value of your home.

IMG_5349.jpegIMG_5378.jpegIMG_5012.jpeg
 

kaymccampbell

Well-known member
Joined
Feb 27, 2015
Messages
29,598
Location
Upstate New York
This is honestly the last nail in the coffin for the lawn makeover. I’m. Not going to rent an excavator to dig up more builder’s waste & debris that I will then have to commit an immense amount of time to getting it properly disposed. Not to mention the costs for skips and actual fee per ton for this kind of waste. And if I’m really winning the lottery, the waste management company wanting testing and proof for ‘no asbestos’.
Have you considered making an art piece, like a fountain or waterfall or sculpture in your garden, out of all the chunks you dig up?
 

Jgaz

Well-known member
Joined
Dec 16, 2016
Messages
1,697
Location
AZ
Sir,
I can sure get appreciate you efforts cleaning up after a lazy, cheap *** builder that buried the debris.

At my last Michigan house I had a heck of a time growing decent grass in my front yard. One day I was messing with the irrigation system trying to get better coverage with the sprinkler heads.
An older gentleman stopped by on his walk and told me the builder had covered a lot of construction debris and put dirt and sod over top of them. MIve was mostly insulation scraps, pieces of drywall, soffit trim scraps, morter and pieces of brick.

I cut the sod, rolled it up, cut back the dirt and debris, added topsoil compacted it, and relaid the sod.
Lots of work.
I feel for you because at least I had the loan of a small tractor with a blade and a bucket.
 
OP
N

Nobody-named-Olli

Well-known member
Joined
Jan 9, 2025
Messages
1,635
Location
North Rhine-Westphalia; Germany
@kaymccampbell I haven’t, because I’m really not any good at ‘arts’, I can’t ‘envision’ or ‘see’ it, if you know what I mean.

@Jgaz Thank you! It’s mind blowing, isn’t it? I could get one of those mini excavators in, no problem - just like a mini dumper and muck truck. It’s just not worth it anymore, now that I know what I’m dealing with. That was what this little project was all about, finding out if it makes sense to do this for the whole lawn.

Kind regards,
Olli
 

kaymccampbell

Well-known member
Joined
Feb 27, 2015
Messages
29,598
Location
Upstate New York
@kaymccampbell I haven’t, because I’m really not any good at ‘arts’, I can’t ‘envision’ or ‘see’ it, if you know what I mean.

@Jgaz Thank you! It’s mind blowing, isn’t it? I could get one of those mini excavators in, no problem - just like a mini dumper and muck truck. It’s just not worth it anymore, now that I know what I’m dealing with. That was what this little project was all about, finding out if it makes sense to do this for the whole lawn.

Kind regards,
Olli
Then try randomly dry stacking the chunks, so that they're more or less stable, without making it a wall. Don't like it? Do it over next week. Make it a game. Sort of Jenga with stones. If it ever comes to a point you like it, then formalize it with a little mortar. In the meantime, it's a work in progress for a very selective customer.
 
OP
N

Nobody-named-Olli

Well-known member
Joined
Jan 9, 2025
Messages
1,635
Location
North Rhine-Westphalia; Germany
Then try randomly dry stacking the chunks, so that they're more or less stable, without making it a wall. Don't like it? Do it over next week. Make it a game. Sort of Jenga with stones. If it ever comes to a point you like it, then formalize it with a little mortar. In the meantime, it's a work in progress for a very selective customer.

I really like the way you think! :) But, it’s gone now. I loaded it up and got it disposed of.

Kind regards,
Olli
 
OP
N

Nobody-named-Olli

Well-known member
Joined
Jan 9, 2025
Messages
1,635
Location
North Rhine-Westphalia; Germany
@drivesitfar Thank you for the advice regarding future concrete demolition! You have a beautiful garden I must say. Love what seems to be the foot path/walkway entry. Also love the edges, they were poured I guess?

I had to look up what a ‘sod’ is, now that I understand that it is basically what we call ‘Rollrasen‘ (pre-grown grass in roll or rectangular tile form) everything makes sense.

I haven’t used any fertilizer so far. What I do is, I start in spring by using an attachment on the aerator to lift the moss out and then the aerator itself. I mix grass seed with our compost and do some ‘patchwork‘. In autumn I give it some lime.

I’m curious to learn what the numbers mean in regard to using fertilizer?

Gladly we definitely do not have a ‘grub’ problem. I will look through your thread to find some pictures, now I’m curious!

I will have to check what kind of fertilizers I can get locally and maybe try that to improve the lawn. I don’t think we have a sod farm anywhere near, but certainly other places that sell fertilizers and such.

Kind regards,
Olli
 

drivesitfar

Well-known member
Joined
Oct 23, 2013
Messages
36,047
Location
Pacific Northwest
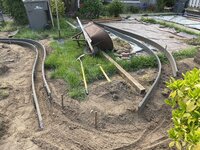
Ollie: my concrete edges were formed with concrete stakes and trex (pvc or plastic 1x6’s) that bend cause my bride loves curves (as do I even if more work). They are about 8 inches wide so my push lawn mower has a plenty of room for this old guy to mow it which is about 2-3 times a week in growing season cause I don’t like raking and grass clippings seem to be good for the lawn if in small amounts. The two edges in my lower south lawn that is about 450 square feet was 65 60 pound concrete bags hand mixed in my wheelbarrow on two separate days. It’s far better than most gym workouts.

The 3 numbers on the bag are nitrogen, phosphorus and potassium according to Google and the 15 15 15 is what the sod (grass) farm gives with new sod that I use for about 6 months every 3-4 weeks a light dusting with a hand spreader. I’ll try to get you the one I use after that every month that is approximately 25 5 and 5.

We play jarts (like darts only more like horseshoes) that really aerate our lawn in the summer but the squirrels burying nuts and birds finding them and worms also helps. I’ve had to replace the top soil with garden mix now and since keeping the grubs out the raccoons and crows attack neighbors yards now and leave mine alone (knock on wood).

I’m far from a lawn expert but I have learned a few years by being a homeowner for about 50 years. I’ve hydro seeded, seeded, sod many times and the watering and care and fertilizer but this last few years while neighbors yards are brown, ripped up by critters and in general not great my bride and I do like ours. Both sections of our front yard looked similar to the nice looking lawn today before a late October raccoon pack came thru a couple late evenings. The north portion is going to be a putting green but it needs a bit more time so temp astroturf covering for now.

Good luck and if your yard work is anything like your cooking ability you’ll do great. Ask questions if you need any or just post up pics of your progress when you have time.
 

Attachments

  • IMG_4848.jpeg
    IMG_4848.jpeg
    1.8 MB · Views: 30
  • IMG_4851.jpeg
    IMG_4851.jpeg
    1.6 MB · Views: 22
  • IMG_4865.jpeg
    IMG_4865.jpeg
    1.7 MB · Views: 21
  • IMG_1991.jpeg
    IMG_1991.jpeg
    1.8 MB · Views: 21
  • IMG_2252.jpeg
    IMG_2252.jpeg
    1.7 MB · Views: 21
Last edited:
To avoid these ads, REGISTER NOW!
Top Bottom