To avoid these ads, REGISTER NOW!

Nobody’s project corner.

OP
N

Nobody-named-Olli

Well-known member
Joined
Jan 9, 2025
Messages
1,635
Location
North Rhine-Westphalia; Germany
Thank you very much! @WoodsTruck Those drill bits look really handy to have at hand!


@Jgaz Thank you very much!

Can’t recommend a track/ plunge saw highly enough to be honest, makes so many things easier and all around fairly safe for the operator. But then again, I wouldn’t want to be without a reg. circular saw either. ;) In my view, they compliment each other.

Kind regards,
Olli
 
To avoid these ads, REGISTER NOW!
OP
N

Nobody-named-Olli

Well-known member
Joined
Jan 9, 2025
Messages
1,635
Location
North Rhine-Westphalia; Germany
#20 New cover plates for the roller shutter housing and a bit of loggia ceiling makeover.

Prequel in four posts here:

Discovery.: https://www.garagejournal.com/forum...your-house-today.513421/page-14#post-11238936

What it looks like.: https://www.garagejournal.com/forum...your-house-today.513421/page-14#post-11238978

Shutter drive unit repair day.: https://www.garagejournal.com/forum...your-house-today.513421/page-16#post-11283170

Fixed.: https://www.garagejournal.com/forum...your-house-today.513421/page-16#post-11283310

Now it was time to re-fit presentable covers and do a bit of overall maintenance/ tidy up.

20.1 Electrical tidy up, adding some insulation, re-fitting window trim in one area.

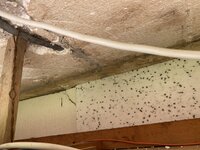
Getting my head into the shutter housing to do some minor electrical tidy up.

IMG_7113.jpeg

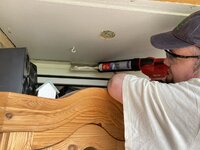
Using the soft-hammering/ hammer energy reducing ”Wallster” SDS-plus drill bit from Diager in my rotary hammer to set wall plugs in a rather soft-brittle unknown material inside the shutter housing. (Explanation of drill bit, here: https://www.garagejournal.com/forum...-tool-arrivals.103272/page-1812#post-11052067 ) Obviously with dust extraction.

IMG_7122.jpeg

And mounting the labeled junction/distribution boxes.

IMG_7130.jpeg

Well, hello everyone! :) - Seriously, just to give an impression from inside the housing.

IMG_7132.jpeg

In the picture above you can see a bit of insulation, I wanted to add another layer to it, which will also repair the broken bits.

IMG_7146.jpeg

IMG_7151.jpeg

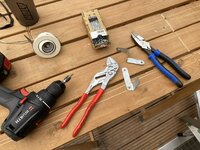
Bending some brackets.

IMG_7142.jpeg

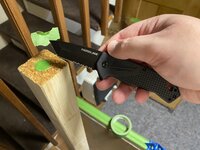
Time to repair/ re-glue some of the window trim.

IMG_7157.jpeg

IMG_7161.jpeg

IMG_7160.jpeg


Will continue in 20.2
 
Last edited:
OP
N

Nobody-named-Olli

Well-known member
Joined
Jan 9, 2025
Messages
1,635
Location
North Rhine-Westphalia; Germany
#20 New cover plates for the roller shutter housing and a bit of loggia ceiling makeover.

20.2 New cover plates, enlarging down light holes.

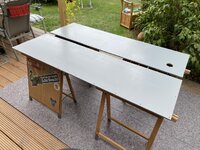
Next came the new cover plates. I got two 10mm MDF boards cut to size from my supplier, so I didn’t have to cut them myself - this is always a bit risky as you have no extra material to re cut in case of damaged corners or edges. But it went well as expected, and the benefit is that I don’t have to cut the MDF myself, as I hate the dust this creates with a passion, and it sometimes gives me hives.

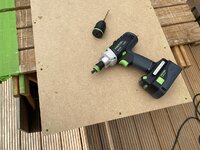
Transferring holes.

IMG_7162.jpeg

IMG_7163.jpeg

Drilling and countersinking.

IMG_7164.jpegIMG_7166.jpeg

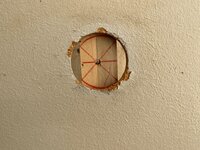
Having tidied the electrical stuff, I decided to replace the down lights with three aluminum/ brushed metal ones I had leftover from another project. This meant I needed to enlarge two existing holes in-situ and put one in one of the new cover plates.

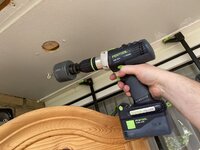
Depending on what type of hole saw you use there are multiple options on how to enlarge an existing hole. Wherever possible I prefer to use a longer drill bit with my hole saw, not just for enlarging holes but in general as well. This allows to carefully plunge into the material at full speed, because it takes longer for the actual hole saw to make contact with the material - and the flutet/cutting part of the drill bit is long past the material and doesn’t pull you down any longer at which point it becomes more of a guide rod than a drill bit. A very safe and relaxed way to cut large holes, but obviously not always possible.

In this instance the long drill bit simply allowed me to use a scrap piece of timber a drill guide for enlarging the holes in-situ.

Making the guide.

IMG_7172.jpeg

In-situ.

- Dry fit.

IMG_7174.jpeg

- Ready to cut.

IMG_7175.jpeg

Hole in the new cover plate.

IMG_7185.jpeg

I’ll spare you the pictures of the next steps, which were simply sanding the shutter housing and also giving the MDF boards a once over with the sander. Will continue in 20.3 & start with priming of the MDF.
 
OP
N

Nobody-named-Olli

Well-known member
Joined
Jan 9, 2025
Messages
1,635
Location
North Rhine-Westphalia; Germany
#20 New cover plates for the roller shutter housing and a bit of loggia ceiling makeover.

20.3 Priming, painting, mounting.

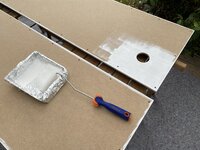
Getting ready to apply primer to MDF.

IMG_7214.jpeg

Applying primer.

- Corners, edges and big hole first.

IMG_7217.jpeg

2 coats of primer applied.

IMG_7218.jpeg

Two coats of paint applied.

IMG_7222.jpeg

Obviously I painted the whole housing once I was at it anyway, but I spare you the extra ballast.

Cover plates were mounted with pan-head screws, which come with a wedge underneath the pan-head. This is what the finished product looks like.

IMG_7233.jpeg

Although the picture shows light deviation, the screws line up 99.8% perfect to the naked eye.

Visual of the underside of the pan-head screw.

IMG_7246.jpeg

I’m not 100% happy with the primer & paint I purchased at the big box store. I should have known better, but I didn’t want to make a special trip to the painter’s supply and buy their minimum quantities for this small area. But well, lesson learned, it’s going to be the painter’s supply or Farrow & Ball again next time.

This was completed in two days.

Thank you for your continued interest in my projects!

Kind regards,
Olli
 
Last edited:

drivesitfar

Well-known member
Joined
Oct 23, 2013
Messages
36,047
Location
Pacific Northwest
Ollie: always love your detailed posts. The padlock edit had me guessing for a second then the light bulb turned on. Nice!!

Since you are a high quality tool guy and you’ve got quite a bit of masonry and concrete I’d like to give a big shout out to my hilti with sds max bits. I own 4 rotohammers and if it’s going to be a tough job this is the tool I really have become fond of.

Carry on with your great work and everything looks great!!IMG_9549.jpeg
 

Jgaz

Well-known member
Joined
Dec 16, 2016
Messages
1,697
Location
AZ
#20 New cover plates for the roller shutter housing and a bit of loggia ceiling makeover.

Prequel in four posts here:

Discovery.: https://www.garagejournal.com/forum...your-house-today.513421/page-14#post-11238936

What it looks like.: https://www.garagejournal.com/forum...your-house-today.513421/page-14#post-11238978

Shutter drive unit repair day.: https://www.garagejournal.com/forum...your-house-today.513421/page-16#post-11283170

Fixed.: https://www.garagejournal.com/forum...your-house-today.513421/page-16#post-11283310

Now it was time to re-fit presentable covers and do a bit of overall maintenance/ tidy up.

20.1 Electrical tidy up, adding some insulation, re-fitting window trim in one area.

Getting my head into the shutter housing to do some minor electrical tidy up.

View attachment 2381336

Using the soft-hammering/ hammer energy reducing ”Wallster” SDS-plus drill bit from Diager in my rotary hammer to set wall plugs in a rather soft-brittle unknown material inside the shutter housing. (Explanation of drill bit, here: https://www.garagejournal.com/forum...-tool-arrivals.103272/page-1812#post-11052067 ) Obviously with dust extraction.

View attachment 2381337

And mounting the labeled junction/distribution boxes.

View attachment 2381338

Well, hello everyone! :) - Seriously, just to give an impression from inside the housing.

View attachment 2381339

In the picture above you can see a bit of insulation, I wanted to add another layer to it, which will also repair the broken bits.

View attachment 2381341

IMG_7151.jpeg

Bending some brackets.

IMG_7142.jpeg

Time to repair/ re-glue some of the window trim.

IMG_7157.jpeg

IMG_7161.jpeg

IMG_7160.jpeg


Will continue in 20.2
I like the reversed “quick clamps“ used with the 2x4 props
 
OP
N

Nobody-named-Olli

Well-known member
Joined
Jan 9, 2025
Messages
1,635
Location
North Rhine-Westphalia; Germany
Ollie: always love your detailed posts. The padlock edit had me guessing for a second then the light bulb turned on. Nice!!

Since you are a high quality tool guy and you’ve got quite a bit of masonry and concrete I’d like to give a big shout out to my hilti with sds max bits. I own 4 rotohammers and if it’s going to be a tough job this is the tool I really have become fond of.

Carry on with your great work and everything looks great!!IMG_9549.jpeg

Thank you very much drives! Hilti is for sure a top notch brand, I wouldn’t give up my TE 2-M for anything. That TE 50 drills through concrete like a hot knife slices through butter. Great machine!

I like the reversed “quick clamps“ used with the 2x4 props

Thank you very much @Jgaz ! It’s one of those applications were you’re really happy to actually have that option with them.

On the matter of using 2x4s, have you ever heard of the “telescopic 2x4”? This is a pretty cool product for temporary construction of dust containment walls and even more rugged (think plywood/osb/mdf) temporary worksite walls: https://www.tomjig.de/ - https://www.tomjig.de/dokumentation-video

Kind regards,
Olli
 

Jgaz

Well-known member
Joined
Dec 16, 2016
Messages
1,697
Location
AZ
OP
N

Nobody-named-Olli

Well-known member
Joined
Jan 9, 2025
Messages
1,635
Location
North Rhine-Westphalia; Germany
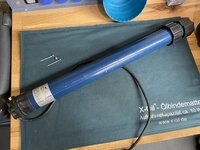
#21 The (totally unnecessary & pointless) teardown of the broken roller shutter drive unit, for no other reason than me wanting to look into it.

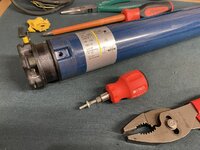
As it came out. (Disregard the screws, they have nothing to do with this.)

IMG_7090.jpeg

Remove power supply cable & metal clip holding plastic collar.

IMG_7093.jpeg

IMG_7094.jpeg

Remove screws holding connector, and limit switch assembly.

IMG_7096.jpeg

And with a few taps, connector/ limit switch assembly and capacitor come out. (Removed the capacitor carefully and then shorted it.)

IMG_7097.jpeg

I think the disassembly up to this point is actually intended. You could replace the capacitor & mechanical limit switch assembly if needed, and everything is straight forward, easy to take apart - wires have plenty of length.

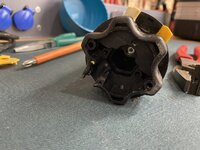
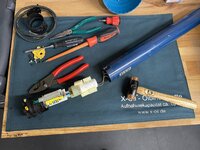
I tried to get the motor and gearbox out the tube next, but it wouldn’t come out with just removing two more screws. I saw two pins, removing them didn’t help either. Since it is broken anyway, I decided not to waste more time and cut the tube.

IMG_7099.jpeg

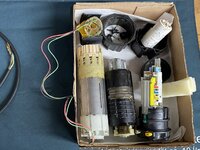
Then I had it all in my hands:

IMG_7098.jpeg

Like I said, pointless little “project”, I just wanted to look inside.

Kind regards,
Olli
 
OP
N

Nobody-named-Olli

Well-known member
Joined
Jan 9, 2025
Messages
1,635
Location
North Rhine-Westphalia; Germany
#22 More work in the garden of “Casa de Nobody”. … Technically too early, but I made sure there were no nests and no critters disturbed. I need to make use of the few weeks left with actual weekly bio/degradable waste pick up, before it switches to the one pick up every three weeks for winter.

Two small trees were entangling each other too much, so one had to go. And I had to fight more ivy that killed too much other stuff.

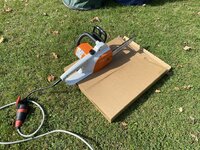
Checking bar oil flow on the electric chainsaw.

IMG_7480.jpeg

The left one has to go.

IMG_7504.jpeg

Cut.

IMG_7506.jpeg

Out.

IMG_7509.jpeg

Stump removed.

IMG_7515.jpeg

IMG_7518.jpeg

Cutting ivy and dead stuff (mostly) killed by ivy.

IMG_7529.jpeg

IMG_7531.jpeg

Cleaning the chainsaw in my comfy lair.

IMG_7556.jpeg

IMG_7559.jpeg

Kind regards,
Olli
 

drivesitfar

Well-known member
Joined
Oct 23, 2013
Messages
36,047
Location
Pacific Northwest
Nice work. Have you owned a battery or gas powered chainsaw and if so how does it compare to the electric one?

I have all 3 types and they all have their purposes in my opinion. I wish I’d spend 15 to 30 minutes cleaning my saws up after using them so they are not sitting around with rotting debris waiting for their next job they might be a year or two or more down the road.
 
OP
N

Nobody-named-Olli

Well-known member
Joined
Jan 9, 2025
Messages
1,635
Location
North Rhine-Westphalia; Germany
@drivesitfar

It doesn’t compare to any of those. It’s a very light duty, “home & garden” type saw that is perfect for clean up in a terraced house’s garden like this property is. It does exactly what I intended it to do. After the last use, it sat unused for about 1 -1/2 years with bio degradable bar oil in it, plugged it in, did the bar oil flow test, topped off the bar oil and started cutting. … Very limited noise, no fumes/ exhaust fumes. Nothing more is needed on this property.

Attractive price, balanced power, could fit a 5cm/ 2” longer bar if necessary (current bar is 30cm/ 11.8”). It’s a MSE 141. Entirely rational purchase.

In my opinion, electrical/ mains powered and comparable to current battery and/or gas powered offerings by Stihl starts with the MSE 210 and that’s more than double the price of the MSE 141. And once shopping that price range, you can also look at the battery powered AK-system offerings by Stihl. … Not an investment I was going to make for this property.

Kind regards,
Olli
 
Last edited:

Fixr

Well-known member
Joined
Dec 23, 2012
Messages
9,708
Location
SW VA
@drivesitfar

It doesn’t compare to any of those. It’s a very light duty, “home & garden” type saw that is perfect for clean up in a terraced house’s garden like this property is. It does exactly what I intended it to do. After the last use, it sat unused for about 1 -1/2 years with bio degradable bar oil in it, plugged it in, did the bar oil flow test, topped off the bar oil and started cutting. … Very limited noise, no fumes/ exhaust fumes. Nothing more is needed on this property.

Attractive price, balanced power, could fit a 5cm/ 2” longer bar if necessary (current bar is 30cm/ 11.8”). It’s a MSE 141. Entirely rational purchase.

In my opinion, electrical/ mains powered and comparable to current battery and/or gas powered offerings by Stihl starts with the MSE 210 and that’s more than double the price of the MSE 141. And once shopping that price range, you can also look at the battery powered AK-system offerings by Stihl. … Not and investment I was going to make for this property.

Kind regards,
Olli
I don't know if you can be a proper GJ member if you don't consistently buy tools that are way overkill and heavy-duty for your needs. It's tradition!;)
 
OP
N

Nobody-named-Olli

Well-known member
Joined
Jan 9, 2025
Messages
1,635
Location
North Rhine-Westphalia; Germany
#23 Garden watering/ irrigation pump suction hose/line repair attempt. (FAIL.)

The other day I noticed that our garden watering/ irrigation pump had troubles starting up and keeping pressure/ flow.

I noticed that the suction hose/line had burst right behind the connector. Now, a new hose doesn’t cost much $ but it’s quite some work including digging to replace it. Since watering/ irrigation season is basically over anyway, I decided I would make an attempt to repair the hose.

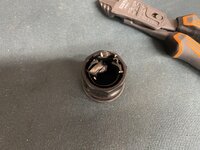
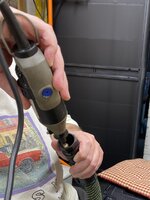
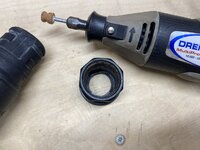
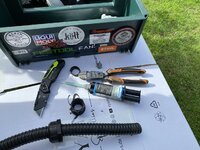
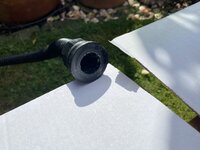
Cut the connector off and removed the old glued-in hose. The first bits came out easily with some side cutters, the remains I ground out with the rotary tool. (Since the connector is hollow, dust extraction was incredibly easy to set up and highly effective.

IMG_7613.jpeg

IMG_7621.jpeg

IMG_7623.jpeg

Cut the hose/ line as square as possible, gave everything a once-over with some sandpaper, and laid down a nice bead of glue inside the connector.

IMG_7626.jpeg

No glue-up/ assembly pictures as I was wearing gloves, since I wanted to ”smoothen” the excess glue with my gloved fingers.

IMG_7629.jpeg

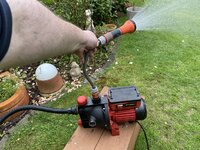
That looked promising. A couple of test runs were 100% successful.

IMG_7636.jpeg

Put everything back in place, gave it a couple of more test on/off cycles, and the connection failed. Seems there was a tiny path not fully glued - it was not a failure of bonding, as the connector was still bonded rock solid to the hose.

Emptied the pump & put in shed, closed off the suction hose/ line. Come spring I will install a new suction hose/ line. So there’s another bit of moving dirt in my future … ;)

Kind regards,
Olli
 
OP
N

Nobody-named-Olli

Well-known member
Joined
Jan 9, 2025
Messages
1,635
Location
North Rhine-Westphalia; Germany
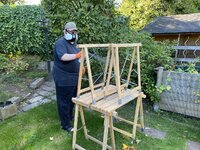
#24 Zinc coating the climbing/ growth supports for our tomato plants.

These are a few years old now, got some rust, some scale … Time to do some quick maintenance before they get stored for the winter.

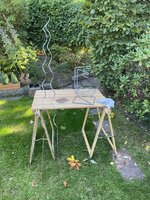
Setting up shop.

IMG_7649.jpeg

Giving them a once over with a sanding pad (120grit, flexible/ sponge type) and wiping them down with a shot of paint thinner.

IMG_7653.jpeg

Improvised hanging rack & hangers.

IMG_7655.jpeg

Coating.

IMG_7663.jpeg

Drying/ curing.

IMG_7671.jpeg

Did this today since the temperature was nice. Getting a bit hotter tomorrow and the day after with no rain and no significant cooling over night, so they can really dry/ cure before getting stored. Perfect timing.

Kind regards,
Olli
 
OP
N

Nobody-named-Olli

Well-known member
Joined
Jan 9, 2025
Messages
1,635
Location
North Rhine-Westphalia; Germany
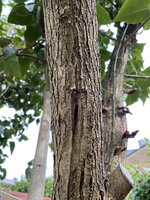
#25 Not sure I can save this lilac tree. Same symptoms as other trees I had to cut down eventually, “eaten inside out/ infested by woodlouse”, discolored mark … Seems all these old trees that are here since the houses were built, lack the stamina to fight these nowadays. Guess we’re spending some $$$$ to replace with adequate sized trees rather sooner than later.

IMG_7741.jpeg

IMG_7743.jpeg

IMG_7744.jpeg

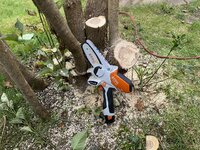
Took two branches out. (And yes, cuts were sealed with appropriate sealer - but I’m starting to wonder if that might as well be part of the problem …)

IMG_7749.jpeg

IMG_7756.jpeg

IMG_7753.jpeg

Kind regards,
Olli
 
Last edited:

RickP

Well-known member
Joined
Jan 15, 2013
Messages
1,555
Location
Annapolis, MD
Nice job cutting up those branches using your cordless saw -- I just got a similar model and I was amazed at how useful it can be!

Your yard is looking really good.
 
OP
N

Nobody-named-Olli

Well-known member
Joined
Jan 9, 2025
Messages
1,635
Location
North Rhine-Westphalia; Germany
#26 The un-squeak-bar.

The story goes as follows: Years ago I renovated both our staircases. Sanded a lacquer finish off the red hardwood rails, sanded the whole staircase. The red hardwood was then finished using a traditional bee’s wax based polish, the staircases painted in a matte (off)-white. I also replaced all the screws & spacers the hold the rails.

At some point a year or two later the staircases started to develop a “squeak”. Over the following years I experimented with different screw lengths, different spacer materials, different “fastening torques” but couldn’t really find a truly permanent fix for it.

I then started to look at the whole construction/ joints, had my better half watch for movement in those with a tape measure while I was going up and down the stairs … And sure enough there was an ever so slightly movement in the joint.

Installed a temporary beam to kind of “bear the load” and sure enough, the staircase was completely quiet immediately and stayed that way.

So, time to switch from temporary to permanent. I decided to keep it simple and removable, since the access beneath the staircase is vital from time to time.

26.1 General beam prep, installing adjustable foot, removing pitch pockets/ resin galls.

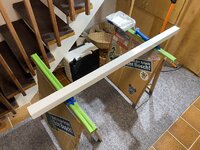
Setting up the beam in the RaliPress.

IMG_8398.jpeg

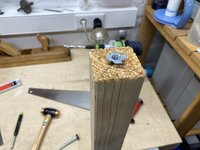
Drilling for the adjustable foot. 10mm hole to hammer in the threaded (M8) insert.

IMG_8400.jpeg

Insert

IMG_8401.jpeg

And in with help of “little Thor”.

IMG_8402.jpeg

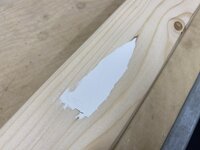
Time to remove the pitch pockets/ resin galls.

IMG_8403.jpeg

The worst one.

IMG_8406.jpeg

And one that isn’t that bad

IMG_8411.jpeg

IMG_8408.jpeg

Didn’t want to go any deeper.

IMG_8415.jpeg

Will continue in 26.2
 
Last edited:
To avoid these ads, REGISTER NOW!
OP
N

Nobody-named-Olli

Well-known member
Joined
Jan 9, 2025
Messages
1,635
Location
North Rhine-Westphalia; Germany
#26 The un-squeak-bar.

26.2 Filling the pitch pockets/ resin gall pockets.

If you’re doing this in a production environment, or when whatever you are working on won’t be painted but rather the grain/ natural look preserved you can buy designated pitch pocket/ resin gall cutters and ready to use wood patches to glue in.

Exemplary cutter (this one is for use with a biscuit joiner and corresponding attachment): https://www.fisch-tools.com/en/produkte/97in0302wb-rosin-gall-blade-tct

Exemplary wood patches: https://www.sfs.ch/en/Fittings/Conn...sin-gall-patch-pine-size-2-1500-pcs-/p/586932

Since I‘m going to paint the beam matte white, I will use a filler instead. While generally this is more work/ consuming more time, it’s less expensive in terms of buying tooling and patches for a one-off project.

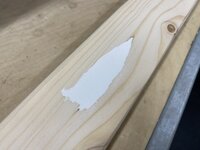
A rough first layer of filler.

IMG_8423.jpeg

The filler shrinks, so this has to be sanded and re-applied in multiple steps. Two exemplary pictures.

IMG_8433.jpeg

IMG_8434.jpeg

Then comes sanding & applying another layer.

IMG_8440.jpeg

IMG_8441.jpeg

And after another curing period and sanding

Some are already a-ok.

IMG_8444.jpeg

Others not, and require another layer, curing period and sanding.

IMG_8445.jpeg

So after that, we’re a-ok on those as well.

IMG_8470.jpeg

Time to give the whole beam a once-over with the sander. Now it’s ready for applying primer.

IMG_8473.jpeg

Will continue in 26.3
 
OP
N

Nobody-named-Olli

Well-known member
Joined
Jan 9, 2025
Messages
1,635
Location
North Rhine-Westphalia; Germany
#26 The un-squeak-bar.

26.3 Applying primer & paint.

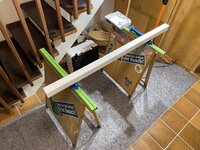
Setting up. Making sure my work piece rests can’t move.

IMG_8474.jpeg

IMG_8475.jpeg

Masking the insert.

IMG_8476.jpeg

IMG_8477.jpeg

Getting ready to apply primer. Two coats. The primer, together will the filled pitch pockets/ resin galls, will ensure the resin will not mess up the paint job, not while applying, not somewhere down the road. It fully encloses it.

IMG_8478.jpeg

IMG_8480.jpeg

IMG_8483.jpeg

Applying paint, 2 coats.

IMG_8484.jpeg

While waiting in between coats.

IMG_8485.jpeg

And finished, left to dry/ cure.

IMG_8488.jpeg

Will continue in 26.4
 
Last edited:
OP
N

Nobody-named-Olli

Well-known member
Joined
Jan 9, 2025
Messages
1,635
Location
North Rhine-Westphalia; Germany
#26 The un-squeak-bar.

26.4 Installation.

Remove masking from threaded insert.

IMG_8502.jpeg

Insert adjustable foot.

IMG_8504.jpeg

Setting up for installation.

IMG_8506.jpeg

Putting the un-squeak-bar in place, adding shim, drilling holes.

IMG_8511.jpeg

Countersinking.

IMG_8513.jpeg

Fixing tie plate in place. This is just a little pre-caution and will make removing & re-setting the un-squeak-bar whenever necessary easier and speed up the process.

IMG_8516.jpeg

And the finished product.

Tie plate & shim. (Shim will be painted on the next staircase renovation.)

IMG_8518.jpeg

View A.

IMG_8517.jpeg

View B. (Lines up perfect with the staircase, nearly invisible.)

IMG_8519.jpeg

View C.

IMG_8520.jpeg

The un-squeak-bar buttoned up. :)

In case you are wondering, that adjustable foot is good for up to 300kg load/ weight capacity.

Kind regards & thank you for your continued interest in my projects!
Olli
 
Last edited:

dasgreasyshrimper

New member
Joined
Nov 11, 2025
Messages
4
Spray painting.

IMG_1442.jpeg


IMG_1445.jpeg


IMG_1446.jpeg


After curing.

IMG_1451.jpeg

Heat curing.

IMG_1456.jpeg

Finished.

IMG_1462.jpeg

Kind regards,
Oliver
Oliver,
I suspect your lid will rust again on the rim fairly quickly because you were unable to remove all the pits and therefore all the rust. I would suggest sandblasting to clean the rust out of the pits and powder coating to create a smoother, harder surface.
 
OP
N

Nobody-named-Olli

Well-known member
Joined
Jan 9, 2025
Messages
1,635
Location
North Rhine-Westphalia; Germany
Hi!

@Jgaz Thank you very much!

@larry4406 Thank you very much, also for the additional information on the design/construction! It definitely makes sense to have a post there. I could really only guess why the staircases here, here meaning our whole terraced housing neighborhood, don’t have that post. Maybe because the staircase above this one, could not have the post in that place because it would interfere with the width of the steps/ usability of the steps? And they thought their design was going to work without? I don’t know. I still have to come up with a solution for the upper staircase as well. As I said, this solution is out of question because that post would then end up on one of the steps of the lower staircase.

@dasgreasyshrimper Thank you very much for your input on the lid, much appreciated. Unfortunately, I’m aware that sandblasting and powder coating would have been the gold standard, however, since I can’t do that myself, the cost for that would have exceeded buying a new hood. I’m happy to report that so far no new rust emerged, but I’m also more careful with storage/ ventilation now.

Kind regards,
Olli
 
Last edited:
OP
N

Nobody-named-Olli

Well-known member
Joined
Jan 9, 2025
Messages
1,635
Location
North Rhine-Westphalia; Germany
@LeonardY Thank you very much!

@rharman Thank you very much! I agree, the footprint is indeed fairly small. I will keep an eye on it, replacing it with another foot is always an option. Or is your concern more about the load distribution on the corner of that tile? I wouldn’t go as far to say that I’m concerned about it, but it did indeed cross my mind. I didn’t want to put something under the foot, although I have different caps for load distribution, typically used to minimize imprints of heavy furniture/ furniture with pointy foots on carpets. A leftover from the past. ;)

The foot I used is from Häfele, I do trust their products - but I will never do business with them directly and try to limit my exposure to that brand to bare minimum, because of a personal experience way back, they definitely lost me for good.

I really appreciate the feedback so I can reflect upon what I did/ might change. :)

Kind regards,
Olli
 

rharman

Well-known member
Joined
Apr 22, 2012
Messages
8,894
Location
SoCal
@Nobody-named-Olli - My concerns are both the point load on the tile with that small foot and the stability of the post if someone bumped it. Hard to tell for sure from the picture but the foot looks to be smooth plastic and I thought it might be slippery on the tile. The one I showed appears to have a rubber base. It was just the first thing that popped up but I thought that was a good feature.
 
OP
N

Nobody-named-Olli

Well-known member
Joined
Jan 9, 2025
Messages
1,635
Location
North Rhine-Westphalia; Germany
#27 Repair/ maintenance on a “hidden” outdoor receptacle.

It’s the end of the year, and that means I have time to do the (silly) little things that always get postponed during the year, especially garden season.

Here’s a “hidden”/“camouflaged“ outdoor receptacle that needed some maintenance/repair and overall cleaning.

IMG_8678.jpeg

IMG_8680.jpeg

The pivot point for the door/latch was broken.

IMG_8681.jpeg

IMG_8682.jpeg

Glueing in a new pivot point, just a small nut.

IMG_8685.jpeg

Some more cleaning.

IMG_8690.jpeg

IMG_8691.jpeg

Ready to go back outside come spring.

IMG_8708.jpeg

IMG_8707.jpeg

Only thing left to do is to pick up a can of spray paint and give it a little touch up, but that I will do come spring, outside.

Kind regards,
Olli
 
OP
N

Nobody-named-Olli

Well-known member
Joined
Jan 9, 2025
Messages
1,635
Location
North Rhine-Westphalia; Germany
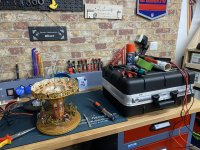
#28 Currently on my bench - just a quick update in between projects.

- Christmas carousel.

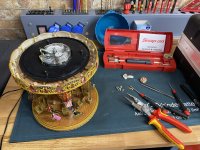
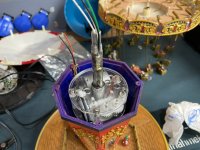
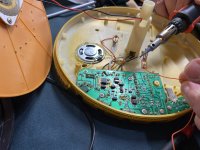
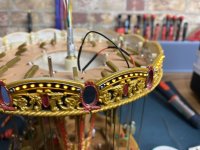
The little chariots can move in and out while it rotates. It stopped doing that without any obvious reason/ damage. It’s a couple of years old, stopped working after one Christmas, and I only got around to opening it up this year. Once I had the screen off, I was able to see the sloppy soldering and the green cable was disconnected. I reconnected the green cable and that solved that issue. Second issue is the LED lights not working. I found another loose connection in the bottom, there a cable became disconnected from a spring contact needed for the slip-ring unit. To repair that properly I need to get the carousel completely disassembled. Or I can try and use a tiny crimp ****-connector and work through the hole for that spring. … I ordered a couple of different ones and will make a decision on that when I have my hands on them.
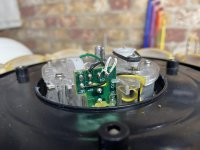
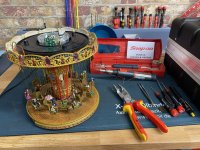
IMG_8770.jpeg

IMG_8771.jpeg

IMG_8773.jpeg

- Help for Rudolph III.

I found Rudolph III, sadly he was in worse condition than Rudolph II from last year. ( Project #4 ) Little guy is missing two antlers and half of a front leg. … Don’t know when or how that happened. But that is when you have so much Christmas decorations, that you don’t put up everything, every year.

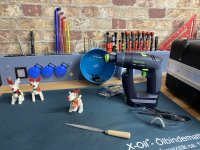
With his buddies.

IMG_8826.jpeg

IMG_8825.jpeg

Flattening the residue of one antler and drilling both out.
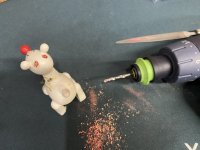
IMG_8829.jpeg

IMG_8832.jpeg

This is also still in the making, as I’m experimenting on how to get a nice half front leg. I have a set of linocut tools/ blades that I think should work on a small piece of soft wood. The antlers are no problem as you can see in the other post.

- Santa Express.

No pictures for that one. It was bought together with that carousel, it worked for a couple of years - but from one day to the other, last year, had a stripped gear. It’s sitting in it’s box and I’m torn between three options: #1 Design gear in AutoCAD/Fusion and have it third-party printed; #2 Design, buy printer, get acquainted with printer, print myself; #3 Trash.

Also did some maintenance/cleaning on the Stihl after using it for dressing the trunk of the Christmas tree.

I hope to get Rudolph III fixed in the coming week, everything else will come together with time.

Also making plans for the area in front of the House that I’m going to pave with my Dad to set up a 4 bin wide bin (trash can) box. Want to use that to make the garden hose in front of the house more/ easier accessible. But that has to be super neat, we originally never wanted bins in front of the house, but the “very small farm road” behind the gardens is becoming more and more of a nuisance and since we seem to be the only ones using it, we’re also the only ones maintaining it, and that is going to stop. Also I’m going to build/ set up a new fence and gate for the garden, so we won’t see that “road” anymore - and then be done with it forever, just pretend it isn’t even there. I’m sooo done pulling the bins over that “road”. …

Good times & projects ahead! :)

Kind regards,
Olli
 
OP
N

Nobody-named-Olli

Well-known member
Joined
Jan 9, 2025
Messages
1,635
Location
North Rhine-Westphalia; Germany
#28

28.1.1 Let’s dive right into the Christmas carousel

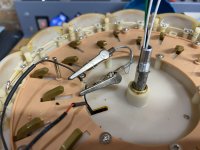
So reconnecting the spring contact of the slip-ring unit from the underside and through that hole wasn’t happening.

Here we are, right before cutting the limit switch to be able to do a complete disassembly. All wires marked.

IMG_8879.jpeg

Drive unit that is responsible for the chariots to push out and pull back in out.

IMG_8881.jpeg

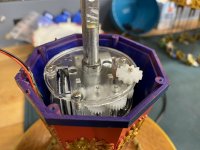
Now looking at the drive unit for rotating the whole carousel.

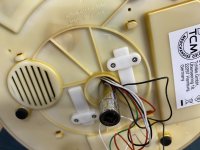
IMG_8883.jpeg

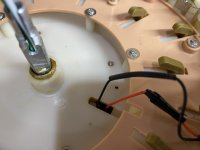
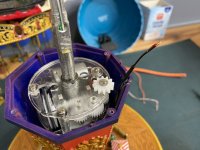
And that showed another issue, the gear sitting on that tiny shaft (right side), was broken.

IMG_8884.jpeg

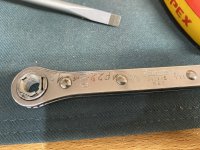
Further disassembly required the moving deck to be separated from the base. For that the big metal shaft had to be pulled. It’s secured inside the base with a 3/8” nut. Couldn’t get my 10mm in there, but luckily the nut had two exposed slots so I was able to drive it with a slotted screwdriver. I sure would like have used a socket to put it back on afterwards, but managed to do that without as well. I sure missed my 3/8” socket in that moment!

IMG_8897.jpeg

IMG_8896.jpeg

Time to reconnect the spring contact.

IMG_8889.jpeg

IMG_8890.jpeg

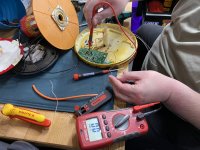
And check for continuity.

IMG_8894.jpeg

Will continue in 28.1.2
 
OP
N

Nobody-named-Olli

Well-known member
Joined
Jan 9, 2025
Messages
1,635
Location
North Rhine-Westphalia; Germany
#28

28.1.2 Continuing on the Christmas carousel

With the spring contact reconnected, I needed to repair that gear.

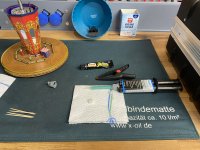
My choice was a super glue gel that I’ve used over and over on various applications with a great rate of success.

IMG_8898.jpeg

And back on. At this point I was still sure to have it back up and running soon.

IMG_8902.jpeg

Reassembly.

IMG_8903.jpeg

Connection for the lights made. But on the first trial run, the gear disintegrated again.

IMG_8909.jpeg

Time for a different glue & clean up afterwards.

IMG_8913.jpeg

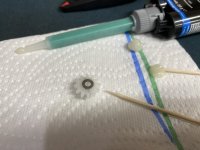
Decided to add reinforcement. With yet another glue.

IMG_8923.jpeg

IMG_8925.jpeg

Glueing wires in place.

IMG_8926.jpeg

Cleanup needed.

IMG_8928.jpeg

Clean Up.

IMG_8929.jpeg

Will continue in 28.1.3
 
OP
N

Nobody-named-Olli

Well-known member
Joined
Jan 9, 2025
Messages
1,635
Location
North Rhine-Westphalia; Germany
#28

28.1.3 More Christmas carousel pain.

At this point I was pretty sure I had it, and put it back together.

IMG_8930.jpeg

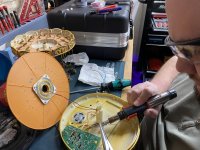
Re-soldered my connections. Not the nicest or neatest, but it’ll work with the shrink tubing.

IMG_8932.jpeg

And here’s were success and failure go hand in hand. After soldering, everything - except the not yet reassembled and soldered drive unit for the chariot movement - works. Lights, rotation & sound work. Yay!

IMG_8933.jpeg

Fixing wires in place.

IMG_8936.jpeg

I proceeded to assemble and solder the drive unit and limit switch for the chariots. Did another trial run - no more rotation. Removed the tape, wires re-marked.

IMG_8940.jpeg

Cut out drive unit/ limit switch. (+ proof that I had it reconnected again …)

IMG_8943.jpeg

The gear broke again.

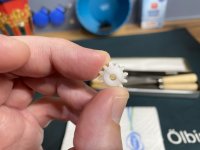
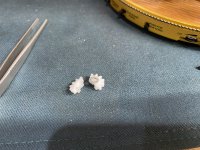
IMG_8938.jpeg

IMG_8939.jpeg

So I’m fairly certain now the gear is made of Nylon/Polyamid. Wich means I will need very aggressive surface prep, a primer/activator and different glue. My suppliers are closed over the holidays, this means this will be something for the new year. At least I know, if I get this gear glued up (or replaced, other option) it will run again.

This will be continued, but not in time for the holidays. So expect 28.1.4 coming some time in future.

Kind regards,
Olli
 
OP
N

Nobody-named-Olli

Well-known member
Joined
Jan 9, 2025
Messages
1,635
Location
North Rhine-Westphalia; Germany
Probably. Also lot of printing service providers. But since I already know I will need another gear for the Santa Express as well, I’m reading up on the subject and think I will purchase a printer - as another option instead of trying another glue up.

(Purchased a welder in Autumn that is still more or less in its box because I haven’t had the time to get into it as well. …)

Kind regards,
Olli
 

Jgaz

Well-known member
Joined
Dec 16, 2016
Messages
1,697
Location
AZ
moment!


IMG_8896.jpeg
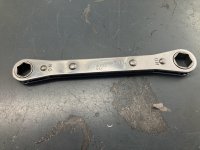
Wow! Don’t see many of these original design ratcheting box wrenches being used anymore.
They are kinda crude compared to whats available today.

I bought this one in the late 70’s to remove the nuts from the rear seat tracks on a GM car when the seat was rearward and the power seat motor crapped out.
There was no room to get a ratchet/socket in the space.
IMG_5979.jpeg
It did the job for a lot of years.
 
To avoid these ads, REGISTER NOW!
Top Bottom