To avoid these ads, REGISTER NOW!

Nobody’s project corner.

OP
N

Nobody-named-Olli

Well-known member
Joined
Jan 9, 2025
Messages
1,639
Location
North Rhine-Westphalia; Germany
I have two SAE ones that were former German military issue. One of them is in the picture (3/8 / 7/16), I used it to confirm it was indeed a 3/8” nut. The other one is - just like you pictured - the 1/2 / 9/16.

Then I have the metric set from 10mm to 15mm and 17 & 19, which I got off the truck years ago.

Reasons for purchasing them, I really, really like them. AND Tim Allen in his role as Tim Taylor in Home Improvement had them hanging on the peg board over his workbench in his home garage/ shop. That was a big influence in wanting to have them. And just like in his garage, mine are hanging on peg board over the bench as well. ;)

I use them whenever I feel like it. They have a very distinctive feel & sound, love that.

Kind regards,
Olli
 
Last edited:
To avoid these ads, REGISTER NOW!
OP
N

Nobody-named-Olli

Well-known member
Joined
Jan 9, 2025
Messages
1,639
Location
North Rhine-Westphalia; Germany
#29 Follow up on #23 Garden watering/ irrigation pump suction hose/line repair attempt. (FAIL.) No more!

With the arrival of spring edging closer and closer it was time to replace the suction line for the garden watering/ irrigation pump.

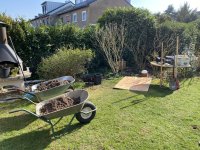
First step, as almost always, set up shop.

IMG_9792.jpeg

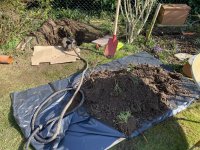
And then start excavating by hand. As usual my goal was to do this as minimally invasive as possible. But I had to realize two wheelbarrows alone wouldn’t cut it - so I laid out some boards & plastic for the last few scoops.

IMG_9798.jpeg

There’s the lid.

IMG_9801.jpeg

Some scoops later & with a little hosing down and a few taps of a hammer I got the lid off the IBC.

IMG_9803.jpeg

IMG_9805.jpeg


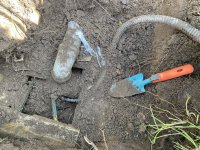
I was very happy to see this. After so many years the DIY build (and DIY connection between the two IBC), years before the whole “craze”started, is still holding water perfectly. (This is IBC 2, the other one is under the rose bush to the left.)

IMG_9804.jpeg

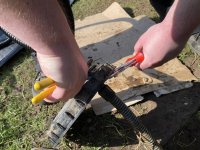
Then it was just a matter of two pairs of water pump pliers and replacing the hose.

IMG_9806.jpeg

Breathing pipe and suction hose back in & ready to go. New cover to keep the dirt out. Suction hose inside pipe for protection now.

IMG_9819.jpeg

Filling & compacting.

IMG_9824.jpeg

All done & works again. Pump sits in that little brown housing build from composite deck boards & is controlled via the switch box I have shown before.

IMG_9825.jpeg


Kind regards & thank you for your continued interest in my projects!
Olli
 

larry4406

Well-known member
Joined
Jan 27, 2006
Messages
19,532
Location
Northern Virginia
#29 Follow up on #23 Garden watering/ irrigation pump suction hose/line repair attempt. (FAIL.) No more!

With the arrival of spring edging closer and closer it was time to replace the suction line for the garden watering/ irrigation pump.

First step, as almost always, set up shop.

IMG_9792.jpeg

And then start excavating by hand. As usual my goal was to do this as minimally invasive as possible. But I had to realize two wheelbarrows alone wouldn’t cut it - so I laid out some boards & plastic for the last few scoops.

IMG_9798.jpeg

There’s the lid.

IMG_9801.jpeg

Some scoops later & with a little hosing down and a few taps of a hammer I got the lid off the IBC.

IMG_9803.jpeg

IMG_9805.jpeg


I was very happy to see this. After so many years the DIY build (and DIY connection between the two IBC), years before the whole “craze”started, is still holding water perfectly. (This is IBC 2, the other one is under the rose bush to the left.)

IMG_9804.jpeg

Then it was just a matter of two pairs of water pump pliers and replacing the hose.

IMG_9806.jpeg

Breathing pipe and suction hose back in & ready to go. New cover to keep the dirt out. Suction hose inside pipe for protection now.

IMG_9819.jpeg

Filling & compacting.

IMG_9824.jpeg

All done & works again. Pump sits in that little brown housing build from composite deck boards & is controlled via the switch box I have shown before.

IMG_9825.jpeg


Kind regards & thank you for your continued interest in my projects!
Olli
Olli - is that just an underground water storage vault from rain, gutters, etc? What kind of water volume does it capture? Clever.

Also, is that a pizza oven in Picture 2 on the left side?
 
OP
N

Nobody-named-Olli

Well-known member
Joined
Jan 9, 2025
Messages
1,639
Location
North Rhine-Westphalia; Germany
Olli - is that just an underground water storage vault from rain, gutters, etc? What kind of water volume does it capture? Clever.

Also, is that a pizza oven in Picture 2 on the left side?

Yes Larry, it collects water from 1/2 of the roof of the house (garden side) and from the roofed patio. Total storage is 2000l/ 528 gal (Two 1000l/ 264 gal IBC).

That is a classic BBQ, you can heat a stone in it to bake pizza on it, but it’s not an oven per se. Can’t close it.

Kind regards,
Olli
 
To avoid these ads, REGISTER NOW!
OP
N

Nobody-named-Olli

Well-known member
Joined
Jan 9, 2025
Messages
1,639
Location
North Rhine-Westphalia; Germany
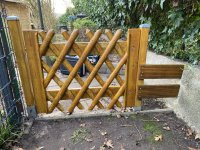
#30 Gate to “very small farm road” makeover.

30.1

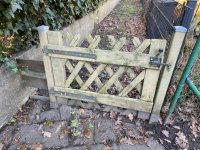
A couple of days ago I did some maintenance and re-adjusting to our old gate. Since doing that I felt that I needed to give it some more attention because it’s showing its age and my rookie mistakes from many years ago, when I purchased this gate made/built from pressure treated lumber and didn’t give it time to wither down before applying wood protective varnish/stain. I did it right away and paid my dues - and had to pay some more this time around.

After completing #29 on Wednesday and having the pressure washer out from cleaning tools, I quickly grabbed a screw gun and removed all the hardware from posts and gate and gave it a wash. Part of the decision to do it was that the weather is phenomenal right now, spring on steroids, so I knew it could completely dry on Thursday and thus enabling me to work on it on Friday, yesterday.

This is what the gate looked like on Monday when I did the maintenance/ re-adjusting.

IMG_9782.jpeg

IMG_9781.jpeg

Removed hardware, some debris from #29.

IMG_9829.jpeg

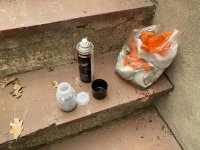
Two bolts I need/ want to re-use in some “rust remover” … So they could sit for some time.

IMG_9830.jpeg

IMG_9833.jpeg


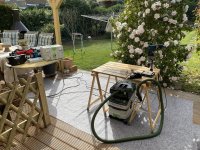
Fast forward to Friday, setting up shop on a beautifully, ”springy” patio. :)

IMG_9836.jpeg

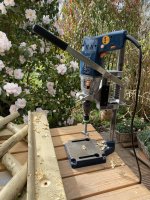
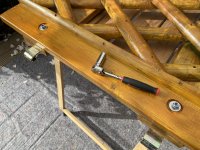
First I drilled two recesses for the main bolts, because I never liked how the nuts went directly into the wood. This not only provides clearance for the nuts (and socket) but also to add a washer.

Using my Swiss Festool Zobo 35mm drill bit with some Festool doo-dahs in the AEG mobile drill press.

IMG_9840.jpeg

And then giving the whole gate a once over. I didn’t want to go overboard with this, I could have spent hours cleaning it up - I just removed the worst and made sure one of my two sanders had touched it all at least once. Did the same with the posts.

IMG_9841.jpeg

IMG_9850.jpeg

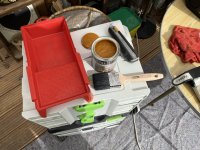
Then it was time to get the wood protective varnish/stain on.

IMG_9853.jpeg

Will continue in 30.2.
 
Last edited:
OP
N

Nobody-named-Olli

Well-known member
Joined
Jan 9, 2025
Messages
1,639
Location
North Rhine-Westphalia; Germany
#30 Gate to “very small farm road” makeover.

30.2

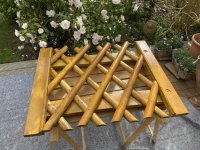
Two layers of wood protective varnish/stain on front, back & the posts.

IMG_9858.jpeg

IMG_9862.jpeg

IMG_9863.jpeg

IMG_9864.jpeg

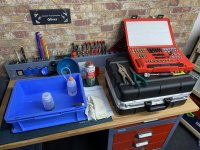
While I let this dry over night, I sat down in the lair to “rescue” the two main bolts.

IMG_9865.jpeg

IMG_9867.jpeg

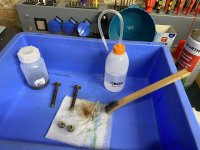
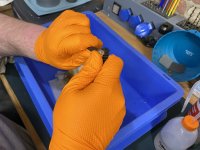
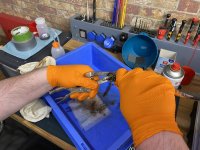
After rough cleaning, thread file as I had trouble getting the thread chaser started.

IMG_9869.jpeg

From there it was straight forward running the thread chaser on and off on the two bolts with a bit of cutting fluid.

IMG_9886.jpeg

And ratcheting wrench for the last portion.

IMG_9897.jpeg

Bolts are useable again. Nuts won’t be reused.

IMG_9901.jpeg

Will continue in 30.3
 
OP
N

Nobody-named-Olli

Well-known member
Joined
Jan 9, 2025
Messages
1,639
Location
North Rhine-Westphalia; Germany
#30 Gate to “very small farm road” makeover.

30.3

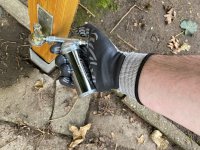
This morning I went and re-installed the hardware. Using “little Thor” to convince the bolts to seat properly.

IMG_9904.jpeg

Washers and nylock nuts for the main bolts.

IMG_9906.jpeg

Greasing where needed.

IMG_9911.jpeg

And fitted.

IMG_9914.jpeg

IMG_9913.jpeg

This will be good to go for at least a couple more years - and who knows what I come up with fence wise anyway - as the ivy bothers me A LOT - and the original wire fence has seen better days as well. …

That’s the gate completed for now.

Thanks for your continued interest in my projects & kind regards,
Olli
 
Last edited:
To avoid these ads, REGISTER NOW!
Top Bottom