To avoid these ads, REGISTER NOW!

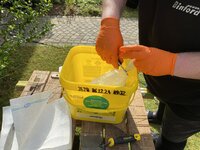
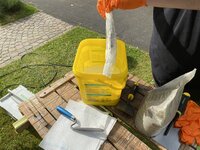
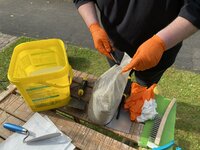
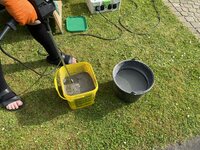
Below 265 SQ/FT Nobody’s tool storage, maintenance & recreation lair.

All workspaces below 265 squarefeet.
OP
N

Nobody-named-Olli

Well-known member
Joined
Jan 9, 2025
Messages
1,650
Location
North Rhine-Westphalia; Germany
#Nobody’s Project Workshop

2. Makeover

2.2 Surface prepping.

2.2.2 Part two.

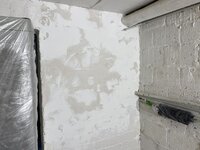
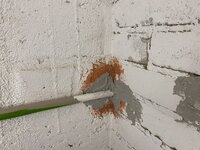
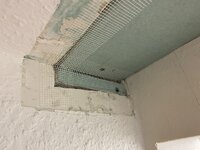
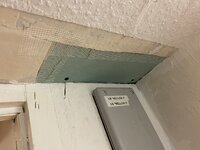
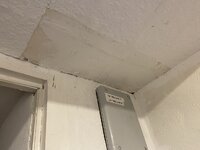
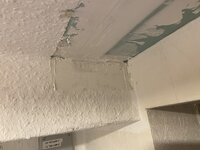
Sanding the plastered patch.

IMG_4034.jpeg

IMG_4035.jpeg

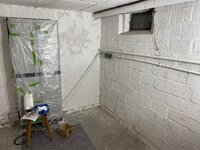
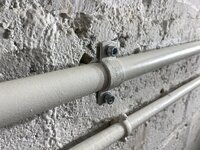
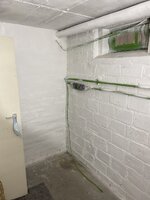
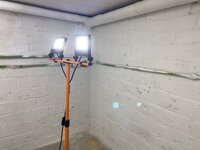
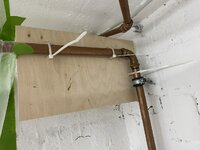
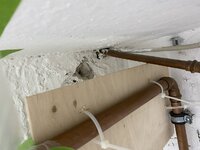
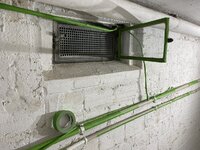
Sanding the water pipe that serves as conduit for ethernet and antenna to the lair and sending the old telecommunication conduit with great care regarding dust protection - and making sure only the paint on it is sanded/ roughened.

IMG_4036.jpeg

IMG_4037.jpeg

IMG_4038.jpeg
 
To avoid these ads, REGISTER NOW!
OP
N

Nobody-named-Olli

Well-known member
Joined
Jan 9, 2025
Messages
1,650
Location
North Rhine-Westphalia; Germany
#Nobody’s Project Workshop

2. Makeover

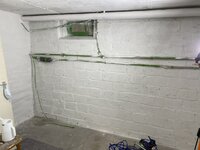
2.3 Painting both conduits with some left over paint (F&B Pointing No. 2003; which is a warm white with yellow tint)

IMG_4042.jpeg

IMG_4047.jpeg

IMG_4048.jpeg

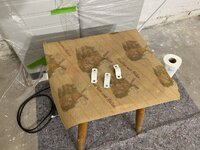
Now I hate painted hardware with a passion, for all the obvious reasons. But I sure as hell wasn’t going to clean up these brackets - so paint it was.

IMG_4045.jpeg
 
OP
N

Nobody-named-Olli

Well-known member
Joined
Jan 9, 2025
Messages
1,650
Location
North Rhine-Westphalia; Germany
#Nobody’s Project Workshop

2. Makeover

2.4 Cutting ‘new’ bolts for the “water pipe now conduit’s” brackets.

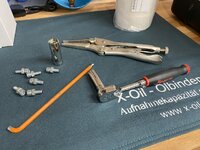
The old slotted bolts were too far gone to be salvaged, so I got some of the few bolts that I keep around, but they needed to be cut down.

Cutting.

IMG_4052.jpeg

So after cutting them, I made a rookie mistake. While I did put a nut on all of the bolts before cutting them - to easily restore the threads. I wanted to chamfer them a bit, and switched to a grinding disc - barely touching the bolts - but at that speed and grit - I did some serious damage to my ‘new‘ bolts.

While I got the nuts off without any serious issues, the threads were still in very bad shape.

IMG_4064.jpeg

IMG_4065.jpeg

IMG_4066.jpeg

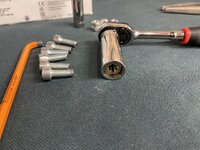
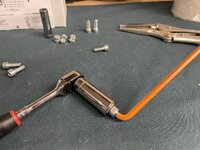
So I got the thread chaser out and managed to get all the bolts working flawless.

IMG_4067.jpeg

IMG_4068.jpeg

Brackets installed with the ’new’ bolts.

IMG_4071.jpeg
 
OP
N

Nobody-named-Olli

Well-known member
Joined
Jan 9, 2025
Messages
1,650
Location
North Rhine-Westphalia; Germany
#Nobody’s Project Workshop

2. Makeover

2.6 Patching remaining holes and whitening of all the walls.

IMG_4122.jpeg

IMG_4127.jpeg

IMG_4128.jpeg

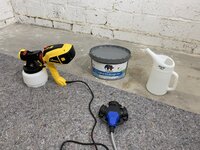
My original plan was to spray this room while I had a professional unit on rent, because I had to spray two whole basements. The timing didn’t work out and I had to return that unit before I was ready to spray this room. Now I probably don’t need to elaborate on how a professional unit is a whole world apart from the homeowner/ DIY type sprayer I used for this room. But in the end it (and I) got the job done. The walls are white. That said, the small Wagner sprayer did surprise me with how effortlessly it sprayed the silicate based paint. I was worried abut having to thin it beyond spec, but thankfully that wasn’t necessary. All pictures taken with paint still wet!

IMG_4143.jpeg

IMG_4150.jpeg

IMG_4151.jpeg

IMG_4152.jpeg

IMG_4153.jpeg

IMG_4154.jpeg

IMG_4155.jpeg
 
OP
N

Nobody-named-Olli

Well-known member
Joined
Jan 9, 2025
Messages
1,650
Location
North Rhine-Westphalia; Germany
#Nobody’s Project Workshop

2. Makeover

2.8 Flooring

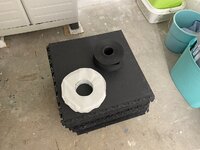
Delivery of PVC tiles.

IMG_5397.jpeg

IMG_5399.jpeg

Cutting station.

IMG_5420.jpeg

Fitting and laying the interlocking PVC tiles.

IMG_5426.jpeg

IMG_5429.jpeg

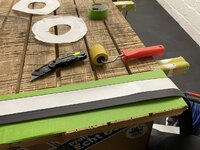
Prepping the flexible PVC skirting/ base board. What I’m applying to the skirting is a high-tack, re-inforced double sided tape that has ‘gum’ like consistency. This will stick to most everything and can compensate for up to 1.5mm of unevenness.

IMG_5433.jpeg

IMG_5435.jpeg

IMG_5436.jpeg

Mounting the skirting/ base board.

IMG_5438.jpeg

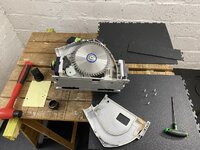
Cleaning the swarf from the track saw. It is recommended to use a ‘metal cutting’ saw blade to cut these PVC tiles. I did that before on the lair’s flooring and it worked like a charm. However, and that is a lesson learned from flooring the lair, the metal cutting blades produce longer swarf because of the different rake angle. So I knew right away that I had to take off the cover plate and ‘deep clean’. When I finished the lair, and switched the saw blade back to my wood saw blade, I was a bit surprised at how much additional swarf fell out - although I had cleaned the saw. Only then I removed the cover and found a nest of swarf. This time I obviously did it right away, and sure enough - there it was again.

IMG_5432.jpeg


Kind regards,
Olli
 
OP
N

Nobody-named-Olli

Well-known member
Joined
Jan 9, 2025
Messages
1,650
Location
North Rhine-Westphalia; Germany
#Nobody’s Project Workshop

2. Makeover

2.9 Detail - Door frame.

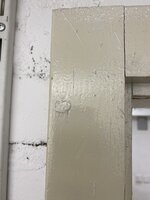
Removing, sanding, filling, sanding & painting door frame.

IMG_4388.jpeg

Removing paint layers over plugged screw holes.

IMG_4389.jpeg

Using auger gimlet to pull the plugs when possible.

IMG_4400.jpeg

In theory - and when everything goes well - you can then remove the screws.

IMG_4390.jpeg

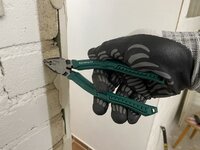
In the end, I had to cut two of them and get them out with the Engineer PZ-59. Luckily the door frame was loose enough by then to sneak the blade of a reciprocating saw behind it with a little help of a pry bar.

IMG_4394.jpeg

IMG_4397.jpeg

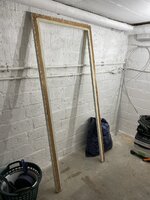
And one pic before painting, in between sanding, filling, sanding, (…)

IMG_5185.jpeg

I’ll spare you the rest of the pictures, and finished door frame and door will be seen when I post the pictures of the finished ’project workshop’.

Kind regards,
Olli
 

drivesitfar

Well-known member
Joined
Oct 23, 2013
Messages
36,076
Location
Pacific Northwest
Ollie: very nice work and thanks for posting about all the details and all the great pictures too.

Since your tools are a step above in quality or sometimes the best you might want to visit the old world tools thread where another member from Germany (Monte) has been hosting it for over a decade.

Since I just finished updating my parents 100 year old home last year I know how hard even a little plaster repair is so nice work with yours. Also I love seeing all the prep cause that is what really makes your work look great.
 
OP
N

Nobody-named-Olli

Well-known member
Joined
Jan 9, 2025
Messages
1,650
Location
North Rhine-Westphalia; Germany
Thank you very much @drivesitfar :) I’ve already participated/ contributed to that thread, but thanks for the heads up, it’s a great thread that deserves recognition! :)

Plastering can be quite challenging, it always takes me a bit to get back into the hang of it and then receive a more or less ‘presentable’ result - of course, the sander is my friend. ;) The hardest for me to plaster is around windows.

Kind regards,
Olli
 
OP
N

Nobody-named-Olli

Well-known member
Joined
Jan 9, 2025
Messages
1,650
Location
North Rhine-Westphalia; Germany
#Nobody’s Storage (building materials) & Boiler room

1. Small water issue.

1.1 Preface

So we have been getting a bit of rain lately, which is good - but my neighbors front gutter has been leaking for a few months now. And he will fix that eventually, rather timely now.

However, this highlighted an issue that I like to get on top of.

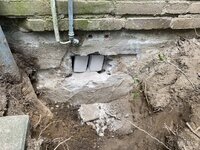
Back in 2021 when we switched from oil to gas, the ‘remote’ fill pipe - leading to the tank inside the basement - was removed and capped. The vent pipe was kept and is just cut on the inside. However, since that was a very shiny & heavy brass/copper cap on the ‘remote’ fill pipe, it went “missing’ soon after.

Since both pipes were cut on the inside & filled - I didn’t worry too much about it. Also because the area I’m about to show you is basically always bone dry. Now with the neighbor’s gutter issue, I think it’s time to remove the remaining pieces of pipe completely and re-seal that part of the basement wall. It’s just a really small issue with no actual damage yet and fairly easy to fix. At least now, with the experience gained from building the lair.

Next week is supposed to be sunny but not too warm, I think I’ll tackle it then.

IMG_5548.jpeg
Picture taken yesterday during the rain fall.

From the algae growth in front and on the conduit (don’t worry, just a temp. feeler) you can see the neighbor’s gutter has been broken for quite some time.

Kind regards,
Olli
 
OP
N

Nobody-named-Olli

Well-known member
Joined
Jan 9, 2025
Messages
1,650
Location
North Rhine-Westphalia; Germany
#Nobody’s Storage (building materials) & Boiler room

1. Small water issue.

1.2 ’Excavating’, assessment & drying.

Spent about 45 minutes on this project today.

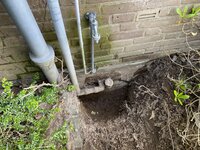
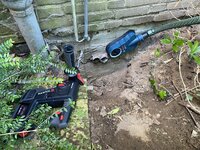
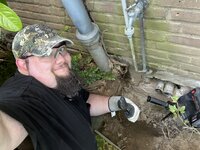
Removed the garden hose & the old fill-pipe bracket.

IMG_5582.jpeg

IMG_5584.jpeg

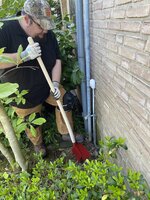
Then started to ‘excavate’. It’s a really tight squeeze all around, hence why I wanted a small shovel. With every load I had to step back behind the magnolia, re-grab the shovel at the neck, turn, extend the shovel again and fill the wheelbarrow.

IMG_5585.jpeg

After a bit I had part of the access needed. (For the curious among the readers, the yellow tape is a warning that there is a line underneath, in this instance it’s an ‘antenna cable’ for cable TV. I know that the cable runs there, but it was nice to see the warning in place. I will reinstate that when I backfill. I removed it as I had to go a bit deeper.)

IMG_5595.jpeg

Checked - as far as I could - that the gutter pipe is not part of the problem. Otherwise I would have let my neighbor know and offered to dig that bit up as well for a repair to take place.

IMG_5596.jpeg

Bad angle for a picture, since the gutter is behind the old vent pipe, but I was able to see enough to know it’s not leaking/broken in that part.

IMG_5598.jpeg

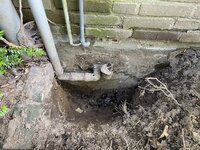
I took a second look hours later and was happy to see it started to dry already.

IMG_5604.jpeg

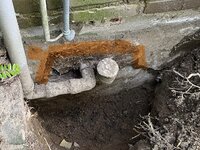
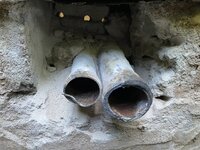
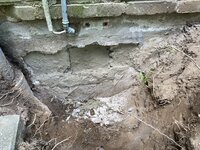
This then revealed how large the original opening to fit the pipes through was. And I found a small crack. (All highlighted in orange)

IMG_5606.jpeg

So once the wall has dried some more, I need to do some prep in the basement. Then I can start chiseling the pipes out. My goal is as ’least invasive’ as possible - but as much as necessary so I not only end up with a hole and the two pipes removed - but with a hole which borders are stable and I can build up on.

Once dry, the wall needs to be scrubbed. Maybe I ‘excavate‘ another shovel or two, I will decide that then.

Got shipping notifications for the materials today, so they should be here tomorrow. That is great, although I will let the wall dry for another couple of days anyway.

Kind regards,
Olli
 

drivesitfar

Well-known member
Joined
Oct 23, 2013
Messages
36,076
Location
Pacific Northwest
You are doing this job correctly so far that is for certain. I’m watching and learning and if it was me I’d do exactly the same so far.

If you do decide to grind that old concrete and dirt make sure to have the best mask and eye protection (and ears). I bought a shop vac attachment for both my 7 inch and 4 inch grinders but even with vacuum attached and running it still can get dusty. I’m not sure you want to run concrete dust thru your sand vac attachment but I’m sure you’ll figure something out that works for you.
 
OP
N

Nobody-named-Olli

Well-known member
Joined
Jan 9, 2025
Messages
1,650
Location
North Rhine-Westphalia; Germany
Good morning! :)

@drivesitfar Thank you very much! That is sound advice!

I run Festool dust extractors - always with filter bags anyway - but they have the correct filtration grade and one of them has the manual filter clean. They take care of the largest part of the dust and debris, I have specific dust shrouds/guards for drilling, cutting and grinding of stone/masonry, concrete, ceramics, (…) - super happy with the setup.

Speaking of PPE, you can see in my pics that I almost always wear my old-school Oakley M-Frame safety glasses during project work. With wire brushes/wheels, stripping discs, (…) those get replaced by my Snap-On “Night Stalker” (what a name …) face shield.

For masks I use mostly 3M. For small jobs like this it will be a disposable/single use FFP2 mask. Normally I use the ones with a valve for ease of breathing out. But then Covid came upon us and they mandated FFP2 without valve, so we still have a box of 3M FFP2 without valve, which I will use up before ordering new ones.

For ear protection I rely on 3M as well. Nothing fancy, just tried and true 3M Peltor Optime ear muffs. No electronics, old-school.

Kind regards,
Olli
 
OP
N

Nobody-named-Olli

Well-known member
Joined
Jan 9, 2025
Messages
1,650
Location
North Rhine-Westphalia; Germany
Good thing my plan is to let the wall dry for a couple of days anyway. I was just informed that somehow I wasn’t at home 50 minutes ago and part of my materials couldn’t be delivered. :ROFLMAO:

(Seriously, I think these logistics company would do themselves a HUGE favor, if they didn’t send ‘generic’ “we didn’t catch you & left a note” messages when they can’t deliver because of something along the lines of ‘Force majeure’ … And that is what this is, the truck wasn’t even out. And obviously no delivery attempt made/ no note left.)

Let’s see if the other logistics company shows up. :ROFLMAO:

Kind regards,
Olli
 
OP
N

Nobody-named-Olli

Well-known member
Joined
Jan 9, 2025
Messages
1,650
Location
North Rhine-Westphalia; Germany
#Nobody’s Storage (building materials) & Boiler room

1. Small water issue.

1.3 Materials

So while the wall is continuing to dry nicely … (Don’t worry about the black debris, the neighbor got our ‘neighbor-community owned big ladder’ and got up to the gutter to clean it out. I was there to support.)

IMG_5626.jpeg


… lets talk about materials.

With the lair build I gained not only some first hand experience but also did quite a bit of research on all the different options. There are many different materials and procedures out there - by no means is this a ‘one fits all’ solution.

IMG_5621.jpeg

My assessment is, that once the gutter is fixed there will be no longer any water present. The water table is much, much lower - and just a little further to the right the whole area is bone dry as it always was. That said, gutters can break, overflow and we did get (and probably will continue to get) our fair share of torrential rains … So it’s the right thing to do to get this weak spot fixed properly.

So I’ll be using three, really two, products to close the hole and seal, once the pipes are out.

First I’m going to mix a ‘sealing slurry’ from fiber reinforced mortar. (Purely mineral product.) This is was the weber.tec 933 is. (You could also get the actual ‘sealing slurry’ compound wich is the weber.tec 930.)

I have a little issue with this, and that is size. As you can see, I only have a bit leftover, and I will likely need a bit more - but I won’t need another 25kg bag of it - and that is the only size Saint-Gobain/ Weber offers.

So what I did instead is get a 5kg bag of a fiber reinforced mortar from my favorite big box store’s ‘professional/ commercial user’ line. (That’s the bag with the brand name ‘PROBAU’ on it, and see, it got PRO right in the name … :ROFLMAO: )

I’m not going to make any claims about the compounds being equal or anything. However, I’m sure for this application it will work just as well. And not leave me with another big bag of material to store - and at some point pay for the disposal.

The ’sealing slurry’ will be applied generously with a brush.

Once that has had some time to cure, the hole will be filled and closed with multiple layers of the fiber reinforced mortar. Since I know that the Weber products work well with each other, I will make sure the last layer will be weber.tec 933.

The fiber reinforced mortar has a ‘compensator’ for/against shrinkage mixed in. This is important as many products will shrink while curing, thus you’d never get a proper seal.

When that has cured, the final sealing layer will be applied. For that, I’ll use the weber.tec Superflex D24.

I’m using their English translation, as I have no idea about the technically correct English terminology.

It is a “Highly flexible, reactive, quick-setting, radon-tight and bitumen-free 2-comp. thick-layer waterproofing coating based on innovative binder technology for safe and durable waterproofing of buildings.”

Besides this being a tried and true, high quality product it is also available in a 6kg variant. Which is great for spot repair and/or amending existing waterproofing layers. That is also the big advantage this product has over others, it can actually be used on/over and to connect to existing waterproofing layers without having to remove them completely first.

IMG_5622.jpeg

It comes neatly packed, 2 bags inside a mixing bucket. One is a dry/powder like substance, the other one is liquid.

This will be applied in probably two steps. A first coat by brush, and then beefing up (thickening) that layer by trowel.

Once that has set and cured, I wanted to put a little protective mat in front of it. (Which still hasn’t been delivered. :ROFLMAO:)

But I’m not 100% sure on that yet. We did that for the lair because the backfill was a correctly sized gravel mix and there would be concrete going back over it - and of course to get any remaining water away from that spot.

In this instance there won’t be any remaining water, and the back fill will be the dirt I excavated as I opted not to get a bucket of gravel for backfilling. So no ‘sharp’ objects rubbing against the sealing layer.

Next step will be the preparation for dust containment & protection in the storage/ boiler room.

Have a wonderful day everyone!

Kind regards,
Olli
 
Last edited:

drivesitfar

Well-known member
Joined
Oct 23, 2013
Messages
36,076
Location
Pacific Northwest
It looks like e got it pretty well figured out now. The yellow bucket looks like hydraulic cement I used to repair some concrete window ledges at my parents 100 year old home last year. I think you mentioned some sort of reinforcement mesh or something covering the hole to put your repair material over which sounds like a great solution.

It also sounds like you have great neighbors which is always a good way to live instead of having the opposite.

Good luck!!
 
OP
N

Nobody-named-Olli

Well-known member
Joined
Jan 9, 2025
Messages
1,650
Location
North Rhine-Westphalia; Germany
@drivesitfar Thank you! Actually, the mortar itself is fiber reinforced.

( The neighbors are generally fun, I don’t necessarily agree with/like everything they do, but nothing so serious that I would trade it for a ‘life of misery‘ in constant fighting over the fence. That just wears you down and out, nothing good will ever come from it. Plus you know, with this overall ‘laissez-fair‘ approach we’ve been running here in the neighborhood, I’ve made some noise on a Sunday or had a container delivered before 7AM on a weekday without someone giving me trouble/ complaining about it. So I’m not gonna be the one to start a ‘war’ over some trivialities, as this typically just goes absolutely nowhere fast. And with all the challenges that future will surely hold, who knows what we will still need each other for. So yeah, spent some time together on a little gutter adventure, why not. ;) )

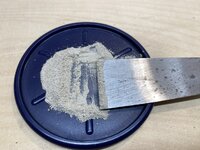
I’ll try to show the fibers in the mortar up close:

IMG_5640.jpeg

IMG_5640.jpeg

IMG_5641.jpeg

(And before someone ‘freaks out’ - this has absolutely zero to do with asbestos. While I wouldn’t eat it or put my nose in it, the fibers are not respirable.)

Kind regards,
Olli
 
OP
N

Nobody-named-Olli

Well-known member
Joined
Jan 9, 2025
Messages
1,650
Location
North Rhine-Westphalia; Germany
#Nobody’s Storage (building materials) & Boiler room

1. Small water issue.

1.4 FULL STOP.

This chapter could have various titles: “The rule of two.” or to quote Yoda: “Always two there are, no more no less.” or accompanied by less dark humor: “What a difference a day makes.”.

Yesterday afternoon I had a molar extracted by my dentist which was smooth sailing all the way. However, you are supposed to give it some time for the cavity to stop bleeding and build up a ‘plug’. So I didn’t continue on the inside prep and masking work, instead did some other stuff and relaxed for the most part.

Today I started to make room in the work area.

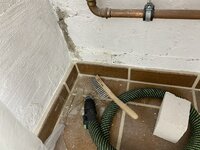
And I discovered this, after moving the rolling container that contains our small supply of tawing salt.

IMG_5643.jpeg

Doesn’t look like much, but: Sadly I know exactly what that means.

And yes, jackpot.

IMG_5646.jpeg

Not that I needed more proof, but why not scratch a little and see how badly the mortar is already damaged in that area.

As expected, just crumbles.

IMG_5647.jpeg

At that point, it became a much bigger project & and will highly likely also become an insurance claim against my neighbor’s insurance. I have to talk to him about that asap.

If you look at the picture above, the left hand wall is the outside wall to the front. This was injection sealed a couple of years ago and is more or less dry. The right hand wall is also an outside wall, but towards the neighbor. We are sharing a foundation, but have entirely separate walls with a filled? gap between them. This wall was not injection sealed because it wasn’t deemed necessary back then.

IMG_0193.jpeg

What likely happened, since the gutter issue has been persistent for months, a lot of the water trickled down and into the gap. Since that gap was certainly filled, or by now has filled with dirt/soil over time it has probably soaked up a lot of the water and is keeping the moisture only to release it into the walls. I’m fairly certain, my neighbor will also have a massive wet spot inside his corner.

The other option is, it is not just the water coming down from the broken gutter (over months and months) but also a broken (or leaking from being blocked) down pipe further down below - where I haven’t excavated, yet.

So whats the course of action now, you might ask.

Well, today is our ’version’ of Labor Day and a holiday. Since it falls on a Thursday this year, many companies won’t resume work until after the weekend on Monday. And since there is no real emergency, I won’t try to make any calls before Monday.

On Monday, it’s calls to our insurance provider, our building protection/ waterproofing specialist and our HVAC tech - because for work in that area to take place, it will be best to remove the gas pipe temporarily. (The copper pipe you see in the pictures is gas supply/feed.) I also need to speak to the neighbor and he then hopefully will make a call to his insurance provider. And then we need to make a plan how to investigate, determine cause, rectify - and last but not least find common ground over who is going to foot the bill for what part of the exercise. …

For the original project, I wasn’t going to give the neighbors a hard time about it as I accept responsibility for the pipes not having been removed earlier/ when the switch from oil to gas was made. Also, including the shovel I bought, this was going to be a project that would cost us 120,- EUR/ 135,- USD in materials and only my labor/ time.

But now this has turned into a much bigger project and depending on the investigation’s results this can now run from anywhere between a couple of grands to full five figures - when an actual excavation is needed.

Needless to say, I did not commence with prep work and masking. And the whole project is now on hold until I know what the full extent will be.

Not that I needed this, but it is what it is and we will take it from here. Might make for some interesting content if nothing else.

Kind regards,
Olli
 
To avoid these ads, REGISTER NOW!

drivesitfar

Well-known member
Joined
Oct 23, 2013
Messages
36,076
Location
Pacific Northwest
If it was me I’d probably just grind off the old mortar and paint and do the repair with that fiber filled mortar/concrete you used. While it might be the neighbors fault pricing it might be difficult and from past experience lawsuits or insurance issues between neigh doesn’t usually end well.

You said your water table is lower than where you were removing the pipes but is it maybe not lower than the foundation? It’s your home and your money do you make the judgment call and I wish you the best in any decision you decide.

Good luck!!
 
OP
N

Nobody-named-Olli

Well-known member
Joined
Jan 9, 2025
Messages
1,650
Location
North Rhine-Westphalia; Germany
I wouldn’t exactly phrase it the way that anyone is at fault here. If I, in my wildest imagination, had foreseen this, I would have pressed him on the gutter issue when it first became obvious. Or had offered to have it repaired/ help finding a professional to do it.

Truth to be told, they are still new here, have not hired any professionals so far as I can tell, so this is a real problem for them: If you call a roofer/plumber to fix a leaking gutter, they will all be busy and out 6 months or longer. Who want’s a minor repair job fixing a gutter that will easily hold another two decades. There’s no money to be made in this at a first glance. And it‘s not like they don’t know that that ’big job’ that could come from it will most likely never come, because when that ‘big job’ is up for grabs, they will still shop around and not just award it to that guy that came around 5 or 10 years ago to fix that minor issue.

I honestly did not see that one coming, speaking of today’s discovery. And the neighbor, he just lacks the experience, for him it was just a leaking gutter. I’m sure that if he allowed me into his basement to measure, we’re getting elevated levels of moisture and highly likely the same overall picture speaking of the condition of the wall/ mortar.

Still, I fully agree with you @drivesitfar - this is a delicate situation and I need to word/phrase that very wisely when talking to him and present it as a ’we are in the same boat’ type situation. I hope the way I write my posts conveys that I’m not angry/mad or whatsoever. It’s an issue that requires an adequate repair - probably in both basements - and that needs to happen. Without going into too much detail, these are valuable houses and properties, the cost of such repairs done right, easily offsets vs. having to bring them to the market at some point with a moist basement.

As with every problem, you need to find the cause and eliminate. Replacing the mortar has to happen anyway, but just doing that won’t get rid of the underlying problem. If it is/was just the gutter issue, it’s an fairly easy fix along what you lined out. Remove mortar & replace with waterproof variant, maybe inject sealant another meter down the wall and 2 or 3 rows of stone high. But now I want to be sure about that.

The lucky part here is, we chose purely mineral/silicate based materials for the boiler room as well, so it’s almost all water permeable and no risk of mold. Except obviously for stuff stored in that room, which still could get moldy if exposed to this for longer.

I’m not going to be unreasonable and blow this up, but the down pipe needs cctv inspection down to the bend to make sure its not the culprit and then I want our wall repaired. And if that means temporary removal of the gas line, that will have to be done.

At this point, what I expect is his insurance to sign off/ pick up the cost of inspection. I don’t care who, I won’t insist on my preferred HVAC/plumbing company to do it - perfectly fine if the insurance company sends someone or if the neighbor gets to choose. Just take plenty of pictures or have a video - with time/date and length and give me a copy. All good. :)

I will have my insurance agent take a look at it, I will have my specialist take a look at it. That is at my discretion and while the insurance agent’s visit will be free of charge, I will pay my specialist‘s hourly rate and travel expense. It’s quite likely that he won’t be asking for payment for such a short visit/ assessment, then it’s a summer BBQ or whatever on us, we have history, so all good as well. Either way, I’m not going to claim those expenses from either the neighbor or his insurance just for the sake of it.

I’m not an idiot, so I’m not going to discuss any of the latter with the neighbor‘s insurance in the first step.

For the second step, if it is the easy fix, I will offer to do this myself for an agreed lower lump-sum based off the cost of/ compared to having my building specialist and my HVAC specialist do the work.

I don’t need to make money of this, if it covers materials and the HVAC specialists quote, as I’m not getting around having my HVAC specialist remove and reinstall the gas line (as I’m obviously not ’messing’ with that myself) I’m satisfied.

Most of the time, when dealing with insurance, they are far more likely to quickly accept that, vs. them arguing with the professionals over quotes/ quoted work they think is not necessary or ‘too expensive’ compared to some low-baller they would typically hire.

If it is not the easy fix, it isn’t entirely my ’problem’ anyway. Then my neighbor’s insurance will split the cost of what has to be done for us off to their third party liability branch/department and what has to be done for him will come out of the home owner/property or building insurance department If he is lucky.

But I’m hoping it’s the easy fix and then I don’t think that we will encounter any real problem at all that would jeopardize going forward as neighbors. And it is entirely up to him/ them to fix it on their end or leave it as is. That does not affect us.

I also don’t see any reason here at all that this will end up in the hands of lawyers or in front of a judge/court.

Again, if we have that wet spot, chances are 98% that they have the same wet spot on their wall. They might not have checked or realized that yet, they might have a cupboard, shelving, boxes … in front of it. But if it is the pipe that causes it, even if just partly blocked and leaking, it won’t go away and come to bite everyone if not fixed properly. I’m sure they will understand it is their property & home at risk as well.

I’m really laid back and easy going all the time, so we’ll see how that goes and where we are on this next week.

Kind regards,
Olli
 

drivesitfar

Well-known member
Joined
Oct 23, 2013
Messages
36,076
Location
Pacific Northwest
Ollie: your response here has me thinking that you have thought this out and have a plan that might work so I’ll just keep watching and enjoying your posts. My thinking originally was that this damage probably took more than a few months of gutters leaking too so proving issues are fairly new might be difficult.

Good luck and keep up the good work!!
 
OP
N

Nobody-named-Olli

Well-known member
Joined
Jan 9, 2025
Messages
1,650
Location
North Rhine-Westphalia; Germany
#Nobody’s Storage (building materials) & Boiler room

1. Small water issue.

1.5 Preface. What happened after ’Full Stop‘ until now, a month later.

I’ll try to keep this brief, but also offer some explanation where necessary.

I had my neighbor over a couple of days later and we assessed the damage together. We had a good conversation, not just about that issue, and in the end he went back over to his place with my moisture meter. As I expected, he had water damage in his basement as well.

We went on a little ‘gutter adventure’ with the big community owned ladder and did CCTV inspection on the down pipe right to the bend below the foundation. That is OK.

He did eventually call it in with his insurance and provided me with a case#.

I talked to my specialist and his initial response was quick as always, sadly he ghosted me after that. Having experienced that before (not the first time I had to remind him 3 or 4 times to get another response & quote) I decided that after 2 reminders with no response at all, I would not play ball any longer and just leave it at that.

Another issue that came up in between were the floor tiles. Those were a classic German product, produced in the same oven since 1974. Company went bust, was acquired, new owner shut down that oven about 9 months earlier. Tiles not available any longer. This was the response I got from my tile dealer upon inquiring for a box or two of these tiles, in case we need them - as some would have to be removed from the floor.

However I was still in the position of having to find a new specialist. I did find a company that does injection sealing & was quick to respond and make an on-site appointment, the guy that came was a classic sales rep and basically confirmed what I already knew, the wall is moist, moisture barrier is shot. They can do the work, will send a quote. We talked a bit about it, I let him know we already had injections done to the long outer wall, and he showed me their moisture meter and the results.

The same day I got their quote, and I already expected a very high price based on the sales rep. behavior/ website/ how they operate, but what they quoted was simply ridiculous. 5.4k EUR/ 6.1k USD to repair and inject that corner. And that is when I do the tile removal and later setting myself & hire a HVAC guy to temporarily remove and re-install the gas line. But then again, it is what it is and I didn’t have any other option at that very moment.

I though about it for a moment and came up with another plan. Since these building protection & sealing specialists that inject, rather than excavate and seal from the outside, are hard to find, I called the manufacturer of the injectable & expanding sealants typically used for this. Called HQ, explained that I was looking for a company in my area that was using their products and to my surprise, they didn’t question my motivation, gave me the cell# of the sales rep. for our area and connected me to him. He then immediately gave me two names upon hearing what I wanted/needed and I was back in the game.

I was a little surprised he did not give me the name of my (former) specialist, as he would have been the closest.

(I had already thought of an innocent explanation as to why I did not want to contact him, without causing any harm, as I wish no ill upon him - ghosting me or not - we have always been and still are to some extend on good terms. I don’t burn bridges if I don’t absolutely have to.)

I simply chose the closest of the two contacts (still a 50 miles roundtrip) that I got through the sales rep. and gave him a call.

We had a great conversation, he wanted pictures, plans and information via e-mail and then get back to me. Got back to me that same evening, also scheduling an on-site appointment.

That appointment took finally place on the 26th of May.

Now please keep in mind that I discovered the moisture issue in that corner on May 1st. And I did my mini excavation before that, on April 28th. The last time it had rained significantly, was on April 24th. We had ventilation running 24/7 ever since.

The new specialist brought a test kit and moisture meter that penetrates deep into the wall and gives kinda a combined result. (My moisture meter penetrates 4 cm/ 1.57” deep into the wall max. under perfect conditions)

His assessment then was to leave it as is, only to remove the loose mortar manually with a wire brush and replace.

He based that not only on the results of his testing, but also the state of the grout around the tiles and the fact that the tiles didn’t sound hollow/loose. He said there is definitely no water coming from below, otherwise the grout would look very different and tiles would sound hollow/ loose - so it was definitely a one time occurrence from the broken gutter. He would advise not to do injections as that is not necessary at this point.

He then went over to the neighbor, as I was asked to send him over and while the neighbor had to take down all the plaster, the brick wall and mortar - just like ours were OK. The neighbor also had a dryer running the whole time.

I’m very happy about the end result, not just for us but also for the neighbor - as his damage was significantly worse than ours overall - taking all the plaster that had to be removed into account.

We closed the insurance case without claim.

The new specialist didn’t even want any reimbursement for the drive, time, (…). He was just like, be happy that it turned out like this.

I’m currently waiting on a new wine delivery, and a couple of other items, so I will send the ‘new specialist’ a nice “care package” in the coming days.

I will continue in part 1.6 with my work as originally planned.

Kind regards,
Olli
 
OP
N

Nobody-named-Olli

Well-known member
Joined
Jan 9, 2025
Messages
1,650
Location
North Rhine-Westphalia; Germany
#Nobody’s Storage (building materials) & Boiler room

1. Small water issue.

1.6 Masking/ dust protection & gas line protection.

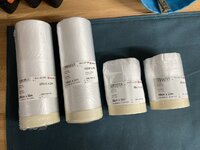
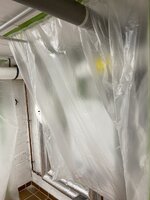
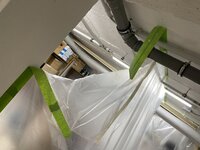
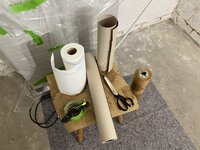
Here’s a product I really like, it’s masking foil with tape on a roll, that can then be unfolded to full length.

IMG_5105.jpeg

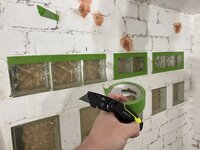
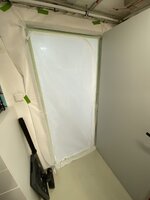
As usual, I stick a double row of FrogTape to the wall/ceiling first. Then stick the masking foil with it’s adhesive strip to that.

IMG_5734.jpeg

IMG_5735.jpeg

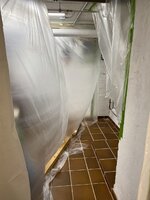
Put in a dust door. Same procedure, FrogTape first, then the double sided adhesive for the door.

IMG_5742.jpeg

IMG_5743.jpeg

Time for the ‘gas pipe shield’. Since I will be drilling from the outside in, I want a layer of protection.

IMG_5745.jpeg

IMG_5746.jpeg

Gas off.

IMG_5751.jpeg

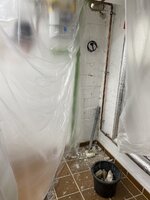
All ’curtains’ down. ;) Everything is wrapped up, especially the boiler, air intake, chimney vent …

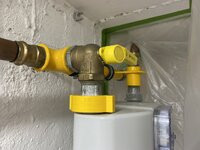
IMG_5753.jpeg

IMG_5754.jpeg
 
OP
N

Nobody-named-Olli

Well-known member
Joined
Jan 9, 2025
Messages
1,650
Location
North Rhine-Westphalia; Germany
#Nobody’s Storage (building materials) & Boiler room

1. Small water issue.

1.7 Setting up & starting pipe removal/ making space/ access for the rotary hammer.

Hi to everyone on this beautiful day!

IMG_5755.jpeg

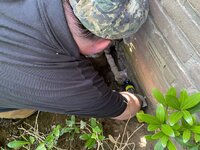
In this position, my small Snap-On reciprocating saw with a Bosch carbide blade was the best options to cut away all the excess pipe. I use a cutting wax/ paste on the blade to keep the cut cooler and thus making these blades last longer.

IMG_5758.jpeg

IMG_5768.jpeg

Being a good part through both pipes, I decided to make my life a little easier by bending the vent pipe (still fixed to the wall at this point) and hopefully snapping the last bit off.

So first I had to remove the pipe brackets.

IMG_5776.jpeg

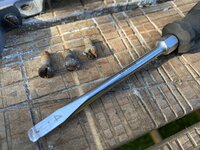
This is again one of those moments were the PB Swiss demo drivers shine. The Swiss (VSM) tip on the slotted drivers makes removing rusted and damaged fasteners just soo easy.

IMG_5791.jpeg

IMG_5798.jpeg

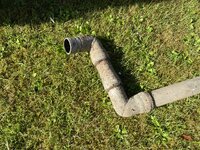
To my surprise, the vent came right out the last sleeve, didn’t even need to snap it at the cut.

IMG_5800.jpeg

A little more cutting with better access on the remote fill, and that’s it.

IMG_5787.jpeg

IMG_5782.jpeg

The cutting wax/ paste I use - and you can see how well those Bosch carbide blades cut even through a partly mortar & dirt filled pipe.

IMG_5789.jpeg

Will continue in 1.8
 
OP
N

Nobody-named-Olli

Well-known member
Joined
Jan 9, 2025
Messages
1,650
Location
North Rhine-Westphalia; Germany
#Nobody’s Storage (building materials) & Boiler room

1. Small water issue.

1.8 Layout, drilling & chiseling.

My original idea was to drill through the wall in a rectangular shape around the pipes, and then remove what I thought would be a block. Kinda like children learn to do in kindergarten, with a blunt needle pricking through paper to ‘cut’ out shapes or objects.

Using a stainless wire brush to get the dirt off, not only so I can see my pencil line, but it’s also important for the coating later.

IMG_5802.jpeg

Layout

IMG_5803.jpeg

A lot of the work had to be done laying down on my belly.

IMG_5808.jpeg

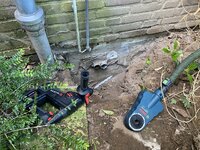
Setting up to drill. Drilling dust attachment on the dust extractor.

IMG_5817.jpeg

Nailed it. But that drill bit went in far too easy.

IMG_5819.jpeg

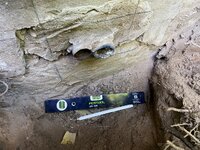
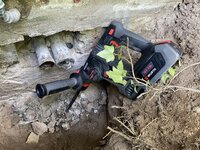
Switching to a chisel. And yeah, it’s just crumbling out - whatever they used back in the day to set these pipes.

IMG_5827.jpeg

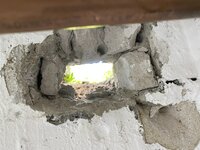
Some more chiseling, and I can now see the ‘inside’ bricks of the double brick wall.

IMG_5840.jpeg

IMG_5839.jpeg

IMG_5846.jpeg

Will continue in 1.9
 
OP
N

Nobody-named-Olli

Well-known member
Joined
Jan 9, 2025
Messages
1,650
Location
North Rhine-Westphalia; Germany
#Nobody’s Storage (building materials) & Boiler room

1. Small water issue.

1.9 Drilling through the inside bricks & pipes out.

Switching to a long drill bit, I can now drill through to the inside.

IMG_5858.jpeg

IMG_5859.jpeg

IMG_5873.jpeg

Little love tap.

IMG_5864.jpeg

Removed the gas pipe shield. Perfect.

IMG_5877.jpeg

I decided that I will punch the pipes through from the inside to outside. I just need an extension. That is easily cut from the vent pipe. I really like these thin Klingspor ‘ceramic media’ cutting discs.

IMG_5881.jpeg

IMG_5883.jpeg

IMG_5888.jpeg

IMG_5890.jpeg

Pipes out.

IMG_5895.jpeg

Will continue in 1.10
 
Last edited:
OP
N

Nobody-named-Olli

Well-known member
Joined
Jan 9, 2025
Messages
1,650
Location
North Rhine-Westphalia; Germany
#Nobody’s Storage (building materials) & Boiler room

1. Small water issue.

1.10 Masonry work.

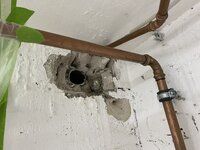
Aftermath.

IMG_5899.jpeg

IMG_5901.jpeg

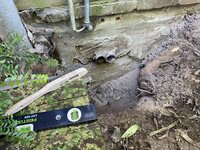
All in all this is a much larger hole now than I had planned originally. But not a real problem. Quick trip to the building materials store and pick up 3 sand-lime bricks.

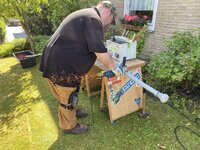
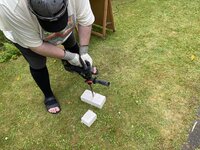
Scoring with a stone saw. The temperature had risen all of the morning, since the heavy lifting was done, I decided to switch into short jogging pants and sandals.

IMG_5910.jpeg

Love tap with the rotary hammer & installed chisel. Perfect cut.

IMG_5915.jpeg

Fits.

IMG_5917.jpeg

Time to brush the mortar joints on the inside and get rid of everything loose.

IMG_5918.jpeg

Double check with the rotary hammer & installed chisel that everything is stable.

IMG_5920.jpeg

And now prepping the mortar joints and wall with a slurry mixed from the reinforced mortar and cement.

IMG_5923.jpeg

IMG_5924.jpeg

IMG_5929.jpeg

Will continue in 1.11
 
OP
N

Nobody-named-Olli

Well-known member
Joined
Jan 9, 2025
Messages
1,650
Location
North Rhine-Westphalia; Germany
#Nobody’s Storage (building materials) & Boiler room

1. Small water issue.

1.11 Masonry work continued. Dust walls down & checking for gas leaks.

Now using the reinforced mortar & cement mix to close the hole in the wall.

IMG_5932.jpeg

IMG_5934.jpeg

IMG_5936.jpeg

Taking dust walls down. And yes, that’s a tiny amount of paint flaking off the ceiling even with the FrogTape.

IMG_5938.jpeg

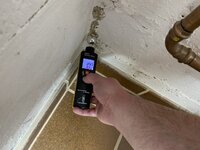
Using my Ridgid Micro CD-100 to check for gas leaks. Now I know I didn’t touch the pipe - or anything at all - neither with the drill bit, chisel or my extension when hammering out the pipes. But still, I want to be 100% sure.

First check as is, second check with gas turned on, third check with boiler in ‘chimney sweep’ mode aka full load firing and gas supply at the highest. All good.

IMG_5944.jpeg

The next day, more masonry work.

IMG_5965.jpeg


Will continue in 1.12
 
OP
N

Nobody-named-Olli

Well-known member
Joined
Jan 9, 2025
Messages
1,650
Location
North Rhine-Westphalia; Germany
#Nobody’s Storage (building materials) & Boiler room

1. Small water issue.

1.12 Applying the 2 component sealant.

Your friendly Binford Tools sales rep. at work. ;)

IMG_5969.jpeg

IMG_5970.jpeg

IMG_5974.jpeg

IMG_5978.jpeg

IMG_5981.jpeg

IMG_5987.jpeg

After reviewing the consistency of the sealant and considering the surface of the wall, I decided to only use a brush to apply the sealant, a trowel would have made no sense. And I was able to apply multiple thick coats with the brush.

IMG_5990.jpeg

IMG_6004.jpeg

The next day, fully cured.

IMG_6019.jpeg

Part 1.13 will follow at some point next week, when I refill and put the protective layer in front of the cured sealant.

Since we got some rain yesterday, a couple of hours after I finished - I will give this a couple of days before closing it.

Hope this was interesting and you enjoyed reading & watching the pictures.

Kind regards,
Olli
 

drivesitfar

Well-known member
Joined
Oct 23, 2013
Messages
36,076
Location
Pacific Northwest
Ollie: it was a tough situation and repair anyway you looked at it and thankfully you resolved it better than most professional people would have and of course with class and hard work.

Since you have a hand 4.5 inch grinder you might try putting a mortar blade on it and using it to cut around each side if bricks are expensive or one side and hit with a small sledge hammer or even a hammer and they usually crack in a line. Since I usually have plenty of bricks or material laying around cause I buy in bulk sometimes I use a tile chisel and just score each side before hitting it to break or just take a chance and hit and hope. Hand sawing looks like it worked maybe as well or better and great work with the hydraulic cement and overall job. You have more nice testing tools than most professionals too and I’m a bit jealous to say the least.

I’m happy to hear you have this work in your rear view mirror so to speak and that you and your neighbor are still on good terms and maybe better than when you started.

Congrats on a job well done!!
 
Last edited:
OP
N

Nobody-named-Olli

Well-known member
Joined
Jan 9, 2025
Messages
1,650
Location
North Rhine-Westphalia; Germany
Thank you very much @captain14 !

Will you have to match an existing pattern, or will it be covered/cladded?

I had to match an existing pattern & color scheme once, that comes with its own set of challenges. In the end, it takes a bit more time & a little more effort/ attention to detail and then it will turn out great. :)

Kind regards,
Olli
 
To avoid these ads, REGISTER NOW!
Top Bottom