
OP
olsenmotorsports
Well-known member
It Is always fun when new equipment shows up. Baileigh has been a good partner for us, Shane in their media department is great to work with. He saw some of the stuff we were using to shrink and stretch, called me up and we made a deal

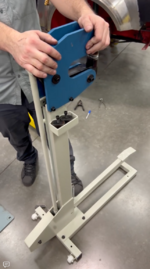
Sorry for the horrible picture's once again but I am pulling screenshots off media vidoes
The MSS-16 is a great bit of kit. Its small and mobile, and helps on the inside radius as the jaws are so small. IIRC it is good to 18 gauge.

The MSS-14 is the big brother. This one is good to 14 gauge *not something we work with frequently - but I am huge fan of buying stuff we do not need so that when we actually have a need (even if its only once) we can execute it and not struggle.
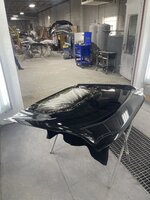
We will probably use the big boy more than you would think for the long exposed panels as it will just take a huge bite and make S*** happen.
How often do you guys upgrade equipment? For me it seems like its never ending. I started our store with no pot to piss in so I had to make do with whatever I could scrounge up, and then upgrade as I could cash flow it.
Happy thanksgiving!
Sorry for the horrible picture's once again but I am pulling screenshots off media vidoes
The MSS-16 is a great bit of kit. Its small and mobile, and helps on the inside radius as the jaws are so small. IIRC it is good to 18 gauge.
The MSS-14 is the big brother. This one is good to 14 gauge *not something we work with frequently - but I am huge fan of buying stuff we do not need so that when we actually have a need (even if its only once) we can execute it and not struggle.
We will probably use the big boy more than you would think for the long exposed panels as it will just take a huge bite and make S*** happen.
How often do you guys upgrade equipment? For me it seems like its never ending. I started our store with no pot to piss in so I had to make do with whatever I could scrounge up, and then upgrade as I could cash flow it.
Happy thanksgiving!


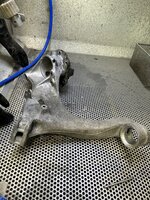


 ) Of course, it was the furthest rocker in the cam housing, which the other side is buried up against the chain housing. Why did I agree to take this ticket??? Turns out this was the one with the broken rocker arm, I am sure the over tightening of the shaft had something to do with breaking the rocker arm, but I cannot prove it outside of theory.


