Steve from Socal
Well-known member
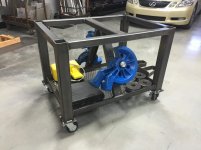
Very nice shop, work and equipment. I really like the dump trailer; a question on it, does it have supports for the back when dumping?
Steve
Steve

Thank you, supports for what? The doors are held open when dumping if that what your asking.
Thanks Mike,
I seem to be using the 5C system a lot these days. I can't believe I went so long with out (15 yrs). Did you ever buy a 5C scroll chuck?
Finding the time to replace/upgrade a functioning machine is tricky, but once your done, its worth every once of effort.
I need to PM you soon as I need information on the "clunk" in the steering column (under dash) on the 05 Dmax.
Take care Mike,
Paco
Paco,
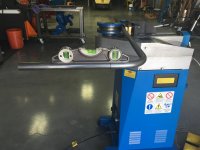
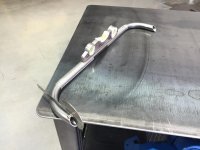
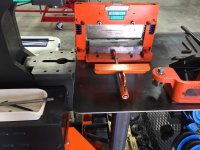
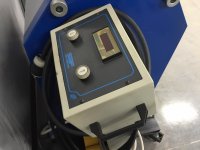
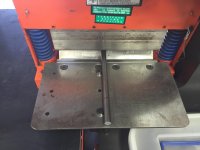
Your threading stop with proximity sensor looks good! I'miss curious though, how are you stopping the lead screw when you reach the stop?
Support for the back of the trailer frame, when the bed is raised the weight shift wants to unload the tongue of the trailer. My trailers with ramps have bases that rotate down to support the back of the trailer when loading. Example; I am driving a scissor lift onto the trailer, without the supports the back of the trailer now has 6K Lbs bearing on the back edge of the trailer.
In looking at the pictures of your dump trailer, what keeps the tongue from lifting the back of the truck when you dump?
Steve
Paco, still haven't purchased a 5C collet yet. Procrastinating I guess. I've been trying to locate an aircraft positioner so that is what I have been keeping my eye open for. Missed one just like I was looking for on eBay the other day because I was too late. Oh well, that's how it goes I guess.
Mike.
Mike, I bet you'll use the 5C chuck way more than the aircraft positioner. I'm still looking for an 8" rotary table/chuck.
I purchased an 8" Bison 4 jaw scroll chuck with fine independent jaw adjustment, a real fine chuck but the 5C has yet to come off since the spider build.
Take care Mike,
Paco
Mike,
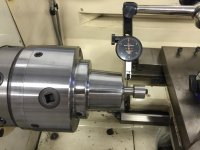
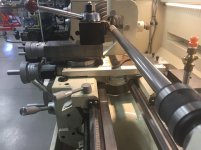
the 5C chuck was purchased via eBay with a independent backing plate and it is a set-tru style around $350-400. I think I sent you a link via PM in the HM forum. If you no longer have the PM, let me know and I will resend it. For the money, this thing kicks *** with minimal run out after set-tru fine tuning. I remember it to be less than 2 tenth on the indicator. A friend has the Bison version with the same runout but his looks way cooler than mine.
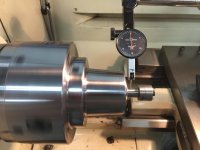
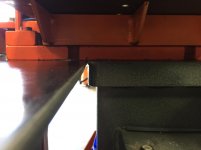
You can see the static reading in the first photo vs the dynamic reading in the second photo. Its about a needles width on a .0005 Best test indicator. As you know, its how well you register the back plate as well as the set-tru feature.
I will add the entire chucks outside surface had a slight wobble but was "tuned-up" to spin true, the business end was already true.
Let me know if you need the link again.

Mike,
Your gonna realize you should have got it sooner hehehe.
Have you considered building your own positioner? Depending on the size your after, this could be a neat project and you have the shop and skill.
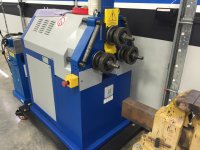
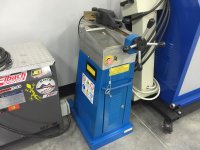
Back in the day when I worked for a shop, we built a large roller type positioner capable of turning large rolled formed tanks down to 6" pipe. We used a reduction gear box and speed control. With the new technology, a guy could use a DC motor (tread mill) and really control the speed. An 8" chuck would probably be a great size with a through hole spindle set up. They are nice to have for sure.
Let me know what you think of the lathemaster scroll chuck.
I married a loan officer too hahah.
Take it easy Mike
 ).
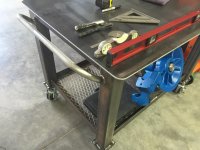
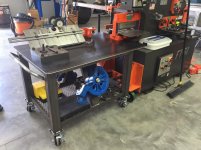
). Amazing shop! Almost drooling looking through all your photos. Also love the custom touches!

Thanks Mike, your always a gentleman.
Thank you Mike.ASC
BloodSweat,
The Sierra 2500HD is an 05 Duramax LLY/Alison, it had a 6" Fabtech lift. I have added a full Denali touch screen nav,6 cd changer and Denali Bose amp. It required re-pinning 23 wires and running 13 new wires including sat antenna. It seems any GMC of that year that came with a Bose premium package has a 10" woofer under the center console that was only used in a Denali or Cadillac Escalade. After the harness modification and upgraded amp the system came alive. It does require a visit to the dealer for vin programming to make it work.
Engine work; Superchips program,cold air (AFE) intake, 4" turbo back exhaust (AFE), EGR blocking plate, "finger stick" and propane injection by MSD. The oil remains the color of honey between oil changes thanks to the EGR blocking plate and "finger stick" (basically resistors that fool the computer to keep the EGR valve and MAF happy).
She produced 620 HP and 630 ft of torque (Dyno) with the propane injection and Superchips programed in performance mode. I also installed a pre fuel filter (2 micron) to supplement the current filter.
Body and chassis; Custom built rear bumper with tire carrier (drops to the ground) and projection headlights,fog lights with HID. She currently has 80K and is mostly kept in tow (programming) and only used to pull a tailor full of steel for shop work. she also has Amp Research folding running boards as Im sawed off at 65.5"
A very comfortable driver and is always a toss up between taking a road trip in the 430GS or the "Cracker" as I affectionally refer to her. She gives me 20-21 MPG on the highway if I keep her under 2K RPM (70-74 MPH).
I have done all the mods myself and have service/tech manuals for entire truck.
Thats the story on the Sierra....
Mike, tell me more about the PVC re-route.
Oh, I forgot to mention the onboard compressor and locomotive horn (153 decibels hehe) triggers by a foot switch to the right of the accelerator. A pillar post has EGT, air pressure, and propane guage.
I used to run 20" wheels but after buying two set of BFG's, I went to 18" as the rubber is almost 1/2 price. Sound like you and I reserve our rigs for tow work and play.
BYW, I like your dresser. I have a 99 Road glide, 95 Bad boy,and a stroked 86 883 (1200).
Have not ridden since last fall. Too damn hot this time of the year.
My 03 had 54k on it when I bought it last year, has just over 60k currently. It doesn't see winter and it's so hard to not drive it, as nice as it is. I'd like diesel swap it or turbo the 6.0 for a little more towing power.
You guys have build links or pics? fnieto, I'd love to see pics of yours with all of your custom mods. Thinking about making a rear bumper for mine as the quadrasteer has led to a few dings in the stock bumper. I'm also looking at the same running boards.