To avoid these ads, REGISTER NOW!

Above 1200 Sq/FT Overcoming Good-Deal-Itis One Project at a Time

Wokspaces above 1200 squarefeet.
OP
S

SilverJimmy

Well-known member
Joined
Apr 14, 2012
Messages
1,685
Location
Prescott/Flagstaff, AZ
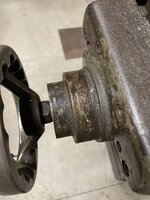
I don’t think my buddy that owned the mill wasted much time cleaning it, it was a tool to do a job and if it worked he didn’t waste time making it pretty! Me being a novice and not knowing any better, I started cleaning it up from the near 50 years of dried on cutting lubricants and chips that were everywhere! I think I got almost 5 gallons of chips out of the knee area. It was completely full and the only way into that area is a slot about 1/4” wide behind the table. I started cleaning the mill body, all the t-slots and the ways using scrapers and rags soaked in mineral spirits.
51B417B5-1F14-4C2A-9ECE-C80D596F6823.jpeg
The feed knobs were almost unreadable!
329FF655-BAE0-4F1C-A5A5-EA32CE695CEA.jpeg
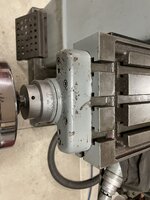
After a couple hours it was starting to look pretty good…
663264A1-4764-4EB3-9C81-B3C9990802CF.jpeg
And these were the most satisfying to get cleaned up!
5F2CB468-B50C-486D-A913-73B2802C760F.jpeg
Still have a bunch more to clean, any suggestions on cleaning the Sony DRO Magnescales? They are really caked with gunk!
D419D9C1-F6F0-48A0-A46D-DBC0E079BABB.jpeg
Right about this time we were getting ready to head to Bonneville for SpeedWeek and the 2022 boat races! When we got home from that mess I really got busy in the shop. Till next time, thanks for checking this out!
 
To avoid these ads, REGISTER NOW!

slik560

Well-known member
Joined
Oct 5, 2009
Messages
787
Location
Kansas, USA
For those SONY-things I would try a citrus cleaner [spray on] with a microfiber cloth and maybe a plastic scraper of some kind. A cheap microfiber that you would'nt bother cleaning. Not sure what these rails do, but SONY implies something electronic - more delicate than cast iron. ;) Good luck. It looks so much better. All that crud that the owner never bothered with would have caught up with you down the road.
 
OP
S

SilverJimmy

Well-known member
Joined
Apr 14, 2012
Messages
1,685
Location
Prescott/Flagstaff, AZ
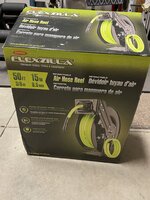
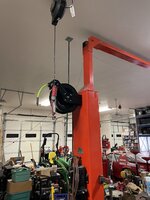
Actually got something done last night! Mounted a FlexZilla airhose reel on my ALM7000 lift. Drilled and tapped 4 each 5/16-18 NC threaded holes into the right lift column.
74FB90E0-C380-4B60-BCB2-A35E40F27DCB.jpeg
These air hoses are nice, they don’t try to catch your feet and kill you when you’re not paying attention!
A0347460-D4A8-47BA-92BF-BB04841E97E6.jpeg
C42E9F6B-7AAA-4582-93CB-4BF3AAC59493.jpeg
Now I need to run the black iron pipe I picked up a couple weeks ago. I contemplated using PVC but then I knew you guys would show up at my place and…. Well, you know! 😂
 
OP
S

SilverJimmy

Well-known member
Joined
Apr 14, 2012
Messages
1,685
Location
Prescott/Flagstaff, AZ
Got home from Bonneville all inspired to get my stuff organized and ready to work, so I came up with a plan…
F40EBF67-BAA1-450E-B15D-161FCC094C57.jpeg
I envy those of you who can draw a perfect rendition… that ain’t me! This is all in and under my old Price Club shelves I wrapped with plywood. As I moved stuff in and around the shelves it did finally come together. I’m getting there!
 
OP
S

SilverJimmy

Well-known member
Joined
Apr 14, 2012
Messages
1,685
Location
Prescott/Flagstaff, AZ
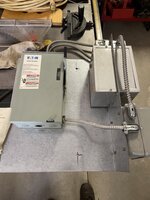
I now needed the magical Three Phase Electricity so of course I knew I could find a good deal on the equipment to make it. I started monitoring FBMarketplace and CL daily and also put the word out to all my contacts. In a couple days I found a couple Phase-A-Matic static converters down south of me in Prescott for a good deal! Looked at a couple pictures the guy sent me, did a little research, I’m in! So I head down that day with cash in hand and buy this setup…D00A2A92-1E0A-4AFA-BC8B-415E0E75B87A.jpeg
Guy said it was in his garage when he bought the house, didn’t know what the PO was using it for, but I’m happy cuz now I’ve got me TWO 3 phase converters! Till when I get home and really get a chance to look just a bit closer to what I bought…. Sometimes it’s not a good deal, at least not for what I needed. My mill has a 2 HP motor and these are not.
05860C8A-F570-4D7B-ABB8-0EA57A72B3BF.jpeg
This one’s too big!
7ECD7523-D52D-439E-8C2E-DB109EACCCC3.jpeg
And this one’s too small! According to Phase-A-Matic you have to get the “Goldilocks” version, just right. Can’t be bigger or smaller, has to be 2 HP in the range of the converter. But I am prepared for the next “Good-Deal”!
 
OP
S

SilverJimmy

Well-known member
Joined
Apr 14, 2012
Messages
1,685
Location
Prescott/Flagstaff, AZ
Now I really have to find a way to power my mill. I have three options.
1: Buy a correct static phase converter. They work but are not really recommended for heavy duty use and you lose 1/3 of the power of the machines motor.
2: VFD. My mill is an Ex-Cell-O and it has an variable head unit so I already have that capability.
3: Rotary Phase Converter. Not the best solution if it is running all day cuz it uses power 100% of the time, but in a hobby shop situation like mine maybe it will work ok?
I’m thinking RPC is the best solution for my setup so I start looking for what’s out there in the land of Good-Deals. After a bit of looking I find this deal from Phoenix Phase Converters, a 3 hp RPC that’s 50% off, maybe it’s discontinued or it’s a refurbished unit, but it’ll do what I need.
77424FF9-8ED1-4D4A-944F-22DE29299FBA.jpeg
Looks well made and the instructions look simple enough even for me, should be able to keep all the magic smoke where it belongs.
 
OP
S

SilverJimmy

Well-known member
Joined
Apr 14, 2012
Messages
1,685
Location
Prescott/Flagstaff, AZ
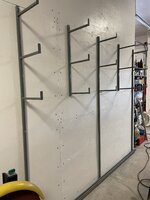
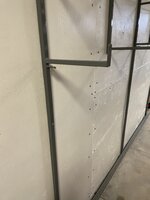
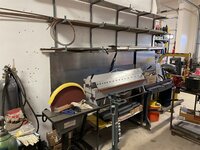
With inspiration from Mike @zmotorsports I welded up something I think will help deal with all the good deals I’ve gotten on materials for all my projects. I had a bunch of different sized stock cluttering up my 4th bay and I wanted to get it up off the floor and organized. So I took a bunch of 1” and 3/4” square tube and welded up these racks, painted it RustOleum gray and then bolted it to my Price Club shelves.
E26F5FC6-ED95-4428-828B-61CBB04F9129.jpegCED4D8AE-B4A4-4E49-98B9-F8583C9FFDC2.jpegBCCD6647-AE3A-4B42-B669-BBF37B947107.jpeg
I used a piece of UniStrut on the bottom for sheet metal storage. It has a pretty large gap in it, if I have more sheet stock than what fits, I’ve got bigger problems!
B5B8592A-0977-4BD2-B993-85E30139CC6E.jpeg331F757B-34C0-4BB1-A0CD-4E14445EC827.jpeg
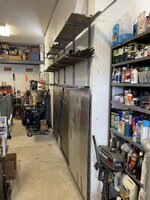
Once all that was done I could move everything back into the 4th bay.
4C738421-2F4A-49F5-88FB-DE72CD7A6108.jpeg
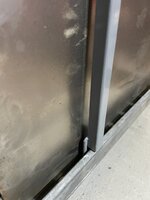
I did make a couple vertical bars to hold the sheet stock against the 1” tube, works pretty good, nothing seems to want to get out of shape.
 
Last edited:
OP
S

SilverJimmy

Well-known member
Joined
Apr 14, 2012
Messages
1,685
Location
Prescott/Flagstaff, AZ
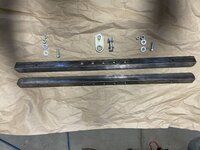
Just in case you were wondering about the vertical bars I made to hold the sheet stock in place..
B01F2E78-9398-4514-80F8-45C552F98A13.jpegE391E367-1AD8-4DDA-B6D5-DC17145A7DC9.jpeg029DAED7-B842-4530-B78F-85C33217806F.jpeg
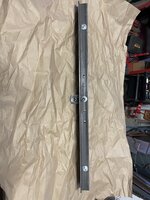
Welded tabs to some 1/2 square tubing that was drilled on one end to go over the bolts I welded to the racks. Primed with RustOleum and then painted them gray.832FA8F8-2E9D-46FB-81F2-6424B9EFC884.jpeg
They are retained by wingnuts at the top and the tab at the bottom slips into the UniStrut, works really well keeping the sheet from falling forward away from the shelves.
4CB8D6C1-CADF-4FC7-86D1-BA7C45A5AF60.jpegF6B4BFEC-24D6-4254-BD5C-FE83025083E8.jpeg
Very happy I don’t have this stuff flopping all over the place any more!
 
OP
S

SilverJimmy

Well-known member
Joined
Apr 14, 2012
Messages
1,685
Location
Prescott/Flagstaff, AZ
Got more done on my lathe. I want to be relaxed and comfortable while learning how to run a lathe so I knew I needed to do some upgrades to it. When this Craftsman-Atlas lathe was designed the average American male was around 5’8” tall and I’m over 6’5” so I knew the lathe needed a lift kit for me to be comfortable for hours operating it. Got 6 nice nickel swivel screw mounts from McMaster-Carr and a piece of 2x4 steel tubing and started cutting and drilling.61285955-BE71-46DF-9A2C-F4D09133BA61.jpeg
Some more RustOleum primer and then the gray paint.45830158-1C3D-45B8-95F3-29063ADE71BA.jpeg
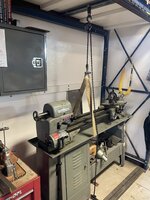
Then I figured I needed to be able to hold my lathe up while I installed the lift kit so I built a lifting beam for my 3/4 ton come-a-long.0FEB5CD7-284F-4C24-9E33-1020CF2BF3B7.jpeg
414E5834-BD27-40F1-A3BF-89CE14CBD6AD.jpeg

Worked great!FC7EB67F-E6B1-4C1E-AA69-26F835E149CC.jpeg1B97C89A-ACAD-428D-A146-4C5B8A08BF48.jpeg0451C620-047A-484A-9AA9-ED1545E80EE6.jpeg233751B3-F33C-4408-80EF-75B4EF2A34BA.jpeg
Next up…. Chip control!
 
OP
S

SilverJimmy

Well-known member
Joined
Apr 14, 2012
Messages
1,685
Location
Prescott/Flagstaff, AZ
To try to contain all the chips that I hope to make I figured I needed to have a plan. My CAD (chalkboard aided design) looked like so…
316BC239-034C-4140-9C9B-E1E011887230.jpeg
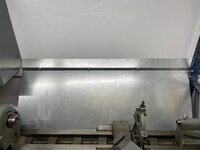
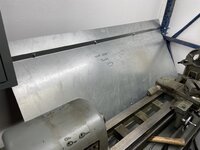
My buddy who seems to always bail me out then went to his old work and bent it up outta some 20 ga. I drilled it to use the bolts in the shelf/wall and the drip tray on the lathe.
79847EEA-E272-4343-A326-DEAEF2289DC0.jpeg
4BBAA552-E0B2-4247-851C-460848813B40.jpeg
Also mounted a cool light I found in my dad’s stash!
11B4917C-023D-40D8-BFD6-AF6F855D175C.jpeg
Put a LED bulb in it, lights up the chuck area great.
 

Attachments

  • 8F3A0328-DC0F-4CBC-AF33-693E84D44D7C.jpeg
    8F3A0328-DC0F-4CBC-AF33-693E84D44D7C.jpeg
    771.8 KB · Views: 20
OP
S

SilverJimmy

Well-known member
Joined
Apr 14, 2012
Messages
1,685
Location
Prescott/Flagstaff, AZ
More Good-Deals, but I hate them….
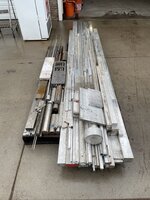
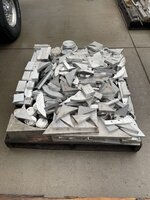
My Mentor, who also is the big brother or really cool Uncle I never had, is having to shut down his home machine shop because Father Time has other plans for him. I have been trying to help him as much as possible to sell and or find new homes for all of his machines, tooling, materials, and supplies that he has acquired in his 40 year career. I have bought as much as I can afford and have a reasonable idea that I could use the item in the time I have left. I told him I wanted nothing to do with his CNC FADAL VMC4020 with a 5th Axis or his Hitachi-Seiki CNC Lathe, I just don’t have the commitment to fill my brain with all those lines of code! Meeting with a representative from Northern Arizona University Tuesday morning to discuss the possibility of donating them to the Engineering School, hopefully they’ll take them and arrange the movers too! My Mentor then gave me all the materials in his shop, new and all the drops! I’m two full truck loads into this and have about one more load to go. Mostly aluminum, 6061-T6, 2024, and a small pile of 7075.
1F3745AD-929D-4C7B-BA22-877889F1B1DF.jpeg
56714801-CD4E-457A-971C-87F2913DF63D.jpeg
I also have a pallet of steel, cold roll bars, round stock, and sheet in 1018 and 8620. Now I need to learn what all these different colors mean that are painted on the ends of a bunch of this stuff!
More stuff to move…. Oh ya, I forgot to mention that we’re moving! Lol!
 
To avoid these ads, REGISTER NOW!
OP
S

SilverJimmy

Well-known member
Joined
Apr 14, 2012
Messages
1,685
Location
Prescott/Flagstaff, AZ
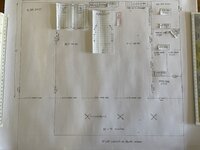
Finally think I’ve figured out the solution to my “Good-Deal-Itis”! My wife and I just bought a new place down south of us, no more Frozen Tundra for us! Almost 2 acres, so plenty of room for my plan. I had to promise that this would be the last “bigger” shop that I’d need to finally get everything organized and into a usable setup. Looking at a 55’x90’ metal building, 4950 sq ft cuz the county requires fire sprinkler system @ 5000 sq ft. Want a 20’ awning over all the bays except for the RV bay, 3 each of 18’x55’ working shop bays, and the last 16’ will be multi-use rooms.
83D9A3EA-FFE2-4218-ACE0-F34E5CF830A4.jpeg
Here’s what I came up with using pencil and paper, now waiting on a price for the building and all the flat work. I’ve been keeping myself entertained by playing with what my wife calls my “paper dolls” cutouts of stuff in the approximate size so I can see where things fit.
AC29301B-1559-42BA-AC40-33435C3CD08A.jpeg
Above all the rooms will be a mezzanine with a forklift landing so I’ll be able to put treasures up there and not have them in the way in the working shop areas. Please, fire away if you see or think I should do something different than what I’ve got penciled out here, I’ve got a big eraser!
 
OP
S

SilverJimmy

Well-known member
Joined
Apr 14, 2012
Messages
1,685
Location
Prescott/Flagstaff, AZ
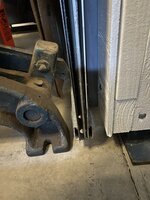
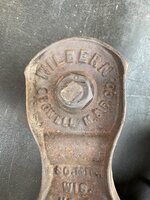
Got another piece of the puzzle today. I want a barn door, 6’ wide and 10’ tall between my RV bay and the work bays so I can move my dirt bikes and 4 wheelers out without having to move the camper and boat that I plan on storing in the RV bay. Swung by my buddies shop, 4th Street Vintage, here in Flagstaff cuz I’d seen some barn door hardware in one of his bins. Picked these up, very cool! These need a 1” black iron pipe to run on, simple enough to build.
3BCAB498-2127-4B7F-89A9-4BE87C5281C5.jpeg
A1E92E24-2EDB-462C-8624-4AF301CA8B01.jpeg
EB2A0B69-1403-40A1-94E4-A8321DB71EEA.jpeg74EB5709-FF1C-48D4-8E35-E4DDA7A5238F.jpeg
Really cool, made in Milwaukee, Wisconsin over 120 years ago. And I’m a retired Snap-On Man, so that makes them even better!
 
OP
S

SilverJimmy

Well-known member
Joined
Apr 14, 2012
Messages
1,685
Location
Prescott/Flagstaff, AZ
Got some drawings of the metal building finally and where I’m thinking of having my stairs come up for the mezzanine is kinda problematic. The steel rafter will have less than 6’ of headroom if I come straight up with my stairs. Looking around here on GJ I found the build by @Juiced06GTO and I‘m thinking the way he did his stairs is the solution I need.
6A3DEA41-5494-4E08-882A-E5A4E9368F64.jpegEB424F8E-3DDC-4192-A8AA-093D18B61E01.jpeg
I want to have a forklift landing at the top of the stairs so I don’t have to go too far back and forth when I’m moving stuff cuz I’ll probably be working alone. Thinking something like this…
22841B64-4123-4DAE-BA90-E4FC266535E1.jpeg
My contractor said a 3’ overhang shouldn’t be a problem, maybe just add a couple extra stringers to it. That way I can keep my forklift out of the wall when lifting stuff up. And I’ll still have the unobstructed opening into the Fab Shop Bay.
 

Lumpy102

Well-known member
Joined
Aug 26, 2012
Messages
207
Location
Ontario Canada
Got some drawings of the metal building finally and where I’m thinking of having my stairs come up for the mezzanine is kinda problematic. The steel rafter will have less than 6’ of headroom if I come straight up with my stairs. Looking around here on GJ I found the build by @Juiced06GTO and I‘m thinking the way he did his stairs is the solution I need.
6A3DEA41-5494-4E08-882A-E5A4E9368F64.jpegEB424F8E-3DDC-4192-A8AA-093D18B61E01.jpeg
I want to have a forklift landing at the top of the stairs so I don’t have to go too far back and forth when I’m moving stuff cuz I’ll probably be working alone. Thinking something like this…
22841B64-4123-4DAE-BA90-E4FC266535E1.jpeg
My contractor said a 3’ overhang shouldn’t be a problem, maybe just add a couple extra stringers to it. That way I can keep my forklift out of the wall when lifting stuff up. And I’ll still have the unobstructed opening into the Fab Shop Bay.
good idea, I'D suggest making the landing 2 ft longer, you'll need room to get around the pallet at the top of the stairs when its sitting on your landing and the top of a flight of stairs is no place to do ballet.
 

Juiced06GTO

Well-known member
Joined
Jun 1, 2014
Messages
356
Location
Sutton, MA
What kind of weight are you going to be throwing up on the platform. I'd def overbuild just to be sure it can handle the weight. Also keep in mind being able to land it on the platform and get a pallet jack into it from the right direction.
 
OP
S

SilverJimmy

Well-known member
Joined
Apr 14, 2012
Messages
1,685
Location
Prescott/Flagstaff, AZ
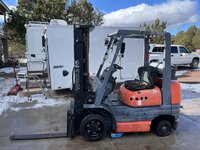
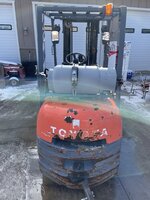
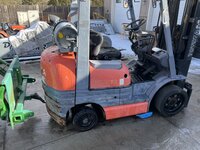
With the upcoming move that is in my future I realized that a second forklift might make the move easier. One here to load stuff and one in Prescott to unload. So using my best skill set, I started looking for a “Good Deal” A couple months ago, one showed up, too good to pass up!
ED4164A6-BC09-4BCC-B217-A7E9504D8B29.jpeg
FFF228E1-E3C0-4F0B-BF68-4F9C1CE29B7E.jpeg
8064E8D6-A4E5-4C3C-9400-D148DCAA3806.jpeg
A 1998 Toyota 42-6FGCU25 forklift. Looks like it has a blown head gasket as there’s coolant in the oil. Toyota made millions of these and the 4Y engine parts seem to be pretty affordable. Going to pull the head and see what’s up, but first I need to move a dead 10,000 lb lump into my garage. This thing is completely hydrostatic so with the engine dead it doesn’t want to move, I can’t even turn the steer wheels cuz they’re hydraulic also. But, I have a plan! My friend who retired that I helped shut down his machine shop gave me his machine skates. Each one has a 7k capacity, so I’m thinking a couple under the frame to get the drive wheels up and then with my John Deere tractor pushing, I should be able to get it inside outta the snow, or as @zmotorsports calls it “White ****”! I know, without pictures, it didn’t happen. Stay tuned!
 
OP
S

SilverJimmy

Well-known member
Joined
Apr 14, 2012
Messages
1,685
Location
Prescott/Flagstaff, AZ
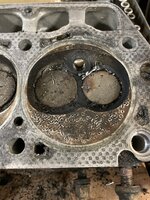
Once it was inside and had the heat of a nice fire to warm everything up, I started tearing it apart. When I got the head off here’s what I found….
383FAE51-12B5-49D5-ABED-113F758F3D7F.jpeg
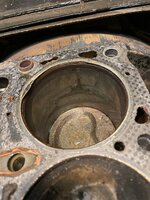
Gasket failure in the fire ring allowing coolant into the oil, oil into the coolant, and, unfortunately, coolant into the cylinder. The coolant and water then caused this damage to the cylinder wall….
A2D4B338-478A-4B6C-95AA-951561B41720.jpeg
I can feel this spot with my fingers, can actually catch a fingernail on the edge. It’s terminal from what I can see. There’s also some other damage in cylinder #1…
B4D61C56-56D8-440D-81CA-B7B06CC9B6A6.jpeg
Something did a tap dance in here, the same damage is on the piston top. I’m now thinking that this needs a complete rebuild. I’ve found a reman long block on the EvilBay for right at 2k, that might be the right direction here.
 
OP
S

SilverJimmy

Well-known member
Joined
Apr 14, 2012
Messages
1,685
Location
Prescott/Flagstaff, AZ
After talking with a guy who specializes in Toyota Forklifts, this model a lot, I’ve decided to follow his advise. He recommended that I just clean everything up really well, flush the oil and cooling systems and then just do the head gasket repair. His thinking was that because I was given the forklift non-running, it would be a gamble to do any major expensive repair before verifying the health of all the other systems. Get it running, make sure the transmission works, hydraulic system works, will it pick anything up without spraying hydraulic oil everywhere cuz the rams are shot. He also told me that over the past year he’s done 6 engine R&R jobs and is just starting the 7th and it takes him over 40 hours to get it done! He charges 41 hours @ $100 per hour. He said that it’s not really difficult, just lots of **** that has to be done and it all is mostly done in the forklift engine bay. So I’m going to go that route and see what happens!
 

hampster

Well-known member
Joined
Jul 7, 2021
Messages
45
Can't count how many times have I wish I had followed that advice!

Must be the optimist in me, I simply never in the moment think "there might be something else wrong besides what I see here".
 
OP
S

SilverJimmy

Well-known member
Joined
Apr 14, 2012
Messages
1,685
Location
Prescott/Flagstaff, AZ
Started cleaning up some parts today so I put the head into my solvent tank and filled all the ports with solvent to see how good the valves and seats are doing.
8527B407-CE80-448D-BE1A-64DC24791ED3.jpeg
After a few minutes there was just a bit of seeping around #2 and #4 exhaust valves. I hadn’t even smacked the valves yet to try and seat them better. I think when I get my gasket set I’ll pull the valves, clean them and the seats, and then reassemble with new stem seals. Should I maybe lightly lap the valves while it’s apart? I also checked the head with my straightedge, couldn’t get a .0015 feeler blade anywhere! I think the head is good! Also found some weird gel/jelly stuff in the cooling passages, I’m thinking it’s what’s left of some cooling system stop leak ****. Had to use my vacuum extractor to **** it out of the block, I’ll clean the head and radiator with my hot water pressure washer.
 
OP
S

SilverJimmy

Well-known member
Joined
Apr 14, 2012
Messages
1,685
Location
Prescott/Flagstaff, AZ
Pulled the radiator out, got it on the floor and checking it out found more of that weird gel/jelly in it.
CFA52E10-2485-4CF9-AB64-1F67C4AA53EA.jpeg
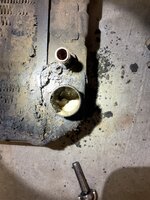
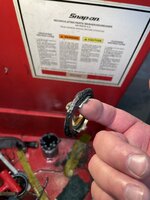
Just more evidence of the hack that used to work on this poor thing, here’s the thermostat…
82B754E4-9209-4DED-81AC-296A49E27933.jpeg
Some “Mechanic” cut the thermostat to try to solve the cooling issues! Really hope it’s just a failed head gasket! But, to be honest, I’m actually having fun playing with this thing, if it runs when I’m done, that’s just a bonus!
 
OP
S

SilverJimmy

Well-known member
Joined
Apr 14, 2012
Messages
1,685
Location
Prescott/Flagstaff, AZ
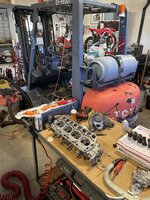
Got the head apart, pulled all the valves, wire wheeled all the carbon and **** off them. Found my can of 6A Clover lapping compound and lapping suction stick and got the valves all lapped in as good as I can. If I was trying for maximum performance this would really need an actual valve job, maybe even a couple new valves, but for what I need this should be good. Took the radiator, the head and the water pump to my old customer, Flagstaff Radiator, and he cleaned everything really well with his steam cleaner. Got all that weird Goo out of all the cooling passages and the radiator. He then insisted that I let him put the radiator in his test tank and check it for leaks. None found, so it’s all good! I’m now waiting on all the parts to arrive, should have everything I need to get this thing running for around $200.00! 7A4E1F99-B8E7-4215-9B44-229A275D76D5.jpeg
Still need to drag the forklift outside and spray the engine compartment with Gunk and wash all the grime off of everything. Also need to pull the starter, my buddy that gave the lift to me said the starter wasn’t engaging like it should, maybe I can get away with cleaning and lubricating the bendix drive. Still having fun, and I’m not having to work on it outside in the snow!
 
To avoid these ads, REGISTER NOW!
Top Bottom