To avoid these ads, REGISTER NOW!

Overseas Jack Rebuild Help Tutorial.

SeattleJeff

New member
Joined
Jul 14, 2012
Messages
1
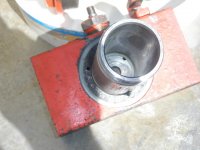
Looking to rebuild my jack. This was a craigslist find--I got this jack plus a chinese craftsman 2-ton for $70.

I have no idea what jack this is, but it was claimed to be US made, has SAE fasteners, and was purchased some time in the 1980s. Bigger than a 2 ton for sure. It is in rough shape, but I'm hoping to recondition it and put it into service. If I can figure out the make/model, then I will try to track down a manual and study it.

On the back frame piece it has the following stamped in:

0000-0911
1 W 4C (where the "W" is in the top half of a half circle)

couple of pics (can take more):

https://lh3.googleusercontent.com/-2vptTRuSiQA/UAIAD6SRryI/AAAAAAAABho/th9ej7Kl0Po/s600/jack1.JPG

https://lh5.googleusercontent.com/-lmcoXPYib6w/UAIAEIryeaI/AAAAAAAABhs/lKQQeOedfXQ/s600/jack2.JPG

This is a great thread and much thanks to Hiball & others. I signed up based on this thread (seems to be a theme).

Jeff in Seattle
 
Last edited:
To avoid these ads, REGISTER NOW!

Hetman

Well-known member
Joined
Jul 3, 2012
Messages
128
One important tip: remove handle return spring permanently and when not used store jacks with open valve and pump fully pushed down.
Otherwise, with time rust specks destroy surfaces and consequently they will be wearing out seals quickly.
 

burger

Well-known member
Joined
Jun 6, 2005
Messages
980
Location
Erf
Hello Hiball and Edgar:

Thanks again for all of your help so far with the rebuild of my American Forge and Foundry 200T floor jack.

With the help of Edgar's post (#232), I was able to troubleshoot my problem and make some progress. Edgar explained the one-way valves as three check balls that sit in conical seats. If any of those balls fail to seat correctly, fluid re-circulates within the jack, preventing it from lifting. That sounded like the problem, so I tore my jack apart to inspect the one-way valves. After I started checking things, I noticed the valves were assembled such that the middle check ball could never come into contact with its seat. PER THE MANUFACTURER'S DIAGRAM, they were installed: little ball - spacer - medium ball - large ball. The spacer was preventing the medium ball from seating, so I assembled them in this order: little ball - medium ball - spacer - large ball. PRESTO! It works.

It is still leaking down and I suspect the plastic cup on the ram. Hiball, I'll be contacting you for some replacement parts.


Thanks again!
Ed
 
OP
H

Hiball

Well-known member
Joined
Apr 30, 2009
Messages
14,026
Location
Missery
Hello Hiball and Edgar:

Thanks again for all of your help so far with the rebuild of my American Forge and Foundry 200T floor jack.

With the help of Edgar's post (#232), I was able to troubleshoot my problem and make some progress. Edgar explained the one-way valves as three check balls that sit in conical seats. If any of those balls fail to seat correctly, fluid re-circulates within the jack, preventing it from lifting. That sounded like the problem, so I tore my jack apart to inspect the one-way valves. After I started checking things, I noticed the valves were assembled such that the middle check ball could never come into contact with its seat. PER THE MANUFACTURER'S DIAGRAM, they were installed: little ball - spacer - medium ball - large ball. The spacer was preventing the medium ball from seating, so I assembled them in this order: little ball - medium ball - spacer - large ball. PRESTO! It works.

It is still leaking down and I suspect the plastic cup on the ram. Hiball, I'll be contacting you for some replacement parts.


Thanks again!
Ed

Responded to your PM..
 

Krazyk25

New member
Joined
Aug 16, 2012
Messages
2
I have this jack anditwill group to the vehicle the with the load it just goes up and down as I move the handle but will not hold however I can not push the ram down without relieving the reliese. Any ideas. Worked fine then something snapped it didnot fall I had to reliese the pressure to drop it then when I went to the other edit would not lift the load just acted like a theater totter back and forth
 
OP
H

Hiball

Well-known member
Joined
Apr 30, 2009
Messages
14,026
Location
Missery
I have this jack anditwill group to the vehicle the with the load it just goes up and down as I move the handle but will not hold however I can not push the ram down without relieving the reliese. Any ideas. Worked fine then something snapped it didnot fall I had to reliese the pressure to drop it then when I went to the other edit would not lift the load just acted like a theater totter back and forth

Handle feedback almost alway indicates a valve issue, possibly a contaminate/air bound issue that is preventing the ball from seating.
 
Last edited:

u118224

Well-known member
Joined
Jun 9, 2012
Messages
535
Location
Northern MI
I am in the process of reassembling my HF floor jack, it's 15-18 years old. I had 3 balls fall out of the valve body before I could determine their orientation. There are two large balls and one small one. I know a large ball came out first. I assume the small ball goes in first. Thoughts?
 
OP
H

Hiball

Well-known member
Joined
Apr 30, 2009
Messages
14,026
Location
Missery
I am in the process of reassembling my HF floor jack, it's 15-18 years old. I had 3 balls fall out of the valve body before I could determine their orientation. There are two large balls and one small one. I know a large ball came out first. I assume the small ball goes in first. Thoughts?

I need a little bit more information, Do you have a picture of the Model? On your common based Yasui based jacks (Like the one i tore down in this thread) there are 2-4 balls depending on what type of Release Valve/Overload Valve you have. In regards to whether the small balls go in first, Yes they always go in first... How far did you tear the jack down? Working Valve? Overload? Release?
 

u118224

Well-known member
Joined
Jun 9, 2012
Messages
535
Location
Northern MI
I tore it completely down with the exception of the Overload. I checked that the overload screw was only backed off 1 1/2 turns so I didn't bother with the rest of those components. I replaced the o-ring and backup with replacements that came with the jack only because I had it apart. The original ones looked OK. My jack has one pump o-ring and backup groove instead of two like the one you tore down. The ram cup looked OK and so did the tank nut o-ring. I may not be able to get pictures tonight but will post them as soon as practical. Thank you!
 
OP
H

Hiball

Well-known member
Joined
Apr 30, 2009
Messages
14,026
Location
Missery
I tore it completely down with the exception of the Overload. I checked that the overload screw was only backed off 1 1/2 turns so I didn't bother with the rest of those components. I replaced the o-ring and backup with replacements that came with the jack only because I had it apart. The original ones looked OK. My jack has one pump o-ring and backup groove instead of two like the one you tore down. The ram cup looked OK and so did the tank nut o-ring. I may not be able to get pictures tonight but will post them as soon as practical. Thank you!

I suspect if you have 3 balls, 1 of them goes into the Release Valve, The other 2 are for the Working Valve. Are 2 of them same size? It would be pretty simple to figure out then.
 

u118224

Well-known member
Joined
Jun 9, 2012
Messages
535
Location
Northern MI
I put the small ball in first and then the two others. I put oil in the unit and reassembled the jack. Everything works as it should, it now raises to full height. I'll lift my truck with it tomorrow night to make sure everything's OK. I could not have tackled this project without Hiball's photos and instructions. It's my backup jack but it's nice to have it working again as it should. Thanks again Hiball!
 

svendawg

New member
Joined
Sep 2, 2012
Messages
1
First of all, thank you for taking the time and effort to put this tutorial together. It gave me the incentive and confidence to rebuild my old Harbor Freight (Alltrade) 2 ton floor jack.
I also want to reiterate the importance of using jack stands when using a floor jack. A couple of day ago I was changing oil on my car and had the car raised with the floor jack. While I was under the car removing the oil filter the car all of a sudden started to lower. Fortunately it lowered onto the jack stands I had placed, just in case. Something to think about for those who think it can’t happen to them and don’t want to go to the trouble of using jack stands. I know I hate setting up the jack stands when I do a quick job under the car.

Now to my question. I have tore down my floor jack and found that my cup seal was deteriorated and I need a replacement. (See photo). Do you have this seal? Its 12mm thick, an O/S dia of 39.5mm and an I/S dia of 22.30mm. These are approx because the seal was not in good shape. The measurement of the cylinder the seal goes into is 40.00mm and the shaft dia on the shaft the seal goes onto is 22.10mm. If you have this part please advise how I go about ordering this part from you.
The other question I have is there is what looks like a nylon washer/seal on the bottom of the cylinder. (Refer to photo), I assume it was part of the cup seal but I’m not sure. Do I need to remove this nylon washer/seal of is it necessary to seal the cup seal.

Thank you for any help you can give me
 

Attachments

  • 003 resize.JPG
    003 resize.JPG
    56.1 KB · Views: 114
  • 004 resize.JPG
    004 resize.JPG
    63 KB · Views: 97
  • 002.JPG
    002.JPG
    60.7 KB · Views: 123
OP
H

Hiball

Well-known member
Joined
Apr 30, 2009
Messages
14,026
Location
Missery
First of all, thank you for taking the time and effort to put this tutorial together. It gave me the incentive and confidence to rebuild my old Harbor Freight (Alltrade) 2 ton floor jack.
I also want to reiterate the importance of using jack stands when using a floor jack. A couple of day ago I was changing oil on my car and had the car raised with the floor jack. While I was under the car removing the oil filter the car all of a sudden started to lower. Fortunately it lowered onto the jack stands I had placed, just in case. Something to think about for those who think it can’t happen to them and don’t want to go to the trouble of using jack stands. I know I hate setting up the jack stands when I do a quick job under the car.

Now to my question. I have tore down my floor jack and found that my cup seal was deteriorated and I need a replacement. (See photo). Do you have this seal? Its 12mm thick, an O/S dia of 39.5mm and an I/S dia of 22.30mm. These are approx because the seal was not in good shape. The measurement of the cylinder the seal goes into is 40.00mm and the shaft dia on the shaft the seal goes onto is 22.10mm. If you have this part please advise how I go about ordering this part from you.
The other question I have is there is what looks like a nylon washer/seal on the bottom of the cylinder. (Refer to photo), I assume it was part of the cup seal but I’m not sure. Do I need to remove this nylon washer/seal of is it necessary to seal the cup seal.

Thank you for any help you can give me

Yes.. I keep those in stock. Pm sent..
 

KMinAF

Well-known member
Joined
Mar 5, 2011
Messages
698
Location
Fairview Utah
Arggg! After carefully rebuilding my Snap On jack as per the write up, it now lifts ok but it won't hold pressure, it will slowly leak down. Where did I go wrong?
 
OP
H

Hiball

Well-known member
Joined
Apr 30, 2009
Messages
14,026
Location
Missery
Arggg! After carefully rebuilding my Snap On jack as per the write up, it now lifts ok but it won't hold pressure, it will slowly leak down. Where did I go wrong?

1. Any visible leakage?
2. Any handle feedback when operating the jack?
3. What are you lifting? How slow does it leak down?
4. Did you venture into the overload?
 

KMinAF

Well-known member
Joined
Mar 5, 2011
Messages
698
Location
Fairview Utah
1. No leaks
2. Handle feels ok.
3. Standard vehicles, Montero, Toyota PU etc
It loses pressure in about 30 seconds but only under a load
4. If the overload is the left side (looking from the rear to the front) it was loose when I began the rebuild and I returned it to the original position but it wouldn't allow the jack to lift anything so I adjusted it to 1 1/2 turns out. The screw on the right was too tight to loosen so I left it alone.

Thanks for the help.
 
OP
H

Hiball

Well-known member
Joined
Apr 30, 2009
Messages
14,026
Location
Missery
1. No leaks
2. Handle feels ok.
3. Standard vehicles, Montero, Toyota PU etc
It loses pressure in about 30 seconds but only under a load
4. If the overload is the left side (looking from the rear to the front) it was loose when I began the rebuild and I returned it to the original position but it wouldn't allow the jack to lift anything so I adjusted it to 1 1/2 turns out. The screw on the right was too tight to loosen so I left it alone.

Thanks for the help.

Well.. Since the Jack is Operating without handle feedback that leads me to believe that the Working Valves (Right side) is probably Ok.. I suspect the problem is either that the Overload isnt set properly and its possible that when you reinstalled the components that the tiny ball didnt square itself in the seat or the spring isnt sitting properly in the Cup. I would double check that area first and if everything looks good, Turn the overload another 1/4 of a turn. Obviously... Without the proper equipment you cant set it correctly so make sure that you or no one else puts thereself in harms way why you are troubleshooting. If this doesnt remedy the sitsuation, Its possible that the Release Valve is the Culprit.. Ive seen those Release Valve's get crooked and damage them or the Seat. Generally if its in there cockeyed it wont even think about lifting a load though. If i have lost you, Shoot me a PM with a contact number and ill give you a call.
 

Fish63

New member
Joined
Sep 19, 2012
Messages
1
Location
St. Louis, MO
Looking for some parts help. I took my jack apart as described. Mine was almost exactly the same as the Hiball example pictured. I got everything apart, got all of the seals out, took them to my local hydraulic store (sign at the counter: We carry the most seals in St. Louis!) and they didn't have the o-ring and cup that goes around the main ram, which was the first one they looked at. They said my seal was a 4.5mm diameter and they only had 4mm and 5mm. They also said good luck finding a replacement cup. Those don't exist. Mine was slightly boogered up and the guy at the shop said even if they had the 4.5mm o-ring, they didn't have the cup and mine probably wouldn't hold a seal as-is. I checked McMaster Carr and the only 4.5mm o-ring they had was a cord that you had to glue together to make your own o-ring. I don't see that working, frankly. Any recommendations other than just buy a new jack?
 

rodsatheart

Member
Joined
Oct 2, 2012
Messages
17
New to the board. Lots of good info. Need help.
I have a 3 ton mvp that has been giving me fits and got to the point of barley working. I tried bleeding using two different methods to no avail. Won't even rapid travel to frame and if it does, lifting power is not there and would rapidly bleed off. Acts like air, but from what I've read could be overload ? Thinking about just resealing it. What should I look for with the cup seal ?
Looks just like "binovc's" jack.
http://www.flickr.com/photos/cocojen/sets/72157629286603784/
Any help is appreciated.
 
To avoid these ads, REGISTER NOW!
OP
H

Hiball

Well-known member
Joined
Apr 30, 2009
Messages
14,026
Location
Missery
New to the board. Lots of good info. Need help.
I have a 3 ton mvp that has been giving me fits and got to the point of barley working. I tried bleeding using two different methods to no avail. Won't even rapid travel to frame and if it does, lifting power is not there and would rapidly bleed off. Acts like air, but from what I've read could be overload ? Thinking about just resealing it. What should I look for with the cup seal ?
Looks just like "binovc's" jack.
http://www.flickr.com/photos/cocojen/sets/72157629286603784/
Any help is appreciated.

First off.. It you haven't already Don't start adjusting valves. Remove the unit from the frame and inspect the main ram cup. If its in one piece, inspect the sealing lips for damages etc.. If its bleeding off fast, I'm leaning towards the Main seal and problems are normally blatant.
 

kenzo42

Member
Joined
Oct 3, 2012
Messages
7
Hiball, what a seriously awesome write up. Thanks.

Are these cheap $30 Craftsman jacks worth rebuilding? If so, are they essentially the same as your write up?

IMG_3482.jpg


Thanks!
 
OP
H

Hiball

Well-known member
Joined
Apr 30, 2009
Messages
14,026
Location
Missery
Hiball, what a seriously awesome write up. Thanks.

Are these cheap $30 Craftsman jacks worth rebuilding? If so, are they essentially the same as your write up?

IMG_3482.jpg


Thanks!

Same principle, different design... Worth fixing? Depends what's wrong...
 

EDGAR

Well-known member
Joined
Aug 21, 2010
Messages
437
For RODSATHEART

Be aware that one of the measurements given by BINOVC for the u-cup on his MVP is wrong. He states that the inside diameter of the u-cup is 25.1 mm when in fact it is 24mm. In the photos he presents, there is one showing a drawing with measurements. The measure he gives for the "outside diameter shoulder" is 24.6mm but then he gives a measure for the u-cup as 25.1mm inside dia. The u-cup could come off the ram if someone pulls the lifting arm by the saddle. Also, and more important, it could leak in the inside diameter as the 1 mm difference is significant in this case. You need a tight fitting inside diameter.

Yesterday I was fixing a CRAFTMAN 3.5 TON QUICK LIFT made by MVP and the u-cup I used was a 24mm x 40mm x 8mm, bought from MFPseals.com. Other MVP I have fixed, like the one from BINOVC also use the same 24 x 40 u-cup. Be warned that this size sometimes can be a slightly tight fitting for the MVP's, it depends on the u-cup manufacturers and the variances in their sizes.

But there is a better fitting size, also sold by MFPSEALS.COM, and it is 23.8mm x 39.68mm x 9.52mm. Since this size may not be available everywhere, there is an alternative in inches, which is 15/16" x 1 - 9/16" x 3/8". Converted to metric, this comes out as 23.8mm x 39.68mm x 9.52mm. This size in inches may be more easy to obtain from a good hydraulic repair shop. This inch size is identified in MFPSEALS.COM, and other manufacturer's seals catalogs, as 312-00.937-375BUR95 and it is what is known as an urethane POLYSEAL, but it might be available in the same size as a regular u-cup (not as a Polyseal, which is a loaded u-cup).

By the way, this size of u-cup is the one used by the blue MICHELIN 3.5 TON and a CRAFTMAN 4 TON (same pump), both made by Shinn Fu. The 24mm x 40mm is a tight fit in the MICHELIN and the CRAFTMAN, it works but it is tight enough that you have to push down the lifting arm with your foot a little.

Below see the measurements given by BINOVC. See the shoulder measurement at the end of the ram (24.6mm) and see the measurement of the I.D. of the U-cup (25.1mm). This is not right as the shoulder is supposed to keep the u-cup in place. If you decide to go with the 25mm x 40mm anyway and it leaks down afterwards, don't be surprised as you were warned that this could happen. As an old saying goes " measure twice, buy once"!;)
 

Attachments

  • u cup id.JPG
    u cup id.JPG
    69.9 KB · Views: 125
Last edited:

rodsatheart

Member
Joined
Oct 2, 2012
Messages
17
Thanks for the info.
I'll try and get the main body apart when I get home today and let you know what I find.
 
OP
H

Hiball

Well-known member
Joined
Apr 30, 2009
Messages
14,026
Location
Missery
Just so there's no confusion, a ucup will always measure bigger on the back side ID than what it's actual nominal size is.

Example.... A cup with a 24 mm ID will have a actual measurement of somewhere Around 24.5mm (+\- based on style) etc. So if your shaft measures 24.6 mm you need a ucup with a 24mm ID. On the opposite end of the spectrum the business end (pressure side) will be smaller, prob somewhere around 23 and some change.
 
Last edited:

binovc

Member
Joined
May 10, 2011
Messages
23
Rodsatheart and Edgar - Sorry if I posted misleading dimensions, I'll add notes to my Flickr pictures to caution and correct. Unfortunately when I measured my u-cup, it was in pretty bad shape, and I did the best I could to measure. My measurements were for the purpose of giving Hiball an idea of what I had, and hoping he could interpolate and send me the correct item (which I believe he sent me the 24x40x8).
 
Last edited:

rodsatheart

Member
Joined
Oct 2, 2012
Messages
17
Is that thing standard or reverse threads ? I have put one heck of a load on it so far and it won't budge !!!!!
 
OP
H

Hiball

Well-known member
Joined
Apr 30, 2009
Messages
14,026
Location
Missery
5' cheater pipe with 4' digging bar for brace and won't budge. Any ideas ?

Is the digging bar keeping the jack solid, or is it allowing it to give? I guess the first question should be, does this jack have a tank nut or are you trying to remove the bottle that has been welded to the base? Pictures? I've torn down thousands of Yasui based jacks and never found one that I couldn't remove... Of course I have big vise to hold the unit stationary.
 

rodsatheart

Member
Joined
Oct 2, 2012
Messages
17
Tank nut. Keeps it solid until about 250 ftlbs. Same pipe I used to break the rear hub nuts on a vw bug last week and didn't require this much force.
 
OP
H

Hiball

Well-known member
Joined
Apr 30, 2009
Messages
14,026
Location
Missery
Tank nut. Keeps it solid until about 250 ftlbs. Same pipe I used to break the rear hub nuts on a vw bug last week and didn't require this much force.

Something isn't right.... If your using a 5' cheater you shouldn't have any problem... Try securing the unit a bit more.
 
Last edited:

binovc

Member
Joined
May 10, 2011
Messages
23
Mine was on very tight. I bolted the bottle to angle iron (pic on flickr), and used a chain-link fence rail steel pipe for a cheater on my pipe wrench. Angle iron braced on the ground. I used at least 5 feet of cheater, maybe more.
 
OP
H

Hiball

Well-known member
Joined
Apr 30, 2009
Messages
14,026
Location
Missery
Mine was on very tight. I bolted the bottle to angle iron (pic on flickr), and used a chain-link fence rail steel pipe for a cheater on my pipe wrench. Angle iron braced on the ground. I used at least 5 feet of cheater, maybe more.

Any jack that relies on torque to seal the reservoir to the base/tank nut has to be tight to prevent leaking. The majority of your newer imported jacks use orings on both sides of the tank and or seals, thus they come apart much easier. I think if he gets the unit secured, he won't have a issue removing the nut... Sometimes it's better to walk away/take a break.
 

EDGAR

Well-known member
Joined
Aug 21, 2010
Messages
437
The nut on the MVP/CRAFTMAN I repaired recently was also very tight. I used a 5 ft steel pipe and even then I had to apply a lot of force to remove the nut and this was after the third try. If you have any flexing on what you are using to hold the pump, this flexing will absorb the force you apply and make removing the nut almost impossible.

Just be sure to make a mark on the nut so that you can return the nut to that same position when reassembling. That way, you will torque the nut to about the same figure it was torqued at the factory. Even if you think that you have applied a lot of force to tighten the nut, you may find that the mark has not yet reached its original position, requiring a lot more tightening. You may apply anti-seize compound to the nut threads to make it easier to tighten the nut.

And don't forget to change the ram sealing o-ring on the nut as this is one of the places were a leak can occur when the o-ring wears out. It is a good idea to change all the o-rings after you take apart the pump and not just the u-cup, to avoid future disassembling because of leaking o-rings.
 
OP
H

Hiball

Well-known member
Joined
Apr 30, 2009
Messages
14,026
Location
Missery
A clean groove and just a "little" loctite 518 will "greatly" reduce the amount of torque required to seal both ends of that reservoir. I've been using that stuff for quite awhile and have yet to have a weeping reservoir, it's not something you want to slobber on... Nor do I recommend using silicone Rtv products. Ive had alot of **** come into the shop, where someone has ran a full bead on both sides the reservoir on the Inside and outside and it not only does it look like ****, you take a chance of that stuff being ingested into the hydraulic system or blocking a intake port at the very least. Thin film is the key....

By the way, this size of u-cup is the one used by the blue MICHELIN 3.5 TON and a CRAFTMAN 4 TON (same pump), both made by Shinn Fu. The 24mm x 40mm is a tight fit in the MICHELIN and the CRAFTMAN, it works but it is tight enough that you have to push down the lifting arm with your foot a little.

Question/Comment for Edgar.. Ive Rebuilt Many of the 3 1/2 ton Michelin Jacks and dont recall ever having a Issue with any excess drag on the Release.. Im curious to how "You" are remedying the Fitment issue if your replacing the OEM seal, With a Standard 24 x 40 x 8 Ucup. The Oem Seal uses a Backup that has a bigger ID than the actual Cup and this size translates to the Shaft..

Picture of OEM Seal.

DSC02928.jpg

DSC02927.jpg


I have a Sneaky suspicion i know where you drag is coming from..
 
Last edited:

rodsatheart

Member
Joined
Oct 2, 2012
Messages
17
And we have success!!!!!!!!!! Took a 3ft x 1 1/2 angle iron screwed down to a 7' 2x12 and still bent the angle iron and better patience, but it's apart.
Main cup is toast. Have pictures, just trying to figure out how to post them. The sizes are as follows.

Main cup 1.577"=40.0558mm od / .957"=24.30779mm id. Green in color.
Inner cup .708"=17.98319mm od / .428"=10.8712mm id. Black in color.

These are the actual bore and shaft sizes.
 
To avoid these ads, REGISTER NOW!
Top Bottom