To avoid these ads, REGISTER NOW!

Pinch Me, it it real?

e-tek

Well-known member
Joined
Dec 19, 2007
Messages
10,690
Location
Saskatoon, SK
**** - from what you've been through, you'll be lucky to get finished the shop and garage project without losing a limb or worse! You need to be way more careful!!! Maybe you should put up one of those signs: "X DAYS without an INJURY" but in your case change "DAYS" to "HOURS"!! ;)

As for tarantula - I'd bet it came from those dumpster finds....One of the MANY reasons I leave many great finds where they are. Unfortunately, Mrs E-tek often finds - and sometimes bring home - dumpster finds and I hate it! :willy_nil

Great build and stories - very entertaining!
 
To avoid these ads, REGISTER NOW!
OP
M

motormitch

Well-known member
Joined
Aug 27, 2012
Messages
636
Location
Austin TX
I have had an usually high number of injuries over the years. I am either ******* or stupid or more likely both. However, my best stories all come from my worst decisions.
 
OP
M

motormitch

Well-known member
Joined
Aug 27, 2012
Messages
636
Location
Austin TX
I need to name this shop. Help me. I am trying to unveil it to the world by the 26th of this month and I would like to hang a sign. Suggestions are welcome. Clearly my name is Mitch and one suggestion from a friend who noticed that when I say my name sometimes people think I called them a ***** and my wife had been heard to tell me to "quit your Mitchin' " about something. He said to embrace that and call it Mitchin' Motors. While I see the humor and cool factor in that suggestion, I do wonder if it is not a little too "full of yourself" to call something after yourself.

I would like something that sounds like a club name because many of my friends will be hanging out there and using the facility kinda like a car club.
 

TheMostToys

New member
Joined
May 16, 2013
Messages
1
First the easy stuff:
HMWH Club (TLR)

No MA'AM (National Organization of Men Against Amazonian Masterhood) (MWC)

Slightly more creative:
Mitchin Rides American Motor Enthusiasts N??? (MR. AMEN)

The Dog House

The Cave

The Can

The Motor Pit

Pit Stop

Even more interesting:
Pink Slips

These next few are a play on 1) how much time you will spend there 2) the fact that you do restorations (like turning back time) 3) speed
Back in Time Mitchin Engineering (BITe ME)

The Time Machine
 
OP
M

motormitch

Well-known member
Joined
Aug 27, 2012
Messages
636
Location
Austin TX
Re: Pinch Me, is it real?

I have the tall version of that. I need to restore. you gota give details! :shocking:

First, take pictures of everything up close to help remember exactly what goes where. The more the better. Next, take it apart carefully, Next either media blast the textured metal parts to remove old paint and rust (or chemically strip and naval jelly to remove rust) then primer and paint your color of choice. I love 1966 Oldsmobile Toronado engine "slate blue" which I buy in spray cans from USA Parts. That was the easy part. Next take all of the metal parts like slides, levers, bolts and nuts and hand polish to as a high a polish luster as you can. I've been doing it a while and can reached "chrome" level finish on hard metals. Depending on the condition, you might need to "de-rust" the parts you want to polish. I LOVE Evaporust from HF if you want to soak the parts. I also use light steel wool and if it is really bad, sand paper starting a little rough and moving to finer and finer grits in steps.

Hand polishing is something that you can get started on with a cheap buffer from HF with two 6 inch wheels. I think it is 39 or 49 bucks. Get the right wheels and compounds and buff, buff buff. There are a lot of of videos on buffing so I won't go in it in detail here, but will say, the right wheels and compounds do really matter. Follow directions on which which metals need which compounds and which wheels. Remember, start fine because you can always more coarse, but starting to coarse will cause you extra work. I will also say that buffing generates a LOT LOT LOT of residue all over the place. Think about think. That was a big part of what finally led to the wife snapping and demanding that I get a separate shop.

Reassemble, lubricate and install motor and belts and then wait for the chicks to line up to see your restored drill press.
 
OP
M

motormitch

Well-known member
Joined
Aug 27, 2012
Messages
636
Location
Austin TX
I got the promised replacement parts for my retractable paint booth in from DuroAir and did more assembly last night. I am now at the point where I will need some help from friends to finish it. Friends, I wonder where I could get some of those? Anyway, I have to plug the folks at Duroair. They have been so supportive during all of the these shipping problems, which are not their fault, and the other day, they called to tell me that they were discounting my final invoice significantly as an apology. That was completely unexpected and unsolicited and reminds me that there are still companies that value the customer and do the right thing, not the cheap thing.

I can promise you that this support will pay back 10 fold to them. I am already singing their praises to my car friends and have offered to allow potential customers to visit my visit to check out the booth and even do a little test shooting. That discount got them a real live free demo site in Austin, Texas and if they ever want it, a written or video testimonial.

Here are a couple of pics of the "skeleton" of the booth that I can now roll in and out and move around to pick final location before hook up to the exhaust chamber. If it looks big in the pictures that because it is. You can order the length of booth in 5' segments and I chose ~30' so I can handle crew cab trucks with long beds (or 59 Caddys) easily.
 

Attachments

  • booth1.jpg
    booth1.jpg
    143.7 KB · Views: 475
  • booth2.jpg
    booth2.jpg
    143.9 KB · Views: 435

Zengineer

Well-known member
Joined
Apr 10, 2010
Messages
781
Location
British Columbia, Canada
Not sure how I missed this one. Epic build, and you have a real gift for storytelling. I share your hatred for all things with 8 legs, and I was nearly as traumatized as you from that story! I can see events unfolding for me in exactly the same way, stitches and all...
 
OP
M

motormitch

Well-known member
Joined
Aug 27, 2012
Messages
636
Location
Austin TX
Starting installing the air delivery system. I went with 3/4" Maxline hose and fittings. Here is a great web site that offers several different choices instead of classic copper or black iron.

http://rapidairproducts.com/maxline.asp

I have to say that I was able to beat thier price at Northern Tools and they had the kit, extra line and a decent selection of fittings in stack at the store.

http://www.northerntool.com/shop/to...ci_sku=20923&gclid=CP_zw_e5sbgCFQto7AodQ2kAnA

I wanted to go with the rapid air system and still might use it for part of the shop, but I needed a larger line to feed some pretty hungry sand blasting gear. So far the hose is very stiff to work with, but manageable. You can definitely shape it by hand. I'll post some pics later today after I go back out at lunch.
 
OP
M

motormitch

Well-known member
Joined
Aug 27, 2012
Messages
636
Location
Austin TX
I would be glad to share the plans such as they are in that I used Google Sketchup to draw it out and then received the detailed metal building plans as part of the manufacturing process of the bolt up kit. I never had professional architecture plans drawn up, but you are welcome to my drawings and certainly welcome to come and look things over and I can tell you what I would do differently (not much really because I spent a long time researching it, but no plan survives the battle)

PM me and I'll give you my contact information.
 
Last edited:
OP
M

motormitch

Well-known member
Joined
Aug 27, 2012
Messages
636
Location
Austin TX
Well, last night I removed the corrugated metal sheets from the interior walls of the living space and opted for sheet rock instead using the metal for the outside walls. Here are some pictures of the work underway last night.
 

Attachments

  • sheetrock2.jpg
    sheetrock2.jpg
    153.8 KB · Views: 286
  • sheetrock3.jpg
    sheetrock3.jpg
    156.7 KB · Views: 291
  • sheetrock4.jpg
    sheetrock4.jpg
    150.3 KB · Views: 260
  • sheetrock1.jpg
    sheetrock1.jpg
    148.3 KB · Views: 262
OP
M

motormitch

Well-known member
Joined
Aug 27, 2012
Messages
636
Location
Austin TX
Update on sheeting rocking. Ready for tape and float today.
 

Attachments

  • float rock2.jpg
    float rock2.jpg
    157.1 KB · Views: 159
  • float rock1.jpg
    float rock1.jpg
    144.2 KB · Views: 175
  • float rock 3.jpg
    float rock 3.jpg
    151.5 KB · Views: 163
OP
M

motormitch

Well-known member
Joined
Aug 27, 2012
Messages
636
Location
Austin TX
Went by at lunch and the electricians were starting on the lights! Here is a pic of the 1st row being done, one guys installing blubs into the fixtures and then the stack of fixtures awaiting installation.
 

Attachments

  • lights blubs.jpg
    lights blubs.jpg
    146 KB · Views: 317
  • lights ready.jpg
    lights ready.jpg
    143.8 KB · Views: 332
  • lights 1 row.jpg
    lights 1 row.jpg
    146.6 KB · Views: 318

raceman17

Well-known member
Joined
Jul 3, 2012
Messages
118
Your build project is coming along very nice.

How many square feet are you cooling with the two package units? Also what is your eve height and roof pitch?

I just finished up on my shop and I just ordered probabaly the same 5 to package unit you are using. Are they working great?
 
OP
M

motormitch

Well-known member
Joined
Aug 27, 2012
Messages
636
Location
Austin TX
Sorry it took me a while to see this.

The building is basically 4000 Sq.ft. but has a 600 sq.ft. living space built in one corner that is on it's own AC system. The walls are 18' and the roof pitch of 1:2 with the center line being at ~22' high. I have 3 steel roll up doors that are insulated made by Janus doors They are 14' high and 18' wide The building has the basic insulation package which I think is R13 for the walls and R19 for the roof. The shop area getting cooled is 3200 sq.ft. I have two separate 5 ton AC/heat pump units with heat stripes. I was going with Trane 3 phase, but ended up using Goodman single phase. Why, long story, but I basically saved 3K and Goodman has made big improvements in the last several years and is looking to gain market share so they are pricing aggressively. I got the same warranty as Trane.

They are working fantastic. It was 107 the day I turned everything on and I was able to cool the whole shop to 75. Of course they had to run non-stop. I was able to get 70 when it was 103 because I didn't start with a hot building. Let me be clear before someone reads this and I get schooled on how silly 70 degrees is for a shop in the summer and why not use fans etc. I do not plan to keep the shop at 70, but I wanted to see what the system could do. I will keep it around 78-80 and run a couple of fans when working. Anyway, I love the system.
 

Orange65

Well-known member
Joined
May 3, 2010
Messages
200
Location
Clanton, AL
Very nice shop! Big enough for the moment at least. You can always buy more cars!

The only thing I have remotely negative to say about it is that having owned shops at my house and away from my house, I would prefer one right by my house. You can mosey out to it for a few minutes and go right back into the house. One away from the house requires more time to get there and such. But that is just me. And I understand your issues with the city- that is one thing that led me to build my first shop away from my house (about 10 miles).
 
OP
M

motormitch

Well-known member
Joined
Aug 27, 2012
Messages
636
Location
Austin TX
I already agree with your comment about having the shop remote. It is 12 miles from my house and it is inconvenient when you just want to zip in and zip out. One thing I am doing to avoid unnecessary pressure from the spouse over never being home is to build out the living area to her standards With TV and full kitchen :) I am also going to install a fence system that will secure our little dogs (The coolest miniature pincher's on the planet) so she can bring them as well. I am also going to install video surveillance so that she can look online to see if I am alive, injured or dead because I never answer my cell phone while I'm working on things.
 
OP
M

motormitch

Well-known member
Joined
Aug 27, 2012
Messages
636
Location
Austin TX
Well, yesterday was pretty exciting. It started at 5:00 in the morning when I went to open up the shop for the subs. I like to go early and look things over, clean up some, etc.. This particular morning, I entered the front door, found my way to one of the temporary shop lights, turned it on and saw that I was a few inches from a tarantula. Did I mention that I have a very high degree of arachnophobia. Very high. After what I am sure was a couple of hours passed, I was able to gain some degree of movement and slowly moon-walked my **** back away from the monster staring at me. Did you know that spiders have beady, little sneaky, sinister looking eyes and a lot of them. I do. When a spider is big enough to trip over, that's just wrong....

After going through some deep breathing exercises, I came to the conclusion that since the sipder-zilla was fairly close to one of the roll up doors, I would let him live outside in the cruel world and would help him along the way with a push broom. When I approached the abomination with the broom, it actually moved a little in my direction. This led me to the conclusion that the length of a standard shop broom was not nearly enough safety distance for any sane person.

I looked around the shop (with one eye still on the evil one) and spied a 2x10 metal stud left over from my construction. 10' hummm... not happy with it, but it might do.
I picked up the stud, which if you don't know is actually more a u-channeled piece of metal, and began to approach to creature by sliding the end ever closer to it. Just when the metal touched it, it JUMPED TOWARD ME!!!!! and then began to RUN up the stud toward me.

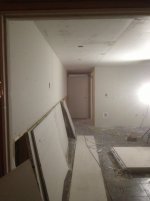
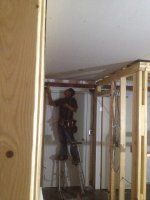
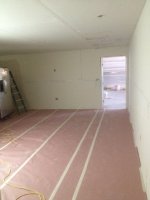
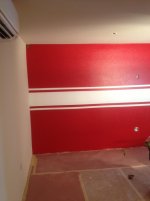
My memories are a little blurry from this moment on, but I know I made a sound like a 4 year girl and threw the metal stud away from me fast enough to make a sonic boom. Unfortunately, I fling it in the direction of the inside living space I had just tiled. Yes, I threw a f-ing Ta-Ta-Ta-rantula inside the area in which I will not only live, but must spend untold hours in installing a kitchen and bathroom.

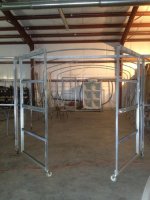
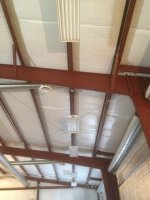
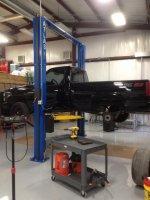
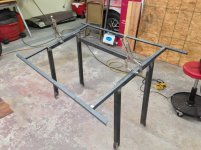
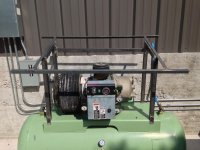
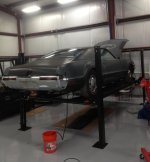
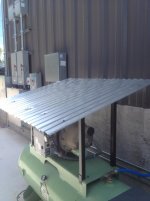
While staring with a look of horror on my face, the thing crawled over the base of the wall and deep into the room. As I ponder what I did in my last life to deserve this fate, I feel a wetness on my hand and realize that throwing a sharp edged metal stud in a fit of panic with no gloves on was not one of my brightest moves. 10 stitches not bright. The little ******* has all ready hurt me without even touching me directly. Where is the demon seed today? Somewhere in the shop, maybe... I will be getting the lifts installed as soon as possible because there is no way I am laying on a creeper at eye level to that crawling nightmare. Everything IS bigger in Texas. Here a couple of pics for your viewing pleasure.

Well, well, well. I found where the one whose name may not be spoken aloud disappeared to. The bathroom is getting sheet rocked and I needed to remove the shower pan that was put down to pass the plumbing top out inspection. I lifted the fiberglass pan up and saw a small bowling ball next to the drain pipe up from the foundation. I thought, how in the world did a small bowling ball get under my shower pan? Answer, IT CRAWLED.

This was not an ordinary bowling ball, no no, it was a transformer bowling ball, because right there in front of my very eyes, the ball pulsated, what appeared to be hundreds of legs unfurled and suddenly I had a tarantula sitting there staring at me with malevolence in it's beady little eyes. Again, as before, my survival instincts kicked and I froze. After some period of time goes by, my friend, whose last name is Mann (and believe me that is an appropriate name for him as you see in a moment), looked in and asked what's up? I replied by slowly raising my hand and pointing to the stuff of nightmares. Joe looks at it and says "cool". To someone with my condition, saying "cool" when staring at spider large enough to look natural with a saddle on it's back, is like hearing someone speak tongues at a revival. He then pushed me out of the way, grabbed a shop rag, a tiny little shop rag!!, and approached the abomination. He bent down and grabbed it in his hand. First, for me to even consider directly touching something like this, I would need a chain mail gauntlet from a suit of amour, covered by a welders glove and then that covered in the glove from a NASA space suit to even consider doing something insane like that.

He causally walked out to the back parking and tossed it in the woods. Since I was following him from a safe distance ready to provide medical support, that I means I got to see what a tarantula looks like flying. Remember how frightening the flying monkeys were in the Wizard of OZ? Yes, like that.

Anyway, Mr. Mann, showed up, manned up and has at least bought me a reprieve from the horror movie reject. I know he is out there, somewhere, watching and waiting.....
 
Last edited:
OP
M

motormitch

Well-known member
Joined
Aug 27, 2012
Messages
636
Location
Austin TX
Zengineer, You are a little evil for planting such a thought in the mind of someone who has this condition :shocking:
 
To avoid these ads, REGISTER NOW!
OP
M

motormitch

Well-known member
Joined
Aug 27, 2012
Messages
636
Location
Austin TX
The floor is finished and curing so I thought I would share a couple of pictures of the process. First we move stuff either up on top of the living space or out onto the driveway.
 

Attachments

  • floor stuff 2.jpg
    floor stuff 2.jpg
    143.9 KB · Views: 432
  • floor stuff 1.jpg
    floor stuff 1.jpg
    140 KB · Views: 397
OP
M

motormitch

Well-known member
Joined
Aug 27, 2012
Messages
636
Location
Austin TX
Next comes the diamond grinding. He was using a 50 grit wheel and man it created serious levels of dust. There was a vacuum attached to the grinder and then two more guys vacuumed the floor again.

Floor 1.jpg
floor dust.jpg
Then they washed the floor with stiff brushes, mopped it completely dry and then ran blowers on it for a hour or so. As you can see from the picture the concrete when cleaned looked mottled after the grinding. That's all of the high and low spots. I was tempted just to seal over it see how it looked :)
floor wash.jpg
 
OP
M

motormitch

Well-known member
Joined
Aug 27, 2012
Messages
636
Location
Austin TX
Now comes the epoxy layer. We are using 100% solids which is the best and also the most caustic. It really bonds into all of the open pores of the freshly ground and cleaned floor. I am told that if you took a small cross section you would actually see small fingers of the epoxy penetrating into the top layer of concrete. After this step comes the polyurethane top coat which I chose to also have pigmented as well to help reduce to visual impact of scratching. Trade a little of the base coat/clear coat look for better wear visually. The poly was applied the next day and I'll take a couple of pictures today of the finished product.

floor 3.jpg
floor 4.jpg
 

Zengineer

Well-known member
Joined
Apr 10, 2010
Messages
781
Location
British Columbia, Canada
Zengineer, You are a little evil for planting such a thought in the mind of someone who has this condition :shocking:

Dude, I feel your pain more than most. I've disgraced myself more than once at the sight of a spider.

However, I've often been told that supplying the facts isn't always telling people what they want to hear... I've yet to learn that lesson, lol.
 
OP
M

motormitch

Well-known member
Joined
Aug 27, 2012
Messages
636
Location
Austin TX
Final floor pictures from the back of the shop looking forward.
 

Attachments

  • final floor1.jpg
    final floor1.jpg
    132.5 KB · Views: 940
  • final floor2.jpg
    final floor2.jpg
    130.4 KB · Views: 819

gipraw

Well-known member
Joined
Apr 25, 2013
Messages
1,033
Location
Cypress, TX
Very nice. I really like that look. It will be interesting to see if it holds up as you expect over the years.
 

dhubbard422

Well-known member
Joined
Jan 16, 2011
Messages
472
Location
Texas Hill Country
Nice build. A great size shop. I laughed pretty hard at your dealings with the city! And then even harder at you spider story!

I used to rent shop space in Austin when we lived in Central Austin, but I finally gave up (this spring) on the (unrealistic) dream of having a cottage, garage and workshop in Hyde Park. :shocking: We just finished a move to Liberty Hill and plan to start my (much smaller) workshop build in a few weeks.

Anyway, I'd love to hear more about your paint booth; a search for paint booths put me onto your thread. I'm considering adding a space for painting (I'd use it for car storage when not actually painting or prepping to paint), but a "convertible" space might also be interesting.

Thanks for sharing your build!
DH
 
OP
M

motormitch

Well-known member
Joined
Aug 27, 2012
Messages
636
Location
Austin TX
I am finally making some progress on the interior of living space. I have selected a bright "tool box" red for the walls and plan to run a while tri-stripe around the center line. The first stripes I ever painted were white ones on my brothers 1970 red Chevelle SS. It looked awesome! Here is a test area to see what it would like. I think I am going to go for it.
 

Attachments

  • color 1.jpg
    color 1.jpg
    141.9 KB · Views: 273
  • color 2.jpg
    color 2.jpg
    126.6 KB · Views: 374
OP
M

motormitch

Well-known member
Joined
Aug 27, 2012
Messages
636
Location
Austin TX
I went out and found that the gravel for the front drive extra parking was done. Looks good and will come in handy for parking cars that like to "mark" their territory.
 

Attachments

  • Front drive gravel.jpg
    Front drive gravel.jpg
    140.9 KB · Views: 453
OP
M

motormitch

Well-known member
Joined
Aug 27, 2012
Messages
636
Location
Austin TX
The drainage ditches had also been graded and filled with rock. No more erosion!
 

Attachments

  • drain2.jpg
    drain2.jpg
    141.8 KB · Views: 322
  • drain1.jpg
    drain1.jpg
    140.4 KB · Views: 272
  • drain3.jpg
    drain3.jpg
    139.5 KB · Views: 253
  • drain4.jpg
    drain4.jpg
    128.6 KB · Views: 380
OP
M

motormitch

Well-known member
Joined
Aug 27, 2012
Messages
636
Location
Austin TX
Last but not least the back yard was graded and grassed, all ready for watering.
 

Attachments

  • backyard 3.jpg
    backyard 3.jpg
    113.1 KB · Views: 305
  • backyard 2.jpg
    backyard 2.jpg
    113.5 KB · Views: 369
  • backyard 1.jpg
    backyard 1.jpg
    132.8 KB · Views: 383
OP
M

motormitch

Well-known member
Joined
Aug 27, 2012
Messages
636
Location
Austin TX
Interior of the living space is moving along. Made a lot of progress on the painting this weekend. The hot red theme with white stripe for the kitchen/great room is looking nice and I went with a Grabber blue/white stripe in the bathroom to break things up. Also got the canned lights installed. Most importantly, the wife stopped by to look it over and actually said that while she had been highly skeptical of my plan, she looks it looks pretty awesome. I knew she would come around because deep inside she is a car chick. Her car ownership history speaks volumes. Her first car was a 76 black TransAM with 455. Need I say more.
 

Attachments

  • red 2.jpg
    red 2.jpg
    147.6 KB · Views: 558
  • red 1.jpg
    red 1.jpg
    149.8 KB · Views: 496
  • grabber blue 1.jpg
    grabber blue 1.jpg
    146.7 KB · Views: 486
OP
M

motormitch

Well-known member
Joined
Aug 27, 2012
Messages
636
Location
Austin TX
This weekend was very productive. Several friends helped me install two lifts in the shop.

A 4 post and a 2 post. The 4 post also has casters for being able to move it around not shown in the picture) so I am not bolting it down for now. The 2 post was harder to install, but still pretty simple once you figure out the cables. Now things can really start to happen.
 

Attachments

  • 2 post.jpg
    2 post.jpg
    135.2 KB · Views: 704
  • 4 post.jpg
    4 post.jpg
    131.6 KB · Views: 633
OP
M

motormitch

Well-known member
Joined
Aug 27, 2012
Messages
636
Location
Austin TX
Last night I started a rear brake job on my 496SS pickup and it was a special moment for me because it is the first time I am using a lift in the new shop to make a repair on one of my rides. I'm in heaven. Everybody deserves a lift in their life! It makes things sooooo much easier. The government lets you have a 401K or an IRA so they should add a 401Lift fund for tax deferred savings :)
 

Attachments

  • truck repair.jpg
    truck repair.jpg
    130.2 KB · Views: 603
OP
M

motormitch

Well-known member
Joined
Aug 27, 2012
Messages
636
Location
Austin TX
Been a while since I updated. I have the basic air delivery system installed except for the air dryer. That's the last thing, but I am trying to decide where I want to place since it will need to drain. I have installed a 100' retractable air hose from the ceiling which is fun by yourself 20' up on a wobbly 1 man lift. It is secured using 1/2" bolts and just drilling those holes through an I-beam up that high was fun fun. FYI..a rotary screw compressor is AWESOME! Great buy. Here are a couple of pictures of a compressor cover frame that my friend Joe has been welding up. Primer-ed it last night and expect to be installing with corrugated roof metal this weekend. The dude does great work. The cover is also hinged for easy access.
 

Attachments

  • comp cover 1.jpg
    comp cover 1.jpg
    142.2 KB · Views: 259
  • comp cover 2.jpg
    comp cover 2.jpg
    137.4 KB · Views: 300
  • comp cover 3.jpg
    comp cover 3.jpg
    138.5 KB · Views: 305
OP
M

motormitch

Well-known member
Joined
Aug 27, 2012
Messages
636
Location
Austin TX
I am starting to move some of my rides into the shop now and I have started using the shop to make the long list of repairs. Here is a shot of a 1969 Toronado getting the tank dropped and coated and a shot of my 1970 XLCH Harley aka Lil-Zebra
 

Attachments

  • zebra bike.jpg
    zebra bike.jpg
    137 KB · Views: 297
  • bat toro.jpg
    bat toro.jpg
    123.3 KB · Views: 350

elwood58

New member
Joined
Aug 22, 2013
Messages
3
Mitch,

Elwood58, aka Mr. Brady, just got his first look at this thread. it will be an honor to have the Convertible Super Beetle delivered to that shop. It is much more than I had pictured. I am looking forward to seeing it in person sometime.

Go big or go home!
 
OP
M

motormitch

Well-known member
Joined
Aug 27, 2012
Messages
636
Location
Austin TX
Been a while since I updated. I have the basic air delivery system installed except for the air dryer. That's the last thing, but I am trying to decide where I want to place since it will need to drain. I have installed a 100' retractable air hose from the ceiling which is fun by yourself 20' up on a wobbly 1 man lift. It is secured using 1/2" bolts and just drilling those holes through an I-beam up that high was fun fun. FYI..a rotary screw compressor is AWESOME! Great buy. Here are a couple of pictures of a compressor cover frame that my friend Joe has been welding up. Primer-ed it last night and expect to be installing with corrugated roof metal this weekend. The dude does great work. The cover is also hinged for easy access.

Here are some pictures of the finished cover. The fact that top is hinged makes access super easy. Now if only we had any rain from which to protect the compressor.
 

Attachments

  • comp cover finished 2.jpg
    comp cover finished 2.jpg
    137.8 KB · Views: 357
  • comp cover finished 3.jpg
    comp cover finished 3.jpg
    142.8 KB · Views: 299
OP
M

motormitch

Well-known member
Joined
Aug 27, 2012
Messages
636
Location
Austin TX
What does it cost to gain your wife's support for building your dream shop? Here is one little part. I gave up my inside space at the house for surfing the web, playing the keyboard, interior safe hobbies, etc.. so that she could get her own private office. I am not allowed to touch anything now that it is done. I think she did a great job designing it and decorating it. There is one thing missing and it is on its way and that is the drinking dipping bird. She has to have something frivolous on that big *** desk.

Sorry about the picture quality. These were taken at night with my phone.
 

Attachments

  • office 1.jpg
    office 1.jpg
    149.7 KB · Views: 590
  • photo-53.jpg
    photo-53.jpg
    145 KB · Views: 592
  • office 3.jpg
    office 3.jpg
    148.3 KB · Views: 531

968944

Active member
Joined
Feb 20, 2013
Messages
27
Location
Kentucky
Did you ever name the place? I remember someone from down-under calling it a shed and you liked that. Maybe "the tool shed" would work.

Pretty understated as this is a very nice place you have here.
 
To avoid these ads, REGISTER NOW!
Top Bottom