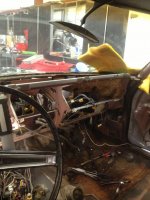
To avoid these ads, REGISTER NOW!

Pinch Me, it it real?

OP
M

motormitch

Well-known member
Joined
Aug 27, 2012
Messages
636
Location
Austin TX
Sorry, I should have warned you ... My poking fun about breathe deep was aimed at the fact it appeared to be galvanized. I figured you had a respirator. Just for the record , I love these stories about thebBlood Shed, so don't use chlorinated Brake parts cleaner to degrease before welding. Fosgene, I think... Gas is a by product and can cause some nasty nasty health issues. Good luck!


Sent from my iPhone using Tapatalk

"Gas is a by product and can cause nasty health issues". Never have truer words been spoken. Words of wisdom to live by.
 
To avoid these ads, REGISTER NOW!
OP
M

motormitch

Well-known member
Joined
Aug 27, 2012
Messages
636
Location
Austin TX
Now let's remove the truck and door skins to work on them off the car. I love the fact that the skins unbolt.

riv trunk off.jpg riv skin off.jpg

Trunk lib, skins and front valence parts all final primed and ready for paint next...

riv parts in booth ready.jpg

Let's jump to the end of where I'm at now with the rest ready for the final block after several other blocks.

Getting slowly closer. Tackled the underside of the hood. Removed it, cleaned and removed old adhesive, primed with black epoxy, sanded, painted with SEM hot rod black, glued and insulation installed. Looking good!
 

Attachments

  • hood expoy coat.jpg
    hood expoy coat.jpg
    142.2 KB · Views: 79
  • hood sanded.jpg
    hood sanded.jpg
    137.6 KB · Views: 74
  • hood painted.jpg
    hood painted.jpg
    140.9 KB · Views: 72
  • hood glued.jpg
    hood glued.jpg
    142.8 KB · Views: 72
  • hood insulation.jpg
    hood insulation.jpg
    135.9 KB · Views: 77
  • hood done.jpg
    hood done.jpg
    137.7 KB · Views: 92
OP
M

motormitch

Well-known member
Joined
Aug 27, 2012
Messages
636
Location
Austin TX
Next come the door jams....

Remove and paint shields, prep and paint jams, door ends, back jams and reassemble.
 

Attachments

  • door jam done.jpg
    door jam done.jpg
    148.7 KB · Views: 72
  • door jam back.jpg
    door jam back.jpg
    135.7 KB · Views: 64
  • door jam door end.jpg
    door jam door end.jpg
    132.4 KB · Views: 64
  • door jam in process.jpg
    door jam in process.jpg
    138.6 KB · Views: 67
  • door jam sheilds.jpg
    door jam sheilds.jpg
    140.7 KB · Views: 67
OP
M

motormitch

Well-known member
Joined
Aug 27, 2012
Messages
636
Location
Austin TX
Making a little more progress on the 65 Riviera. Shot the rear last night. Long way to go, but seeing improvement gives me motivation. Here are a couple of before and current shots.

riv right side bad.jpg riv back left corn bad.jpg

riv lerft side with pins.jpg

riv1.jpg riv2.jpg

riv3.jpg riv4.jpg
 
OP
M

motormitch

Well-known member
Joined
Aug 27, 2012
Messages
636
Location
Austin TX
Hit the shop at 0300 this morning and got more of the first 65 Riviera painted. Front bumper cover, rear hood valence, both door skins and restored the vinyl roof as well. Man, I'm having fun! I love making ugly old things look bad ***......
 

Attachments

  • roof.jpg
    roof.jpg
    144.4 KB · Views: 109
  • door 2.jpg
    door 2.jpg
    141.6 KB · Views: 89
  • door 1.jpg
    door 1.jpg
    138 KB · Views: 97
  • valence.jpg
    valence.jpg
    128.2 KB · Views: 101
  • bumper cover.jpg
    bumper cover.jpg
    133.4 KB · Views: 102

Askme42

Well-known member
Joined
Dec 9, 2012
Messages
2,538
Location
Goreville IL
The comment about the soda blaster and the door being open did not convey the full extent of the disaster. I turned a valve on and the nozzle jumped out of my hand and flew into the house in the kitchen and living room area. Every surface was completely covered in white. My wife was going to be home in four hours with her best friend to stay the weekend. I immediately vacuumed and dusted everything I could but we had hardwood floors. In a moment of brilliance I thought that if I were to mop the hardwood floors that would get everything out of the cracks. Water and baking soda equal grout. When she brings this up, as she often does, I have to actually leave and worry about my life.

So this is what I picture actually happened (at least if it were me). Wife bringing home best friend for the weekend. I have work to do but all I can think of is ********* ********* *********. Because my testosterone is over riding my common sense I leave the door open while soda blasting just feet away from it. After the disaster I'm thinking ok I have 4 hours to clean this up or no *********. Let's get to work. I get it all almost done and realize all the baking soda in the cracks of the hardwood. Ok a ********* is so close at this point common sense isn't even registering. So let's mop it up and she'll never know anything happened. After mopping is when ********* ********* ********* soon turns to oh **** oh **** oh ****. :lol_hitti
 
OP
M

motormitch

Well-known member
Joined
Aug 27, 2012
Messages
636
Location
Austin TX
So this is what I picture actually happened (at least if it were me). Wife bringing home best friend for the weekend. I have work to do but all I can think of is ********* ********* *********. Because my testosterone is over riding my common sense I leave the door open while soda blasting just feet away from it. After the disaster I'm thinking ok I have 4 hours to clean this up or no *********. Let's get to work. I get it all almost done and realize all the baking soda in the cracks of the hardwood. Ok a ********* is so close at this point common sense isn't even registering. So let's mop it up and she'll never know anything happened. After mopping is when ********* ********* ********* soon turns to oh **** oh **** oh ****. :lol_hitti

Sounds about right :)
 
OP
M

motormitch

Well-known member
Joined
Aug 27, 2012
Messages
636
Location
Austin TX
Hit the shop at 0300 ? Ugh. :lol:

I do my best work early in the morning with no one around, no text messages and no wife "just checking to see if you're OK", calls. As I've gotten older I find I only need to average 4-5 hours sleep a night.
 
OP
M

motormitch

Well-known member
Joined
Aug 27, 2012
Messages
636
Location
Austin TX
Wet sanded and buffed the hood last night. I am please to announce that I haven't lost all my skills over the year that I had stopped doing this type of thing.

However, I found a small 1/2" scratch on the outer edge of the hood that I am trying to decide if I should redo the hood over. This car is going to be up for sale, but it is not a frame off restoration 30-40K car. It is going to be a very nice weekend cruiser for 15-20K. I guess I'll wait and see how everything else buffs out before deciding. If I find another piece that needs redoing then maybe I'll do it.
 

Attachments

  • hood 1.jpg
    hood 1.jpg
    143.5 KB · Views: 85
  • hood 2.jpg
    hood 2.jpg
    132.7 KB · Views: 98
  • hood 3.jpg
    hood 3.jpg
    143.8 KB · Views: 107

KZOC

Well-known member
Joined
Feb 28, 2010
Messages
113
Hope you're staying warm out there in LW!

I spent just a few hours in the garage yesterday and was pretty darn cold...
 
OP
M

motormitch

Well-known member
Joined
Aug 27, 2012
Messages
636
Location
Austin TX
Work on one of the 1865 Rivieras has progressed significantly over the last several days so I thought I would share some photos.

There was a LOT of hidden damage and tons of old body filler.

Here is a picture of a large dent that you could barely see until I got into it. After removing a couple pounds of old filler, I pulled the dent out the way it should have been done.

riv lerft side with pins.jpg

Then there was the rear end to deal with...

riv back left corn bad.jpg

Working it..

riv back in progress.jpg

Then on the other side, another dent filled with filler. Here is a picture of grinding it out..

riv right side bad.jpg

Getting there slowly but surely.

riv right side looking better.jpg

Hope you're staying warm out there in LW!

I spent just a few hours in the garage yesterday and was pretty darn cold...

I kept it at close to 70 all weekend....
 
OP
M

motormitch

Well-known member
Joined
Aug 27, 2012
Messages
636
Location
Austin TX
Been a while, but I am continuing to move along slowly on the Riviera. Decided to take of the top of the motor and do a little media blasting and factory correct painting. Here are some before pictures.
 

Attachments

  • engine AC.jpg
    engine AC.jpg
    147.1 KB · Views: 80
  • engine dirty 1.jpg
    engine dirty 1.jpg
    142.6 KB · Views: 82
  • engine dirty 2.jpg
    engine dirty 2.jpg
    139.9 KB · Views: 80
  • engine dirty 3.jpg
    engine dirty 3.jpg
    142.5 KB · Views: 82
OP
M

motormitch

Well-known member
Joined
Aug 27, 2012
Messages
636
Location
Austin TX
Then when I was finished, the motor looked good, but when I connected everything and fired it up, I found a little problem. When I removed the water hoses from the heater core, I must have cracked the connector solder because it poured into the floorboard. I pulled the outside cover and it is pretty rough. From everything I can read, to get the core out properly, I will be pulling the center console and basically the whole dash. Fun Fun. Oh well, at lease I will have no excuse not to replace all of the old vacuum lines. Also, my friend Allen, who is much better at this than I am, will be helping so it might actually work.

You can see how different the correct color on the motor was and then the sorry shape of the heater core.
 

Attachments

  • engine painted.jpg
    engine painted.jpg
    137.5 KB · Views: 146
  • engine leak.jpg
    engine leak.jpg
    146 KB · Views: 143
OP
M

motormitch

Well-known member
Joined
Aug 27, 2012
Messages
636
Location
Austin TX
Not too sound like a big cry baby, but after busting the heater core yesterday in Riviera, now my 496SS truck got a flat, the thermostat stuck shut causing an overheating break down and now a leaking radiator. All before 6:30 this morning. Fun flipping fun. Good thing I love cars and truck or I would REALLY hate them.
 
OP
M

motormitch

Well-known member
Joined
Aug 27, 2012
Messages
636
Location
Austin TX
They say that it is always darkest before dawn and man do I hope that saying applies to car restoration. That little bitty POS heater core has turned into a BIGGGGGGG pain in the ***. Please observe my pain in these pictures of what had to be done just to get to the little *******.....
 

Attachments

  • dash gone 1.jpg
    dash gone 1.jpg
    135.3 KB · Views: 147
  • dash gone 2.jpg
    dash gone 2.jpg
    141.6 KB · Views: 151
  • dash gone 3.jpg
    dash gone 3.jpg
    141.6 KB · Views: 161
OP
M

motormitch

Well-known member
Joined
Aug 27, 2012
Messages
636
Location
Austin TX
Oh, I forgot. Here is the the source of my pain or as I like to say, "the core of my pain". I know, I know but come on, I need a chuckle.

Notice the little bulge at the top. Allen, who has been a massive help in removing all of the **** and diagnosing the problem, tells me that it is likely caused by someone letting plain water freeze in the core. When he hooked up pressure to it, it looked just a shower head spraying right out of the bulge.
 

Attachments

  • the problem.jpg
    the problem.jpg
    147.9 KB · Views: 124

Seagoon

Well-known member
Joined
Jan 23, 2014
Messages
859
Location
Scunthorpe. UK.
They say that it is always darkest before dawn and man do I hope that saying applies to car restoration. That little bitty POS heater core has turned into a BIGGGGGGG pain in the ***. Please observe my pain in these pictures of what had to be done just to get to the little *******.....
Having twice removed heater cores, from different cars, I have come to the conclusion that they start with a heater core then build the rest of the car around it!:lol_hitti I hate the job!
 
To avoid these ads, REGISTER NOW!
OP
M

motormitch

Well-known member
Joined
Aug 27, 2012
Messages
636
Location
Austin TX
To make lemon-aid from lemons, I have media blaster everything from in the dash and painted it up nicely (not that it will ever be seen) and started refinishing the center console.
 

Attachments

  • riv stuff sanded.jpg
    riv stuff sanded.jpg
    134.3 KB · Views: 121
  • riv stuff painted.jpg
    riv stuff painted.jpg
    131.9 KB · Views: 123
  • riv console.jpg
    riv console.jpg
    138.2 KB · Views: 146

shinertx

Active member
Joined
Mar 30, 2012
Messages
34
Location
shiner,texas
Mitch,

as i was reading this today in my office at work got the part of electricty and you pride and joy been zapped, feel out of my office chair on the ground laughing! My office staff thought i had lost my mind. Sorry that had happend to you i know what it feels like by hand of course.
 
OP
M

motormitch

Well-known member
Joined
Aug 27, 2012
Messages
636
Location
Austin TX
Mitch,

as i was reading this today in my office at work got the part of electricty and you pride and joy been zapped, feel out of my office chair on the ground laughing! My office staff thought i had lost my mind. Sorry that had happend to you i know what it feels like by hand of course.

I'm just glad my pain brought someone joy!
 
OP
M

motormitch

Well-known member
Joined
Aug 27, 2012
Messages
636
Location
Austin TX
Continuing to take advantage of the fact the fact that everything is out of the car, I decided to rebuild the gauge/dash. Here is the tear down.
 

Attachments

  • dash apart.jpg
    dash apart.jpg
    146.3 KB · Views: 95
OP
M

motormitch

Well-known member
Joined
Aug 27, 2012
Messages
636
Location
Austin TX
Here are some finished items and the completed dash.
 

Attachments

  • gauges restored.jpg
    gauges restored.jpg
    146.5 KB · Views: 137
  • lights restored.jpg
    lights restored.jpg
    138.7 KB · Views: 98
  • glove box door restored.jpg
    glove box door restored.jpg
    138.2 KB · Views: 99
  • clock restored.jpg
    clock restored.jpg
    149.8 KB · Views: 101

shinertx

Active member
Joined
Mar 30, 2012
Messages
34
Location
shiner,texas
Mitch, when you get a chance can you take a picture of your retractable paint booth. I would like to see what it looks like. Thanks robert
 
OP
M

motormitch

Well-known member
Joined
Aug 27, 2012
Messages
636
Location
Austin TX
[/ATTACH]
Mitch, when you get a chance can you take a picture of your retractable paint booth. I would like to see what it looks like. Thanks robert

Here are 5 pictures that I already have on my camera.

Here is the booth retracted and you can the see the air handler and vent.

booth1.jpg

Here is the booth extended, but the front filters aren't shown installed yet (5 minutes)

booth2.jpg

Here is the front with filters looking directly at it with the doors closed and the booth retracted.

booth3.jpg

These last two show the booth from the inside facing the rear. You can see the filter wall for cleaning the exhaust air and there is a man door on the left to use when painting. PM me if you want to talk about it and I'll send you my cell.
 

Attachments

  • bumper 3.jpg
    bumper 3.jpg
    139.1 KB · Views: 183
  • booth5.jpg
    booth5.jpg
    133.3 KB · Views: 190

Dugan

Well-known member
Joined
Sep 30, 2013
Messages
605
Location
New Castle, DE
I was practicing some welding on thin metal. I felt pretty good about my bead work, but my friends told me I should take some classes. I think they are being too judgmental and just jealous of my skills. So what do you think?

Stick to painting, hahah. Also galvanized will let off fumes that give you symptoms of the flu. Drink milk to get rid of them. Had this a few times and I hate milk...


Also fosgene only came from the Chlorinated brake cleaner. I dont think you can find anything but Non-Chloro anymore. Either way I dont use it.
 
OP
M

motormitch

Well-known member
Joined
Aug 27, 2012
Messages
636
Location
Austin TX
Stick to painting, hahah. Also galvanized will let off fumes that give you symptoms of the flu. Drink milk to get rid of them. Had this a few times and I hate milk...


Also fosgene only came from the Chlorinated brake cleaner. I dont think you can find anything but Non-Chloro anymore. Either way I dont use it.

It's good thing there aren't any fumes that can hurt you painting.......
 

quasi_accurate

Well-known member
Joined
Oct 31, 2013
Messages
196
Location
Austin, TX
Wow, incredible build! I've often heard that our city's permitting office is way backed up, so I wasn't surprised to hear about so many delays. Your garage turned out really well!
 
OP
M

motormitch

Well-known member
Joined
Aug 27, 2012
Messages
636
Location
Austin TX
Wow, incredible build! I've often heard that our city's permitting office is way backed up, so I wasn't surprised to hear about so many delays. Your garage turned out really well!

Since you are a fellow Austin deweller, you should come by and check it out. Just PM me and I'll give you the address and my phone number.
 
OP
M

motormitch

Well-known member
Joined
Aug 27, 2012
Messages
636
Location
Austin TX
I have just finished restoring the cracked up 1965 riviera steering wheel and it turned out pretty darn nice. Here are some before and after pics. The before are after I had already started the filling process so everywhere you see light blue is a major heat crack that I am repairing.
 

Attachments

  • new wheel 4.jpg
    new wheel 4.jpg
    147.6 KB · Views: 98
  • new wheel 3.jpg
    new wheel 3.jpg
    145.3 KB · Views: 99
  • new wheel 2.jpg
    new wheel 2.jpg
    145.9 KB · Views: 93
  • new wheel 1.jpg
    new wheel 1.jpg
    136 KB · Views: 99
  • old wheel 2.jpg
    old wheel 2.jpg
    133.4 KB · Views: 103
  • old wheel 1.jpg
    old wheel 1.jpg
    135.4 KB · Views: 110
OP
M

motormitch

Well-known member
Joined
Aug 27, 2012
Messages
636
Location
Austin TX
The 1965 Riviera continues to progress in spite of the heater core set back (heater core not so bad, entire dash removal to get to it BAD) I just finished restoring the parts that have wood inserts like the door panels and the center console parts. I still need to do the two big door panels but I want to wait till I have a second set of hands since it is so long. Here are some pictures...
 

Attachments

  • wood door panel.jpg
    wood door panel.jpg
    139.9 KB · Views: 59
  • wood console center.jpg
    wood console center.jpg
    138.2 KB · Views: 56
  • wood console top.jpg
    wood console top.jpg
    134.4 KB · Views: 53
  • wood shift plate.jpg
    wood shift plate.jpg
    135.7 KB · Views: 50

davalf

Member
Joined
Sep 16, 2013
Messages
17
First, I have been following your thread for a long time and every time I see there is an update, I get excited hoping it is one of your well written stories. They make me laugh every time. I love your shop and what you have been doing with it. I myself only have a 24 x 31 that is always a work in progress but I have been paying more attention to my 67 Valiant inside the shop.

The gauges you rebuilt look great. Can you go into greater detail on what you did, what you used, and how you did it. I am looking for some ideas to do the same to my car.

Thank you for helping make garage journal one of the most enjoyable forums for me.

Dave
 

Tylor55

New member
Joined
Aug 28, 2012
Messages
2
just sat in front of my screen for 4 hours reading all 26 pages every post looking at every picture thank you for the laughs was very enjoyable to read very nice shop and nice toys also
 
OP
M

motormitch

Well-known member
Joined
Aug 27, 2012
Messages
636
Location
Austin TX
First, I have been following your thread for a long time and every time I see there is an update, I get excited hoping it is one of your well written stories. They make me laugh every time. I love your shop and what you have been doing with it. I myself only have a 24 x 31 that is always a work in progress but I have been paying more attention to my 67 Valiant inside the shop.

The gauges you rebuilt look great. Can you go into greater detail on what you did, what you used, and how you did it. I am looking for some ideas to do the same to my car.

Thank you for helping make garage journal one of the most enjoyable forums for me.

Dave

I have been panning to do the second part of the mini bike story and it's role in my childhood development so I'll get to it.

As far as the gauges go, I wish there was a "secret" I could share, but it is really just slow careful work. First, I disassemble the gauge cluster (I always look to see if there are any videos or how to's on the web to learn from those who have gone before me). As I disassemble, I take a LOT LOT LOT of pictures with my phone because you would be shocked at some of the crazy little design tricks the guys in the 60-70s used. Next I take the housing and clean with soap ad water and then usually paint it if that is appropriate. In the Riviera's case it was just good old semi-flat black paint. A spray can usual works fine for a simple color like that. I use Krylon semi-flat.

Next I take the lens and polish them with a mini little buffer that I have as a part of a "3M De-nibber" kit the wife bought me for Christmas, but I used to just to it by hand. If there aren't too bad, I use 3M Scratch remover and micro fiber cloth. If there are really bad, I will wet sand them with a very fine paper like 1200 and then polish with 3M buffing compound, followed by 3M machine polish or the scratch remover.

Next, very carefully take a piece of paper to slide under the little needles on the gauge face and use a mini spray can of paint from the hobby store to repaint them. Usually a florescent safety orange or yellow, but I have even seen green.

If you have chrome trim rings that have rusted, tarnished, etc., I take a piece of aluminum foil and crumple it up into a loose wad and use some water to gently rub the piece until the chrome shines again. If there are really bad, send them off to be re-plated if you want to spend the money. I also have a very fine stainless steel brush I use with water to remove rust and pitting on chrome.

Replace all of the bulbs while you have it out. Now it is time to carefully reassemble and wow!

That's how I do it.
 

sean Buick 76

Well-known member
Joined
May 7, 2013
Messages
3,221
Location
Edmonton Alberta
I love your shop build! My wife is also super hot and a little bit scary when I piss her off...

Like you I am building a shop remotely because there is not enough room to do my dream shop at our residence.

If it makes you feel better my shop is being built 45 minutes away from where we live so you are doing pretty good! I am still on the lookout for a chunk of land closer to home but the wife says "no more properties"...

I am 31 and expecting my first baby so |I have out the shop build on hold and trying to make do with what I have for a year or so...

Congrats on the great build!!!!!!
 
To avoid these ads, REGISTER NOW!
Top Bottom