To avoid these ads, REGISTER NOW!

Scepter's Shop Build and Projects

OP
S

ScepterToad

Well-known member
Joined
Nov 9, 2023
Messages
340
Keith, I'm not a water person, but those pictures of being out on the water are amazing, so calm and tranquil appearing.

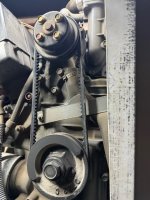
Out of curiosity, how many miles are on your coach? I just turned over 148k on our trip last week and I have service both my rear end and transmission three times now, even though Allison and Eaton state 75k mile intervals, I'd rather be a little overzealous than not on service intervals. Allison also states a 4-year interval in there but after speaking with a rep. several years ago he led me to believe that the time interval, while still recommended, was more for off-highway or stationary equipment that was running for longer durations and at higher loads.

Looks like you've already completed yours, but I do have a video showing the Allison service as well as the rear diff. service thrown in for good measure. The key points on the Allison are to not over-torque the filter housing bolts. Specs are 38-43 ft/lbs. and anything more can pull the threads in the case which will turn into a bad day. I've had to repair a few from other's misfortune and so I highly recommend sticking to the OEM torque specifications.

As for the oil filter, I prefill mine because they hold nearly a gallon and that is a long time to go with no oil pressure, even though Cummins states not to. I think they recommend against it is solely because of the possibility of introducing contaminants into the oil, but if you're clean and take care in what you are doing, I see no downside. Fuel filters, I do follow their recommendation and do not prefill, because the orifices are so much smaller in the injectors, plus they have a method of cycling the key to prime the system. Now with my FASS fuel pump, filling filters is even more simple.
I have to say Mike, on the water is probably the most relaxing thing I can do. Something about it just melts everything away. Problem for me is that the coach is ruining my boating habit! :ROFLMAO:

Our coach has just about 92K on it, and you'd be right to note that the service of the trans and diff are severely behind schedule. From here on, it'll be a much shorter interval. I've actually watched your video several times. Interestingly enough, the Allison filter kit did not come with instructions like I think yours did. I did torque mine on the low end at 38. I felt that it was adequate. Coming out, the bolts were VERY tight.

Interestingly enough, I recently looked up the oil filter prefill on Quickserve for my engine. The service instruction actually says to pre-fill the oil filters. I found that service procedure when responding to a thread over on IRV2. So, in response to this, I figured I'd go back and see what Cummins had to say about it. And, I have to say I'm shocked but not shocked. There's lots of bad information on the internets these days, and I'll try this procedure next time I do fuel filters.

According to Cummins, for a CAPS fuel system (which I don't have), do NOT prefill the fuel filters. For Common Rail (which I have): "It will be necessary to fill the 10-micron water stripping (suction-side) fuel filter with fuel." It goes on to say to not fill the 3-micron primary.


Hopefully that link will work. I think next time, I'll try it out and see what happens. The downside is, if I'm on the side of the road with bad fuel (for whatever reason), and I go to change the filters, it's unlikely I'd be able to get and stay started based on my most recent experience.

EDIT: I read the remainder of the procedure. The lift pump cycle time is 30 full seconds and the ECM needs 10 seconds to reset between priming intervals. And, you're supposed to increase idle speed after starting to purge the air out of the system.
 
Last edited:
To avoid these ads, REGISTER NOW!
OP
S

ScepterToad

Well-known member
Joined
Nov 9, 2023
Messages
340
I hope everyone had a great weekend! We spent the last week down in North GA on a trip to get out of town and go see a couple of the kids. We were able to spend some quality time with them and their significant others, for which we're grateful.

The area around Ellijay/Blue Ridge/Carter's Lake is a beautiful place. The campground we stayed in was brand new, with many of the fire pits clearly never used. Nice concrete pads with fire pit areas big enough for at least 4 chairs around the pit. The only real down side to the sites was that they weren't quite wide enough. The area at the back of the coach was only about 1 foot wider than the coach itself. That in and of itself isn't terrible, except that the site we were in was heavily treed. I had to be very careful with the slides out and leveling to not get into one tree in particular.

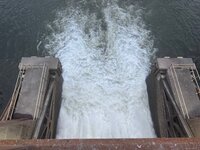
We were near Carter's Lake, which is a power generation lake with a reregulation lake at the bottom. They make power during the day when demand is higher and then pump water from the reregulation lake back up to Carter's Lake in the evening. The reregulation dam was just a short walk and is closed to traffic so we were able to walk the dogs up there in the evening to watch the sun set.

IMG_2280.jpeg

Reregulation Lake

IMG_2281.jpeg
IMG_2282.jpeg

IMG_2286.jpeg

Reregulation dam outlet. Folks fish all of this area and we did see one guy pull a nice one out.

Coach performed flawlessly until the trip home when we stopped for fuel. My Valid Air Leveling has been acting up a bit more and more lately. Typically, when I pull in (in travel mode), I'll hit the auto button and it beeps at me and does nothing. From there, what I've been doing is hit the manual button, manually level for a few seconds, and then hit auto. Coach then levels itself no problem. When we pulled out of the fuel island, it started beeping and showed "fault" and all 3 lights on the rear were red. I stopped, hit manual, then travel and it came back. Checked everything out and all seemed fine, so I went on my way. After several cycles of the manual back to travel, it cleared up for the duration. I'll have to take the panel apart and make sure all the connections are tight and clean and then probably get under the coach and do the same on the level sensors. My guess is it's an electrical connection or a ground somewhere.

Next up is the Jeep. I popped a check engine light after I felt what seemed like a misfire. Sure enough, P301 Cylinder 1 misfire. Cleared it and it didn't come back until the next to last day. I suspect that the most likely culprit is the valve cover gasket leaking into the spark plug. After that, maybe a coil pack going bad. It does have 132K on it, so I'll be in for some maintenance for sure. For now, it's running fine so I'll wait until the weekend to get it into the shop and figure out what's going on.
 
OP
S

ScepterToad

Well-known member
Joined
Nov 9, 2023
Messages
340
I hope everyone had a great weekend! No shop work this past weekend, but I did do some work, and some play.

Went out to my folks house and helped clean their pellet stove and chimney. Dirty job, but those pellet stoves work so much better when they are clean. We dismantle most of the stove including the blowers (squirrel cages). They do love that heat in the winter.

On Sunday we were invited down to the riverfront to go for a boat ride. This festival used to be called Tall Stacks and back in the day (I hear) there were MANY more boats. Cincinnati is a river town with quite a bit of history in that regard. There aren't many functional paddle boats left as most of them have been converted over to prop boats. Cincinnati also has a pretty decent beer history, so there were tents set up for tastings and whatnot. It was a beautiful day to be on the water and hang out with some folks I've known for more than half of my life.

We did a 2 hour cruise on the Belle of Cincinnati which included a buffet lunch and a trip up river. Complete with some old timey banjo music. Overall a great day.
IMG_2352.jpeg
Belle of Louisville


IMG_2354.jpeg
Couple of smaller boats.

IMG_2356.jpeg
The Natchez is a boat out of NOLA. They have a calliope playing and were by far the most vocal boat with respect to running the horns.

IMG_2370.jpeg
Serpentine wall.

IMG_2373.jpeg
And a view of downtown from the Purple People Eater Bridge. This was a train bridge that's been converted to a walk over from Cincinnati to Newport, KY.

IMG_2367.jpeg
And of course, we grabbed a pretty decent selection of tastings.

Fall is here, so my attention will be turning towards getting everything ready for winter, as it is coming.
 
OP
S

ScepterToad

Well-known member
Joined
Nov 9, 2023
Messages
340
Almost forgot...actually did get to the shop last weekend for a day.

Daughters car (Kia Optima) has been exhibiting some strange behavior lately. Intermittent crank/stop crank (no start). She'll put the key in, crank, car stops cranking for a second or two, resumes cranking. Might do it once and start, might go 6 times and not start, then start just fine. Might not happen at all.

Looked at it a few weeks ago and didn't find any obvious wiring issues. No corrosion on the battery cables. Decided to tear it down as the starter is under the intake manifold. Joy.

I didn't get any pictures, but I did get some help. Her BF is a pretty good guy and a car guy. He knows at least basics of working on cars. We dug in and in not a lot of time was able to get to the starter. Had to remove the electric fan, which came out fairly easily and disconnect several wire harnesses and the throttle body. I left the throttle body connected to the coolant system and just pulled it out of the way to get the intake manifold off.

I suspected that the starter wire was loose as the plastic connector takes a lot of heat and vibration. It wasn't loose enough to cause concern. What did cause concern was the rust on the starter and the battery connection on the starter end. So, being that there's an Autozone just down the street, we pulled the starter and had it tested. Their test machine said "out of specification". It certainly didn't sound good when they ran it. They had the $400 starter in stock, but not the cheaper one. They're on a budget, so the cheaper one it was. Went to another Autozone and they had it. Tried to get the old one tested again, but their tester was on the fritz.

Also replaced the serpentine belt while we were at it. That was a joy as well. Ended up pulling the front wheel and the plastic guard to get it back on. Just not a lot of room in there.

In any case, I enjoyed spending a bit of time in the shop with her BF. It was nice to have an extra set of hands.

Not likely to get back to the shop for a few weeks as I'll be final prepping for deer season and then knocking a few down with my dad. Not gonna be too many more seasons for that I'm afraid.
 
OP
S

ScepterToad

Well-known member
Joined
Nov 9, 2023
Messages
340
Hi all! I hope everyone has had a great start to the new year! I've been lurking, but haven't been posting much as I've been sick three dang times in the last month and half. It's getting ridiculous.

I've done a few minor things in the shop here and there. Changed the oil in the Jeep and did a brake inspection on a friends 2024 Grand Cherokee. He's put a crapload of miles on it so far (40K). Everything looked fine and we rotated the tires while we were at it.

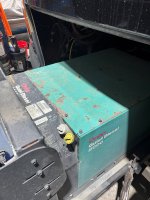
After that, I was piddle farting around the shop picking a few things up and I noticed the can of Onan Green spray paint I have sitting on the shelf. If came with the coach when I bought it from the original owner. He's a great guy and I suspect he just didn't get to it. He's in his mid nineties and I can't complain about any of the maintenance it's he did do. So, popped open the generator slide and took a look. Easy enough to pull the cover off and prep to paint. I also needed to check the gen out anyway as this is the first time I'd pulled the cover.

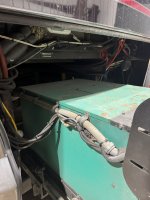
Got the cover off and started taking a look around. First thing I noticed was the coolant tank has a giant crack in it. ****. So, I pulled that out so I could get a new one. The part number is obsolete, but there's a new one out and hopefully I can find one reasonably priced. That made a decision for me to go ahead and swap out the thermostat and coolant cap while I'm into it. So, as I get parts in, I'll get going on getting this taken care of. We are trip planning for the year now and the first big one will probably be a week long spring break trip back to Destin. We also wanted to gat at least one weekend in February for a winter trip. We'll see how that goes. I still have several other projects to get to as well.


Gen 1.jpg
Top of the gen set.

Gen 2.jpg

Tank.jpg
Tank top. I don't really like that the top of the generator ties into the tank. I feel like it's just asking for the tank to crack with all the vibration. I wonder how they do this in the newer generators and if it's been an ongoing problem.
Hose.jpg

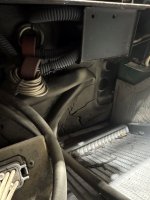
As you can see there's a bit of debris on the radiator, which I think happened when I pulled the cover. Also, I really don't like the way the hose is kinked like that. It's the fill hose where the radiator cap screws on. It has to have some play in it because the hose has to be able to come out of the top of the generator. Just seems like a lot to me.

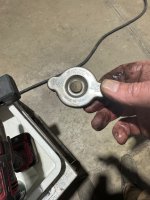
Cap.jpg
I'll put a new cap on as well.
Tag.jpg
And finally, I have the Kubota tag to so I can buy parts when needed.

I also need to get going on my air compressor rebuild as I need to get the rear wheels off of the coach and get the cat eye's installed. I'd really like to have the big compressor online when the time comes to get the rears back up to proper inflation. Plus, well, it's an air compressor taking up space currently.
 

zmotorsports

ALLIANCE MEMBER
Joined
Oct 20, 2009
Messages
21,441
Location
Northern Utah
Ahh. Genny maintenance time Keith.

How many hours on your Onan? I just did cooling system maintenance again on mine last year for the third time in our ownership, plus adjusted valves for the third time as well. My 10kw has the Isuzu three cylinder in it.
 
OP
S

ScepterToad

Well-known member
Joined
Nov 9, 2023
Messages
340
Ahh. Genny maintenance time Keith.

How many hours on your Onan? I just did cooling system maintenance again on mine last year for the third time in our ownership, plus adjusted valves for the third time as well. My 10kw has the Isuzu three cylinder in it.
I'm right at 1400 hours Mike. Your thread is what has inspired me to get into this thing more. I'm not quite ready to go through the valve adjustment yet, but once I find a shop manual for it, that may change my mind. I can't remember how many hours yours has and when you schedule the adjustments.
 

zmotorsports

ALLIANCE MEMBER
Joined
Oct 20, 2009
Messages
21,441
Location
Northern Utah
I'm right at 1400 hours Mike. Your thread is what has inspired me to get into this thing more. I'm not quite ready to go through the valve adjustment yet, but once I find a shop manual for it, that may change my mind. I can't remember how many hours yours has and when you schedule the adjustments.

Onan calls out for valve adjustments @ 800 hours I believe. When we purchased our coach the Onan 10kw had right around 1200 hours and not knowing the history of the coach, I went through and adjusted them. None really needed adjustment at that time. I then adjusted them right @ 2000 hours and they did require a little adjustment at that interval, they were off a couple thou each. I stretched my last valve adjustment out to around 3k hours and they were spot on.

I don't run the genny as much since getting out of racing, maybe only 20-30 hours a year these days.
 
OP
S

ScepterToad

Well-known member
Joined
Nov 9, 2023
Messages
340
I hope everyone had a great weekend. I managed to get back out to the shop to do some work on the Onan and get thinking and preparing for other upcoming projects in preparation for the upcoming camping season. I've had several things on my list for a while now, but since the weather is starting to cooperate a bit I figure I need to re-evaluate a bit.

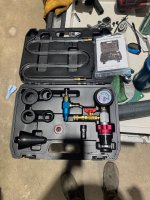
Starting with the generator, which has around 1400 hours on it, I definitely wanted to check the valve clearance and I have designs on changing out the thermostat. Still thinking I might do that. At a minimum I need to get a new belt as the one I have is pretty loose. In preparation for the coolant system, I sourced a coolant vac and fill kit from Amazon. We'll see how well it works.

On to the valves. I could see the top portion of the flywheel and I could see a smaller portion of it next to the starter. The fan is on the rear of the generator head, which makes it easy to turn the engine over. However, I could not find one single mark on the flywheel anywhere. So, I pulled the rear cover off to see if there was anything on the end of the crankshaft. Nothing. So, I watched Mike's video on his YT channel and did a bit of research. The problem I was having was I had it in my head that I'd be able to feel a bit of looseness on the rocker arms in the areas that are first to adjust. Not the case for me. So, I spun and spun trying to get it sorted out in my head. This is not a job I've done very often, so I wasn't sure of myself. More reading and videos later, I decided that I had #1 cylinder in the correct position. #1 was tight and #2 exhaust was a bit loose. I measured it, and it was good so I adjusted #1. They were tight, but not crazy. From there, I marked the fan with a paint marker and set a small square on the generator head so I could judge the 1 revolution to get to the other set of valves. From there, all but one were in spec. The one that wasn't, I had to loosen quite a bit and it didn't seem right, so I spun the engine a small amount and noticed the valve wasn't quite in the correct spot. Fixed the position and it was a lot closer. Rechecked them all and they were within spec. Hopefully I didn't screw it up.

From there, I had to get some work stuff started with welding up a few frames, only to run out of wire and my stick welder has the old 3 prong style plug on it, for which I don't have an adapter. I called it a day. Once I get the valve cover gasket and the belt, I'll get it put back together and tested. Hopefully by then, it'll be warmer than 0 degrees and I can get the shop door open to run the generator for a while and let it get up to temp. I can also during that time get the top cover painted with the door open.

I still need to pull the rears and get the cat eye's installed and I'd really like to get the fronts up off the ground and check the king pins and bearings. Then would be a great time to swap out the front shocks, which I'm not sure I'll get to before we head out on the first trip of the year. We'll see. Anyway, On to the pics!

IMG_2600.jpeg
Generator was FILTHY. I blew a bunch of dust out of it, but I'll want to clean a bit more as it goes back together.

IMG_2603.jpeg
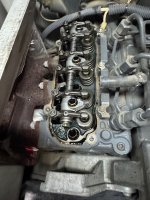
I'm pretty happy with how clean the inside of the engine is.
IMG_2604.jpeg

Valve train

IMG_2605.jpeg
Here's how I judged 1 revolution with the paint mark and small square.
IMG_2615.jpeg

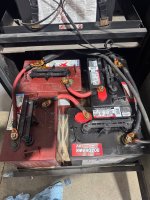
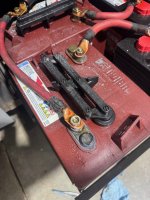
I almost forgot....I pulled the house battery tray out to check the water level and the corrosion was rampant. Decided I may as well fix that. I turned the charger off and cut the house battery switch off.

IMG_2616.jpeg
IMG_2617.jpeg

IMG_2618.jpeg
The red batteries are fairly old and the black ones are 21's. Reds are older. They seem to work ok and I don't boondock very often at all, so I don't worry too much about it. The red ones are showing signs of swelling, so I'll start to plan on replacements. NOCO spray on all connections after I cleaned them up.

That's all for now. Hopefully next weekend I'll be able to get the generator back together and run it.
 

zmotorsports

ALLIANCE MEMBER
Joined
Oct 20, 2009
Messages
21,441
Location
Northern Utah
Nice work on the genny Keith.

I noticed a bit of corrosion on my battery terminals the other day as well, so I washed them off and need to remove and recoat with NOCO on the terminals.
 
OP
S

ScepterToad

Well-known member
Joined
Nov 9, 2023
Messages
340
I hope everyone had a great weekend. I got back out to the shop for one day after the debacle that I'm still mad about last weekend. So, I guess we'll start there.

Last weekend, I headed over to the shop, excited to get some work done. The tasks were to get the gen set put back together, coolant in, and fired up/tested to make sure it all worked. I got there and realized that I forgot the coolant vac/fill kit I had purchased. Strike 1. No matter, I had some shiny new Crown SS braided brake lines to install on the Jeep. I've been having an intermittent pull on on hard braking (or at least braking at highway speeds) for a while and I even replaced a caliper last summer while on vacation to NY thinking that was a problem. So, got the front jacked up and on jack stands and had one wheel pulled and figured I'd better check on the brake fluid situation. Didn't have any in the shop. Strike 2. Oh well, I have frames to weld, better get on that for work. No problem. I had gone to the eye doc a few days before and she told me that I was finally forced into readers. I wear contacts, so when she set me up to see far away, I lost my up close. I'm gonna try multifocal contacts, but you gotta order those special, so I didn't have the, yet. Forgot my readers. And the ceiling int he shop is white, so the weld reflects back into my helmet. So, I couldn't see a dang thing to weld. Strike 3 and I was out. I'm still mad about it, but I shouldn't be.

So, yesterday I was prepared: Readers, check; helmet hood, check; coolant vac, check; brake fluid, check. I was ready.

Starting with the generator, I installed the valve cover and torqued to spec then moved on to the new overflow tank. The hoses had the crimp clamps, which I don't have tools or replacements for, so I went back with regular screw type hose clamps. The generator shell is fairly tight I think to components, so I'll have to make sure that nothing is rubbing on anything.

Once I had everything buttoned up, I hooked up the vac and ran it. I could get a small amount, but no where near what it should be. Scratching my head, I realized that I hadn't installed the drain plug. Duh. Put that back on and she pulled down in a hurry. Nice. So, I shut it off and it had a pretty good leak. I think the problem was the way I had it attached to the overflow tank, so I switched it to the radiator cap. That mostly worked, but again, it just wasn't great. So, back to the tank. I suspect that my particular kit isn't quite good enough for the small cap and tank fill tube. In any case, I got a vacuum, swapped over to the fill hose, and got just a small amount of coolant in before I lost vacuum. Weird. So, I tried it again. Same thing. From there, I just filled down the tub and then the overflow tank. I got a full gallon in (which is right at capacity) and checked for leaks. Nothing. So, I fired it up and let it run a while and put a load on it. Everything worked great and she sounds good. Once I shut it all back down, I did notice that the cap was leaking. I'll get a replacement this week and call it good.

IMG_2674.jpeg
IMG_2675.jpeg
Stupid drain cap I forgot.


IMG_2676.jpeg
Terrible picture but this is the way I had the vacuum gauge connected.

More to come.
 
OP
S

ScepterToad

Well-known member
Joined
Nov 9, 2023
Messages
340
On to the Jeep brake project. This took me an abominable 5 hours to complete. Part of that was me taking my time, but most of that was the previous owner moved the front brake lines down and bolted them direct to the frame. That worked fine, and I did the same as you'll see later, but no antiseize on the bolts meant that they broke off in the frame. Additionally, all but the passenger rear hard lines were seized to the soft lines. That meant that the fronts had to be twisted off by the soft lines and the new lines screwed on that way as I couldn't get them loose. The drivers rear eventually came loose. They were all doused with PB blaster. I should have used my acetone/ATF combo, but I didn't think about it until after the fact.
IMG_2677.jpeg

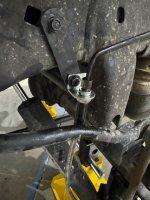
Starting at the rear, the sway bar was in the way of these lines. The factory lines have a small section of hard line, which is bent away from the sway bar.

IMG_2679.jpeg
This didn't work as I had to put the bracket that came with the new lines on the back of the existing bracket.

IMG_2681.jpeg
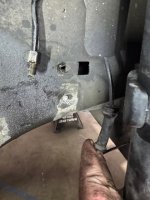
Passenger front. If you look, the ABS line is not mounted correctly, and just above that is the original location of the bracket. I can only suppose that they moved it when doing the lift, but I'm not sure.

IMG_2682.jpeg

Additional picture so I route it back correctly.
IMG_2683.jpeg


IMG_2684.jpeg

Bolt broken off.
IMG_2686.jpeg
Metric bolt bucket. I have them in here until I can get my cabinets restored a bit and then get things more organized.
IMG_2687.jpeg
The clip in the Jeep went flying and I couldn't find it, so I found this one in the bolt bucket. Had to grind it down a bit for it to fit into the hole.


IMG_2688.jpeg

Clearance on the bolt I selected. More to come.
 
OP
S

ScepterToad

Well-known member
Joined
Nov 9, 2023
Messages
340
Obviously by this time, I was getting a bit frustrated. The passenger front took me forever to get done. Once I figured that all out, the drivers front went a lot faster.

IMG_2690.jpeg
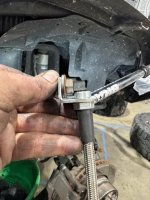
I ground the head of the bolt and made a flat on the washer to clear the locking bracket for the brake line.
IMG_2691.jpeg
First test mount.

IMG_2692.jpeg
It needed to go to the other side, so I did get to fire up the old Craftsman DP and punch a hole. I guess the day can't be all bad when you get to use an old press like this.
IMG_2693.jpeg
And I did manage to have some of these so I could secure the ABD line back to the bracket. I had to destroy most of them taking the lines apart.

IMG_2696.jpeg
Placement of the ABS sensor.

IMG_2697.jpeg
Drilled and tapped for M6x1 on both sides (that's the bolts I had handy).
IMG_2698.jpeg
Mounted.
IMG_2699.jpeg
And routed. These lines don't have the ABS brackets, so I used zip ties. I may see if I can find something else on the internets.

A bit more to come.
 

zmotorsports

ALLIANCE MEMBER
Joined
Oct 20, 2009
Messages
21,441
Location
Northern Utah
Keith, quick note, when you pulled the vacuum on the genny cooling system using the radiator cap connection point, did you also block off the overflow tube? This is a commonly forgotten small hose and can result in a less than full vacuum pulled on the system.


Also, depending on what kind of articulation you have on your Jeep, have you thought about relocating the rear brake lines up on top of the frame rails? I have seen Jeeps with a good amount of articulation catch the rigid lines that run along the outside of the frame rails and rip them apart on the trail. I have rerouted mine as well as a few other Jeeps up on top of the frame rail and mount the rigid to flex connection inboard of the frame rail completely removing it from harm's way. It is a worthwhile modification to avoid losing a brake line on the trail. Just FYI.
 
OP
S

ScepterToad

Well-known member
Joined
Nov 9, 2023
Messages
340
Keith, quick note, when you pulled the vacuum on the genny cooling system using the radiator cap connection point, did you also block off the overflow tube? This is a commonly forgotten small hose and can result in a less than full vacuum pulled on the system.


Also, depending on what kind of articulation you have on your Jeep, have you thought about relocating the rear brake lines up on top of the frame rails? I have seen Jeeps with a good amount of articulation catch the rigid lines that run along the outside of the frame rails and rip them apart on the trail. I have rerouted mine as well as a few other Jeeps up on top of the frame rail and mount the rigid to flex connection inboard of the frame rail completely removing it from harm's way. It is a worthwhile modification to avoid losing a brake line on the trail. Just FYI.
Thanks Mike

Yeah I did manage to think far enough ahead to block that little hose off. I think it was probably the fact that I couldn't get the entire rubber piece into where the cap goes. It was just too shallow and when I went to tighten the rubber on the vac gauge, I don't think it sealed very well. I ended up using a small amount of sil glyde on it and was able to get it into the cap for the overflow tank. But, those hoses are so small that I'm not sure it did as well as I thought. The top hose that ran from the thermostat housing to the radiator was collapsed, so it was at least doing something.

As far as the brake lines and articulation, that's a great idea. I haven't been able to test my Jeep as thoroughly as I'd like to so I'm not sure how close they could be. I don't disconnect sway bars (yet) so it can really only go so far. Moab was the most difficult off roading this Jeep has seen so far and it worked well for what I did. I did have a few cases where I floated a tire, but nothing crazy.

Once things settle down a bit more at work, I'll be able to get back to mods and thinking about the future of this Jeep. I still look at L86's on FBM and think all the time about what sort of suspension I'd really want. What I have is OK, it's just not great. I'd like to get it to ride a bit better for one so I have a bit of work ahead of me in that regard.
 
OP
S

ScepterToad

Well-known member
Joined
Nov 9, 2023
Messages
340
Well, we're getting down to that time of the year when I don't want to be working on the coach, but traveling in it. Alas, there are several projects which need completing in the next week or two so we can make our way down to Destin for Spring Break with my brother and sister in law. Our kids are grown, but theirs aren't and we do enjoy traveling with them. As of right now, they think we're skipping out on them this year. Plan is to pull up and run the air horn at them or something else like that. Should make fore a good time. We also might be taking one of our dogs (Maggie), who is just a sweetheart and hiding in the weeds while we send her over to their campsite. Haven't worked out the scenario just yet, but I'll try to surprise them as much as I can. All in good fun.

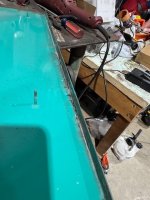
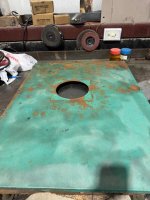
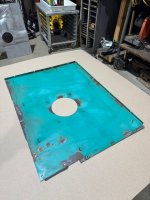
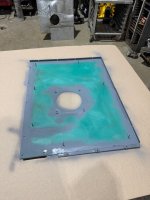
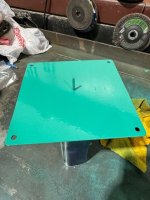
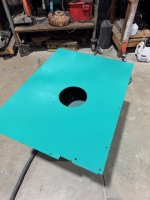
Along those lines, I'm working towards finishing up the generator repairs, which started off as a simple paint job. So, this past weekend, I was able to get over there and get most of the rust sanded out of the top, primed, and painted with the Onan Green I had from the original owner of the coach. Luckily for me, the paint was still good, even though the metal had rusted on the top of the can under the cap, which had probably never been removed.

I'm no metal finisher, and I kind of wish I knew a bit more about it. As it was, I pulled out the cup wire brush and went to town on it, followed by 120 and then 180 grit sand paper. It smoothed most of it out, but you can definitely see the areas where the paint flaked off and the top rusted. I'll call it good for now. I almost had project creep come into play, which would have caused me another weekend. As it is, I used most of the can of paint on the top (top and bottom of the panel).

IMG_2756.jpeg
As it started out

IMG_2757.jpeg
I had to carefully pull these off to get the insulation off the inside of the panel. I used a combination of these small needle nose and a long flat screwdriver to gently pry them up and essentially turn them inside out so they slid off of the post.


IMG_2758.jpeg
As you can see, there's some rust hiding on the underside of the panel in the corners.

IMG_2759.jpeg
Wire wheel and some sanding complete.

IMG_2760.jpeg

This was after the wire wheel.

IMG_2761.jpeg
I thought about scraping this off and trying to find another sticker. For the time being, I taped over it. When I tear this back down to do all of the panels, I'll look for a new sticker and replace it.

IMG_2769.jpeg
Bottom side ready for primer.

IMG_2772.jpeg
On the top, I primed the whole thing. On the bottom, just the areas which were rusted got primer.

That's it for the first part, more to come.
 
Last edited:
OP
S

ScepterToad

Well-known member
Joined
Nov 9, 2023
Messages
340
Moving on to the actual painting...

IMG_2765.jpeg
I tested the paint can on the underside of the access panel. Seemed to do just fine (I'm no painter).

IMG_2766.jpeg
First coat over primer.

IMG_2767.jpeg
I think this might be the second coat. I did 3 on top and bottom.

IMG_2768.jpeg
And the final coat on the access panel.

One more update for the day's work.
 
OP
S

ScepterToad

Well-known member
Joined
Nov 9, 2023
Messages
340
While the paint was drying (and I left it there for the week), I figured I'd knock out a few more things. First up, the water pump belt on the gen.

IMG_2762.jpeg

Cummins part number

IMG_2763.jpeg
Old belt was fairly loose.

IMG_2764.jpeg

New belt was nice a tight.

After that, I started detailing the exterior of the coach. I generally leave this for the winter because I don't really want to spend much time during the summer. I do feel that I need to up my washing game in the summer a bit more, but overall I keep the coach "mostly" clean in the summer and do detail work in the winter as I have more time. This year, I still need to compound and wax the **** out of the front of the coach and hit the windshield and mirrors with rain x.

IMG_2770.jpeg

IMG_2771.jpeg
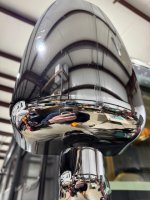
I do LOVE a shiny mirror housing!!

Almost as much as I LOVE polished wheels....
 
To avoid these ads, REGISTER NOW!

zmotorsports

ALLIANCE MEMBER
Joined
Oct 20, 2009
Messages
21,441
Location
Northern Utah
Nice job on the generator paint touch up Keith, as well as the brightwork on the coach. Like you, I try to get everything completed before the travel season so I can enjoy the coach rather than be working on it when trying to travel. However, I had a bit of scope creep on my last project that has me with the coach's bathroom completely torn apart for the time being. And to make matters worse I tore into a yard project all while the coach is torn apart, which is completely out of character for me and I am feeling it.

I would someday like to remove all of the panels of my generator and strip them down to repaint, but haven't quite gotten that serious about. I would love to have a brand new looking genny tucked up under the front cap of the coach, but I can't bring myself to tear it apart enough for a repaint at this point. Kuddos to you for taking it to the next level.
 
OP
S

ScepterToad

Well-known member
Joined
Nov 9, 2023
Messages
340
I hope everyone had a great weekend! I did manage to get a bit more prepped for the start of the RV season, and got some basic yard work done.

First order of business was getting the generator back together all the way. I had been searching for a new radiator cap because the old one sprung a leak when I put it back together. I suspect that the seal was just too dented from being in there probably since new. So, I measured and looked around for a replacement. First up, Cummins. Luckily, I have a local shop that's pretty decent for parts and lot's of times, the pricing is the same or just over what I can buy parts for in the internets. Called them up, and the part number is 130-4320. This is for a 13psi cap. He first asked if I'd go to a 16psi, which I told him I would if the part number had changed via Onan. Nope. And, the 13psi cap is NLA. Great. So, to Google I go to get a new cap. Nowhere to be found. One RV place has it on their website, but when I contacted them, they said backorder. So, I dug around and came up with Murray 7013 at Oreilley auto. Went and grabbed one and it was too big (this is a small cap). So, fired up the google AI and took a picture if the original cap. That came up with a Stant (which it is), and just so happened it's the same cap that a 1991 Mazda Miata, which is a Duralast 7513. I would prefer to have a Stant, but here we are. I may look for one in the future.

I was a bit surprised that the paint that I did last week seemed to be a bit sticky after a week of sitting. My guess is it's just old. In any case, I put the heat shield back on.


IMG_2805.jpeg
And bolted it all back together


IMG_2806.jpeg
Looks a heck of a lot better than it did. Don't mind my dirty fingerprints on that cover in the center.

Moving on to the Jeep, I've been fighting an intermittent ABS error. Sometimes, no code, sometimes it has a code. The code is for the drivers rear sensor, which I've replaced already and it did the same thing. So, I suspect I have a wiring issue somewhere. Anyway, I was under the Jeep a while back and was poking around and grabbed the driveshaft and gave it a wiggle. At that time, I felt a bit of wiggle and a noise, which I attributed to the front CV joint (mine has one on each end). So, I ordered up the new Teraflex RZeppa joint.

IMG_2807.jpeg
They actually sent a ball end allen stock for their bolts. I was a bit shocked when I opened the box.

Well, turns out, it's not the CV joint, it's the slip joint in the middle of the driveshaft moving ever so slightly. Ugh. I packed the RZeppa Joint back up and on the shelf it goes for a rainy day.

I'd be interested in folks experience or opinion on a CV vs U-Joint for a rear driveshaft. I do wheel a bit, but nothing crazy and I feel like the CV joints in my application and strong enough.

So, since I didn't have to swap out the CV joint, I moved back over to the coach and got a few more cleaning/setup item's taken care of: cleaned and rain X on the windshield, loaded tools for the first trip, and put some water on/inspected the house water filter. I also pulled the cover off of the steering shaft inside the coach and inspected that. There have been folks who had the bolts back out on those, which then get jammed in the housing and prevent turning altogether or prevent it to one side. Mine was all good.
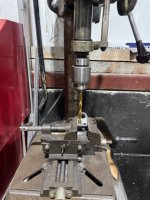
I think we're just about ready. I'll check my maintenance schedule on the Jeep and do a chassis lube on the coach next weekend and we should be ready to go.
 

zmotorsports

ALLIANCE MEMBER
Joined
Oct 20, 2009
Messages
21,441
Location
Northern Utah
I'd be interested in folks experience or opinion on a CV vs U-Joint for a rear driveshaft. I do wheel a bit, but nothing crazy and I feel like the CV joints in my application and strong enough.

Keith, I replace those Rzeppa joints with a good aftermarket driveshaft from Tom Woods using a double cardan joint at the TC. Personally, I'm not a fan of the Rzeppa style joint in these Jeeps. For anything subjected to extreme off-road I recommend 1350 joints to my clients and 1310 for daily driving/weekend wheeling type Jeeps.

There are other good aftermarket joints out there such as JE Reel as well, but I'm a dealer for Tom Woods and he's local to me, plus I've never had an issue with any of his driveshafts in the 30+ years I've been using them. I dealt with Tom when he worked at a local driveshaft shop before he opened up his business in the late 90's.
 
OP
S

ScepterToad

Well-known member
Joined
Nov 9, 2023
Messages
340
Keith, I replace those Rzeppa joints with a good aftermarket driveshaft from Tom Woods using a double cardan joint at the TC. Personally, I'm not a fan of the Rzeppa style joint in these Jeeps. For anything subjected to extreme off-road I recommend 1350 joints to my clients and 1310 for daily driving/weekend wheeling type Jeeps.

There are other good aftermarket joints out there such as JE Reel as well, but I'm a dealer for Tom Woods and he's local to me, plus I've never had an issue with any of his driveshafts in the 30+ years I've been using them. I dealt with Tom when he worked at a local driveshaft shop before he opened up his business in the late 90's.
Thanks for that Mike! I may go to that or have the local driveline shop make me one. They do a TON of driveshafts for big trucks (semis, concrete trucks, etc.) and did the extension and shortening on my Excursion driveshafts when I did the Cummins/G56 swap from the 6.0/5R. They did a great job at a very reasonable price.

Probably a good thing to add to the list for when I finally get gears. That project is languishing and has gotten put off for longer than I care to admit.
 
OP
S

ScepterToad

Well-known member
Joined
Nov 9, 2023
Messages
340
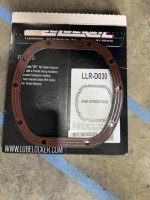
Hi all! Final prep last weekend for the trip to Destin coming up. I was looking back as maintenance records for the Jeep and decided that it was time to go back through the transmission, transfer case, and differentials. Unfortunately for me, I didn't get to all three, but started prep. Transfer case went fine as that's what I had parts for. I ordered up a set of Lube Lockers for the front and rear diffs and I'll get the transmission service done when we get back. It works awful hard with the bigger/heavy tires and wheels and high gears. I've put about 35K on it since I've owned it, so the transfer case and diffs are probably a bit overdue with the flat towed miles added in.

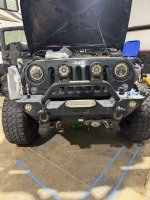
The other thing I started looking at is the front bumper. If you remember, I had the bar with the lights on it in front of the grille.
IMG_2821.jpeg

I've had the winch off for a while as I want to drop it down into the bumper a bit more than it is right now as it sits on top. I think I can drop it a few inches at least without much trouble and hopefully a bit more. That project is on the list, slowly creeping up.

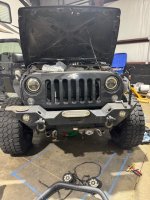
So, I cut the bar off....

IMG_2822.jpeg
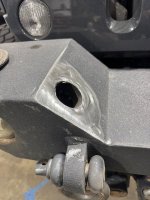
Sawzall made short work of it and I ground the welds flat but left the ends of the pipe in there for now. I really just wanted it off and clean enough that if someone sticks their finger in there, they don't get cut. And, the bumper doesn't rust in the mean time.

IMG_2824.jpeg

IMG_2827.jpeg
So, I hit it with some rustoleum I had in the shop. When this is all finished, I'll probably look at getting it powder coated and doing the front and rear.

Other service was the oil change. I had noticed my drain plug was a bit deformed last time so I fired up the internets and found a replacement. It has a nice strong magnet in it and they supplied a few of the copper washers. I made the switch but I'm keeping the OEM until I'm satisfied the new one won't leak. It hasn't yet.

IMG_2825.jpeg
After all that, I ran through the coach one last time checking tire pressures and completing the chassis lube. I have a few other items that I'll want to check off the list after this trip for the coach and Jeep in preparation for a hopeful trip out west this year that we missed last year. Southwest Utah to start and then back to the San Juan Mts and then back home. We'll see if this year is the year it happens.

I'll post up some pics of the upcoming trip once we get back.
 

zmotorsports

ALLIANCE MEMBER
Joined
Oct 20, 2009
Messages
21,441
Location
Northern Utah
Nice job on removing obstructions from the bumper. Your cooling stack will thank you for it.


I think you are wise to choose to service the transmission, transfer case and differentials sooner than the recommended OEM intervals. I do the same as our Jeeps are far from stock and we ask a lot of them.

I service my transmission @ 25k roughly as well as differentials. I service my TC about half that when I flush my brake fluid every other year.
 
OP
S

ScepterToad

Well-known member
Joined
Nov 9, 2023
Messages
340
Nice job on removing obstructions from the bumper. Your cooling stack will thank you for it.


I think you are wise to choose to service the transmission, transfer case and differentials sooner than the recommended OEM intervals. I do the same as our Jeeps are far from stock and we ask a lot of them.

I service my transmission @ 25k roughly as well as differentials. I service my TC about half that when I flush my brake fluid every other year.
Agreed Mike. There's just no reason not to. $100 for fluid and a filter (or whatever it is these days) is cheaper than a transmission.

Plan right now is to get the Excursion back on the road so I can tear the Jeep all the way down and do the gears. My first time won't take me a day or even a weekend. My guess is it'll be down a minimum of 2 weeks.
 

zmotorsports

ALLIANCE MEMBER
Joined
Oct 20, 2009
Messages
21,441
Location
Northern Utah
Agreed Mike. There's just no reason not to. $100 for fluid and a filter (or whatever it is these days) is cheaper than a transmission.

Absolutely. Heat is the biggest killer of transmissions and we ask a LOT of our transmission in vehicles with the aerodynamics of a phone booth, are heavy, pushing oversize tires and over uneven terrain. Not just one creator of heat, ALL the heat creators. :ROFLMAO:
 
OP
S

ScepterToad

Well-known member
Joined
Nov 9, 2023
Messages
340
First big trip in the books for the year and I'm glad we decided to do it. I needed the time away.

Coach performed flawlessly save for the toilet seal that I didn't know was a problem until we were underway. We took two days to do the 12 hour drive time going down and a single day coming back, which is pretty standard for us on this trip. Destin is a touristy town, but try to stay off the beaten path and just relax, which we did. Lot's of hanging out at the campsite, pool, just one beach day (that's enough), and a day on a rental pontoon, which is always fun. Had a couple of nice dinners out with some good food as well. One rain day and a fair amount of wind, but for the time of year not bad weather all around.
IMG_2855.jpeg
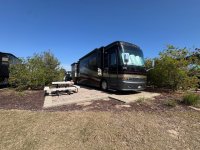
Campsite for the week

IMG_2863.jpeg
Sunset from inside one of the restaurants. Don't mind the weird lights, it's not aliens.


IMG_2866.jpeg
Beach

IMG_2871.jpeg

IMG_2876.JPG
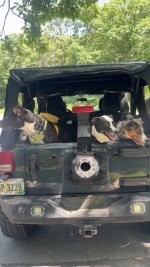
Even Maggie got a great vacation away from the boys at home. She LOVES water, so we took her on the boat, which she hated until we got to the beach over by Crab Island. She loved that. Played with the ball in the water and laid up in the sand for a whole day.

IMG_2892.jpeg
Sunset walks on the beach were nice as well.

Back to regularly scheduled programming and projects to knock off the list.
 
OP
S

ScepterToad

Well-known member
Joined
Nov 9, 2023
Messages
340
I hope everyone had a great weekend. I was finally able to get back in the shop following a solid month and half of college graduation for the youngest, grad parties with friends, helping the oldest get into her first house, and working on my own yard to try and bring the back patio back from the dead.

I've been putting off fixing the hood of the Jeep because I wanted to try and find a good used OEM hood to paint. However, I managed to score an OEM hood on FBM that was already the factory color. And for $100 at that. I'll take it!

IMG_3083.jpeg

I have new hinges which I'll paint once I get to that point. Until then, I'll use my OE hinges as they are only slightly bent (provided I can straighten them out a bit). Now I just have to learn to paint well enough to paint a new cowl and a used left fender. My plan is to start learning by painting the fender flares I have and then move on to the front and rear bumpers.

This weekend was also oil change time and front and rear diff change. But first up, I've been having a weird noise come from the left front tire when turning and sometimes when driving slow. It was bugging me as it sounded like a dust cover catching. Sure enough, I pulled the front tire and saw this.
IMG_3084.jpeg

Touching just enough to make noise. Sometimes. I'm still not happy about the spacers and wheels I have, so I've been on the hunt for a set of satin black ION 171's (bullet holes). I found a used set on ebay in good condition, so I grabbed them. Unfortunately, the guy selling them is an oil rig guy and I must have missed them. eBay let me buy them, so I'm still sorting that out. We'll see what happens.

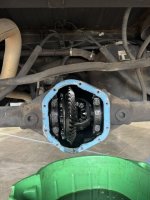
On to the diff change. When I bought the jeep some 45K ago, I changed the front and rear diff immediately and used regular gaskets and sealant. This time, I went with the lube lockers and I don't think I'll ever go back. Super easy and I didn't have to sit ther and wait for the sealant to skim over and then dry all the way before driving. Overall, that went pretty well.
IMG_3109.jpeg

IMG_3110.jpeg

IMG_3111.jpeg
This gasket material and sealant came off pretty easy with a nice sharp putty knife.

IMG_3118.jpeg
All cleaned up inside before paint.

IMG_3119.jpeg
Prepped for paint.
IMG_3120.jpeg
First coat on. I ended up doing 3.

I had noticed that the rear fluid came out a little weird color. There was material on the magnet, but not more than I would expect. Then I looked at the pan.

IMG_3126.jpeg
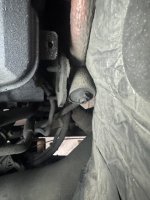
That looks like water to me. I didn't dawn on me to check the vent on the rear diff at the time. I need to do that today.

That's all for the Jeep. While all this was draining, I cleaned up the covers and bolts and moved into the coach as I've had an air leak when the exhaust brake is actuated for a while now. Last trip it was louder so I needed to investigate. More to come.
 
OP
S

ScepterToad

Well-known member
Joined
Nov 9, 2023
Messages
340
Exhaust brake time. this has been bothering me for a while. Sometimes when I'm driving the coach at low speeds, I can hear an air leak when the flap closes. Only sometimes. This last trip to college graduation, I felt like I could hear it louder. and it appeared that the air gauges were dropping while it was closed. Time to figure it out.

There's a supply line to the bottom of a solenoid and then a supply line to the air ram that moves the flap. Thankfully, there's a plug that I could unplug the solenoid. I pulled 12V power from the chassis battery and ran a wire up to where the solenoid is. Aired up the coach, and applied power and ground to the solenoid plug. Sure enough, an air leak. Thankfully, not on the air cylinder. It felt like it was coming from the hose attached at the solenoid.

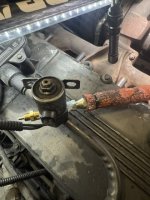
IMG_3112.jpeg

IMG_3114.jpeg

IMG_3116.jpeg

Of course it's in a crappy place to get to, smashed between the firewall and the engine. I pulled the screws holding it to the engine lifting point and got it moved around to where I could pull the supply line. For the life of me, I couldn't get it off. Then it dawned on me that the supply line has full air pressure on it, so I drained the tanks down and it came off relatively easily. From there, I pulled the solenoid and hose from the air cylinder and got it on the bench.

Not knowing exactly how this works, I applied air pressure to the end of the hose that was attached to the air cylinder. It bled out of the vent on top of the solenoid. I did some googling and apparently that's not supposed to happen. Since this is an air component of the whole system and I can't have a leak, I'll replace them both. I suspect that the hose is still good so if I can get a local shop to test it, I will. Time will tell. I can't really relocate the solenoid because the air supply line is super short, but I'd like to. I'll do some more investigating though because I'm pretty sure the line is too short to cut the end off of so I get a good connection back to the push lock fitting. So, I may be in it for a new supply run anyway. I'm inclined to put a compression fitting back on and replace the push lock. I like those better anyway.
 
OP
S

ScepterToad

Well-known member
Joined
Nov 9, 2023
Messages
340
I hope everyone had a great Father's day weekend!

I was able (while I was visiting my folks for Father's Day) to get the exhaust brake solenoid bench tested further and come up with the actual problem this time.

In my previous post, I had blown back through the outlet with shop air and the blowoff valve passed the air through. At the time, I figured the solenoid was bad. The more I thought about it, the more I realized this would be the case if the solenoid was not activated. Duh!

So, I grabbed a fitting and put shop air to it at about 130psi, capping the outlet. No leaks. I then actuated the solenoid with 12V power from a battery and the leak became apparent. The fitting on the outlet line, which screws into the air cylinder is leaking. It's a crimped fitting, so a replacement hose will have to be found. This also explains why, when I had it in the coach still, that I felt air at the solenoid on the first test, but none after. The air was coming down the heat covering on the hose. Once I cut it back a bit and folded it over, I couldn't feel the air because it was then just blowing back. Additionally, this hose is super "crunchy" when you bend it. Even if the crimp hadn't failed, it was probably time for a new hose.

I should be able to find a replacement this week locally with the several truck shops around town. I also want to swap out the push lock fitting for the supply side to a compression fitting. I find that even when cutting a new end on the plastic lines, the old used fittings just don't seal very well. Unfortunately for this application, the supply line is so short, that I don't think I'd be able to cut even a small amount off and have it reach comfortably. Otherwise, I'm in it for the whole line and I'd rather not be if possible.

Sorry, no pictures this time. Thanks for reading.
 
OP
S

ScepterToad

Well-known member
Joined
Nov 9, 2023
Messages
340
I hope everyone had a great 4th of July weekend! Busy weekend for me as I worked in the sop all day Friday and part of the day Sunday and had family party on Saturday. Also went to see my folks on Sunday morning. More on that later.

I stopped in the tire shop last week to inquire about two new steers for the coach. The Goodyear G670s I had on just turned 7 and I just wasn't happy with the way they were wearing. I think I've said it before, but they were rivering on the outside edges. I suspect that the PO ran then underinflated for a period of time and they were developing knots on the sidewall. I just didn't trust them any more and when I'm sitting in the seat for 18 hours (sometimes), I don't want to sit there and worry about them. Are they still ok? Probably. Is it worth the risk? Nope. I also asked about the Mickey Thompson's I want to put on the Jeep and his price came back a little high on those. The steers he quoted basically what I can buy the tires for online with no tax, shipping, or install. Deal done.

First up though, was the exhaust brake install. Pretty straightforward, aside from not being able to thread the hose into the air cylinder with the solenoid connected on the other end. It's just wonky in there, and not a lot of room to move around. I prepped the fittings on the bench and went after it.

IMG_3167.jpeg
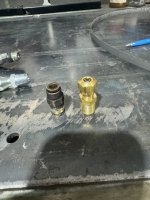
I swapped out the old push lock for a compression fitting. I find that these are much more likely to not leak after a removal and install. In this case, I just didn't have much room to cut the end off of the supply line. Certainly would have a leak if I just reinstalled the same fitting. Cheap insurance.
IMG_3168.jpeg
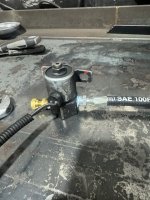
New hose installed on the solenoid. Later I'd have to take it back off.

IMG_3169.jpeg
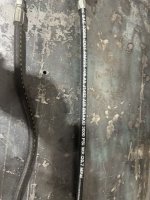
The old hose had a pretty good kink in it and was super crunchy, being almost 20 years old now.

IMG_3170.jpeg
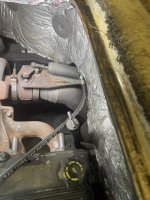
Hose threaded into the air cylinder. As you can see, there's just not much room in there and the angle is weird.
IMG_3171.jpeg
Solenoid threaded back on and the area where I cut back the insulation zip tied.

All in, this is not a terrible project but there are a few things I'm not super happy about. I didn't get a good picture, but the self tapping screws they used to mount this to the engine lifting point is very close to an injector line. It's hasn't caused problems in the 20 year life of the coach, but I'll be checking it from time to time as it's around 1/8" from the tip if the screw to the line.

More to come.
 
OP
S

ScepterToad

Well-known member
Joined
Nov 9, 2023
Messages
340
Next up, I started working through removing the stees from the coach. However, I ran into a few issues so I moved on to the Jeep hood for the time being.

I scored this hood for a cool $100 and it's in pretty decent shape. There's one small dent and one area where the paint is rubbed through. I also reused the hinges for now as the new ones are not painted. Yet.

I removed the old hood and then the wiper arms and cowl. Once I had the hood off, I could access the hinges and remove those. I straightened them up as best I could in the vice and reinstalled. Swapped over the hood latches and accessories (hood latch and spring) and se the hood back on. It's a bit awkward by myself, but it worked out.

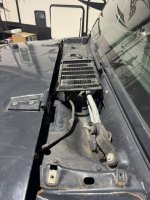
IMG_3180.jpeg
Here you can see the hinges connected back (loosely) and the fender, which still needs replaced).

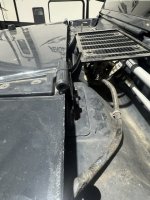
IMG_3181.jpeg
Hood latches back on and hood set down. It's not quite right yet.

IMG_3182.jpeg
This hinge mount is a little bent, so I'll have to straighten it out once I go after the fender.
IMG_3183.jpeg
Hood still off a bit. I had to torque it around a bit by hand.

IMG_3184.jpeg
Passenger side getting closer. Here you can see places where the paint it chipped off from the tree.

IMG_3185.jpeg
Overall happy with the install. It's not perfect. Once I get a little relief from the hot humid weather this year I'll get started on painting the drivers fender I have and hopefully get the areas painted that need it.

Last bit coming up.
 
OP
S

ScepterToad

Well-known member
Joined
Nov 9, 2023
Messages
340
Now for the coach. My idea was to jack stand the frame by raising the air suspension up, jack stand, then lower the front air bags, setting the frame down on the jack stands.

That wasn't to be. On Friday, I started this project thinking I knew how the suspension on the coach worked. So much for that. I ended up making another set of cribbing blocks, 16.5x16.5 with 3/4" plywood and 2x6's. I placed everything under the coach, got it all moved around close, raised the suspension, moved the stands into place, lowered the suspension and nothing. Jack stands were still in the same place they were before. My mind was blown. How could I lower the coach 4" and still not be touching the jack stands??? I tried again. Raise then dump the air (as opposed to just lowering it). Still nothing. I was flabbergasted. And not smart enough (apparently) to realize that my jack stands were under the air bags, not on top of them. Duh. That thought didn't dawn on me until I was telling my dad my issue on Sunday morning. Further adding to my frustration was the bent breaker bar from trying to get the lug nuts loose. That's the point at which I called it and worked on the Jeep on Friday.

Fast forward to Sunday morning. I went out to see my folks as I won't see them for a few weeks and pick up a new cheater pipe and a 3/4" impact. I was chatting with my dad about it and through that conversation I realized my mistake. To say I felt like an idiot is an understatement. But, live and learn. If I didn't want to know how this stuff works, I wouldn't be doing this work. In any case, I decided to lift from the font axle one side at a time and place jack stands under the axle. Once I looked further at the frame and suspension. I don't think I could place jack stands on the upper frame anyway due to clearance and the fact that the upper and lower are stacked on top of each other.

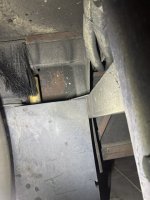
IMG_3187.jpeg
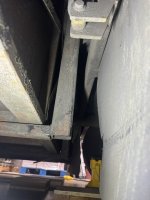
Originally I placed the jack stand under the frame net to that mud flap. You can also see the vertical piece in the background that runs up to the upper frame. I don't think I can place a jack stand under that area. Possibly I can. More on that in a the next picture.

IMG_3189.jpeg
Here's the front section, where I could possibly place another jack stand under the control arms. If I placed at all 4 corners, might work.

IMG_3190.jpeg
Here's that rear vertical piece behind the air bag. It just doesn't seem like the top is welded fully around where this piece attaches to the main top frame rail.

IMG_3193.jpeg
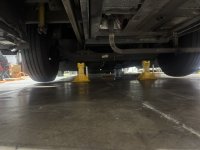
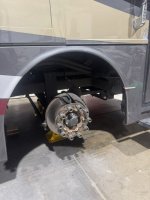
In the end, she's up on jack stands placed under the axle where the frame bolts to the axle.

IMG_3194.jpeg
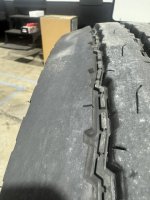
Here you can see the rivering on the outside treads. Some are worse than others.

IMG_3195.jpeg
This one is particularly bad.
IMG_3197.jpeg


IMG_3201.jpeg
I also picked up a set of centramatics to go back with once the tires are mounted and balanced.

IMG_3202.jpeg
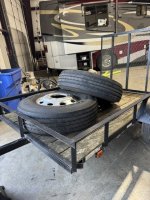
Loaded on the trailer. I strapped them down and delivered to the tire shop this morning and they'll be ready by lunch.

the only other thing I'll say about this is that the Icon 3/4" breaker bar did well on this job. It certainly flexed pretty good and withstood the 5' cheater pipe I had on it. 450 foot pounds is no joke for sure. All in, the worst part about this job was the lug nut torque.

Thanks for reading along.
 
OP
S

ScepterToad

Well-known member
Joined
Nov 9, 2023
Messages
340
Got the coach tires put back on last night, along with the centramatics. I cleaned up the rims best I could and cleaned up all the mating surfaces. One thing I found interesting during this whole process was the suspension on the coach. Jacking from the axle on one side raised essentially both sides at once. By the time I had the passenger side on the jack stand, most of the drivers wheel was off of the ground as well.

A set of Mickey's are going on the Jeep now. Small fortune in tires this past week, but a necessary evil.
IMG_3204.jpeg
Mating surface wire wheeled.

IMG_3205.jpeg
I scrubbed these twice. Someday I'll clean them up a bit better.
IMG_3206.jpeg
Wheel seated against the hub with the centramatic sandwiched in there.

IMG_3207.jpeg
Don't mind the dirty wheel and tire. I'll clean those up.

Super excited to get the Jeep tires changed out finally. The old ones are so dang noisy I can barely hear myself think on the highway.

All tire dates are 1126 on the coach and Jeep save for one on the Jeep. It's a 1725. Not super happy about that, but I figure I'll run through them in 3 years or so. I also can't complain as I got them for a pretty decent price. The coach tires actually came in $100 cheaper all in than I could get them online for before taxes and shipping.
 
OP
S

ScepterToad

Well-known member
Joined
Nov 9, 2023
Messages
340
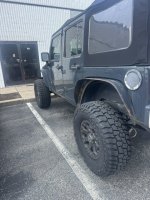
Well, the first commute on the Mickey's went as well as I'd hoped. Almost no road noise whatsoever. The only downside is the spare no longer fits on the rear mount. I've always had a swing tire carrier on the list but it just moved up considerably.

I originally wanted to swap out the wheels now with the new tires, but the coach tires ate up that budget. I'll deal withe the current wheels for this set of tires.

IMG_3213.jpeg
 
To avoid these ads, REGISTER NOW!
Top Bottom