To avoid these ads, REGISTER NOW!

Scoutman's attached 2 'car' garage makeover

Scoutman

Well-known member
Joined
Mar 3, 2010
Messages
161
Location
Huntsville, AL
They call them 1, 2, or 3+ car garages... but what if you don't have any cars? A 2 Jeep garage or truck garage just doesn't have the same ring does it? Well after a few requests in another thread to see more of my garage makeover I decided to lay it all out there for the Journal to see. I've spent enough time on here to get some good ideas so many thanks to those who have contributed to the GJ forum. :beer:

We have 2 Jeeps, 1 Scout II that's in pieces, and my Dodge Ram 3500. Everything we own is 4x4 and I wouldn't have it any other way. :thumbup:

Background: We've been in this house for coming up on 10 years. We don't expect to stay too much longer just because we really want more land and a space to build a shop and a barn (for wife's horse). That being said, we have been on the 2 year plan for about 4 years now so who knows. We can't justify building a shop at this house right now so what I have will have to do.

I have had a 8x12 garden shed for all the yard stuff and spare parts. It was here when we bought the house. When we first moved in to this house the agreement was that my wife at least had to have a spot to park inside. Well after my first major Scout drivetrain overhaul, that promise was busted. :lol_hitti For years we have had it configured to 2 vehicles or at least where I could roll some things around and fit a second vehicle in during hail or storms. Over the years I have been getting everything on casters to make things easy to move around. Things need to change as my uses change. One day I may be doing fab work and the next we may be having a crawfish boil. Enough social stuff happens in this garage that I wanted it to be functional but nice looking. Basically what started the makeover was I was tired of looking at nasty brown cluttered pegboard and cleaning cobwebs and bug carcases out of hard to reach places. My garage has evolved through the years, as most of ours has, but has never really had a good 'rezoning'. Gone are the days of similar tools on opposite corners of the garage.

The Plan: The overall plan was to take this one wall at a time to minimize the chaos and to keep the cost down to small bites. I wanted things to look fresh, be easy to clean, and to be zoned so that I didn't have to run from side to side to chase tools down for tasks. I do mostly metalwork so the mess that it can make I wanted contained to one side that I could blow out or sweep up easily. I am limited on electrical with no serious plans to upgrade so I will have to make do here as well.

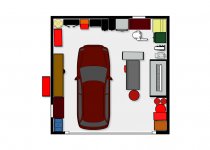
I gave up on the idea of keeping this a 2 car garage and the primary layout will have a spot for 1 vehicle on the left and workshop space on the right. After lots of time messing with an online layout tool, I came up with a layout that I liked and I thought would work. I used the one from Icovia which was pretty generic but easy to use and got the point across.
 
To avoid these ads, REGISTER NOW!
OP
S

Scoutman

Well-known member
Joined
Mar 3, 2010
Messages
161
Location
Huntsville, AL
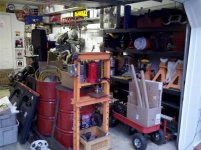
Here is where it all started back in January this year. It was very much a working garage with things hung and stuck in about every corner I could. I have been since working to get rid of the things I don't use or need and regrouping to get all of the various organizers gone.

I forgot to mention that I have about 21'x21' of available floor space with about 9' of ceiling height. I have a storage closet off the left side of the garage that is maybe 4x10' and is where I have most of my camping gear, paints, flamables, and other misc stuff that I want easy access to.
 

Attachments

  • IMG_20110107_073912 (Large).jpg
    IMG_20110107_073912 (Large).jpg
    68.4 KB · Views: 601
  • IMG_20110107_073922 (Large).jpg
    IMG_20110107_073922 (Large).jpg
    118.9 KB · Views: 678
  • IMG_20110107_073930 (Large).jpg
    IMG_20110107_073930 (Large).jpg
    112.8 KB · Views: 611
  • IMG_20110107_073941 (Large).jpg
    IMG_20110107_073941 (Large).jpg
    108.1 KB · Views: 588
  • IMG_20110107_073950 (Large).jpg
    IMG_20110107_073950 (Large).jpg
    144.4 KB · Views: 581
  • IMG_20110107_073959 (Large).jpg
    IMG_20110107_073959 (Large).jpg
    137.1 KB · Views: 572
  • IMG_20110107_074012 (Large).jpg
    IMG_20110107_074012 (Large).jpg
    107.6 KB · Views: 553
OP
S

Scoutman

Well-known member
Joined
Mar 3, 2010
Messages
161
Location
Huntsville, AL
Here is the layout planner that I used...

...to come up with this.
From the left bottom corner clockwise...
-Parts washer
-Steps to storage room
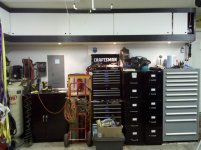
-8' workbench with Harbor Freight 13 drawer built in and space for shop stool or roll around work cart parking.
-Welder
-60 gal IR air compressor
-black 2 door cabinet
-shop press/torch cart
-black craftsman box
-2 heavy black filing cabinets
-gray lyon/lista type heavy cabinet
-steps to house
-beer fridge
-tool cabinet with machininst tool box on top
-drill press
-bandsaw (on rollers)
-lathe
-storage rack

I would eventually like to be rid of the storage rack but I think it will be a while before I'm able to do so. That right wall will be one of the last to be redone so I'll address it then.
 

Attachments

  • myimage.jpg
    myimage.jpg
    111.9 KB · Views: 293
OP
S

Scoutman

Well-known member
Joined
Mar 3, 2010
Messages
161
Location
Huntsville, AL
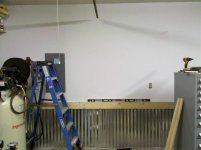
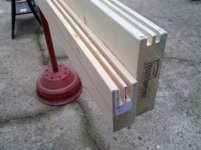
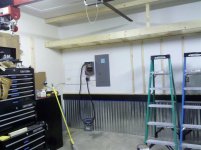
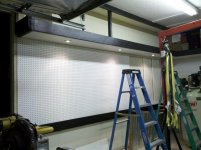
I started with the back wall as it didn't have anything built onto it other than electrical. I used a 2x6 as my 'chair rail' which is where I will eventually run air lines and electrical conduent. A 1.5" tall by .5" deep notch was cut on the back to let the galvanized roofing fit behind. A 12' strip of roofing was enough for (4) 3' high panels so it didn't take much to do a wall and it's only $14 per strip. Granted a lot of this will be covered up when my stuff goes back but oh well.

Then I started cutting grooves in the upper boards for the sliding doors. My little helper getting all the sawdust cleaned up.
 

Attachments

  • IMG_20110116_170453 (Large).jpg
    IMG_20110116_170453 (Large).jpg
    131 KB · Views: 380
  • IMG_20110116_170518 (Large).jpg
    IMG_20110116_170518 (Large).jpg
    85.8 KB · Views: 365
  • IMG_20110130_152456 (Large).jpg
    IMG_20110130_152456 (Large).jpg
    123.8 KB · Views: 381
  • IMG_20110130_152618 (Large).jpg
    IMG_20110130_152618 (Large).jpg
    110.1 KB · Views: 314
  • IMG_20110130_152633 (Large).jpg
    IMG_20110130_152633 (Large).jpg
    134.4 KB · Views: 302
OP
S

Scoutman

Well-known member
Joined
Mar 3, 2010
Messages
161
Location
Huntsville, AL
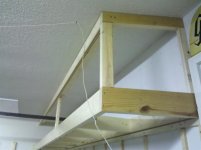
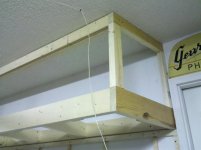
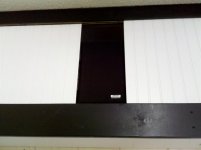
Construction of the upper cabinets on the rear wall.
 

Attachments

  • IMG_20110214_214936 (Large).jpg
    IMG_20110214_214936 (Large).jpg
    68.2 KB · Views: 352
  • IMG_20110214_214914 (Large).jpg
    IMG_20110214_214914 (Large).jpg
    76 KB · Views: 333
  • IMG_20110214_214859 (Large).jpg
    IMG_20110214_214859 (Large).jpg
    86 KB · Views: 374
  • IMG_20110214_214838 (Large).jpg
    IMG_20110214_214838 (Large).jpg
    110.8 KB · Views: 361
  • IMG_20110214_214822 (Large).jpg
    IMG_20110214_214822 (Large).jpg
    116.5 KB · Views: 411
OP
S

Scoutman

Well-known member
Joined
Mar 3, 2010
Messages
161
Location
Huntsville, AL
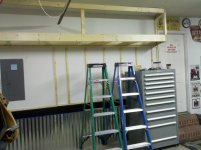
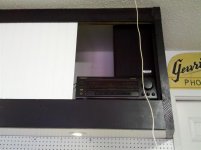
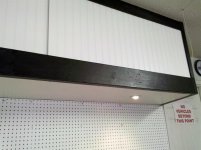
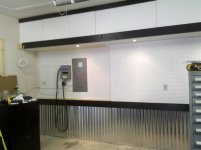
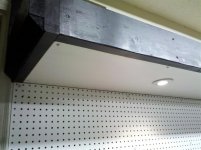
Rear upper cabinets are finished but picts don't show the finger holes I cut in each end of each sliding pannel.

I still have to finish the left end of this wall and get the electrical squared away so I can put up the last sheet of pegboard.

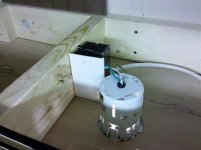
The lights are the $10 each Utilitech 3" cans from Lowes.

Sorry, most of these picts are from my phone and the good ones are on my other camera.

I pre-wired all the cabinets for 3 speakers. The electrical switches for all 3 walls of can lights are right by the door to the house. I had an old receiver and a few Bose bookshelf speakers to use for now.
 

Attachments

  • IMG_20110226_120533 (Large).jpg
    IMG_20110226_120533 (Large).jpg
    60.2 KB · Views: 336
  • IMG_20110226_120523 (Large).jpg
    IMG_20110226_120523 (Large).jpg
    85.2 KB · Views: 384
  • IMG_20110226_120508 (Large).jpg
    IMG_20110226_120508 (Large).jpg
    107.3 KB · Views: 387
  • IMG_20110226_120432 (Large).jpg
    IMG_20110226_120432 (Large).jpg
    124.3 KB · Views: 390
  • IMG_20110226_120355 (Large).jpg
    IMG_20110226_120355 (Large).jpg
    99.8 KB · Views: 422
  • IMG_20110226_120340 (Large).jpg
    IMG_20110226_120340 (Large).jpg
    96.8 KB · Views: 432
  • IMG_20110226_120324 (Large).jpg
    IMG_20110226_120324 (Large).jpg
    103.7 KB · Views: 513
OP
S

Scoutman

Well-known member
Joined
Mar 3, 2010
Messages
161
Location
Huntsville, AL
Beginning wall #2:

I had to dismantle the workbench that I build almost 10 years ago. Lots of memories and projects had happened here as evidenced by the scard and stained 2x6 top. Funny time to reflect when I'm taking it apart.

Pulled off the moulding that covers the bottom of the drywall where it meets the block and got to work with the chair rail and correguated roofing. I only took the roofing down about half way cause the workbench is going to cover the rest.

The boards used to offset the pegboard were painted white so they wouldn't show through as bad and I used white headed screws to finish it all out.
 

Attachments

  • IMG_20110426_220724 (Large).jpg
    IMG_20110426_220724 (Large).jpg
    98.7 KB · Views: 305
  • IMG_20110426_220701 (Large).jpg
    IMG_20110426_220701 (Large).jpg
    89.7 KB · Views: 323
  • IMG_20110426_220653 (Large).jpg
    IMG_20110426_220653 (Large).jpg
    89.4 KB · Views: 336
  • IMG_20110426_220638 (Large).jpg
    IMG_20110426_220638 (Large).jpg
    94.7 KB · Views: 320
  • IMG_20110426_220621 (Large).jpg
    IMG_20110426_220621 (Large).jpg
    146 KB · Views: 326

Jack Olsen

Super Moderator
Staff member
Joined
Mar 22, 2009
Messages
6,678
Location
Los Angeles
That's looking great. I'm amazed at the amount of equipment and tools you're using in such a small space. Even the 'before' pictures are impressive.
 
OP
S

Scoutman

Well-known member
Joined
Mar 3, 2010
Messages
161
Location
Huntsville, AL
Thanks Jack. :thumbup:

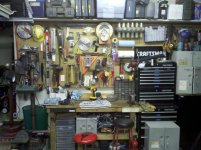
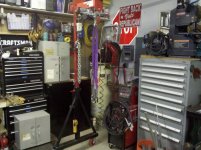
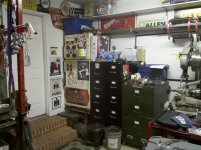
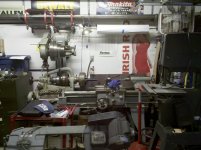
So most of this brings me up to today's status. I will probably take a break for a bit and finish some other things before I tear apart any more parts of the garage. I'll get some better picts of where things stand now but here are the cell picts of where I'm at.

I purchased a Harbor Freight 13 drawer lower cabinet and ordered threaded feet from McMaster Carr (separate thread for workbench build). I need to find some straight lumber (LOL!) and will then begin making my workbench. The plans for the workbench are laminated 2x4's on edge 8' long to make up a 24"x8' solid work top. It will sit on 4x4 corner posts and tie into the chair rail on the wall. Part of the bench top will overhang the steps and the air hose reel will hang below to give me some extended range in the driveway. What space is left is for the roll around tool cart and shop stool or maybe the shop vac. The welder has to stay over in the corner by the AC cause that is where the power is and it can be rolled to anywhere within 55' of the plug. :bounce:


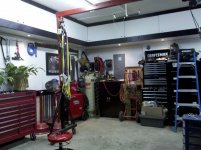
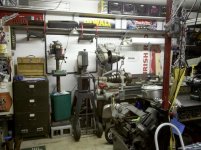
You can see in one of the picts how I rearranged the right side of the garage to group all the 'dirty' machines. I purchased one of the HF wooden machinist tool boxes to hold all my lathe tooling, bits, measuring tools, etc. Down the middle isle is the bandsaw, steel table, tube bender, and barrels. I have (2) 55 gal barrels on casters. One has some heavy floor grating and I use it for the plasma cutter, chop saw (rarely used now with the bandsaw), and the 12" sander. Most of the dust goes into the drum. There are a few concrete blocks in the bottom to keep it from being top heavy. I have different round tops for different tasks (wood, aluminum, X-metal, etc) The other barrel holds scrap wood. The green box under the steel table is all bad scrap steel and the good steel drops are on the shelf. Aluminum is in a bucket. 20' sticks of tube are on the right wall under the shelf and 6' and under drops are on a steel roll around cart that you can't see. All the jackstands are in one place now and believe it or not a lot of the clutter is gone although the picts are sort of confusing at this angle.

Ignore the plants on the toolbox. My wife was changing jobs over the weekend and I set them there while we moved her stuff to the new office. Funny thing is she repotted them and they match the toolbox so they would fit in and give a nice feel to the place right? :spit:

Once I get things where I want them then I will go back and repaint some things red or black so they will fit in with the scheme. I never wanted a fancy floor mainly due to the work and abuse that it would see and also because it is in such poor shape.
 

Attachments

  • IMG_20110509_215744 (Large).jpg
    IMG_20110509_215744 (Large).jpg
    145.1 KB · Views: 750
  • IMG_20110509_215752 (Large).jpg
    IMG_20110509_215752 (Large).jpg
    139.6 KB · Views: 10,589
  • IMG_20110509_215819 (Large).jpg
    IMG_20110509_215819 (Large).jpg
    123.8 KB · Views: 703
  • IMG_20110509_215832 (Large).jpg
    IMG_20110509_215832 (Large).jpg
    119.3 KB · Views: 640
  • IMG_20110509_215842 (Large).jpg
    IMG_20110509_215842 (Large).jpg
    113.9 KB · Views: 614
OP
S

Scoutman

Well-known member
Joined
Mar 3, 2010
Messages
161
Location
Huntsville, AL
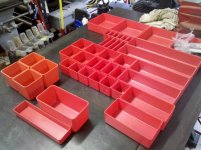
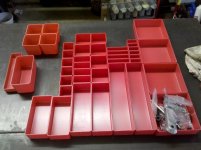
I ordered some organization bins to go in the gray cabinet drawers and help get rid of some of the mismatched organizers. I picked a few of just about every size in the 2" deep bins with a few 3" deep ones too.

Here was what I got to see if I liked them and to decide what sizes I would use the most of.

I ordered direct from Schaller Corp. The red even goes with my color scheme. :thumbup:
 

Attachments

  • IMG_20110514_123853 (Large).jpg
    IMG_20110514_123853 (Large).jpg
    133.6 KB · Views: 89
  • IMG_20110514_123841 (Large).jpg
    IMG_20110514_123841 (Large).jpg
    105.5 KB · Views: 101

jamesemery728

Well-known member
Joined
May 2, 2009
Messages
961
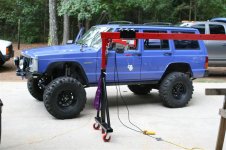
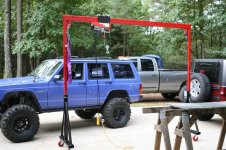
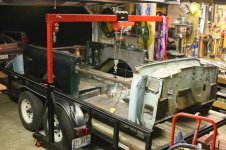
Looks great even before you started. Interesting looking gantry. How about some info on it, pics. Did you make it?
 
OP
S

Scoutman

Well-known member
Joined
Mar 3, 2010
Messages
161
Location
Huntsville, AL
Looks great even before you started. Interesting looking gantry. How about some info on it, pics. Did you make it?

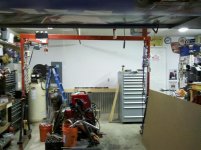
Yes. I made it to be adjustable height so it would work inside for small jobs or outside for tall jobs. It works great and saves me from trying to pick up things I shouldn't be. Most of the time I'm working alone in the garage so it makes things easier and is much more user friendly for most jobs than an engine hoist. It's tall enough to take the hardtop off my wife's JK and is wide enough to straddle the trailer. I've lifted my Scout tub onto it without any problems.

Here's the build thread I did over on Pirate.
 

Attachments

  • IMG_1283 (Medium).JPG
    IMG_1283 (Medium).JPG
    77.9 KB · Views: 310
  • IMG_1284 (Medium).JPG
    IMG_1284 (Medium).JPG
    99.6 KB · Views: 299
  • IMG_1279 (Medium).JPG
    IMG_1279 (Medium).JPG
    63.7 KB · Views: 274
  • IMG_2019 (Medium).JPG
    IMG_2019 (Medium).JPG
    88.2 KB · Views: 318
OP
S

Scoutman

Well-known member
Joined
Mar 3, 2010
Messages
161
Location
Huntsville, AL
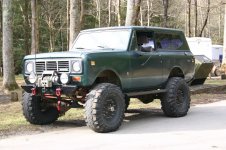
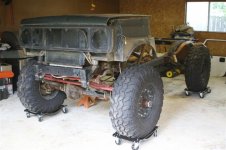
So in those last few picts you can see one of our primary project rigs the 96 Jeep XJ. My baby is a 76 Scout II. Here is a shot of her in her prime a number of years ago. I'm slowly getting it back over to my place to work on again as the big pieces have been over at a friends shop for the last few years. The shot with no body was a few years ago right before I pulled and sold the tires and axles.

Some day she'll run again.
 

Attachments

  • tellico1-05scout.jpg
    tellico1-05scout.jpg
    145.5 KB · Views: 189
  • IMG_1415 (Medium).JPG
    IMG_1415 (Medium).JPG
    68.5 KB · Views: 171
OP
S

Scoutman

Well-known member
Joined
Mar 3, 2010
Messages
161
Location
Huntsville, AL
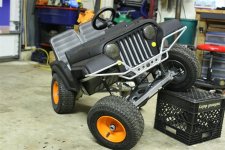
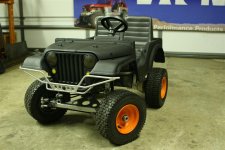
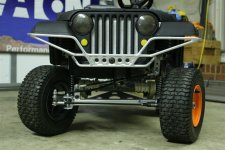
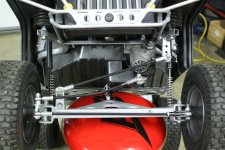
Here's a project I built for my son.
 

Attachments

  • Picture 064 (Large).jpg
    Picture 064 (Large).jpg
    119.9 KB · Views: 422
  • Picture 015 (Large).jpg
    Picture 015 (Large).jpg
    49.3 KB · Views: 334
  • Picture 034 (Large).jpg
    Picture 034 (Large).jpg
    61.2 KB · Views: 348
  • Picture 049 (Large).jpg
    Picture 049 (Large).jpg
    77 KB · Views: 449
  • Picture 003 (Large).jpg
    Picture 003 (Large).jpg
    98 KB · Views: 396
To avoid these ads, REGISTER NOW!
OP
S

Scoutman

Well-known member
Joined
Mar 3, 2010
Messages
161
Location
Huntsville, AL
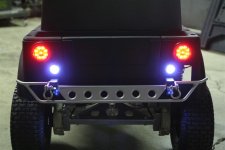
LOL. The Jeep started out as a side of the road find. It needed some TLC but most things were in working order with nothing major missing. Then the ideas for a rock crawler started coming in. It is a 93 model metal framed Power Wheels Barbie Jeep. Obviously the pink had to go. Almost all parts were made from scratch. Some stats...

-dimple die'd sheet metal belly pan
-1 link suspensions front and rear with track bars
-gas shocks on all 4 corners
-steering box from John Deere tractor
-round rod and dimpled sheet for bumpers with 1/4" SS clevis'
-solid axles front and rear
-limiting chains
-LED headlights, running lights, tail lights, rock lights (underneath)
-LED reverse lights (only when in reverse and pushing pedal)
-18v high and 12v low speeds
-truck starting solenoid for power transfer
-40A auto resetting circuit breakers
-13" pneumatic tires (no pressure needed)
-3M undercoating lined body, Krylon Fusion for remaining plastic
-Silver chassis
-Provisions for a winch (I have the idea, but havne't bought parts yet)
 
OP
S

Scoutman

Well-known member
Joined
Mar 3, 2010
Messages
161
Location
Huntsville, AL
More picts...
 

Attachments

  • 20096181436_IMG0545800.jpg
    20096181436_IMG0545800.jpg
    46.4 KB · Views: 239
  • Picture 006 (Large).jpg
    Picture 006 (Large).jpg
    99.7 KB · Views: 215
  • Picture 057 (Large).jpg
    Picture 057 (Large).jpg
    94.5 KB · Views: 251
  • Picture 045 (Large).jpg
    Picture 045 (Large).jpg
    111.6 KB · Views: 276
  • Picture 010 (Large).jpg
    Picture 010 (Large).jpg
    86.5 KB · Views: 251
  • Picture 050 (Large).jpg
    Picture 050 (Large).jpg
    86.2 KB · Views: 232

fergus

Well-known member
Joined
Oct 4, 2009
Messages
1,620
Location
Yolo County CA
Dude...mad amounts of equipment. Nice makeover...I like that white and black setup with the tin roof. Looks real usable for that amount of stuff in a 2 car. Or 2-truck. Whatever...
 

UN4GTBL

Well-known member
Joined
Oct 26, 2007
Messages
434
Damn thats one awesome little jeep.

i actually built a little car off of the frame of one of those once upon a time. its long gone, and it didn't have anything but the frame left when i found it, but it was lots of fun.
 
OP
S

Scoutman

Well-known member
Joined
Mar 3, 2010
Messages
161
Location
Huntsville, AL
I had a fellow request more details on the cabinets and I meant to get this posted weeks ago but got ******* at work.

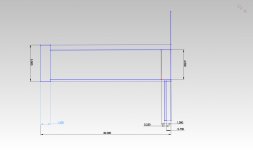
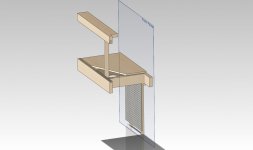
Here's a crude drawing of what I did and some basic dimensions.

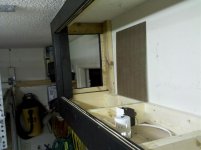
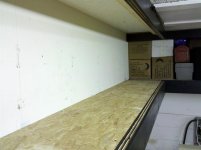
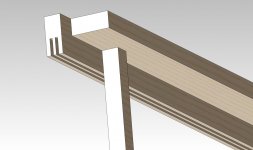
The wall would be on your right in the drawing... The right board is a 2x6 that has been ripped down to be 4.5". This dimension plus the 5/8" osb on top for the shelf and the 1/4" bottom sheet roughtly make up a full 2x6 at around 5.5" tall (the board on the left). The board on the left is the one that has the door grooves cut into it. The 2 boards at the bottom are the 1x2 strips for the pegboard and the pegboard itself. I hope all this makes sense but it all fit together nicely in the end and meant that the shelf and lower sheet were both tucked behind the outtermost 2x6 that the doors slide into. It made for a clean look to me.
 

Attachments

  • Part1.JPG
    Part1.JPG
    146.2 KB · Views: 79
OP
S

Scoutman

Well-known member
Joined
Mar 3, 2010
Messages
161
Location
Huntsville, AL
These may show it better.
 

Attachments

  • overhead cabinet-1.jpg
    overhead cabinet-1.jpg
    69.3 KB · Views: 132
  • overhead cabinet-2.jpg
    overhead cabinet-2.jpg
    93.5 KB · Views: 117
  • overhead cabinet-3.jpg
    overhead cabinet-3.jpg
    95.8 KB · Views: 113

bobemmerich

Well-known member
Joined
Aug 23, 2009
Messages
1,611
Location
Middletown, Ct.
Awesome . The mini-jeep is pretty cool, too. One question, where did you get the Allen Tool sign? I've searched and can't find anything. Most of my hand tools are Allen, and it would be cool to have one.
Keep the pics/updates coming.
 
OP
S

Scoutman

Well-known member
Joined
Mar 3, 2010
Messages
161
Location
Huntsville, AL
Awesome . The mini-jeep is pretty cool, too. One question, where did you get the Allen Tool sign? I've searched and can't find anything. Most of my hand tools are Allen, and it would be cool to have one.
Keep the pics/updates coming.

I used to work at Fastenal and they were clearing out a bunch of 'junk' so I ended up with them.
 
OP
S

Scoutman

Well-known member
Joined
Mar 3, 2010
Messages
161
Location
Huntsville, AL
I couldn't agree more! Your place looks great!

Thanks guys.

Not many updates other than a new black beer fridge. The old one finally died, I bought a rough one off of CL for $30 and killed it when I cleaned it so just decided to bite the bullet and get a new one.
 

Scout Driver

Well-known member
Joined
Nov 20, 2009
Messages
4,286
Location
South Dakota
Wow!! Just found this thread today and I'm lovin' every bit of it. The garage turned out great. I really like the overhead cabinets with the sliding doors. Very cool little Jeep too. Really impressed with the Scout. Looks stout and well engineered just by looking at the steering/suspension setup.

Looking forward to seeing more. :thumbup:

Scott
 
To avoid these ads, REGISTER NOW!
Top Bottom