Clutches on sewing machine predate the electric motor, they were originally lineshaft driven.
The problem with most clutch motors is the clutch is shot. No one adjusts them, no one lubricates them, and they're grabby as all get out. Properly set up, they're actually pretty easy to use, and work well. But worn out, they ****, and for what a servo costs, a worthwhile upgrade. they're also a lot quieter, which is a nice bonus.
I never adjusted the clutch motors I had. They seemed to work just fine, but they did make it tricky to learn to sew on an industrial machine. I suspect if you never learned a car or motorcycle clutch the concept would be totally new.
I'd never sewn on any machine (other than playing with my mom's when i was a kid) before my first industrial, so I didn't really know what to expect. I had to learn everything from scratch. My first machine was a Singer Industrial, but it was a non-walking foot machine - so it wasn't what i needed but I used it anyway. I had to use the clutch because I couldn't afford to replace the motor. When I finally did, it was nice, but I already had the clutch technique down, so I can't say it was a game changer.
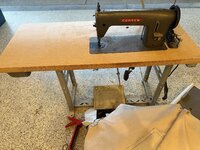
I have only run it to make sure everything worked as designed (forward, reverse, walking foot, bobbin filler, motor and clutch) and even with my knowledge of feathering the clutch, OMG it’s fast. There is some rust on the bobbin cover that I am going to remove. I plan to clean/oil it up and practice on some scrap fabric. If I can’t learn to control the clutch, I’m going straight to a servo set up. Thanks for helping out.
The difference with the clutch motor is it runs all the time and you use the pedal to engage the drive, while the servo turns on when you push the pedal. I would say the clutch has more power than a servo at low RPM, but it's also much harder to control - you've got to feather the clutch. Once you learn to sew at higher speed, the advantage of the servo is negated somewhat. Obviously since the clutch motor runs all the time it makes more noise and probably uses more electricity, but the ones I've had were pretty quiet.
There are a bunch of oiling points on the machine - the owners manual will point them all out. I just put a drop of oil in every oil point before I sit down to work - it takes about 30 seconds. Probably the only tricky things are: 1. balancing the tension between top and bottom threads and 2. Timing the machine.
You shouldn't really ever have to time the machine, but industrial machines tend to sew really heavy materials and sometimes they get jammed and the timing gets thrown off.
I've bought two used machines that needed re-timing. If the machine skips or misses stitches or won't stitch, then the timing is probably off. It sounds really onerous, but it's not. The way a sewing machine works is the needle pierces the material stretching the top thread through. Just as the needle starts to come back up and the top thread bulges away from the needle a metal hook passes by, grabs the top thread and loops it over the bottom thread, forming a stitch.
So setting timing is setting up the relationship between the position of the needle and the position of the hook. It needs to be pretty precise, because a machine can do a up to 80 stitches a second. Usually you set the position of the needle at a certain distance above the bottom of the stroke and then loosen a screw and set the tip of the hook to line up with the needle at that point. Every machine is slightly different so you need the manual to do this.