To avoid these ads, REGISTER NOW!

Show us your sewing projects!

kerrynzl

Well-known member
Joined
Nov 8, 2013
Messages
5,054
Location
Tauranga, New Zealand
Squinting helps a lot :)

You're only focusing on your sewing [have a look at the overall job]

If you ever pulled apart any manufactured furniture, you'd swear they used a "seeing eye dog" to help them sew.


Here is my latest work ! One of these "It pissed me off so I finally needed to fix it" Jobs

I do a bit of Dumbbell weight training on a bench at home.
Whenever I finish a set, I sit up and lower the weights to the floor. But the problem is my dumbbells kept catching on the pockets of my tracksuit pants.
This resulted in twisting wrist injuries and ripping the tracksuit pockets. [65lb dumbbells always win]

So I was going to sew the pockets shut, then I had an idea. ......... Sew some zips into the pockets
I had some leftover continuous chain zip and a couple of sliders so I sewed these into the existing pockets [after unpicking the ends]

Sewn blind from the under side [while inside out]
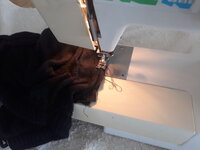
20240306_154137.jpg

20240306_154143.jpg

Then I turned it back in and threaded the sliders on !
And sewed across the ends so the sliders wouldn't come off

20240306_155015.jpg

20240306_155249.jpg

I should've done this months ago

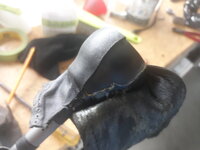
While I was "on a roll" I decided to sew the thumbs on my training gloves back together [I use cheap cyclist gloves]

20240306_160208.jpg

20240306_160436.jpg

So don't look too closely ! This ^^^^ isn't my proudest work [Fine Craftsmanshit 😁😁]
 
To avoid these ads, REGISTER NOW!

mike93lx

ALLIANCE MEMBER
Joined
Dec 9, 2013
Messages
37,722
Location
Richmond, VA
You're only focusing on your sewing [have a look at the overall job]

If you ever pulled apart any manufactured furniture, you'd swear they used a "seeing eye dog" to help them sew.


Here is my latest work ! One of these "It pissed me off so I finally needed to fix it" Jobs

I do a bit of Dumbbell weight training on a bench at home.
Whenever I finish a set, I sit up and lower the weights to the floor. But the problem is my dumbbells kept catching on the pockets of my tracksuit pants.
This resulted in twisting wrist injuries and ripping the tracksuit pockets. [65lb dumbbells always win]

So I was going to sew the pockets shut, then I had an idea. ......... Sew some zips into the pockets
I had some leftover continuous chain zip and a couple of sliders so I sewed these into the existing pockets [after unpicking the ends]

Sewn blind from the under side [while inside out]
20240306_154137.jpg

20240306_154143.jpg

Then I turned it back in and threaded the sliders on !
And sewed across the ends so the sliders wouldn't come off

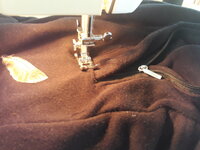
20240306_155015.jpg

20240306_155249.jpg

I should've done this months ago

While I was "on a roll" I decided to sew the thumbs on my training gloves back together [I use cheap cyclist gloves]

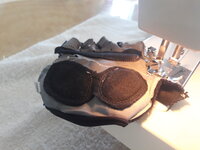
20240306_160208.jpg

20240306_160436.jpg

So don't look too closely ! This ^^^^ isn't my proudest work [Fine Craftsmanshit 😁😁]
Don't get me wrong, I am super happy with the result. That case has been annoying me since I got it and it was great working with what I have instead of buying some other cheap junk on Amazon to take its place.

I had tried to get red stitching to match, but I'm glad I ran the dark blue.

I'm looking forward to practicing some more.
 

Modern Garage

Well-known member
Joined
Mar 26, 2015
Messages
583
Location
Southern Minnesota
I finally bought a walking foot machine (just sold a couple of projects and feeling flush). I looked at a couple of dozen different machines and finally realized I didn't want to dedicate a large space so one of the portables would fit my needs better. I settled on a Consew CP206RL - like the machine Sailrite has marketed so well but with an extra two inches of space under the arm. There are about a zillion of these clones out there with different names on them and I chose the Consew because it came from an actual dealer so I could hope for some support and be less likely to get a conglomeration of rejected parts sold as a working machine. I've read that these machines require break-in time and boy is that right! Out of the box I popped off the top cover and lubed everything that moved, top and bottom, then ran it without thread. After ten or so minutes I could smell the motor getting hot. Not burnt electrical smell but just hot metal smell so I walked away for a half hour then came back and did the same again. I had to do three cycles of that before it would run freely and I could feel it getting better every time I used it for the next few hours.
First project was new cushions for a vintage glider Mrs. Garage found at a garage sale. I could have sewed these with my 50's White home machine but the walking foot made it almost effortless, and the piping channel under the feet made creating piping way easier, too. I had been using a zipper foot for piping and guiding the material carefully to keep it straight. I just finally bought piping feet for my White but hadn't used them when I bought the Consew - this is like cheating.
I made a couple of tiny mistakes on this project, and I didn't realize how much material the piping would consume. I ended up with NO scraps left, I used every inch, but I'm proud of how it turned out. The cushions are reversible and I was extra careful to make sure the pattern lined up from the seat to the arm cushions on both top and bottom. One other lesson I learned is what a PIA it is to cover buttons. The outdoor fabric was too thick to snap the buttons together so I just cut and hemmed circles of fabric then wrapped and sewed them on with thread cris-crossing the back of the button. My chunky fingers don't like tying so many knots in this tiny slippery polyester thread!
Joe
 

Attachments

  • IMG_9513.jpg
    IMG_9513.jpg
    220.7 KB · Views: 64

metlmunchr

Well-known member
Joined
Sep 10, 2011
Messages
1,278
My chunky fingers don't like tying so many knots in this tiny slippery polyester thread!
I've got a Consew 225 walking foot machine. Tying knots in thread made me feel like the most fumble fingered fool on earth. My wife is a nurse, and she brought home some hemostats and other similar things they were throwing away at her work with the thought that I might use something from the pile. Then she showed me how to tie knots using the hemostat, and with a bit of practice you won't believe how something can go from near impossible to easy as can be. Hemostats are available on Amazon for 5 or 6 bucks. They typically have a toothed locking mechanism that allows them to positively clamp something (like a suture needle I guess), but for use in knot tying I found it better to grind off the locking teeth.
 

dscheidt

Well-known member
Joined
Apr 26, 2017
Messages
2,905
I've got a Consew 225 walking foot machine. Tying knots in thread made me feel like the most fumble fingered fool on earth. My wife is a nurse, and she brought home some hemostats and other similar things they were throwing away at her work with the thought that I might use something from the pile. Then she showed me how to tie knots using the hemostat, and with a bit of practice you won't believe how something can go from near impossible to easy as can be. Hemostats are available on Amazon for 5 or 6 bucks. They typically have a toothed locking mechanism that allows them to positively clamp something (like a suture needle I guess), but for use in knot tying I found it better to grind off the locking teeth.

The general class of medical instrument for pinchy-squeezey stuff is the forceps. There are huge numbers of them, some super specialized, and others pretty common. Lots of them are available in pretty decent quality for fairly cheap, in non-surgical grades.
hemostats are used to clamp blood vessels shut during surgery. They get used for IV tubes and other sorts of clampy stuff, too. Needle holders are similar, but have shorter jaws and higher leverage to grab a needle tight. They're both very handy for sewing. so are some the little tweezery things, but the trick is figuring out what they're called.
 

WoodsTruck

Well-known member
Joined
Jan 12, 2013
Messages
1,025
so are some the little tweezery things, but the trick is figuring out what they're called.
ebay search for "tweezery things"?
I saw on here somewhere, the use of one that had a hoop end to hold wires for soldering. Fellow Bronco owner picked me up one at a swap meet. Works, but the hoop is too small so I need to find one with a larger "window".
 

Outlawmws

Well-known member
Joined
Aug 9, 2011
Messages
39,291
Location
The Badlands
Forceps are apparently either the scissor handled "pliers" or Tweezers based - either set open or grip to open. I have some of all the above. Some former medical, some hobby/industrial (one open on grip tweezers has wood grip panels... :dunno: )
 

Bob Heine

ALLIANCE MEMBER
Joined
Oct 24, 2009
Messages
10,707
Location
Boca Raton, Florida
ebay search for "tweezery things"?
I saw on here somewhere, the use of one that had a hoop end to hold wires for soldering. Fellow Bronco owner picked me up one at a swap meet. Works, but the hoop is too small so I need to find one with a larger "window".
@WoodsTruck, those are gauze or sponge forceps and you're right about the window being small for soldering. You might want to pick up a pair of soldering pliers for holding the wires.
Soldering Pliers.jpg
Amazon has them on sale at the moment: https://www.amazon.com/gp/product/B0BSGG7T3G/?tag=atomicindus08-20

My forceps and tweezers seem to multiply in one of my pliers drawers. Among the different kinds, I've found forceps that are handy for retrieving small things that fall into unreachable places. The three at the top of the photo with the little jaw at the end are Alligator forceps.
Forceps and Tweezers.jpg
 

Modern Garage

Well-known member
Joined
Mar 26, 2015
Messages
583
Location
Southern Minnesota
I actually have a couple of different forceps here but never tried to tie knots with them.
But this is the internet age... I should be able to find a tutorial on almost anything.
Joe
 

kerrynzl

Well-known member
Joined
Nov 8, 2013
Messages
5,054
Location
Tauranga, New Zealand
My chunky fingers don't like tying so many knots in this tiny slippery polyester thread!
Joe

You don't !!!

You reverse sew it 3 stitches minimum
Forward 3 stitches, then Reverse 3 stitches, then start sewing [the opposite at the finish end]

In the 47 years I've been sewing , I've never used forceps or tweezers
When it came to pushing out corners after turning jobs inside out, I use the back side of the scissors tip .[or a plastic picnic knife]
Also with polyester thread , spray the reels with silicone spray to lube it [or it tries to "untwine" as it passes through the needle]

@snorvet Beautiful work, especially when you can hand stitch as good as a machine stitch [That takes some skill] 👍👍👍
 

snorvet

Well-known member
Joined
Oct 29, 2005
Messages
777
Location
Northern Illinois
You don't !!!

You reverse sew it 3 stitches minimum
Forward 3 stitches, then Reverse 3 stitches, then start sewing [the opposite at the finish end]

In the 47 years I've been sewing , I've never used forceps or tweezers
When it came to pushing out corners after turning jobs inside out, I use the back side of the scissors tip .[or a plastic picnic knife]
Also with polyester thread , spray the reels with silicone spray to lube it [or it tries to "untwine" as it passes through the needle]

@snorvet Beautiful work, especially when you can hand stitch as good as a machine stitch [That takes some skill] 👍👍👍
Thanks!
 

Modern Garage

Well-known member
Joined
Mar 26, 2015
Messages
583
Location
Southern Minnesota
Hi Kerry, not having any trouble with the seams, just those damn buttons. I didn't take any pictures, but to cover them I just wrapped fabric around to the backside and tied threads back and forth across the diameter in five or six places knotting each time. The threads through the cushion to hold the buttons front and back was another minor struggle.
Joe
 

NBraun

Well-known member
Joined
Sep 14, 2020
Messages
158
Not as impressive as some of the other projects on here, but here's my contribution. I like to wear Carhartt vests. Unfortunately as the sizes go up, they don't really get any longer, just wider. My wife suggested I try and make my own. She's the sewist, but she walked me through how to do everything and I think it turned out pretty good.
 

Attachments

  • EImB9L5.jpg
    EImB9L5.jpg
    176.2 KB · Views: 73

mike93lx

ALLIANCE MEMBER
Joined
Dec 9, 2013
Messages
37,722
Location
Richmond, VA
Not as impressive as some of the other projects on here, but here's my contribution. I like to wear Carhartt vests. Unfortunately as the sizes go up, they don't really get any longer, just wider. My wife suggested I try and make my own. She's the sewist, but she walked me through how to do everything and I think it turned out pretty good.
Pretty good? Lol.

Looks great
 
To avoid these ads, REGISTER NOW!

dscheidt

Well-known member
Joined
Apr 26, 2017
Messages
2,905
Just finished a long seam and thought "Gee, I haven't checked my bobbin thread lately."
Like one of my friends says; I'll take luck over skill any day.
Joe
I never win at bobbin chicken. many machines make a little rattling noise as the bobbin gets empty (it moves more in the bobbin holder). If you can hear that, you know it's time to change the bobbin. (mine does, but only at high speed, and I don't usually sew at 3000 stiches/min). I was always amazed at a friend who would say "change the bobbin" to people using a machine at a makerspace, until she told me what she oculd hear.
 

kerrynzl

Well-known member
Joined
Nov 8, 2013
Messages
5,054
Location
Tauranga, New Zealand
Tent/sleeping bag zippers drove me nuts assembling...

Try getting 3-way zip sliders in phase on a hiker tent entrance with continuous chain zips.

That is when you have bottom side of the chain goes all the way across the bottom.
The top side goes half way along and turns 90° and goes UP, and the other side is a mirror opposite.

The whole lot resembles an inverted "T" but all the sliders meet in the centre when closed.
It takes a bit of practice to mesh them in phase but can be done

The secret is to start in the centre and go down, then start on one side and go across, THEN make sure there isn't a twist in the 3rd side AND plenty of excess to chop off [when you phase the last side]
I use to staple the last side out to get the lengths approx correct

Doing this ^^^^ was my 1st job after school back in 1976 at a tent manufacturer
 

Bad Mojo

Well-known member
Joined
Sep 2, 2012
Messages
119
I was fortunate to be able to pick up a Juki industrial machine, but I am realizing I am in situation similar to a having a drill with no drill bits. I am looking for some guidance on the items/tools that support the sewing machine. IE measuring equipment, marking, cutting, etc. I am also interested in the little things that made sewing setups easier or more enjoyable to use.
 

Outlawmws

Well-known member
Joined
Aug 9, 2011
Messages
39,291
Location
The Badlands
I am also interested in the little things that made sewing setups easier or more enjoyable to use.

You may have more than you think, but start with the maintenance manual and proper lubricants for the machine:

Good sharp shears and snipers for cutting the cloth and thread (you may want different sizes and types of scissors), Pinking shears as well for some jobs; Yardstick, cloth tape measure, regular tape measure; Taylor's Chalk for marking; Needle threader; Tweezers for threading also. Thimble that actually fits, (they make different sizes); a good seam ripper (BTW the beaded prong goes UNDER not over - Its so you don't snag the material.) any machine specific drivers or wrenches.

Much bigger is a large table for laying out and cutting for doing large projects, (typically lightly padded and cloth covered).

And the machine setup so you have sufficient out-feed (and sometimes in-feed) to do the task at hand.

The bigger the job, the more space you need.
 

kerrynzl

Well-known member
Joined
Nov 8, 2013
Messages
5,054
Location
Tauranga, New Zealand
I was fortunate to be able to pick up a Juki industrial machine, but I am realizing I am in situation similar to a having a drill with no drill bits. I am looking for some guidance on the items/tools that support the sewing machine. IE measuring equipment, marking, cutting, etc. I am also interested in the little things that made sewing setups easier or more enjoyable to use.

Flat Sew [Needle Feed] or Walking Foot ??

If it is a walking foot, try and get a couple of extra presser foots. And cut them back for sewing piping and bulk ropes [1 left and 1 right]
These also are great for sewing zips.

I always find sewing one direction is better for zips [and many other situations] so it is preferable to swap the foot than to change direction and sew back up the other side.

Get yourself a Hot Knife [poor man's overlocker 😁]
And for your sewing machine a good swivel mounted Back light

I also use an electric stapler to pin fabrics on a table for marking and cutting [ I try to cut shapes to the warp and weft of the fabric ]
I NEVER use a knife for cutting only scissors, Get some long scissors and learn to cut in longer strokes and it will be straighter

If you're left handed [like me] learn to use R/H scissors because the R/H side of the sewing machine is where you place them while sewing [and a lot of L/H scissors available are only R/H scissors with L/H handles]


And start sewing ............... You can develop new skills from using basic tools [get some "miles" behind you]
-----------------------------------------------------------------------------------------------------------------------------------------------


I just started Hand Sewing "baseball stitching" the other day

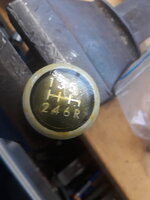
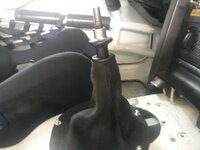
I'm in the process of putting a Subaru shift lever in my Mustang [I need the pull-up ring on the lever for a reverse lockout]
The shift knob was like this
20240407_144617.jpg

I ruled a line then glued it
20240410_152820.jpg

Then glued some soft leather [and walked away and had a cup of coffee]
20240410_153020.jpg

Heat Gun and stretch it [baseball stitch the join]
20240410_155824.jpg

Glue the top
20240410_161528.jpg

Press it all together and Urethane the top and the base ring together
Total cost was $1-00
20240417_164119.jpg
 
Last edited:

WoodsTruck

Well-known member
Joined
Jan 12, 2013
Messages
1,025
I have a swing-away binder attachment which I also made a fold-over hemmer piece to use the swing arm. Quite handy for edging material.
For some material I use a rotary cutter (pizza cutter with a spring loaded guard) with a 4' aluminum ruler on a plastic cutting mat. The mat isn't big enough, so I had to tape another one to it so I don't run off the board before I hit the 4' mark.
Believe it or not, I found a pair of scissors out in the woods one day that have the grabby teeth on both blades. They work awesome for the heavier material I typically so since they tend to hold the material and not push it out while you try to cut. Plus a little pair of snippers.
Magnetic LED light that I have positionined by the thread arms so the needle area is mostly lit when I get inside bags or working with very dark materials.
Lots of bobbins: I try to load up as many as I can when I do it so I can simply reach for anther one during a project. https://www.sewingpart.com/category-s/1704.htm
 

WILD-BILL

Well-known member
Joined
Dec 10, 2011
Messages
875
Location
Brook Park Oh
The mat isn't big enough, so I had to tape another one to it so I don't run off the board before I hit the 4' mark.
How big is your working table and how big of a may would you think you'ld like?

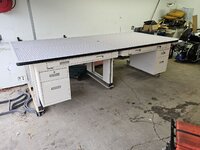
My sewing Table is 5'x10' And they do make mats that big and IIRC I think slightly bigger.
Sewing table 00005.jpg

It wasn't what Id call cheap though and I do have an older 2 1/2(or3) x 5' mat that I use for smaller pieces that don't justify dragging this beast out.
 

WoodsTruck

Well-known member
Joined
Jan 12, 2013
Messages
1,025
You assume I have room for a table that big.
I have a full roll of 600/PVC material that I started to make a product with so I made a dispenser that mounts to the wall of the shop, rolling it out on a glass surface to cut with a hot knife.
The rest I either cut on the floor(using my cutting mats) or the kitchen island with scissors.
Red units are covers for 10 gallon Igloo water coolers I think I posted before.
White unit is a top cover for my dads ATV cab since he blows/plows snow with them in the winter.
 

Attachments

  • IMG_1449.jpg
    IMG_1449.jpg
    790.7 KB · Views: 36
  • IMG_3571.jpg
    IMG_3571.jpg
    512.7 KB · Views: 23

WILD-BILL

Well-known member
Joined
Dec 10, 2011
Messages
875
Location
Brook Park Oh
You assume I have room for a table that big.

Not at all.

Simply offering that larger mats are available if you desire.

I thought long and hard about weather I wanted to sacrifice the garage space for this table.

Ultimately decided that if I really want to try and make a business out of it a large table would be invaluable.

I tried doing some on my dining room table but the lower height made my back hurt from the way I was bending over to work.

Most of my boat interior was all done on the floor. (before I got the table)
 

kerrynzl

Well-known member
Joined
Nov 8, 2013
Messages
5,054
Location
Tauranga, New Zealand
Bumping this thread.....

I purchase some "******** Alcantara" [faux suede] for a shifter boot/gaiter for my race car.
But I needed to practice on something else.


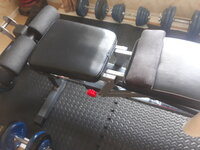
I had a temporary pad made for my gym bench [a real shameless job made from an old T-shirt stapled to some wood😁 ] So I decided to upgrade this.

1738224838717.jpeg

Showing the top stitching [the join on the border is a "French seam"]
1738224939684.jpeg


After stapling to the base , here is the finished result. [I need it to fill the gap when "Flat Benching"]
1738225220445.jpeg

It lifts out when I incline bench or shoulder press
1738225356957.jpeg


A simple Job to get me into practice before I tackle my race car shifter.
 
Last edited:

kerrynzl

Well-known member
Joined
Nov 8, 2013
Messages
5,054
Location
Tauranga, New Zealand
I'll try and revive this thread as a How-to for the shifter boot/gaiter for my race car.
[so this will be over a few postings, but feel free to comment / question / criticise etc]

This boot will be made from faux suede [******** alcantara🍺] because it is cheap.
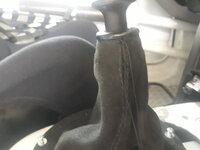
I wanted the boot to be a cone or witches hat shape with only 1 vertical seam away from the line of sight.
This join will be a "french seam" which is a challenge on deep cone shapes.

Most shifter boots are normally made from 4x triangle panels

Why the new shifter boot! Because the new lever is offset and has a plastic cone for a "pull-up ring" on the lever.

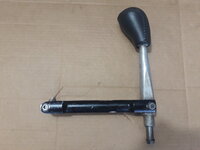
Here is the old remote shift lever
1740213041946.jpeg

And the new shift lever [showing the offset ]
1740213132546.png

This is the plastic cone for a "pull-up ring" [the boot needs to slip over this AND be tight under the lip/edge]
1740213291506.png

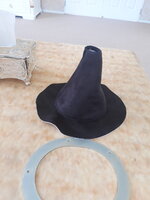
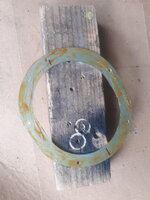
This is the base ring I got laser cut to screw direct to the tunnel [normal cars clip this underneath the console]
The ring was zinc plated so contact glue will stick to it without rusting.
1740213669559.jpeg

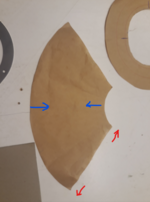
I calculated and scribbled out a pattern for the offset [the rear "blue" is shorter than the front "red"] and also pattern for the base
1740213512708.png
 
Last edited:

kerrynzl

Well-known member
Joined
Nov 8, 2013
Messages
5,054
Location
Tauranga, New Zealand
Here is the Faux Suede pieces being cut out
1740213938408.jpeg

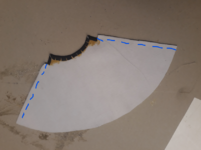
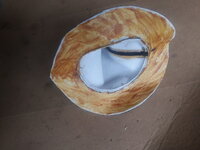
The top edge was "glue hemmed" with contact glue.
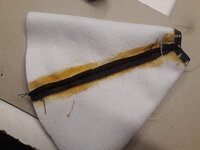
If you look closely there is a hair line! This is polyester cord used like a "bulk rope"

I then sewed along the blue lines right up the side, along the top and back down the other side [the sewing isn't shown here]
1740214182052.png

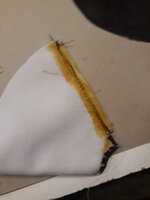
Here is the polyester cord [this is to prevent the edges from ripping]
1740214274812.jpeg


Then I sewed the cone together [run seam that is backtacked at the top and bottom]
Then both sides of this seam were glued to create a Faux "French Seam"
1740214388473.jpeg

The French Seam is glued down [and flattened with a roller]
The top of the cone remains open to slip over the plastic cone on the lever.
1740214533121.jpeg
 

kerrynzl

Well-known member
Joined
Nov 8, 2013
Messages
5,054
Location
Tauranga, New Zealand
Trial fit [you can see the cone offset here]
1740215236584.jpeg

The Transmission and lever installed . The shifter boot was twisted 90° clockwise so I can get access to "baseball stitch" top of the boot.
1740215418228.jpeg


I use the simple 2 needle technique to Baseball Stitch [it is simple like lacing shoes]
This also explains why I used polyester cord around the top edge.

This stitch appears loose but I had to push the boot upwards so the cone was loose enough to rotate the boot back 90° [anti-clockwise] when finished.
1740215596502.jpeg


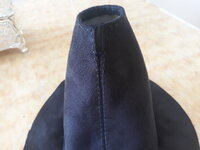
The finished product with the knob installed [getting eager to go racing again]
no vertical seams are showing

1740215880503.jpeg
 
Last edited:
To avoid these ads, REGISTER NOW!
Top Bottom