Outlawmws
Well-known member
Very nice work and write up!

That's a nicely done shift boot Kerry. You are racing in the lap of luxury! I've never had a shift boot in a race car. Just a naked shifter.

Wow, impressive
Very nice work and write up!
Top notch work and explanation. Thanks for sharing.
jhn9840
John
I've just finished a re-upholstery job for a friend who didn't like the color of the chair she inherited. Simple job except the original assembly guys were apparently paid by the staple. They were shoulder to shoulder. I did learn how to fold and sew 'hider gimp' though, so I've got that under my belt. (I could show pics but you'll get a better view if you look for Sailrite's video.)
Now I'm onto a porch glider I curb picked last Fall. I finished the first cushion today and I'm wondering if there's another technique I don't know for closing the box cushions. I've installed zippers and Velcro and also hand stitched the closing seam with a blind stitch, which I did today. Is there any other closing method I haven't learned yet? I like the looks of the blind stitch but it sure is slow.
Joe

Kerry, I love the boot and knob but it appears the seat and steering wheel are on the wrong side. I had a friend shift the van when we were visiting New Zealand. He wasn't comfortable driving on the proper side but was happy to synchronize the lever with my clutch pedal and it quickly became a fun ride. When I reserved the van I asked for an automatic and the line kinda went dead. Apparently the idea of an automatic in a van was totally foreign. On the way to Mount Hutt, we pulled over to let our friends see the South Island's herd of sheep (I failed to mention that you have more).The finished product with the knob installed [getting eager to go racing again]
no vertical seams are showing

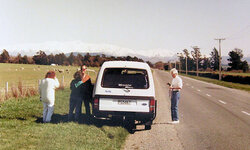
Kerry, I love the boot and knob but it appears the seat and steering wheel are on the wrong side. I had a friend shift the van when we were visiting New Zealand. He wasn't comfortable driving on the proper side but was happy to synchronize the lever with my clutch pedal and it quickly became a fun ride. When I reserved the van I asked for an automatic and the line kinda went dead. Apparently the idea of an automatic in a van was totally foreign. On the way to Mount Hutt, we pulled over to let our friends see the South Island's herd of sheep (I failed to mention that you have more).
The one on the right with the white hair was my 'shifter.'
Thanks Kerry, I may try that. I've been careful to leave the closing seam on what will be the bottom edge of each cushion so I could probably get away with a small top stitched seam and not be too unhappy.
This glider has an innerspring seat bench so there's no way I can wrestle it around to machine sew the closing there, but I still have a couple of side/armrest pillows so make.
Joe




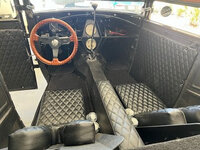
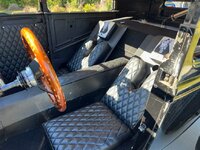


Kerry, it's funny how great the directional signal on the right was for me. It was right there under my right hand in my Toyota Camry. On the other hand, doing a K-turn was not so great with the shifter on my left. It did help that the RTA required me to have an $85 heavy duty spinner on the wheel. In the US I have to reach across to the left side of the steering wheel to signal. Not horrible when I'm going straight and signaling for a turn but gets iffy when the turn is followed by another turn in the opposite direction. If signaling wasn't so ingrained in me I would do like 90% of Florida drivers and act like that stalk carries a fatal electrical charge.Bob, on the race track there is no keep left or right road rules, so it doesn't matter which side you sit on.
But I hear you about switching driving sides [I do that often flying between NZ and USA on the same day]
I find the turn signal on the other side of the steering column is more of an issue. And also reversing out of a driveway onto the wrong side of the road.
That photo looks like when you approach Lake Tekapo in the McKenzie Basin ???
The Otago "lakes district" is really nice, do you get down to Milford Sound while you're there




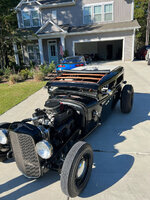
@WILD-BILL, very well deserved.It Actually won the Top Modified class at the Hilton Head Island Concours d'Elegance
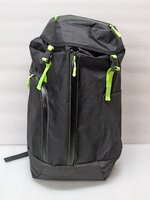
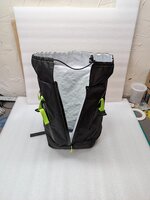
I'm impressed.I've been working on a laptop bag for work, that can also double as a weekend travel bag (just big enough for a couple days' worth of clothes and travel essentials). It took me a lot of time to sketch it out, pick out the features I wanted, and then template it out to get true measurements. I had been putting off assembling the bag, because the materials are on the expensive side (fancy, ultralight laminates), but I finally decided to dive in.
It was by far the most complicated project I've worked on. I really had to think through order of operations for each seam, and how I would get the bag inverted when working with the lining. I learned a few things along the way, made a couple of major mistakes that had to be fixed, but overall I'm happy with how it turned out. I made a lot of notes in my sketchbook on what to alter on the design if I make another one.
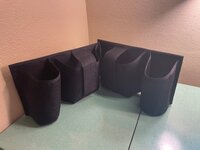
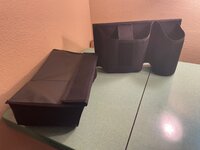
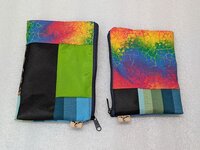
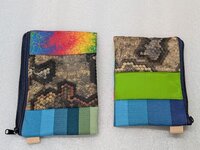
I also took some scraps that I'd saved from other projects, sewed them together like quilt, and made these little zipper pouches. Much simpler than the backpack!
My basket of scraps is still way too full. I'm going to need to purge it, because I don't know what I would use them for other than silly little bags like these...
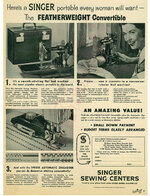
One of these days, I’ll find someone selling a crinkle featherweight for a gloss featherweight price and cash in.@Outlawmws, that's our other Singer. They made lots of them and they are available on eBay for anything from a couple of hundred to more than a thousand. Absolutely wonderful machines. Not quite up to boat covers or reinforced denim pockets but great for day to day stuff.
Ours is one of a group of 25,000 commissioned August 15, 1940. It's one of the rare ones that have a Wrinkle (crinkle) finish.
There's a website devoted to the Singer Featherweight (https://singer-featherweight.com/collections/sold?p=10) and they mention these special machines:
"August 1940 - a very small handful of Featherweights were finished with a Wrinkle finish (aka Crinkle), however, the Wrinkle Featherweights in this batch were most likely put into storage and not distributed until 1947, when they received the chromed, striated faceplate."
I suspect this Featherweight was a gift to my mother-in-law when she and her husband moved into their first house around 1947-8. She had eight [frugal] sisters who probably pooled their money to buy it.
Singer also sold a Featherweight 222 Convertible that made it easy to sew cuffs on sleeves:
"July 1953, the Singer 222K Free-Arm Featherweight was introduced in the UK, Europe, Australia and some in Canada. This machine was not marketed in the USA. Production of the 222k continued until 1961."
This is one of those tiny rabbit holes people like me and @Squankum tumble into.
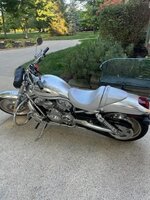
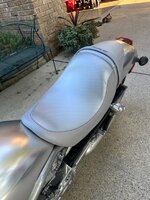



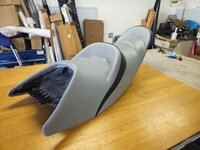
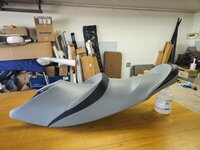
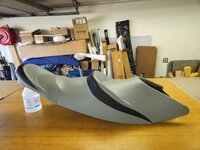
I like it.I need to check in here more often. I got a few projects done to add.
I'll spare you the before shots and try to keep this, um, right.
V Rod seat.........
So what you are saying is it's pretty straight forward and simple?No, the pics are not reversed. The 4 buttons down the center are factory plastic push on retainers. IIRC they push into holes in the structure of the roof bracing. Should be easy to find at any junk yard but colors may be limited.
This one, as well as most newer cars is foam backed fabric that is glued to a fiber board core.
The assembly needs to be removed from the vehicle. (some cars may need to remove either a windshield or back glass for this)
Removal of the old is the worst part. Best method I've found (so far) is to pull the fabric off, then using a shop vac, scrap away at the remaining foam and glue. The more you can get off this way the better. (I've done 2 of these and one was easier to clean then the other with this method)
After you get as much as you can sucked up with the vac, mineral spirits on a rag will help break down the remaining glue and clean the surface for the new install. Just like paint, surface prep is key. You want it clean as new.
Lay the new material over the board so that there is plenty of over hang. You only get on shot at this so you don't want to come up short on an end or side.
Once the material is layed out and your sure you will have full coverage, fold the materiel back over it's self halfway. ((i went front to back because of the length but you could go side to side on a shorter one).
Now for the glue. DO NOT use anything you can likely find in a spray can at the big box store. (even the 3M super 77). They break down with heat and will fail and separate after a short time. Weldwood Landau Top & Trim Contact Adhesive is the industry standard. They do offer it in aerosol cans but I have not used it so not sure if it will last. I buy it in bulk and spray it through a HF siphon style spray gun. Spray the entire exposed half of the board and the underside of the foam. You want complete coverage but don't get to much in spot as it can soak though. IT WONT STICK WHERE THERE'S NO GLUE !!!!
After spraying, wait a few minutes until the glue tacks up. It should feel sticky but not transfer to your finger.
You only have one shot at this.
Working from the fold over, start slowly smoothing the material onto the board with your flat hand. Hard presses or finger impressions are likely to stay for ever. Start from the center working out towards the side and end smoothing the material into place. Do not press hard, With a light touch it's possible to get it to stick but not so much that you can't pull it back and redo if needed. The idea of course is to get it layed out in one shot smooth with no wrinkles so you don't need to risk pulling it up as that can very likely rip the foam, ruin the project and make you have to start over.
Did I mention, You only have one shot at this.
With the first half down, repeat for the second half. Once it's all in place, then you can go over it smoothing it out with a flat hand pressing down a little firmer.
Once it is all glued down, walk away. Let it sit for roughly 8 hrs (i left it over night) before you flip it over to glue the edges and fold over areas. I think I let it sit after gluing those for about 4 hrs before cutting out the holes and installing it back in the van.
There are plenty of good you tube vids that show in detail everything I tried to describe.
Did I mention, You only have one shot at this.
Thanks very much for the detailed instructions I have an F350 with a very badly hanging headliner- what's the source for the material?No, the pics are not reversed. The 4 buttons down the center are factory plastic push on retainers. IIRC they push into holes in the structure of the roof bracing. Should be easy to find at any junk yard but colors may be limited.
This one, as well as most newer cars is foam backed fabric that is glued to a fiber board core.
The assembly needs to be removed from the vehicle. (some cars may need to remove either a windshield or back glass for this)
Removal of the old is the worst part. Best method I've found (so far) is to pull the fabric off, then using a shop vac, scrap away at the remaining foam and glue. The more you can get off this way the better. (I've done 2 of these and one was easier to clean then the other with this method)
After you get as much as you can sucked up with the vac, mineral spirits on a rag will help break down the remaining glue and clean the surface for the new install. Just like paint, surface prep is key. You want it clean as new.
Lay the new material over the board so that there is plenty of over hang. You only get on shot at this so you don't want to come up short on an end or side.
Once the material is layed out and your sure you will have full coverage, fold the materiel back over it's self halfway. ((i went front to back because of the length but you could go side to side on a shorter one).
Now for the glue. DO NOT use anything you can likely find in a spray can at the big box store. (even the 3M super 77). They break down with heat and will fail and separate after a short time. Weldwood Landau Top & Trim Contact Adhesive is the industry standard. They do offer it in aerosol cans but I have not used it so not sure if it will last. I buy it in bulk and spray it through a HF siphon style spray gun. Spray the entire exposed half of the board and the underside of the foam. You want complete coverage but don't get to much in spot as it can soak though. IT WONT STICK WHERE THERE'S NO GLUE !!!!
After spraying, wait a few minutes until the glue tacks up. It should feel sticky but not transfer to your finger.
You only have one shot at this.
Working from the fold over, start slowly smoothing the material onto the board with your flat hand. Hard presses or finger impressions are likely to stay for ever. Start from the center working out towards the side and end smoothing the material into place. Do not press hard, With a light touch it's possible to get it to stick but not so much that you can't pull it back and redo if needed. The idea of course is to get it layed out in one shot smooth with no wrinkles so you don't need to risk pulling it up as that can very likely rip the foam, ruin the project and make you have to start over.
Did I mention, You only have one shot at this.
With the first half down, repeat for the second half. Once it's all in place, then you can go over it smoothing it out with a flat hand pressing down a little firmer.
Once it is all glued down, walk away. Let it sit for roughly 8 hrs (i left it over night) before you flip it over to glue the edges and fold over areas. I think I let it sit after gluing those for about 4 hrs before cutting out the holes and installing it back in the van.
There are plenty of good you tube vids that show in detail everything I tried to describe.
Did I mention, You only have one shot at this.
I think you only have one shot on a self-appendectomy too! That reminds me wasn't there news awhile back of some surgeon in Antarctica who had to do an appendectomy on himself because they were stuck in a weather travel window?So what you are saying is it's pretty straight forward and simple?
Sounds like it's time for a color change in the wife's daily!
Feels like I'd rather do a self-appendectomy than replace a headliner
Thanks very much for the detailed instructions I have an F350 with a very badly hanging headliner- what's the source for the material?
I think you only have one shot on a self-appendectomy too! That reminds me wasn't there news awhile back of some surgeon in Antarctica who had to do an appendectomy on himself because they were stuck in a weather travel window?
Same experience here, and it was a small ceiling.I will second "do not use 3M super 77", it will fail in short order.