Sure... why are the 2 holes not used on the mount bracket?

It does not look like a production trailer, it looks a lot nicer... great work!! Mild steel and you get them galvanized?
I also have another brake controller that has different mounting brackets. I normally pay about $5-$10 for them from our local "U-Pull" [most junkyard scavengers don't know what they are]
I used Duragalv steel that is electro-galvanized . This steel is galv'd inside and out so it doesn't rust. I simply use a flap wheel to sand of a bit of Galv for the welds, then touch it up with an Aerosol can of CRC Zinc paint [one can does the whole trailer]
Duragalv steel only adds about $80 to the whole trailer vs painting at approx $150 just for materials
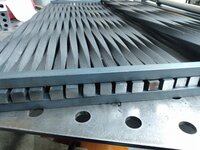
The deck is Aluminium glued to the steel, I've had hop dip galvanized steel delaminate with the deck whereas duragalv doesn't
finished product [it is designed for long ramps so I can drive my race car on with the front spoiler still attached]

being built

Why is there a brake change controller mounted there?
Sometimes I will get another [person] vehicle to tow my trailer home from the track that doesn't have a brake controller.
Normally I use an in-car controller and dont fit this.
The controller is "T"d into the Brake, Stoplight, and Ground circuits of the trailer harness. For the 12v source I ran a wire from the winch battery to a relay then the brake controller [the relay is activated via the taillights being switched on]
Outside of the USA our cars have separate Amber turn signals [not blinking stoplights] so this is possible without turn signals pulsing the brakes
I figure it doesn’t matter what vehicle it gets connected to that way. The water would get to it where I live.
They drive on the wrong side of the road too! Ha! Just kidding Kerry. I would love to visit NZ some time.
@gearhead1
You should visit our part of the world [I'll throw out the "welcome mat" for you]. Be warned ............ Once you start travelling in your later years [like me] It is very difficult to stop. I am quite willing to sell all my toys to keep travelling ,but so far I don't need to!
We have these Waterproof Trailer Mount controllers available that are powered by the cars stoplights.
But they are only good for 2 wheel brakes or it will blow fuses in the tow vehicle.
On the above set-up I have a clear plastic "tupperware lunch box" that I drilled holes in and mounted upside down to keep the rain out [I haven't tested this yet]
I prefer a hardwired in-car mounted controller [the spare is only used for tow vehicle swaps]
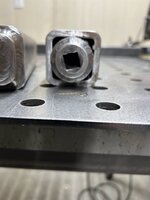
Here mounted on the tongue [it has to be inline to the direction of travel]


.jpg")
.jpg")
.jpg")
.jpg")


.jpeg")
")